Happy New Year to everyone and all the best for 2013

Happy New Year to everyone and all the best for 2013
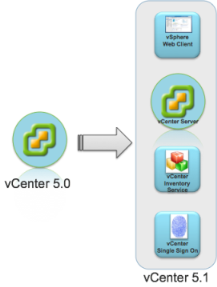
Architectural Changes
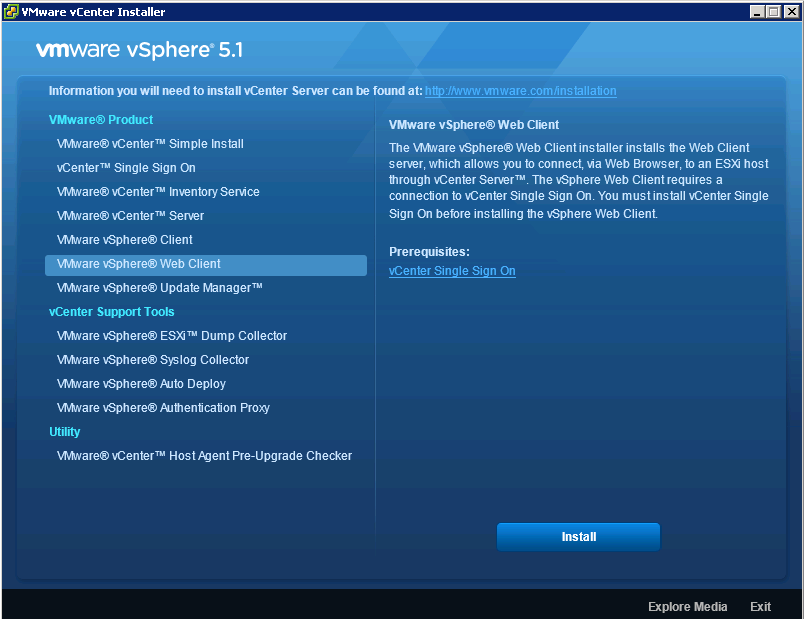
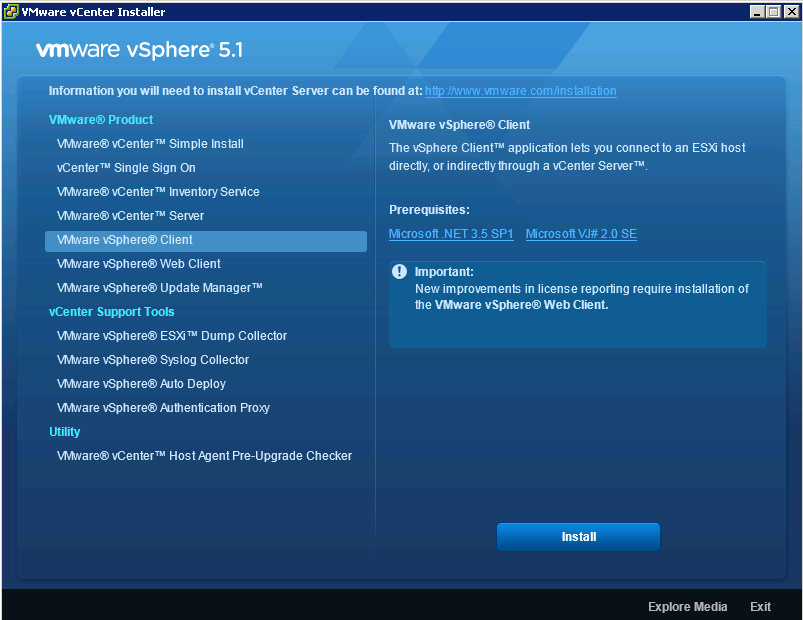
The vCenter Server 5.1 release includes significant architectural changes. You must understand these changes before attempting to freshly install or upgrade to vCenter Server 5.1 from older versions of the product. There are four separate services that constitute the vCenter Server 5.1 platform. These are below and must be installed in order
Pre Requisites
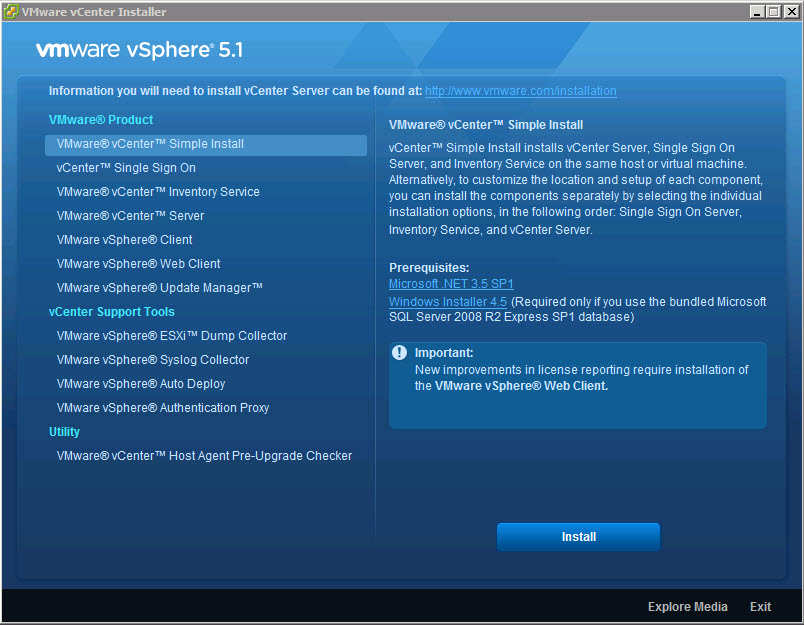
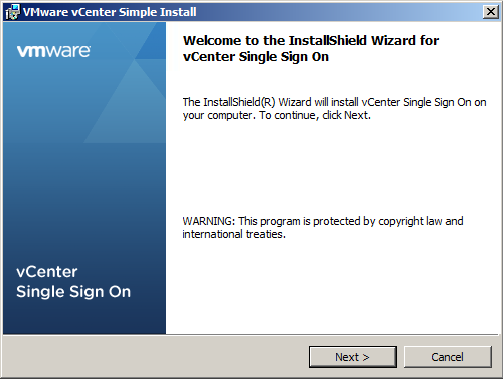
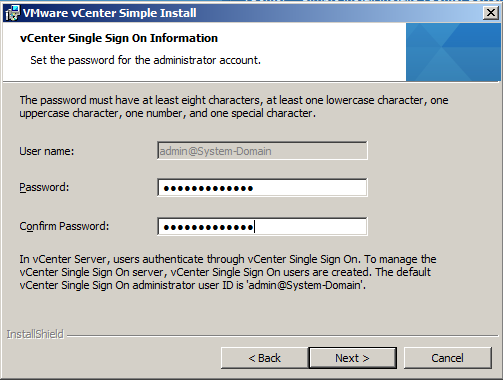
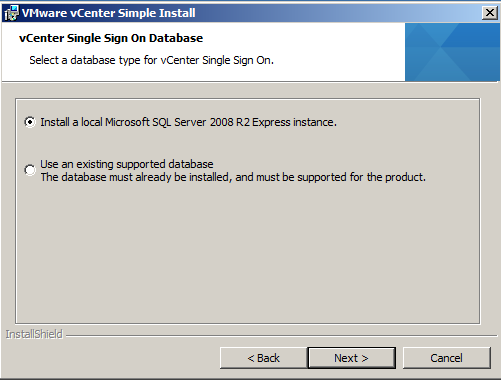
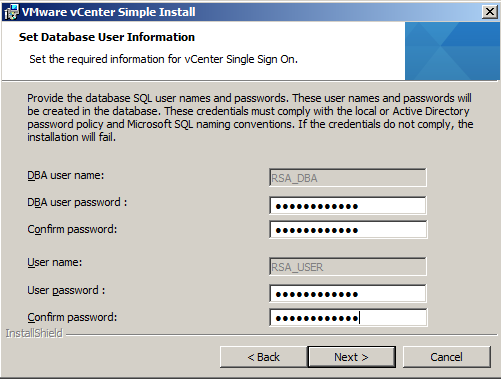
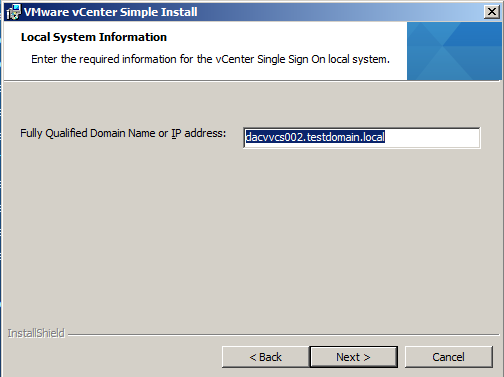
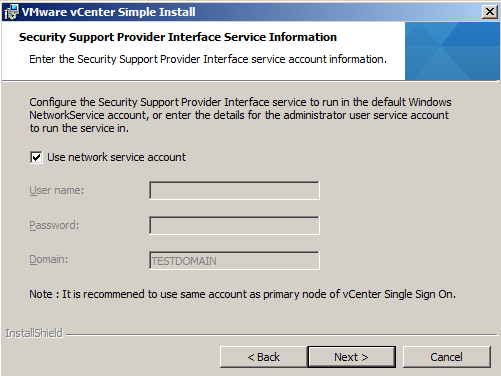
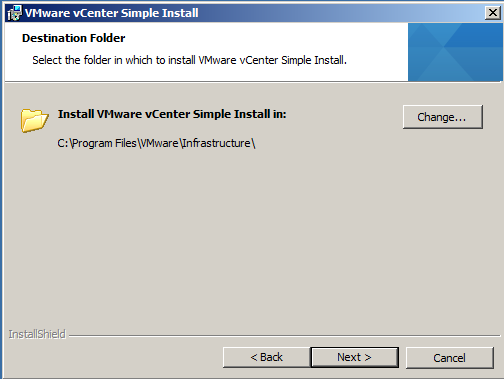
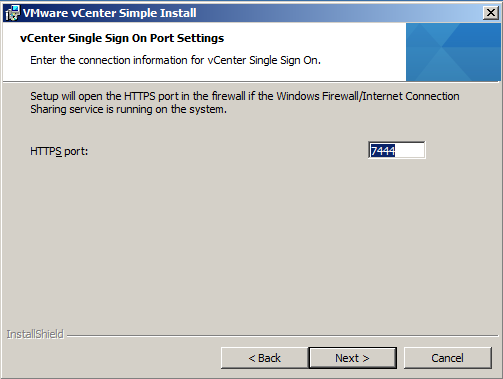
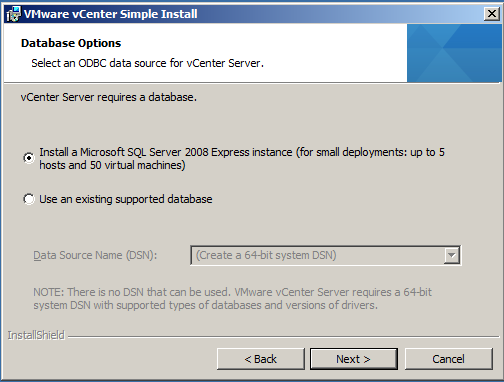
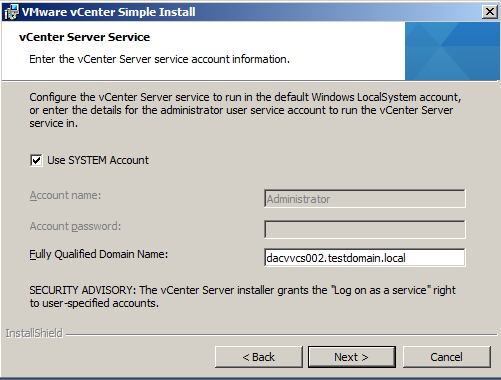
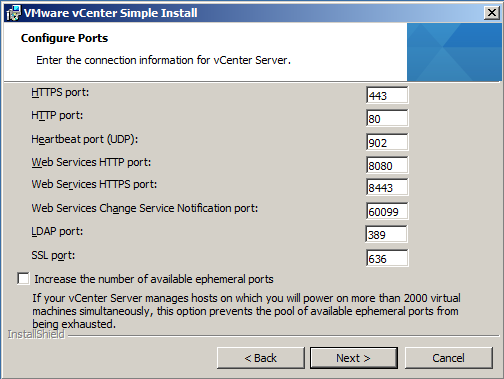
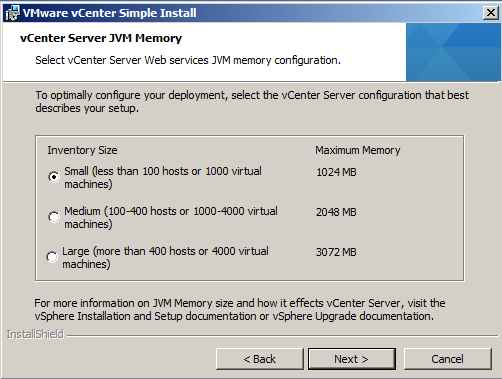
Before installing vCenter Server 5.1, vSphere 5.1 requires you to install vCenter Single Sign On and install the Inventory Service. You can install vCenter Single Sign On, Inventory Service, and vCenter Server all on a single host machine using the vCenter Server Simple Install option. This option is appropriate for small deployments.
Alternatively, you can install vCenter Single Sign On, vCenter Inventory Service, and vCenter Server separately to customize the location and configuration of the components. (I found this to be the best way)
You also need Adobe Flash installed for the vSphere Web Client
If you are running vCenter as a Virtual Machine in Workstation then you will need at least 2GB RAM or more!
This blog will focus on installing vCenter Single Sign On, Inventory Service, and vCenter Server all on a single host machine running Windows Server 2008 R2 Enterprise
Instructions
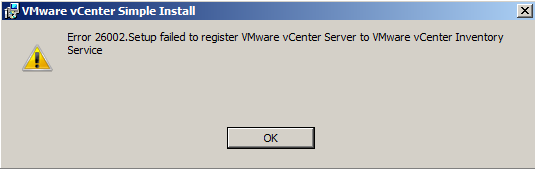
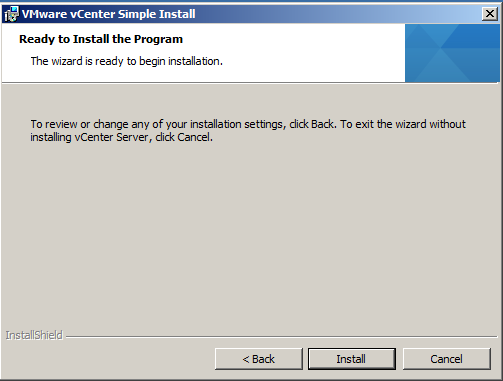
Note: It may be best to install each component separately. I encountered a few errors when I went through the Simple Install Method. See screenprint below
Useful VMware KB for troubleshooting known certificate error
http://blogs.vmware.com/kb/2012/10/implementing-ca-signed-ssl-certificates-with-vsphere-5-1.html
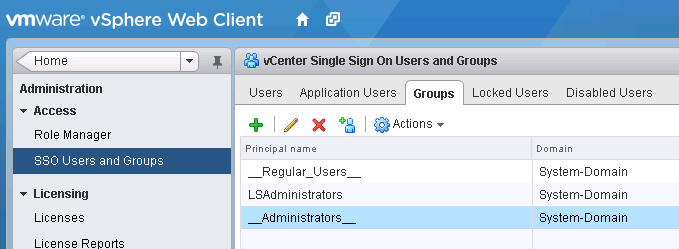
SSO Issues (Cannot log in using Domain account to vClient etc)
http://blogs.vmware.com/kb/2012/10/vsphere-sso-resources.html
http://longwhiteclouds.com/2012/09/26/vsphere-5-1-gotcha-with-single-sign-on-sso/
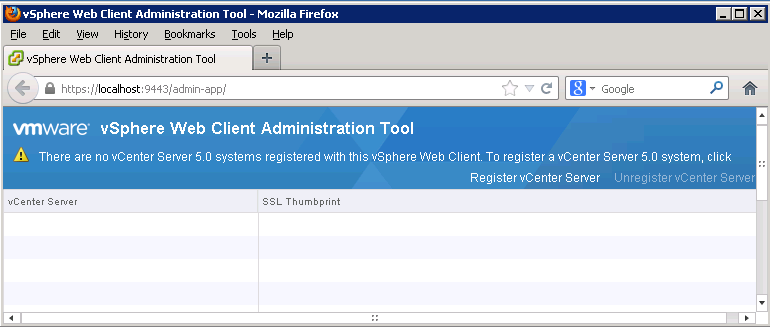
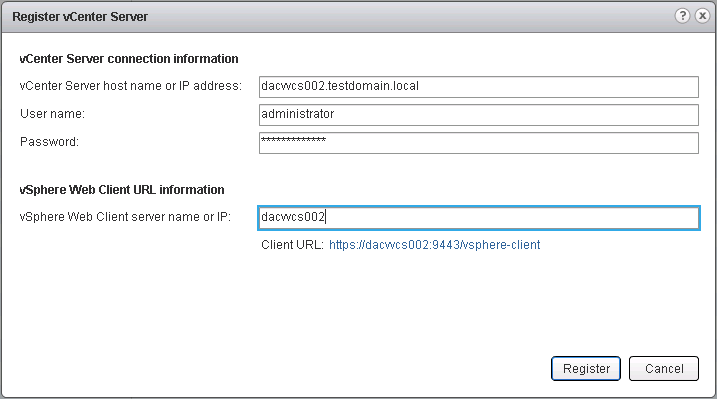
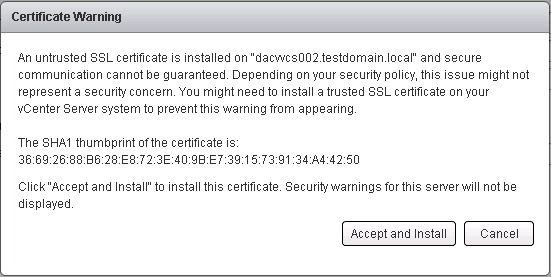
Registering vCenter Server 5 (Not 5.1)
Can you run vCenter 5 on Windows Servers 2012?
vCenter isn’t officially supported on Server 2012
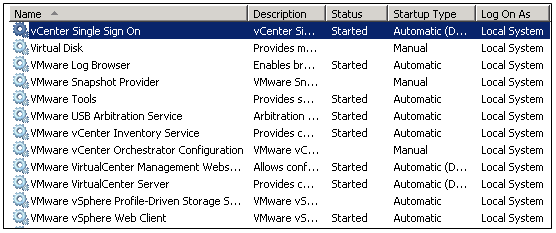
What you will find is that the installation fails just before it tries to install the vSphere Profile-Driven Storage Service.
The reason why
To install that service, the vCenter service needs to be running. However, the vCenter service does not start properly in Windows Server 2012. This is due to a missing dependency. In particular, the VirtualCenter Server service relies on the ProtectedStorage service which was removed from Win8/Server 2012. The work around is the following open regedit and go to \System\CurrentControlSet\Services\vpxd and then open the DependOnService key and remove ProtectedStorage from the list. Reboot the machine and the vCenter service should come alive (might take a while). Then restart only the vCenter installation again once everything has come up (you need to wait for vCenter service to come alive which can take a few minutes). The install will continue from where it kicked off and finish
So the short version is, when the vCenter install fails, go to registry and remove ProtectedStorage dependency from the vpxd service, reboot and it should work. Restart the vcenter install and it will finish as per normal.

Recently following a clear out of my Windows 7 64bit laptop and running TreeSize to locate offending large files and folders, I found a 6GB folder called WinSXS. Not having a clue about what this folder was, I decided to investigate..
First of all “Can I delete the \Windows\Winsxs directory?”
To answer the question, the answer is actually: No.
Why?
Because the component store (\Winsxs) is needed to repair the OS binaries in the event that a file becomes corrupted or, in worst case scenarios, compromised. There are a few directories in the component store so let’s look at them and what their general role is in Windows. WinSxS folder replaces the old $NTUninstall folders from XP which is one of the reasons it grows after installing Updates
Explanation
The Windows component store (C:\Windows\winsxs) directory is used during servicing operations within Windows installations. Servicing operations include, but are not limited to, Windows Update, Service Pack and hotfix installations.
The component store contains all of the files needed for a Windows installation and any updates to those files are also held within the component store as they are installed. This will cause the component store to grow over time as more updates, features or roles are added to the installation. The component store utilizes NTFS hard links between itself and other Windows directories to increase the robustness of the Windows platform.
The component store will show a large directory size due to the way the Windows Explorer shell accounts for hard links. The Windows shell will count each reference to a hard link as a single instance of the file for each directory the file resides in. For example, if a file named advapi32.dll was 700 KB in size and was contained in the component store and the \Windows\system32 directory, Windows Explorer would inaccurately report that it consumes 1400 KB of hard disk space
The component store cannot reside on another volume other than the system volume due to the use of NTFS hard links. Attempting to move the component store will result in the inability to properly install Windows updates, Service Packs, roles or features. Additionally, it is not recommended that files be manually removed or deleted from the component store.
To reduce the size of the component store directory on a Windows installation you can choose to make the service pack installation permanent and reclaim used space from the Service Pack files. Doing this will make the Service Pack permanent and it will not be removable.
To remove the Service Pack files from a Windows installation use the following in-box utilities:
Scavenging may also be proactively performed on Windows Vista and Windows 2008 installations by forcing a removal event on the system. Scavenging will attempt to remove any unneeded system binaries from the installation and allow Windows to reclaim the disk space. To issue an uninstall event on a Windows installation, simply add and remove any unneeded system component that is not already installed and reboot the Windows installation. Scavenging will be performed during the subsequent reboot of the operating system.
NOTE: Scavenging is performed automatically on Windows 7 and Windows 2008 R2 installation

What are TechNet Virtual Labs?
TechNet Virtual Labs enable you to quickly evaluate and test Microsoft’s newest products and technologies through a series of guided, hands-on labs that you can complete in 90 minutes or less. There is no complex setup or installation required, and you can use TechNet Virtual Labs online immediately, free
What Labs are available?
Link
http://technet.microsoft.com/en-us/virtuallabs/default.aspx
Server 2012 Labs
http://technet.microsoft.com/en-us/windowsserver/hh968267.aspx

What is it?
The Hands on Lab Portal is using the Project Nee Application developed by Mike D. and Curtis P. who have been part of the VMworld Hands on Labs Program for over 4 years. The Application is built for the web (HTML 5) and can run its workload from any vCloud resource (all you need to do is connect to a vCloud API and you are set) It looks like the design in the portal can serve many different use cases (think SalesForce model) – the first of which were the Education Environment and our VMware Hands on Labs.
The VMware Hands-on Labs are now available online! VMware currently have 10 VMworld Labs and will be adding more during the next few weeks – in total they plan to have all 36 labs and add more along the way. The public beta has over one thousand users and is growing every day.
To participate in this exciting effort, register your interest below.
http://www.surveymethods.com/EndUser.aspx?AA8EE2FBAAEDF7FDAB
HOL Poster

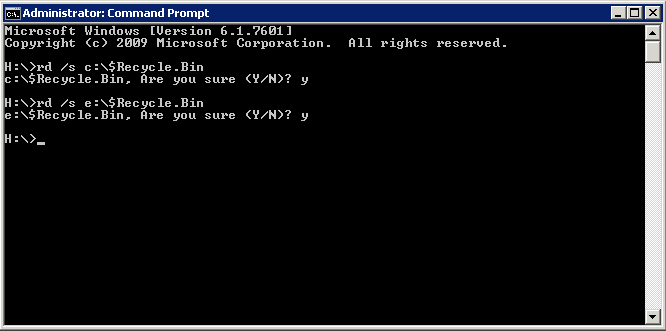
If you have multiple user accounts logging into a Windows computer or server and are running low on space, you can easily empty the recycling bin for all users with a single command line, assuming your user account has administrator privileges.
The Command for Windows 7 and Server 2008
rd /s (Drive):\$Recycle.Bin
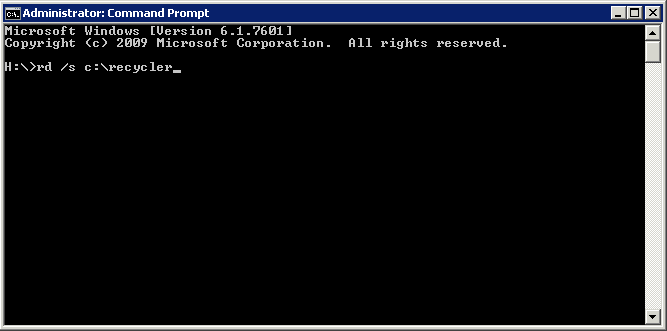
The Command for XP, Vista and 2003
rd /s (Drive):\Recycler
Change the Recycle Bin settings
You can change the settings of the Recycle Bin to suit the way you work. For example, if you rarely empty the Recycle Bin because you want to avoid discarding files you might someday want to recover, you can increase the maximum storage size of the Recycle Bin. You can also turn off the delete confirmation dialog box that appears every time you send files to the Recycle Bin, or even choose not to move files to the Recycle Bin and instead immediately remove them from your computer when you delete them.

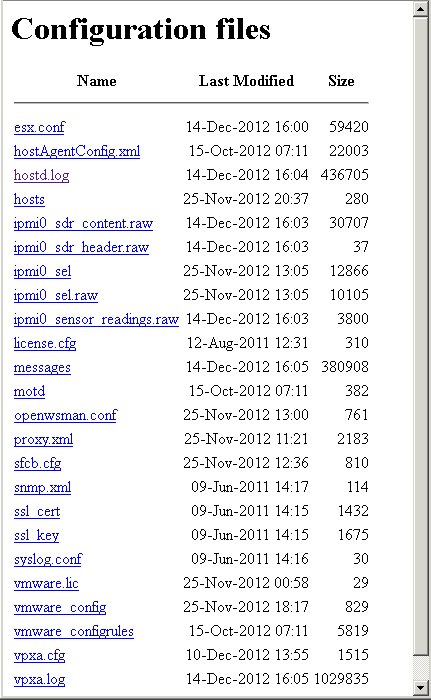
A quick way to view VMware ESXi logs is via a web browser. Just do the following
You will see the following
Pre Requisites
Instructions
use [master]
go
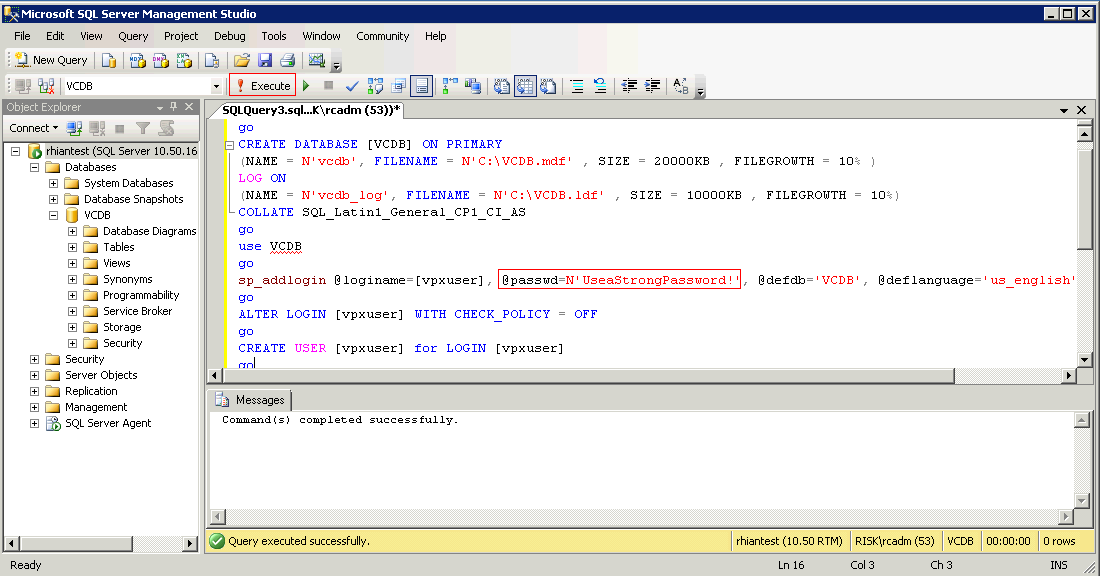
CREATE DATABASE [VCDB] ON PRIMARY
(NAME = N’vcdb’, FILENAME = N’C:\VCDB.mdf’ , SIZE = 20000KB , FILEGROWTH = 10% )
LOG ON
(NAME = N’vcdb_log’, FILENAME = N’C:\VCDB.ldf’ , SIZE = 10000KB , FILEGROWTH = 10%)
COLLATE SQL_Latin1_General_CP1_CI_AS
go
use VCDB
go
sp_addlogin @loginame=[vpxuser], @passwd=N’UseaStrongPassword!’, @defdb=’VCDB’, @deflanguage=’us_english’
go
ALTER LOGIN [vpxuser] WITH CHECK_POLICY = OFF
go
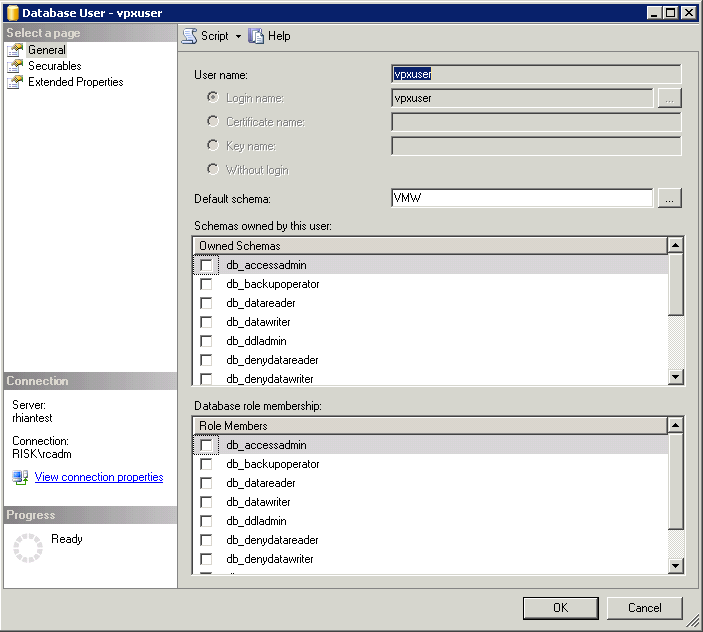
CREATE USER [vpxuser] for LOGIN [vpxuser]
go
CREATE SCHEMA [VMW]
go
ALTER USER [vpxuser] WITH DEFAULT_SCHEMA =[VMW]
go
–User should have DBO Privileges or VC_ADMIN_ROLE and VC_USER_ROLE database roles
sp_addrolemember @rolename = ‘db_owner’, @membername = ‘vpxuser’
go
if not exists (SELECT name FROM sysusers WHERE issqlrole=1 AND name = ‘VC_ADMIN_ROLE’)
CREATE ROLE VC_ADMIN_ROLE;
GRANT ALTER ON SCHEMA :: [VMW] to VC_ADMIN_ROLE;
GRANT REFERENCES ON SCHEMA :: [VMW] to VC_ADMIN_ROLE;
GRANT INSERT ON SCHEMA :: [VMW] to VC_ADMIN_ROLE;
GRANT CREATE TABLE to VC_ADMIN_ROLE;
GRANT CREATE VIEW to VC_ADMIN_ROLE;
GRANT CREATE Procedure to VC_ADMIN_ROLE;
if not exists (SELECT name FROM sysusers WHERE issqlrole=1 AND name = ‘VC_USER_ROLE’)
CREATE ROLE VC_USER_ROLE
go
GRANT SELECT ON SCHEMA :: [VMW] to VC_USER_ROLE
go
GRANT INSERT ON SCHEMA :: [VMW] to VC_USER_ROLE
go
GRANT DELETE ON SCHEMA :: [VMW] to VC_USER_ROLE
go
GRANT UPDATE ON SCHEMA :: [VMW] to VC_USER_ROLE
go
GRANT EXECUTE ON SCHEMA :: [VMW] to VC_USER_ROLE
go
sp_addrolemember VC_ADMIN_ROLE , [vpxuser]
go
sp_addrolemember VC_USER_ROLE , [vpxuser]
go
use MSDB
go
CREATE USER [vpxuser] for LOGIN [vpxuser]
go
–User should have DBO Privileges or VC_ADMIN_ROLE
sp_addrolemember @rolename = ‘db_owner’, @membername = ‘vpxuser’
go
if not exists (SELECT name FROM sysusers WHERE issqlrole=1 AND name = ‘VC_ADMIN_ROLE’)
CREATE ROLE VC_ADMIN_ROLE;
go
grant select on msdb.dbo.syscategories to VC_ADMIN_ROLE
go
grant select on msdb.dbo.sysjobsteps to VC_ADMIN_ROLE
go
GRANT SELECT ON msdb.dbo.sysjobs to VC_ADMIN_ROLE
GO
GRANT EXECUTE ON msdb.dbo.sp_add_job TO VC_ADMIN_ROLE
go
GRANT EXECUTE ON msdb.dbo.sp_delete_job TO VC_ADMIN_ROLE
go
GRANT EXECUTE ON msdb.dbo.sp_add_jobstep TO VC_ADMIN_ROLE
go
GRANT EXECUTE ON msdb.dbo.sp_update_job TO VC_ADMIN_ROLE
go
GRANT EXECUTE ON msdb.dbo.sp_add_jobserver TO VC_ADMIN_ROLE
go
GRANT EXECUTE ON msdb.dbo.sp_add_jobschedule TO VC_ADMIN_ROLE
go
GRANT EXECUTE ON msdb.dbo.sp_add_category TO VC_ADMIN_ROLE
go
sp_addrolemember VC_ADMIN_ROLE , [vpxuser]
go
A breakdown of the script
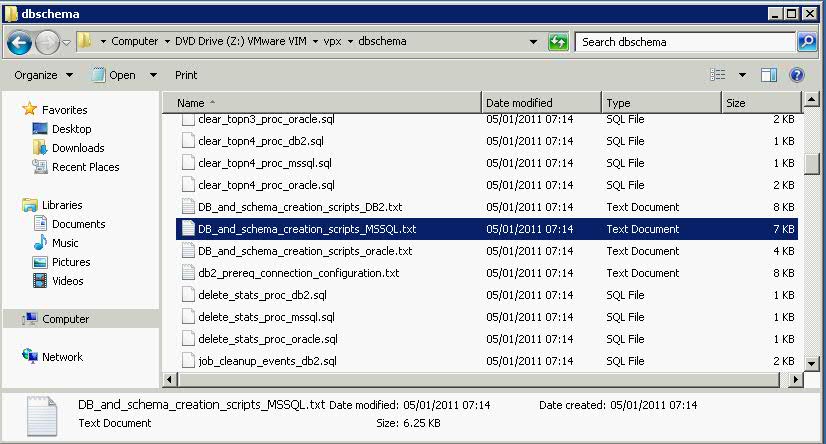
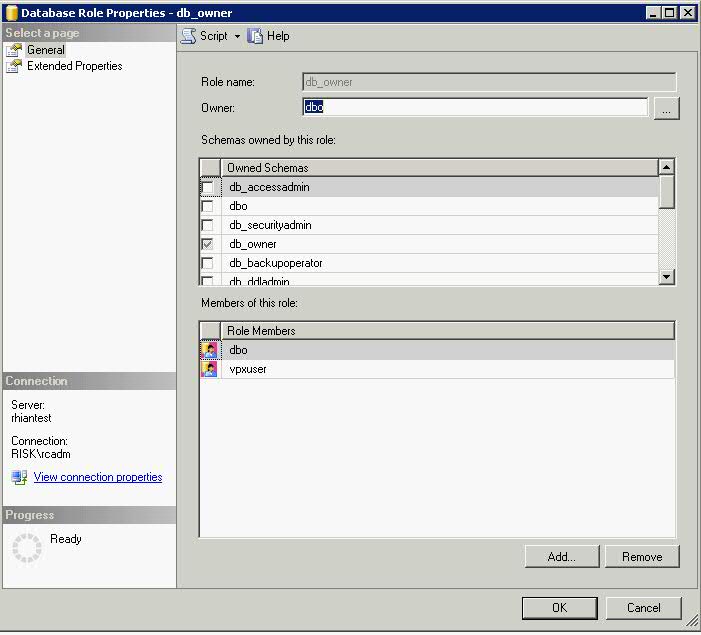
This DB_and_schema_creation_scripts_MSSQL.txt file describes how to use optional scripts to create a Microsoft SQL database for vCenter Server and to create the database schema. If you do not use these scripts, you can create the database manually and allow the vCenter Server installer to create the database schema.
To prepare a SQL Server database to work with vCenter Server, you generally need to create a SQL Server database user with database operator (DBO) rights. When you do this, you must make sure that the database user login has the db_owner fixed database role on the vCenter Server database and on the MSDB database. (The db_owner role on the MSDB database is required for installation and upgrade only. You can revoke this role after the installation or upgrade process is complete.) The purpose of granting DBO permissions to the vCenter Server database user is to enable the vCenter Server installer to create the vCenter Server database schema.
For environments in which the user cannot have DBO permissions on the vCenter Server database, you can instead run scripts that create the vCenter Server database schema before you run the vCenter Server installer.
You can use the DB_and_schema_creation_scripts_MSSQL.txt script to create a database, user, and permissions for successful installation of vCenter Server.
use [master]
go
CREATE DATABASE [VCDB] ON PRIMARY
(NAME = N’vcdb‘, FILENAME = N’C:\VCDB.mdf’ , SIZE = 20000KB , FILEGROWTH = 10% )
LOG ON
(NAME = N’vcdb_log’, FILENAME = N’C:\VCDB.ldf’ , SIZE = 10000KB , FILEGROWTH = 10%)
COLLATE SQL_Latin1_General_CP1_CI_AS
go
use VCDB
go
sp_addlogin @loginame=[vpxuser], @passwd=N’UseaStrongPassword!‘, @defdb=’VCDB’, @deflanguage=’us_english’
go
ALTER LOGIN [vpxuser] WITH CHECK_POLICY = OFF
go
CREATE USER [vpxuser] for LOGIN [vpxuser]
go

use VCDB
go
CREATE SCHEMA [VMW]
go
ALTER USER [vpxuser] WITH DEFAULT_SCHEMA =[VMW]
go
sp_addrolemember @rolename = ‘db_owner’, @membername = ‘vpxuser‘
go
if not exists (SELECT name FROM sysusers WHERE issqlrole=1 AND name = ‘VC_ADMIN_ROLE’)
CREATE ROLE VC_ADMIN_ROLE;
GRANT ALTER ON SCHEMA :: [VMW] to VC_ADMIN_ROLE;
GRANT REFERENCES ON SCHEMA :: [VMW] to VC_ADMIN_ROLE;
GRANT INSERT ON SCHEMA :: [VMW] to VC_ADMIN_ROLE;
GRANT CREATE TABLE to VC_ADMIN_ROLE;
GRANT CREATE VIEW to VC_ADMIN_ROLE;
GRANT CREATE Procedure to VC_ADMIN_ROLE;
if not exists (SELECT name FROM sysusers WHERE issqlrole=1 AND name = ‘VC_USER_ROLE’)
CREATE ROLE VC_USER_ROLE
go
GRANT SELECT ON SCHEMA :: [VMW] to VC_USER_ROLE
go
GRANT INSERT ON SCHEMA :: [VMW] to VC_USER_ROLE
go
GRANT DELETE ON SCHEMA :: [VMW] to VC_USER_ROLE
go
GRANT UPDATE ON SCHEMA :: [VMW] to VC_USER_ROLE
go
GRANT EXECUTE ON SCHEMA :: [VMW] to VC_USER_ROLE
go
sp_addrolemember VC_ADMIN_ROLE , [vpxuser]
go
sp_addrolemember VC_USER_ROLE , [vpxuser]
go
use MSDB
go
CREATE USER [vpxuser] for LOGIN [vpxuser]
go
sp_addrolemember @rolename = ‘db_owner’, @membername = ‘vpxuser‘
go
if not exists (SELECT name FROM sysusers WHERE issqlrole=1 AND name = ‘VC_ADMIN_ROLE’)
CREATE ROLE VC_ADMIN_ROLE;
go
grant select on msdb.dbo.syscategories to VC_ADMIN_ROLE
go
grant select on msdb.dbo.sysjobsteps to VC_ADMIN_ROLE
go
GRANT SELECT ON msdb.dbo.sysjobs to VC_ADMIN_ROLE
GO
GRANT EXECUTE ON msdb.dbo.sp_add_job TO VC_ADMIN_ROLE
go
GRANT EXECUTE ON msdb.dbo.sp_delete_job TO VC_ADMIN_ROLE
go
GRANT EXECUTE ON msdb.dbo.sp_add_jobstep TO VC_ADMIN_ROLE
go
GRANT EXECUTE ON msdb.dbo.sp_update_job TO VC_ADMIN_ROLE
go
GRANT EXECUTE ON msdb.dbo.sp_add_jobserver TO VC_ADMIN_ROLE
go
GRANT EXECUTE ON msdb.dbo.sp_add_jobschedule TO VC_ADMIN_ROLE
go
GRANT EXECUTE ON msdb.dbo.sp_add_category TO VC_ADMIN_ROLE
go
sp_addrolemember VC_ADMIN_ROLE , [vpxuser]
go
You can also run the following scripts to enable database health monitoring.
Create an ODBC Connection
To modify an existing SQL Server ODBC connection, select the connection from the System Data
Source list and click Configure.
To create a new SQL Server ODBC connection, click Add, select SQL Native Client, and click
Finish.
Run the vCenter Installer in the vCenter Server
Youtube Video
Courtesy of Wee Kiong Tan

The problem
An error appears when you try and deploy a VMware template following an upgrade of VMware and/or vCenter
“Customization of the guest operating system ‘rhel5_64Guest’ is not supported in this configuration. Microsoft Vista (TM) and Linux guests with Logical Volume Manager are supported only for recent ESX host and VMware Tools versions.”
The Resolution
![]()
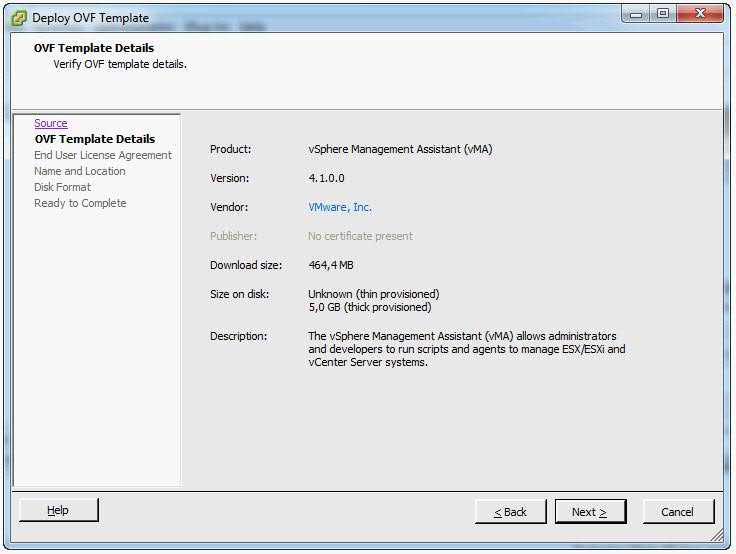
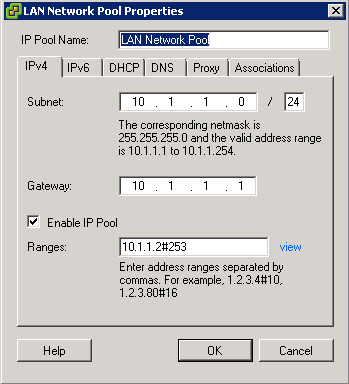
What is the VMware vSphere vMA?
The vSphere Management Assistant (vMA) is a SUSE Linux Enterprise Server 11‐based virtual machine that includes prepackaged software such as the vSphere command‐line interface, and the vSphere SDK for Perl.
Why use vMA?
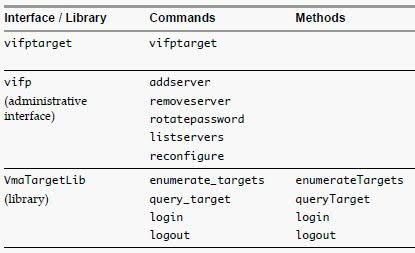
vMA Capabilities
vMA Component Overview
When you install vMA, you are licensed to use the virtual machine that includes all vMA components.
Requirements
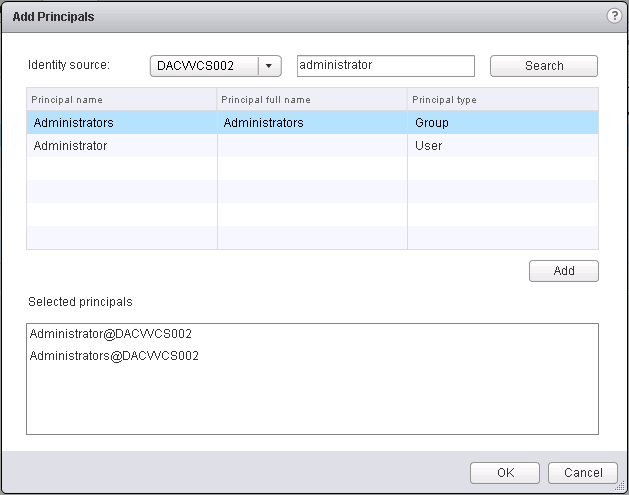
vSphere Authentication Mechanism
vMA’s authentication interface allows users and applications to authenticate with the target servers using vi‐fastpass or Active Directory. While adding a server as a target, the Administrator can determine if the target needs to use vi‐fastpass or Active Directory authentication. For vi‐fastpass authentication, the credentials that a user has on the vCenter Server system or ESXi host are stored in a local credential store. For Active Directory authentication, the user is authenticated with an Active Directory server.
When you add an ESXi host as a fastpass target server, vi‐fastpass creates two users with obfuscated passwords on the target server and stores the password information on vMA:
The creation of vi‐admin and vi‐user does not apply for Active Directory authentication targets. When you add a system as an Active Directory target, vMA does not store any information about the credentials. To use the Active Directory authentication, the administrator must configure vMA for Active Directory.
After adding a target server, you must initialize vi‐fastpass so that you do not have to authenticate each time you run vSphere CLI commands. If you run a vSphere CLI command without initializing vi‐fastpass, you will be asked for username and password. You can initialize vi‐fastpass by using one of the following methods:
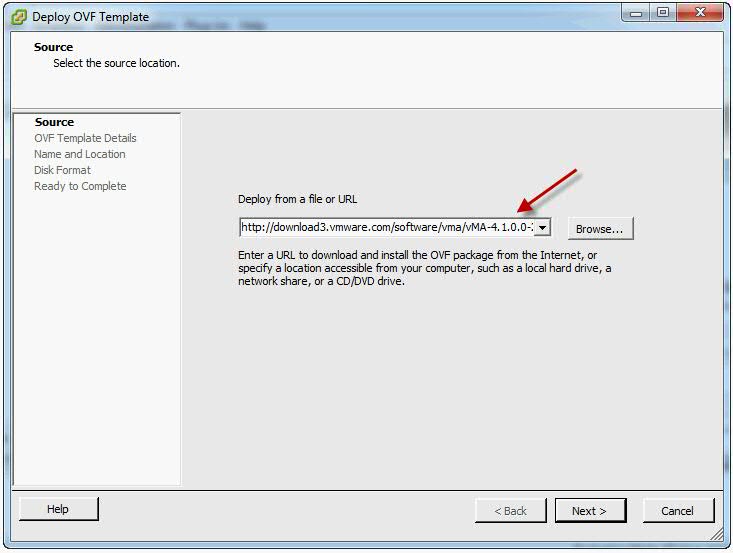
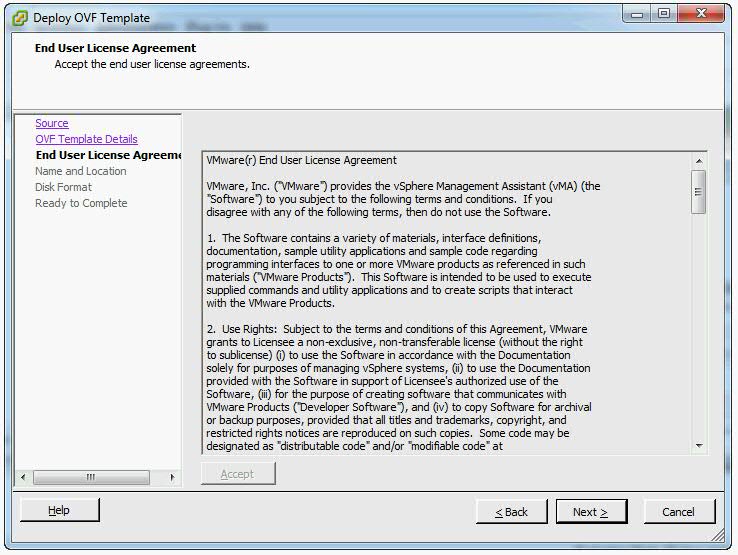
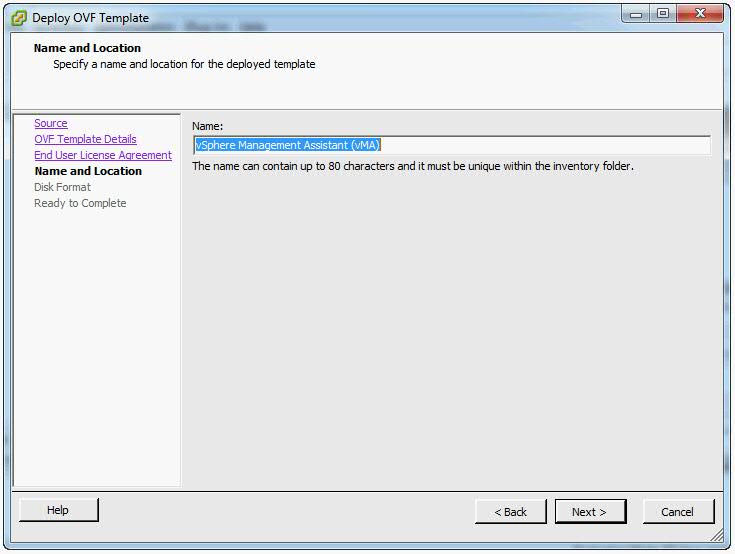
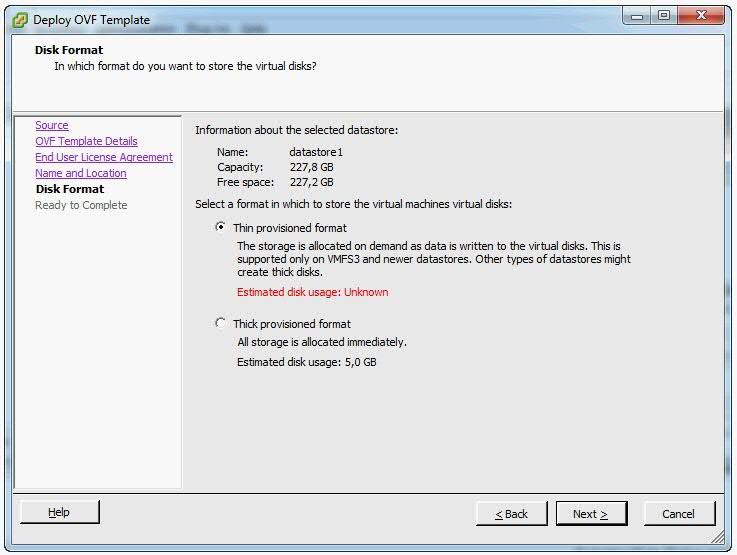
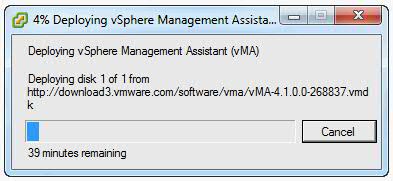
Installing vMA
Download the vMA from the following location
https://my.vmware.com/web/vmware/details?productId=229&downloadGroup=VMA50
Upgrading or Updating
Upgrading
IMPORTANT: You cannot upgrade a previous version of vMA to vMA 5.0. You must install a fresh vMA 5.0 instance.
Updating
You can download software updates including security fixes from VMware and components included in vMA, such as the SUSE Linux Enterprise Server updates and JRE.
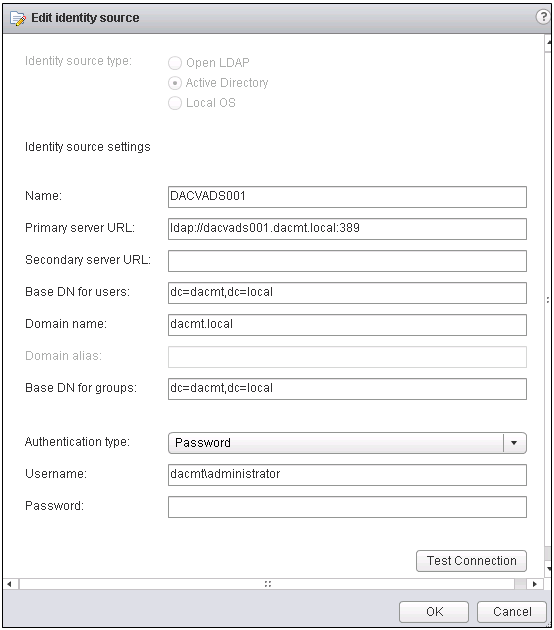
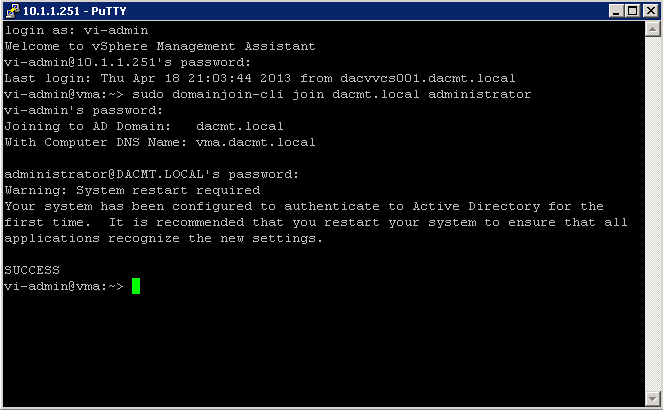
Configure vMA for Active Directory Authentication
Configure vMA for Active Directory authentication so that ESXi hosts and vCenter Server systems added to Active Directory can be added to vMA without having to store the passwords in vMA’s credential store. This is a more secure way of adding targets to vMA.
Add Target Servers to vMA
After you configure vMA, you can add target servers that run the supported vCenter Server or ESXi version. For vCenter Server, and ESXi system targets, you must have the name and password of a user who can connect to that system
To add a vCenter Server system as a vMA target for Active Directory Authentication
vifp addserver vc1.mycomp.com –authpolicy adauth –username ADDOMAIN\user1
Here, –authpolicy adauth indicates that the target needs to use the Active Directory authentication. If you run this command without the –username option, vMA prompts for the name of the user that can connect to the vCenter Server system. You can specify this user name as shown in the following example:
If –authpolicy is not specified in the command, then fpauth is taken as the default authentication policy.
vifp listservers –long
vifptarget –set | -s
esxcli –server –vihost network nic list
IMPORTANT: If the name of a target server changes, you must remove the target server by using vifp removeserver with the old name, then add the server using vifp addserver with the new name
To add a vCenter Server system as a vMA target for fastpass Authentication
vifp addserver vc2.mycomp.com –authpolicy fpauth
Here, –authpolicy fpauth indicates that the target needs to use the fastpass authentication.
vifp listservers –long
vifptarget –set | -s
esxcli –server –vihost network nic list
IMPORTANT: If the name of a target server changes, you must remove the target server by using vifp removeserver with the old name, then add the server using vifp addserver with the new name
To add an ESXi host as a vMA target
vifp addserver Serverxyz
In a vSphere client connected to the target server, the Recent Tasks panel displays information about the users that vMA adds. The target server’s Users and Groups panel displays the users if you select it.
vifp listservers
vifptarget –set | -s Serverxyz
esxcli network nic list
Running vSphere CLI for the Targets
If you have added multiple target servers, by default, vMA executes commands on the first server that you added. You should specify the server explicitly when running commands.
To run vSphere CLI for the targets
vifp addserver vCenterserver
vifp addserver serverxyz
vifp listservers
vifptarget -s serverxyz
esxcli –server serverxyz network nic list
Target Management Example Sequence
The following sequence of commands adds an ESXi host, lists servers, runs vifptarget to enable vi‐fastpass, runs a vSphere CLI command, and removes the ESXi host.
cdrom vmhba0:1:0 (0MB has 1 paths and policy of fixed
Local 0:7:1 vmhba0:1:0 On active preferred
Enable the vi-user for the first time
Note: The vi-admin is not “root” and receives all its privileges from the configuration of sudo. Sudo is a delegation system that allows “root” to allow other users privileges above and beyond merely being a “user.”
Adding another user alongside vi-admin and vi-user
‘sudo useradd username -p password’
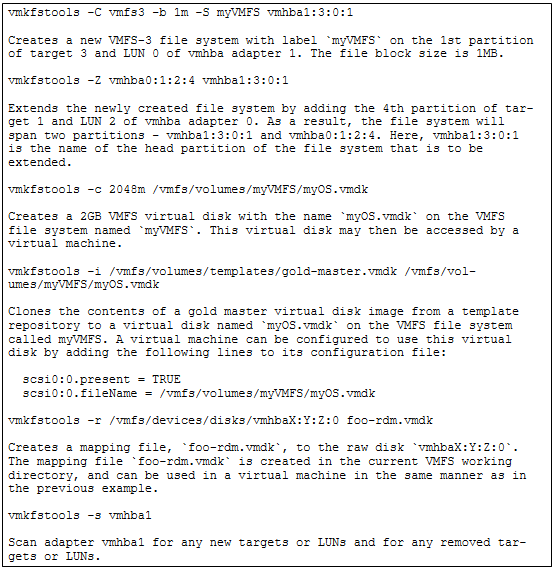
Use vmkfstools to manage VMFS Datastores
Useful Command Ref
http://vmetc.com/wp-content/uploads/2007/11/man-vmkfstools.txt
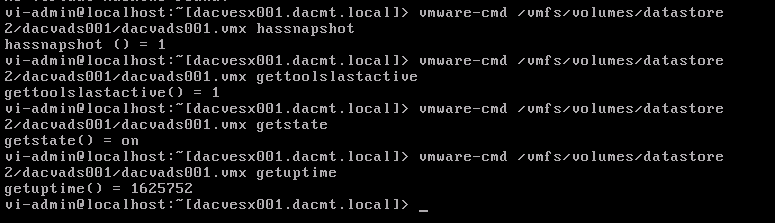
Use vmware-cmd to manage VMs
Useful Command Ref
http://www.vmware.com/support/
Example showing 4 different commands
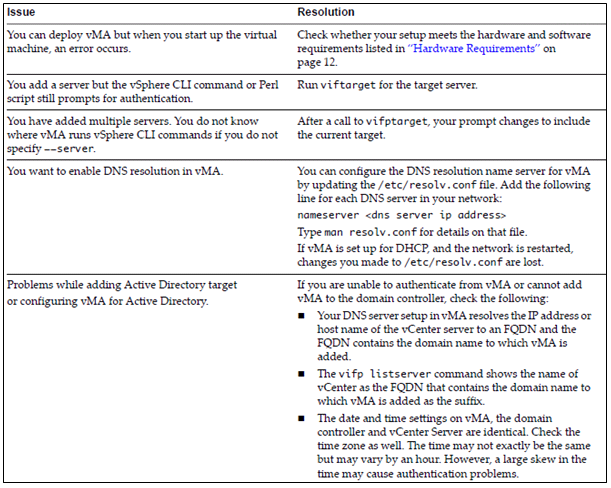
Troubleshoot common vMA errors and conditions
VMware TV
http://www.youtube.com/watch?v=cIh4QT0-hdY
Changing the IP Address or Hostname of vMA
https://communities.vmware.com/people/ravinder1982/blog/2012/06/15/changing-ip-address-or-hostname-of-vma

