Patch and Extension Baselines
You can remediate hosts against baselines that contain patches or extensions. Depending on the patch criteria you select, patch baselines can be either dynamic or fixed.
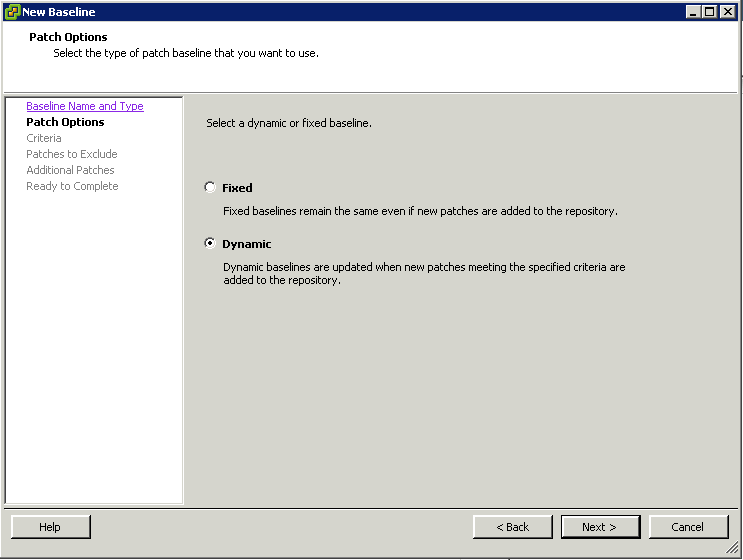
- Dynamic patch baselines contain a set of patches, which updates automatically according to patch availability and the criteria that you specify.
- Fixed baselines contain only patches that you select, regardless of new patch downloads.
- Extension baselines contain additional software modules for ESX/ESXi hosts. This additional software might be VMware software or third-party software. You can install additional modules by using extension baselines, and update the installed modules by using patch baselines.
If your vCenter Server system is part of a connected group in vCenter Linked Mode, and you have more than one Update Manager instance, patch and extension baselines that you create are not applicable to all inventory objects managed by other vCenter Server systems in the group. Baselines are specific for the Update Manager instance you select.
Create a Fixed Patch Baseline
Fixed baselines consist of a specific set of patches that do not change as patch availability changes.
Prerequisites
Connect the vSphere Client to a vCenter Server system with which Update Manager is registered, and on the Home page, click Update Manager under Solutions and Applications. If your vCenter Server system is part of a connected group in vCenter Linked Mode, you must specify the Update Manager instance to use, by selecting the name of the corresponding vCenter Server system in the navigation bar.
Procedure
- On the Baselines and Groups tab, click Create above the Baselines pane.
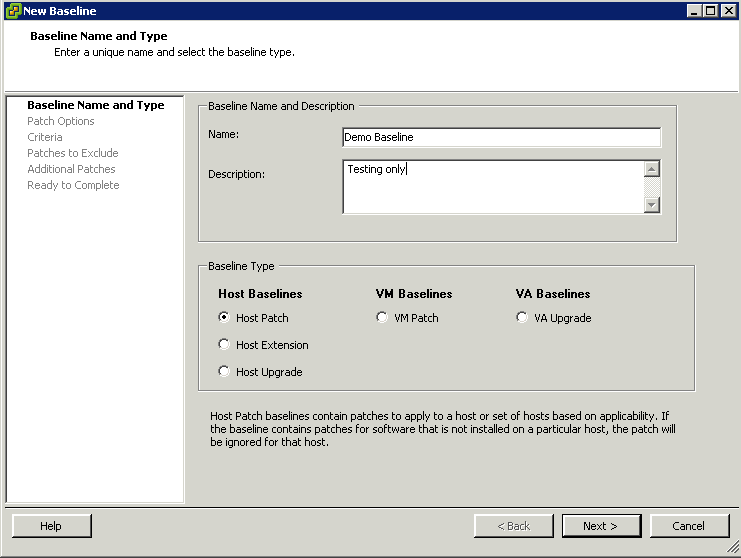
- Type a name, and optionally, a description of the baseline.
- Under Baseline Type, select Host Patch, and click Next.
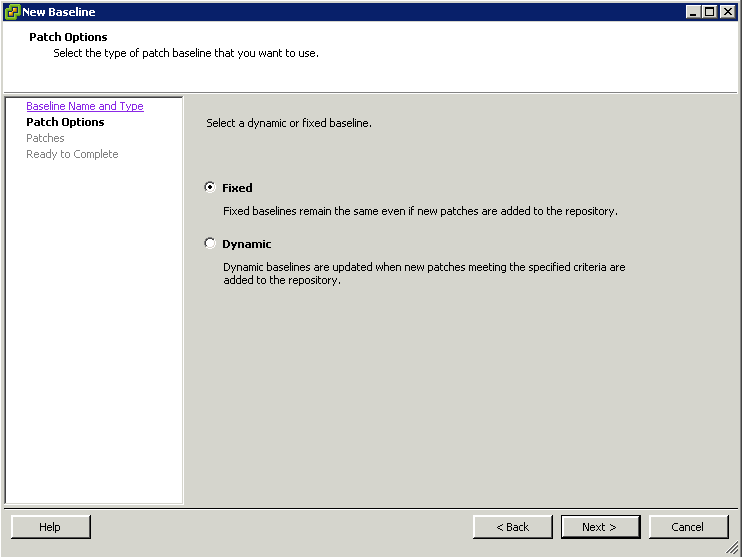
- Select Fixed for the type of baseline and click Next.
- Select individual patches to include and click the down arrow to add them to the Fixed Patches to Add list.
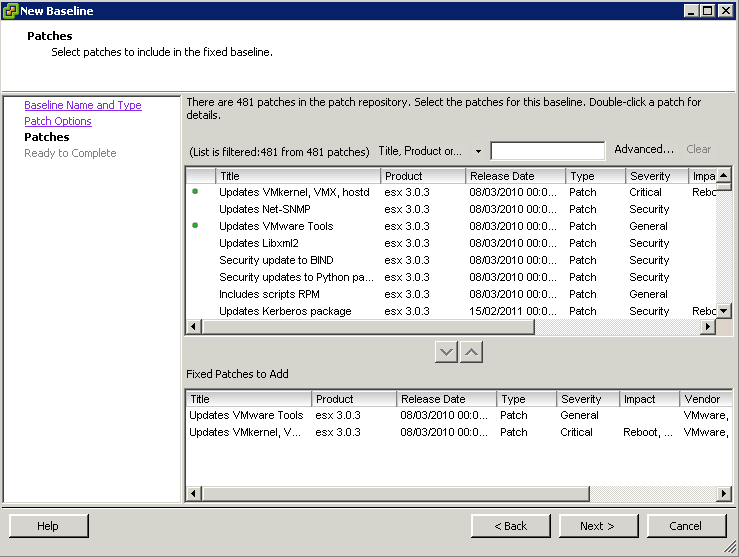
- (Optional) Click Advanced to find specific patches to include in the baseline.
- Click Next
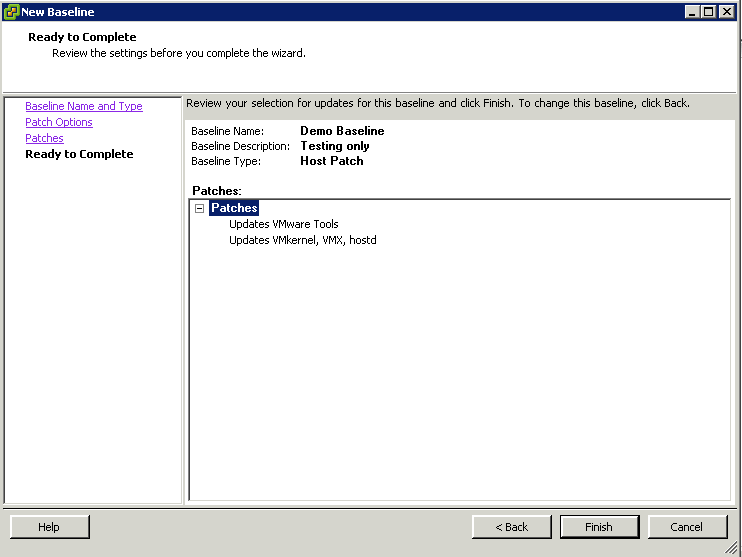
- On the Ready to Complete page, click Finish.
- The new baseline is displayed in the Baselines pane of the Baselines and Groups tab.
Create a Dynamic Patch Baseline
Dynamic baselines consist of a set of patches that meet certain criteria. The contents of a dynamic baseline varies as the available patches change. You can also exclude or add specific patches. Patches you select to add or exclude do not change with new patch downloads.
Prerequisites
Connect the vSphere Client to a vCenter Server system with which Update Manager is registered, and on the Home page, click Update Manager under Solutions and Applications. If your vCenter Server system is part of a connected group in vCenter Linked Mode, you must specify the Update Manager instance to use, by selecting the name of the corresponding vCenter Server system in the navigation bar.
Procedure
- On the Baselines and Groups tab, click Create above the Baselines pane.
- Type a name, and optionally, a description of the baseline.
- Under Baseline Type select Host Patch, and click Next.
- Select Dynamic as the type of baseline, and click Next.
- On the Dynamic Baseline Criteria page, specify criteria to define the patches to include, and then click Next.
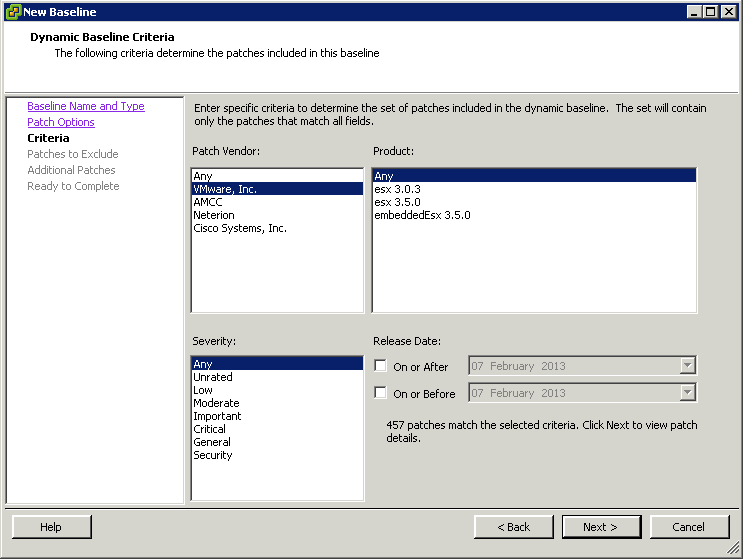
- For example, when you select a product and severity option, the patches are restricted to the ones that are applicable for the selected product and are of the specified severity level
- (Optional) On the Patches to Exclude page, select one or more patches in the list and click the down arrow to permanently exclude them from the baseline.
- (Optional) Click Advanced to search for specific patches to exclude from the baseline.
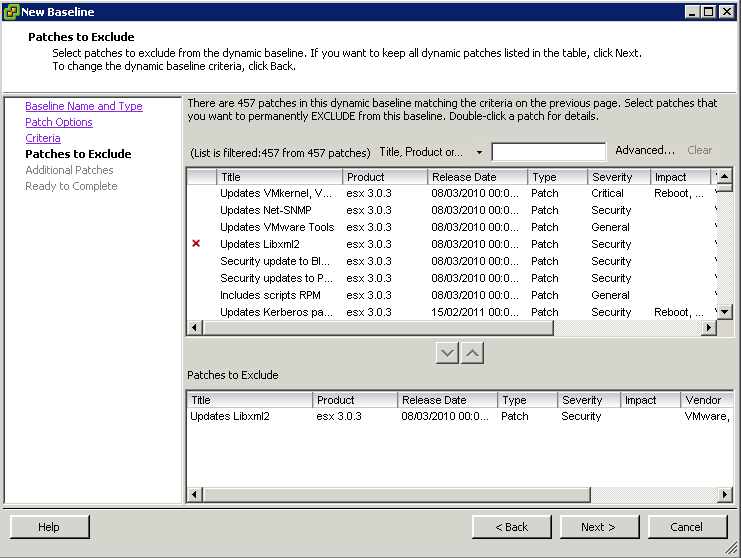
- Click Next.
- (Optional) On the Other Patches to Add page, select individual patches to include in the baseline and click the down arrow to move them into the Fixed Patches to Add list.
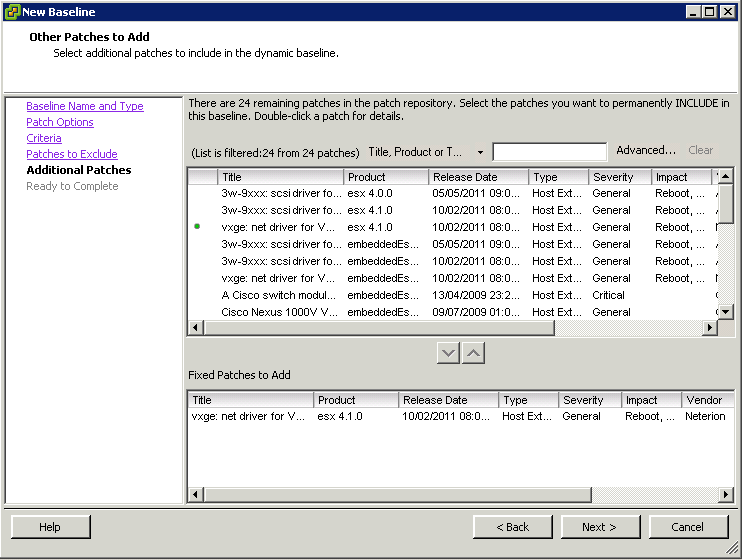
- The patches you add to the dynamic baseline stay in the baseline regardless of the new downloaded patches.
- (Optional) Click Advanced to search for specific patches to include in the baseline.
- Click Next.
- On the Ready to Complete page, click Finish.
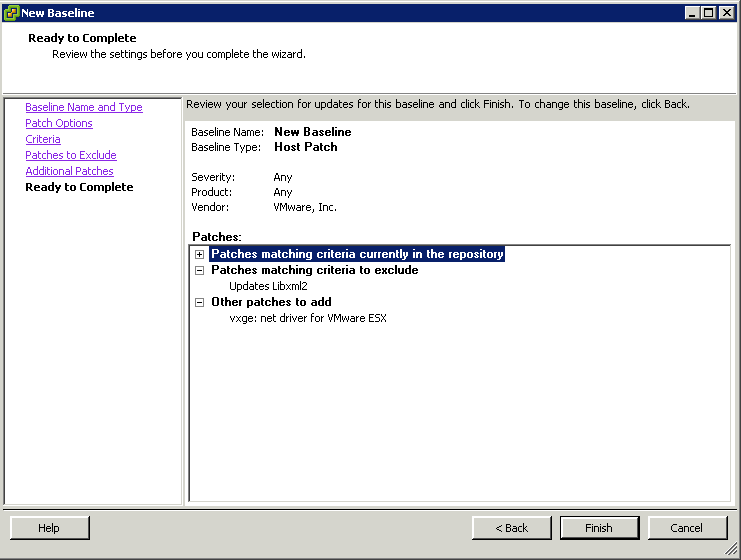
The new baseline is displayed in the Baselines pane of the Baselines and Groups tab
Create a Host Extension Baseline
Extension baselines contain additional software for ESX/ESXi hosts. This additional software might be VMware software or third-party software. You create host extension baselines using the New Baseline wizard.
Extensions can provide additional features, updated drivers for hardware, Common Information Model (CIM) providers for managing third-party modules on the host, improvements to the performance or usability of existing host features, and so on.
Host extension baselines that you create are always fixed. You must carefully select the appropriate extensions for the ESX/ESXi hosts in your environment.
To perform the initial installation of an extension, you must use an extension baseline. After the extension is installed on the host, you can update the extension module with either patch or extension baselines.
Note
When applying extension baselines by using Update Manager, you must be aware of the functional implications of new modules to the host. Extension modules might alter the behavior of ESX/ESXi hosts. During installation of extensions, Update Manager only performs the checks and verifications expressed at the package level.
Prerequisites
Connect the vSphere Client to a vCenter Server system with which Update Manager is registered, and on the Home page, click Update Manager under Solutions and Applications. If your vCenter Server system is part of a connected group in vCenter Linked Mode, you must specify the Update Manager instance to use, by selecting the name of the corresponding vCenter Server system in the navigation bar.
Procedure
- On the Baselines and Groups tab, click Create above the Baselines pane.
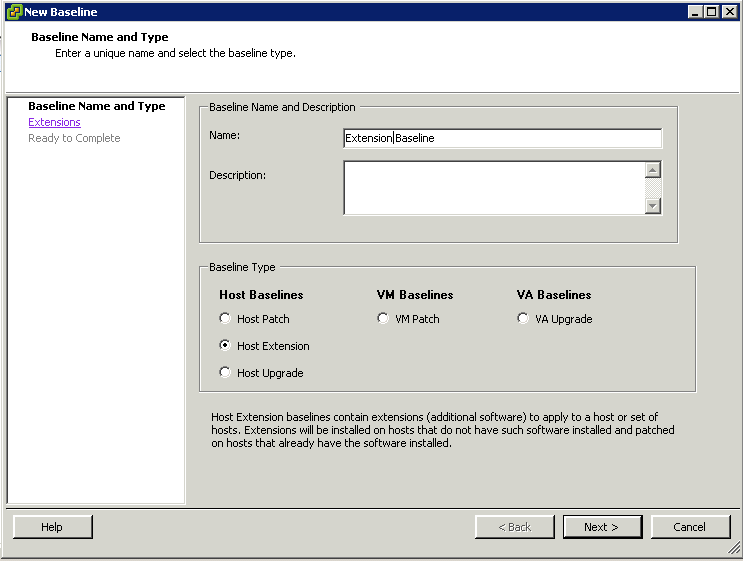
- Type a name, and optionally, a description of the baseline.
- Under Baseline Type, select Host Extension and click Next.
- On the Extensions page, select individual extensions to include in the baseline and click the down arrow to add them to the Included Extensions list.
- (Optional) Click Advanced to filter the extensions to include specific extensions in the baseline
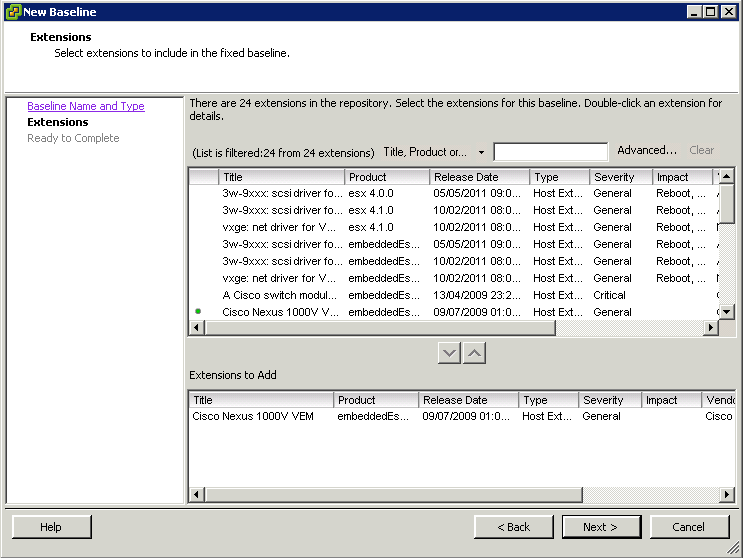
- Click Next.
- On the Ready to Complete page, click Finish.
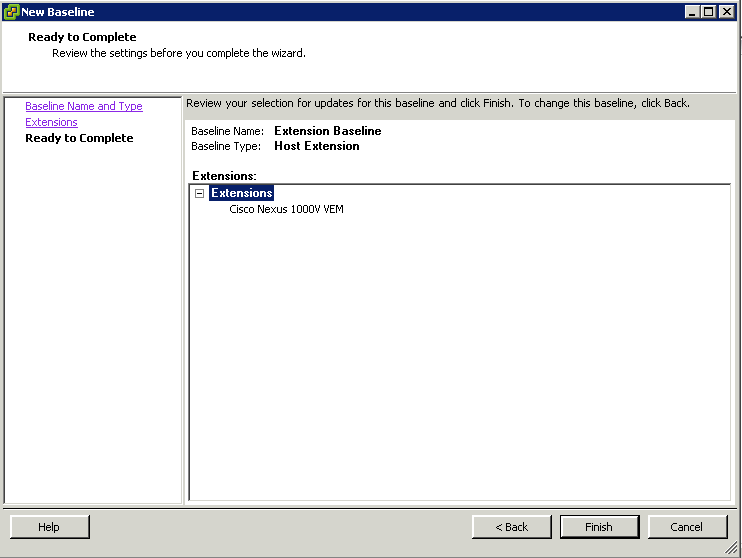
- The new baseline is displayed in the Baselines pane of the Baselines and Groups tab.
Baseline Groups
A baseline group is a collection of patch, upgrade, and/or extension baselines.
Procedure for Host Upgrade Baseline Group
- Login to the vCenter server using vSphere client
- Navigate to Home > Solutions and Applications > Update Manager
- Click Create
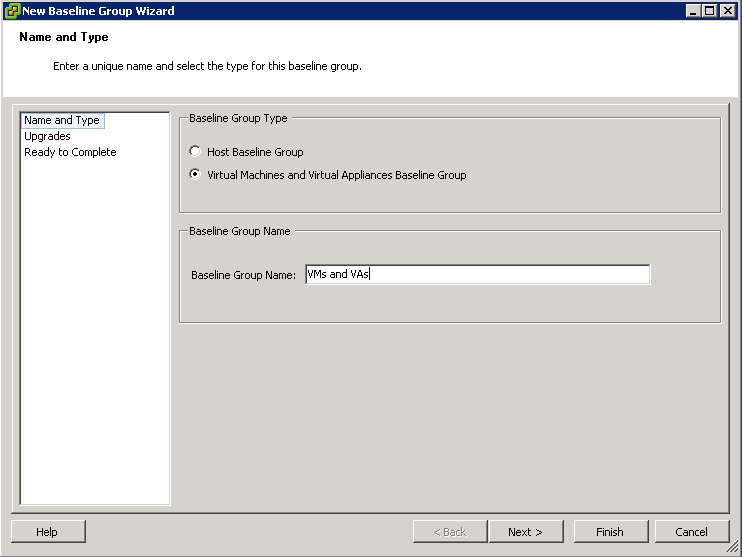
- Select Host Baseline Group, provide a name for the new baseline group
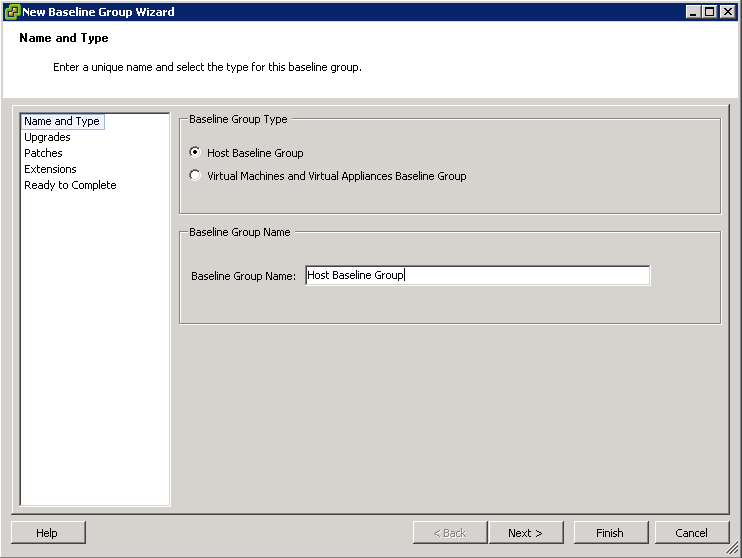
- Click Next
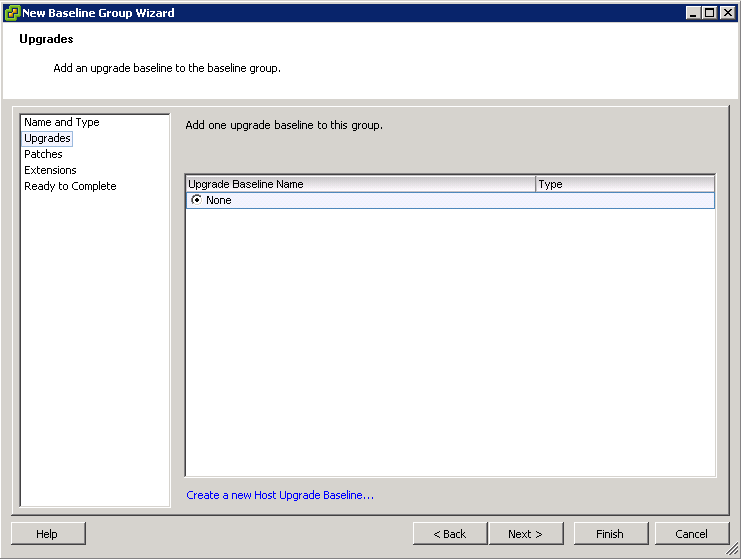
- At the upgrade screen you can select a Host Upgrade Baseline or optionally Click the blue link at the bottom of the screen to Create a new Host Upgrade Baseline
- Select Extension Baseline
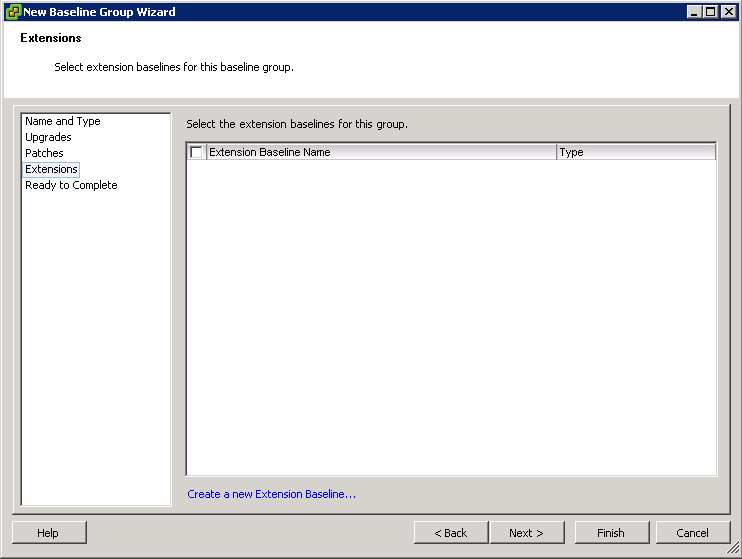
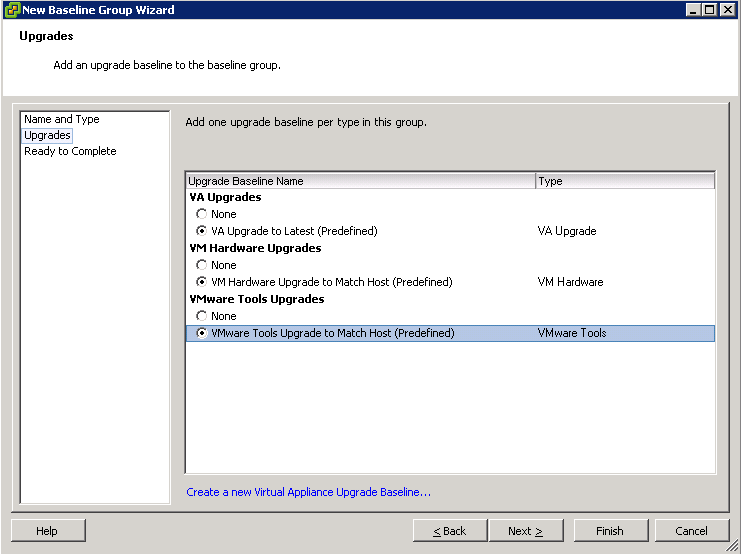
Procedure for creating a Baseline Group for Virtual Machines and Virtual Appliances
- Add one upgrade baseline per type in this group