ActiveSync
Exchange ActiveSync is a Microsoft Exchange synchronization protocol that’s optimized to work together with high-latency and low-bandwidth networks. The protocol, based on HTTP and XML, lets mobile phones access an organization’s information on a server that’s running Microsoft Exchange. Exchange ActiveSync enables mobile phone users to access their e-mail, calendar, contacts, and tasks and to continue to be able to access this information while they’re working offline When you allow mobile phones or other mobile devices to synchronize with your Exchange 2010 server, you allow sensitive corporate information to be stored on small, portable devices that can be easily lost or stolen. Before you deploy Exchange ActiveSync, we recommend that you familiarize yourself with the various security settings you can configure to keep your corporate information safe. You can configure an authentication method for Exchange ActiveSync, deploy Exchange ActiveSync mailbox policies, and use remote device wipe to remove personal and corporate data from a lost or stolen mobile phone
Things to have setup
In order to be able to receive external email into your internal Exchange server, you will need to have an external domain which is setup to forward your MX and A records to your internal environment. As an example I have a domain called electricmonk.org.uk which I use as my test external domain for this blog. I had to ask my domain company to setup the following records and forward them to my routers external address.
- MX mail.electricmonk.org.uk
- A mail.electricmonk.org.uk
- A owa.electricmonk.org.uk
- A autodiscover.electricmonk.org.uk
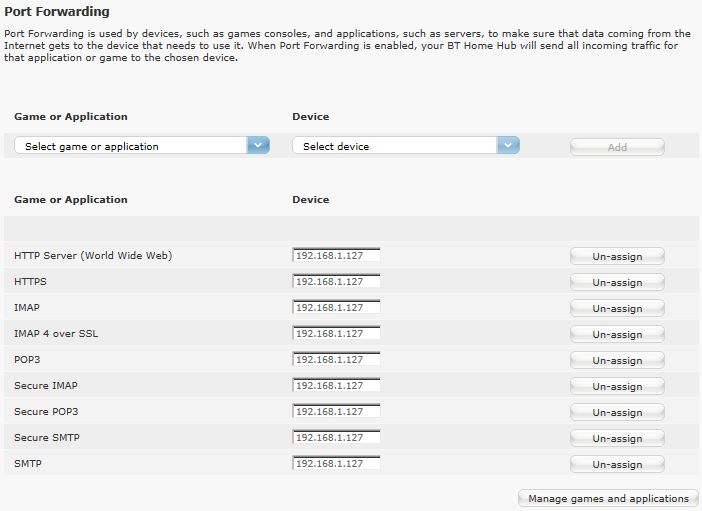
These records will then hit my router then depending on your routers setup, you will need to forward the relevant mail ports to your Exchange Server.
- POP3 = 110
- IMAP = 143
- SMTP = 25
- HTTP = 80
- HTTPS = 443
- Secure SMTP = 465
- Secure POP3 = 995
- Secure IMAP = 585
- IMAP4 over SSL = 995
- Exchange (SMTP-MSA) =587
This is my BT Router Port Forwarding setup set to forward these ports to my mail server on my internal network
Features in Exchange ActiveSync
Exchange ActiveSync provides the following:
- Support for HTML messages
- Support for follow-up flags
- Conversation grouping of e-mail messages
- Ability to synchronize or not synchronize an entire conversation
- Synchronization of SMS messages with a user’s Exchange mailbox
- Support for viewing of message reply status
- Support for fast message retrieval
- Meeting attendee information
- Enhanced Exchange Search
- PIN reset
- Enhanced device security through password policies
- Autodiscover for over-the-air provisioning
- Support for setting auto-replies when users are away, on vacation, or out of the office
- Support for tasks synchronization
- Direct Push
- Support for availability information for contacts
Exchange ActiveSync Server Security
There are several security-related tasks you can perform on a server that’s running Exchange ActiveSync. One of the most important tasks is to configure an authentication method. Exchange ActiveSync runs on a computer running Exchange 2010 that has the Client Access server role installed. This server role is installed with a default self-signed digital certificate. Although the self-signed certificate is supported for Exchange ActiveSync, it isn’t the most secure method of authentication. For additional security, consider deploying a trusted certificate from a third-party commercial certification authority (CA) or a trusted Windows public key infrastructure (PKI) certification authority.
Selecting an Authentication Method for Exchange ActiveSync
In addition to deploying a trusted digital certificate, you should consider the different authentication methods that are available for Exchange ActiveSync. By default, when the Client Access server role is installed, Exchange ActiveSync is configured to use Basic authentication with Secure Sockets Layer (SSL). To provide increased security, consider changing your authentication method to Digest authentication or Integrated Windows authentication
Exchange ActiveSync Mailbox Policies
Exchange ActiveSync for Exchange 2010 enables you to create Exchange ActiveSync mailbox policies to apply a common set of security settings to a collection of users. These settings include the following
- Requiring a password
- Specifying the minimum password length
- Requiring numbers or special characters in the password
- Designating how long a mobile phone can be inactive before the user is required to re-enter the password
- Specifying that the mobile phone or mobile device be wiped if an incorrect password is entered more than a specific number of times
Accessing ActiveSync Policies
- Click on Organization Configuration > Client Access then in the Action pane select Exchange ActiveSync Mailbox Policies
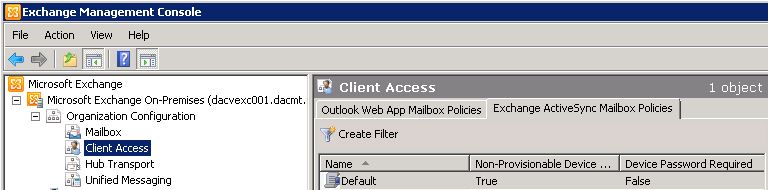
- Right click on Default and select Properties

- Allow non-provisional devices – Select this check box to allow mobile phones that can’t be provisioned automatically. These mobile phones may be unable to enforce all the Exchange ActiveSync policy settings. By selecting this box, you’re allowing these mobile phones to synchronize even though some policy settings may not be applied.
- Refresh Interval – Select this check box to force the server to resend the policy to clients at a fixed interval defined in the number of hours between policy refresh events.
- Click on Password

- Require password – Select this checkbox to require a password for the mobile phone. If passwords are required, the following options become available.
- Require alphanumeric password – Select this check box to specify that the mobile phone password must include non-numeric characters. Requiring non-numeric characters in passwords increases the strength of password security.
- Minimum number of character sets – Use this text box to specify the complexity of the alphanumeric password and force users to use a number of different sets of characters from among the following: lower case letters, upper case letters, symbols and numbers.
- Enable password recovery – Select this check box to enable password recovery for the mobile phone. Users can use Outlook Web App to look up their recovery password and unlock their mobile phone. Administrators can use the EMC to look up a user’s recovery password.
- Require encryption on device – Select this check box to require encryption on the mobile phone. This increases security by encrypting all information on the mobile phone.
- Require encryption on storage cards – Select this check box to require encryption on the mobile phone’s removable storage card. This increases security by encrypting all information on the storage cards for the mobile phone.
- Allow simple password – Select this check box to allow users to lock their mobile phones with simple passwords such as 1111 or 1234. If you clear this check box, users will be required to use more secure password sequences.
- Number of failed attempts allowed – Use this text box to limit the number of failed password attempts a mobile phone accepts before all information on the mobile phone is deleted and the mobile phone is automatically returned to the original factory settings. This reduces the chance of an unauthorized user accessing information on a lost or stolen mobile phone that has a password.
- Minimum password length – Use this text box to specify a minimum password length for the mobile phone password. Long passwords can provide increased security. However, long passwords can decrease mobile phone usability. A moderate password length of four to six characters is recommended.
- Time without user input before password must be re-entered (in minutes) – When a mobile phone password is required, you can use this text box to prompt the user for the password after the mobile phone has been inactive for a specified period of time. For example, if this setting is set to 15 minutes, the user must enter the mobile phone password every time that the mobile phone is idle for 15 minutes. If the mobile phone is idle for 10 minutes, the user won’t have to re-enter the password.
- Password expiration (days) – Use this text box to force users to reset their mobile phone’s password at a given interval. The interval is set in a number of days.
- Enforce password history – Select this check box to force the mobile phone to prevent the user from re-using their previous passwords. The number you set determines how many past passwords the user won’t be allowed to reuse.
- Next Click on Sync Settings
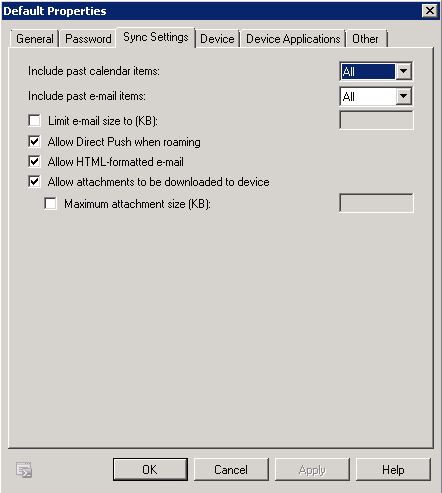
- Include past calendar items – Use this drop-down list to select the date range of calendar items to synchronize to the mobile phone. The available options include the following: All, Two Weeks, One Month, Three Months, and Six Months. If you have to specify other options, use the Shell to configure this setting.
- Include past e-mail items – Use this drop-down list to select the date range of e-mail items to synchronize to the mobile phone. The available options include the following: All, One Day, Three Days, One Week, Two Weeks, and One Month. If you have to specify other options, use the Shell to configure this setting.
- Limit e-mail size to (KB) – Select this check box to limit the message size that can be downloaded to the mobile phone. After you’ve selected the check box, use the text box to specify a maximum message size, in kilobytes (KB).
- Allow Direct Push when roaming – Select this check box to enable the mobile phone to synchronize as new items arrive when you’re roaming with your phone. You’re roaming when you’re outside your normal service area. Check with your mobile service provider to determine your normal service area. Clearing this check box forces you to manually launch synchronization when you’re roaming with the phone and data rates are traditionally higher.
- Allow HTML-formatted e-mail – Select this check box to enable e-mail messages that are formatted in HTML to be synchronized to the mobile phone. If this check box isn’t selected, all e-mail messages will be converted to plain text before synchronization. Use of this check box doesn’t affect whether or not messages are received on the mobile phone.
- Allow attachments to be downloaded to device – Select this check box to enable attachments to be downloaded to the mobile phone. If this check box is cleared, the name of the attachment is visible within the e-mail message but can’t be downloaded to the mobile phone.
- Maximum attachment size (KB) – Select this check box to specify a maximum size for attachments that are downloaded to the mobile phone. After you select the check box, use the text box to enter a maximum attachment size, in KB. If this check box is selected, attachments that are larger than the specified size can’t be downloaded to the device.
- Next Click on Device. Use the Device tab to specify a variety of device-specific settings. All settings that you access on the Device tab of the Exchange ActiveSync policy Properties page are premium features of Exchange ActiveSync. For these features to be implemented on a mobile phone, the mailbox requires an Exchange Enterprise client access license (CAL).

- Allow removable storage – Select this check box to allow storage cards to be accessed from a mobile phone. If this check box isn’t selected, storage cards can’t be accessed from a mobile phone.
- Allow camera – Select this check box to allow the mobile phone camera to be used.
- Allow Wi-Fi – Select this check box to allow the mobile phone to use a Wi-Fi connection for Internet access. Direct Push isn’t supported over Wi-Fi.
- Allow infrared – Select this check box to allow the mobile phone to establish an infrared connection with other devices or computers.
- Allow Internet sharing from device – Select this check box to allow another device to share the Internet connection of the mobile phone. Internet sharing is frequently used when the device functions as a modem for a laptop or desktop computer.
- Allow remote desktop from device – Select this check box to allow the mobile phone to establish a remote desktop connection to another computer.
- Allow desktop synchronization – Select this check box to allow the mobile phone to synchronize with a desktop computer through desktop ActiveSync or the Windows Mobile Device Center.
- Allow Bluetooth – Use this drop-down list to control the Bluetooth functionality of the mobile phone. You can choose to Allow, Disable, or enable Bluetooth for Handsfree only
- Click on Device Application. Use the Device Applications tab to enable or disable specific features on a mobile phone. All settings that you access on the Device Applications tab of the Exchange ActiveSync policy Properties pages are premium features of Exchange ActiveSync. For these features to be implemented on a mobile phone, the mailbox requires an Exchange Enterprise client access license (CAL).
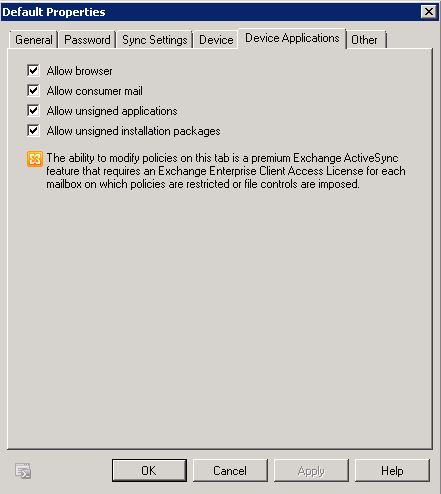
- Allow browser – Select this check box to allow mobile phones to use Pocket Internet Explorer
- Allow consumer mail – Select this check box to allow the mobile phone to access e-mail accounts other than Microsoft Exchange accounts. Consumer e-mail accounts include accounts that are accessed through POP3 and IMAP
- Allow unsigned applications – Select this check box to allow unsigned applications to be installed on the mobile phone.
- Allow unsigned installation packages – Select this check box to allow unsigned installation packages to be run on the mobile phone
- Click on Other. Use the Other tab to specify allowed and blocked applications. All settings that you access on the Other tab of the Exchange ActiveSync policy Properties pages are premium features of Exchange ActiveSync. For these features to be implemented on a mobile phone, the mailbox requires an Exchange Enterprise client access license (CAL).
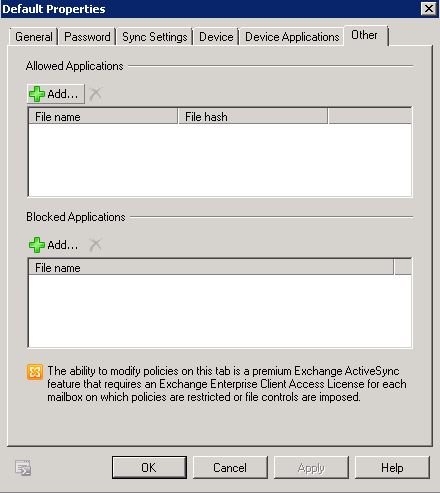
- Allowed Applications You can add applications to or remove them from the Allowed Applications list. Allowed applications can be installed and run on the mobile phone. Click Add to add an application, and click Delete to remove an application.
- Blocked Applications You can add applications to or remove them from the Blocked Applications list. Blocked applications are prohibited from running on the mobile phone. Click Add to add an application, and click Delete to remove an application.
Accepted Domains
Make sure you have your accepted external domain listed here
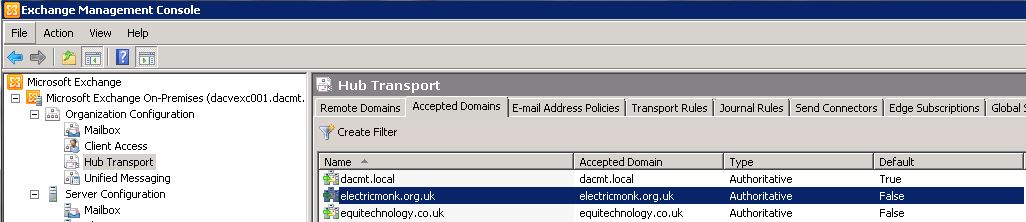
- Click on Organization Configuration and then click on Hub Transport
- Click on the Accepted Domains tab and you should see your local address
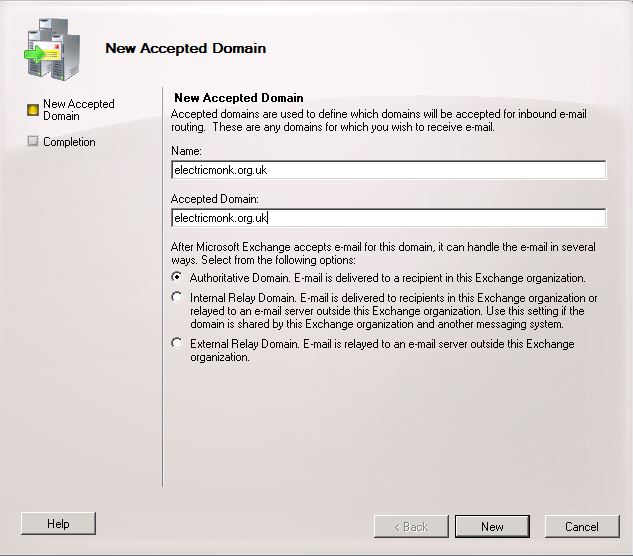
- In the Actions pane, click on New Accepted Domain
- Put in a name for this Domain and the name itself
- You should now see your domains
Send Connectors
- Go to Organisation Configuration > Hub Transport
- Click New Send Connector
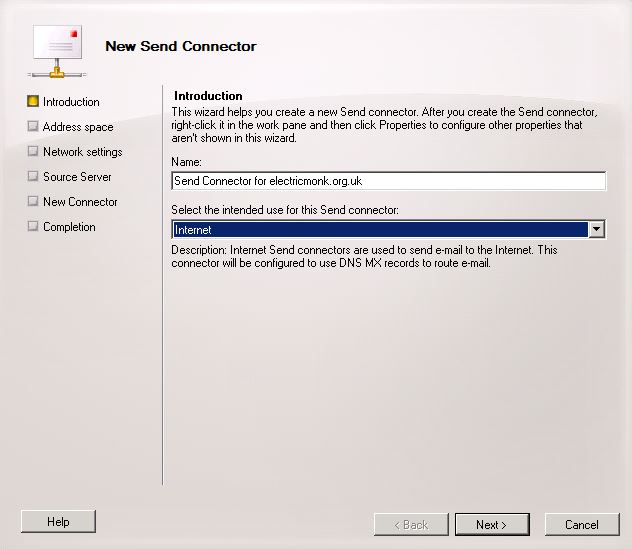
- Type a name and choose Internet for the intended use
- Click Next
- On the Address space page click Add and add in * to Address and tick Include all subdomains
- Keep Use Domain name system (DNS) “MX” records to route mail automatically ticked
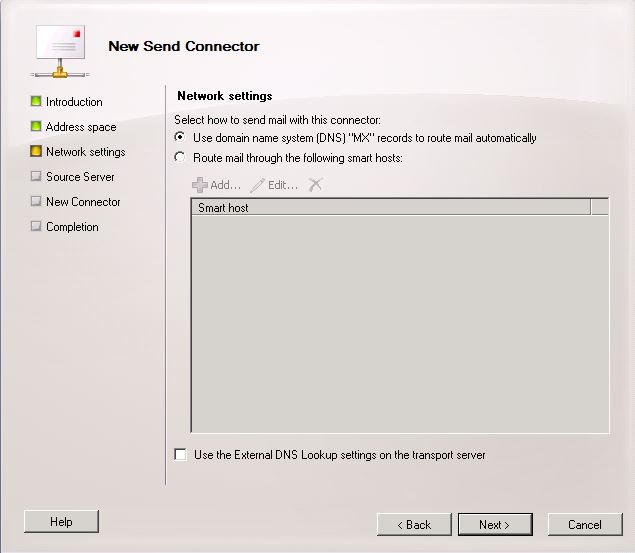
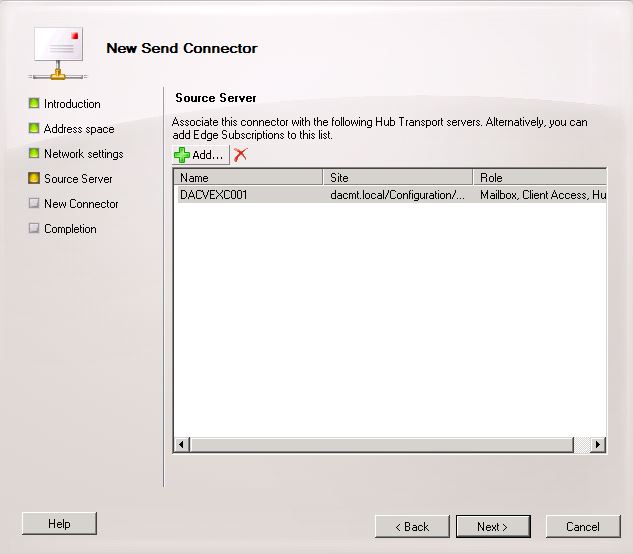
- Check your Source Server is selected
- The Summary Page will appear. Check the details and click New
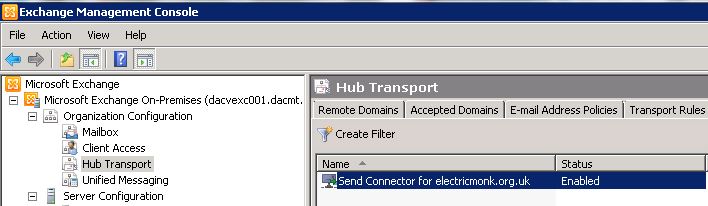
- You should now see your new Send Connector
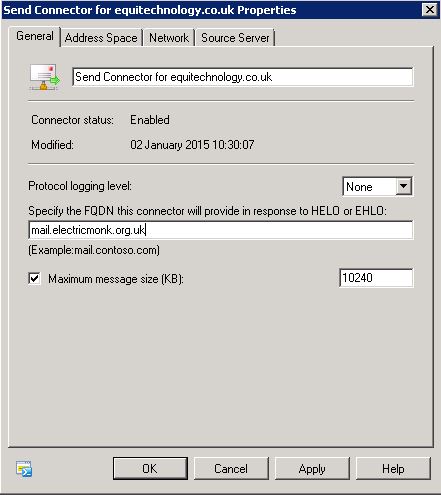
- Double click on this Send Connector and select Properties
- You need to put in your external domain here
Set up an email policy
- Go to Organization Configuration
- Go to Hub Transport
- Go to E-mail Address Polices
- Click on the Default Policy
- Click Next
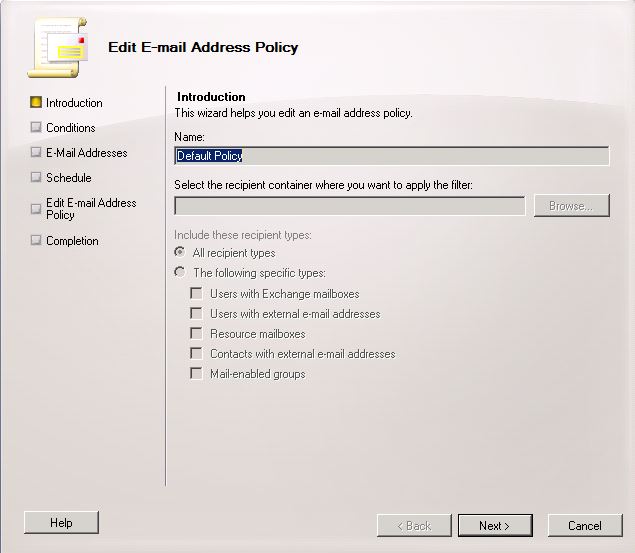
- You are now on the New E-Mail Address Policy Page. Don’t select anything on here for now
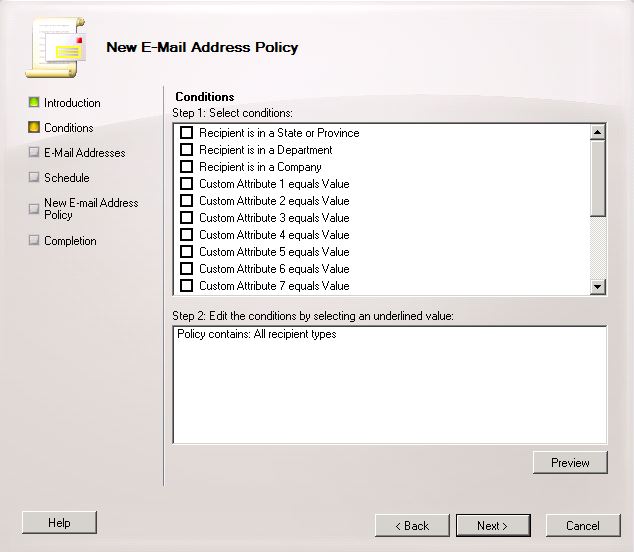
- Click Next and you are now on the E-Mail Addresses Page
- Click Add
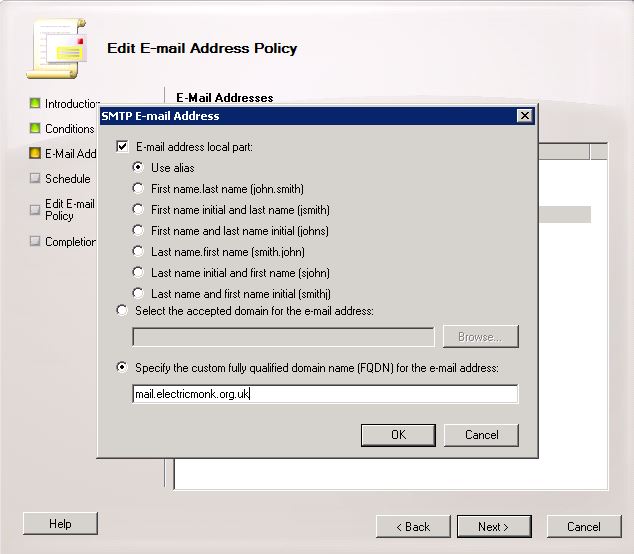
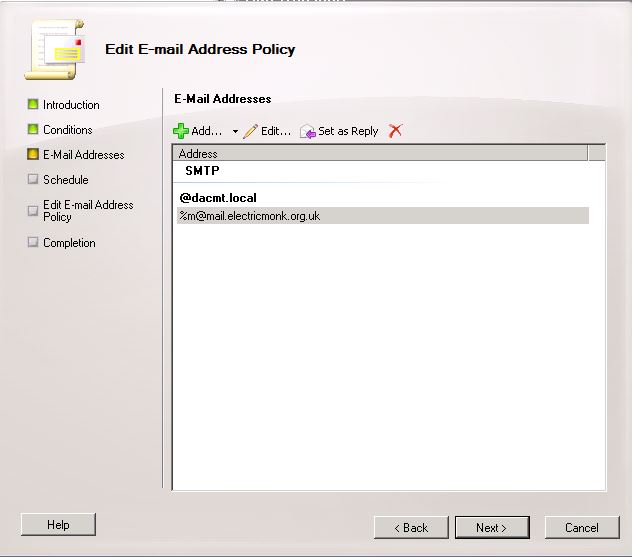
- Click the %m@mail.electricmonk.org.uk and select Set as Reply
- On the Schedule Page, leave this as Immediately
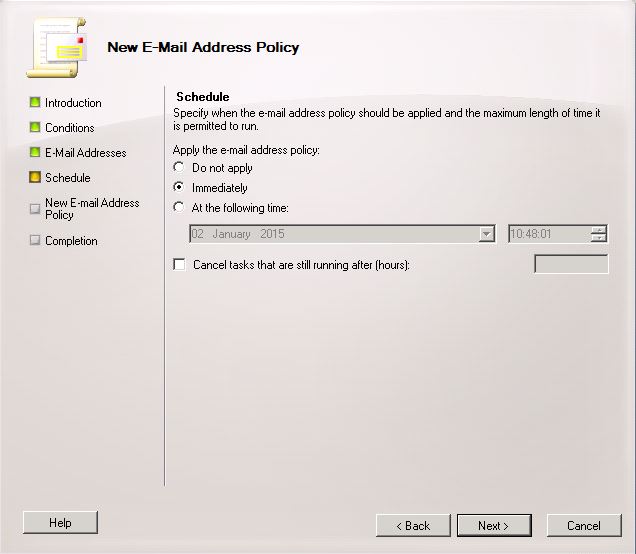
- Finally click New and the wizard will complete

ActiveSync Virtual Directory
By default, when Exchange 2010 is installed, a new virtual directory is created in the default website in Internet Information Services (IIS). This virtual directory is named Microsoft-Server-ActiveSync. You can create additional Exchange ActiveSync virtual directories under Web sites other than the default Web site. All Exchange ActiveSync virtual directories you create will have the name Microsoft-Server-ActiveSync. After you have installed the Client Access server role on an Exchange Server 2010 computer, Exchange ActiveSync is enabled by default. An Exchange ActiveSync virtual directory is created on the Exchange 2010 Client Access server. You can configure a variety of options on that virtual directory.
Viewing the ActiveSync Virtual Directory Properties
- In the console tree, navigate to Server Configuration > Client Access
- In the work pane, click the Exchange ActiveSync tab, and then click the Microsoft-Server-ActiveSync virtual directory.
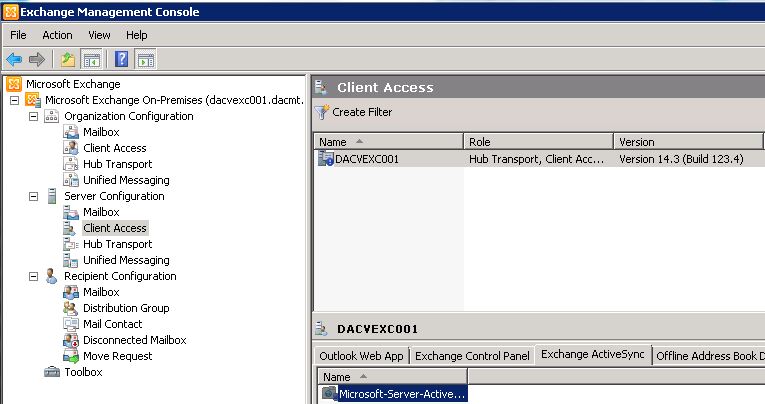
- In the action pane, under click Microsoft-Server-ActiveSync, click Properties.
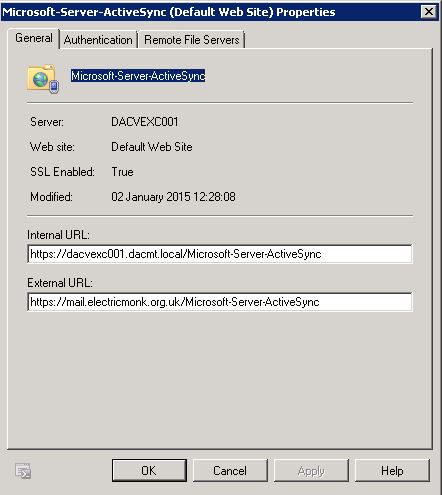
- Use the General tab to view display-only information about the Exchange ActiveSync virtual directory and to modify the Internal and External URLs.
- Server – This read-only field shows the name of the server the virtual directory is located on.
- Web site This read-only field shows the name of the Web site that holds the virtual directory. Normally, this will be the Default Website.
- SSL Enabled This read-only field shows the Secure Sockets Layer (SSL) status of the virtual directory. The default is True.
- Modified This read-only field shows the date and time that the virtual directory was last modified.
- Internal URL This field shows the
InternalURL setting for the virtual directory. In most cases, you shouldn’t change this setting.
- External URL This field shows the
ExternalURL setting for the virtual directory. In an Internet-facing Active Directory site, this field will be populated with the external DNS endpoint for Exchange ActiveSync, for example, http://mail.electricmonk.org.uk/Microsoft-Server-ActiveSync.
- Use the Authentication tab to control the authentication methods for the Exchange ActiveSync virtual directory.
- Basic authentication (password is sent in clear text) Select this check box if you want the mobile device to send the user name and password in clear text. Because passwords are sent in clear text with Basic authentication, you should configure SSL to encrypt data transferred between your mobile clients and the Exchange ActiveSync virtual directory.
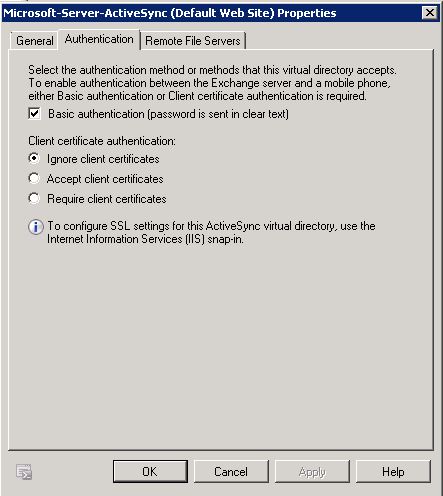
- Client Certificate authentication – Select whether you want to ignore, accept, or require client certificate authentication.
- Certificates can reside in the certificate store on a mobile device or on a smart card. A certificate authentication method uses the Extensible Authentication Protocol (EAP) and Transport Layer Security (TLS) protocols. In EAP-TLS certificate authentication, the client and the server prove their identities to each other. For example, an Exchange ActiveSync client presents its user certificate to the Client Access server, and the Client Access server presents its computer certificate to the mobile device to provide mutual authentication.
Note: Requiring client certificates will force you to configure SSL on the Web site that’s hosting the Exchange ActiveSync virtual directory.
- Exchange ActiveSync clients can access files and Web sites that are located on Windows SharePoint Services and Windows file shares. Use the Remote File Servers tab to specify allowed and blocked host names for your Exchange ActiveSync clients. This tab also allows you to configure which domains are treated as internal.
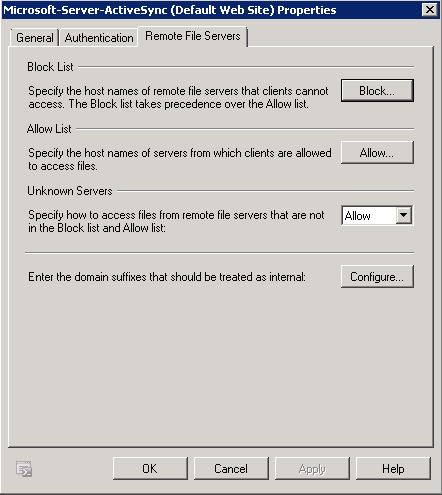
- Block List – Click Block to configure a list of host names of servers to which clients are denied access.
- The Block list takes precedence over the Allow list. To add a host name to the Block list, type the host name in the Block List dialog box, and then click Add. To remove a host name from the Block list, select the host name, and then click Delete in the Block List dialog box.
- Allow List – Click the Allow button to configure a list of host names of servers from which clients are allowed to access files.
- To add a host name to the Allow list, type the host name in the Allow List dialog box, and then click Add. To remove a host name from the Allow list, select the name, and then click Delete in the Allow List dialog box.
- If a host name is specified in the Allow list and the Block list, clients will be blocked from accessing files from that host name.
- Unknown Servers Use this list to specify how to access files from host names that aren’t listed in either the Block list or the Allow list. The default value is Allow.
- Enter the domain suffixes that should be treated as internal Use this option to configure specific host names as internal host names. Click Configure to add host names to the Internal Domain Suffix List. When clients try to access files on one of these host names, Exchange ActiveSync uses the internal network to access these files instead of trying to access them over the Internet
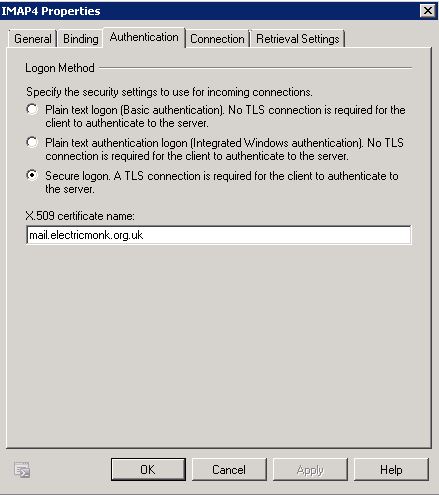
IMAP Configuration
- Go to Server Configuration
- Go to Client Access
- Go to POP3 and IMAP4
- Double click on IMAP4 and go to Authentication
- In the X.509 certificate name type in your domain
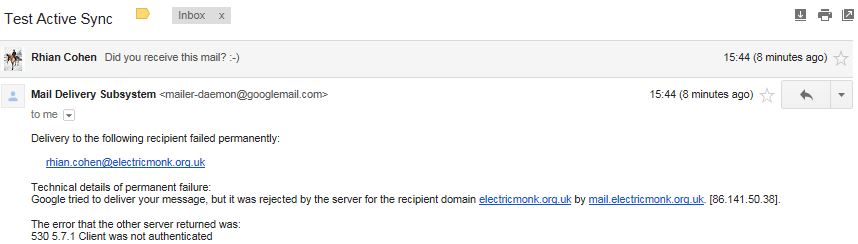
Enabling Anonymous Authentication
If this is not enabled, it can stop external mail programs from being able to email your Exchange server. See below when trying to send email from Gmail to my Exchange Address
- Open EMC
- Go to Server configuration > Hub Transport Server
- Click on Default Receive Connector and select Properties
- Click on last tab “Permission Groups” and place check mark into “Anonymous users” click apply and ok.
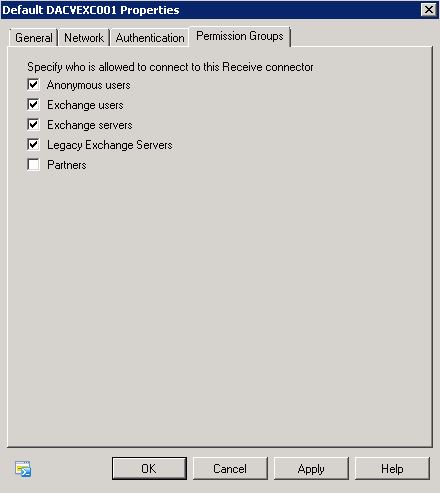
- Now if you try resending the email it should work
Devices Enabled for Exchange ActiveSync
Users can take advantage of Exchange ActiveSync by selecting mobile phones that are compatible with Exchange ActiveSync. These mobile phones are available from many manufacturers. For more information, see the device documentation.
Mobile phones that are compatible with Microsoft Exchange include the following
- Apple – The Apple iPhone, iPod Touch, and iPad all support Exchange ActiveSync.
- Nokia – Nokia offers Mail for Exchange on their E series mobile phones. E-mail, calendar, and contact data can be synchronized over a cellular network or a wireless LAN.
- Sony Ericsson – Sony Ericsson offers Exchange ActiveSync support on several of their newer smartphones. They also support Direct Push through a third-party program.
- Palm – Palm offers some models of mobile phones that have the Windows Mobile operating system. These devices support Direct Push.
- Motorola – Motorola has its own synchronization framework that enables over-the-air synchronization through Exchange ActiveSync on many of its devices.
- Symbian – Symbian Limited licenses Exchange ActiveSync for use in the Symbian operating system. This operating system is an open standard operating system for mobile phones.
- Android – Many mobile phones with the Android operating system support Exchange ActiveSync. However, these mobile phones may not support all available Exchange ActiveSync mailbox policies.
Setting up an iPhone 5S
- Go into Settings > Mail Contacts and Settings
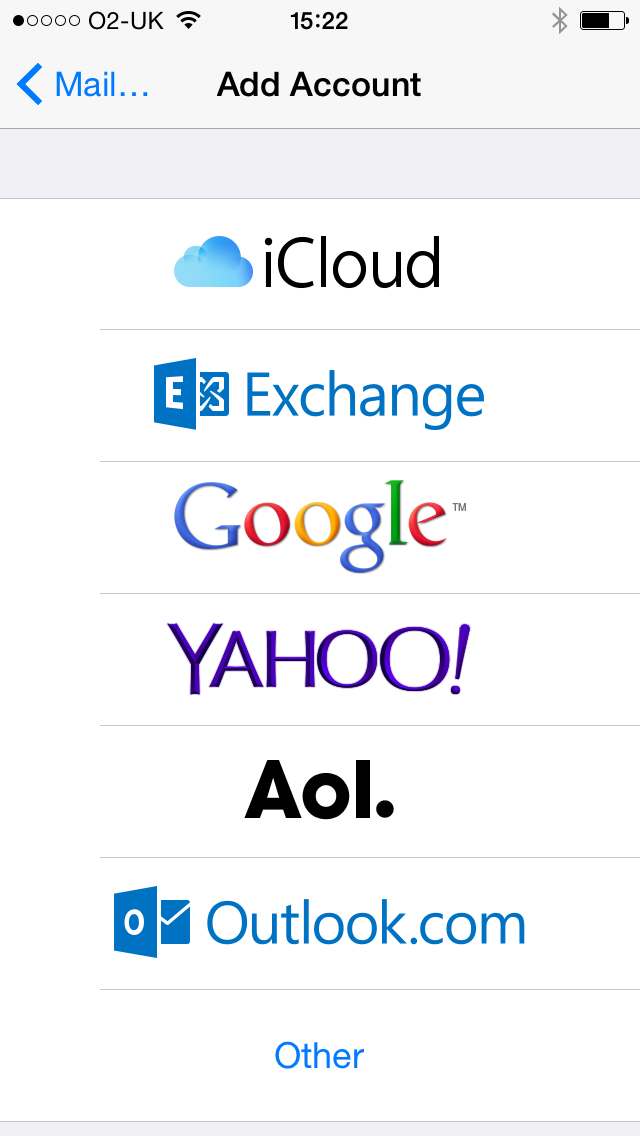
- Click Add Account
- Choose Exchange
- Put in your e-mail address and password
- You will also see your Exchange Device ID
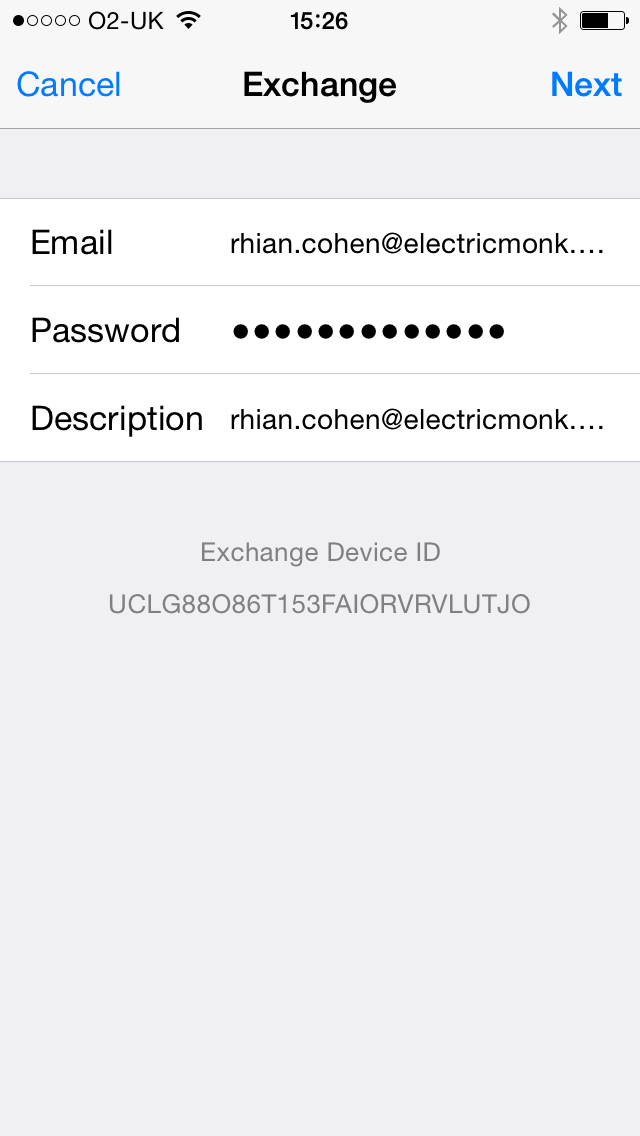
- Tap Next
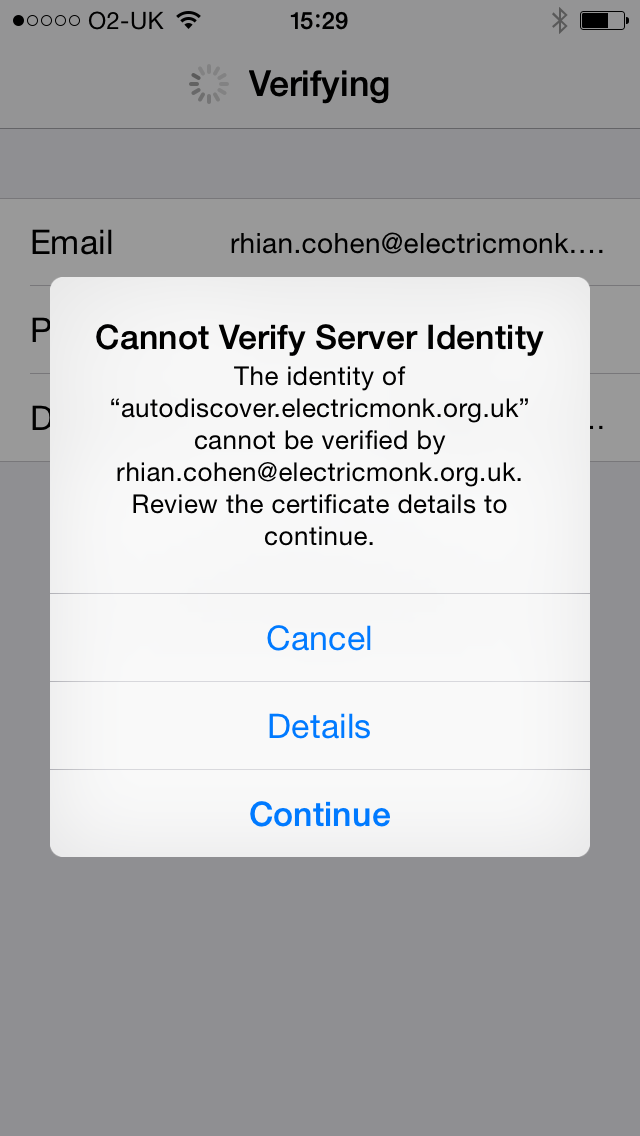
- As I don’t have a proper certificate I get these 2 warnings. Just click Continue
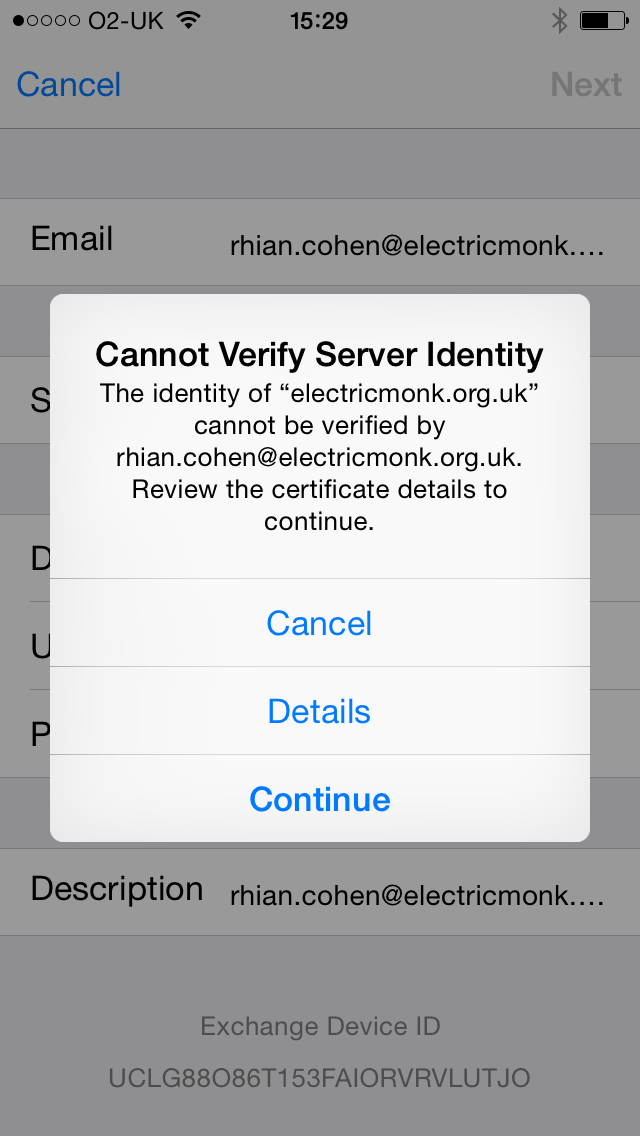
- Next you will need to enter the relevant information for your servers and email addresses and passwords.
- E-mail: Your e-mail address
- Server: The external address you setup with you domain provider
- Domain: Note: I had to put my internal local domain for this to work which is my test lab domain dacmt.local
- Username: Active Directory Username
- Password: Active Directory Password
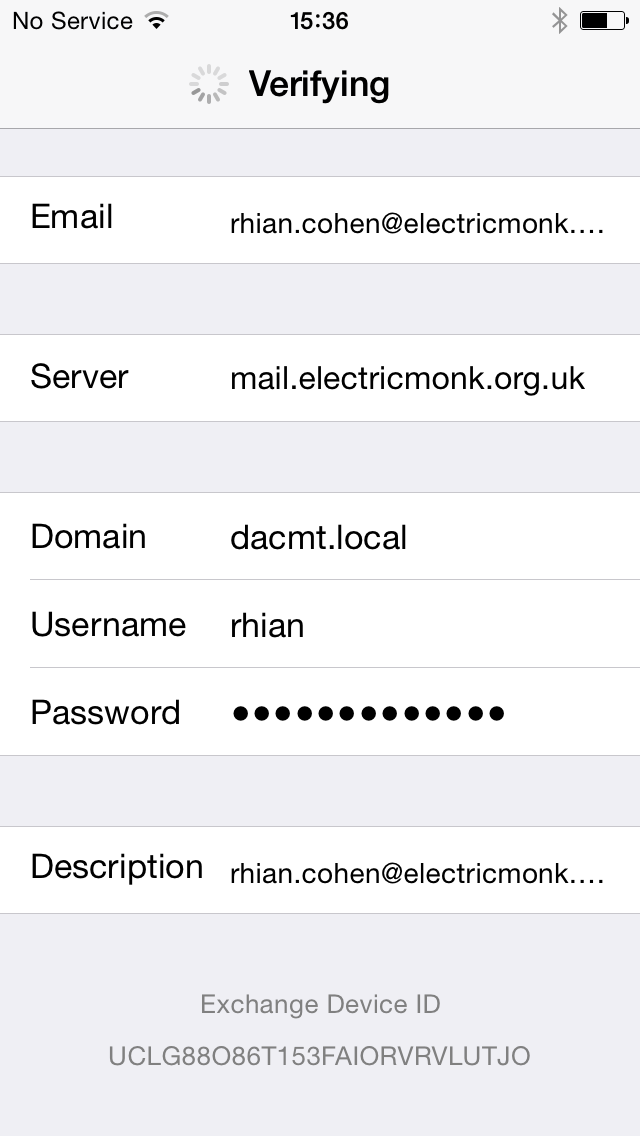
- Click Done and it should say Verifying and then place a tick against all settings
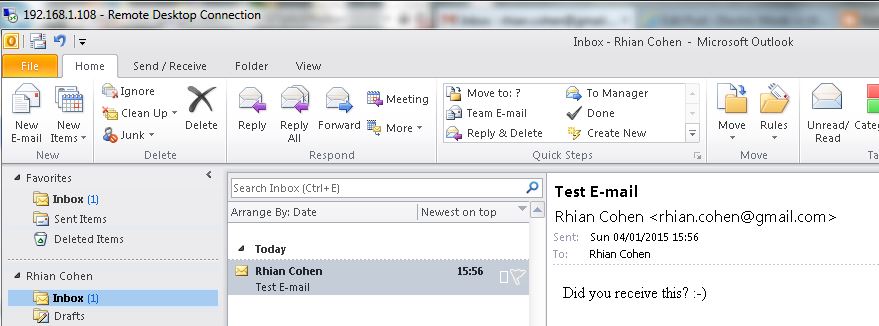
- Now you need to test sending an email to your email account
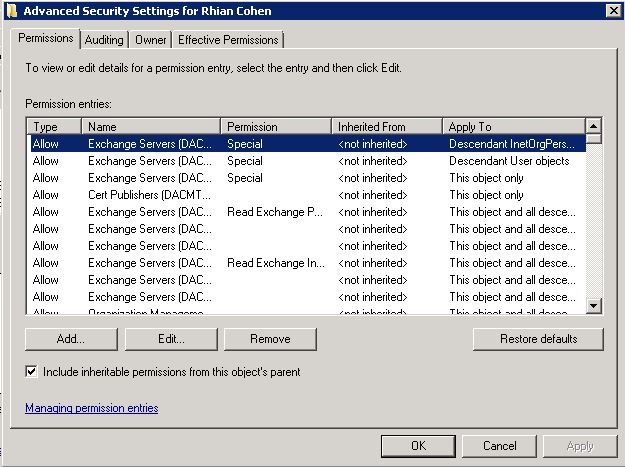
If all the settings verify but email is not coming through
This may be the cause of a simple mis-configuration in the Microsoft Active Directory services for that user.
- Open the Active Directory Users and Computers
- Select the View menu from the top and click on “Advanced Features”.
- Open the properties on the user having the issue and select the “Security” tab. Under this tab will be windows with user accounts listed and a “Advanced button” at the bottom. Select this button and find the check box “Include Inheritable permissions from this object’s parent” . If this is the problem you will find the box “unchecked”. Just check the box and try again. You should see mail start to come in.
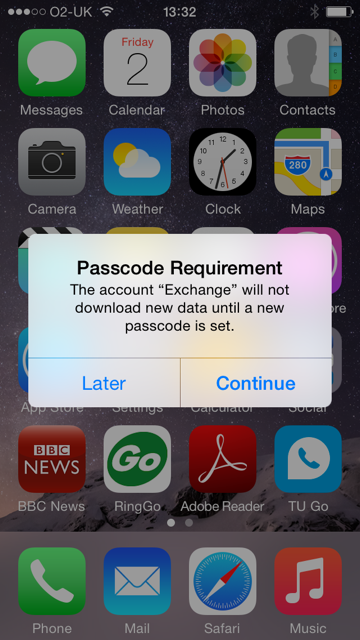
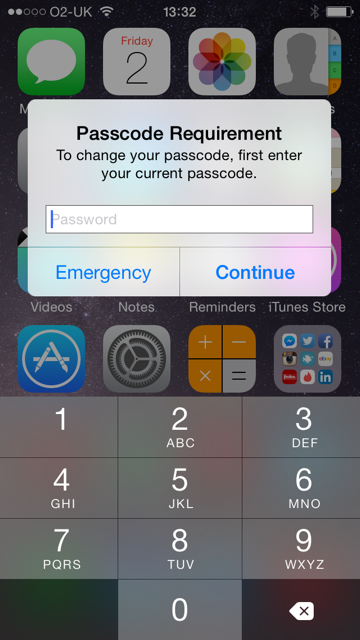
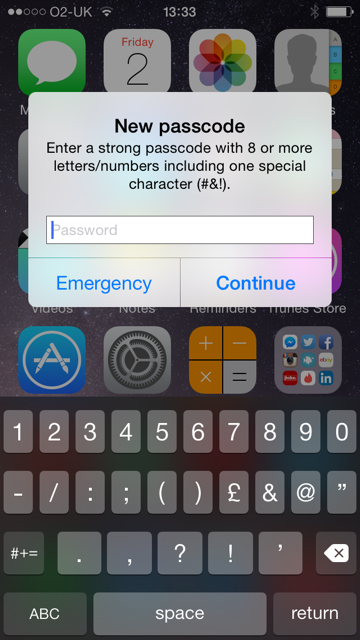
If you have set an Exchange Active Sync Policy which requires a password
Then when the account is setup, after a few minutes it should come up with the following prompts
Using Remote Wipe
Mobile phones can store sensitive data that belongs to your organization and provide access to many of your organization’s resources. If a mobile phone is lost or stolen, that data can be compromised. Remote device wipe is a feature that enables the Exchange server to set a mobile phone to delete all data the next time that the mobile phone connects to the Exchange server. A remote device wipe effectively removes all synchronized information and personal settings from a mobile phone. This can be useful when a mobile phone is lost, stolen, or otherwise compromised. After a remote device wipe has occurred, data recovery is very difficult. However, no data removal process leaves a mobile phone or other mobile device as free from residual data as it is when it’s new. Recovery of data from a mobile phone or other mobile device may still be possible using sophisticated tools.
Microsoft Exchange Server 2010 lets you send a command to a mobile phone to perform a remote device wipe of that phone. This process removes all the information that’s stored on the phone. This includes Exchange information. This process then completes a full reset of the device. You can use the EMC or the Exchange Management Shell to perform a remote wipe on a mobile phone. You can use this procedure to clear data from a stolen phone or to clear data from a phone before you assign it to another user
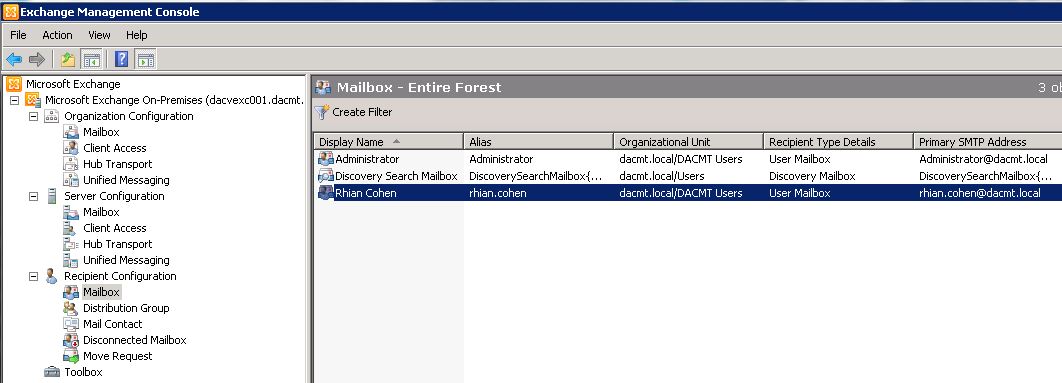
- In the console tree, navigate to Recipient Configuration > Mailbox.
- Select the user from the Mailbox window.
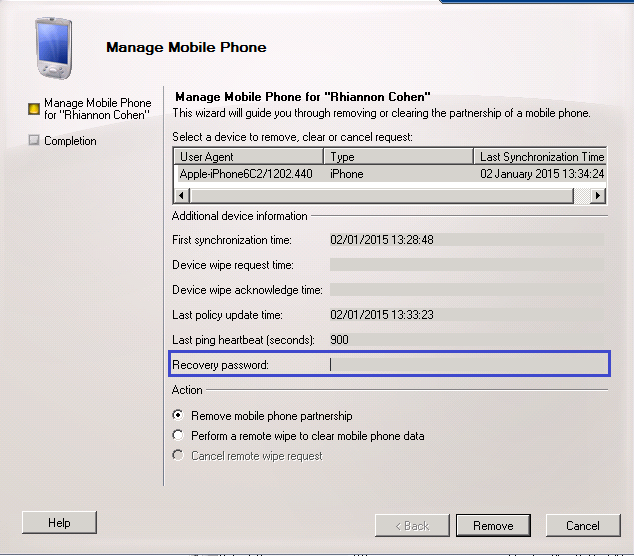
- In the action pane, click Manage mobile device, or right-click the user’s mailbox, and then click Manage mobile device.
- Select the mobile phone you want to clear all data from.
- In the Actions section, click Perform a remote wipe to clear mobile phone data
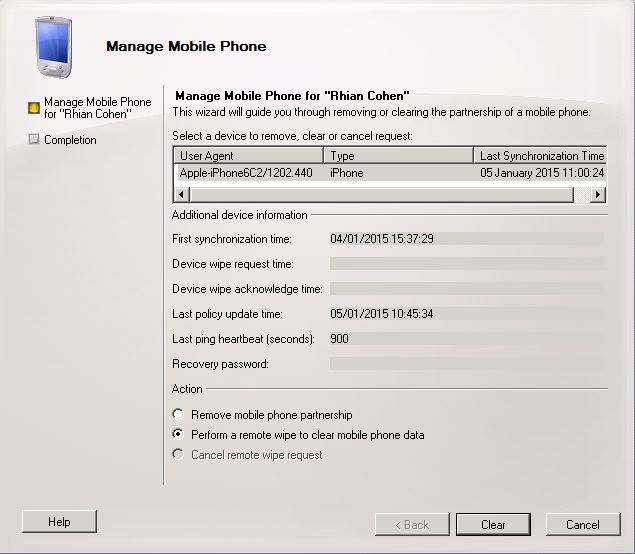
- Click Clear.
- Note: Performing either of these actions will wipe the iPhone!
- It will also send an email message to you saying that the device has been wiped
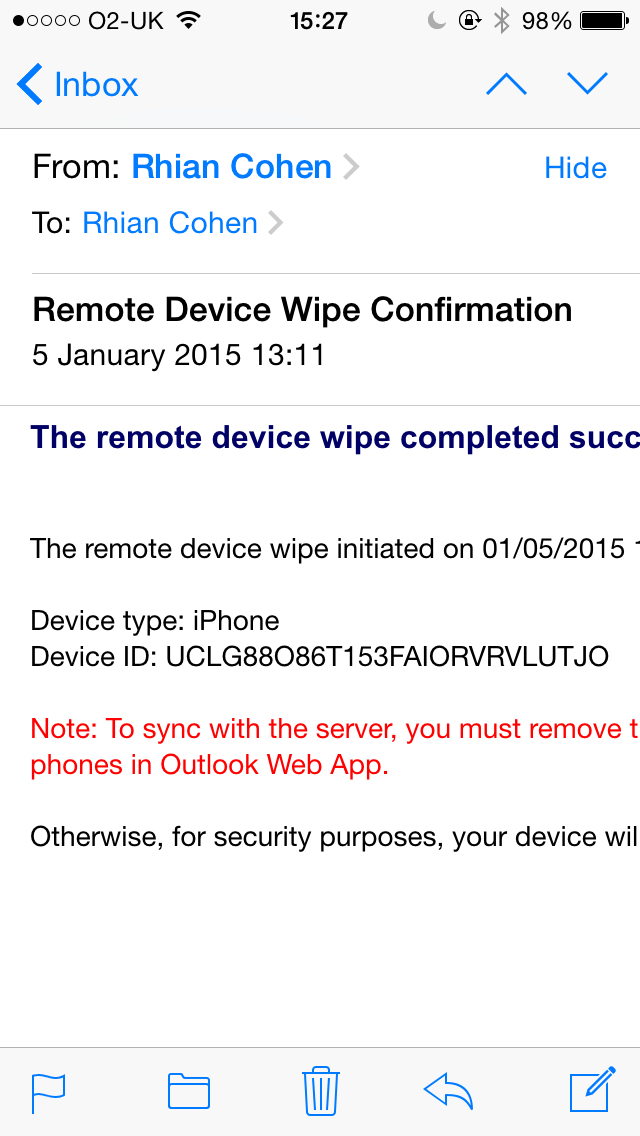
Recovering a Device Password
Note: This feature does not appear to be available for iPhones unfortunately which is a shame as the only option is to wipe the phone to get round a forgotten password
http://en.wikipedia.org/wiki/Comparison_of_Exchange_ActiveSync_clients
You can use
- The EMC
- The Shell
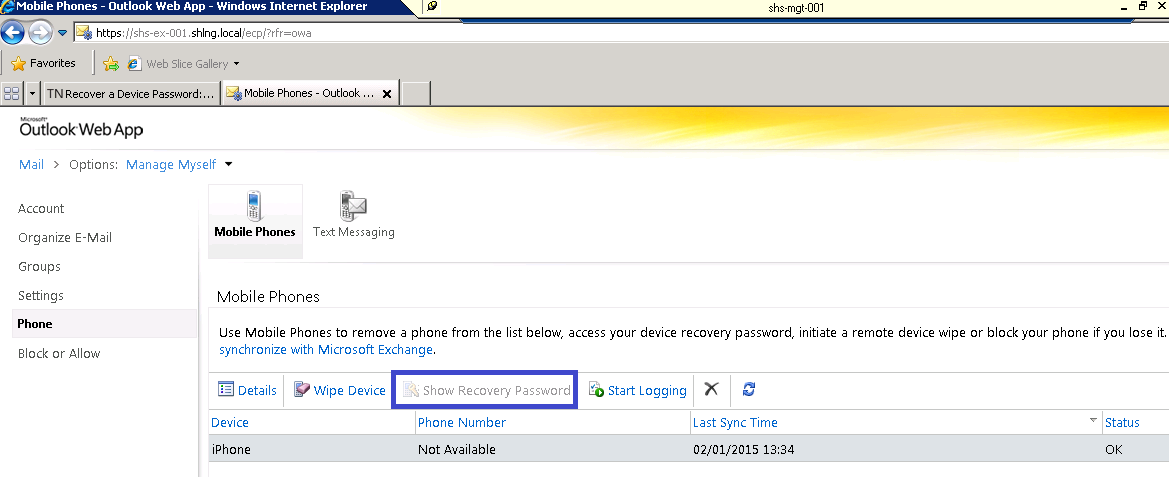
- Microsoft Office Outlook Web App to recover a device password.
You can require a device password through Microsoft Exchange ActiveSync policies. A user can configure a device password even if your Exchange ActiveSync policies don’t require one. If users forget their password, you can obtain a recovery password using the EMC or the Shell. The recovery password unlocks the device and lets the user create a new password. Users can also recover their device passwords by using Outlook Web App.
The EMC
You need to be assigned permissions before you can perform this procedure.
- In the console tree, navigate to Recipient Configuration > Mailbox.
- In the details pane, select a user, and then select Manage Mobile Device from the action pane. The device recovery password is displayed in the Manage Mobile Device dialog box
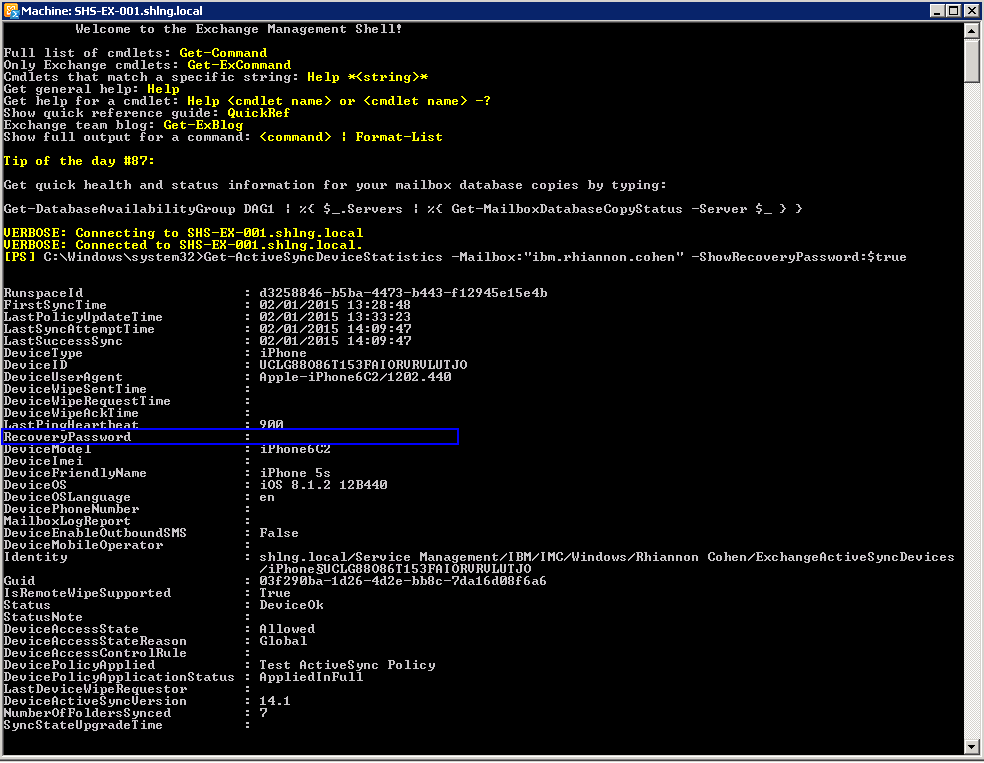
The Shell
- Open Exchange Management Shell
- Type Get-ActiveSyncDeviceStatistics -Mailbox:”rhian.cohen” -ShowRecoveryPassword:$true
Outlook Web Access
- Log into Outlook Web Access
- Click on Options
 Useful links
http://technet.microsoft.com/en-us/library/bb124558(v=exchg.141).aspx http://technet.microsoft.com/en-us/library/aa998357.aspx#WindowsPhone7 https://www.apple.com/kr/ipad/business/docs/iOS_6_EAS_Sep12.pdf
Youtube Tutorials (Thanks to Hotfoot Training
Part 1 https://www.youtube.com/watch?v=dDg4oY1oUzQ
Part 2 https://www.youtube.com/watch?v=2tyhnOptqZ0
Part 3 https://www.youtube.com/watch?v=glASOiu8yMY