Archive for May 2015

Software rollout via Group Policy

Softwareicon

How can we install software remotely from Group Policy?

  • Assigning Software

You can assign a program distribution to users or computers. If you assign the program to a user, it is installed when the user logs on to the computer. When the user first runs the program, the installation is completed. If you assign the program to a computer, it is installed when the computer starts, and it is available to all users who log on to the computer. When a user first runs the program, the installation is completed. Assigned means that the application appears on the start menu.

  • Publishing Software

You can publish a program distribution to users. When the user logs on to the computer, the published program is displayed in the Add or Remove Programs dialog box, and it can be installed from there

What type of software file can we deploy?

The Group Policy Management Console’s job is to deploy MSI files. GPMC can also deploy other kinds of files, but I’m going to skip over that for today and focus only on MSI files.

Remember: MSI files are application packages that come from manufacturers (or, you can also create them yourselves with 3rd party MSI repackaging tools.

Step 1 Create a Distribution Point

  • Log on to the server as an administrator (I am using my Test Lab)
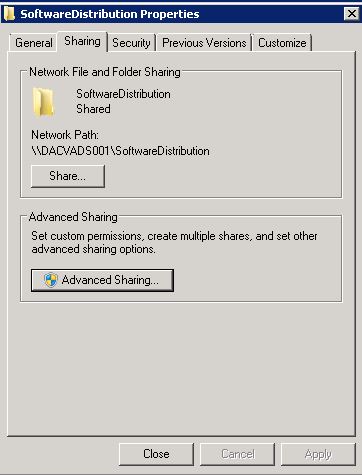
  • Create a shared network folder where you will put the Microsoft Windows Installer package (.msi file) that you want to distribute

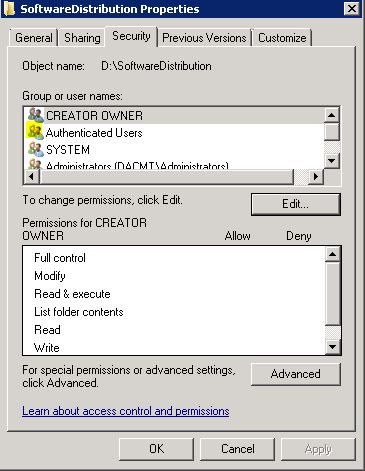
SoftwareDistribution

  • Set permissions on the share to allow access to the distribution package.
  • You must add Authenticated Users with Read Access to the Share and NTFS permissions if you are applying this to Computer OUs as Computers are Authenticated Users in AD

authusers

  • Copy or install the package to the distribution point.
  • I’m going to use the Google Chrome 32bit .msi

Step 2 Create a Group Policy Object

  • I am just going to test this on a Windows 7 machine
  • Open Group Policy Management Console
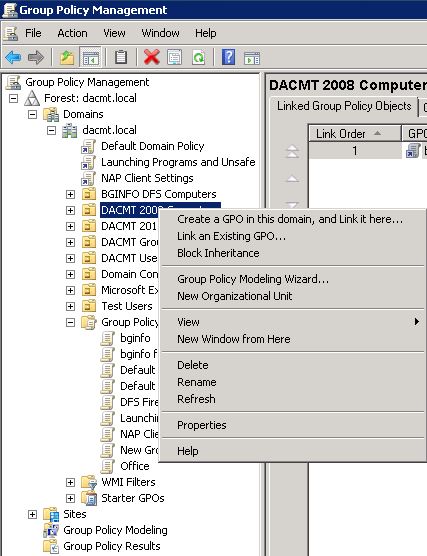
  • Find the OU which contains the computer/computers you want to apply the policy to and right click and select Create a GPO in this domain and link it here

CreateanewGPO

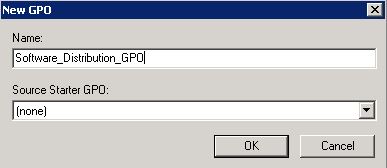
  • Put in a name. Mine is Software_Distribution_GPO

NameGPO

  • Click on the policy and select it.
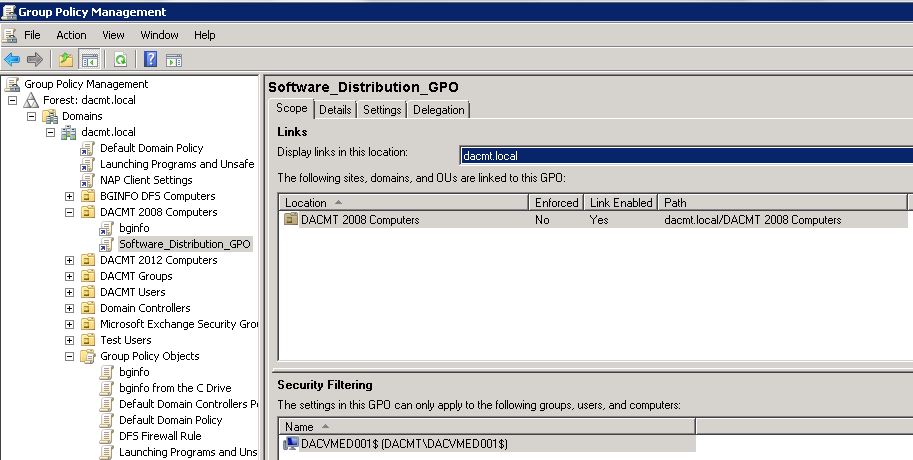
  • In my policy I am going to set the security filtering to just my Windows 7 test machine (dacvmed001)

GPOSecurityFiltering

  • Click Edit on your GPO
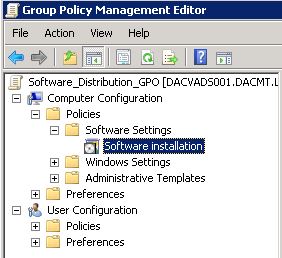
  • Under Computer Configuration expand Policies to see Software Settings

SoftwareSettings

  • Right click and select New Package
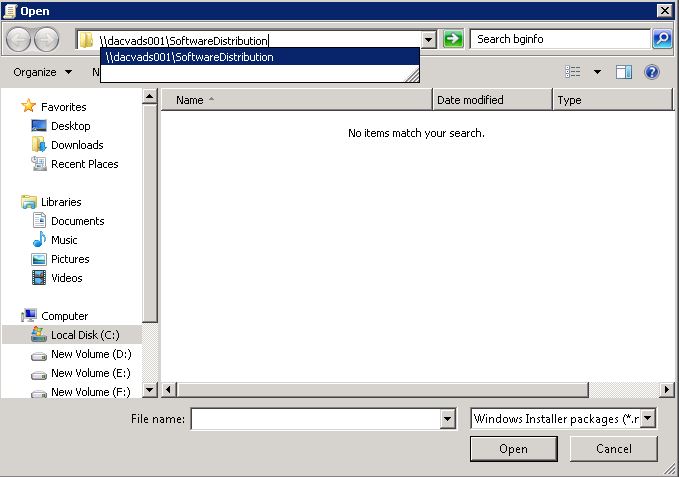
  • Type in the full (UNC) path to your Software Distribution share. In my case \\dacvads001\SoftwareDistribution

SelectSoftware

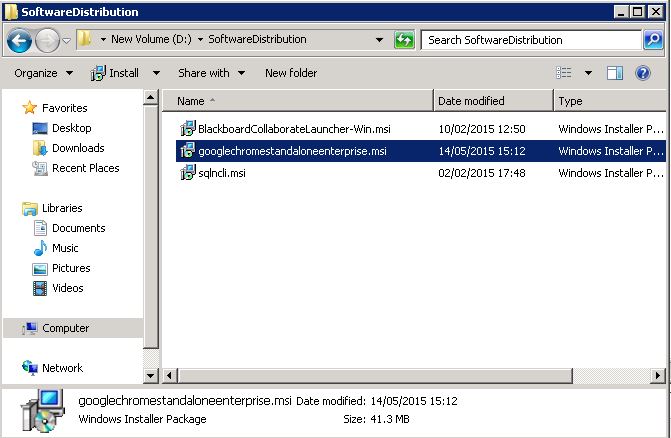
  • You should now see your .msi software

softwarerepository

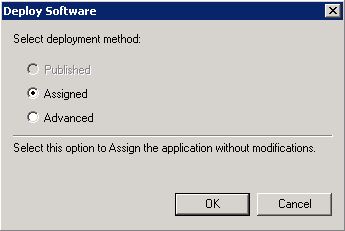
  • Click Assigned. If you click Advanced, it gives you options to configure Published or Assigned Options and to apply modifications to a package
  • NOTE: The Published option is greyed out as it is only available if I deploy my package to a User Container. Software deployed to computers does not support publishing

DeploySoftware

  • You can now see your package in your GPO

gposoftware

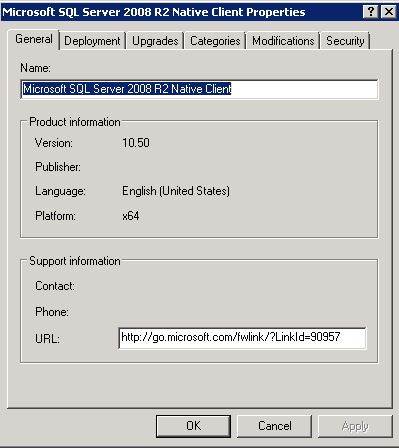
  • If you right click on your package and select Properties, you can see further information. Note I have screenprinted the properties of the SQL Client
  • The General Tab

Properties1

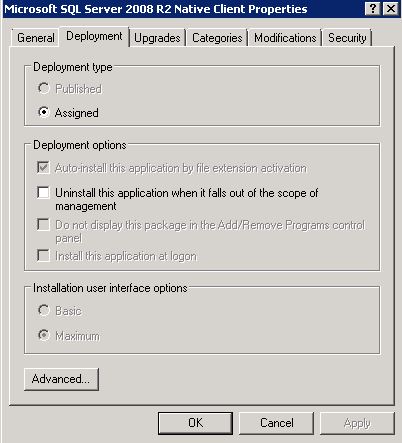
  • The Deployment tab
  • Basic means that the user will see few / no screens when the application installs.
  • Maximum means that the user will have full interaction when the application installs.

Properties2

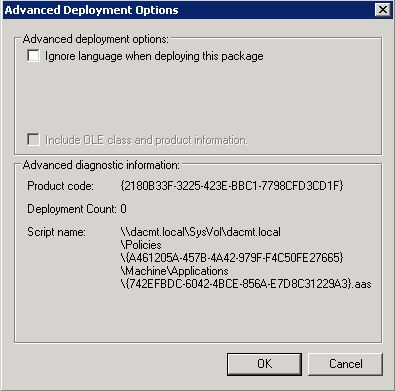
  • Advanced Options

Properties3

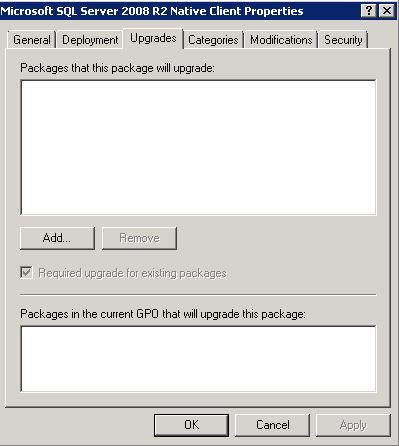
  • Upgrades

Properties4

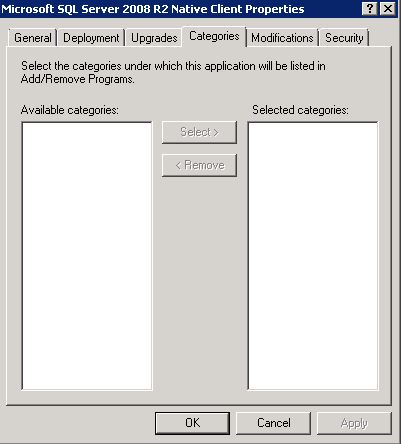
  • Categories

Properties5

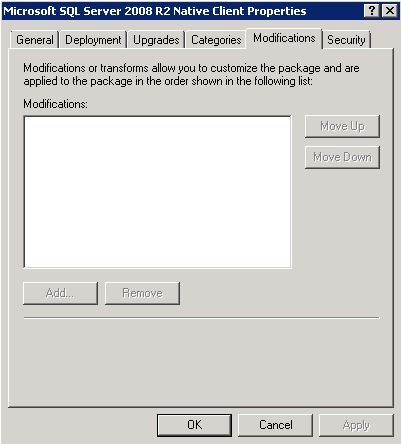
  • Modifications

Properties6

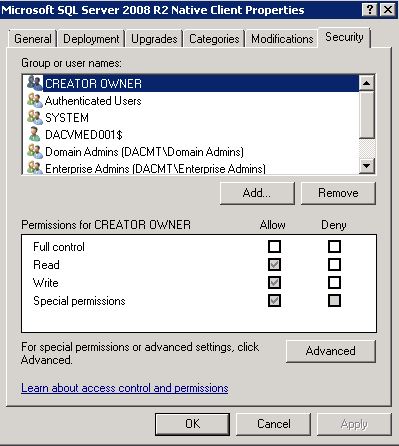
  • Security

Properties7

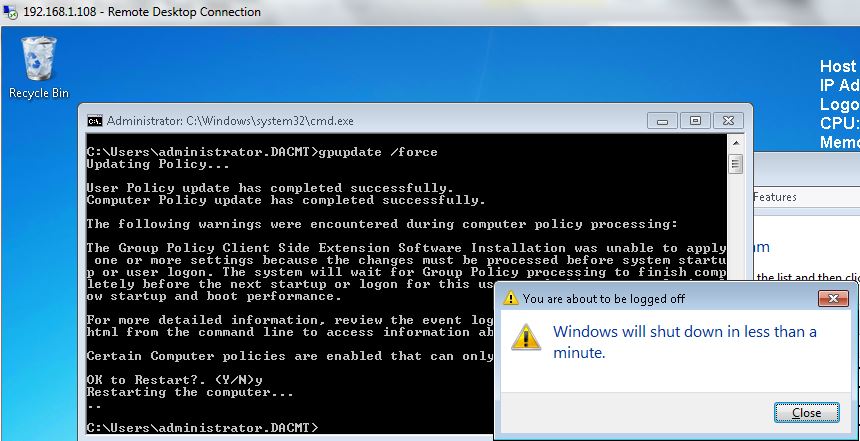
  • Next do a gpupdate /force on the Domain Controller and reboot your PC.

gpupdate

  • Check that the software has been installed in Control Panel > Programs and Features

chrome

Redeploy a MSI package

Sometimes you may need to redeploy a package (for example when doing an upgrade). For redeploying a package you can follow these steps:

  • Open Group Policy tab, select the object you used to deploy the package and click Edit
  • Expand the Software Settings element (per-user or per-machine) which contains the deployed package
  • Expand the Software Installation element which contains the deployed package
  • Right-click the package in the right pane of the Group Policy window
  • Select the All Tasks menu and click Redeploy application
  • Click the Yes button for reinstalling the application wherever it is installed
  • Close the Group Policy snap-in, click OK and exit the Active Directory Users and Computers snap-in

Remove an MSI package

Group Policy also allows you to remove packages which have been deployed in the past. Here are the steps for removing a package:

  • Open Group Policy, select the object you used to deploy the package and click Edit
  • Expand the Software Settings element (per-user or per-machine) which contains the deployed package
  • Expand the Software Installation element which contains the deployed package
  • Right-click the package in the right pane of the Group Policy window
  • Select the All Tasks menu and click Remove
  • Select from the following options:
    • Immediately uninstall the software from users and computers
    • Allow users to continue to use the software but prevent new installations
  • Click the OK button to continue
  • Close the Group Policy snap-in, click OK and exit the Active Directory Users and Computers snap-in

What can we do about .exe’s that we want to turn into usable .msi’s?

You will need to get a packaging utility to turn that .exe file into .msi file. Many of them are available for instant download from internet

One of the best one’s I have trialled is http://www.exetomsi.com/

Tips and Advice on EXE to MSI Repackaging
http://exe-to-msi.com/

VMware View 4/5 and License activation issues

view

The Issue

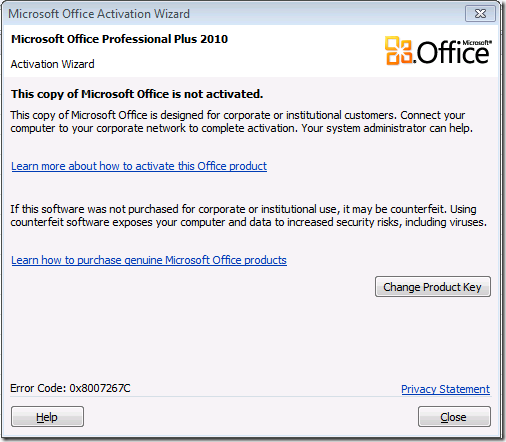
All of a sudden when users log into our VDIs, they are getting a pop up message advising them that Office 2010 is not activated. Nothing appears to have changed and so we will do some investigation into what is happening.

officeactivation

Issues with application virtualization

There are some fantastic benefits for using application virtualization however there are a few disadvantages as listed below.

  • Application virtualization means all apps can be centralised and controlled however some apps may not be suited to this.
  • Over time, an original software vendor may not support the use of ThinApp or other tools like it
  • Software that installs or requires some kind of kernel mode driver will in most cases be impossible to capture in the application virtualization software. For example, you cannot create a ThinApp of VMware Workstation. When VMware Workstation installs, it adds drivers to the underlying Windows OS and modifies the underlying network infrastructure as well. This limitation also extends to scanner software and webcam software.
  • Although you can have three different versions of Acrobat Reader or Microsoft Word simultaneously running fine on one OS, only one of them can “own” the file associations of the application. So when you double-click on a PDF file, the question would be which ThinApp would be used as the default application? Most application virtualization vendors have a method of setting a preference. In the case of View, it uses an .INI file
  • You will really want to use applications which allow for bulk activation, or even bypass the activation process altogether. However, ThinApp obviously doesn’t change your application vendor’s license policy, it merely captures the install you would have done if you didn’t own some kind of application virtualization software. So, if you want to run 20 copies of an application, and the vendor says you need a special unique TXT file for each application that runs, the same restriction would apply to a ThinApp.
  • You will need a clean Windows install every time you capture an app, so that there are no dependencies present during the capture process. This avoids a situation where a .NET application refuses to function because the source OS had .NET installed before the capture process, and it was therefore ignored. When the virtual application is loaded on the destination it might fail because .NET is not installed.
  • Do you want the user being notified about software updates? Edit all settings before capturing.
  • Some organizations decide that large multi-app application suites like Microsoft Office are better installed locally to the virtual desktop, leaving application virtualization to deliver strategic applications. This is not dissimilar from how companies use Citrix XenApp to deliver mission critical services like email and database access, but still continue to install applications locally. It remains to be seen whether such approaches remain popular as application virtualization technology matures.

So what’s going on?

It looks like the reason our Microsoft Office applications will not activate is because the CMID (Client Machine ID) for the Office suite is the same across all of our virtual desktops. This can happen if you forgot to rearm the Office 2010 suite before you deployed your new VMware View pool.  Failure to rearm the Office 2010 suite will mean that all of the cloned virtual desktops, although quickprepped or sysprepped with new CMID for the Windows operating system, will retain the old Office 2010 CMID.

Are your VDIs using the same CMID?

Run the following command in cmd.exe or PowerShell to see the CMID

Office CMID

You can then do one of two things

  • Re-arm all the Virtual Desktop’s Office Suite via a script or if there are many VDI VMs it is best to modify the master image.

Office CMID2

  • Re-arm your master image

Office CMID2

What is Volume Activation?

Volume Activation is a product activation technology that was first introduced with Windows Vista and Windows Server 2008. It is designed to allow Volume License customers to automate the activation process in a way that is transparent to end users.

Volume Activation applies only to systems that are covered under a Volume Licensing program and is used strictly as a tool for activation. It is not tied to license invoicing or billing.

Volume Activation provides different models for completing volume activations.

  • VAMT (Volume Activation Management Tool)
  • Multiple Activation Key (MAK) – MAK activates systems on a one-time basis, using Microsoft’s hosted activation services.
  • Key Management Service (KMS) – KMS allows organizations to activate systems within their own network
  • Starting with Windows 8, Windows Server 2012, and Office 2013 – Active Directory-based Activation
  • During Active Directory-based Activation, any Windows 8, Windows Server 2012, and Office 2013 computers connected to the domain will activate automatically and transparently during computer setup. These clients stay activated as long as they remain

What is VAMT?

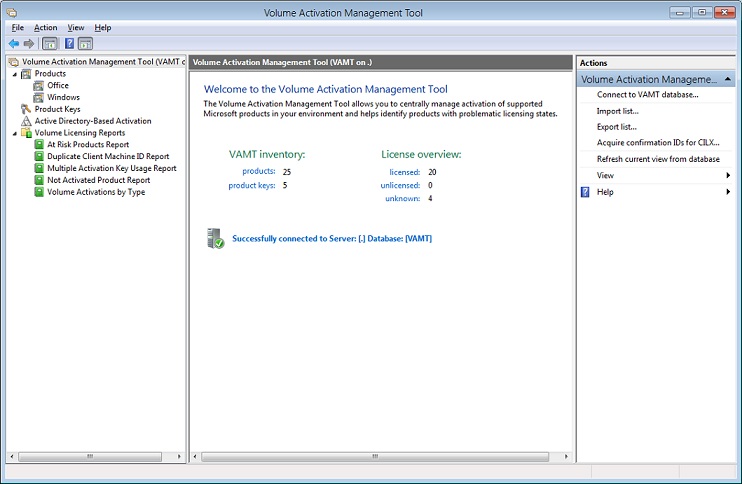
If you are deploying volume editions of Office 2010 using KMS or MAK activation, the Volume Activation Management Tool (VAMT) 2.0 can downloaded, installed and used to manage activation for these products

vamt

What is a Multiple Activation Key (MAK) and how does it work?

A Multiple Activation Key (MAK) requires computers to connect one time to a Microsoft activation server. Once computers are activated, no further communication with Microsoft is required. There are two activation methods for MAK:

  • MAK Independent Activation: Each computer individually connects to Microsoft via the web or telephone to complete activation.
  • MAK Proxy Activation: This method uses the Volume Activation Management Tool (VAMT). One centralized activation request is made on behalf of multiple computers with one connection to Microsoft online or by telephone. Note: VAMT enables IT professionals to automate and centrally manage the volume activation process using a MAK.

Each MAK has a predetermined number of allowed activations, based on your Volume Licensing agreement. To increase your MAK activation limit, please contact your Microsoft Activation Center.

What is a KMS Server?

The Key Management Service (KMS) is an activation service that allows organizations to activate systems within their own network, eliminating the need for individual computers to connect to Microsoft for product activation. It does not require a dedicated system and can be easily co-hosted on a system that provides other services.

KMS requires a minimum number of either physical or virtual computers in a network environment. These minimums, called activation thresholds, are set so that they are easily met by Enterprise customers.

  • Activation Thresholds for Windows – Your organization must have at least five (5) computers to activate servers running Windows Server 2008, Windows Server 2008 R2, or Windows Server 2012 and at least twenty-five (25) computers to activate client systems running Windows Vista, Windows 7, or Windows 8.
  • Activation Thresholds for Office – Your organization must have at least five (5) computers running Office 2013, Project 2013, Visio 2013, Office 2010, Project 2010, or Visio 2010 to activate installed Office products using KM

Am I running a KMS Server?

To find out if you are running a KMS server anywhere on your network, you can do the following

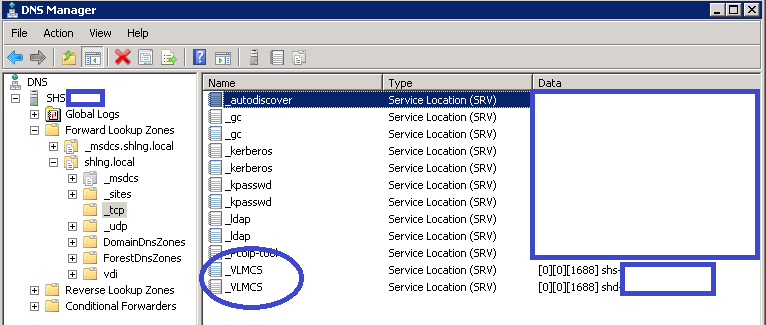
  • Log into DNS
  • Go to Servername
  • Go to Forward Lookup Zones
  • Go to your <domain>
  • Go to _tcp > _VLMCS
  • You should then see the servers that are KMS Servers. Note I have had to blank out our names but you should be looking at the _VLMCS section.

KMS1

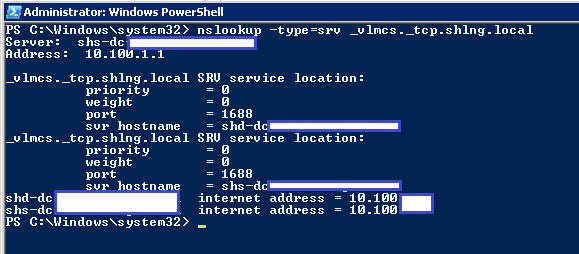
  • You can also type in nslookup -type=srv _vlmcs._tcp.[your_domain].local and this will give you your KMS servers

KMS3

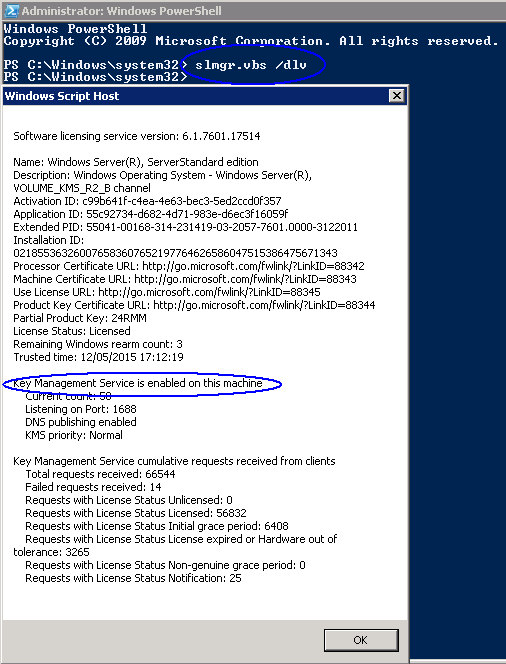
You can also log into a cmd.exe prompt or PowerShell and run the following which will show you more KMS Information

  • slmgr.vbs /dlv

KMS2

Install Microsoft Windows 2008 R2 Key Management Service (EASY)

  • The most difficult part is locating your KMS Key! If you have a Microsoft License agreement, log into the the Microsoft Volume License Service Center, and retrieve the KMS License Key for your produc
  • Note: To License/Activate Server 2008 R2 AND Windows 7 THIS IS THE ONLY KEY YOU NEED. You do NOT need to add additional keys for Windows 7. (You DO for Office 2010, but I’ll cover that below)
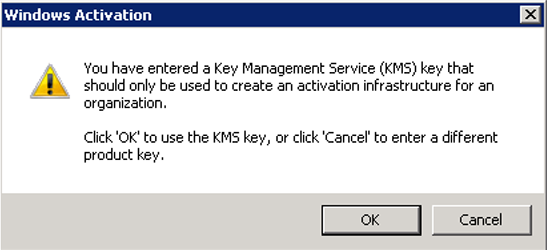
  • When you have your new key, you simply need to change the product key on the server that will be the KMS server, to the new key. Start > Right Click “Computer” > Properties. (Or Control Panel > System). Select “Change Product Key” > Enter the new KMS Key > Next
  • You will get a warning that you are using a KMS Key > OK. You may now need to activate your copy of Windows with Microsoft, if you can’t get it to work over the internet you can choose to do it over the phone.

KMS4

  • Sometimes you may need to allow access through the local firewall for the “Key Management Service”, (this runs over TCP port 1688)
  • That is all you need to do. Your KMS Server is up and running
  • Next to license any more keys you will need to run the following command in cmd.exe as an Administrator or PowerShell

KMS5

  • Next we need to activate the server. Follow the onscreen prompts and it should tell you it was successfully added.

KMS6

  • This is now complete

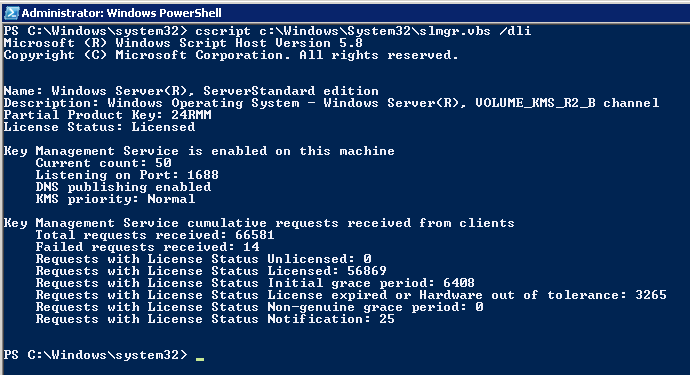
Before it will start working, you need to meet certain thresholds, with Windows 7 clients it WONT work till it has had 25 requests from client machines. If you are making the requests from Windows 2008 Servers then the count is 5. (Note: For Office 2010 the count is 5 NOT 25)

  • There is no GUI console for KMS to see its status, so run the following command on the KMS server;

KMS7

  • Next. Installing Office KMS Keys

An Office 2010 KMS host is required if you want to use KMS activation for your volume license editions of Office 2010 suites or applications, Microsoft Project 2010 or Microsoft Visio 2010. When Office 2010 volume edition client products are installed, they will automatically search for a KMS host on your organization’s DNS server for activation. All volume editions of Office 2010 client products are pre-installed with a KMS client key, so you will not need to install a product key.

This download contains an executable file that will extract and install KMS host license files. Run this file on either 32-bit or 64-bit supported Windows operating systems. These license files are required for the KMS host service to recognize Office 2010 KMS host keys. It will also prompt you to enter your Office 2010 KMS host key and activate that key. After this is done, you may need to use the slmgr.vbs script to further configure your KMS host.

  • First locate your Office 2010 KMS Key! If you have a Microsoft License agreement, log into the the Microsoft Volume License Service Center, and retrieve the KMS License Key for “Office 2010 Suites and Apps KMS”
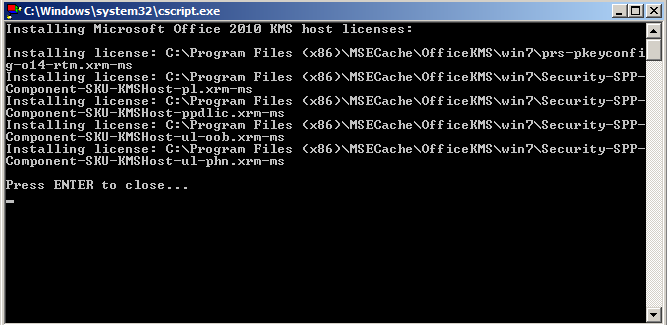
  • Download and run the “Microsoft Office 2010 KMS Host License Pack“.
  • When prompted type/paste in your “Office 2010 Suites and Apps KMS” product key > OK. It should accept the license key

KMS8

What is Best Practice for dealing with VDIs and License Keys?

It is considered best practice when dealing with View to utilize a KMS server. KMS is preferred (although either KMS or MAK may be used) because each time a computer is activated using a MAK, one activation is decremented. This applies to both physical and virtual computers

Frequently Asked Questions

https://www.microsoft.com/en-us/licensing/existing-customer/FAQ-product-activation.aspx

Great Link for KMS (Thanks to Pete Long)

http://www.petenetlive.com/KB/Article/0000582.htm