Archive for August 2014

Cloning SQL Server 2005 in VMware 5.5

double

Understanding Clones

A clone is a copy of an existing virtual machine. The existing virtual machine is called the parent of the clone. When the cloning operation is complete, the clone is a separate virtual machine — though it may share virtual disks with the parent virtual machine.

  • Changes made to a clone do not affect the parent virtual machine. Changes made to the parent virtual machine do not appear in a clone.
  • A clone’s MAC address and UUID are different from those of the parent virtual machine.

Procedure

  • First of all go to the SQL Server you want to clone and check the services. Most people use custom Active Directory Service Accounts for specific SQL Services as shown below

sqlcloning1

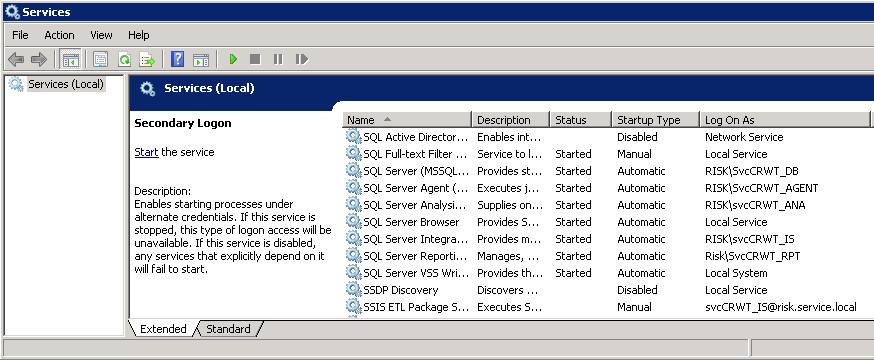
  • It is worth taking a screenshot of your services so you know which ones have been set so you can go back easily post cloning and adjust them
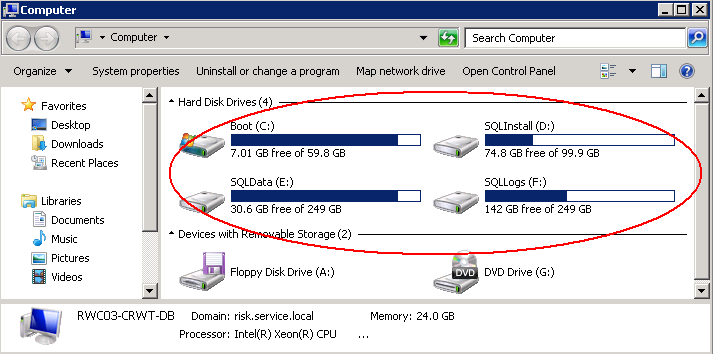
  • It is also worth knowing your drive mappings if you have separate drives for SQL DBs and SQL Logs etc although you can get them from the server afterwards. E.g What is held on C, D, E Drives etc
  • Also make sure you know all your passwords as you will need to set these on the original SQL Server and the newly cloned SQL Server afterwards
  • Next you will need to change the start-up mode of all your critical services like SQL server and Application services from “Automatic” to “Manual” start-up
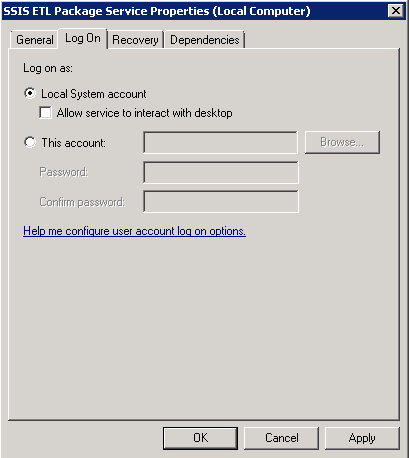
  • If SQL server and its related services are started by local Windows accounts, then I suggest that you change the service account to “Local system” for now.

localsystemaccount

  • Reboot the original SQL Server just to make sure everything is ok
  • Now you can either do a cold clone or a hot clone
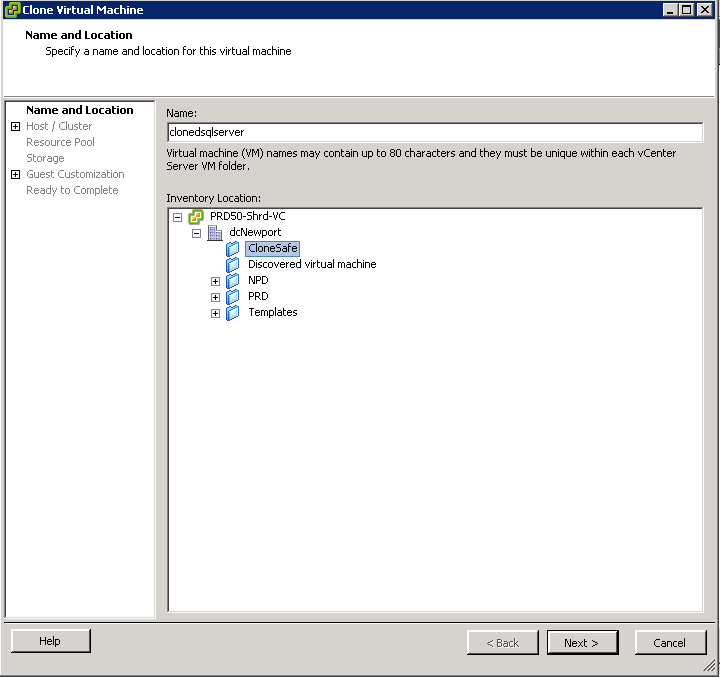
  • Go to vCenter and right click on the SQL Server you want to clone and the Clone Virtual Machine Wizard will come up
  • Put in a name and inventory location

sqlcloning2

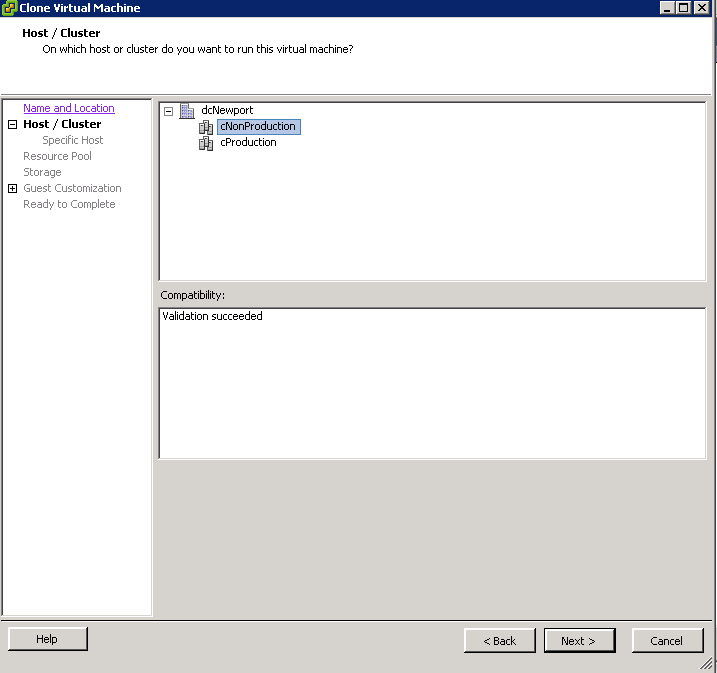
  • Choose a Host/Cluster to run the SQL Clone on

sqlcloning3

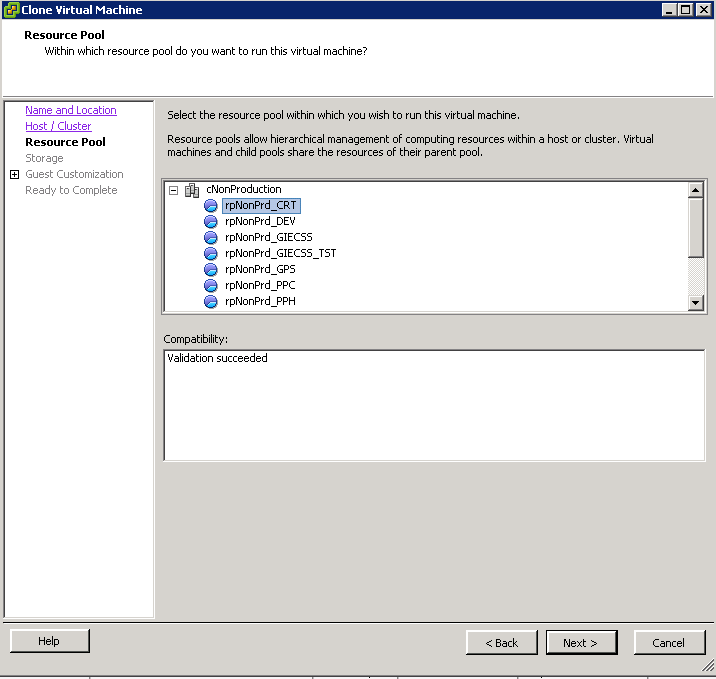
  • Choose a Resource Pool

sqlcloning4

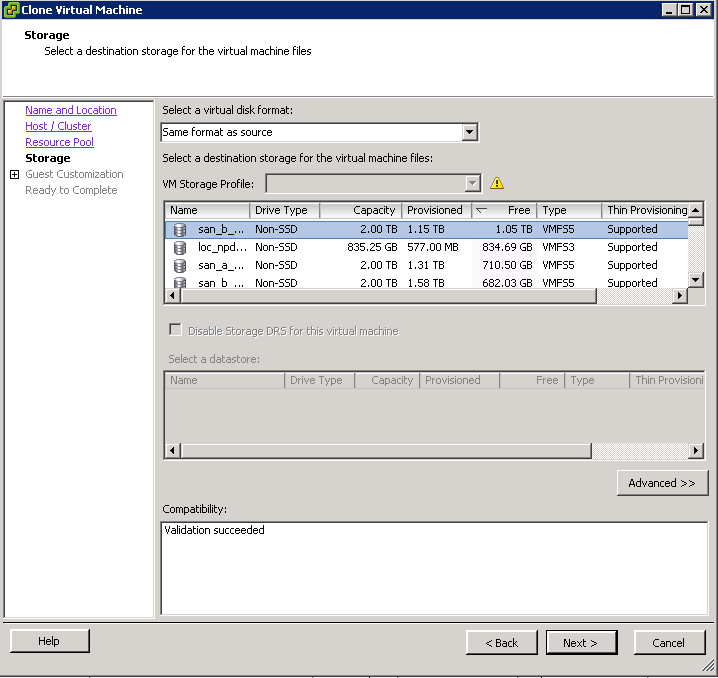
  • Choose a location for your cloned VM. Make sure you have enough space as there are often multiple drives associated with SQL Server for the Database and Logs etc

sqlcloning5

  • On the Guest Customization wizard, it is recommended to choose to customize

sqlcloning6

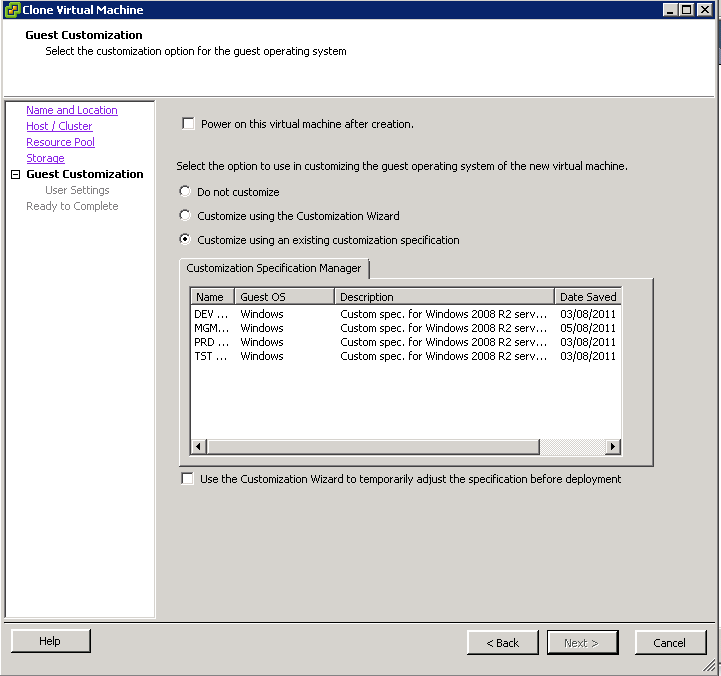
  • You will obviously have different customizations to go through. E.g NIC Settings etc
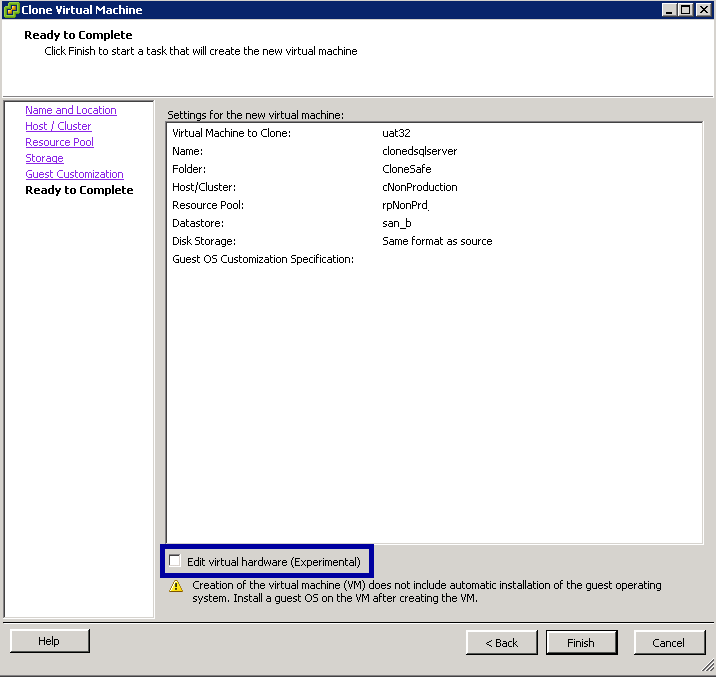
  • When you have completed these, click Next and you are ready to complete and start cloning
  • There is an experimental setting highlighted in blue below where you can edit your virtual hardware before proceeding. It depends if you want to change your settings but in any case you can adjust this afterwards at any point as well.

sqlcloning8

  • When the cloning has finished, power on your cloned SQL Server
  • Check the VM name and IP Address/Subnet Mask/Gateway are corrrect
  • Join the VM to the domain if not already through Guest Customisations
  • Check all your disk drives are online and operational
  • IMPORTANT: When I did the cloning and powered the VM on, the Cloned VM had re-arranged the drive mappings. They need to be identical to the VM you cloned from or your SQL Services will not start probably saying
  • Windows could not start the SQL Server (MSSQLSERVER) Service on Local Computer. Error 2. The system cannot find the file specified

sqlservercloning2

  • Go into Services
  • Change your services to the accounts you want, put them on Automatic and Start them
  • Hopefully at this point everything is looking ok
  • Next you will need to log into SQL Management Studio and follow the below link for some further info
  • http://support.microsoft.com/kb/303774
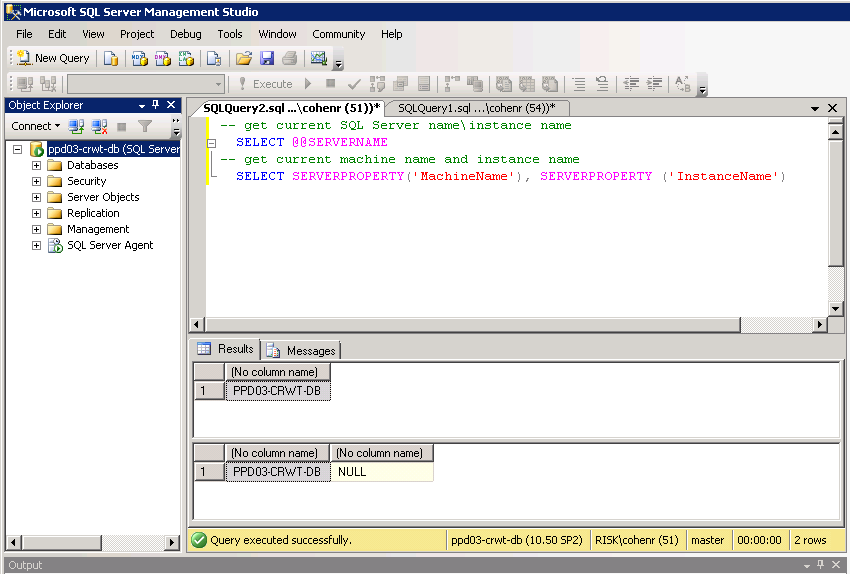
  • If you want to check the name of your cloned SQL Server, run a query and type Select @@SERVERNAME

sqlcloning10

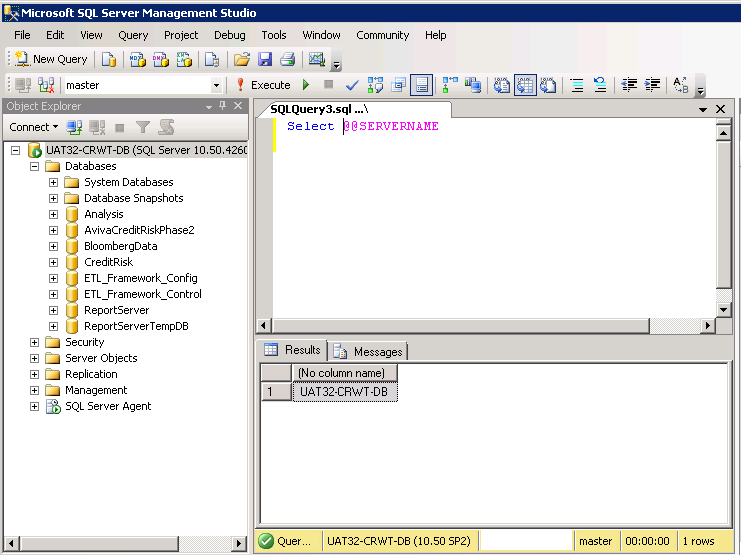
  • To check if you have a mismatch between your SQL Server servername and the computer’s machinename, compare the values from the statements that follow. If the values do not match or if @@SERVERNAME is NULL, you need to rename your SQL Server. For example: The values below match. We don’t have an instance which is why the second column is NULL. This is how it should look after you have renamed the server using the MS Link above

sqlservercloning

  • If everything is looking ok then you will need to restart the SQL Server (MSSSQLSERVER) Service for the change to take effect if it hasn’t already
  • If there are other SQL Services like SSIS, SSRS and SSAS then you may need to restart these also to avoid any issues. We found some issues with SSIS reporting afterwards which was resolved by restarting
  • Finish 🙂

Understanding CPU Ready Time in VMware 5.x

clock

General Rules for Processor Scheduling

  1. ESX(i) schedules VMs onto and off of processors as needed
  2. Whenever a VM is scheduled to a processor, all of the cores must be available for the VM to be scheduled or the VM cannot be scheduled at all
  3. If a VM cannot be scheduled to a processor when it needs access, VM performance can suffer a great deal.
  4. When VMs are ready for a processor but are unable to be scheduled, this creates what VMware calls the CPU % Ready values
  5. CPU % Ready manifests itself as a utilisation issue but is actually a scheduling issue
  6. VMware attempts to schedule VMs on the same core over and over again and sometimes it has to move to another processor. Processor caches contain certain information that allows the OS to perform better. If the VM is actually moved across sockets and the cache isn’t shared, then it needs to be loaded with this new info.
  7. Maintain consistent Guest OS configurations

Monitoring CPU Ready Time

CPU Ready Time is the time that the VM waits in a ready-to-run state (meaning it has work to do) to be scheduled on one or more of the physical CPUs by the hypervisor. It is generally normal for VMs to have small values for CPU Ready Time accumulating even if the hypervisor is not over subscribed or under heavy activity, it’s just the nature of shared scheduling in virtualization. For SMP VMs with multiple vCPUs the amount of ready time will generally be higher than for VMs with fewer vCPUs since it requires more resources to schedule/co-schedule the VM when necessary and each of the vCPUs accumulates the time separately.

There are 2 ways to monitor CPU Ready times.

  • esxtop/resxtop
  • Performance Overview Charts in vCenter

ESXTOP/RESXTOP

  • Open Putty and log into your host. Note: You may need to enable SSH in vCenter for the hosts first
  • Type esxtop
  • Press c for CPU
  • Press V for Virtual Machine view

esxtopcpu

  • %USED – (CPU Used time) % of CPU used at current time.  This number is represented by 100 X Number_of_vCPU’s so if you have 4 vCPU’s and your %USED shows 100 then you are using 100% of one CPU or 25% of four CPU’s.
  • %RDY – (Ready) % of time a vCPU was ready to be scheduled on a physical processor but could not be due to contention.  You do not want this above 10% and should look into anything above 5%.
  • %CSTP – (Co-Stop) % in time a vCPU is stopped waiting for access to physical CPU high numbers here represent problems.  You do not want this above 5%
  • %MLMTD – (Max Limited) % of time vmware was ready to run but was not scheduled due to CPU Limit set (you have a limit setting)
  • %SWPWT – (Swap Wait) – Current page is swapped out

Performance Monitor in vCenter

If you are looking at the Ready/Summation data in the perf chart below for the CPU Ready time, converting it to a CPU Ready percent value is what provides the proper meaning to the data for understanding whether or not it is actually a problem. However, keep in mind that other configuration options like CPU Limits can affect the accumulated CPU Ready time and other VMs vCPU configuration on the same host should be checked as well as it is not good to have VMs with large amounts of vCPUs running on a host with VMs with single vCPUs

cpuready

To convert between the CPU ready summation value in vCenter’s performance charts and the CPU ready % value that you see in esxtop, you must use a formula. At one point VMware had a recommendation that anything over 5% ready time per vCPU was something to monitor
The formula requires you to know the default update intervals for the performance charts.

These are the default update intervals for each chart:

Realtime:20 seconds
Past Day: 5 minutes (300 seconds)
Past Week: 30 minutes (1800 seconds)
Past Month: 2 hours (7200 seconds)
Past Year: 1 day (86400 seconds)

To calculate the CPU ready % from the CPU ready summation value, use this formula:
(CPU summation value / (<chart default update interval in seconds> * 1000)) * 100 = CPU ready %

Example from the above chart for one day: The Realtime stats for the VM gte19-accal-rds with an average CPU ready summation value of 359.105.

(359.105 / (20s * 1000)) * 100 = 1.79% CPU ready

Useful Link

http://kb.vmware.com/selfservice/microsites/search.do?language=en_US&cmd=displayKC&externalId=2002181

Other options to check if you think you have a CPU issue

  • Verify that VMware Tools is installed on every virtual machine on the host.
  • Compare the CPU usage value of a virtual machine with the CPU usage of other virtual machines on the host or in the resource pool. The stacked bar chart on the host’s Virtual Machine view shows the CPU usage for all virtual machines on the host.
  • Determine whether the high ready time for the virtual machine resulted from its CPU usage time reaching the CPU limit setting. If so, increase the CPU limit on the virtual machine.
  • Increase the CPU shares to give the virtual machine more opportunities to run. The total ready time on the host might remain at the same level if the host system is constrained by CPU. If the host ready time doesn’t decrease, set the CPU reservations for high-priority virtual machines to guarantee that they receive the required CPU cycles.
  • Increase the amount of memory allocated to the virtual machine. This action decreases disk and or network activity for applications that cache. This might lower disk I/O and reduce the need for the host to virtualize the hardware. Virtual machines with smaller resource allocations generally accumulate more CPU ready time.
  • Reduce the number of virtual CPUs on a virtual machine to only the number required to execute the workload. For example, a single-threaded application on a four-way virtual machine only benefits from a single vCPU. But the hypervisor’s maintenance of the three idle vCPUs takes CPU cycles that could be used for other work.
  • If the host is not already in a DRS cluster, add it to one. If the host is in a DRS cluster, increase the number of hosts and migrate one or more virtual machines onto the new host.
  • Upgrade the physical CPUs or cores on the host if necessary.
  • Use the newest version of hypervisor software, and enable CPU-saving features such as TCP Segmentation Offload, large memory pages, and jumbo frames.