![]()
vSphere 6 Platform Services Controller HA Setups – Enhanced Linked Mode
To install vCenter Server with 2 or more external Platform Services Controllers, first install a Platform Services Controller for Windows followed by a second Platform Services Controller joined to the same domain The Platform Services Controller contains the common services, such as vCenter Single Sign-On and the License service, which can be shared across several vCenter Server instances.
You can install many Platform Services Controllers and join them to the same vCenter Single Sign-On domain. Concurrent installations of Platform Services Controllers are not supported. You must install the Platform Services Controllers in a sequence.
1. Enhanced Linked Mode
When you select to join an existing vCenter Single Sign-On domain, you enable the Enhanced Linked Mode feature. Your Platform Services Controller will replicate infrastructure data with the joined vCenter Single Sign-On server.
Note: You can use the appliance or a Windows Server. In the steps below, I have 2 Windows servers I am using as an example
Steps to enable Enhanced Linked Mode on 2 Platform Service Controllers
- Install Windows 2012 on a new server
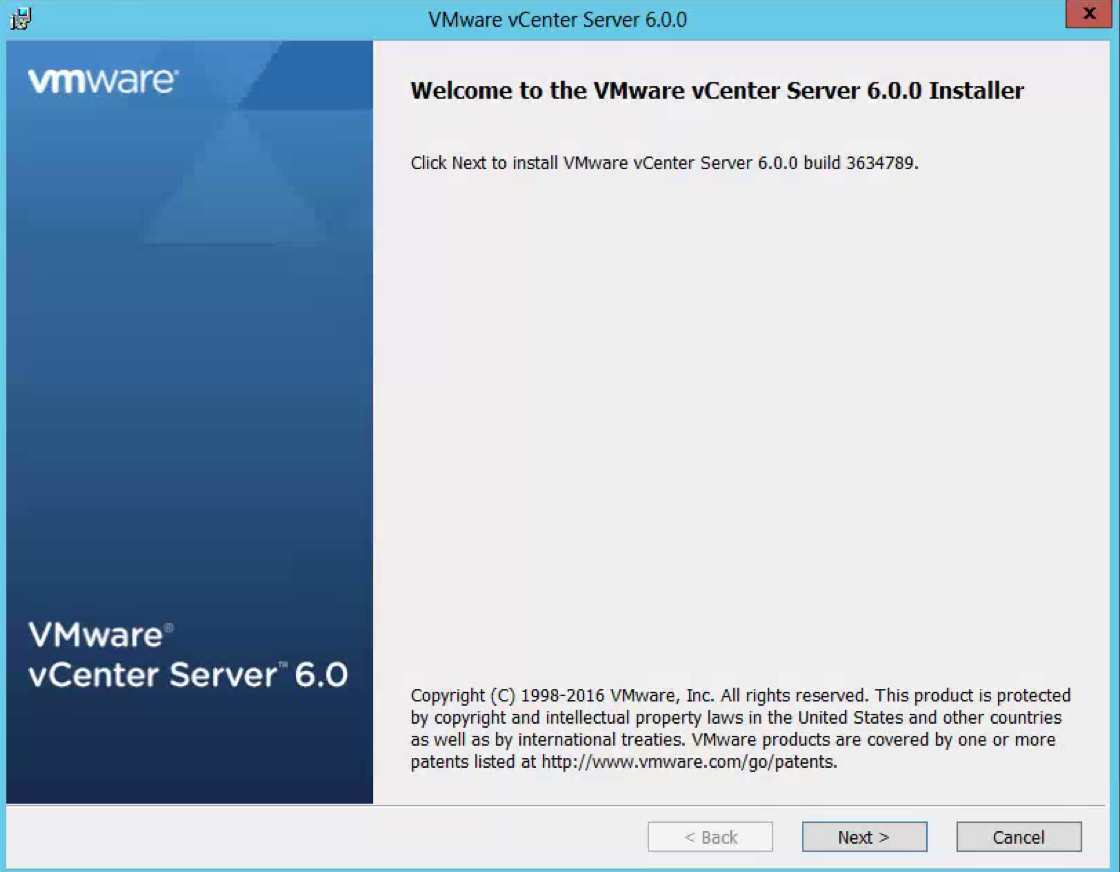
- Attach the vCenter 6 ISO to the server
- In the software directory, double click the autorun installer
- Accept the License Agreement
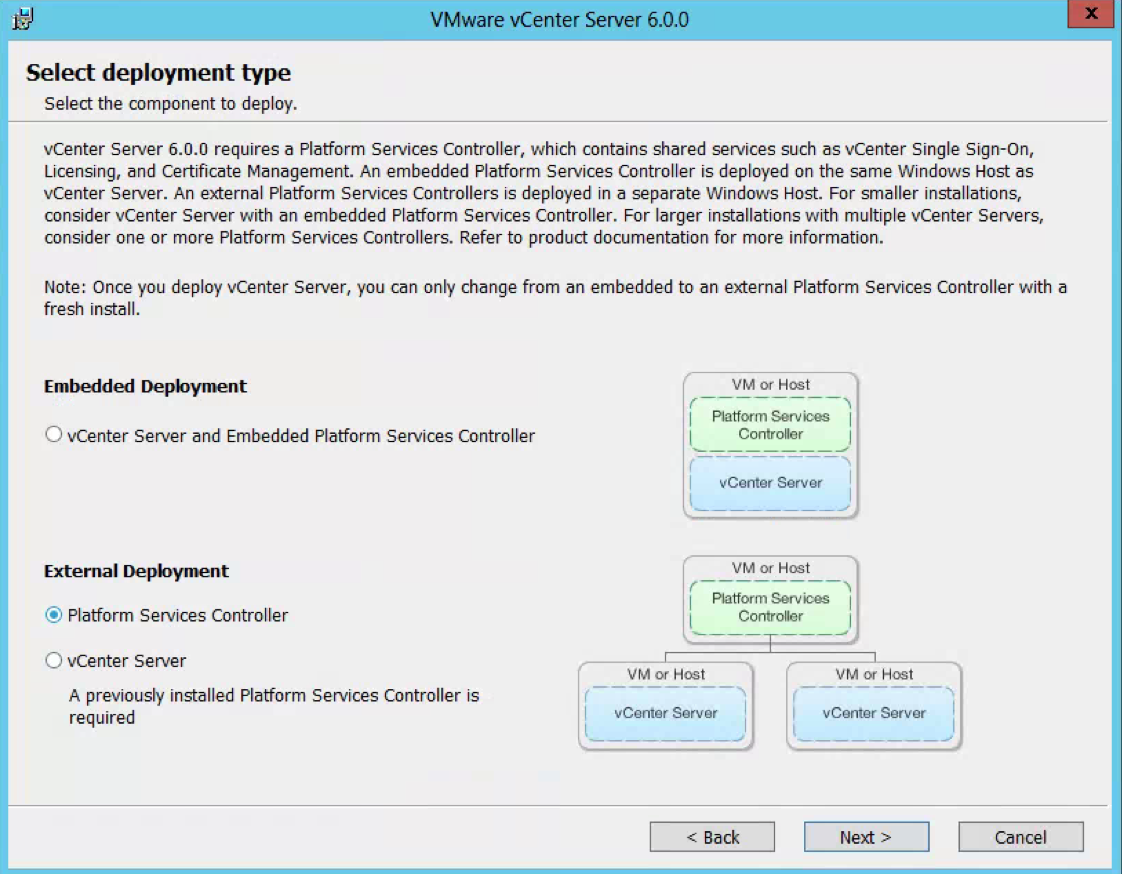
- Choose External Deployment > Platform Services Controller
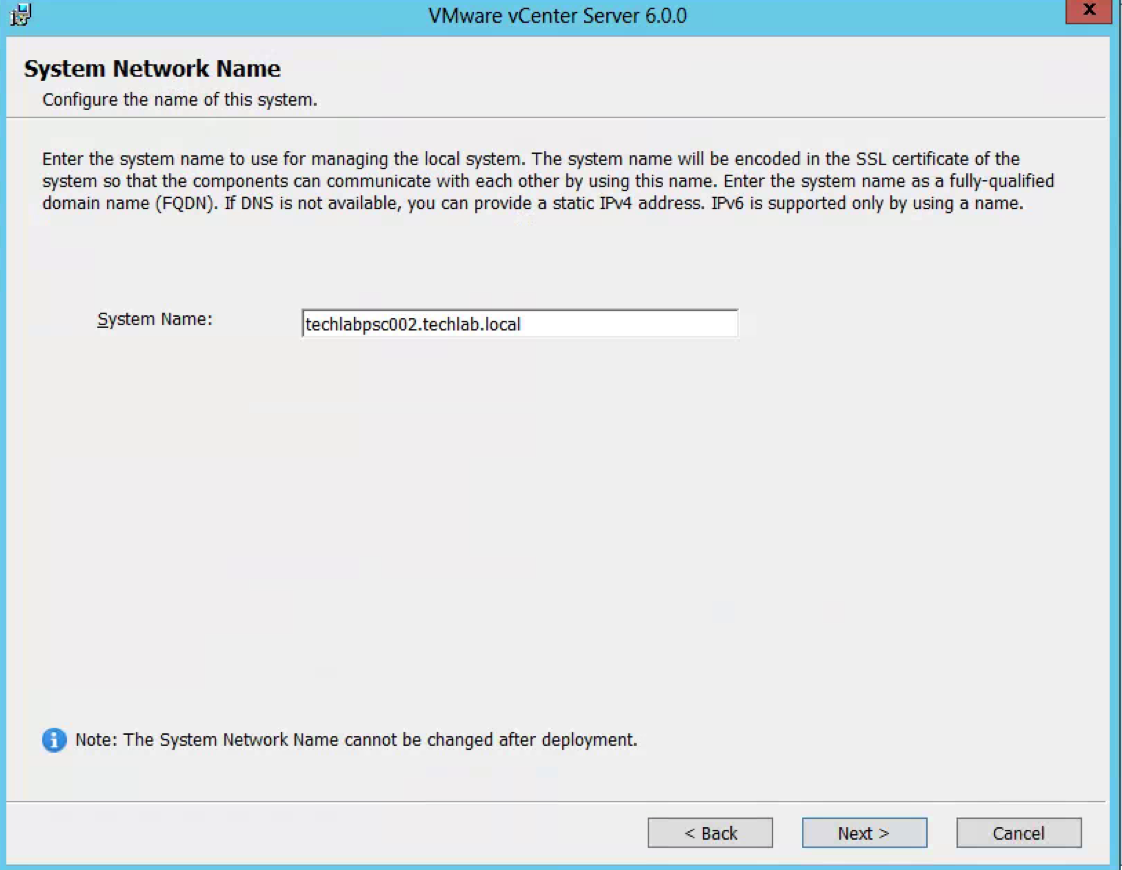
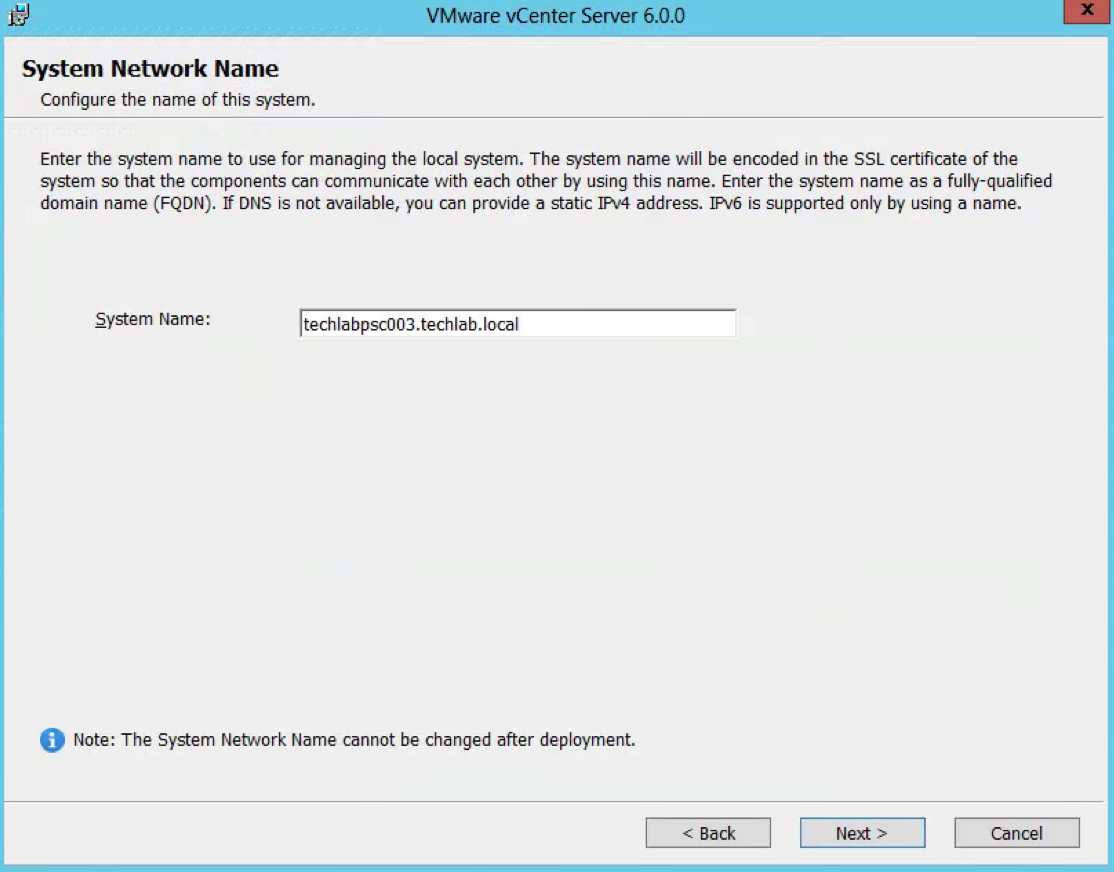
- Put in a FQDN System Network Name for the Platform Services Controller
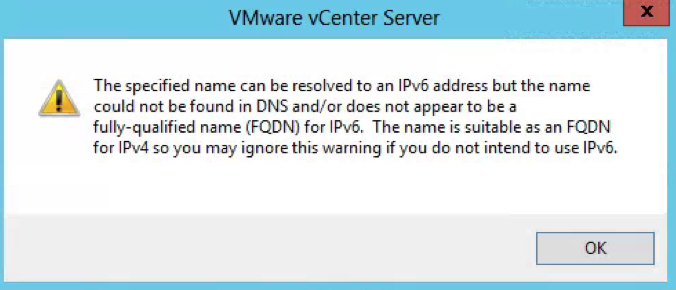
- Ignore the warning below but do make sure you have added a DNS entry for the PSC into your DNS server and that it is joined to the domain
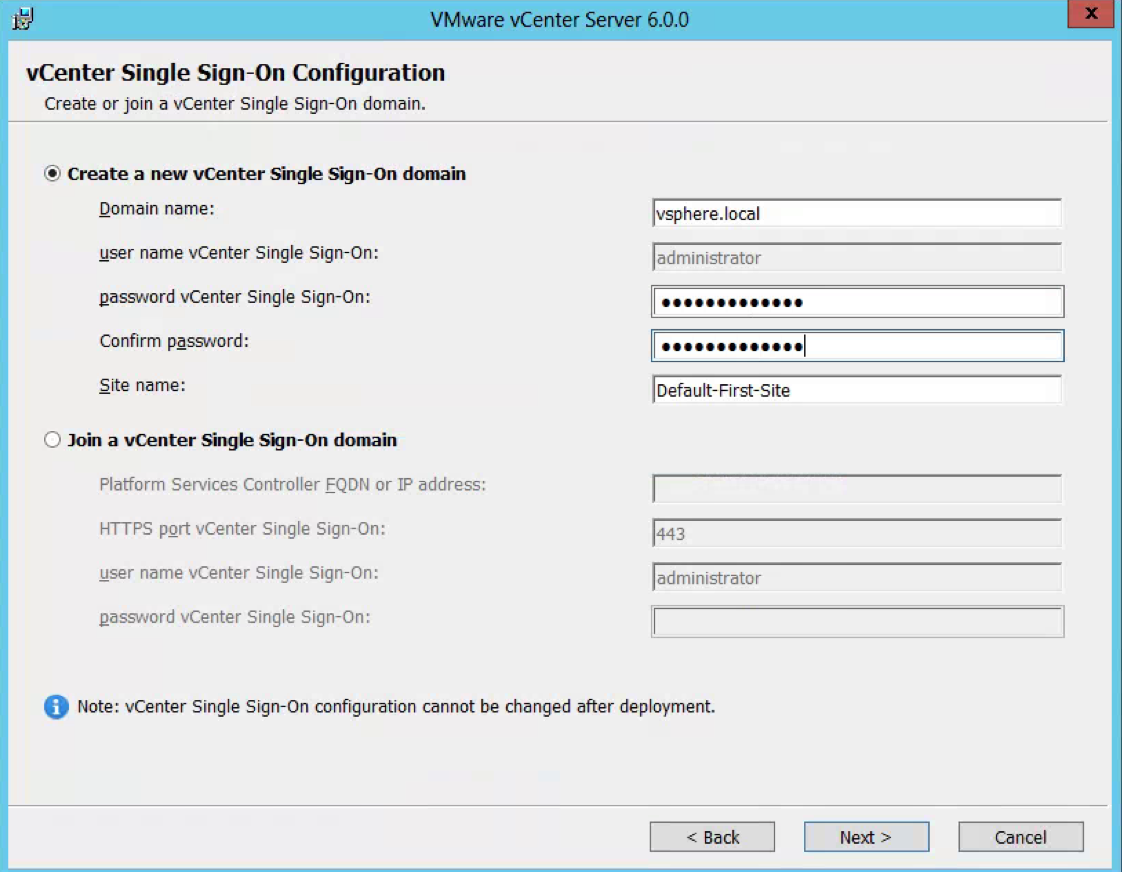
- As this is the first PSC, you will need to select Create a new vCenter Single Sign-On domain.
- Enter an SSO password
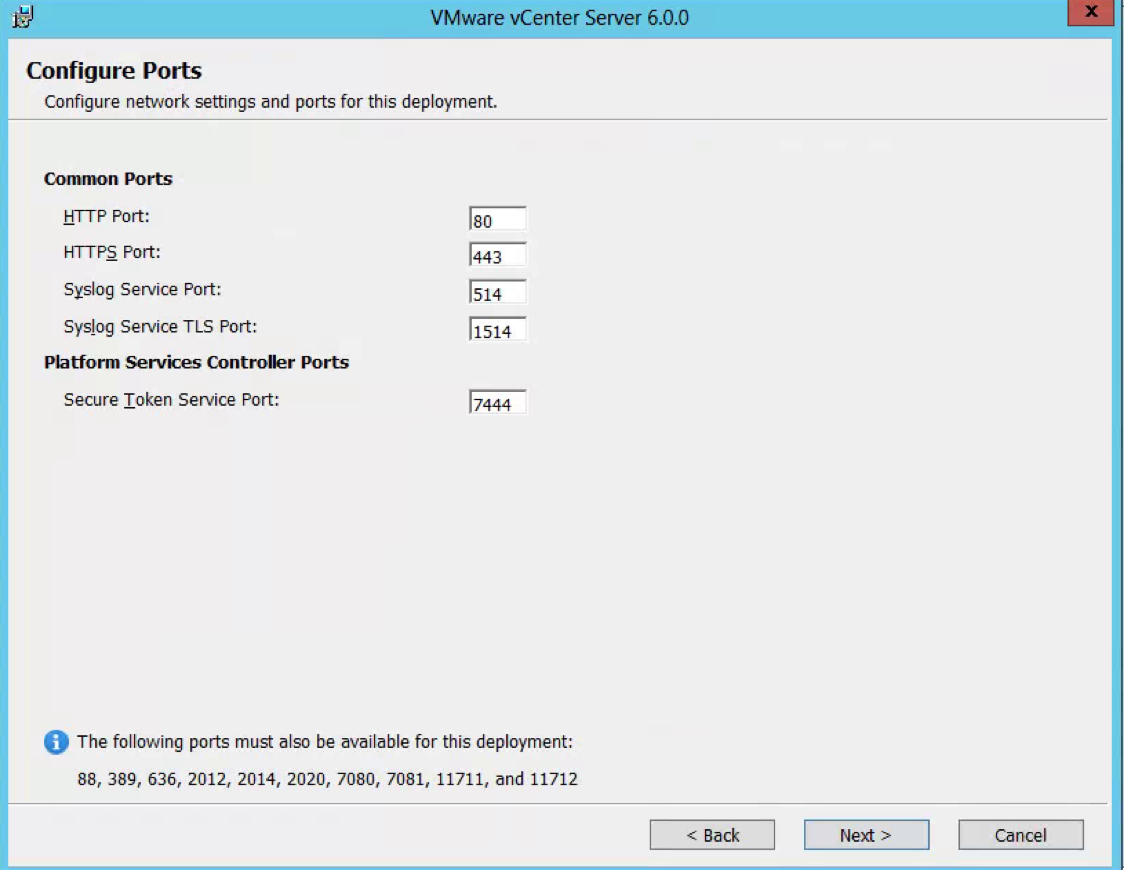
- Check the ports which need to be available
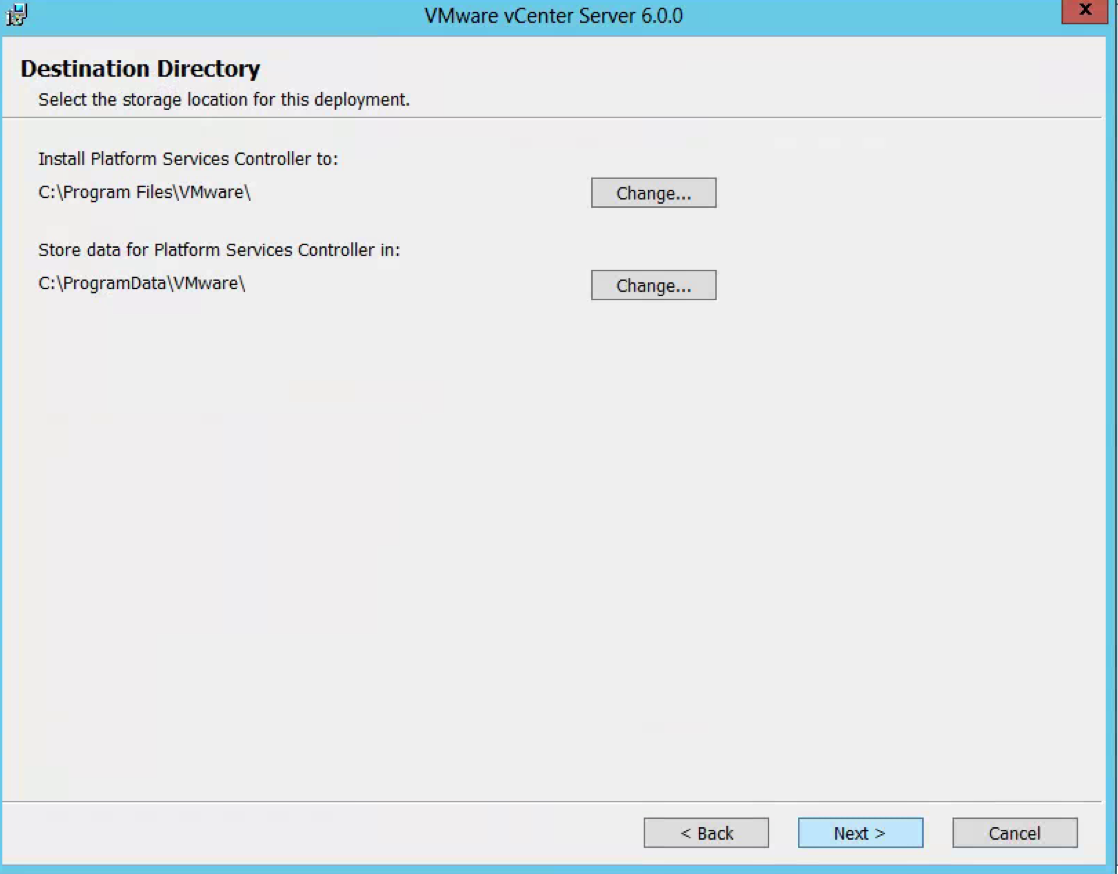
- Select the destination directory
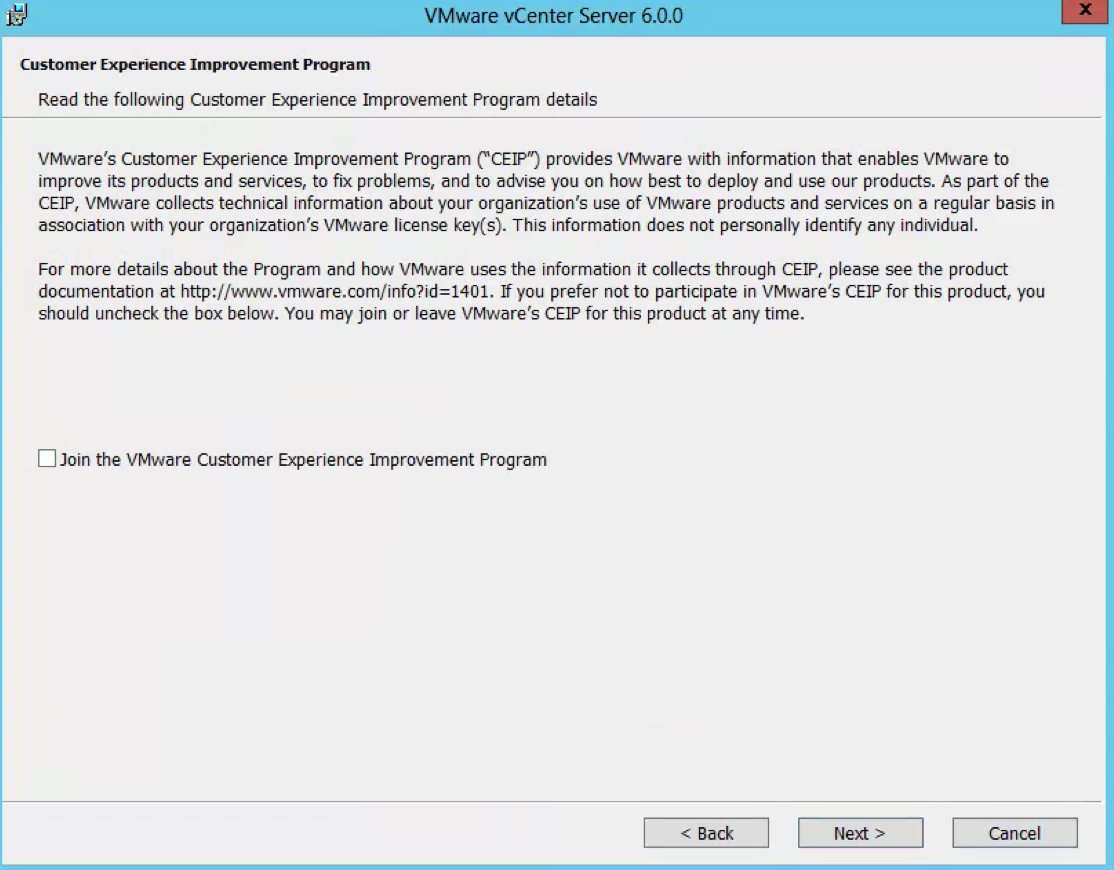
- Choose whether to join the VMware Customer experience program
- Double check the details you have entered
- Once installed you should see the below screen

Now we need to move on to the second PSC and install this in Enhanced Linked Mode
- Install Windows 2012 on a new server
- Attach the vCenter 6 ISO to the server
- In the software directory, double click the autorun installer
- Accept the License Agreement
- Choose External Deployment > Platform Services Controller
- Put in a name for your second PSC Controller
- Ignore the warning below but do make sure you have added a DNS entry for the PSC into your DNS server and that it is joined to the domain
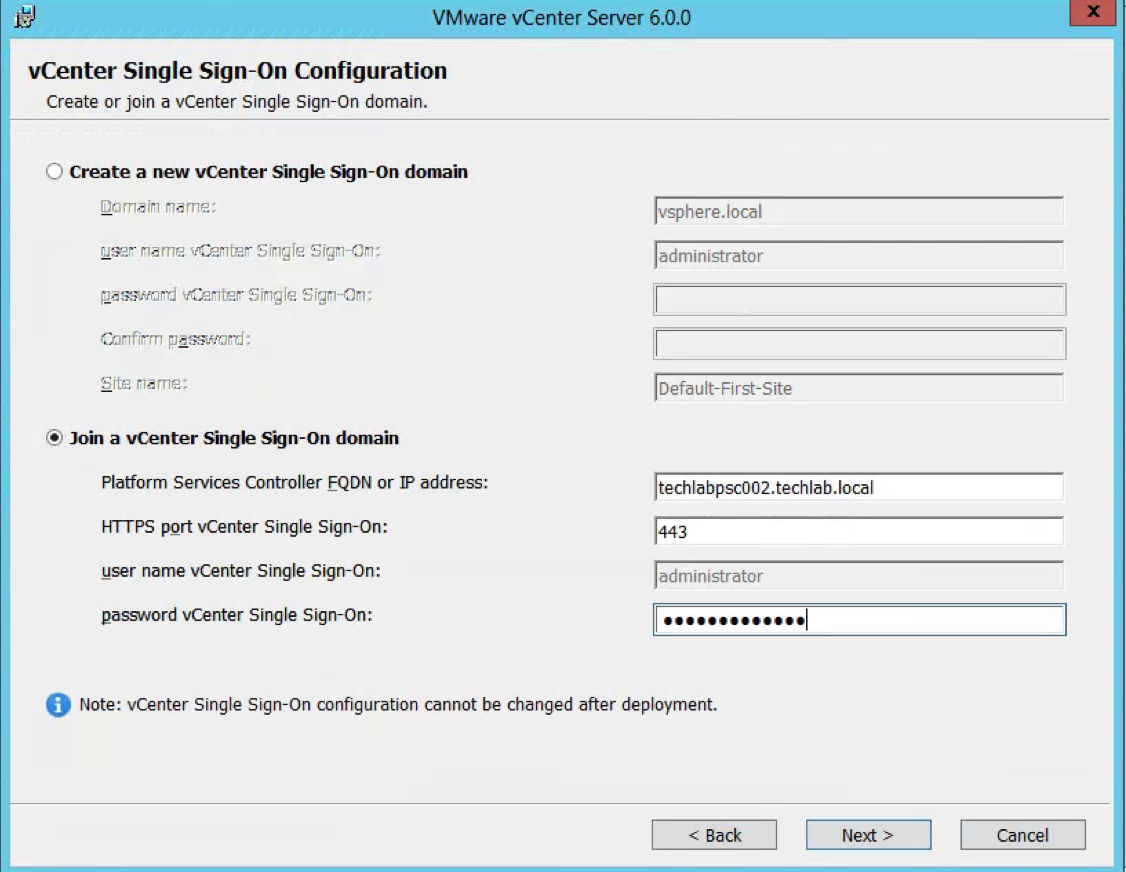
- As this is the second PSC, you will need to Join an existing vCenter Single Sign-On domain and put in the FQDN of the first PSC created earlier
- Enter the Single Sign-On password
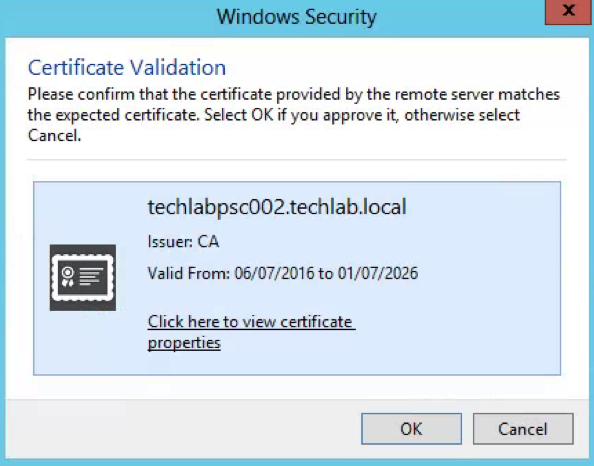
- Accept the certificate
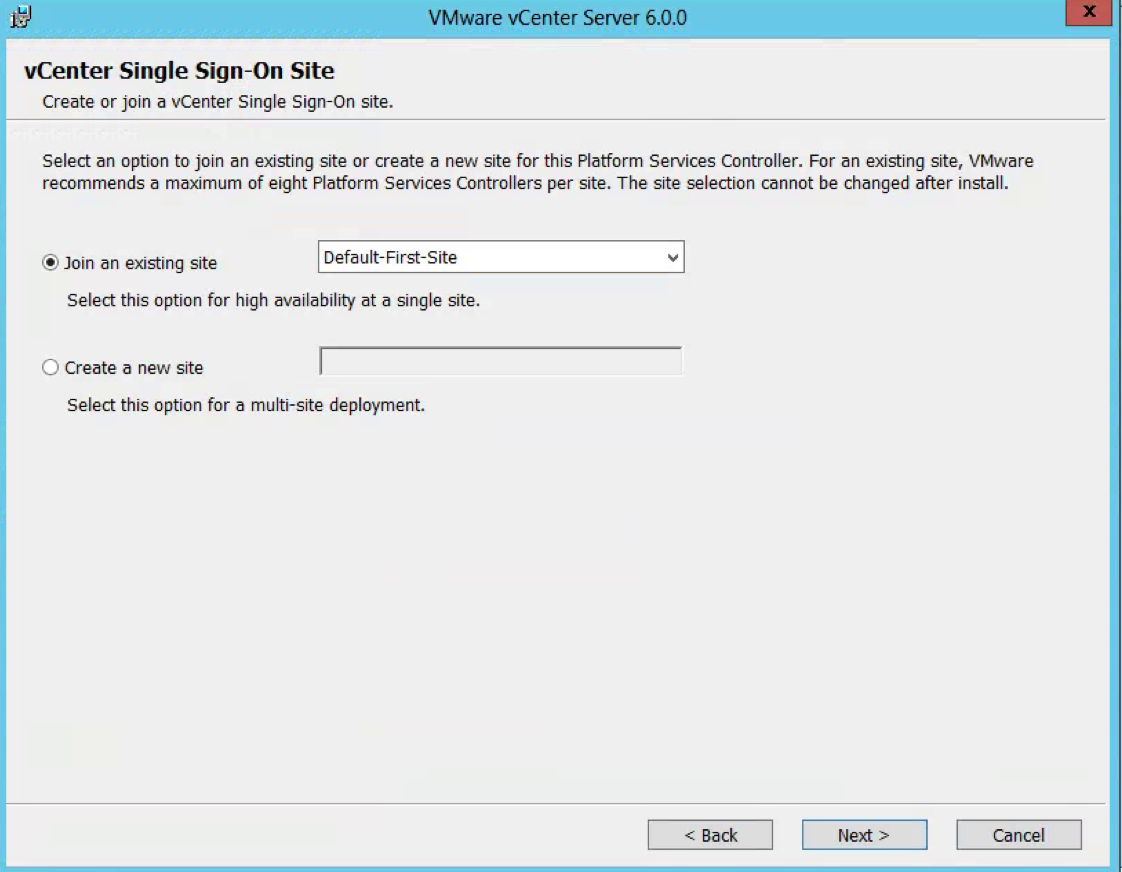
- Select to join an existing site which in this case is the Default-First-Site
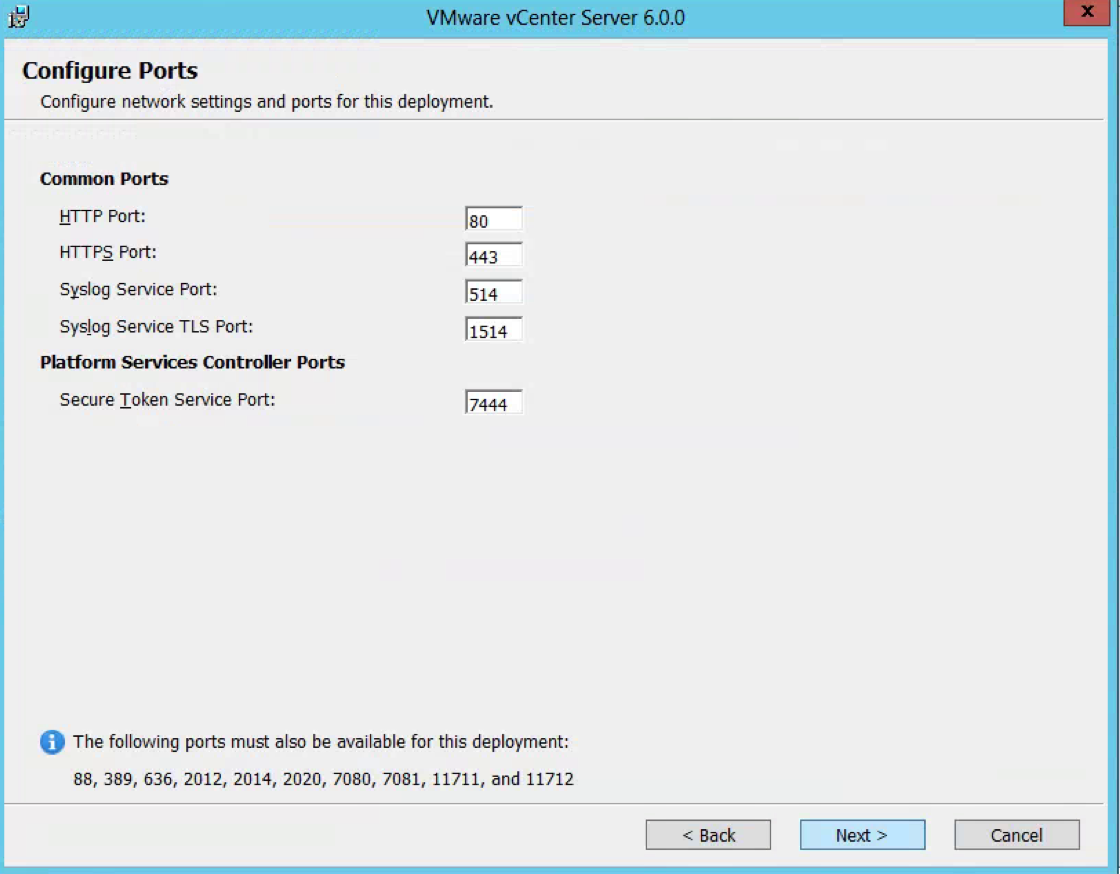
- Check the Ports screen
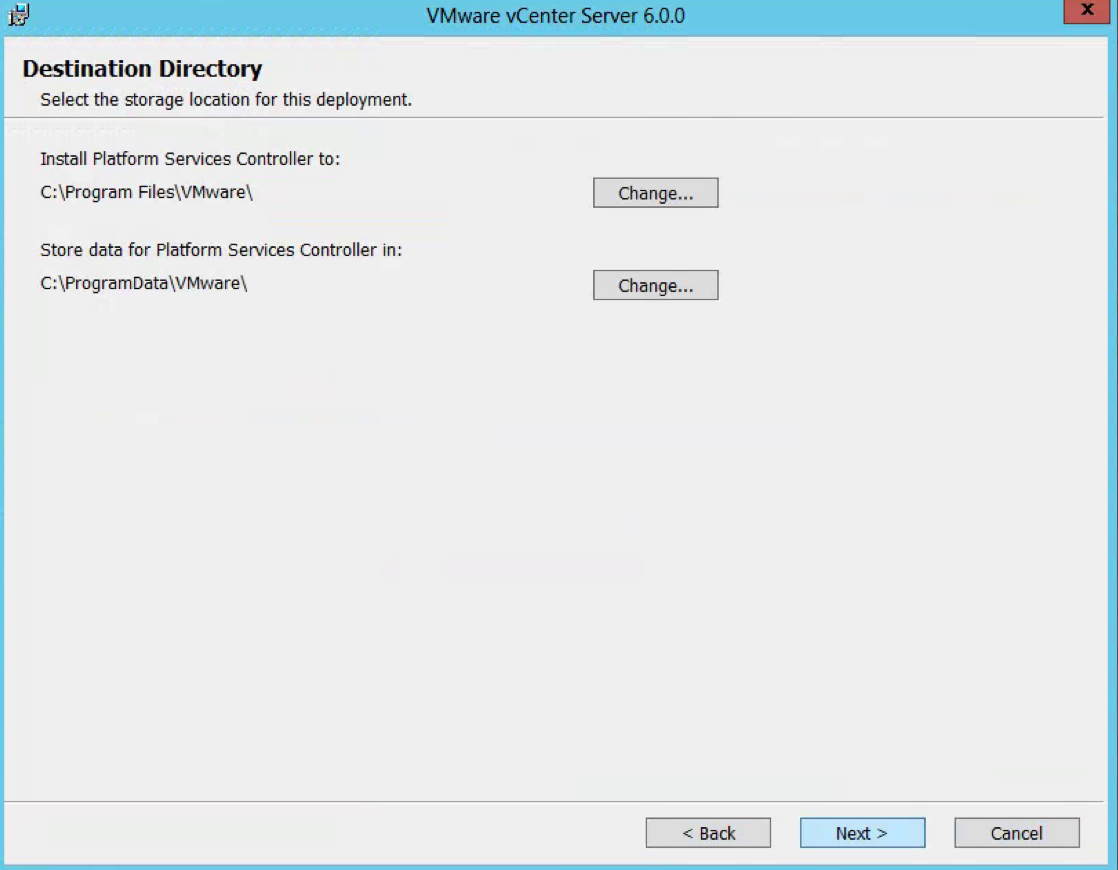
- Choose the Destination Directory
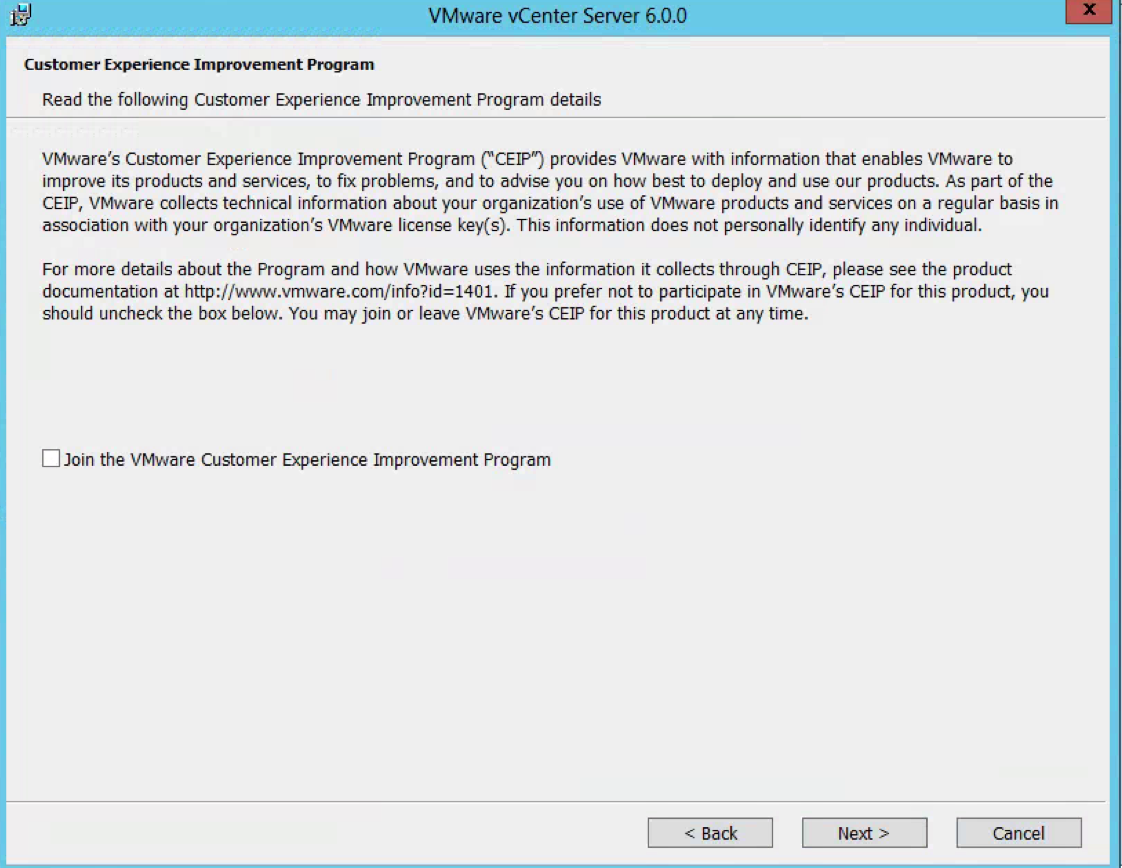
- Select whether to join the Customer Experience Program
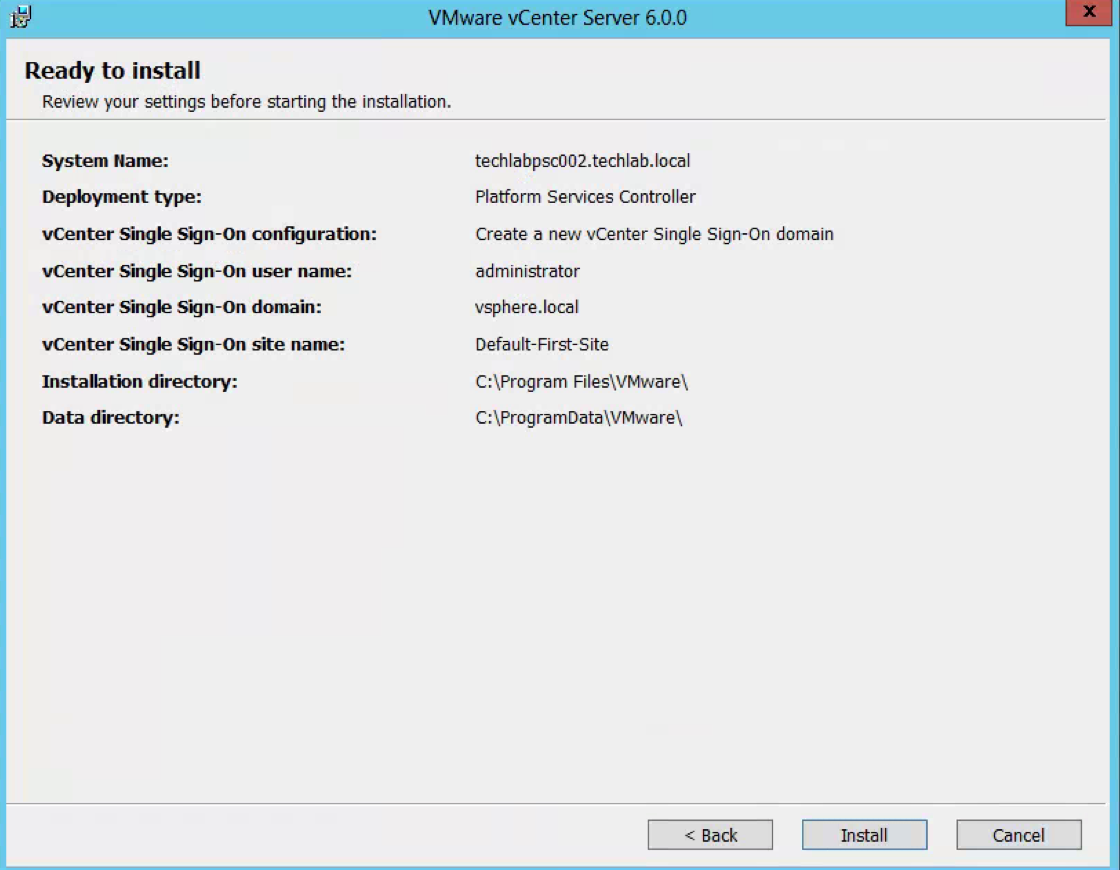
- Check the final details
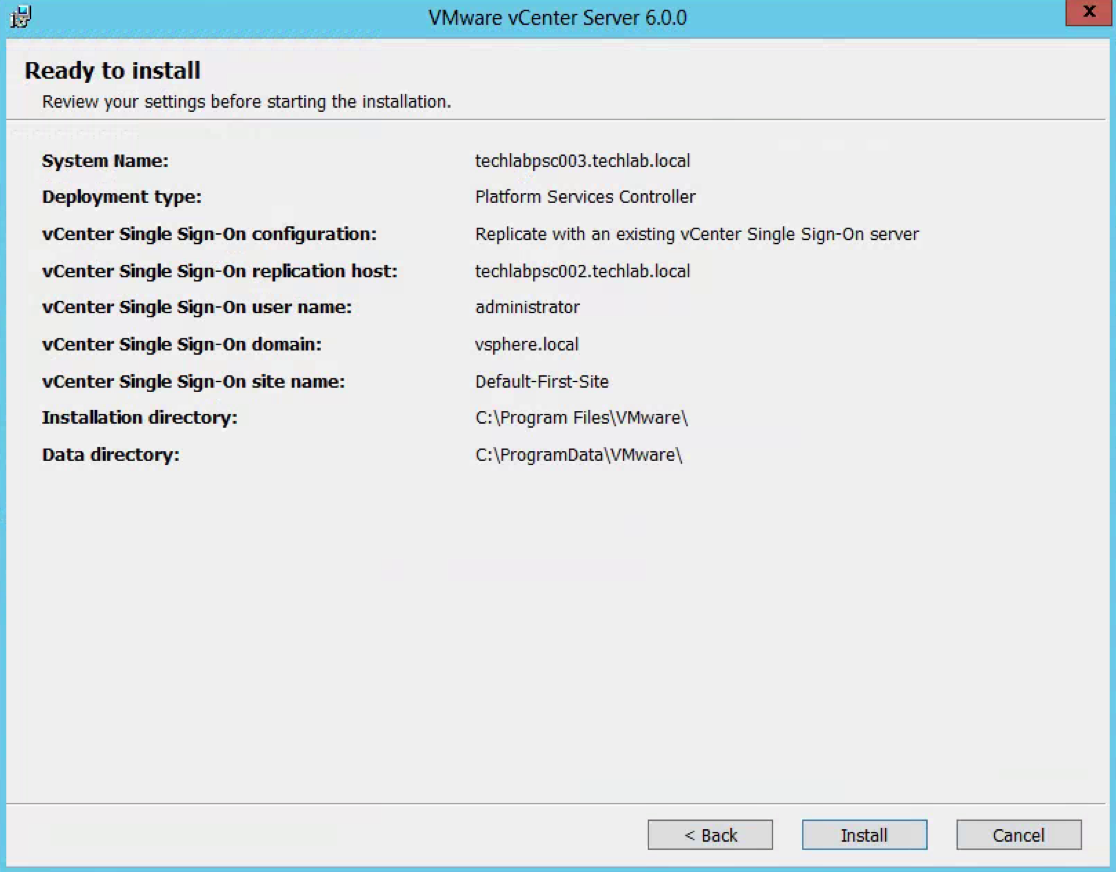
- Finish.
- The 2 PSCs are now set up in Enhanced Linked Mode
Determining replication agreements and status with the Platform Services Controller using vdcrepadmin
Useful VMware KB Link here
Use these parameters using the vdcrepadmin CLI:
- showservers – Displays all of the PSCs in a vSphere domain.
- showpartners – Displays the current partnerships from a single PSC within a vSphere domain.
- showpartnerstatus – Displays the current replication status of a PSC and any of the replication partners of the PSC.
- createagreement and removeagreement – Allows for creation and removal of additional replication agreements between PSCs within a vSphere domain.
Steps for vdcrepadmin showservers
This steps below provide information on using the vdcrepadmin command-line interface (CLI) for reviewing the existing vSphere domain, Platform Services Controllers (PSC) that make up your vSphere domain as well as checking the replication agreements configured and replication status within your environment. Although the utility can be used for other operations, at this time, only what is documented must be executed by technical support staff and customers.
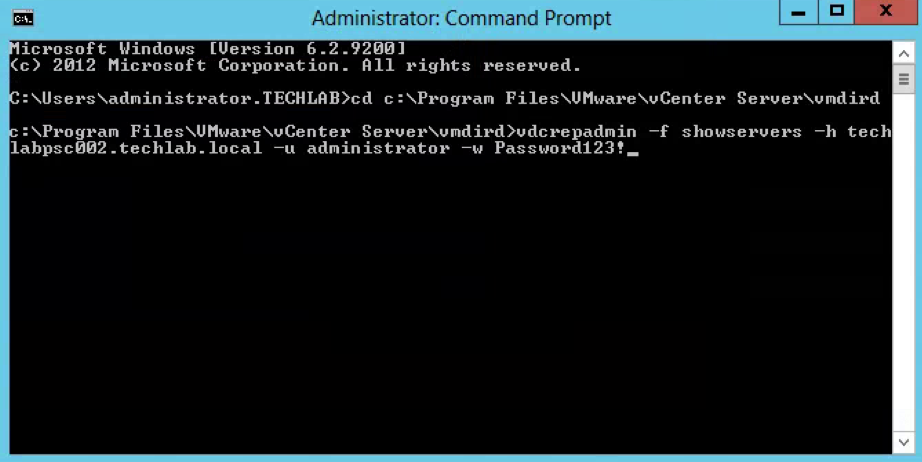
- Open a Command Prompt as Administrator
- Navigate to cd c:\Program Files\VMware\vCenter Server\vmdird
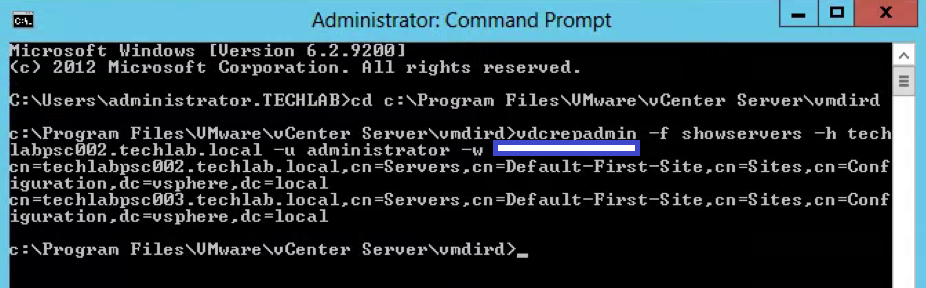
- Type the below command to show all the PSC Controllers in the vSphere domain
vdcrepadmin -f showservers -h PSC_FQDN -u administrator -w Administrator_Password
Example
vdcrepadmin -f showservers -h techlabpsc002.techlab.local -u administrator -w Password123!
- You should now see the below showing you your 2 PSCs
Steps for vdcrepadmin showpartners
- Next type the following command to show the psc partners
vdcrepadmin -f showpartners -h psc1.vmware.local -u administrator -w VMw@re123
Example
vdcrepadmin -f showpartners -h techlabpsc002.techlab.local -u administrator -w Password123!

- You could run this showpartners command against all PSCs to map out the topology of the current vSphere domain by re-running this command against each of the PSCs in order to determine all of the partnerships.
- You can see that some environments will be installed in an in-line fashion, with each PSC installed against the previous PSC, rather than a hub-and-spoke fashion where all of the PSCs would terminate to a central PSC
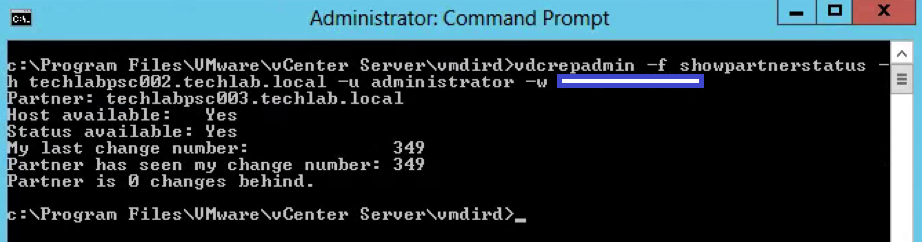
Steps for vdcrepadmin showpartnerstatus
- Next type the following command to show the partner replication status.
- This CLI is limited to execution only against the local PSC. Using the command to query the replication status from one PSC to a different PSC is not yet supported.
vdcrepadmin -f showpartnerstatus -h localhost -u administrator -w Administrator_password
Example
vdcrepadmin -f showpartnerstatus -h techlabpsc002.techlab.local -u administrator -w Password123!
- If you have problems with replication failing, review the /var/log/vmware/vmdird/vmdird-syslog.log or %VMWARE_LOG_DIR%\vmdird\vmdird-syslog.log file for details. This provides all information related to replication status and the objects that are replicated
Steps for vdcrepadmin createagreement – Example only with 4 PSCs as I only have 2 PSCs
- Note: This cannot be used to create replication agreements between disparate (separate) vSphere domains
- Map out the topology of the current vSphere domain by re-running the showpartners command against each of the PSCs in order to determine all of the partnerships
For example you have 4 PSCs
- psc1
- psc2
- psc3
- psc4
You can use the showservers parameter to get a list of all of the PSCs in the domain.
vdcrepadmin -f showpartners -h psc1.vmware.local -u administrator -w VMw@re123
ldap://psc2. vmware.local
vdcrepadmin -f showpartners -h psc2.vmware.local -u administrator -w VMw@re123
ldap://psc1. vmware.local
ldaps://psc3. vmware.local
vdcrepadmin -f showpartners -h psc3.vmware.local -u administrator -w VMw@re123
ldap://psc4. vmware.local
ldaps://psc2. vmware.local
vdcrepadmin -f showpartners -h psc4.vmware.local -u administrator -w VMw@re123
ldap://psc3. vmware.local
- With the topology defined, we can now generate new replication agreements. Using the PSCs 1-4 in this section as a model, we need to generate additional replication agreements between:
- PSC1.* and PSC3.*
- PSC1.* and PSC4.*
- PSC2.* and PSC4.*
- Use the following command to create a new replication agreement between PSCs to generate a mesh topology:
vdcrepadmin -f createagreement -2 -h Source_PSC_FQDN -H New_PSC_FQDN_to_Replicate -u administrator -w Administrator_Password
For example:
vdcrepadmin -f createagreement -2 -h psc1.vmware.local -H psc3.vmware.local -u Administrator -w VMw@re123
vdcrepadmin -f createagreement -2 -h psc1.vmware.local -H psc4.vmware.local -u Administrator -w VMw@re123
vdcrepadmin -f createagreement -2 -h psc2.vmware.local -H psc4.vmware.local -u Administrator -w VMw@re123
- Repeat this operation for additional PSCs until you have created an entire mesh topology.
- After completion, repeat Step 5 to confirm that you have generated a mesh topology.
- Note: Due to replication time, it may take a few seconds to minutes for a complete mesh topology to be configured.
Steps for vdcrepadmin removeagreement – Example only with 4 PSCs as I only have 2 PSCs
- Map out the topology of the current vSphere domain by re-running the showpartners command against each of the PSCs in order to determine all of the partnerships
For example you have 4 PSCs
- psc1
- psc2
- psc3
- psc4
You can use the showservers parameter to get a list of all of the PSCs in the domain.
vdcrepadmin -f showpartners -h psc1.vmware.local -u administrator -w VMw@re123
ldap://psc2. vmware.local
ldap://psc3. vmware.local
ldap://psc4. vmware.local
vdcrepadmin -f showpartners -h psc2.vmware.local -u administrator -w VMw@re123
ldap://psc1. vmware.local
ldap://psc3. vmware.local
ldap://psc4. vmware.local
ldap://psc4. vmware.local
vdcrepadmin -f showpartners -h psc3.vmware.local -u administrator -w VMw@re123
ldap://psc4. vmware.local
ldap://psc2. vmware.local
ldap://psc1. vmware.local
vdcrepadmin -f showpartners -h psc4.vmware.local -u administrator -w VMw@re123
ldap://psc3. vmware.local
ldap://psc1. vmware.local
ldap://psc2. vmware.local
- Use the following command to remove a replication agreement
vdcrepadmin -f removeagreement -2 -h Source_PSC_FQDN -h PSC_FQDN_to_Remove_from_Replication -u administrator -w Administrator_Password
For example:
vdcrepadmin -f removeagreement -2 -h psc1.vmware.local -h psc3.vmware.local -u administrator -w Administrator_Password

