Tag Archive for Microsoft

Installing the Microsoft Remote Desktop Gateway Role Service

gw

What is Microsoft Remote Desktop Gateway?

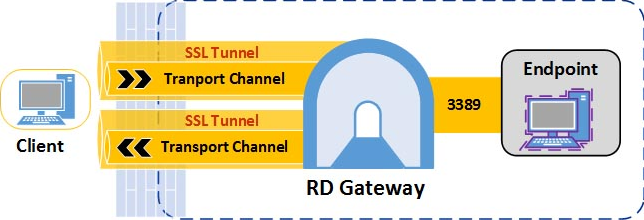
A Remote Desktop Gateway (RD Gateway) server is a type of gateway that enables authorized users to connect to remote computers on a corporate network from any computer with an Internet connection. RD Gateway uses the Remote Desktop Protocol (RDP) along with the HTTPS protocol to help create a more secure, encrypted connection.

In earlier versions of Remote Desktop Connection, people couldn’t connect to remote computers across firewalls and network address translators because port 3389—the port used for Remote Desktop connections—is typically blocked to enhance network security. However, an RD Gateway server uses port 443, which transmits data through a Secure Sockets Layer (SSL) tunnel.

Benefits of an RD Gateway server

  • Enables Remote Desktop connections to a corporate network from the Internet without having to set up virtual private network (VPN) connections.
  • Enables connections to remote computers across firewalls
  • Allows you to share a network connection with other programs running on your computer. This enables you to use your ISP connection instead of your corporate network to send and receive data over the remote connection.

How does RD Gateway work?

When a client makes a connection, RD Gateway first establishes SSL tunnels between itself and the external client. Next, RD Gateway checks the client’s user (and optionally the computer) credentials to make sure that the user / computer are authorized to connect to RD Gateway. Then RD Gateway makes sure the client is allowed to connect to the requested resource. If the request is authorized then RD Gateway sets up an RDP connection between itself and the internal resource. All communication between the external client and the internal endpoint goes through RD Gateway

Connections to RD Gateway use the RDGSP protocol. RDGSP creates two SSL tunnels (one for incoming data and one for outgoing data) from the external client to RD Gateway. Once the tunnels are established the client and RD Gateway establish a main channel over each tunnel. Data between client and the destination machine is sent over the channels and RD Gateway sits in the middle proxying the data back and forth

RD Gateway2

RDGSP uses a transport to create the channels.  In Windows Server 2008 R2, RDGSP used the RPC over HTTP transport. RPC over HTTP is still available for down-level RDP clients, but whenever available, RDP 8.0 clients will use the new and much more efficient HTTP transport. The difference is this: RPC over HTTP makes RPC calls for every data transfer to and from the client. This adds significant CPU overhead. The new HTTP transport does not have this overhead so it’s possible to accommodate up to twice as many RDP sessions on the same hardware.

Important Notes about Certificates

The certificate must meet these requirements:

  • The name in the Subject line of the server certificate (certificate name, or CN) must match the DNS name that the client uses to connect to the TS Gateway server, unless you are using wildcard certificates or the SAN attributes of certificates. If your organization issues certificates from an enterprise CA, a certificate template must be configured so that the appropriate name is supplied in the certificate request. If your organization issues certificates from a stand-alone CA, you do not need to do this.
  • The certificate is a computer certificate.
  • The intended purpose of the certificate is server authentication. The Extended Key Usage (EKU) is Server Authentication (1.3.6.1.5.5.7.3.1).
  • The certificate has a corresponding private key.
  • The certificate has not expired. We recommend that the certificate be valid one year from the date of installation.
  • A certificate object identifier (also known as OID) of 2.5.29.15 is not required. However, if the certificate that you plan to use contains an object identifier of 2.5.29.15, you can only use the certificate if at least one of the following key usage values is also set: CERT_KEY_ENCIPHERMENT_KEY_USAGE, CERT_KEY_AGREEMENT_KEY_USAGE, and CERT_DATA_ENCIPHERMENT_KEY_USAGE.
  • The certificate must be trusted on clients. That is, the public certificate of the CA that signed the TS Gateway server certificate must be located in the Trusted Root Certification Authorities store on the client computer

Checklist to install the Remote Desktop Gateway Role

  1. Install the Remote Desktop Gateway role service.
  2. Obtain a certificate for the RD Gateway server.
  3. Create a Remote Desktop connection authorization policy (RD CAP)
  4. Create a Remote Desktop resource authorization policy (RD RAP)
  5. Configure the Remote Desktop Services client for RD Gateway.

Install the Remote Desktop Gateway Role

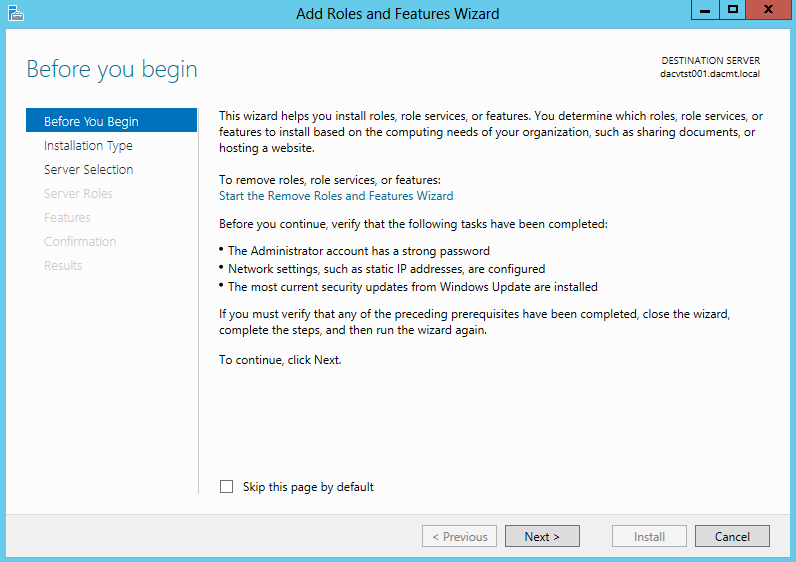
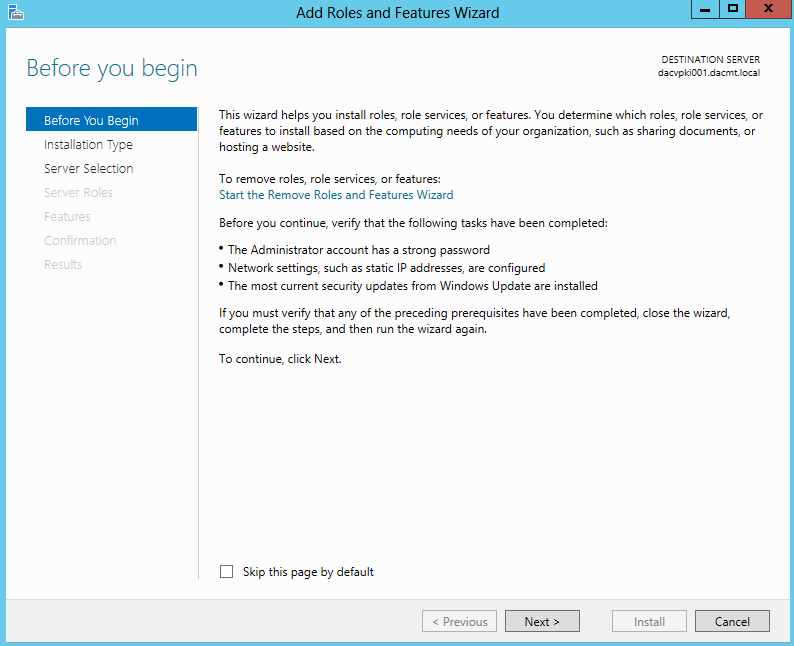
  • Open Server Manager and select Add Roles and Features. You will get the Before you begin page. Click Next

rdgateway1

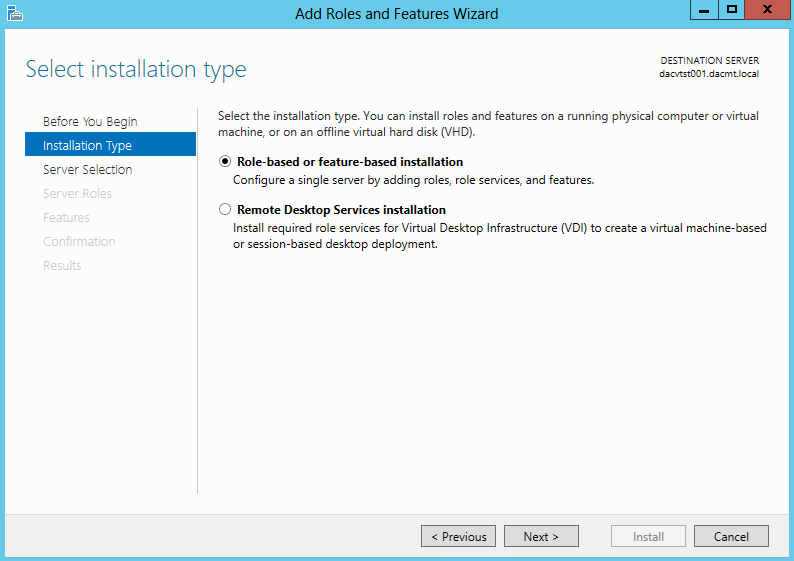
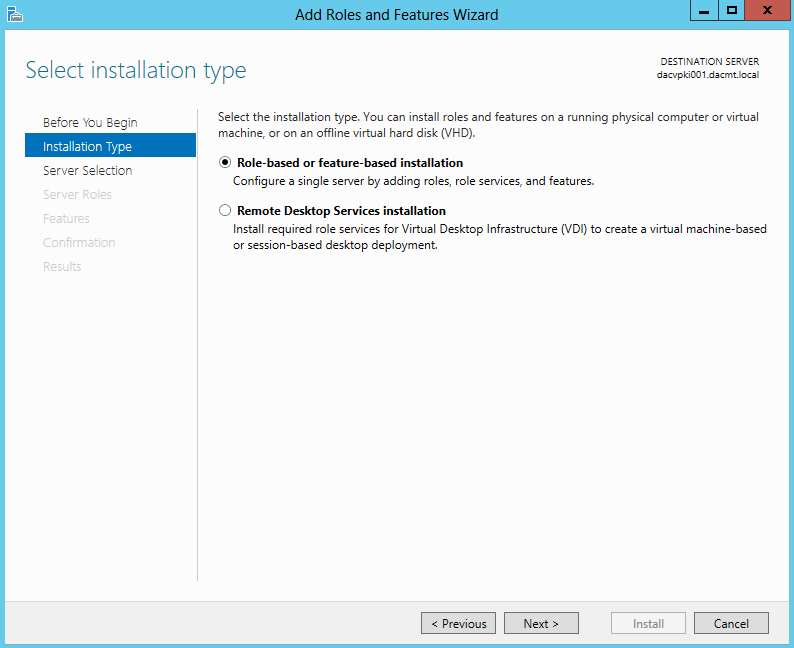
  • Select Installation Type. Choose Role based or Feature based Installation

rdgateway2

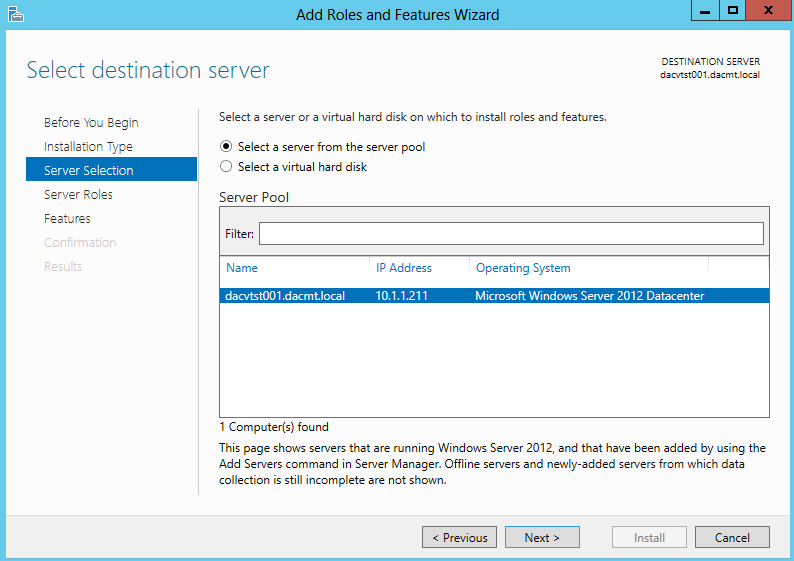
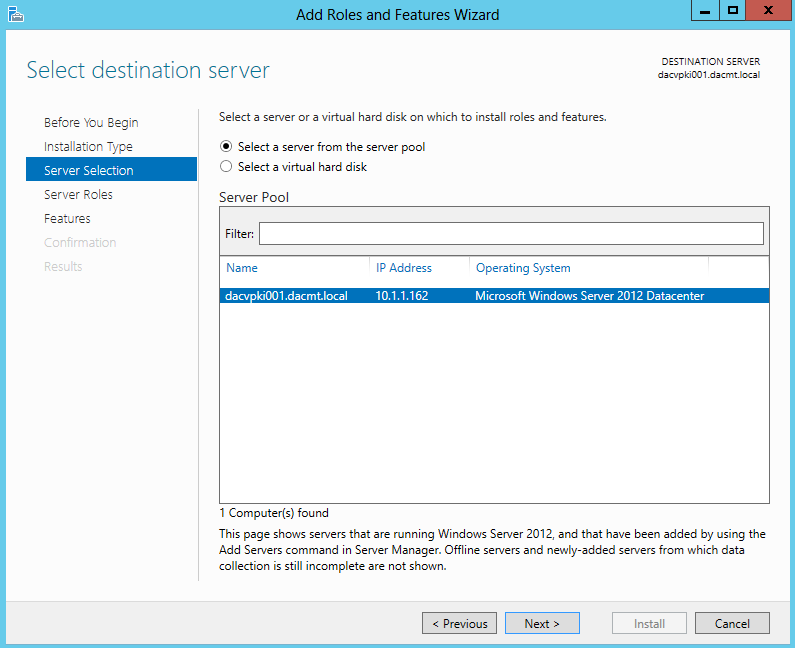
  • Select Destination Server

rdgateway3

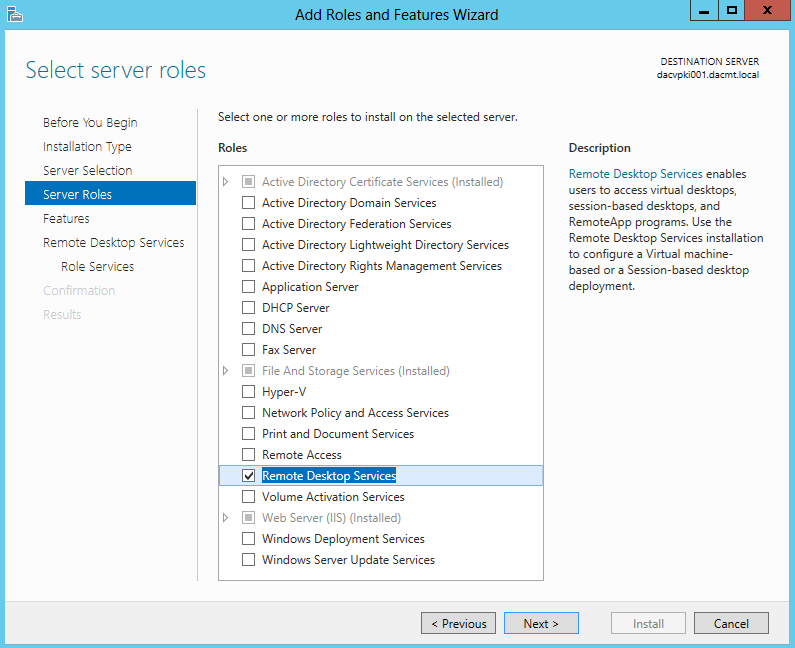
  • Select Server Roles. Choose Remote Desktop Services

rdgateway4

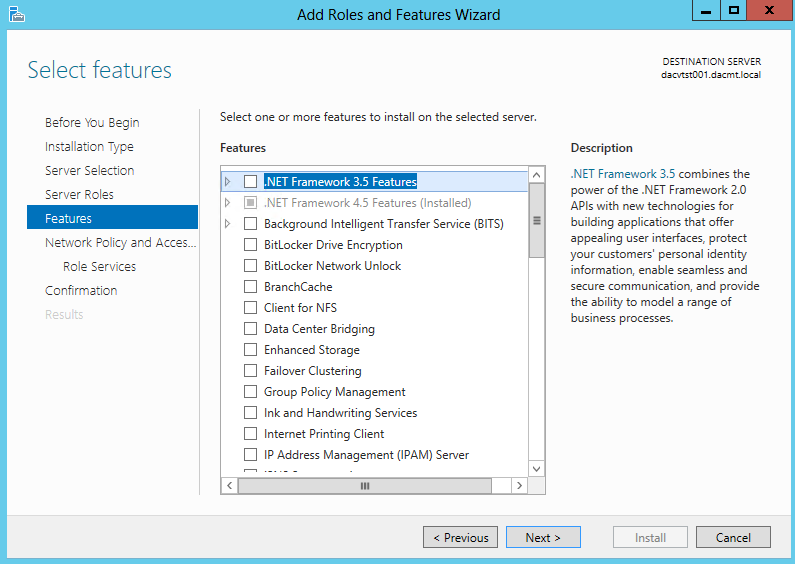
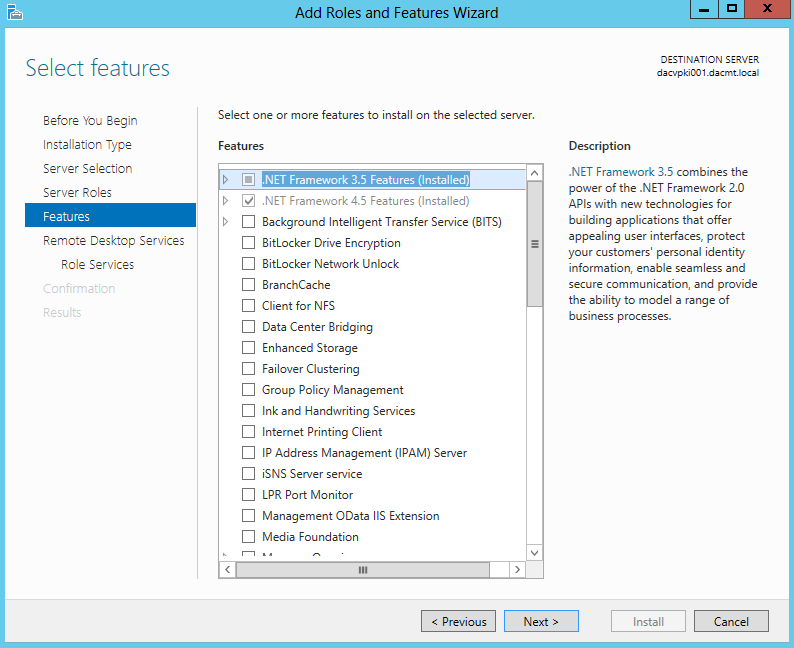
  • Click Next on Features

rdgateway5

  • Click Next on Remote Desktop Services Page
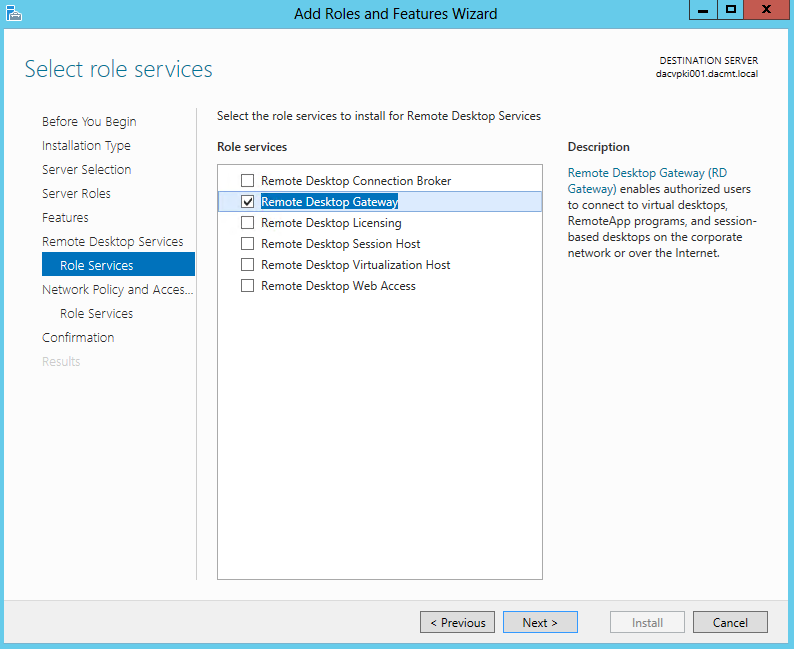
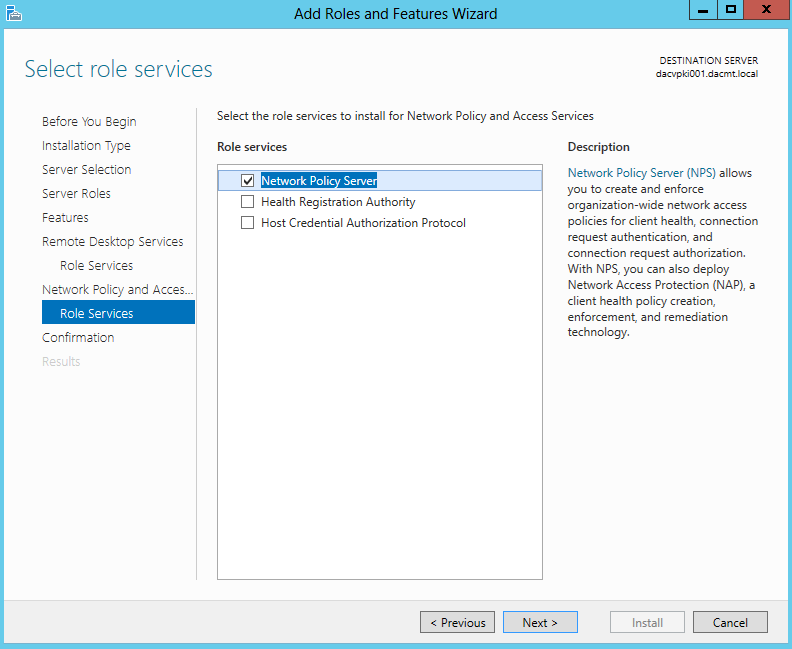
  • On the Select Role Services, choose Remote Desktop Gateway
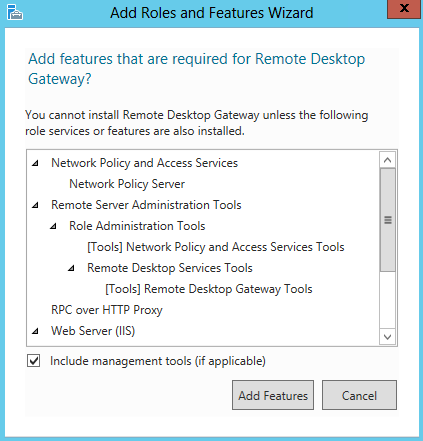
rdgateway7

  • Click Add Features

rdgateway8

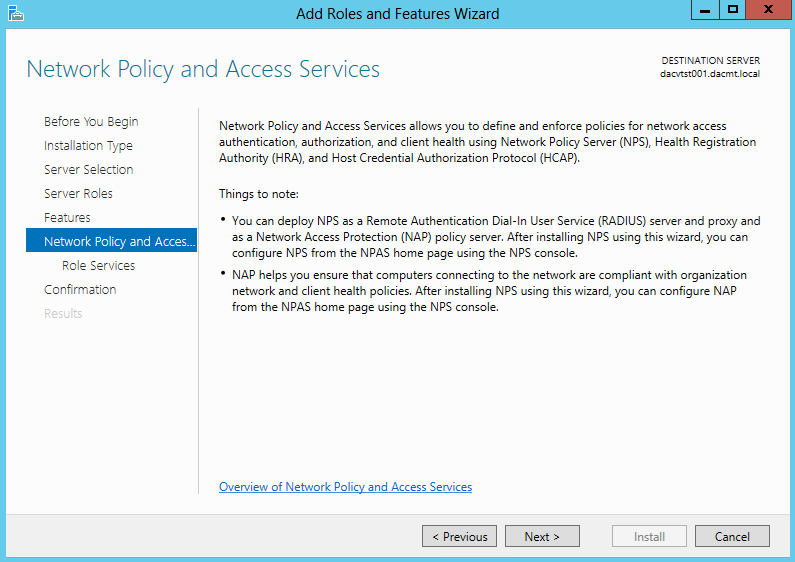
  • On the Network Policy and Access Screen, click Next

rdgateway9

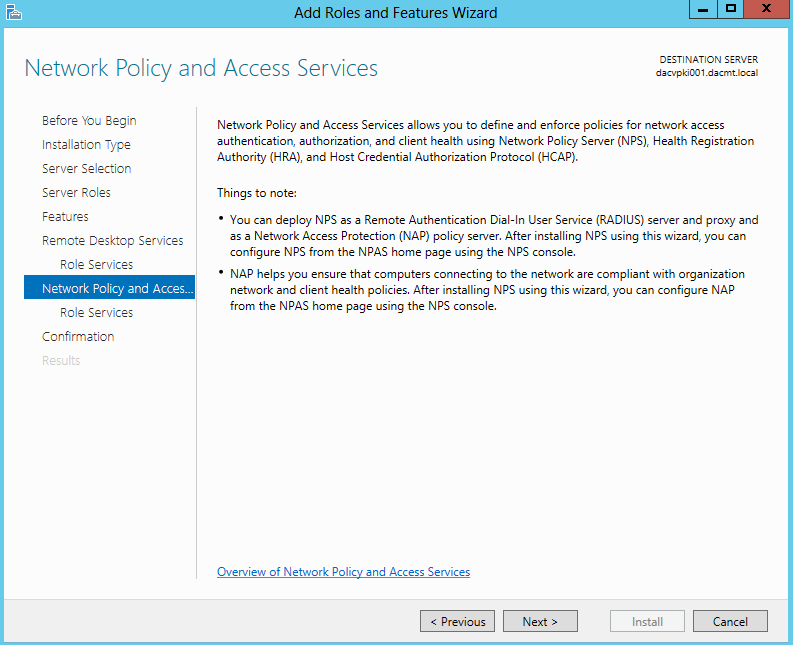
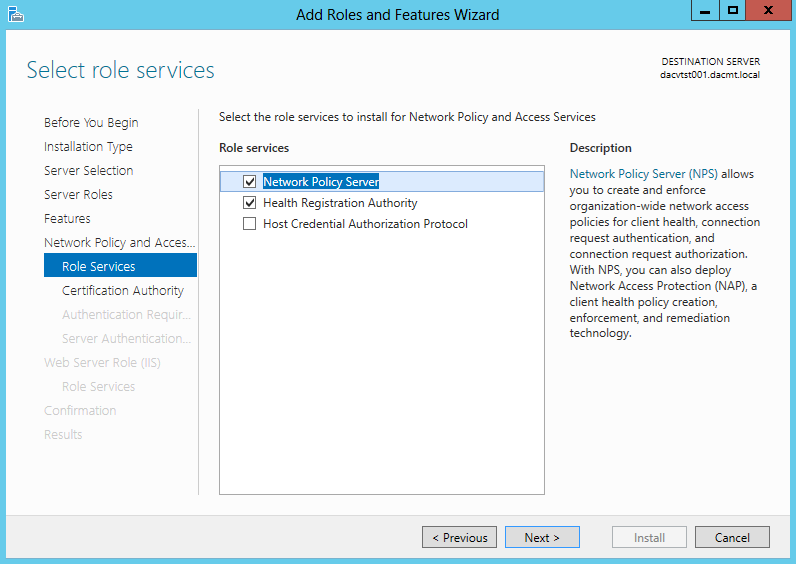
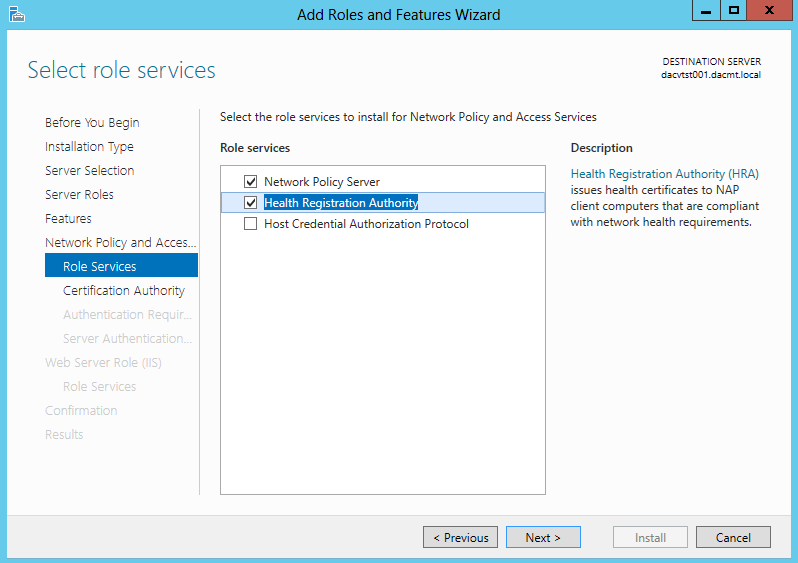
  • Leave Network Policy Server checked

rdgateway10

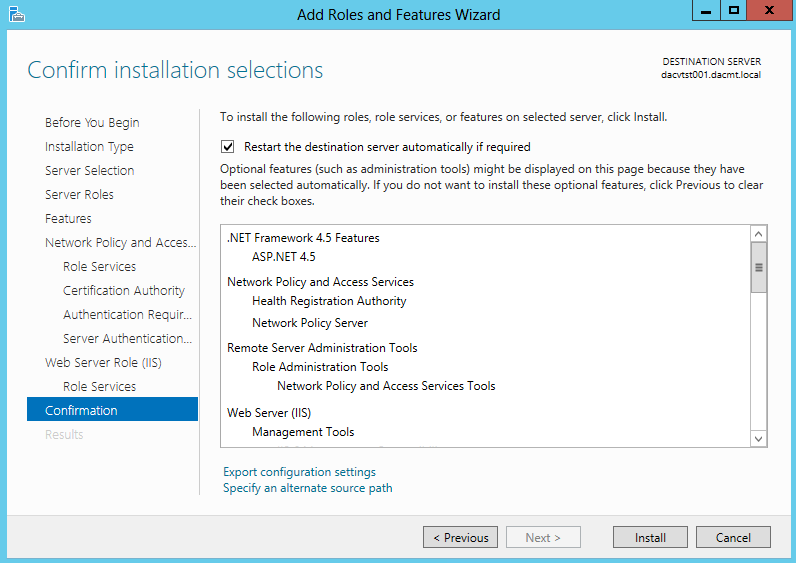
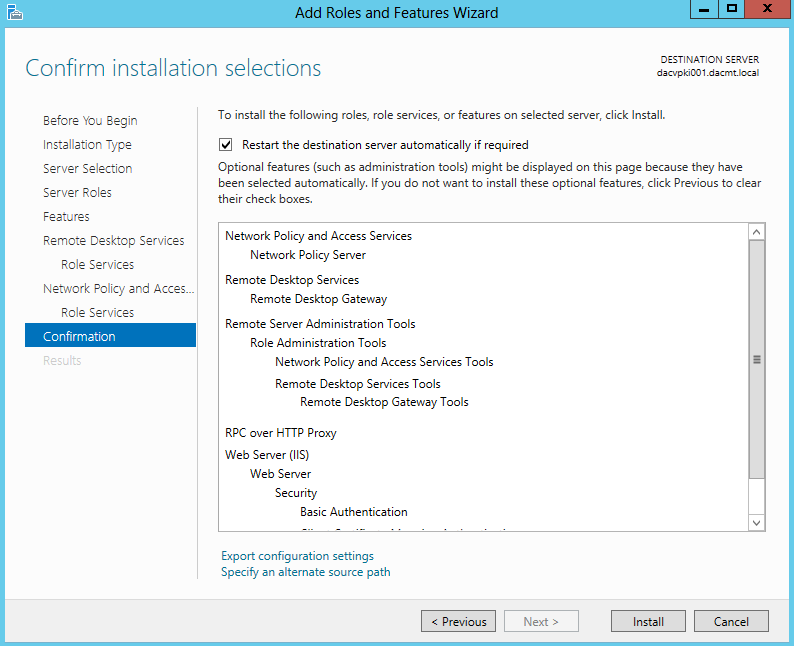
  • Confirm Installation Selections and click Install

rdgateway11

  • Next launch Remote Desktop Gateway Manager by going to Server Manager > Tools > Terminal Services > Remote Desktop Gateway Manager

rdgateway12

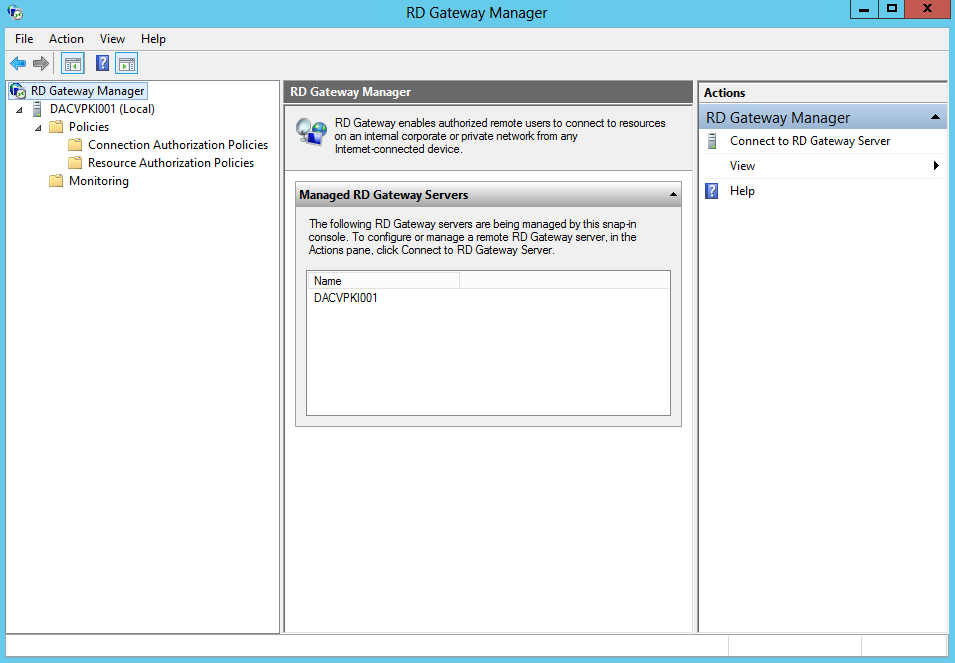
  • Select the Servername and you will see several messages to further configure this server

rdgateway13

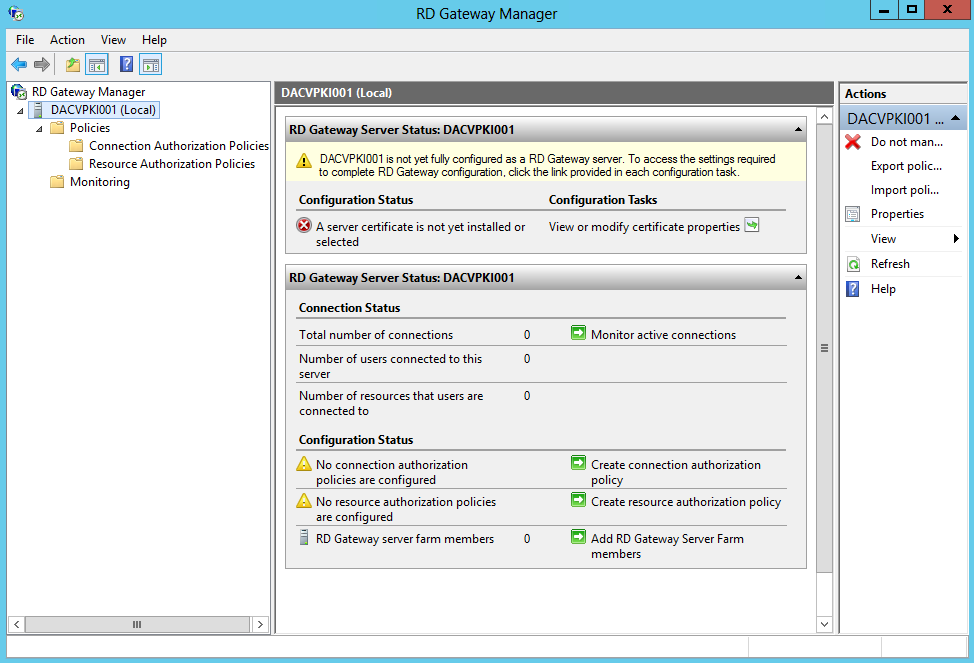
  • Select View or modify certificate properties
  • You do not need a certification authority (CA) infrastructure within your organization if you can use another method to obtain an externally trusted certificate that meets the requirements for TS Gateway. If your company does not maintain a stand-alone CA or an enterprise CA and you do not have a compatible certificate from a trusted public CA, you can create and import a self-signed certificate for your TS Gateway server for technical evaluation and testing purpose
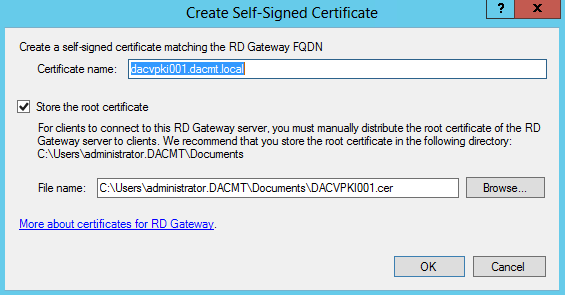
  • I am going to use a Self-Signed Certificate. Select Create and Import Certificate.

rdgateway14

  • The following screen will come up

rdgateway15

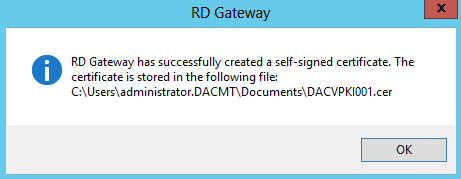
  • It will pop up with a confirmation box below

rdgateway16

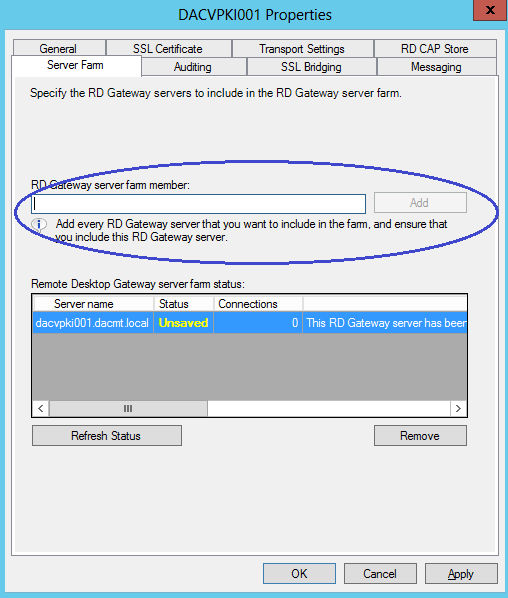
  • In the Server Farm tab, enter the name of the Remote Desktop Gateway Server and click Add
  • The add the second Remote Desktop Gateway Server etc if you have one

rdgateway17

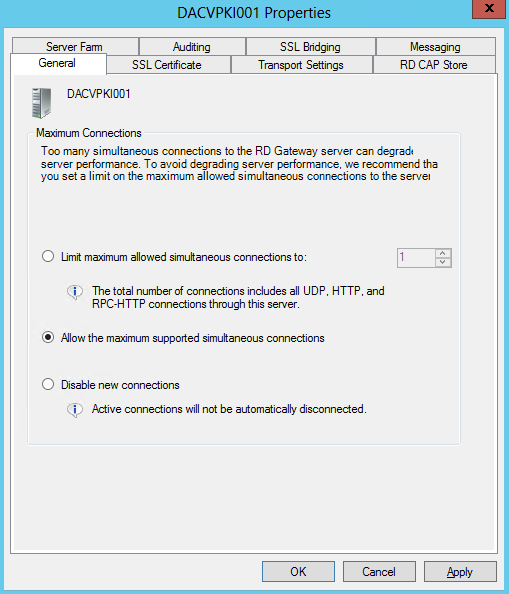
  • Now have a look at the other settings
  • Look at General

rdgateway20

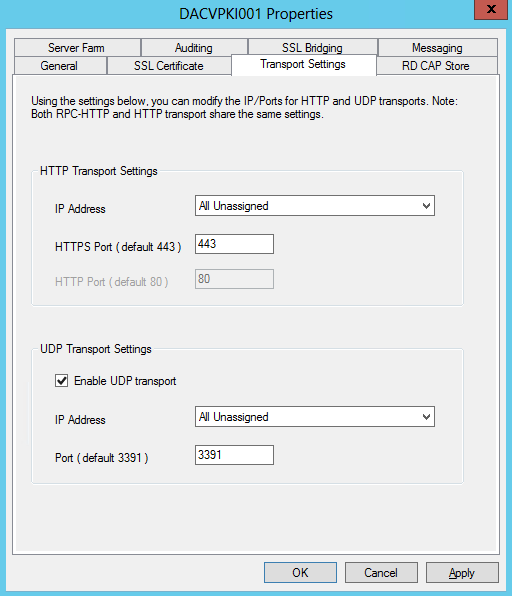
  • Look at Transport Setttings

rdgateway18

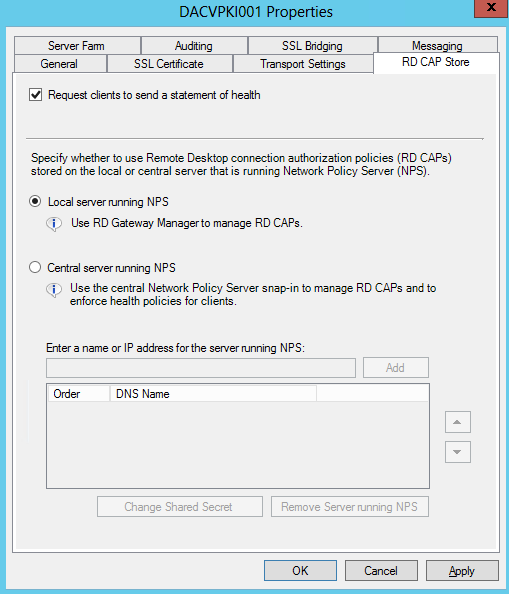
  • Next is RD CAP Store
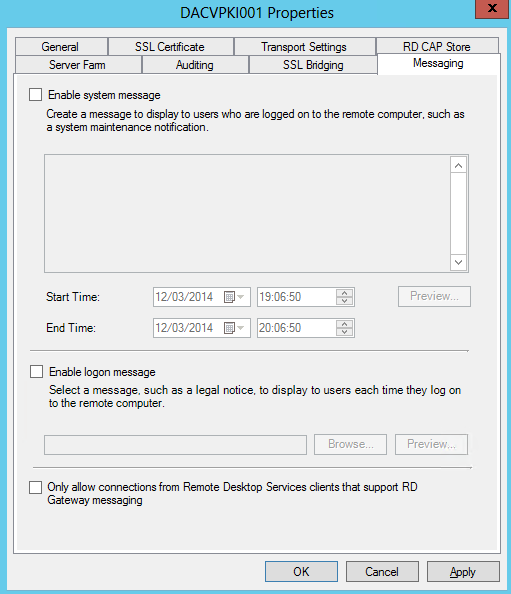
rdgateway19

  • Look at Messaging

rdgateway21

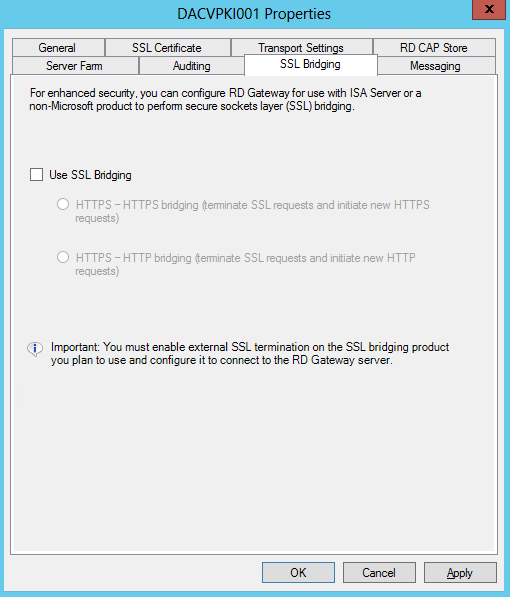
  • Look at SSL Bridging
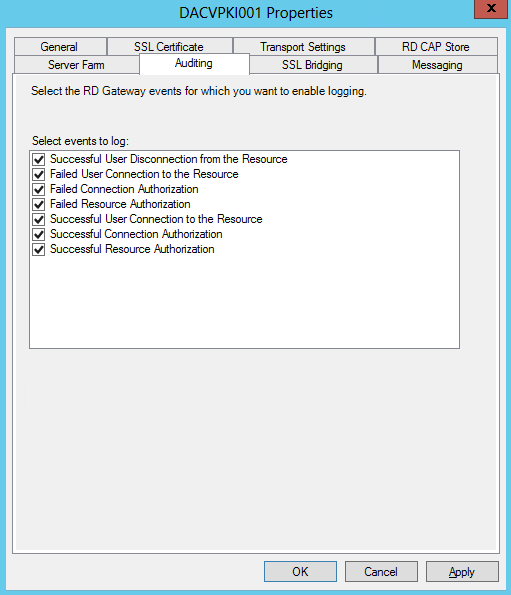
rdgateway22

  •  Look at Auditing

rdgateway23

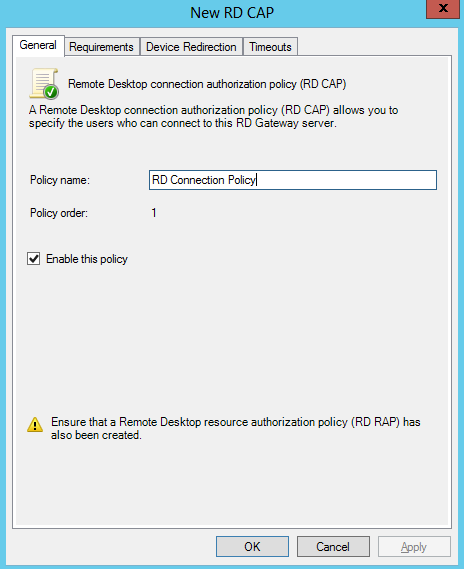
  • Now we need to define Connection Authorization Policy. Select Create connection authorization policy.

rdgateway24

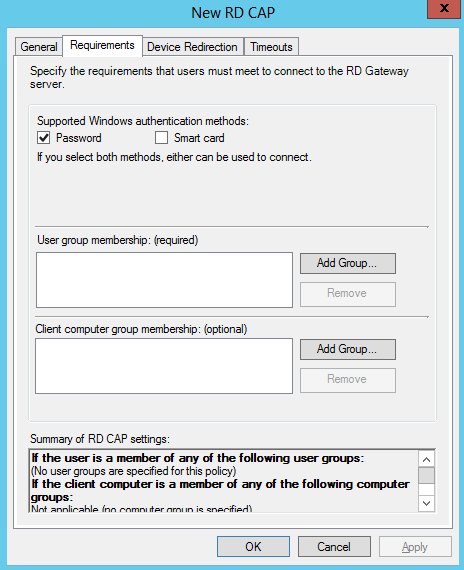
  • Click Requirements and add your User Groups or Computer Groups

rdgateway25

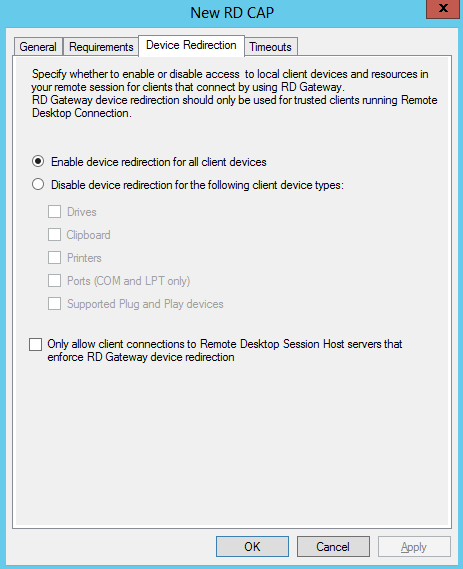
  • Click on Device Redirection
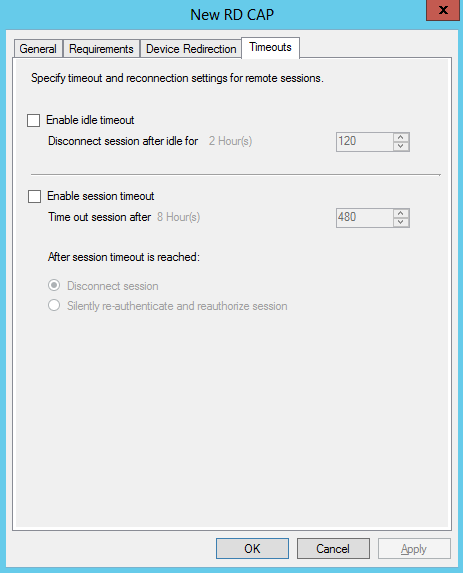
rdgateway26

  • Click on Timeouts

rdgateway27

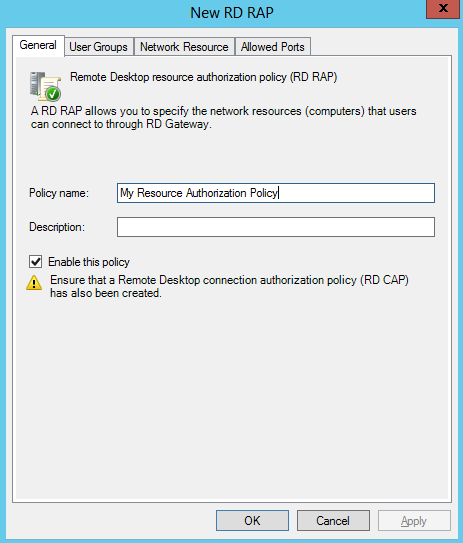
  • Next go back to the main console and create a resource authorization policy

rdgateway28

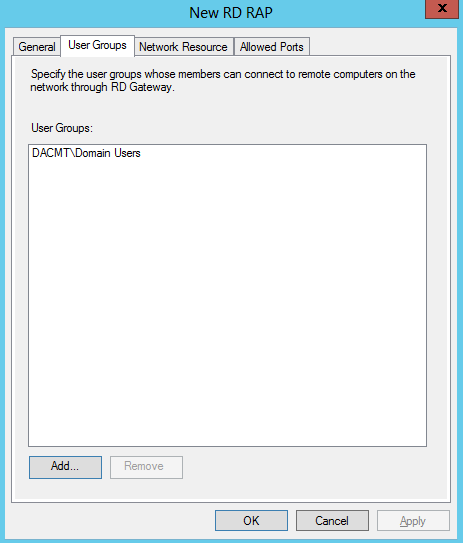
  • Click User Groups and add a group or groups

rdgateway29

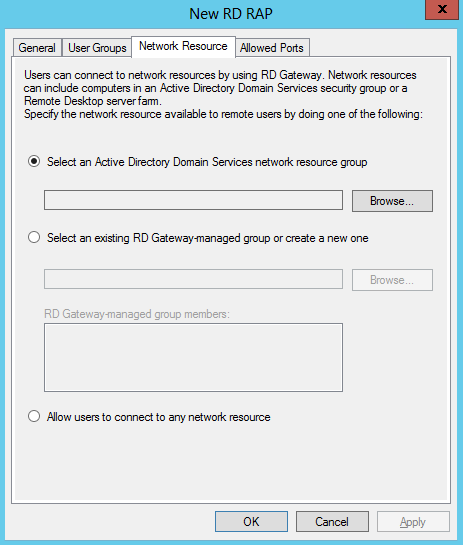
  • Click Network Resource
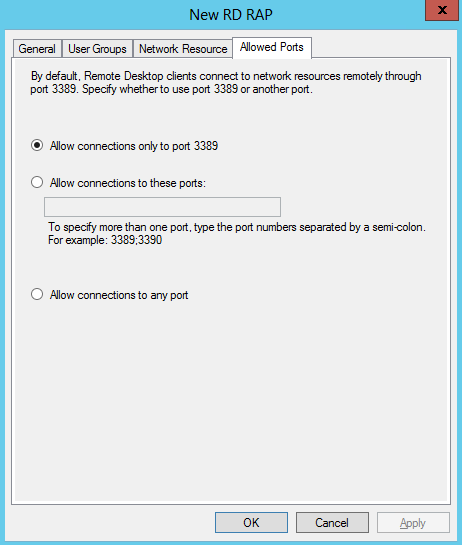
rdgateway30

  • Click Allowed Ports

rdgateway31

  •  Complete
  • Now test your mstsc access!

Useful Step by Step Guide from Microsoft

http://technet.microsoft.com/en-us/library/cc771530%28v=ws.10%29.aspx

PDF Guide

TS Gateway Step by Step Guide

Useful Notes about Certificates

http://go.microsoft.com/fwlink/?LinkID=74577

Useful RD Gateway Firewall Blog

http://blogs.msdn.com/b/rds/archive/2009/07/31/rd-gateway-deployment-in-a-perimeter-network-firewall-rules.aspx

Resolving Issues

  • You must make sure you have the correct certificates. You must use a certificate with a SAN (Subject Alternative Name) and this must match the internal FQDN.

RDWEB4

  • You must make sure you have set up the correct RAPs and CAPs
  • You used password authentication but the TS Gateway server is expecting smart card authentication (or vice versa
  • Make sure you haven’t limited connections
  • Check DNS for individual servers and RDS Farms
  • Check Event Viewer on the Gateway Server > Event Viewer > Applications and Services Logs > Microsoft > Windows > TerminalServices-Gateway > Operational
  • You may have a Port assignment conflict. You can use netstat tool to determine if port 3389 (or the assigned RDP port) is being used by another application on the Remote Desktop server
  • Users must be a member of the Remote Desktop Group on the servers they want to connect to

If using RD Gateway with RD Web Access then it can be useful to check the following

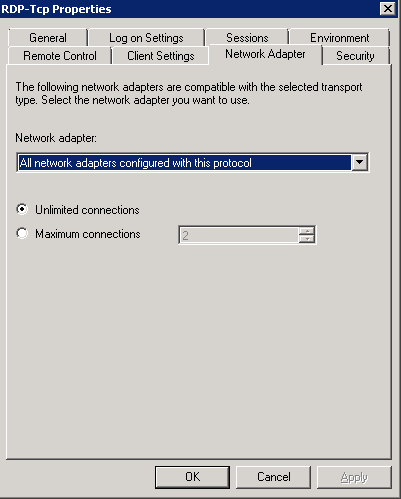
  • If you are using a Terminal Server Farm, you need to make sure the Start > All Programs > Administrative Tools >  Remote Desktop Services > Remote Desktop Session Host Configuration has the following set for Networking

RDWEB1

RDWEB2

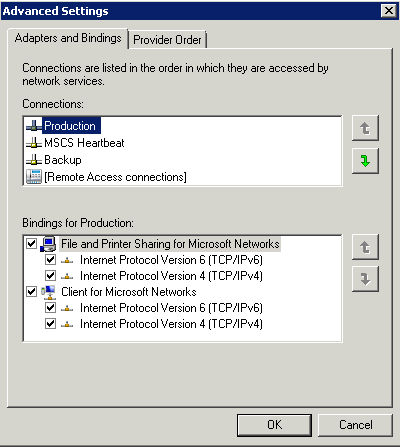
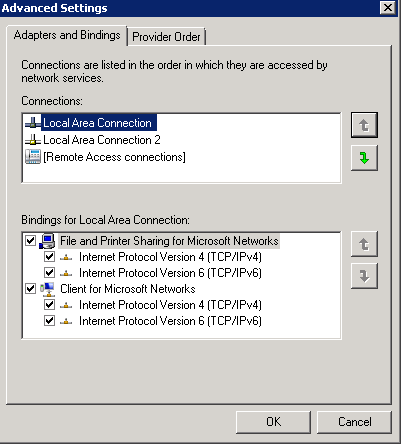
  • Sometimes you may need to check NIC Order in Network Connections

RDWEB3

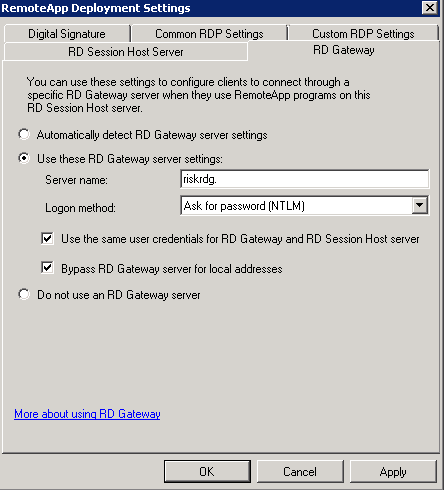
  • In RemoteApp Manager check you have a FQDN in your RemoteApp Deployment Settings and the port is correct
  • Check RD Gateway Settings are correct. Note I have blanked out the FQDN but this should be the case in these fields

RDWEB5

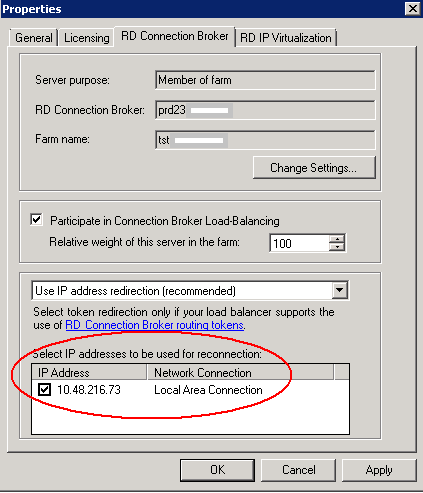
  • Make sure on each individual RDS Server in a farm that you have the Connection Broker Server and the RD Web Access Server.

NAP (Network Access Protection) on Windows Server 2012

keep-out

What is NAP?

Network Access Protection (NAP) is a new technology introduced in Windows Vista® and Windows Server® 2008. (NAP can also be deployed on computers running Windows Server 2008 R2 and Windows 7). NAP includes client and server components that allow you to create and enforce health requirement policies that define the required software and system configurations for computers that connect to your network. NAP enforces health requirements by inspecting and assessing the health of client computers, limiting network access when client computers are deemed noncompliant, and remediating noncompliant client computers for unrestricted network access. NAP enforces health requirements on client computers that are attempting to connect to a network. NAP also provides ongoing health compliance enforcement while a compliant client computer is connected to a network.

In addition, NAP provides an application programming interface (API) set that allows non-Microsoft software vendors to integrate their solutions into the NAP framework.

NAP enforcement occurs at the moment when client computers attempt to access the network through network access servers, such as a VPN server running Routing and Remote Access, or when clients attempt to communicate with other network resources. The way that NAP is enforced depends on the enforcement method you choose.

NAP enforces health requirements for the following:

  • Internet Protocol security (IPsec)-protected communications
  • Institute of Electrical and Electronics Engineers (IEEE) 802.1X-authenticated connections
  • Virtual private network (VPN) connections
  • Dynamic Host Configuration Protocol (DHCP) configuration
  • Terminal Services Gateway (TS Gateway)

Installing NAP

  • Select Add Roles and Features and when the screen below comes up, Click Next

Nap1

  • Select Role-based or feature based installation

Nap2

  • Choose your server. I have a test Windows 2012 box called dacvtst001

Nap3

  • Select Network Policy and Access Services

Nap4

  • Click to Add Features when you select Network Policy and Access Services

Nap5

  • Click Next on Select Features

Nap6

  • Read the Network Policy and Access Services screen

Nap7

  • The following screenprints show the different descriptions of each Role Service. The first one being the Network Policy Server

Nap8

  • The second one being the Health Registration Authority

Nap9

  • The third one being the Host Credential Authorization Protocol
  • Choose your Certificate settings. I chose Select a CA later using the HRA Console as this is just a test system but choose whatever is relevant to your setup

Nap11

  • Choose Authentication Requirements

Nap12

  • Choose your Server Authentication Certificate for encryption

Nap13

  •  Read the Web Server Role (IIS)

Nap14

  • Select Web Server Role Services Features

Nap15

  • Confirm Installation Selections

Nap16

  •  You will also need to install the Group Policy Management Feature
  • In Server Manager, under Features Summary, click Add Features.
  • Select the Group Policy Management check box, click Next, and then click Install.
  • Verify the installation was successful, and then click Close to close the Add Features Wizard dialog box.
  • Close Server Manager.
  • Next once everything is installed and rebooted, hit the Windows Key and Q to see the Aero view of all Applications
  • Select Network Policy Server and you should see the below screen

NAP1

  • And here is what it looks like with the menus expanded

NAP

The NAP wizard helps you configure each NAP component to work with the NAP enforcement method you choose. These components are displayed in the NPS console tree, and include:

  • System Health Validators. System health validators (SHVs) define configuration requirements for computers that attempt to connect to your network. E.g. Configured to require only that Windows Firewall is enabled.
  • Health Policies. Health policies define which SHVs are evaluated, and how they are used in the validation of the configuration of computers that attempt to connect to your network. Based on the results of SHV checks, health policies classify client health status.
  • Network Policies. Network policies use conditions, settings, and constraints to determine who can connect to the network. There must be a network policy that will be applied to computers that are compliant with the health requirements, and a network policy that will be applied to computers that are noncompliant.
  • Connection Request Policies. Connection request policies are conditions and settings that validate requests for network access and govern where this validation is performed.
  • RADIUS Clients and Servers. RADIUS clients are network access servers. If you specify a RADIUS client, then a corresponding RADIUS server entry is required on the RADIUS client device. Remote DHCP servers are configured as RADIUS clients on NPS.
  • Remediation Server Groups. Remediation server groups allow you to specify servers that are made available to noncompliant NAP clients so that they can remediate their health state and become compliant with health requirements. If these servers are required, they are automatically available to computers on the restricted access subnet when you add them to remediation server groups.

Configuring NAP

  • In the details pane, under Standard Configuration, click Configure NAP. The NAP configuration wizard will start
  • Choose Dynamic Host Configuration Protocol (DHCP) Note I already have DHCP installed on this test VM

NAPconfig2

  • You should then see the below

NAPconfig3

  • Choose the Radius clients. Note I already have DHCP installed so I just click Next

NAPconfig4

  • Click Add and type a name for your DHCP Scope. Mine is called DACMT scope

NAPconfig5

  • Configure Machine Groups. Just click Next

NAPconfig6

  • Choose Remediation Server Groups. Just click Next here

NAPconfig7

  • Define NAP Health Policy. Verify that Windows Security Health Validator and Enable
    auto-remediation of client computers check boxes are selected, and then click Next

NAPconfig8

  • On the Completing NAP Enforcement Policy and Radius Client Configuration screen, check the details and click Finish

NAPconfig9

Configure SHVs

SHVs define configuration requirements for computers that attempt to connect to your network.

  • In the Network Policy Server console tree, double-click Network Access Protection, and then click System Health Validators >
  • In the details pane, click Windows Security Health Validator.
  • In the Windows Security Health Validator Properties dialog box, click Settings.

NAPconfig10

  • Tick whichever Security Health Validations you want to enforce on your network

Enable NAP settings for the scope

  • In the DHCP console, double-click dacvtst001.dacmt.local, and then double-click IPv4
  • Right-click Scope [10.1.1.0] DACMT Scope, and then click Properties.
    On the Network Access Protection tab, under Network Access Protection Settings, choose Enable for this scope, verify that Use default Network Access Protection profile is chosen, and then click OK

NAPconfig11

Configure the default user class

Next, configure scope options for the default user class. These server options are used when a compliant client computer attempts to access the network and obtain an IP address from the DHCP server.

  • In the DHCP console tree, under Scope [10.1.1.0] DACMT Scope, right-click Scope Options, and then click Configure Options.
  • On the Advanced tab, verify that Default User Class is chosen next to User class.
  • Select the 006 DNS Servers check box, in IP Address, under Data entry, type 10.1.1.160, and then click Add.

DHCP1

  • Select the 015 DNS Domain Name check box, in String value, under Data entry, type dacmt.local, and then click OK.
  • The dacmt.local domain is a full-access network assigned to compliant NAP clients.

DHCP2

  • Note The 003 Router option is configured in the default user class if a default gateway is required for client computers. Because all computers in the test lab are located on the same subnet, this option is not required.

DHCP3

Configure the default NAP class

Next, configure scope options for the default network access protection class. These server options are used when a noncompliant client computer attempts to access the network and obtain an IP address from the DHCP server.  To configure default NAP class scope options

  • In the DHCP console tree, under Scope [10.1.1.0] DACMT Scope, right-click Scope Options, and then click Configure Options.
  • On the Advanced tab, next to User class, choose Default Network Access Protection Class.
  • Select the 006 DNS Servers check box, in IP Address, under Data entry, type 10.1.1.60, and then click Add.
  • Select the 015 DNS Domain Name check box, in String value, under Data entry, type restricted.dacmt.local, and then click OK. access network assigned to noncompliant NAP clients.
  • Note The 003 Router option is configured in the default NAP class if a default gateway is required for client computers to reach the DHCP server or remediation servers on a different subnet. Because all computers in the test lab are located on the same subnet, this option is not required.

Configure NAP client settings in Group Policy

The following NAP client settings will be configured in a new Group Policy object (GPO) using the Group Policy Management feature on NPS1:

  • NAP enforcement clients
  • NAP Agent service
  • Security Center user interface

After these settings are configured in the GPO, security filters will be added to enforce the settings on computers you specify. The following section describes these steps in detail

  • On dacvtst001, click Start, click Run, type gpme.msc, and then press ENTER.
  • In the Browse for a Group Policy Object dialog box, next to dacmt.local, click the icon to create a new GPO, type NAP Client Settings for the name of the new GPO, and then click OK.
  • The Group Policy Management Editor window will open. Navigate to Computer Configuration/Policies/Windows Settings/Security Settings/System Services.
  • In the details pane, double-click Network Access Protection Agent.
  • In the Network Access Protection Agent Properties dialog box, select the Define this policy setting check box, choose Automatic, and then click OK.

NAPconfig12

  • In the console tree, open Network Access Protection\NAP Client Configuration\Enforcement Clients.
  • In the details pane, right-click DHCP Quarantine Enforcement Client, and then click Enable.

NAPconfig13

  • In the console tree, navigate to Computer Configuration\Policies\Administrative Templates\Windows Components\Security Center.
  • In the details pane, double-click Turn on Security Center (Domain PCs only), choose Enabled, and then click OK.

NAPconfig14

  • Close the Group Policy Management Editor window.
  • If you are prompted to apply settings, click Yes

Configure security filters for the NAP client settings GPO

Next, configure security filters for the NAP client settings GPO. This prevents NAP client settings from being applied to server computers in the domain.

  • On dacvtst001, click Start, click Run, type gpmc.msc, and then press ENTER.
  • In the Group Policy Management Console (GPMC) tree, navigate to Forest: dacmt.local\Domains\Contoso.com\Group Policy Objects\NAP client settings.
  • In the details pane, under Security Filtering, click Authenticated Users, and then click Remove.
  • When you are prompted to confirm the removal of delegation privilege, click OK. In the details pane, under Security Filtering, click Add.
  • In the Select User, Computer, or Group dialog box, under Enter the object name to select (examples), type NAP client computers group, and then click OK.

NAPconfig15

  • Close the GPMC.

Microsoft App-V v5

APPV

What is Microsoft App-V?

Microsoft Application Virtualization is an application virtualization and application streaming solution from Microsoft

  • Allows applications to be deployed (“streamed”) in real-time to any client from a virtual application server
  • Removes the need for traditional local installation of the applications, although a standalone deployment method is also supported
  • The App-V stack sandboxes the execution environment so that an application does not make changes directly to the underlying operating system’s file system and/or Registry, but rather contained in an application-specific “bubble”
  • App-V applications are also sandboxed from each other, so that different versions of the same application can be run under App-V concurrently, and so that mutually exclusive applications can co-exist on the same system.
  • Supports policy based access control; administrators can define and restrict access to the applications by certain users by defining policies governing the usage.

App-V Deployment Options

Microsoft offers three deployment options. These three options are significantly different from an architectural standpoint: Dedicated App-V Management Server, Shared System Center Configuration Manager Architecture, and “Stand-alone” Mode wherein the application may be delivered manually.

Dedicated App-V management server

The App-V system architecture is composed of the following components:

  • ‘Microsoft Systems Center Virtual Application Server, also called App-V Application Server, which hosts virtualized application packages and streams them to the client computers for local execution. It also authorizes requesting clients and logs their application usage. Applications are converted to virtualized packages using the App-V Sequencer.
  • Microsoft Application Virtualization Client for Windows Desktops of MDOP) or Microsoft Application Virtualization Client for Remote Session Hosts (i.e. Terminal Services), which are generally called the App-V client, is the client side runtime which requests the application server to stream some application, receives the streamed virtual application packages, sets up the runtime environment and executes the applications locally.
  • App-V Management Console, the management tool to set up, administer and manage App-V servers. It can be used to define policies that govern the usage of the applications. It can also be used to create, manage, update and replicate virtualized application packages.
  • App-V Sequencer, a tool for preparing applications for virtualization.

Shared System Center Configuration Manager

In 2009 Microsoft offered a new way to implement App-V with enhancements to System Center Configuration Manager. System Center Configuration Manager Architecture consists of the following components:

  • System Center Configuration Manager Site Server, serving as the primary repository for holding system images, application packages created using traditional installers, and virtual applications.
  • System Center Configuration Manager Distribution Server, used to cache and distribute the software on a more local level.
  • Microsoft Application Virtualization Client for Windows Desktops of MDOP) or Microsoft Application Virtualization Client for Remote Session Hosts (i.e. Terminal Services), previously described.
  • App-V Sequencer, previously described.

“Stand-alone” mode

The App-V clients may also be used in a “stand-alone” mode without either of the server infrastructures previously described. In this case, the sequenced packages are delivered using an external technique, such as an Electronic Software Delivery system or manual deployment

Architecture Overview

A typical App-V 5.0 implementation consists of the following elements.

App-V2

General Diagram of App-V Infrastructure

appv02

Microsoft Application Virtualization 5 Administrator’s Guide

http://technet.microsoft.com/en-us/library/jj713487.aspx

Recommended Deployment Methods

The following list displays the recommended methods for installing the App-V 5.0 server infrastructure:

  • Install the App-V 5.0 server.
  • Install the database, reporting, and management features on separate computers. For more information
  • Use Electronic Software Distribution (ESD).
  • Install all server features on a single computer.

Installing the App-V 5.0 server

I am going to use my following test servers which are VMware Virtual Machines running on VMware vSphere 5.5.

  • 1 x Windows 2012 Server with SQL 2012, IIS 7.5 (Web Server role), Application Server role and Silverlight pre-installed which will also be my App-V 5 Server
  • 1 x Windows 2008 R2 AD server

IIS Settings

  • Common HTTP Features > Static Content
  • Common HTTP Features > Default Document
  • Application Development > ASP.NET
  • Application Development > .NET Extensibility
  • Application Development > ISAPI Extensions
  • Application Development > ISAPI Filters
  • Security > Windows Authentication
  • Security > Request Filtering
  • Management Tools > IIS Management Console

Run the following 2 commands to register ASP.NET with .NET 4 Framework in IIS

  1. “C:\Windows\Microsoft.Net\Framework\v4.0.30319\aspnet_regiis.exe” –ir
  2. “C:\Windows\Microsoft.Net\Framework64\v4.0.30319\aspnet_regiis.exe” -ir

Instructions

  • Copy the App-V 5.0 server installation files to the computer on which you want to install it on. To start the App-V 5.0 server installation right-click and run appv_server_setup.exe as an administrator. Click Install.

APPV1

  • On the Getting Started page, review the license terms. To accept the license terms select I accept the license terms. Click Next.

APPV2

  • On the Use Microsoft Update to help keep your computer secure and up-to-date page, to enable Microsoft updates, select Use Microsoft Update when I check for updates (recommended). To disable Microsoft updates, select I don’t want to use Microsoft Update. Click Next

APPV3

  • On the Feature Selection page, select all five of the components

APPV4

  • On the Installation Location page confirm the location where the selected components will be installed. You should accept the default. To change the location, type a new path on the Installation Location line. Click Next.

APPV5

  • On the initial Create New Management Database page configure the Microsoft SQL Server instance and Management Server database
  • If you are using a custom Microsoft SQL Server instance, select Use the custom instance and type the name of the instance. For example, the format should be INSTANCENAME and the installation will assume it is on the local computer.
  • Specifying the server name using the following format ServerName\INSTANCE is not supported.
  • If you are using a custom database name, select Custom configuration. and type the database name.
  • Note: The database name provided must be unique. If an existing database name is specified the installation will fail.

APPV6

  • On the Configure page, accept the default value: Use this local computer. Click Next.
  • Note: If you are installing the management server and management database side-by-side, options on this page are not available. In this scenario the appropriate options are selected by default and cannot be changed.

APPV7

  • On the initial Create New Reporting Database page configure the Microsoft SQL Server instance and Reporting Server database
  • If you are using a custom Microsoft SQL Server instance, select Use the custom instance and type the name of the instance. For example, the format should be INSTANCENAME and the installation will assume it is on the local computer.
  • Note: Specifying the server name using the following format ServerName\ INSTANCE is not supported
  • If you are using a custom database name, select Custom configuration. and type the database name.
  • Note: The database name provided must be unique. If an existing database name is specified the installation will fail.

APPV8

  • On the Configure page, accept the default value: Use this local computer. Click Next
  • Note: If you are installing the reporting server and reporting database side-by-side, options on this page are not available. In this scenario the appropriate options are selected by default and cannot be changed.

APPV9

  • On the Configure (Management Server Configuration) page, type the AD Universal Security group with sufficient permissions to manage the App-V 5.0 environment.
  • Note: You can add additional users or groups using the management console after installation. However, global security groups and Active Directory Domain Services (AD DS) distribution groups are not supported. You must use Domain local or Universal groups are required to perform this action.
  • On the Website name line specify the custom name that will be used to run the publishing service. If you do not have a custom name, do not make any changes.
  • For the Port binding, specify a unique port number that will be used by App-V 5.0, for example 12345. You should also ensure that the port specified is not being used by another website like the default IIS website using 80

APPV11

  • On the Configure Publishing Server Configuration page, Specify the URL for the management service. This is the address the publishing server uses to connect to. For example, http://localhost:12345.
  • Specify the Website Name that you want to use for the Publishing Service. Leave the default unchanged if you do not have a custom name.
  • For the Port binding, specify a unique port number that will be used by App-V 5.0, for example 54321. You should also ensure that the port specified is not being used by another website.

appv36

  • On the Reporting Server page, Specify the Website Name that you want to use for the Reporting Service. Leave the default unchanged if you do not have a custom name
  • For the Port binding, specify a unique port number that will be used by App-V 5.0, for example 55555. You should also ensure that the port specified is not being used by another website.

APPV13

  • On the Ready page, to start the installation, click Install.

APPV14

  • On the Finished page, to close the wizard, click Close.
  • To confirm that setup completed successfully, open a web browser, and type the following URL: http://<Management server machine name>:<Management service port number>/Console.html. For example, http://localhost:12345/console.html. If the installation succeeded the App-V 5.0 management console will be displayed without any errors

APPV15

  • And then you will see the following web console

APPV16

The App-V Management Server has a Silverlight®-based management site, which enables administrator configuration of the App-V infrastructure from any computer. By using this site, administrators can add and remove applications, manipulate shortcuts, assign access permissions to users and groups, and create connection groups. The App-V Management Server is the communication conduit between the App-V Web Management Console and the SQL Server data store

Also in a test environment, you may want to change the following registry settings on your publishing server. By default the Publishing Server polls the App-V database for published applications every 10 minutes (600 seconds). This is called a publishing refresh. change the publishing refresh interval to 10 seconds to reduce wait times during publishing. Evaluation of the correct interval for a production environment is outside the scope of this blog.

HKEY_LOCAL_MACHINE\SOFTWARE\Microsoft\AppV\Server\PublishingService PUBLISHING_MGT_SERVER_REFRESH_INTERVAL = 600 (default setting in seconds) PUBLISHING_MGT_SERVER_REFRESH_INTERVAL = 10 (common value used for test environment)

Create and Share a Content folder

The content share is the central library of App-V packages. The content store contains the source files of the packages published by the App-V publishing server.

  1. Open Windows Explorer.
  2. Create a folder on the root of the C: drive named Content.

NOTE: In the production environment, the content folder should not be placed on the same drive as the operating system files as it can affect performance of the system. Ensure the use of a different drive in a production environment.

  1. Browse to C:\, right click the Content folder, go to Properties.
  2. Click the Sharing tab, click Advanced Sharing.
  3. Check Share this folder. Click Permissions
  4. Click Add. Click Object Types. Select Computers. Click OK.
  5. In the Enter the object names to select box, enter the name of the App-V management server. Select Full Control and Click OK.
  6. In the Enter the object names to select box, enter the name of the NETWORK SERVICE account. Click OK. Select Full Control and Click OK.
  7. In the Enter the object names to select box, enter the name of the App-V management server and the AppV Administrators group. Select Full Control and Click OK.
  8. Click OK, Click OK, Click Close

Configure Windows Firewall to Allow Incoming Connections

  1. Open Control Panel, open Windows Firewall
  2. Click Advanced Settings.
  3. Click Inbound Rules, in the actions pane click New Rule…
  4. Select Port, click Next
  5. Select TCP, in the Specific local ports: field, enter your 3 port numbers, click Next
  6.  Click Next, Unselect Private, and Public, click Next
  7. In the Name field, enter AppV Server Connections, click Finish

Next

The next thing to do is to start installing and using the App-V 5 Sequencer and Microsoft Application Virtualization Desktop Client and/or the Microsoft Application Virtualization Remote Desktop Services (RDS) Client which I have covered in another blog. Please see below link

http://www.electricmonk.org.uk/2013/11/28/app-v-5-sequencing/

Microsoft Qualification Pathways

exam

This may prove helpful to those of you who are undertaking qualifications with Microsoft or upgrading qualifications.

Pathways

  • Client
  • Server
  • Database
  • Developer

exams

Roaming Profiles and Redirecting Folders on Windows Server 2008 R2Terminal Servers

redirect

What is a Roaming Profile?

A roaming user profile is user data, stored in a specific folder structure, to follow users as they log on to and log off from different computers. Roaming user profiles are stored on a central server location. At log on, Windows copies the user profile from the central location to the local computer. When the user logs off, Windows copies changed user profile data from the client computer to the central storage location. This ensures that the client data follows users as they roam the environment.

Roaming user profiles solve part of the roaming problem, but it also creates added concerns. User profiles can increase in size, some as large as 20 megabytes or more. This increase causes delays in user logons, because it takes some time for Windows to copy the information to the local computer. Another concern with roaming user profiles is that they are saved only at logoff. Therefore, when a user logs on to one computer and changes data within their profile, the changes remain local and remain local until the user logs off, making real-time access to user data challenging in a roaming user environment. Folder Redirection reduces some of these problems.

Folder Redirection

Folder Redirection is a client side technology that provides an ability to change the target location of predetermined folders found within the user profile. This redirection is transparent to the user and gives the user a consistent way of saving their data, regardless of its storage location. Folder Redirection provides a way for administrators to divide user data from profile data. This division of user data decreases user logon times, and Windows downloads less data. Windows redirects the local folder to a central location, giving the user immediate access to their data when they save it, regardless of the computer they are using. This immediate access removes the need to update the user profile.

Folder Redirection helps with slow logons and missing data problems because the Application Data, Desktop, My Documents, My Pictures, and Start Menu can be supported by Folder Redirection in Windows XP/Vista/7

Windows XP Profile Folder Locations

* These directories are hidden by default. To see these directories, change the View Options.

XPLocation2

Windows 7 Profile Folder Locations

  • The biggest change is the location of the profiles themselves – the user profiles are now located under c:\users\<username> instead of c:\documents and settings\<username>
  • Appdata – This is now a combination of c:\documents and settings\\application data\ and c:\documents and settings\\local settings\ – this folder contains three folders – “Local”, “LocalLow” and “Roaming”

7Location2

Setting up a Profile and Home Directory Folder Requirements

Note: Profiles and Home Directories can be on the same server

  • A Profile Server
  • A Home Directory Server

Instructions

When setting up the file server you need to be sure that the permission on the folder are setup so that a user can create a new folder however you also need to ensure that they can only see their own files.

Note: When creating the Share, it is Best Practice to add a $ sign to the end of the Share which will keep it hidden from regular users

  • Create a new folder and call it Profiles

profile folder

  • Click the Sharing tab and then click Advanced Sharing then click Permissions
  • Make sure the Everyone Group has Full Control
  • Make sure the Administrators Group has Full Control, you may have a differently named Admin Group so add as necessary
  • Make sure the SYSTEM group has Full Control

permissions

  • Click OK
  • Click on the Security Tab and Untick “Include inheritable permission form this object’s parent”
  • Click on the Security Tab and Select Advanced
  • Select Change Permissions and make sure your permissions look like the below screenprint and conform to the below information
  • Configure the folder to not inherit permissions and remove all existing permissions.
  • Add the file server’s local Administrators group with Full Control of This Folder, Subfolders, and Files.
  • Add the Domain Admins domain security group with Full Control of This Folder, Subfolders, and Files.
  • Add the System account with Full Control of This Folder, Subfolders, and Files.
  • Add the Creator/Owner with Full Control of Subfolders and Files.
  • Add the Authenticated Users group with both List Folder/Read Data and Create Folders/Append Data – This Folder Only rights. The Authenticated Users group can be replaced with the desired group, but do not choose the Everyone group as a best practice.

The share permissions of the folder can be configured to grant administrators Full Control and authenticated users Change permissions.

perms2

  • After you configure the share and security permissions, click on the Sharing tab and then the “Caching” button and select the “No Files or programs from the share folder are available offline” options then press OK then OK then Close.

caching

  • Next do exactly the same to create a shared folder for the Home Directory folder

Setting up a User account with a Profile Path Remote Desktop Profile Path and Home Directory

NOTE: This can be controlled by Group Policy but do it manually while you test a user

NOTE: I had to put the same path in the Profile Path and the Remote Desktop Services Profile Path to get full roaming profile on my folders

  • You configure the profile location for a user on the Profile or Remote Desktop Services Profile tab within Active Directory Users and Computers. Type a UNC path to where Windows should create the user profile. The following screen shots below give you an example a user account configured with a profile path and a Remote Desktop Services Profile
  • The folder redirection client side extension is only able to process two environment variables: %username% and %userprofile%. Other environment variables such as %logonserver%, %homedrive% and %homepath% will not work with folder redirection.

profiles2

  • And also add the same for the Remote Desktop Services Profile (Note this can be controlled by Group Policy as detailed at the end of this document. For now, I’ve just added it in manually so you can see where it is)

rdprofile

Setting up Group Policy for re-directing User Profile folders

  • To start the Group Policy snap-in from the Active Directory Users and Computers snap-in, click Start, point to Programs, click Administrative Tools, and then click Group Policy Management
  • In the MMC console tree, right-click the domain or the OU for which to access Group Policy and select  Create a GPO in this domain and link it here
  • Click New, and type the name to use for the GPO. For example, type Roaming Profile GPO
  • Expand the OU so you can see the new Policy and right click and Edit to open the Group Policy
  • Click Edit to open the Group Policy snap-in and edit the new GPO
  • In the Group Policy console, expand the User Configuration, Policies, Windows Settings, and Folder Redirection nodes. Icons for the personal folders that can be redirected will be displayed

gpfolders1

  • Right click on AppData (Roaming) and select Properties
  • There are 3 settings to choose from –  Not Configured, Basic Redirection and Advanced Redirection

Basic Redirection and Advanced Redirection are available to all folders listed in the snap-in. You use basic redirection when you store the selected folder in the Group Policy object on the same share for all users. You use Advanced Redirection when you want to redirect the selected folder to a different location based on a security group membership of the user. For example, you would use Advanced Folder Redirection when you want to redirect folders belonging to the Accounting group to the Finance server and folders belonging to the Sales group to the Marketing server

  • Choose Basic – Redirect everyone’s folder to the same location
  • Choose Create a folder for each user under the root path
  • Type the root path to the shared folder

appdatar

  • Click Settings
  • Untick Grant the User Exclusive rights to AppData(Roaming)

If you leave “Grant the user exclusive rights to Documents” ticked then when the folder is initially setup Windows will block inheritance on the folder and grant exclusive access to the users on these files. This will lockout even administrators to the files which makes administration of these folders very difficult. If an administrator did need to access these files they will need to take ownership which in turn removes access from the users to their files. The admin will then need to ensure that they need to re-setup the permission on the folder to ensure that they users can still access the files.

gpappdatasettings

  • Only apply redirection policy when you have multiple O/S’s
  • Generally recommended for Policy Removal to Leave the folder in the new location when the policy is removed
  • The Pictures, Music and Videos Properties page provides an additional options for the folder as seen in the below screenprint: Follow the Documents Folder

gppictures

  • When it comes to the My Documents/Documents folder there are several options again
  • Note: Unlike Windows 2000, you do not need to type in the %username% variable. The folder redirection code will automatically create a My Documents folder for each user, inside a folder based on their user name. For example, type \\FolderServer\MyDocumentsFolders rather than \\FolderServer\MyDocumentsFolders\%username% as you would on Windows 2000.

docsnew1

  • Click the Settings Tab
  • By default, Administrators do not have permissions to users’ redirected folders. If you require the ability to go into the users folders you will want to go to the “Settings” Tab, and uncheck: “Grant the user exclusive rights to” on each folder that is redirected. This allows Administrators to enter the users redirected folder locations without taking ownership of the folder and files.

docsnew2

  • Note: If you already have a shared home folder as we set up earlier, it is best not to select Redirect to the Users Home Directory. See Link below for more info

http://support.microsoft.com/kb/321805

gpdocuments_homedir

  • Go through all the rest of the folders you want to redirect
  • Finish

When you enable folder redirection for users for the first time, you will find the logon to be very slow. You are in effect copying the contents of all the user’s personal folders across the network to the server and you can imagine the effect if you are doing this for multiple users at the same time when the login. Before applying this policy to an OU containing hundreds of users, it may be worth creating a new OU and migrating a few users at a time across and will also help you troubleshoot easier without thousands of helpdesk calls about profiles.

You can enable Access based Enumeration however if there is going to a lot of user folders on any one of these shares you could experience degradation of performance. Enabling ABE on a share does come at a price of performance

Other Group Policy Settings

  • Setting the same Roaming Profile path for all users logging on

Navigate to Computer Configuration > Policies > Administrative Templates > System > User Profiles and enable the “Set roaming profile path for all users logging onto this computer” and configure the path to the shared folder for profiles.

gp1

  • Add the Administrators Security Group to roaming user profiles

Navigate to Computer Configuration > Policies > Administrative Templates > System > User Profiles and enable the “Add the Administrators Security Group to roaming user profiles”

gp2

  • Set Path for the Remote Desktop Services Roaming User Profile

Navigate to Computer Configuration > Policies > Administrative Templates > Windows Components > Remote Desktop Services > Remote Desktop Session Host\Profiles

rdgp

  • Set Remote Desktop Services User Home Directory

Navigate to Computer Configuration > Policies > Administrative Templates > Windows Components > Remote Desktop Services > Remote Desktop Session Host\Profiles

rdhome2

  • Background upload of a roaming profile’s registry while user is logged on

Navigate to Computer Configuration > Policies > Administrative Templates > System > User Profiles > Background upload of a roaming profile’s registry while user is logged on

sync

  • User Group Policy loopback processing mode

Navigate to: Computer Configuration > Policies > Admin Templates > System > Group Policy and change the following setting: User Group Policy loopback processing mode to Replace

loopback

Quotas

Quotas on Profile and Home Directories can be controlled to stop them growing large. Please see the following Blog post for details on setting this up

http://www.electricmonk.org.uk/?s=quota

Issues

  • If you set the Group Policy Computer Configuration > Administrative Templates > Windows Components > Remote Desktop Services > Remote Desktop Session Host > Profiles > Set Remote Desktop Services User Home Directory as per below

gpo

and

gpo2

  • You will get a folder mapped which is actually \\server\homedrive%username%.%domain%
  • The username only folder which is what you actually want when it is mapped not the username.domain folder is created just after the username.domain folder, this is actually when the redirection policy is running. The folder redirection is creating the username directory and you will see the redirected folders underneath this. If you try redirecting to %username%.%userdomain% it starts to mess redirection up.

What can you do?

  • You could live with the fact that your \\server\homedrive\%userame% folder is holding the redirected folders and
  • You could live with the fact that your \\server\homedrive%username%.%domain% folder is the offiical GPO created tshome folder
  • But you can not set this policy at all and simply leave it as unconfigured and set the home drive on the user’s AD Profile as per below
  • Then it setups correctly and you’ll see all your redirected folders in here as well.

gpo3


Should you delete files in the \WinSXS directory?

92736_340

Recently following a clear out of my Windows 7 64bit laptop and running TreeSize to locate offending large files and folders, I found a 6GB folder called WinSXS. Not having a clue about what this folder was, I decided to investigate..

First of all “Can I delete the \Windows\Winsxs directory?”

To answer the question, the answer is actually: No.

Why?

Because the component store (\Winsxs) is needed to repair the OS binaries in the event that a file becomes corrupted or, in worst case scenarios, compromised.  There are a few directories in the component store so let’s look at them and what their general role is in Windows. WinSxS folder replaces the old $NTUninstall folders from XP which is one of the reasons it grows after installing Updates

  1. \Winsxs\Catalogs:  Contains security catalogs for each manifest on the system
  2. \Winsxs\InstallTemp: Temporary location for install events
  3. \Winsxs\Manifests: Component manifest for a specific component, used during operations to make sure files end up where they should
  4. \Winsxs\Temp: Temp directory used for various operations, you’ll find pending renames here
  5. \Winsxs\Backup: Backups of the manifest files in case the copy in \Winsxs\Manifests becomes corrupted
  6. \Winsxs\Filemaps: File system mapping to a file location
  7. \Winsxs\<big_long_file_name>: The payload of the specific component, typically you will see the binaries here.

Explanation

The Windows component store (C:\Windows\winsxs) directory is used during servicing operations within Windows installations.  Servicing operations include, but are not limited to, Windows Update, Service Pack and hotfix installations.

The component store contains all of the files needed for a Windows installation and any updates to those files are also held within the component store as they are installed.  This will cause the component store to grow over time as more updates, features or roles are added to the installation.  The component store utilizes NTFS hard links between itself and other Windows directories to increase the robustness of the Windows platform.

The component store will show a large directory size due to the way the Windows Explorer shell accounts for hard links.  The Windows shell will count each reference to a hard link as a single instance of the file for each directory the file resides in. For example, if a file named advapi32.dll was 700 KB in size and was contained in the component store and the \Windows\system32 directory, Windows Explorer would inaccurately report that it consumes 1400 KB of hard disk space

The component store cannot reside on another volume other than the system volume due to the use of NTFS hard links.  Attempting to move the component store will result in the inability to properly install Windows updates, Service Packs, roles or features.  Additionally, it is not recommended that files be manually removed or deleted from the component store.

To reduce the size of the component store directory on a Windows installation you can choose to make the service pack installation permanent and reclaim used space from the Service Pack files.  Doing this will make the Service Pack permanent and it will not be removable.

To remove the Service Pack files from a Windows installation use the following in-box utilities:

  • Windows Vista Service Pack 1 installed: VSP1CLN.EXE
  • Windows Vista Service Pack 2 or Windows Server 2008 Service Pack 2 installed: Compcln.exe
  • Windows 7 Service Pack 1 or Windows Server 2008 R2 Service Pack 1 installed: DISM /online /Cleanup-Image /SpSuperseded or Disk Cleanup Wizard (cleanmgr.exe)

Scavenging may also be proactively performed on Windows Vista and Windows 2008 installations by forcing a removal event on the system.  Scavenging will attempt to remove any unneeded system binaries from the installation and allow Windows to reclaim the disk space.  To issue an uninstall event on a Windows installation, simply add and remove any unneeded system component that is not already installed and reboot the Windows installation.  Scavenging will be performed during the subsequent reboot of the operating system.

NOTE: Scavenging is performed automatically on Windows 7 and Windows 2008 R2 installation

SQL Server 2008 Clustering

This post follows on from the previous post regarding the setup of Microsoft Windows Clusters which will be required before you can set up Microsoft SQL Clustering

Pre Requisites

  • You must have installed Microsoft .NET Framework on both nodes in the cluster – On the Windows Server, you can go to Add Features and select Microsoft .NET 3.5 SP1
  • Create all necessary SQL Server Active Directory Groups for the relevant SQL Server Services (SQL Agent, DB Agent, Analysis Services) Note that Reporting Services/Integration Services are not cluster aware but you can install it to be used with just this server
  • Make sure all patching and software updates are current
  • You must be running Microsoft Enterprise/Datacenter edition
  • Please see the table below for an example of the amount of NICs and different subnets required for a 2 Node Windows/SQL Cluster

Number of Nodes supported by SQL Server versions

Instructions for Node 1

  • On Node 1, connect the SQL Server 2005/2008 ISO or installer
  • Click Setup and choose New SQL Server Failover Cluster Installation

  • Select to Install Setup Support Rules

  • If you get a Network Binding error and your bindings all look correct with the LAN NIC at the top correctly then please try modifying the registry. It looks like sometimes the system takes the Virtual Cluster adapter to be the top binding but this is not visible from Network Connections Window when you go into Advanced settings
  • Drill down to HKEY_LOCAL_MACHINE\SYSTEM\CurrentControlSet\services\Tcpip\Linkage and open up the Bind value and move the LAN ID to the top

  • Setup Support Files
  • Select Product Key
  • On Feature, Select Database Engine Services, Replication Services and Analysis Services
  • Note that Reporting Services/Integration Services are not cluster aware but you can install it to be used with just this server
  • On Instance Configuration, you need to enter a SQL Server Network Name like SQLCLUSTER
  • Keep the default instance or choose a new instance
  • You can change the Instance Root Directory if you wish also *NEED TO CHECK THIS
  • Click Next
  • On the Cluster Resource Group, you can keep the settings
  • In the Cluster Disk Selection, Select the disks you want to use for SQL DB and SQL Logs (Make sure both are ticked!!!)
  • Next the Cluster Network Configuration

  • Untick DHCP and provide a new IP Address and Subnet
  • On Cluster Security Policy, keep Use Service SSIDs

  • On Service Accounts, please fill in the AD accounts you previously created for SQL Server Agent and SQL Server DB Engine
  • Check Collation is as you want it – Usually Latin1_General_C1_AS
  • In Database Engine Configuration, select Mixed mode and add a password for sa and add the current user
  • Click the Data Directories Tab and configure these paths as appropriate

  • Enable Filestream if you want
  • On Error and Usage Configuration
  • Next
  • Next
  • Install

Instructions for Node 2

  • Choose Add Node to a SQL Server Failover Cluster

  • Next
  • Put in Product Key
  • Accept Licensing
  • Install Setup Support Files
  • Check Setup Support Rules
  • On the Cluster Node Configuration, check this is all correct

  • Enter password for SQL Server Engine and SQL Server Agent account
  • Click Next on Error Reporting
  • Click Next on Add Node Rules
  • Click Install
  • Complete and Close

Testing Failover

  • Log into the SQL Server and open SQL Management Studio. Test a query against your DB
  • Open Failover Cluster Manager
  • Go to Services and Applications
  • Click on SQL Server (Cluster Name)

  • Select Move this Application or Service to another node.
  • Once this has transferred, do the same query test on the second server and make sure everything works as expected.
  • If so then Failover is working correctly
  • Go to vCenter and create a new HA rule keeping these DB Servers running on separate hosts for the ultimate in failover 🙂

Note: If you find you want to clear the Event Logs post Installation and have a fresh start, then you will need to clear the logs from both servers then close Failover Cluster Manager and restart it.

Useful Articles

capture


Testing Microsoft Failover Clustering on VMware Workstation 8 or ESXi4/5 Standalone

VMware Workstation and vSphere ESXi (Free Version) are the ultimate flexible tools for testing out solutions such as Microsoft Failover Clustering. I wanted to test this out myself before implementing this on a live VMware environment so I have posted some instructions on how to set this up step by step.

Pre-Requisites

Note: This test environment should not be what you use in a Production environment. It is to give you a way of being able to work and play with Windows Clustering

Note: Failover Clustering feature is available with Windows Server 2008/R2 Enterprise/Data Center editions. You don’t have this feature with the Standard edition of Windows Server 2008/R2.

Note: You also need a form of Shared Storage (FC or iSCSI) There are very good free solutions by Solarwinds and Freenas as per the links below you can download and use for testing

Note: To use the native disk support included in failover clustering, use basic disks, not dynamic disks and format as NTFS

  • VMware Workstation 8 (If you are a VCP 4 or 5, you will have a free VMware Workstation license)
  • Setup 1 Windows 2008 R2 Domain Controller Virtual Machine with Active Directory Services and a Domain
  • Setup 1 x Windows Server 2008 R2 Virtual Machine for Node 1 of the Windows Cluster with 2 NICs
  • Setup 1 x Windows Server 2008 R2 Virtual Machine for Node 2 of the Windows Cluster with 2 NICs
  • 1 x Freenas Virtual Machine (Free Storage Virtual Machine in ISO format) We will not be using this in this demo but it is also a very good free solution for creating Shared Storage for Testing
  • http://www.freenas.org/
  • 1 x Free Starwind ISCSI SAN edition (Requires a corporate email registration) This is what we will be using in this demo (Version 6.0.4837)
  • http://www.starwindsoftware.com/starwind-free

Instructions

  • Make sure all Virtual Machine are joined to the domain
  • Make sure all Virtual Machines are fully updated and patched with the latest S/W updates
  • On the first network adapter rename this as Public and on the second adapter, rename this as Private or MSCS Heartbeat
  • On the first network adapter, add the static IP address, Subnet Mask, Gateway and DNS
  • On the second network adapter, just add the IP Address and Subnet Mask
  • Go back to the original screen and untick the following boxes
  • Clear the Client for Microsoft Networks
  • Clear the File and Printer Sharing
  • Clear QOS Packet Scheduler
  • Clear Link Layer Toplogy checkboxes

Link Layer

  • Click Properties on Internet Protocol Version 4 (TCP/IPv4)

  • Click the DNS tab and clear the Register this Connection’s Addresses in DNS

DNS

  • Select the WINS tab and clear the Enable LMHOSTS Lookup checkbox

LMHOSTS

  • After you configured the IP addresses on every network adapter verify the order in which they are accessed. Go to Network Connections click Advanced > Advanced Settings and make sure that your LAN connection is the first one. If not click the up or down arrow to move the connection on top of the list. This is the network clients will use to connect to the services offered by the cluster.

BINDING

  • Make sure you note down all IP Addresses as you go along. This is always handy
  • Disable the Domain Firewall on both Windows Servers
  • At this point, you can choose whether to use Freenas or Starwind. I will be continuing with Starwind but you can follow the Freenas instructions as per below link if you are more familiar with this
  • http://www.sysprobs.com/nas-vmware-workstation-iscsi-target
  • Install the Starwind Software on your Domain Controller
  • Highlight Starwind Server and select Add Host which will be the DC
  • Click General and Connect
  • Put in root and the Password is starwind
  • Go to Registration – Load License which you should have saved from your download
  • Select Devices in the left and Pane, right click and Add a new device to the target. The wizard opens as below. Select Virtual Hard Disk

  • Click Next and Select Image File Device

  • Click Next and Create new Virtual Disk

  • Select the radio button at the end of the New Virtual Disk Location

  • The below window will open

  • Create a new folder called StarwindStorage

  • Type in the first name quorum.img so it all looks like the bottom

  • Edit the size to what you want

  • Next

  • Next

  • Next, type an alias name > Next

  • Next

  • Finish

  • Do the exact procedure above for SQLData
  • Do the exact procedure above for SQLLogs
  • Do the exact procedure above for MSDTC
  • You need to add MSDTC to every Windows Cluster you build. It ensures operations requiring enlisting resources such as COM+ can work in a cluster. It is recommended that you configure MSDTC on a different disk to everything
  • The Quorum Database contains all the configuration information for the cluster
  • Go on to your first Windows Server
  • Click Start > Administration Tools > iSCSI Initiator. If you get the message below, just click Yes

  • Click the Discovery Tab > Add Portal
  • Add the Domain Controller as a Target Portal
  • Click the Targets Tab and you will see the 4 disks there
  • Login to each disk clicking Automatically Restore this Connection
  • Go to Computer Management > Click Disk Management
  • Make all 4 disks online and initialized
  • Right click on each select create Simple Volume
  • Go to the second Windows Server
  • Click Start > Administration Tools > iSCSI Initiator
  • Click the Discovery Tab > Add Portal
  • Add the Domain Controller as a Target Portal
  • Click the Targets Tab and you will see the 4 disks there
  • Login to each disk clicking Automatically Restore this Connection
  • Go to Computer Management > Click Disk Management
  • Don’t bring the disks online, don’t do anything else to the disks on the second server
  • Go back to the first Windows Server
  • Select Server Manager > Add Features > Failover Clustering
  • Go back to the second Windows Server
  • Select Server Manager > Add Features > Failover Clustering

  • Once installed on the second server, go back to the first Windows Server
  • To open Failover Clustering, click on Start > Administrative Tools > Failover Cluster Manager

  •  Click on Validate a configuration under management.
  • When you click on Validate a Configuration, you will need to browse and add the Cluster nodes, these are the 2 Windows servers that will be part of the cluster, then click Next
  • Select Run all tests and click Next

  • Click Next
  • Review the validation report, as your configuration might have few issues with it and needs to be addresses before setting up your cluster

  • Your  configuration is now validated and you are ready to setup your cluster.
  • Click on the second option, Create a Cluster, the wizard will launch, read it and then click Next

  • You need to add the names of the servers you want to have in the cluster

  • After the servers are selected, you need to type a Cluster name and IP for your Cluster
  • Put this cluster name and IP in your DNS server

  •  Next
  • Next
  • Finish
  • Open Failover Cluster Manager and you will see your nodes and setting inside the MMC. Here you can configure your cluster, add new nodes, remove nodes, add more disk storage and any other administration
  • If you want to install SQL Server clustering, we will need to install a MSDTC Service
  • Go to Services and Applications – right click and select “Configure a service or application

  • Select the DTC and click next
  • On the Client Access Point page, enter a Name and an IP address to be used by the DTC, and then click Next.
  • Put the DTC Name and IP Address in your DNS Server

  • If you find that it has taken the wrong disk for your Quorum Disk, you will need to do the following
  • Right click on the cluster and select More Actions
  • Configure Cluster Quorum Settings
  • Click Next
  • On the next Page – Select Quorum Configuration
  • Keep Node and Disk Majority

  • On Configure the Storage Witness, select the drive that should have been the Quorum drive
  • Now you should be completely set up for Windows Clustering. Have a look through all the settings to familiarise yourself with everything.

Next Post

My next post will contain Instructions on on how to setup SQL Server clustering. You should have this environment set up first before following on with installing SQL Server.

YouTube Videos

These videos are extremely useful as quidance to this process

http://www.youtube.com/watch?v=7onR2BjTVr8&feature=relmfu

http://www.youtube.com/watch?v=iJy-OBHtMZE&feature=relmfu

http://www.youtube.com/watch?v=noJp_Npt7UM&feature=relmfu

http://www.youtube.com/watch?v=a27bp_Hvz7U&feature=relmfu

http://www.youtube.com/watch?v=B2u2l-3jO7M&feature=relmfu

http://www.youtube.com/watch?v=TPtcdbbnGFA&feature=relmfu

http://www.youtube.com/watch?v=GNihwqv8SwE&feature=relmfu

http://www.youtube.com/watch?v=0i4YGr0QxKg&feature=relmfu

http://www.youtube.com/watch?v=2xsKvSTaVgA&feature=relmfu

http://www.youtube.com/watch?v=Erx1esoTNfc&feature=relmfu

Windows XP Mode

What is it?

Windows XP Mode is a downloadable compatibility Mode option that is available for

  • Windows 7 Professional
  • Windows 7 Enterprise
  • Windows 7 Ultimate

Windows XP Mode allows you to use the latest version of Microsoft Virtual PC to allow you to run an installation of XP virtually under Windows 7. All the applications you install on the Windows XP Mode client will be available automatically on the Windows 7 computer. It looks like it is executing directly on the Win7 machine

Windows XP Mode provides an x86 version of Windows XP Professional SP3 and does not support x64 virtual clients so you cannot use this for 64bit apps. Almost all programs compatible with Windows Vista, and the majority of Windows XP programs, run well in Windows 7. If a program doesn’t, first try the Program Compatibility troubleshooter. It can fix several problems and is included in all versions of Windows 7.

Requirements

  • A processor which supports hardware virtualisation using either the AMD-V or Intel VT Option
  • Minimum 2GB RAM

Installation of software

  • Download and Install Windows XP Mode
  • Download and Install Windows Virtual PC
  • Start Windows XP Mode client from the Virtual PC folder of the start menu
  • Install the application you want
  • You can then start it from the Virtual Windows XP Applications folder of the Start Menu
  • You can also copy work between the 2 sessions
  • You can place the program on the taskbar if required
  • Install a version of antivirus as you are not covered even if your Win 7 machine has AV

Link

http://www.microsoft.com/windows/virtual-pc/

User Profiles and configuring Roaming Profiles

Introduction:

This blog post contains a high-level overview of different types of profiles, considerations for choosing a profile solution for your deployment, highlights of new profile features in Windows Server 2008 R2, and a best practices recommendation for deploying roaming user profiles with folder redirection in a Remote Desktop Services environment.

Terminology

Below are some basic definitions for background understanding of different types of profiles and folder redirection.

Local user profiles

A local user profile is created the first time a user logs on to a computer. The profile is stored on the computer’s local hard disk. Changes made to the local user profile are specific to the user and to the computer on which the changes are made.

Roaming user profiles

A roaming user profile is a copy of the local profile that is copied to, and stored on, a server share. This profile is downloaded to each computer a user logs onto on a network. Changes made to a roaming user profile are synchronized with the server copy of the profile when the user logs off. The advantage of roaming user profiles is that users do not need to create a profile on each computer they use on a network.

Mandatory user profiles

A mandatory user profile is a type of profile that administrators can use to specify settings for users. Only system administrators can make changes to mandatory user profiles. Changes made by users to desktop settings are lost when the user logs off. Mandatory profiles can be created from roaming or local profiles.

Temporary User Profiles

A temporary user profile is issued each time an error condition prevents the user’s profile from loading. Temporary profiles are deleted at the end of each session, and changes made by the user to desktop settings and files are lost when the user logs off. Temporary profiles are only available on computers running Windows 2000 and later.

Folder Redirection

Folder redirection is a client-side technology that provides the ability to change the target location of predetermined folders found within the user profile. This redirection is transparent to the user and gives the user a consistent way of saving their data, regardless of its storage location. Folder redirection provides a way for administrators to divide user data from profile data. This division of user data decreases user logon times because Windows downloads less data. Windows redirects the local folder to a central location, giving the user immediate access to their data when they save it, regardless of the computer they are using. This immediate access removes the need to update the user profile.

There are two primary benefits to Folder Redirection as it applies to profile data:

  1. When used with roaming profiles, it can significantly reduce the size of the portable profile data carried around by users for logon/logoff. Since these folders are redirected to network shares, you trade local I/O impact for network/remote I/O impact. This can be very helpful on disk-constrained deployments.
  2. Using Folder Redirection with mandatory profiles allows users to have some control/persistence of customization such as application configuration settings (AppData) or IE Favorites.

Useful Links

  • Managing Roaming User Data Deployment Guide

http://go.microsoft.com/fwlink/?LinkId=73760

  • User Profiles on Windows Server 2008 R2 Remote Desktop Services

http://blogs.msdn.com/b/rds/archive/2009/06/02/user-profiles-on-windows-server-2008-r2-remote-desktop-services.aspx