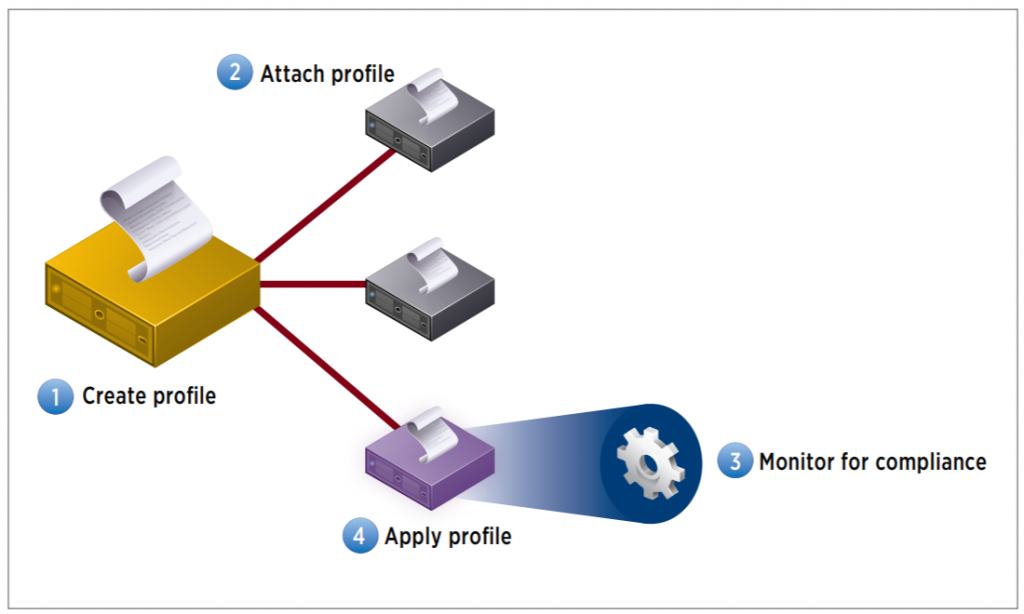
What is AutoDeploy?
vSphere Auto Deploy lets you provision hundreds of physical hosts with ESXi software.
Using Auto Deploy, administrators can manage large deployments efficiently. Hosts are network-booted from a central Auto Deploy server. Optionally, hosts are configured with a host profile of a reference host. The host profile can be set up to prompt the user for input. After boot up and configuration complete, the hosts are managed by vCenter Server just like other ESXi hosts.
Types of AutoDeploy Install
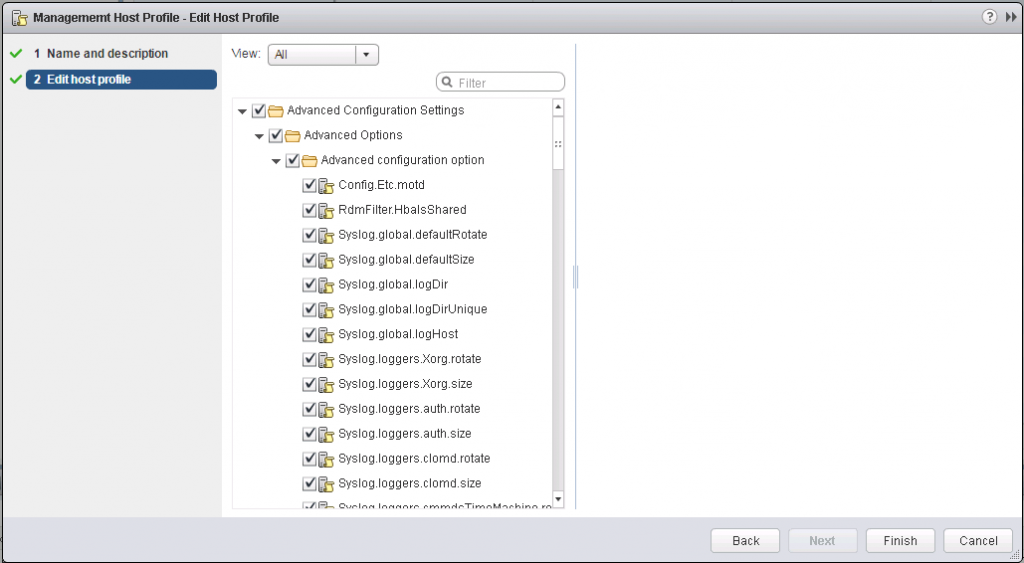
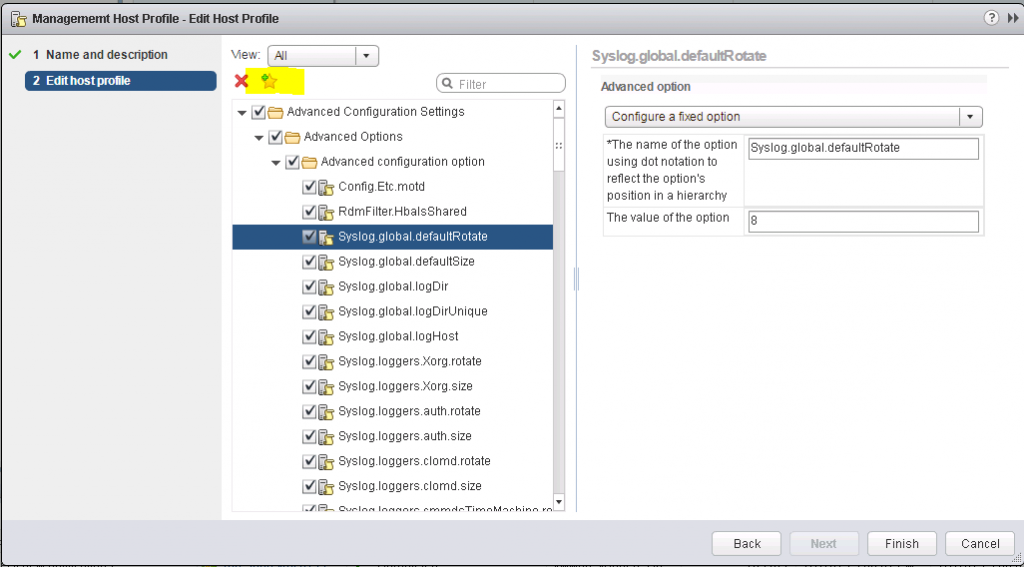
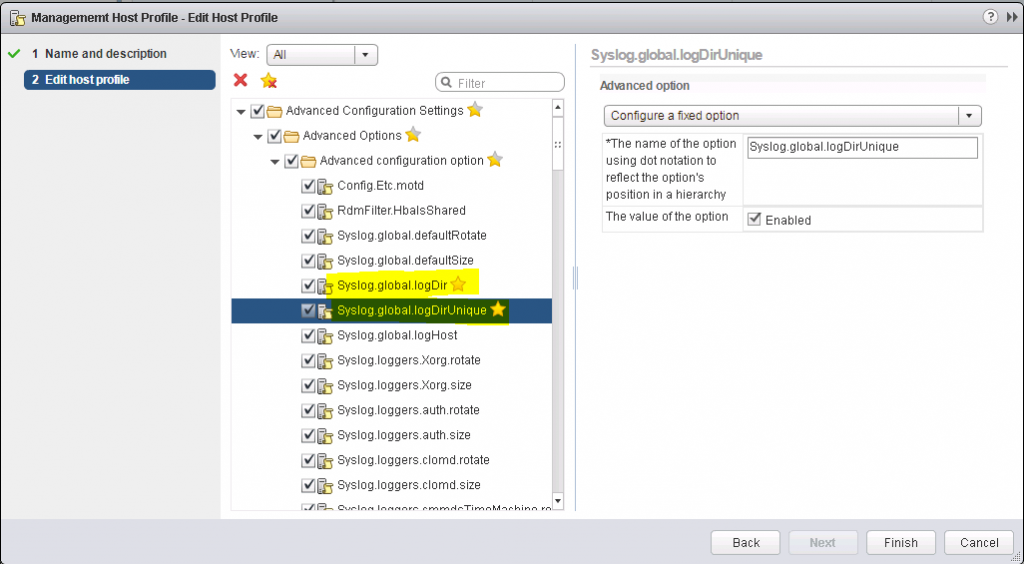
Auto Deploy can also be used for Stateless caching or Stateful install. There are several more options than there were before which are shown below in a screen-print from a host profile.
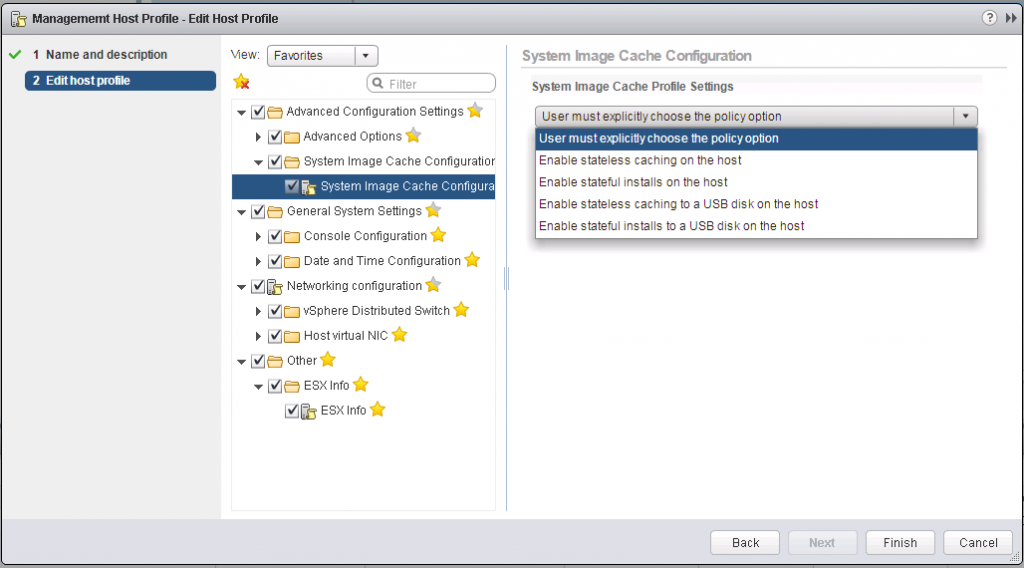
What is stateless caching?
Stateless caching addresses this by caching the ESXi image on the host’s local storage. If AutoDeploy is unavailable then the host will boot from its local cached image. There are a few things that need to be in place before stateless caching can be enabled:
- Hosts should be set to boot from network first, and local disk second
- Ensure that there is a disk with at least 1 GB available
- The host should be set up to get it’s settings from a Host Profile as part of the AutoDeploy rule set.
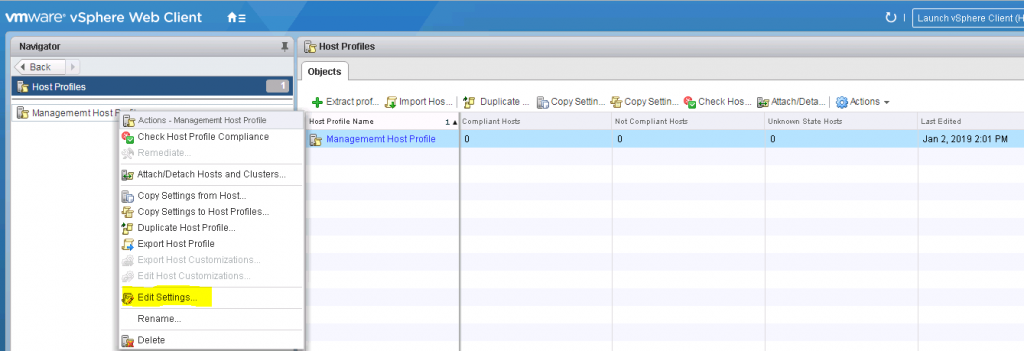
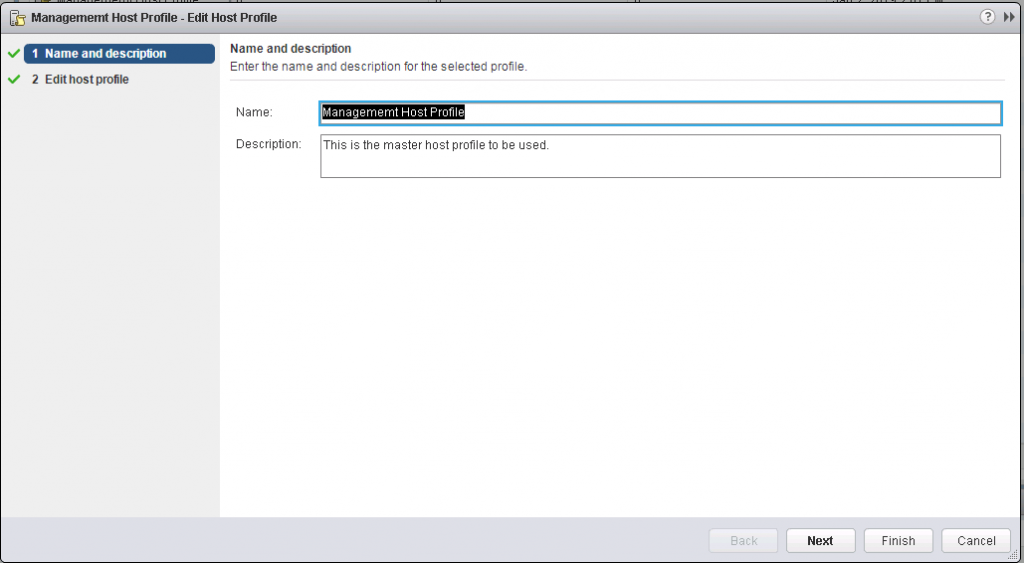
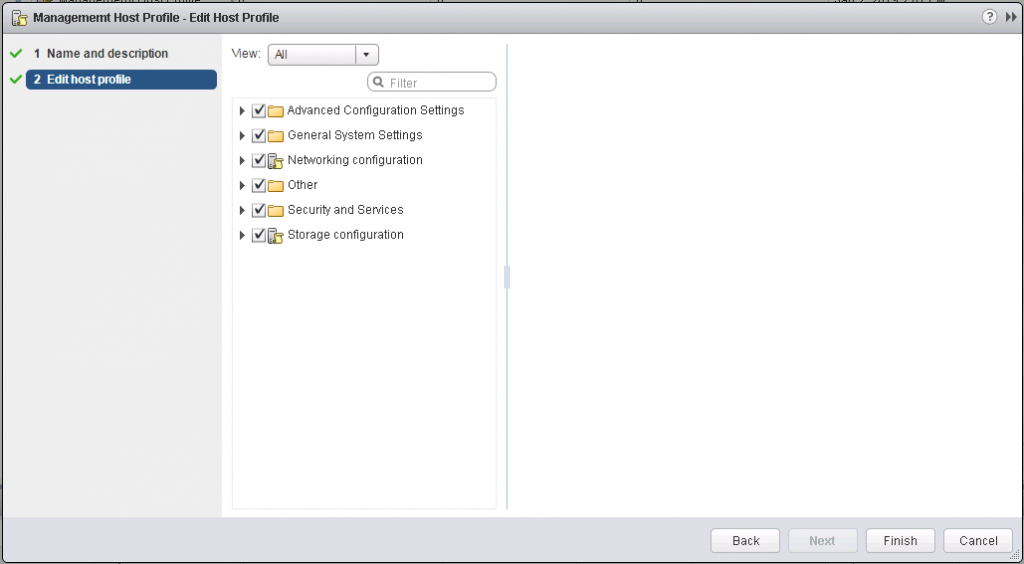
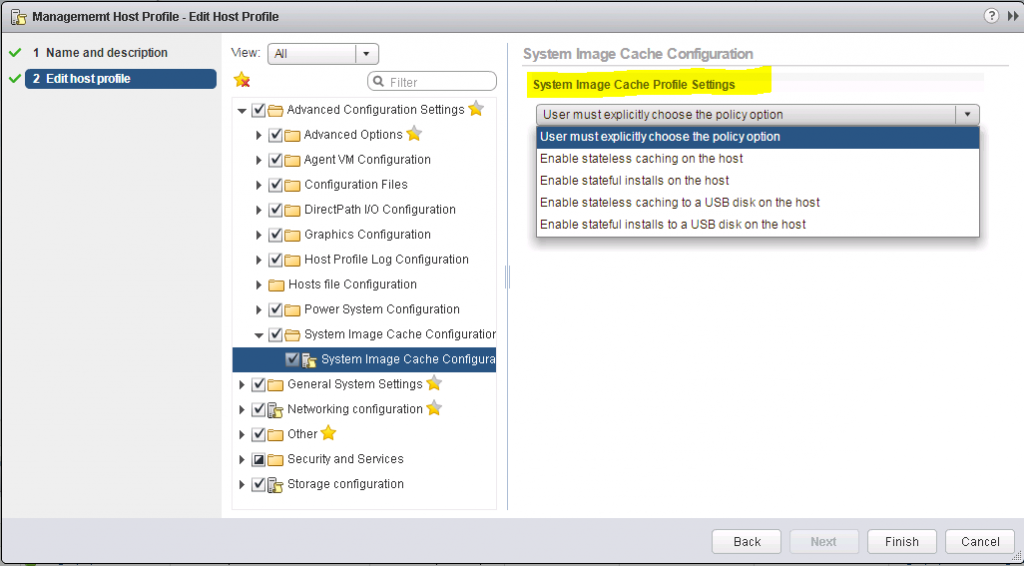
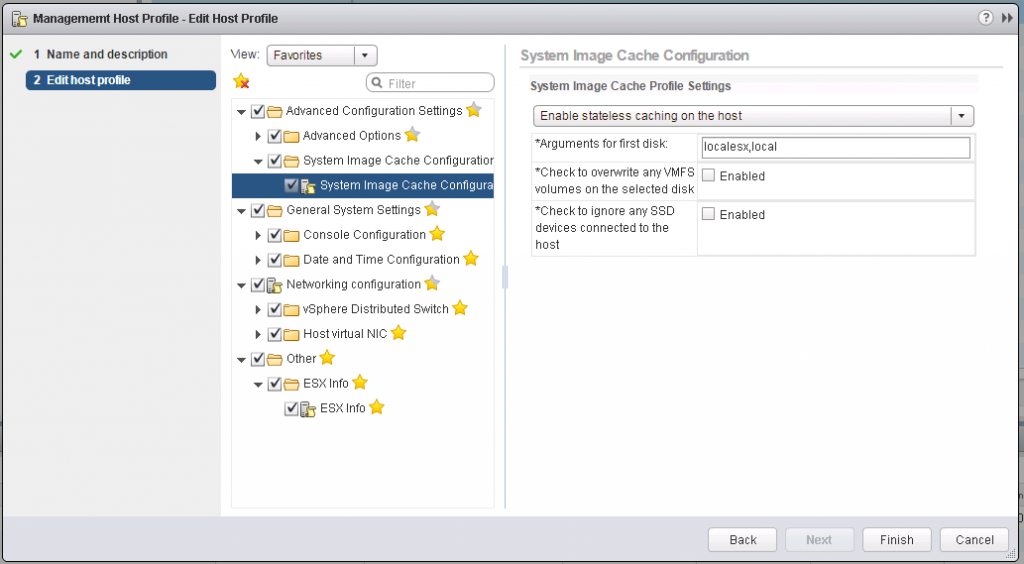
To configure a host to use stateless caching, the host profile that it will receive needs to be updated with the relevant settings. To do so, edit the host profile, and navigate to the ‘System Image Cache Profile Settings’ section, and change the drop-down menu to ‘Enable stateless caching on the host’
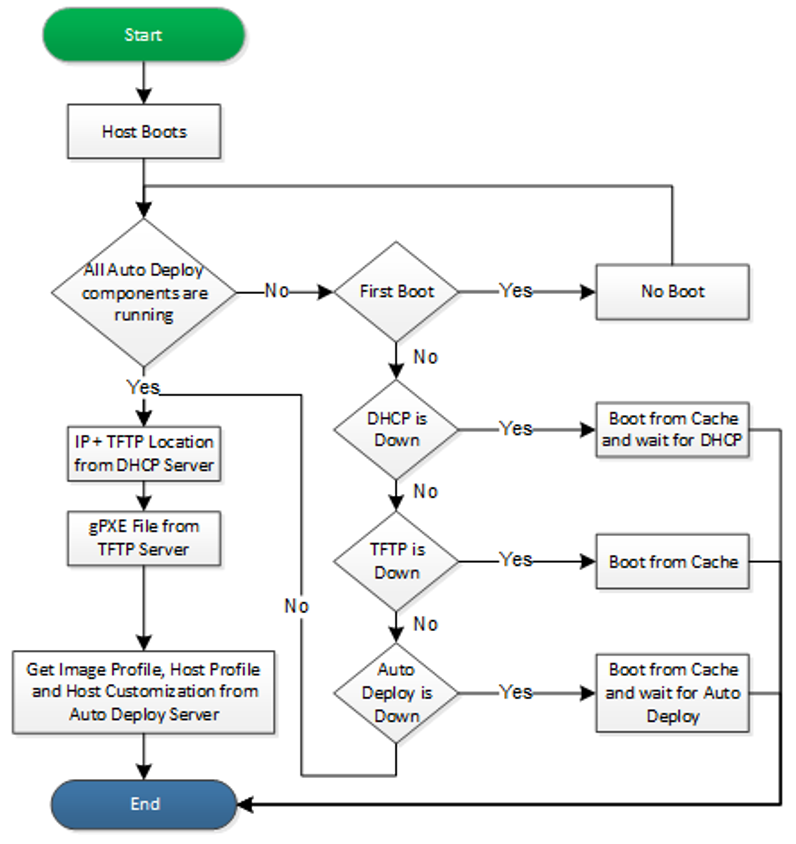
Stateless caching can be seen in the below diagram
What is Stateful Caching?
It is also possible to have AutoDeploy install ESXi. When the host first boots it will pull the image from the AutoDeploy server, then on all subsequent restarts the host will boot from the locally installed image, just as with a manually built host. With stateful installs, ensure that the host is set to boot from disk firstly, followed by network boot.
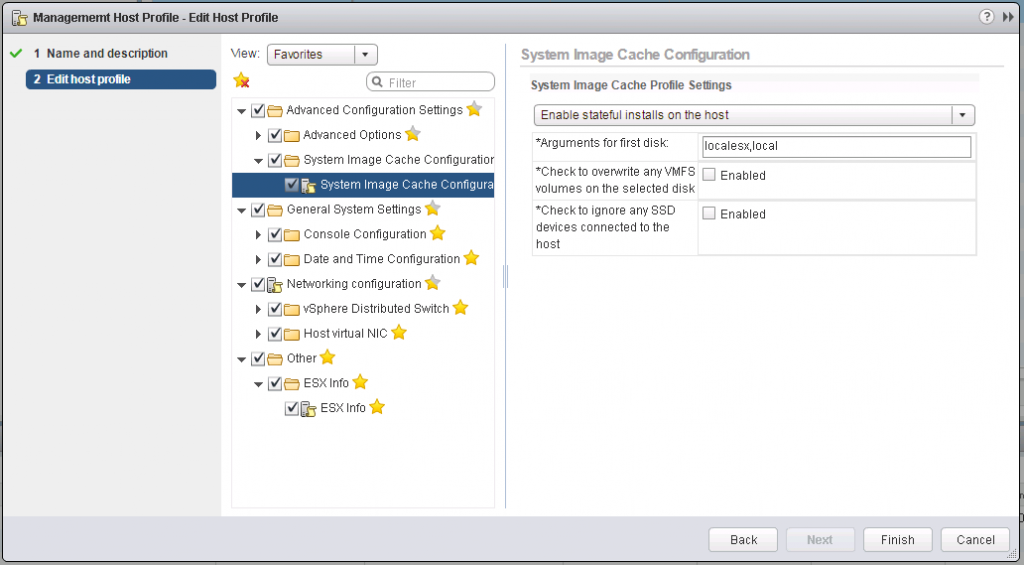
AutoDeploy stateful installs are configured in the same way as stateless caching. Edit the host profile, this time changing the option to ‘Enable stateful installs on the host’:
AutoDeploy Architecture
Pre-requisites
A vSphere Auto Deploy infrastructure will contain the below components
- vSphere vCenter Server – vSphere 6.7U1 is the best and most comprehensive option to date.
- A DHCP server to assign IP addresses and TFTP details to hosts on boot up – Windows Server DHCP will do just fine.
- A TFTP server to serve the iPXE boot loader
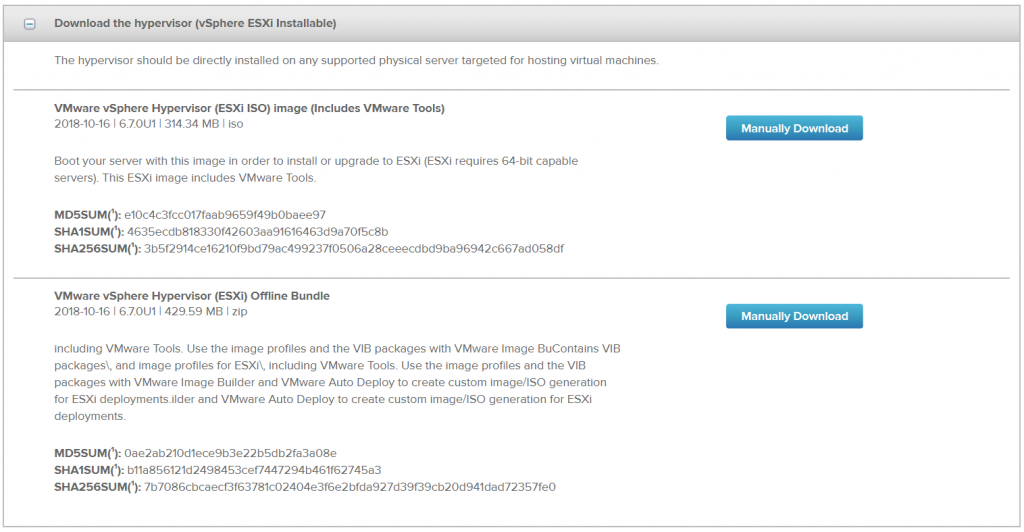
- An ESXi offline bundle image – Download from my.vmware.com.
- A host profile to configure and customize provisioned hosts – Use the vSphere Web Client.
- ESXi hosts with PXE enabled network cards
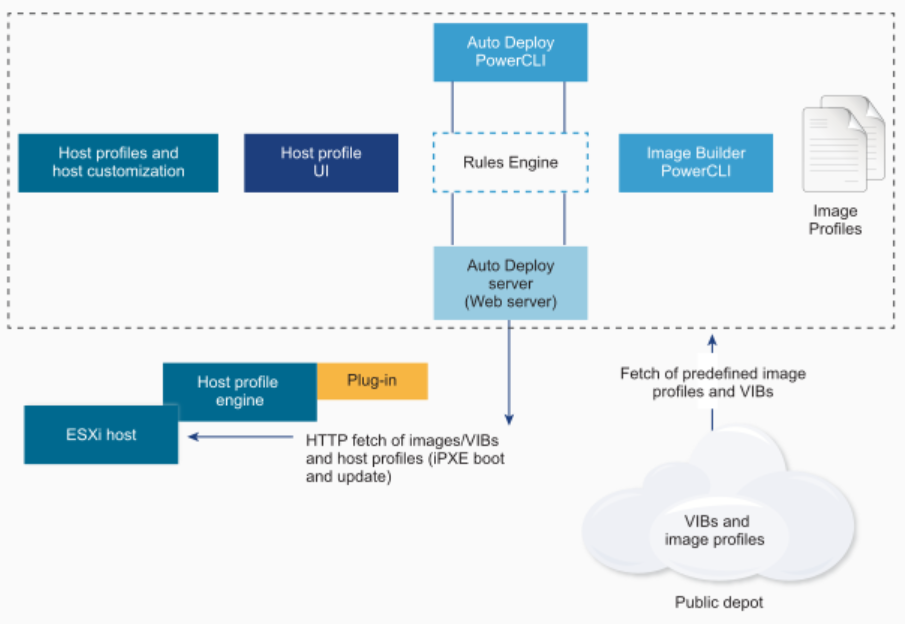
1.VMware AutoDeploy Server
- Serves images and host profiles to ESXi hosts.
- vSphere Auto Deploy rules engine
- Sends information to the vSphere Auto Deploy server which image profile and which host profile to serve to which host. Administrators use vSphere Auto Deploy to define the rules that assign image profiles and host profiles to host
2. Image Profile Server
Define the set of VIBs to boot ESXi hosts with.
- VMware and VMware partners make image profiles and VIBs available in public depots. Use vSphere ESXi Image Builder to examine the depot and use the vSphere Auto Deploy rules engine to specify which image profile to assign to which host.
- VMware customers can create a custom image profile based on the public image profiles and VIBs in the depot and apply that image profile to the host
3. Host Profiles
Define machine-specific configuration such as networking or storage setup. Use the host profile UI to create host profiles. You can create a host profile for a reference host and apply that host profile to other hosts in your environment for a consistent configuration
4. Host customization
Stores information that the user provides when host profiles are applied to the host. Host customization might contain an IP address or other information that the user supplied for that host. For more information about host customizations, see the vSphere Host Profiles documentation.
Host customization was called answer file in earlier releases of vSphere Auto Deploy
5. Rules and Rule Sets
Rules
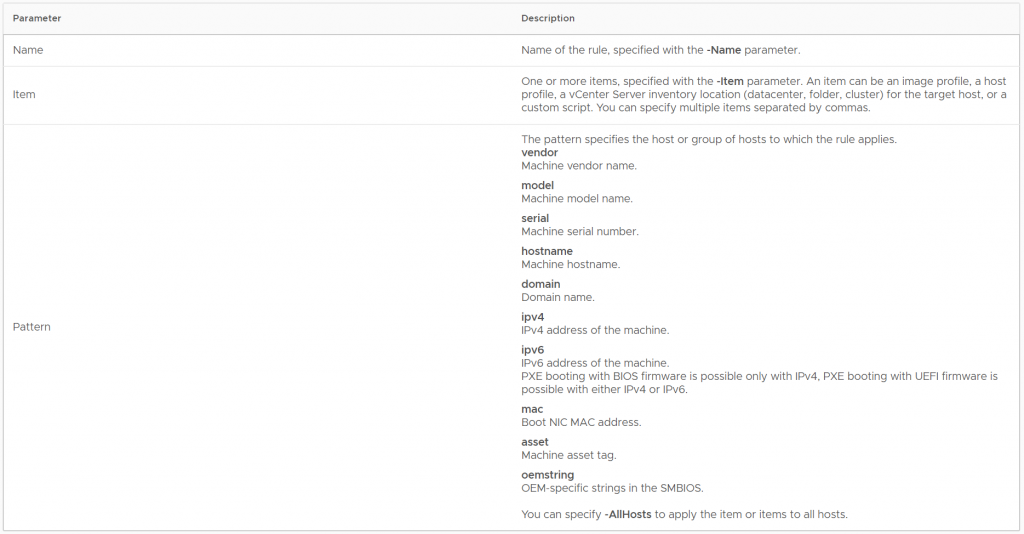
Rules can assign image profiles and host profiles to a set of hosts, or specify the location (folder or cluster) of a host on the target vCenter Server system. A rule can identify target hosts by boot MAC address, SMBIOS information, BIOS UUID, Vendor, Model, or fixed DHCP IP address. In most cases, rules apply to multiple hosts. You create rules by using the vSphere Client or vSphere Auto Deploy cmdlets in a PowerCLI session. After you create a rule, you must add it to a rule set. Only two rule sets, the active rule set and the working rule set, are supported. A rule can belong to both sets, the default, or only to the working rule set. After you add a rule to a rule set, you can no longer change the rule. Instead, you copy the rule and replace items or patterns in the copy. If you are managing vSphere Auto Deploy with the vSphere Client, you can edit a rule if it is in inactive state
You can specify the following parameters in a rule.
Active Rule Set
When a newly started host contacts the vSphere Auto Deploy server with a request for an image profile, the vSphere Auto Deploy server checks the active rule set for matching rules. The image profile, host profile, vCenter Server inventory location, and script object that are mapped by matching rules are then used to boot the host. If more than one item of the same type is mapped by the rules, the vSphere Auto Deploy server uses the item that is first in the rule set.
Working Rule Set
The working rule set allows you to test changes to rules before making the changes active. For example, you can use vSphere Auto Deploy cmdlets for testing compliance with the working rule set. The test verifies that hosts managed by a vCenter Server system are following the rules in the working rule set. By default, cmdlets add the rule to the working rule set and activate the rules. Use the NoActivate parameter to add a rule only to the working rule set.
You use the following workflow with rules and rule sets.
- Make changes to the working rule set.
- Test the working rule set rules against a host to make sure that everything is working correctly.
- Refine and retest the rules in the working rule set.
- Activate the rules in the working rule set.If you add a rule in a PowerCLI session and do not specify the NoActivate parameter, all rules that are currently in the working rule set are activated. You cannot activate individual rules
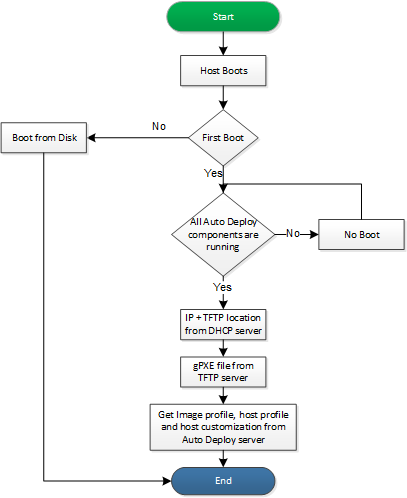
AutoDeploy Boot Process
The boot process is different for hosts that have not yet been provisioned with vSphere Auto Deploy (first boot) and for hosts that have been provisioned with vSphere Auto Deploy and added to a vCenter Server system (subsequent boot).
First Boot Prerequisites
Before a first boot process, you must set up your system. .
- Set up a DHCP server that assigns an IP address to each host upon startup and that points the host to the TFTP server to download the iPXE boot loader from.
- If the hosts that you plan to provision with vSphere Auto Deploy are with legacy BIOS, verify that the vSphere Auto Deploy server has an IPv4 address. PXE booting with legacy BIOS firmware is possible only over IPv4. PXE booting with UEFI firmware is possible with either IPv4 or IPv6.
- Identify an image profile to be used in one of the following ways.
- Choose an ESXi image profile in a public depot.
- Create a custom image profile by using vSphere ESXi Image Builder, and place the image profile in a depot that the vSphere Auto Deploy server can access. The image profile must include a base ESXi VIB.
- If you have a reference host in your environment, export the host profile of the reference host and define a rule that applies the host profile to one or more hosts.
- Specify rules for the deployment of the host and add the rules to the active rule set.
First Boot Overview
When a host that has not yet been provisioned with vSphere Auto Deploy boots (first boot), the host interacts with several vSphere Auto Deploy components.
When a host that has not yet been provisioned with vSphere Auto Deploy boots (first boot), the host interacts with several vSphere Auto Deploy components.
- When the administrator turns on a host, the host starts a PXE boot sequence.The DHCP Server assigns an IP address to the host and instructs the host to contact the TFTP server.
- The host contacts the TFTP server and downloads the iPXE file (executable boot loader) and an iPXE configuration file.
- iPXE starts executing.The configuration file instructs the host to make a HTTP boot request to the vSphere Auto Deploy server. The HTTP request includes hardware and network information.
- In response, the vSphere Auto Deploy server performs these tasks:
- Queries the rules engine for information about the host.
- Streams the components specified in the image profile, the optional host profile, and optional vCenter Server location information.
- The host boots using the image profile.If the vSphere Auto Deploy server provided a host profile, the host profile is applied to the host.
- vSphere Auto Deploy adds the host to thevCenter Server system that vSphere Auto Deploy is registered with.
- If a rule specifies a target folder or cluster on the vCenter Server system, the host is placed in that folder or cluster. The target folder must be under a data center.
- If no rule exists that specifies a vCenter Server inventory location, vSphere Auto Deploy adds the host to the first datacenter displayed in the vSphere Client UI.
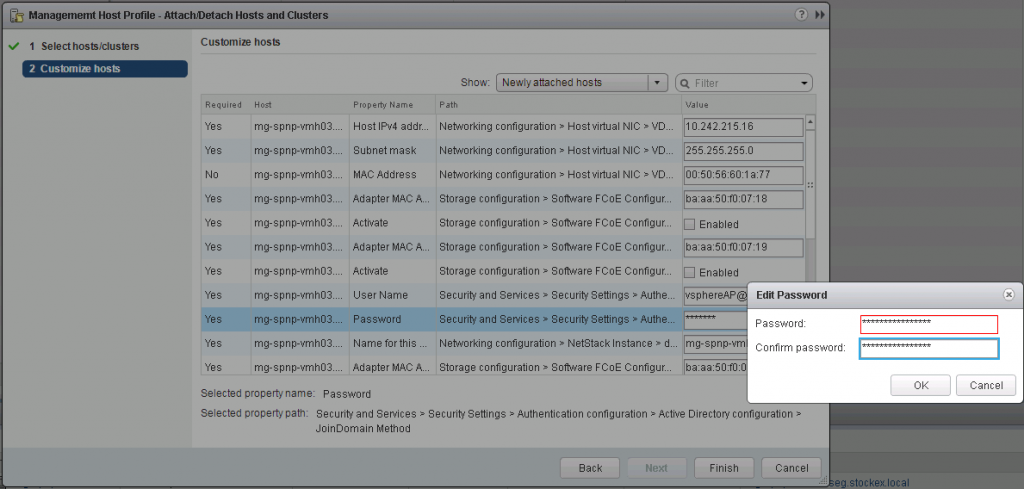
- If the host profile requires the user to specify certain information, such as a static IP address, the host is placed in maintenance mode when the host is added to the vCenter Server system.You must reapply the host profile and update the host customization to have the host exit maintenance mode. When you update the host customization, answer any questions when prompted.
- If the host is part of a DRS cluster, virtual machines from other hosts might be migrated to the host after the host has successfully been added to the vCenter Server system.
Subsequent Boots Without Updates
For hosts that are provisioned with vSphere Auto Deploy and managed by avCenter Server system, subsequent boots can become completely automatic.
- The administrator reboots the host.
- As the host boots up, vSphere Auto Deploy provisions the host with its image profile and host profile.
- Virtual machines are brought up or migrated to the host based on the settings of the host.
- Standalone host. Virtual machines are powered on according to autostart rules defined on the host.
- DRS cluster host. Virtual machines that were successfully migrated to other hosts stay there. Virtual machines for which no host had enough resources are registered to the rebooted host.
If the vCenter Server system is unavailable, the host contacts the vSphere Auto Deploy server and is provisioned with an image profile. The host continues to contact the vSphere Auto Deploy server until vSphere Auto Deploy reconnects to the vCenter Server system.
vSphere Auto Deploy cannot set up vSphere distributed switches if vCenter Server is unavailable, and virtual machines are assigned to hosts only if they participate in an HA cluster. Until the host is reconnected to vCenter Server and the host profile is applied, the switch cannot be created. Because the host is in maintenance mode, virtual machines cannot start.
Important: Any hosts that are set up to require user input are placed in maintenance mode
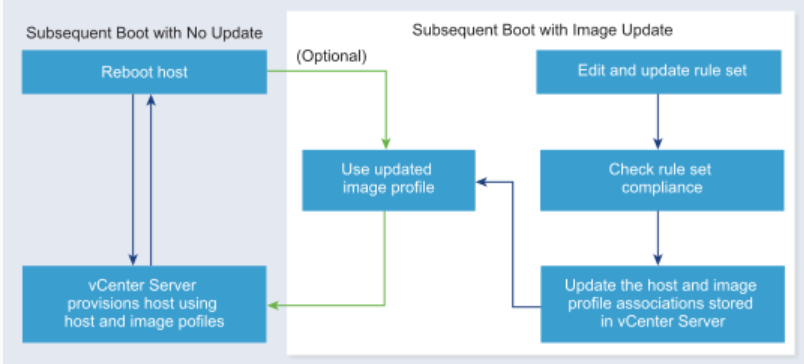
Subsequent Boots With Updates
You can change the image profile, host profile, vCenter Server location, or script bundle for hosts. The process includes changing rules and testing and repairing the host’s rule compliance.
- The administrator uses the Copy-DeployRule PowerCLI cmdlet to copy and edit one or more rules and updates the rule set. .
- The administrator runs the Test-DeployRulesetCompliance cmdlet to check whether each host is using the information that the current rule set specifies.
- The host returns a PowerCLI object that encapsulates compliance information.
- The administrator runs the Repair-DeployRulesetCompliance cmdlet to update the image profile, host profile, or vCenter Server location the vCenter Server system stores for each host.
- When the host reboots, it uses the updated image profile, host profile, vCenter Server location, or script bundle for the host.If the host profile is set up to request user input, the host is placed in maintenance mode
Note: Do not change the boot configuration parameters to avoid problems with your distributed switch
Prepare your system for AutoDeploy
Before you can PXE boot an ESXi host with vSphere Auto Deploy, you must install prerequisite software and set up the DHCP and TFTP servers that vSphere Auto Deploy interacts with.
Prerequisites
- Verify that the hosts that you plan to provision with vSphere Auto Deploy meet the hardware requirements for ESXi. See ESXi Hardware Requirements.
- Verify that the ESXi hosts have network connectivity to vCenter Server and that all port requirements are met. See vCenter Server Upgrade.
- Verify that you have a TFTP server and a DHCP server in your environment to send files and assign network addresses to the ESXi hosts that Auto Deploy provisions.
- Verify that the ESXi hosts have network connectivity to DHCP, TFTP, and vSphere Auto Deploy servers.
- If you want to use VLANs in your vSphere Auto Deploy environment, you must set up the end to end networking properly. When the host is PXE booting, the firmware driver must be set up to tag the frames with proper VLAN IDs. You must do this set up manually by making the correct changes in the UEFI/BIOS interface. You must also correctly configure the ESXi port groups with the correct VLAN IDs. Ask your network administrator how VLAN IDs are used in your environment.
- Verify that you have enough storage for the vSphere Auto Deploy repository. The vSphere Auto Deploy server uses the repository to store data it needs, including the rules and rule sets you create and the VIBs and image profiles that you specify in your rules.Best practice is to allocate 2 GB to have enough room for four image profiles and some extra space. Each image profile requires approximately 350 MB. Determine how much space to reserve for the vSphere Auto Deploy repository by considering how many image profiles you expect to use.
- Obtain administrative privileges to the DHCP server that manages the network segment you want to boot from. You can use a DHCP server already in your environment, or install a DHCP server. For your vSphere Auto Deploy setup, replace the gpxelinux.0 filename with snponly64.efi.vmw-hardwired for UEFI or undionly.kpxe.vmw-hardwired for BIOS.
- Secure your network as you would for any other PXE-based deployment method. vSphere Auto Deploy transfers data over SSL to prevent casual interference and snooping. However, the authenticity of the client or the vSphere Auto Deploy server is not checked during a PXE boot.
- If you want to manage vSphere Auto Deploy with PowerCLI cmdlets, verify that Microsoft .NET Framework 4.5 or 4.5.x and Windows PowerShell 3.0 or 4.0 are installed on a Windows machine. You can install PowerCLI on the Windows system on which vCenter Server is installed or on a different Windows system. See the vSphere PowerCLI User’s Guide.
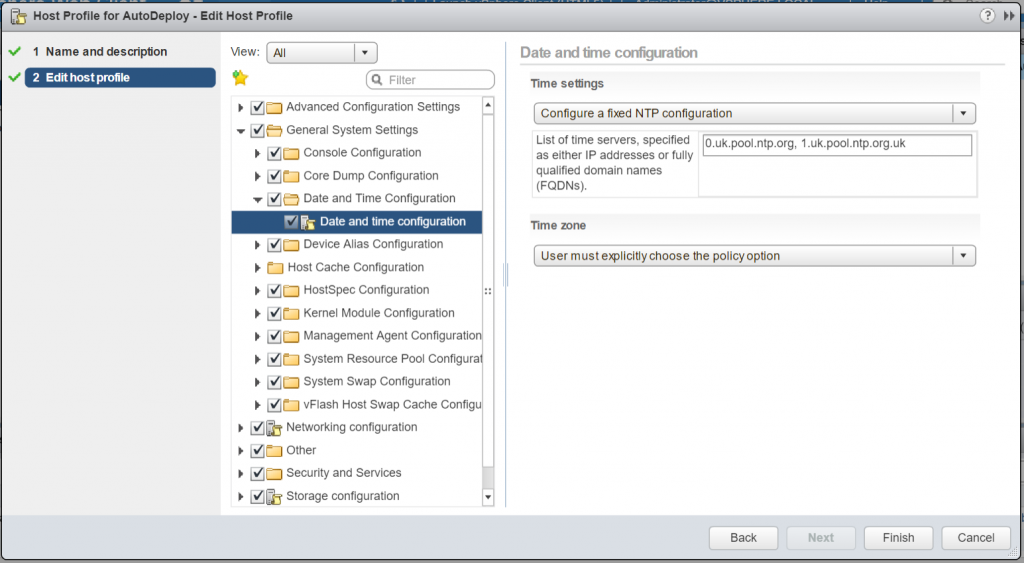
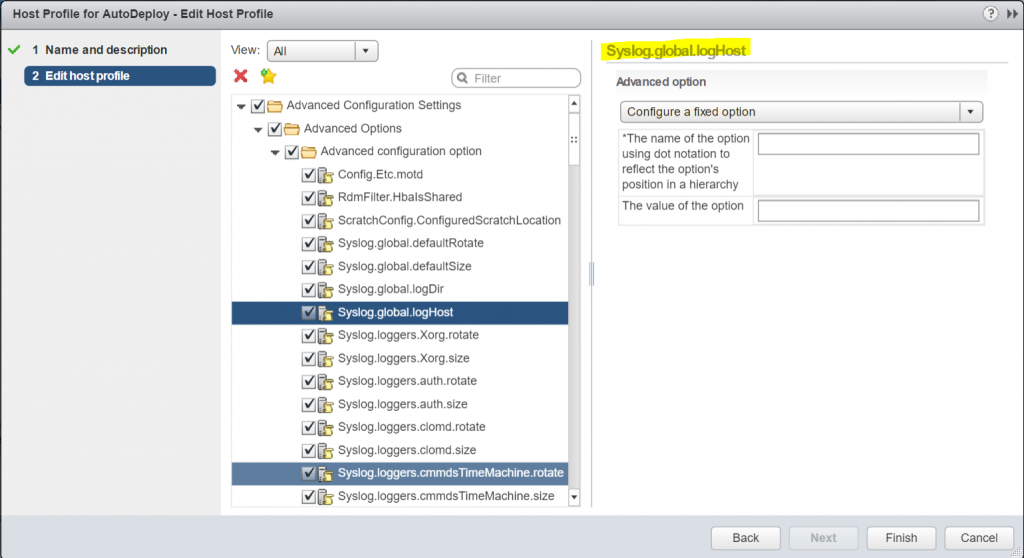
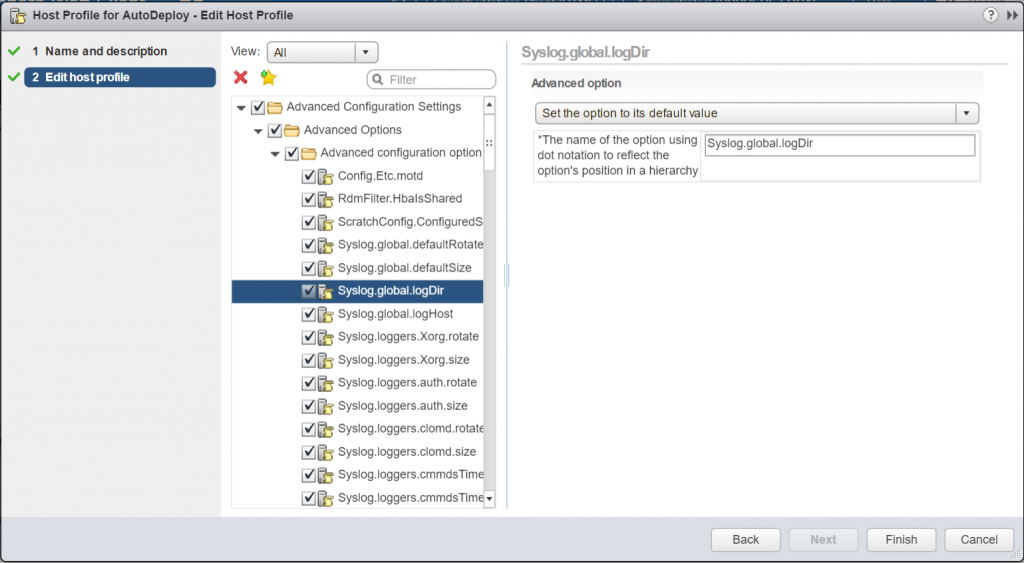
- Set up a remote Syslog server. See the vCenter Server and Host Management documentation for Syslog server configuration information. Configure the first host you boot to use the remote Syslog server and apply that host’s host profile to all other target hosts. Optionally, install and use the vSphere Syslog Collector, a vCenter Server support tool that provides a unified architecture for system logging and enables network logging and combining of logs from multiple hosts.
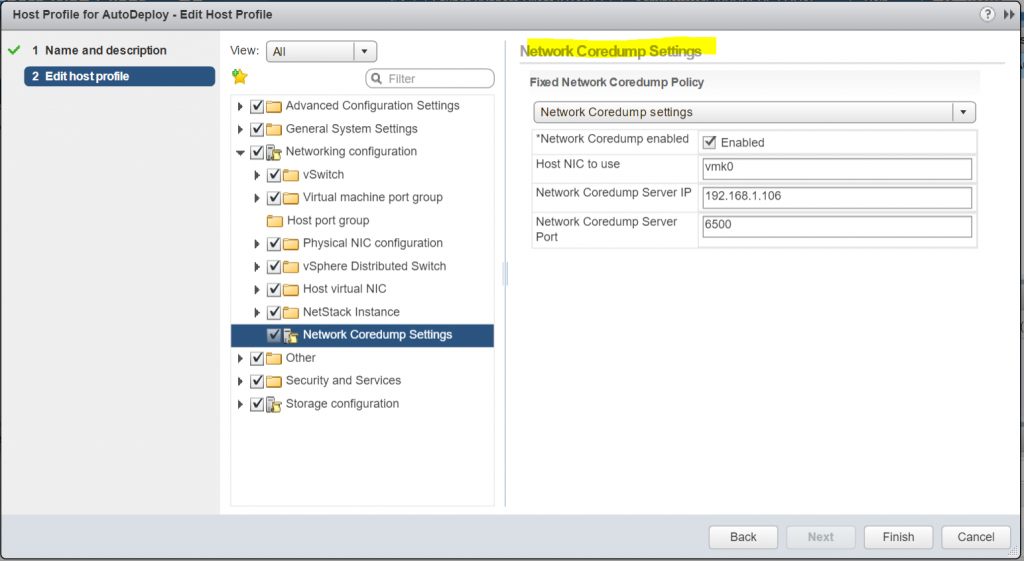
- Install ESXi Dump Collector, set up your first host so that all core dumps are directed to ESXi Dump Collector, and apply the host profile from that host to all other hosts.
- If the hosts that you plan to provision with vSphere Auto Deploy are with legacy BIOS, verify that the vSphere Auto Deploy server has an IPv4 address. PXE booting with legacy BIOS firmware is possible only over IPv4. PXE booting with UEFI firmware is possible with either IPv4 or IPv6.
Starting to configure AutoDeploy
Step 1 – Enable the AutoDeploy, Image Builder Service and Dump Collector Service
- Install vCenter Server or deploy the vCenter Server Appliance.The vSphere Auto Deploy server is included with the management node.
- Configure the vSphere Auto Deploy service startup type.
- On the vSphere Web Client Home page, click Administration.
- Under System Configuration, click Services
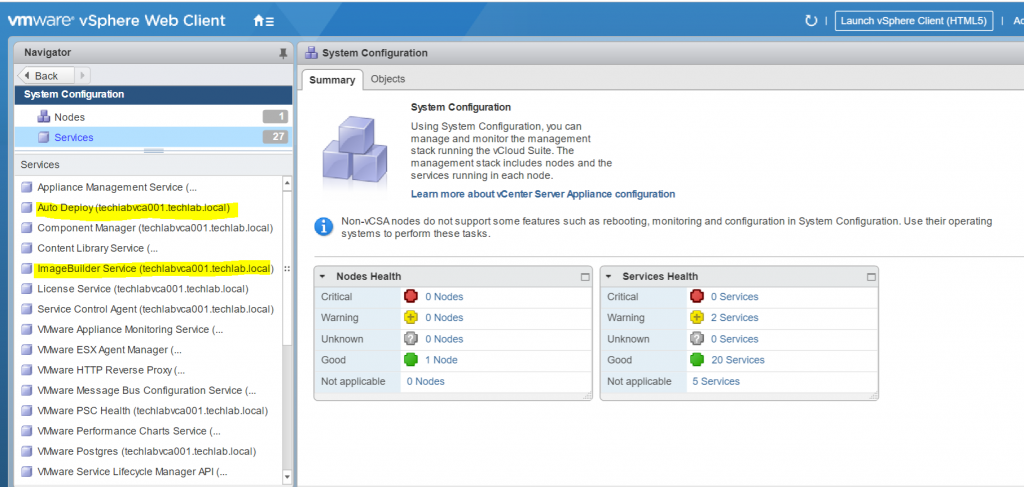
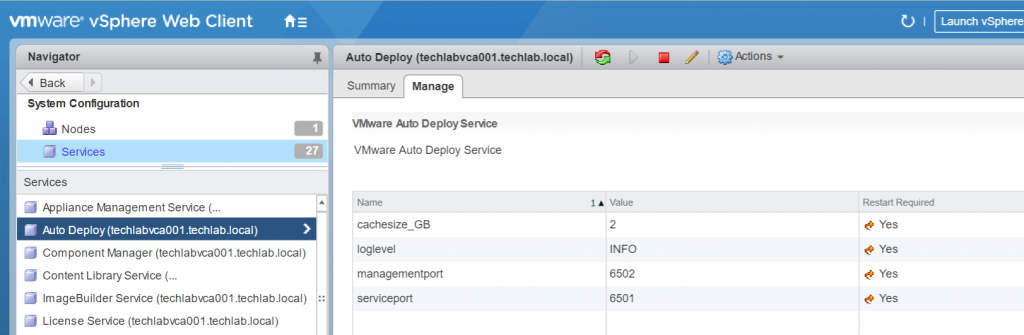
- Select Auto Deploy, click the Actions menu, and select Edit Startup Type and select Automatic
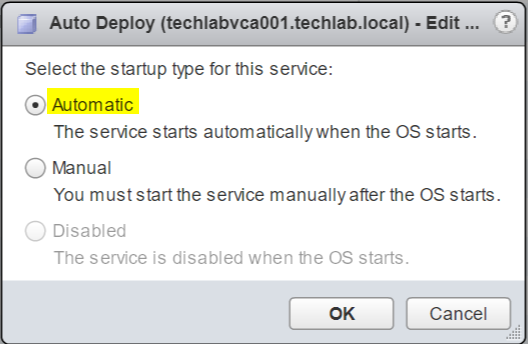
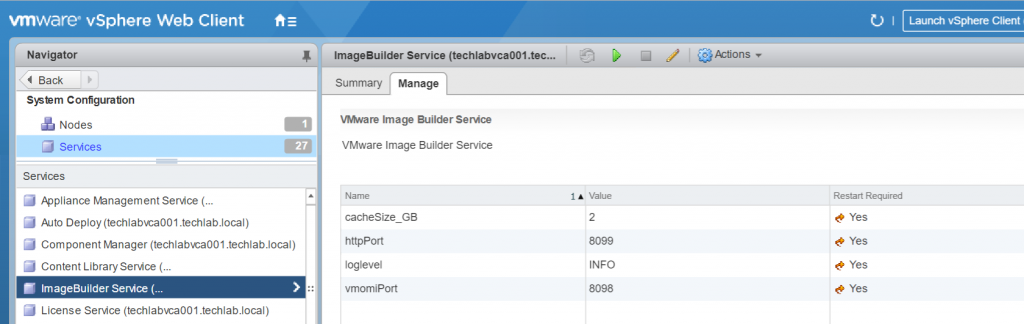
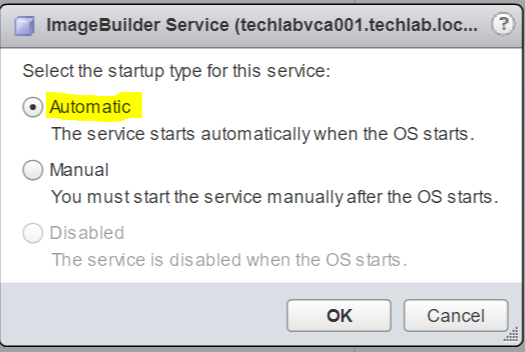
- (Optional) If you want to manage vSphere Auto Deploy with the vSphere Web Client, configure the vSphere ESXi Image Builder service startup type
- Check the Startup
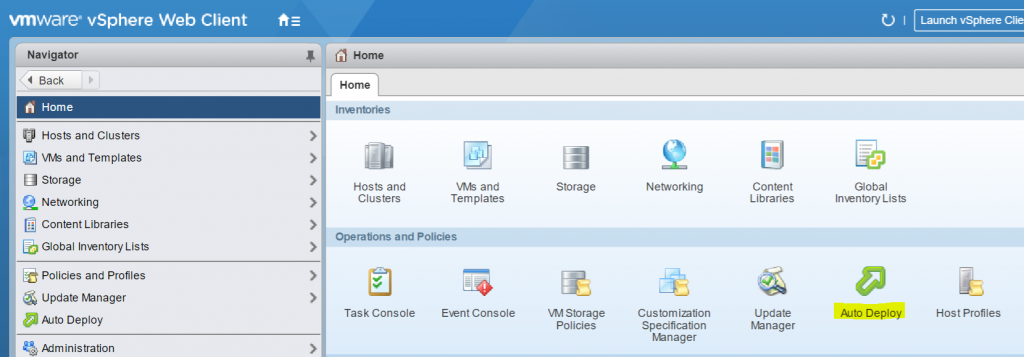
- Log out of the vSphere Web Client and log in again.The Auto Deploy icon is visible on the Home page of the vSphere Web Client
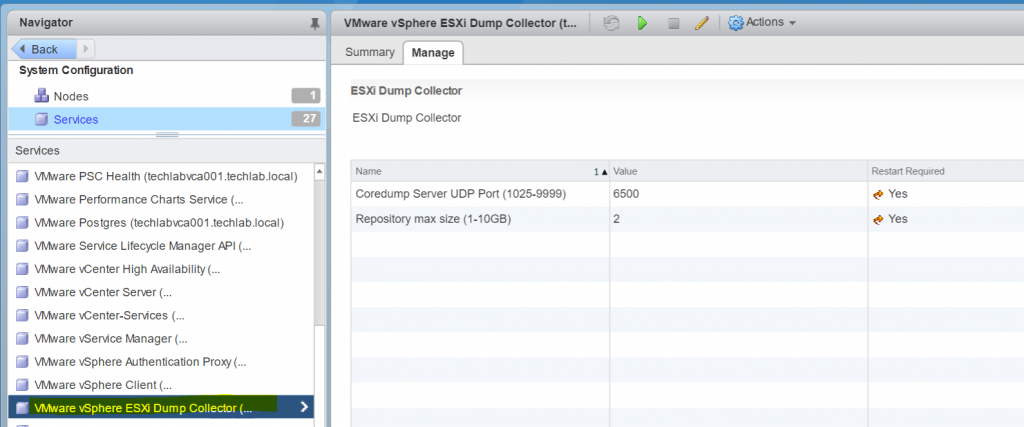
- Enable the Dump Collector
- You can now either set the dump collector manually on each host or configure the host profile with the settings
- If you want to enter it manually and point the dump collector to the vCenter then the following commands are used
- esxcli system coredump network set –interface-name vmk0 –server-ipv4 10.242.217.11 –server-port 6500
- esxcli system coredump network set –enable true
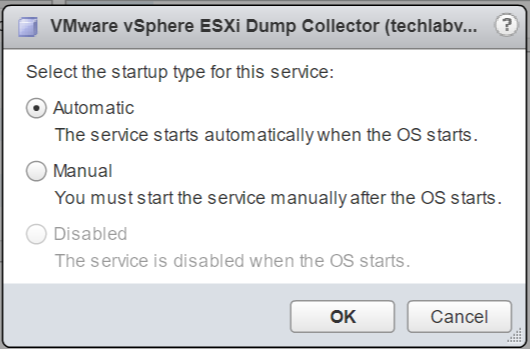
- Enable Automatic Startup
Step 2 Configure the TFTP server
There are different options here. Some people use Solarwinds or there is the option now to use an inbuilt TFTP service on the vCenter
Important: The TFTP service in vCenter is only supported for dev and test environments, not production and will be coming out of future releases of vCenter. It is best to have a separate TFTP server.
Instructions
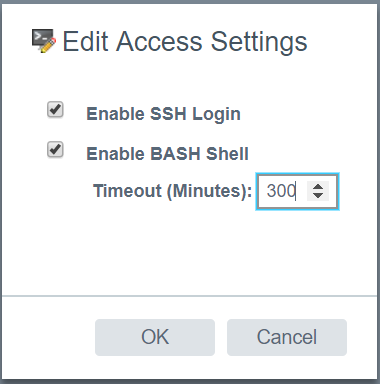
- Now that Auto Deploy is enabled we can configure the TFTP server. Enable SSH on the VCSA by browsing to the Appliance Management page: https://VCSA:5480 where VCSA is the IP or FQDN of your appliance.
- Log in as the root account. From the Access page enable SSH Login and Bash Shell.
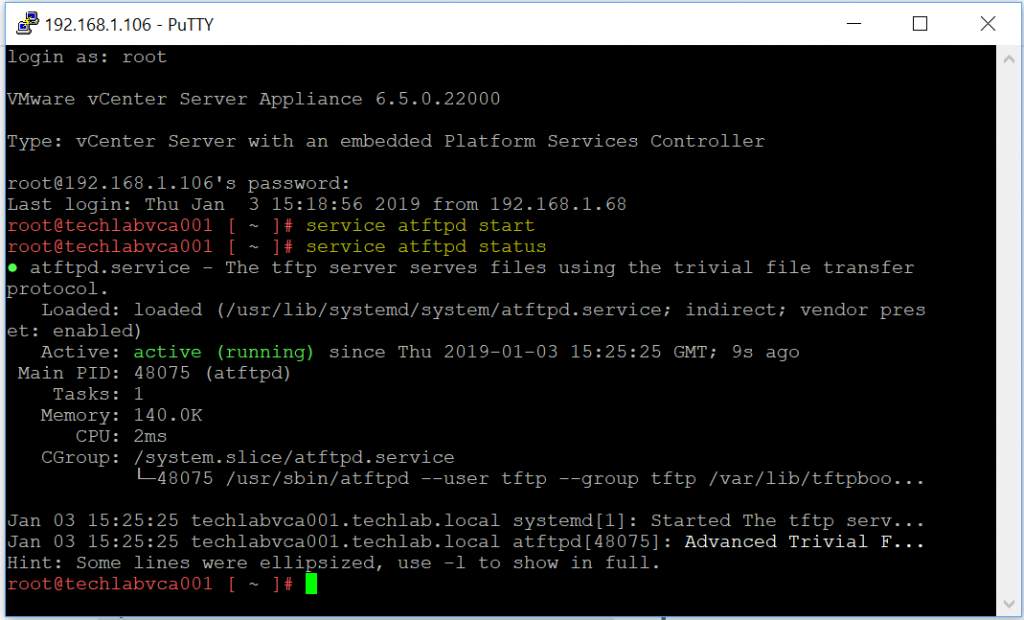
- SSH onto the vCenter Appliance, using a client such as Putty, and log in with the root account. First type shell and hit enter to launch Bash.
- To start the TFTP service enter service atftpd start
- Check the service is started using service atftpd status
- To allow TFTP traffic through the firewall on port 69; we must run the following command. (Note double dashes in front of dport)
- iptables -A port_filter -p udp -m udp –dport 69 -j ACCEPT
- Validate traffic is being accepted over port 69 using the following command
- iptables -nL | grep 69
- iptables can be found in /etc/systemd/scripts just for reference

- Validate traffic is being accepted over port 69 using iptables -nL | grep 69

- Type chkconfig atftpd on

- To make the iptables rules persistent is to load them after a reboot from a script.
- Save the current active rules to a file
iptables-save > /etc/iptables.rules

- Next create the below script and call it starttftp.sh
#! /bin/sh
#
# TFTP Start/Stop the TFTP service and allow port 69
#
# chkconfig: 345 80 05
# description: atftpd
### BEGIN INIT INFO
# Provides: atftpd
# Required-Start: $local_fs $remote_fs $network
# Required-Stop:
# Default-Start: 3 5
# Default-Stop: 0 1 2 6
# Description: TFTP
### END INIT INFO
service atftpd start
iptables-restore -c < /etc/iptables.rules
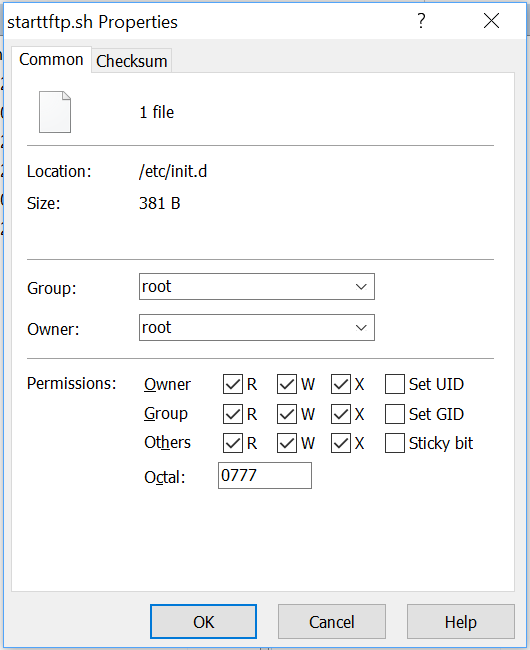
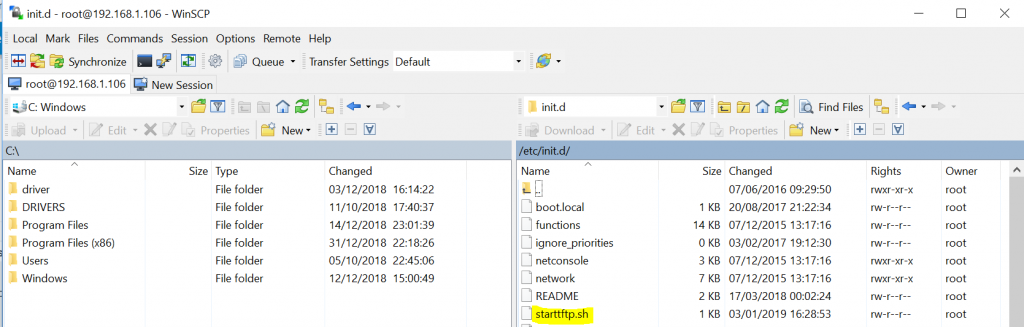
- Put the starttftp.sh script in /etc/init.d via WinSCP
- Put full permissions on the script
- This should execute the command and reload the firewall tables after the system is rebooted
- Reboot the vCenter appliance to test the script is running. If successful the atftpd service will be started and port 69 allowed, you can check these with service atftpd status and iptables -nL | grep 69.
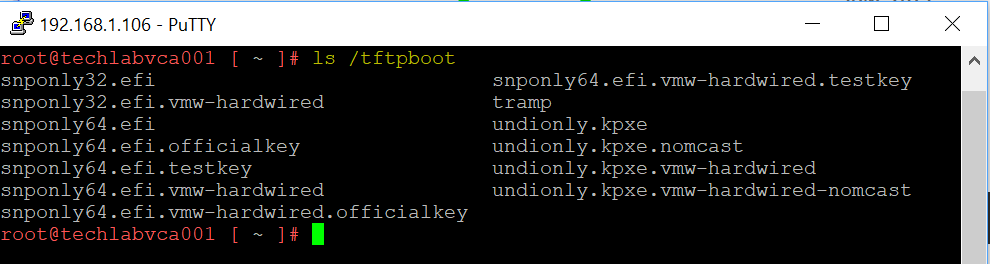
- Your TFTP directory is located at /tftpboot/
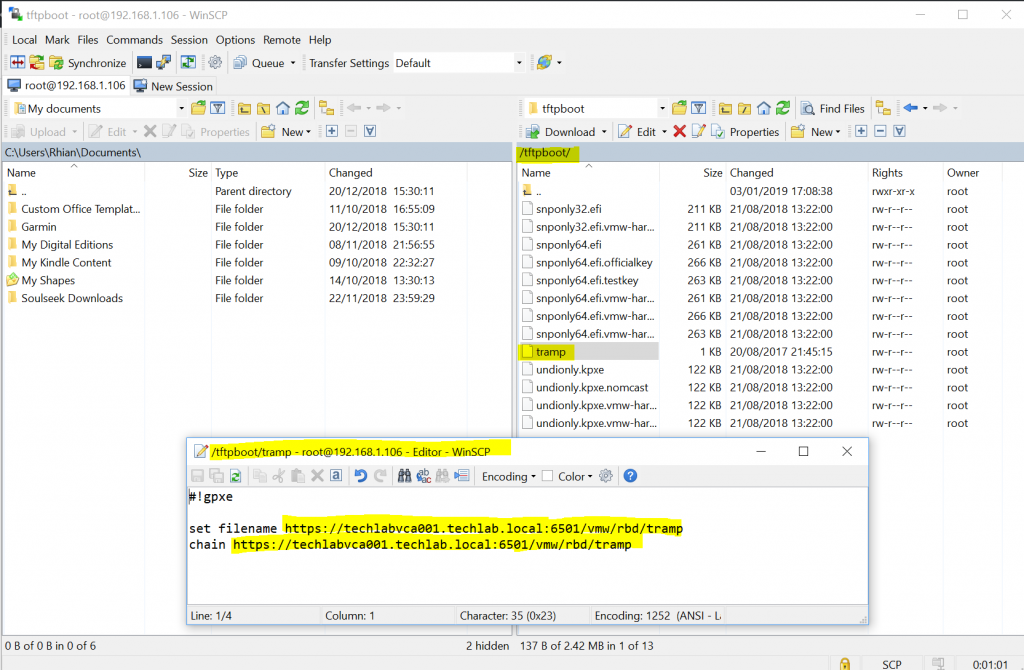
- The TRAMP file on the vCenter must also now be modified and the DNS name removed and replaced with the IP address of the vCenter. Auto Deploy will not work without doing this part
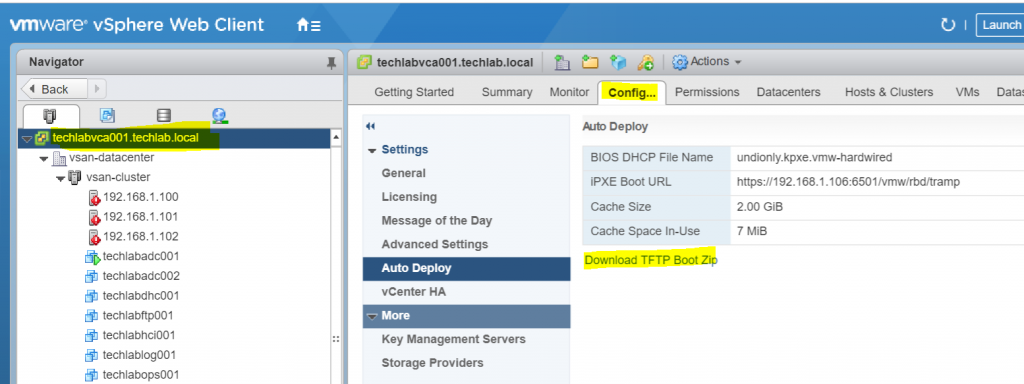
- The directory already contains the necessary files for Auto Deploy (tramp file, undionly.kpxe.vmw-hardwired, etc) Normally if you use Solarwinds TFTP server, you would need to download the TFTP Boot Zip and extract the files into the TFTP Root folder
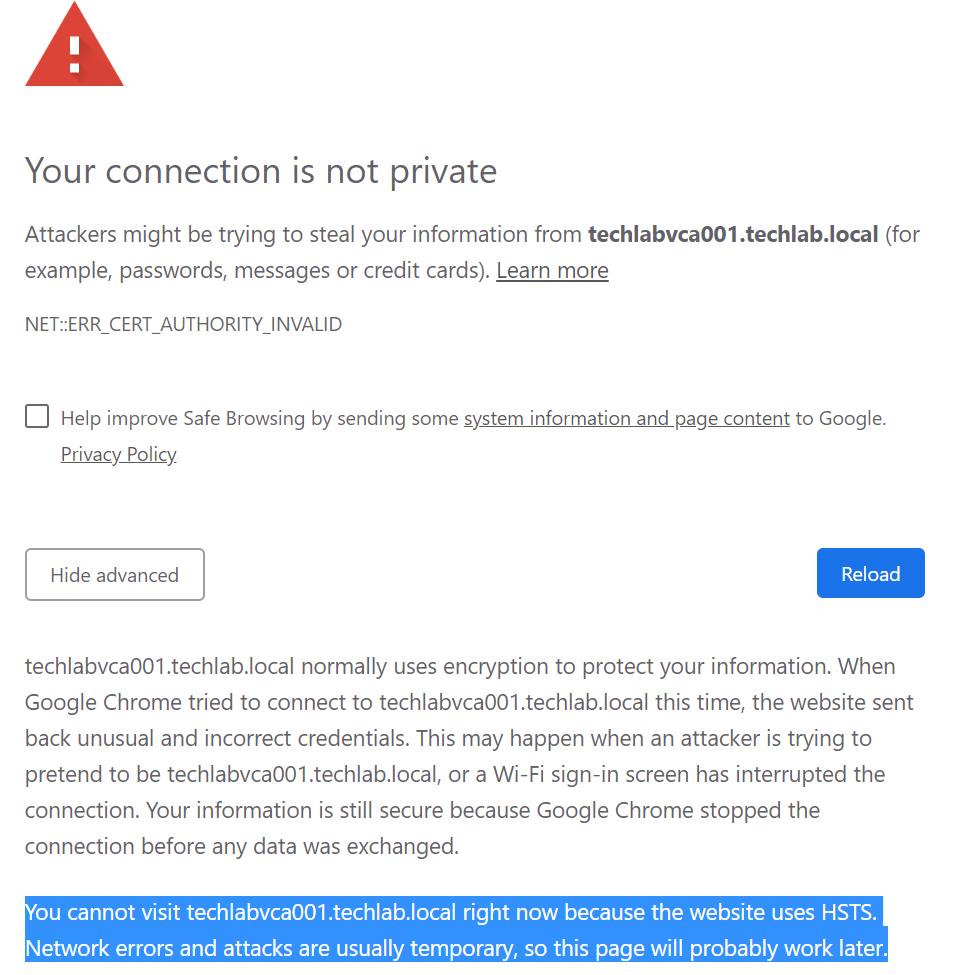
- Note there may be an issue with downloading this file due to security restrictions being enabled by some of the well known browsers – This is the likely message seen below. You may have to modify a browser setting in order to access the file
- If everything is ok then you’ll be able to download it but note again, you do not need to download this if you are using the inbuilt TFTP server in vCenter as the files are already there.
Step 3 – Setting up DHCP options
- The DHCP server assigns an IP address to the ESXi host when the host boots. The DHCP server also provides two required options to point the host to the TFTP server and to the boot files necessary for vSphere Auto Deploy to work. These additional DHCP options are as follows:
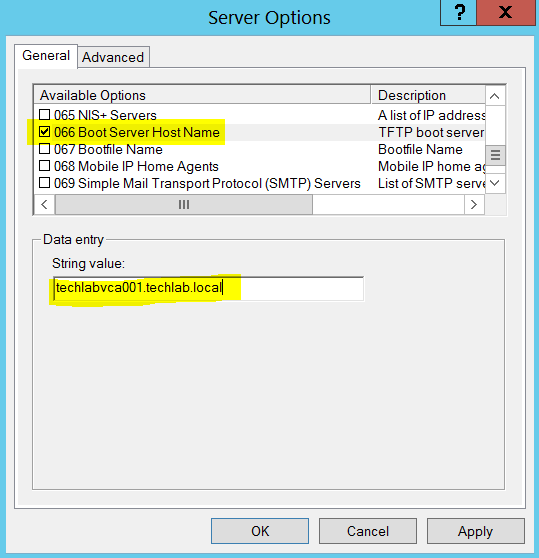
- 066 – Boot Server Host Name – This option must be enabled, and the IP address of the server running TFTP should be inserted into the data entry field.
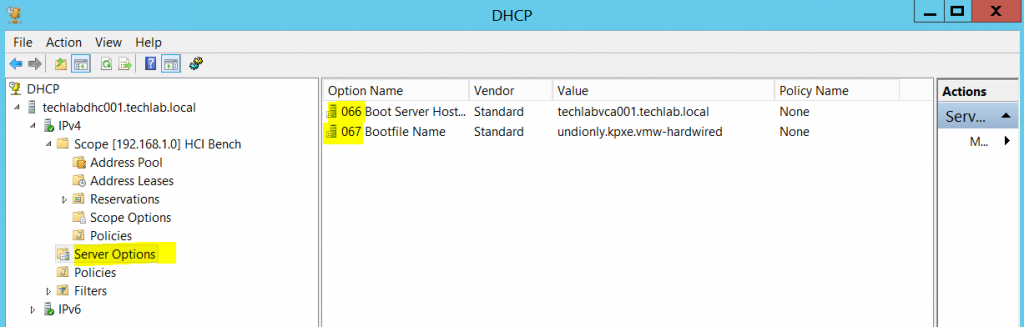
- 067 – Bootfile Name –The “BIOS DHCP File Name” found in the vSphere Auto Deploy settings of your vCenter Server must be used here. The file name is undionly.kpxe.vmw-hardwired.
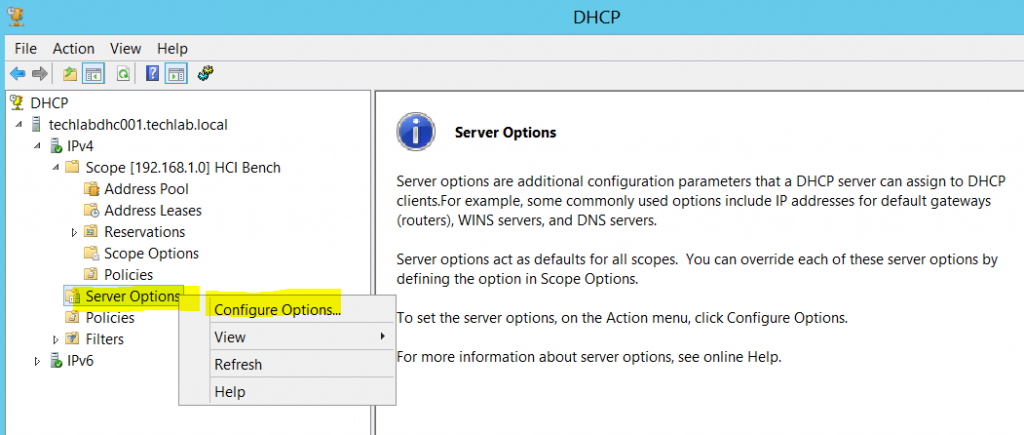
- Go to Server Options and click Configure Options
- In the value for option 066 (next-server) enter the FQDN of the TFTP boot server. In my case my vCenter Server hosting the TFTP service
- Select option 67 and type in undionly.kpxe.vmw-hardwired.The undionly.kpxe.vmw-hardwired iPXE binary will be used to boot the ESXi host

- Note: if you were using UEFI, you would need to put snponly64.efi.vmw-hardwired
- You should now see the two options in DHCP
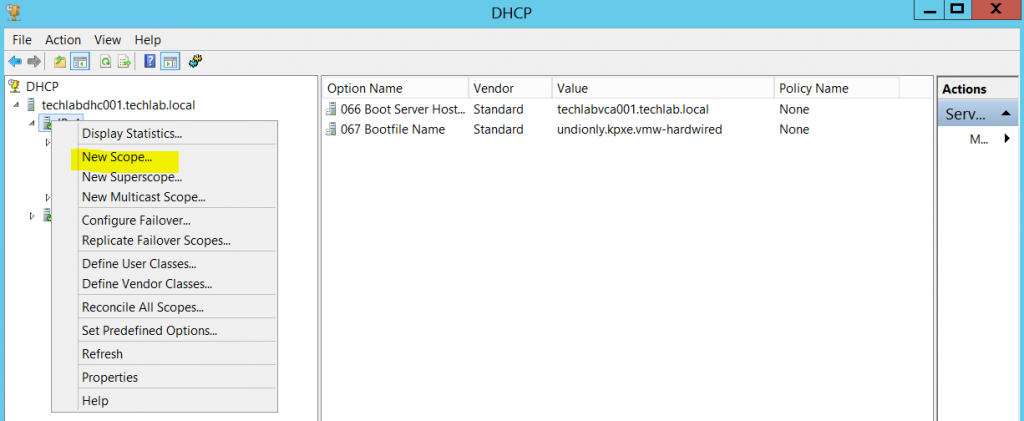
- Next we need to add a scope and reservations to this scope
- Right click IPv4 and select New Scope
- A wizard will pop up
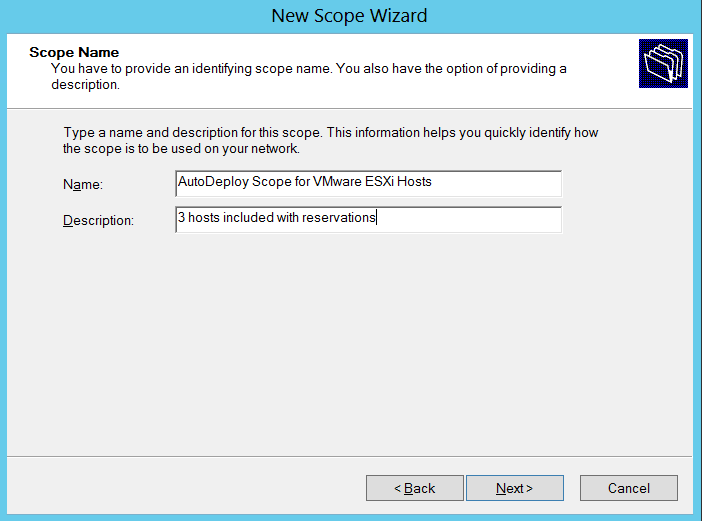
- Put in a name and description
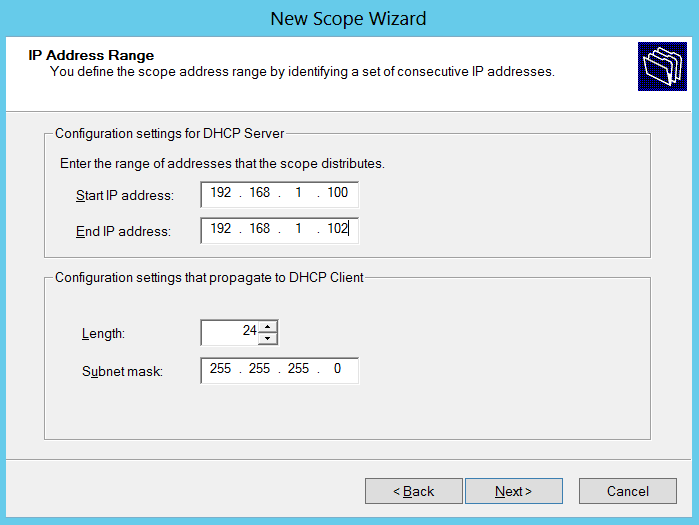
- Put in the network IP range and subnet mask for the scope. Note: I have 3 hosts for testing.
- Ignore the next screen and click Next
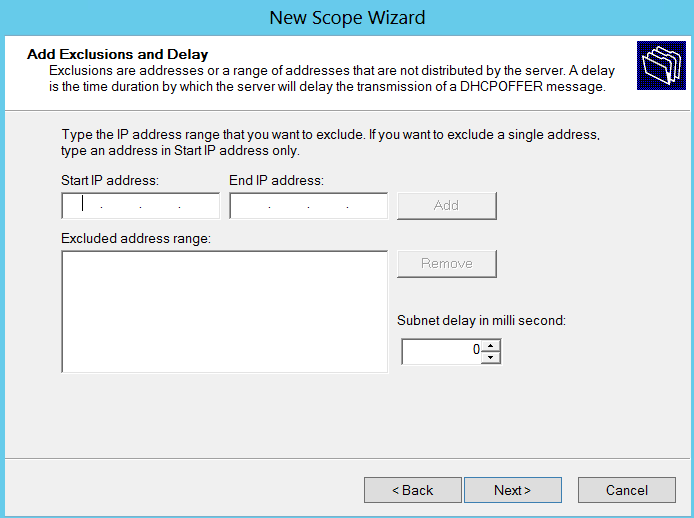
- Ignore the next screen and click Next
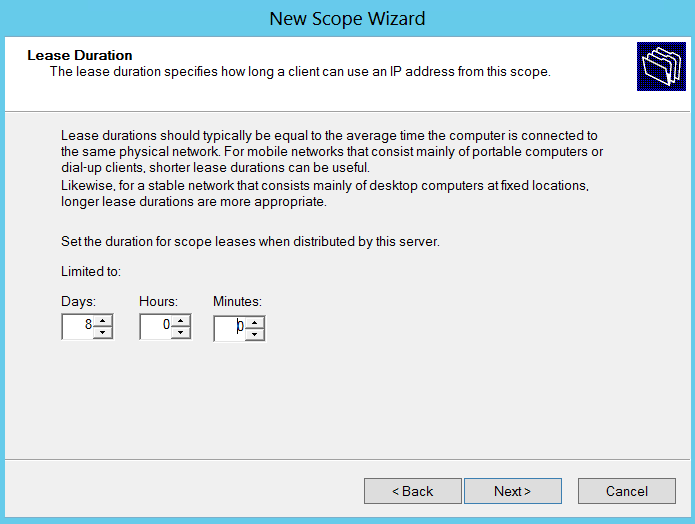
- Click No to configure options afterwards

- Click Finish
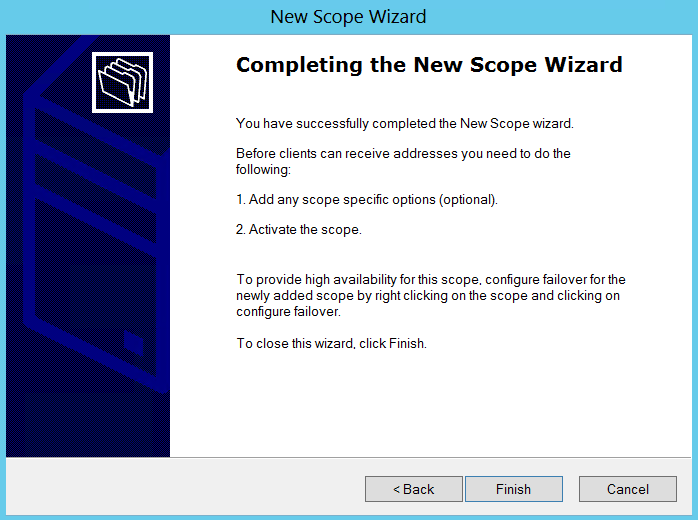
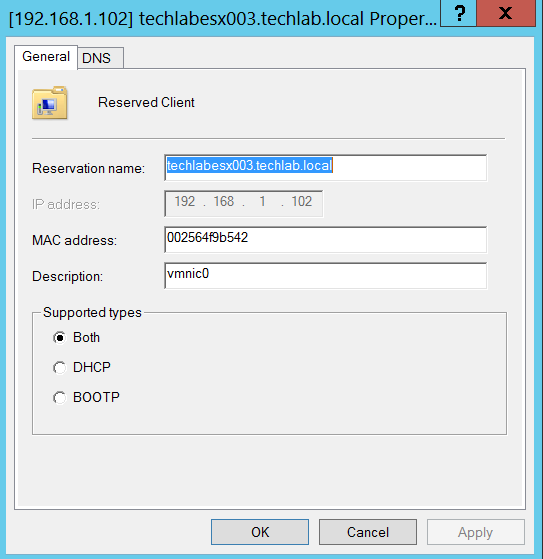
- We now need to create a DHCP reservation for each target ESXi host
- In the DHCP window, navigate to DHCP > hostname > IPv4 > Autodeploy Scope > Reservations.
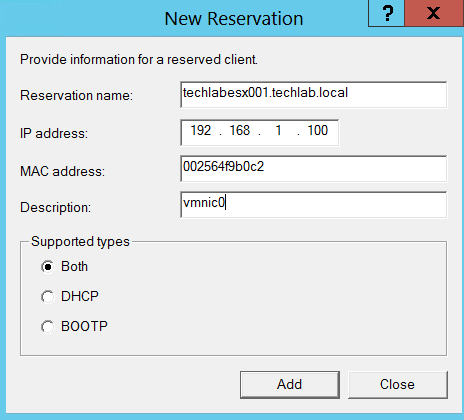
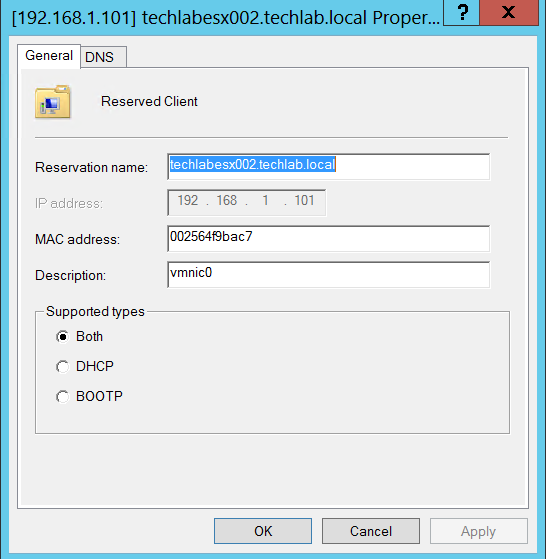
- Right-click Reservations and select New Reservation.
- In the New Reservation window, specify a name, IP address, and the MAC address for one of the hosts. Do not include the colon (:) in the MAC address.
- The initial installation and setup is now finished and we can now start with the next stage
Stage 4 Image Builder and AutoDeploy GUI
- The next stage involves logging into myvmware.com and downloading an offline bundle of the version of ESXi you need
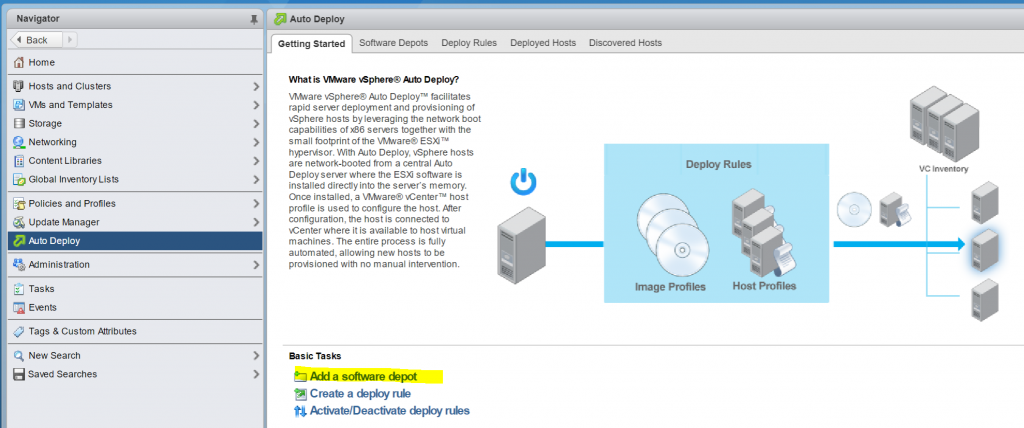
- Go to Home > Autodeploy in vCenter and select Add a Software Depot
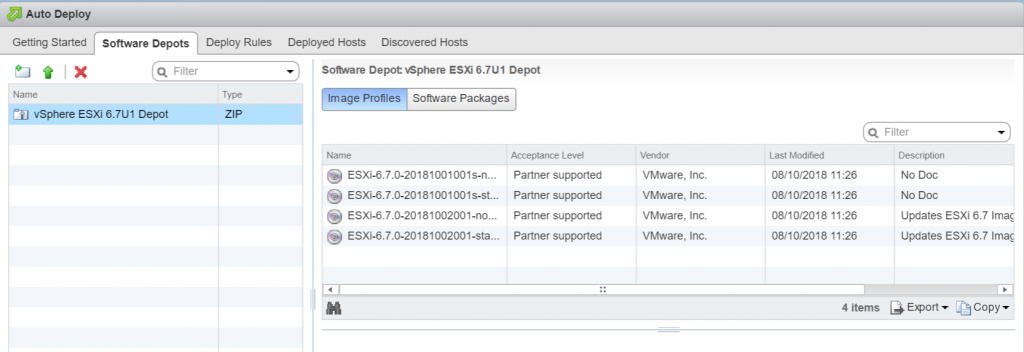
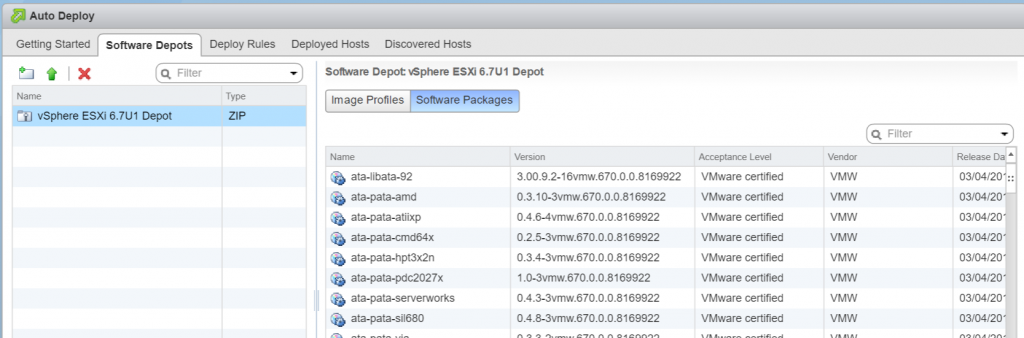
- Click Software Depots and then click Import Software Depot and upload. 4 images are normally recommended space wise.

- Once uploaded, click on the depot and you should see the below
- And
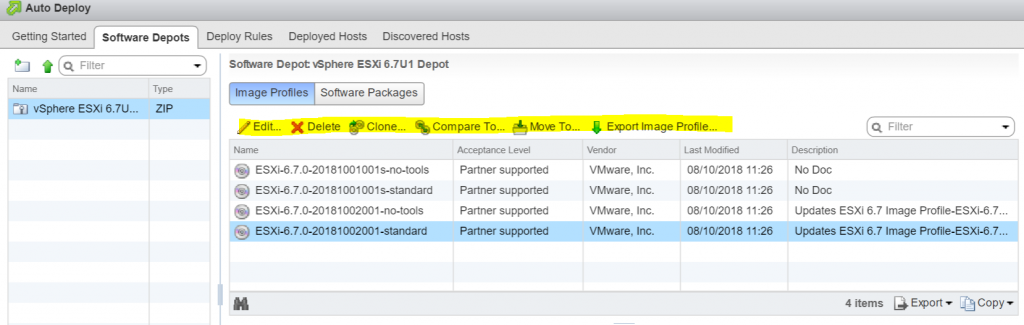
- If you click on an image, you get options above where you can clone or export to an iso for example
Stage 5 – Creating an Deploy Rule
- A deploy rule gives you control over the deployment process since you can specify which image profile is rolled out and on which server. Once a rule is created, you can also Edit or Clone it. Once created, the rule has to be activated for it to apply. If rules are not activated, Auto Deploy will fail
- Click on the Deploy Rules tab and add a name
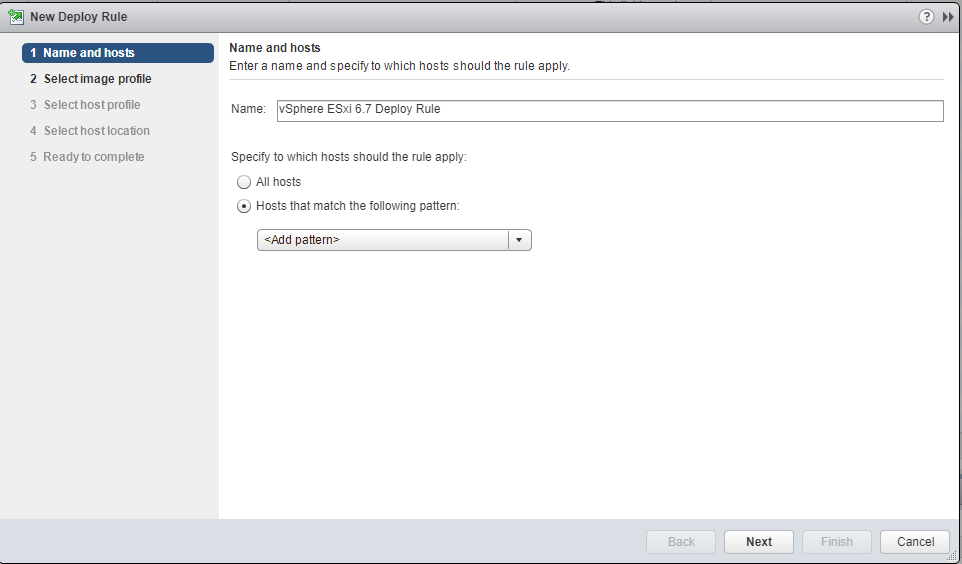
- Next we want to select hosts that match the following pattern. There are multiple options
- Asset
- Domain
- Gateway IPv4
- Hostname
- IPv4
- IPv6
- MAC address
- Model
- OEM string
- Serial number
- UUID
- Vendor
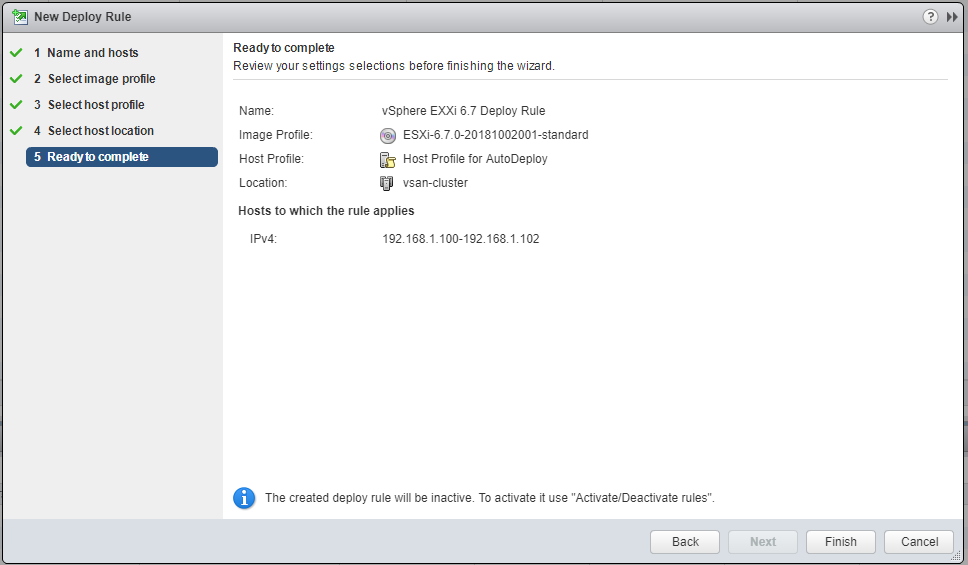
- I am going to use an IP range of my 3 hosts which is 192.168.1.100-192.168.1.102

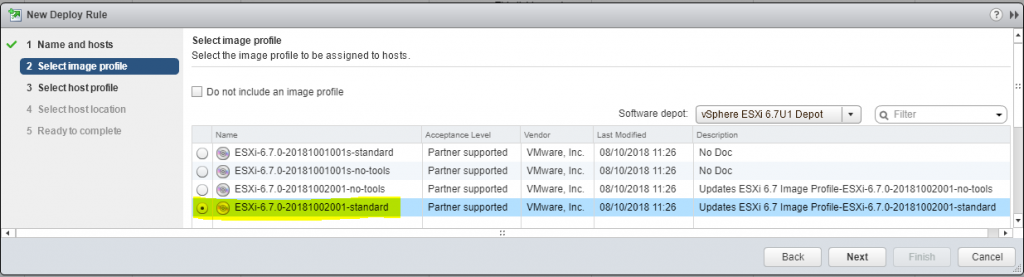
- Next Select an Image Profile
- Select the ESXi image to deploy to the hosts, change the software depot from the drop down menu if needed, then click Next. If you have any issues with vib signatures you can skip the signature checks using the tick box.
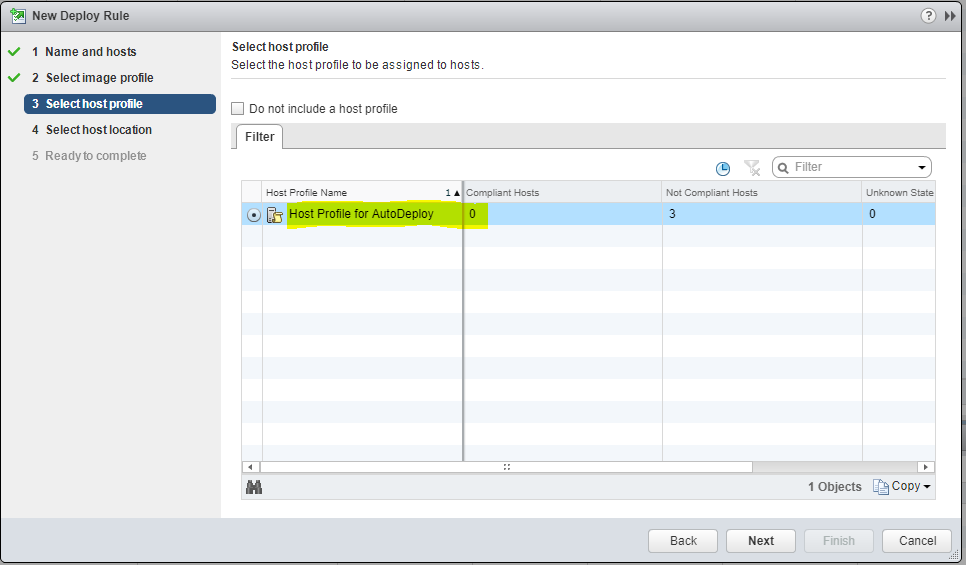
- Next, select a Host Profile. I have already pre-created one which was covered in another blog below. http://www.electricmonk.org.uk/2019/01/02/a-dive-into-host-profiles-on-vsphere-6-5/
- The main setting which must be chosen when creating a host profile to be used with AutoDeploy is how you want AutoDeploy to install an image as per below

- Host Profile selection screen
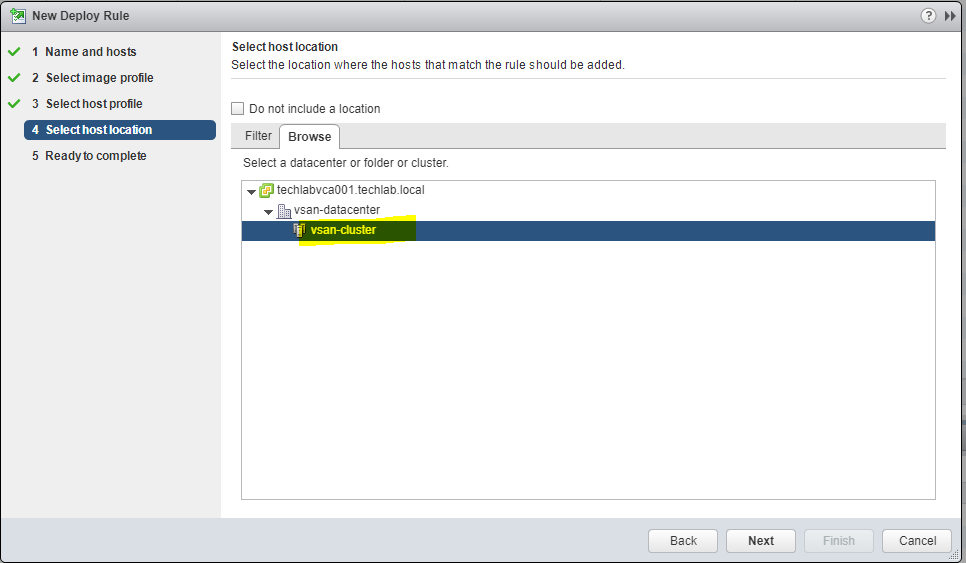
- Next Select a location
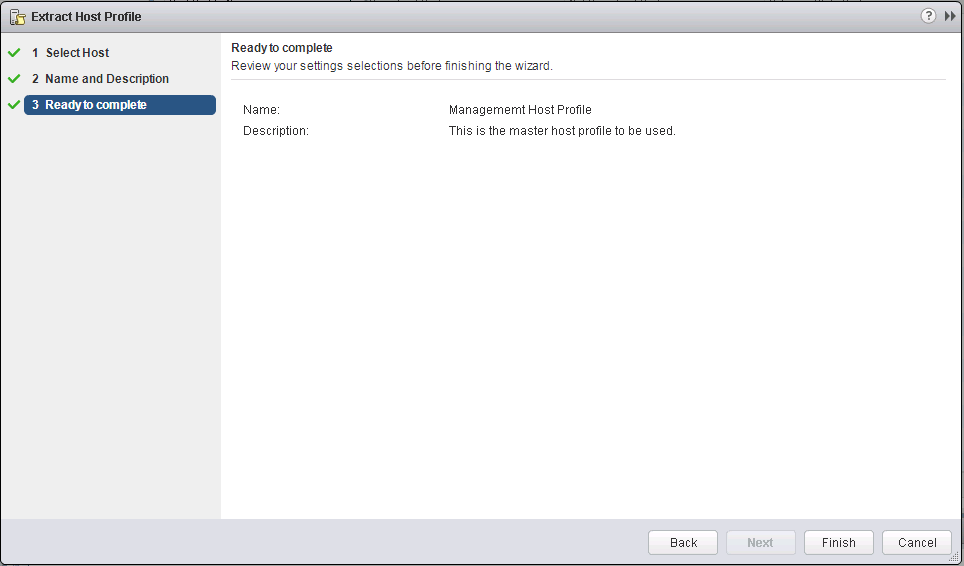
- Next you will be on the Ready to Complete screen. Check the details and click Finish if you are happy
- Note: The rule will be inactive – To use it, you will need to activate it but we will cover this in the next steps
- The deploy rule is created but in an inactive state. Select the deploy rule and note the options; Activate / Deactivate, Clone, Edit, Delete. Click Activate / Deactivate, a new window will open. Select the newly created deploy rule and click Activate, Next, and Finish.

- Now the deploy rule is activated; when you boot a host where the deploy rule is applicable you will see it load ESXi and the customization specified in the host profile. Deploy rules need to be deactivated before they can be edited.
- You can setup multiple deploy rules using different images for different clusters or host variables. Hosts using an Auto Deploy ruleset are listed in the Deployed Hosts tab, hosts that didn’t match any deploy rules are listed under Discovered Hosts
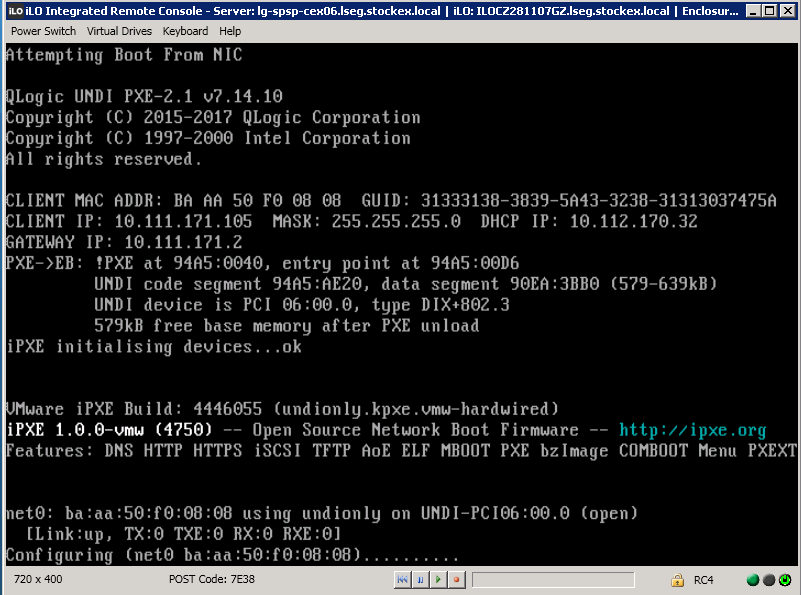
Stage 6 – Reboot the ESXi host and see if the AutoDeploy deployment works as expected.
- When you reboot a host, it will then come up as per the below screenprint
- Once booted up, remediate the host
- If you type in the following URL – https://<vCenter IP>:6502/vmw/rbd, it should take you to the Auto Deploy Debugging page where you can view registered hosts along with a detailed view of host and PXE information as well as the Auto Deploy Cache content
What do you do when you need to modify the Image Profile or Host Profile?
There are 2 commands you need to run to ensure the hosts can pick up the new data from the AutoDeploy rule whether it be a new image or a new/modified host profile. If you don’t run these, you will likely find that when you reboot your vSphere hosts they still boot from the old image”.
Test-DeploySetRuleCompliance <server-name>
Test-DeploySetRuleCompliance <server-name> | Repair-DeploySetRuleCompliance
This situation occurs when you update the active ruleset without updating the corresponding host entries in the auto deploy cache. The first time a host boots the Auto Deploy server parses the host attributes against the active ruleset to determine (a) The image profile, (b) The host profile, and (c) the location of the host in the vCenter inventory. This information then gets saved in the auto deploy cache and reused on all future reboots. The strategy behind saving this information is to reduce the load on the auto deploy server by eliminating the need to parse each host against the rules engine on every reboot. With this approach each host only gets parsed against the active ruleset once (on the initial boot) after which the results get saved and reused on all subsequent reboots.
However, anytime you make a change to the active ruleset that results in a host using a different image profile or host profile or being assigned to a different vCenter location. When you make changes not only do you need to update the rules in the active ruleset but you also need to update the host entries saved in the cache for the affected hosts. This is done using the Test-DeployRuleSetCompliance cmdlet together with the Repair-DeployRuleSetCompliance cmdlet.
Use the “Test-DeployRuleSetCompliance” cmdlet to check if the host information saved on the auto deploy server is up-to-date. This cmdlet parses the host attributes against the active ruleset and compares the results with the information saved in the cache. If the saved information is incorrect (i.e. out of compliance) the cmdlet will return a status of “Non-Compliant” and show what needs to be updated. If the information in the cache is correct, then the command will simply return an empty string.
Thanks to Kyle Gleed for his blog on the above
https://blogs.vmware.com/vsphere/2012/11/auto-deploy-host-booting-from-wrong-image-profile.html
Steps to test the DeployRuleSetCompliance
- Connect to vCenter through Putty
- In order to check one host, we can use Test-DeployRuleSetCompliance lg-spsp-cex03.lseg.stockex.local. it will tell us it is non-compliant

- In order to repair a single host to do a test we can use the below piped command. If you get an empty string back then the cache is not correct and ready to use the new image
- Test-DeployRuleSetCompliance lg-spsp-cex03.lseg.stockex.local | Repair-DeployRuleSetCompliance

- However, if we want to be clever about this because we have a lot of hosts, then we can run a quick simple PowerCLI “foreach” loop so we don’t have to update one host at a time
- foreach ($esx in get-vmhost) {$esx | test-deployrulesetcompliance | repair-deployrulesetcompliance}

- At this point, I would now start the TFTP service on the vCenter. Note: If you are using Solarwinds, this not necessary! Unless you want to double check it is all ok first.
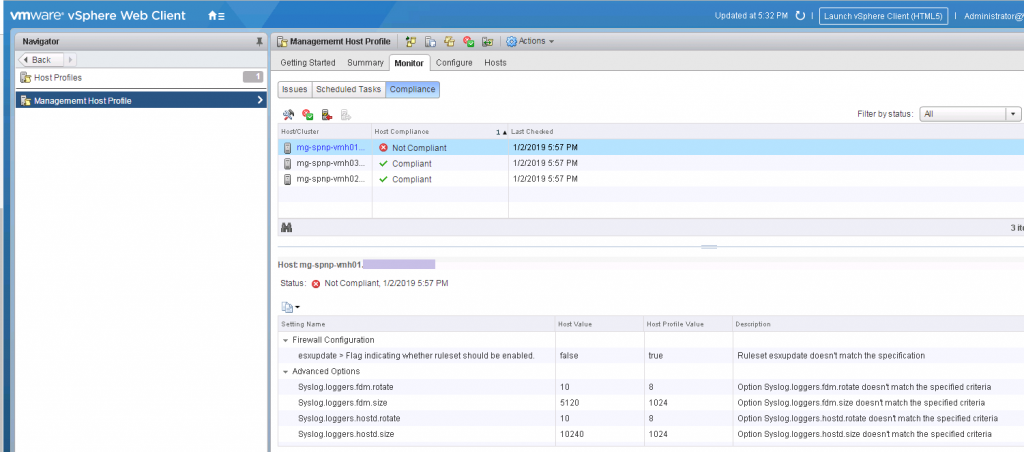
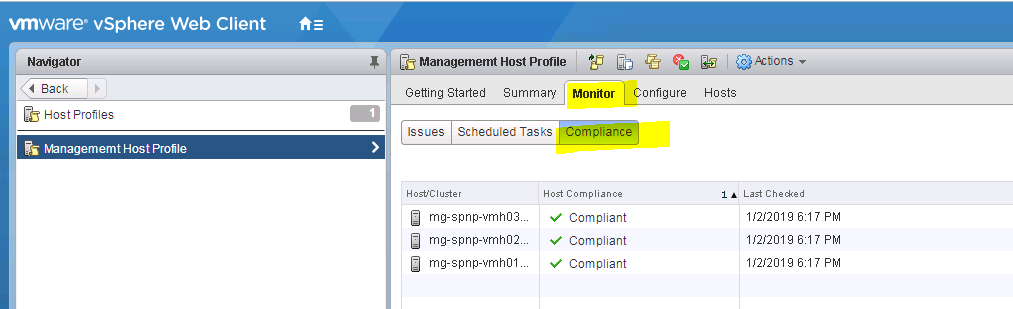
- Next Reboot the hosts and check they come up as the right version, example of our environment below pre and post remediation
Other issues we faced!
Issue 1 – TFTP Service on the vCenter
We used the TFTP service which was inbuilt to the vCenter. What you will find if you use this is that it will start but then it will automatically stop itself after a while which is fine. It’s just a case of remembering to start it. I found that with our HPE hosts, even after modifying the AutoDeploy rule and running the TestDeploy and RepairDeploy rules, that it was still booting from cache. In the ILO screen, you could see it picking up a DHCP address and the DHCP service passing the TFTP server to the host but then it timed out, Once the service was started on the vCenter it was fine.
service atftpd start
service atftp status
Note: Apparently VMware do not support the inbuilt vCenter Service so when we asked how we could keep the service running, we were told they wouldn’t help with it. So probably best to install something like Solarwinds which will keep the service running continuously.
Issue 2 – HPE Oneview Setting for PXE Boot
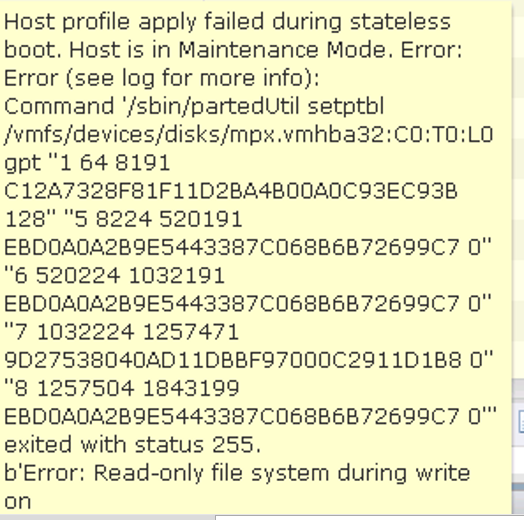
We found that with HPE BL460 Blades with SSD cards in, sometimes an empty host would boot up and lock a partition. This resulted in the host profile not being able to be applied, settings all over the place and there was absolutely no way of getting round it. We could only resolve it by using gparted to wipe the disk and boot again. There seemed to be no logic though as 5 out of 10 fresh hosts would boot up fine and 5 would not and lock the partition.
This what you would see if you hover over the error in vCenter