Archive for November 2016

Installing the Linux Log Insight agent on the vCenter Orchestrator appliance

vRARobot2

Installing the Linux Log Insight agent on vCenter Orchestrator

The Log Insight agent now gets pre-installed on some of the vRealize appliances which is very useful which means there is no need to install agents manually.  Some of the VMware products which have the agent pre-installed:

vRealize Business
vRealize Operations Manager (beginning from 6.1)
vRealize Orchestrator (beginning from 7.0.1)
vRealize Automation (beginning from 7.0.1)
vRealize Log Insight

However this version of Orchestrator is 6.0.3 due to work testing so we need to install the agent manually.

vCO Details

  • Name = techlabvco001.techlab.local
  • IP Address = 192.168.1.123/24
  • SSH enabled
  • vCO Config Page = https://192.168.1.123:8283
  • vCO Getting started page and Orchestrator client download = https://192.168.1.123:8281/vco
  • vCO Appliance login = https://192.168.1.123:5480

Log Insight Details

  • Name = techlabvrl001.techlab.local
  • IP Address = 192.168.1.122/24
  • SSH enabled
  • Log Insight Configuration = https://192.168.1.122

Useful link to Log Insight Documentation Center

http://pubs.vmware.com/log-insight-30/index.jsp#com.vmware.log-insight.agent.admin.doc/GUID-04892000-72C6-4227-BB37-6A2271E03B8C.html

Steps

Note: You may already have Orchestrator installed. If so go from connecting WinScp to the Orchestrator appliance.

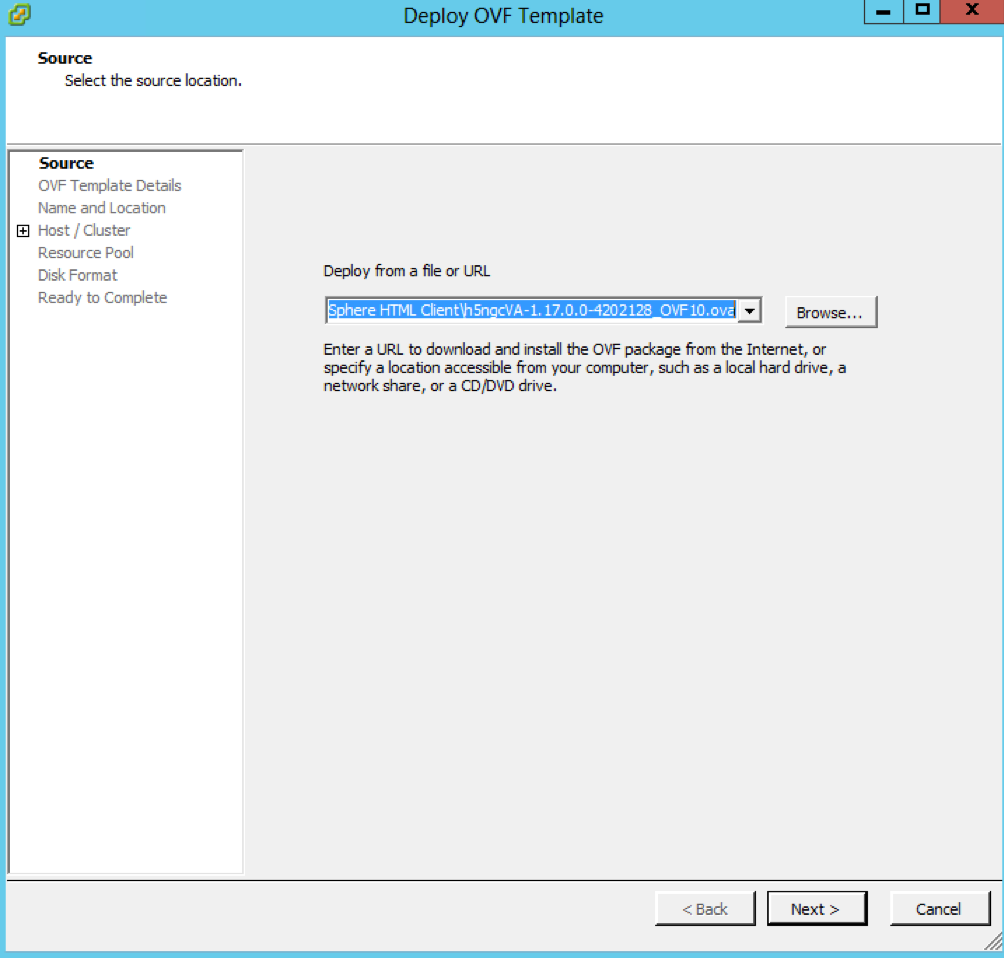
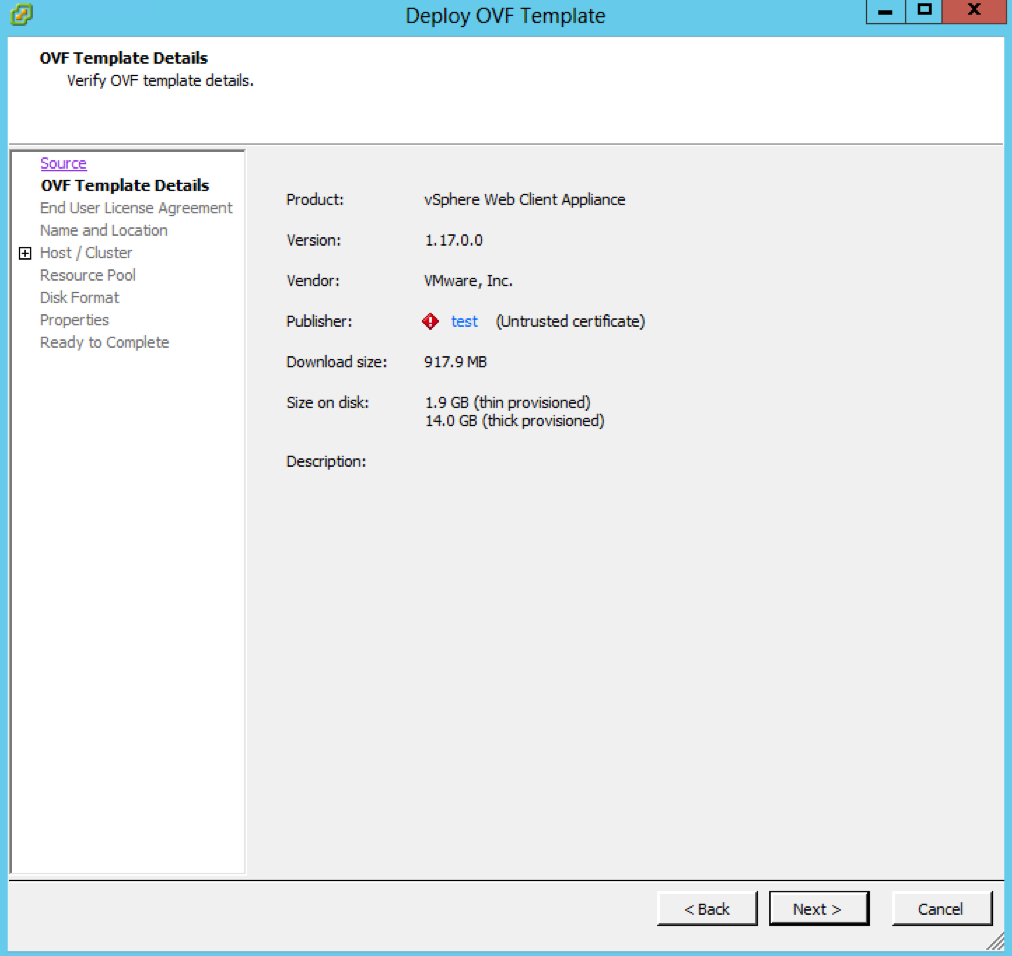
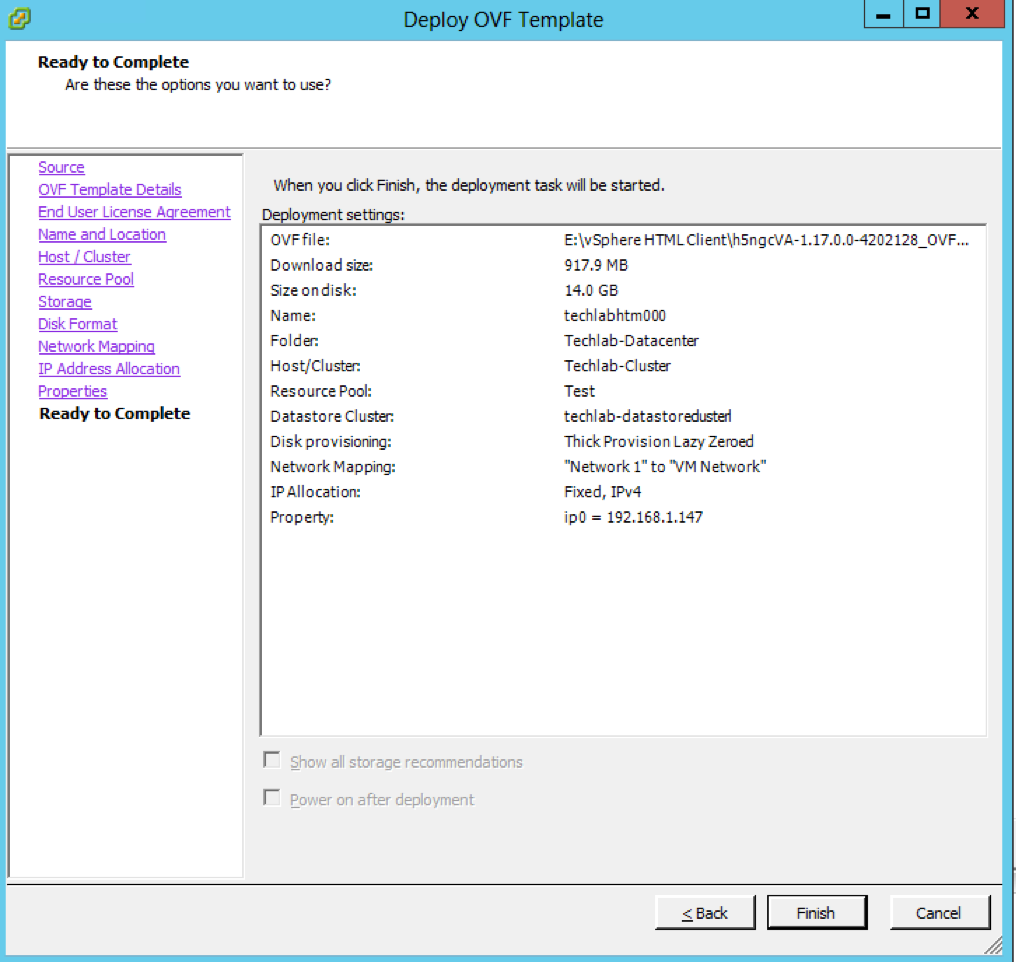
  • Download and install the vCenter Orchestrator OVF. In my case this was version 6.0.3 as I was doing some testing for work.
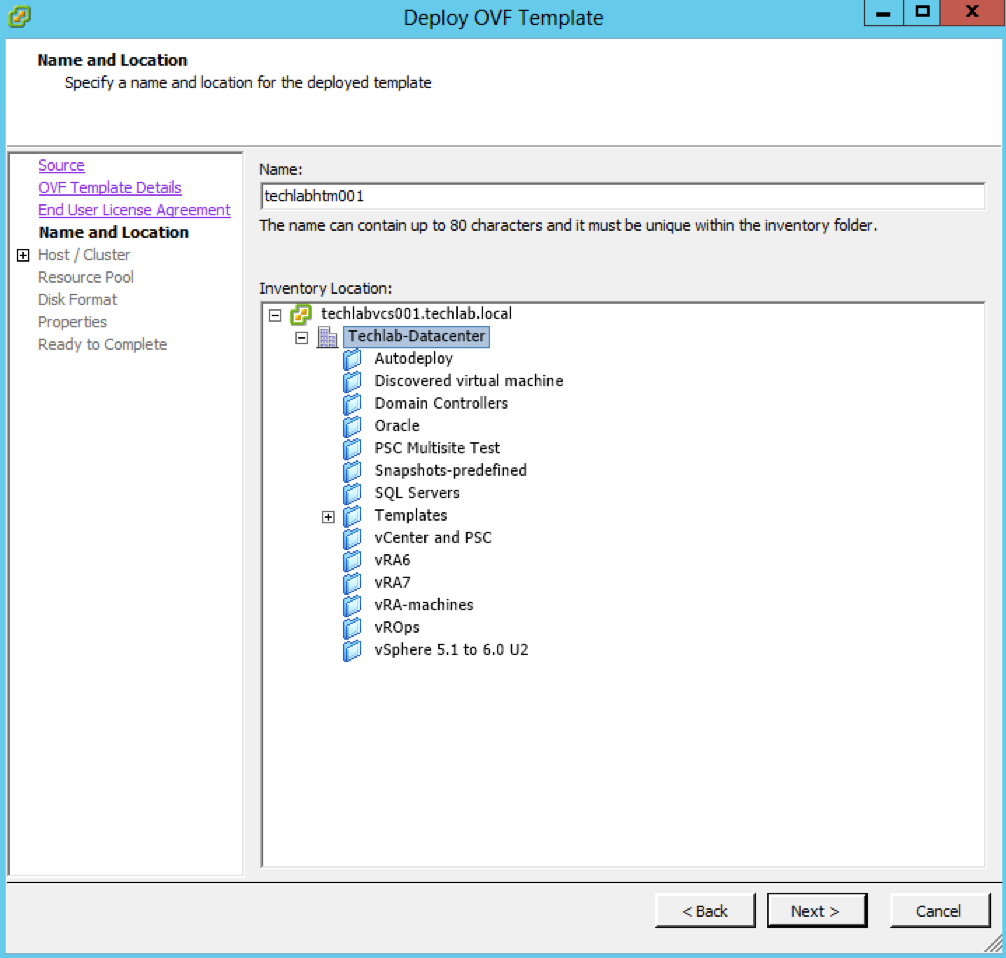
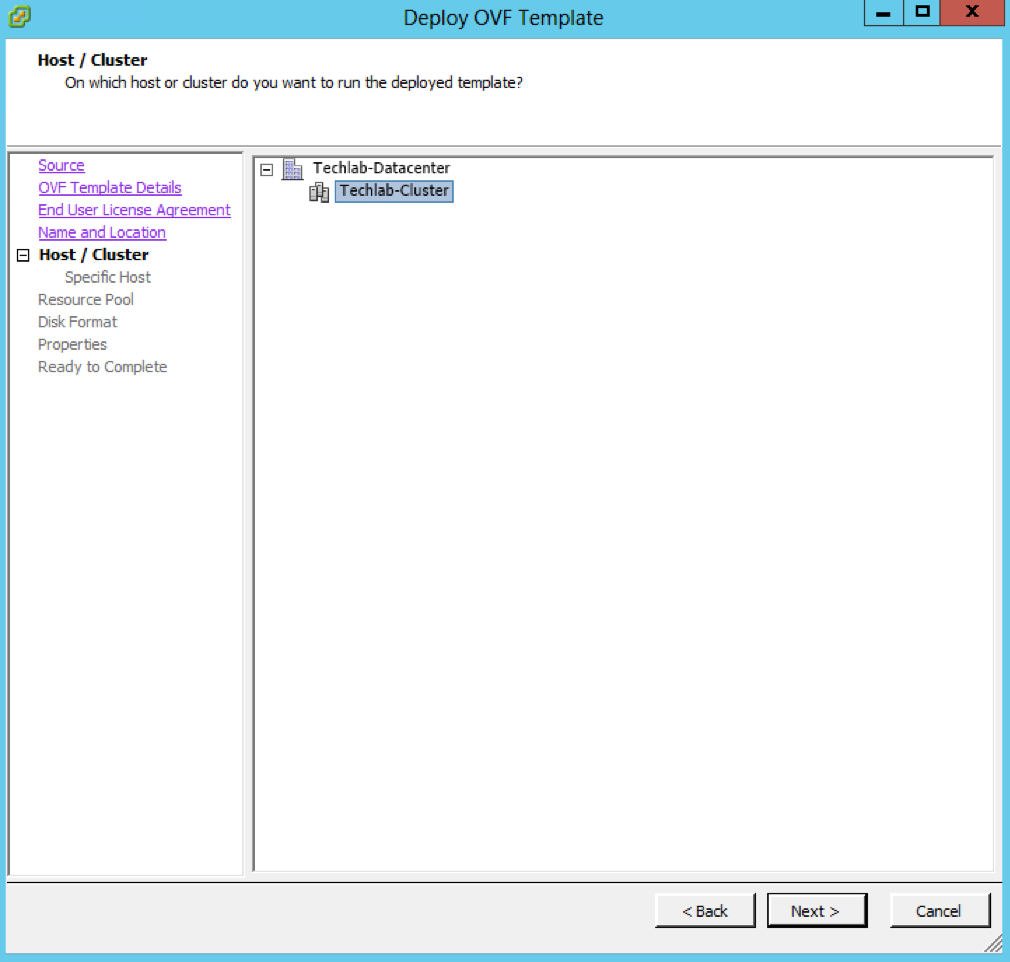
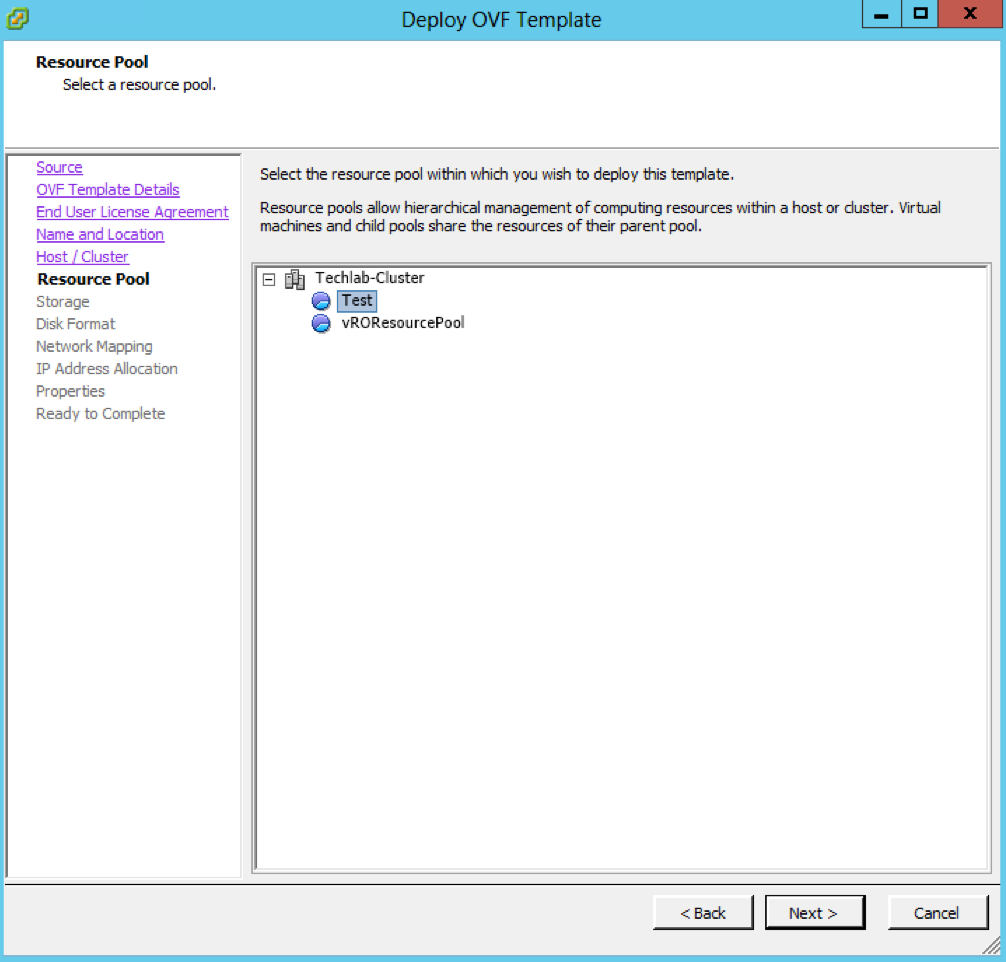
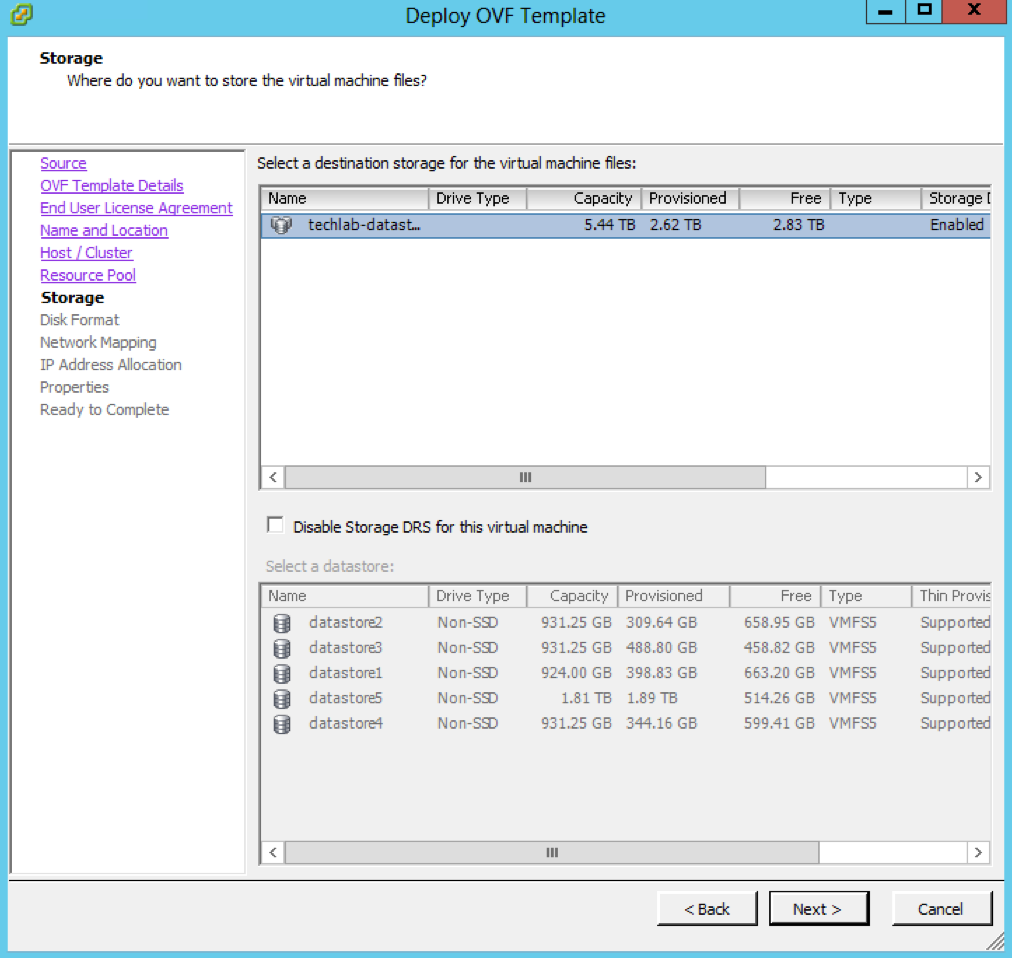
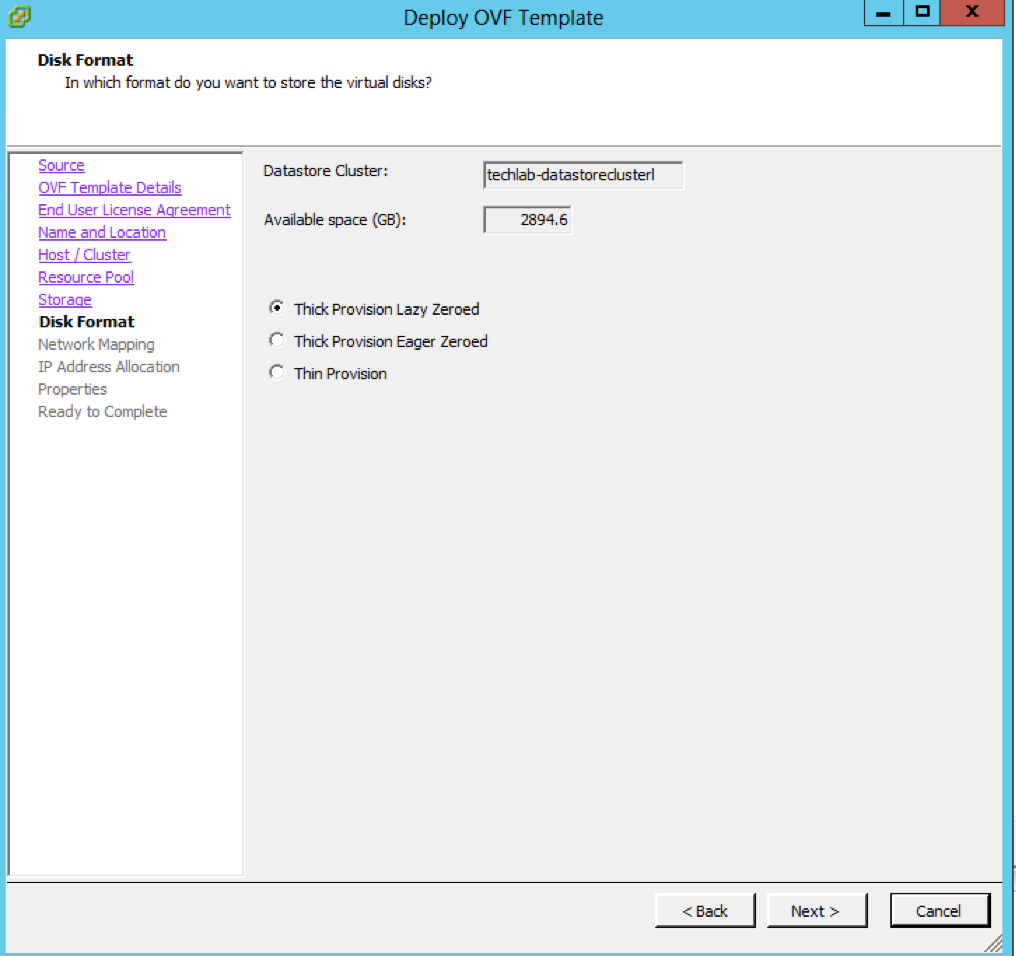
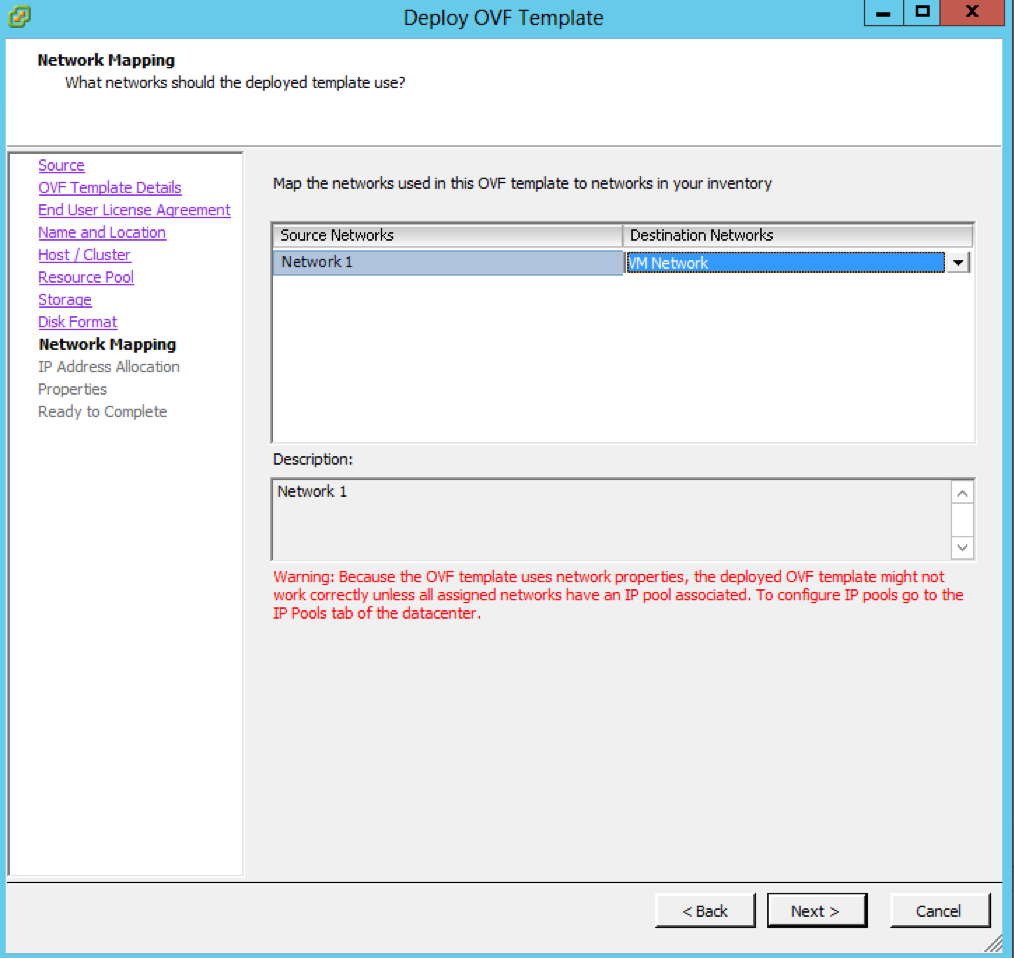
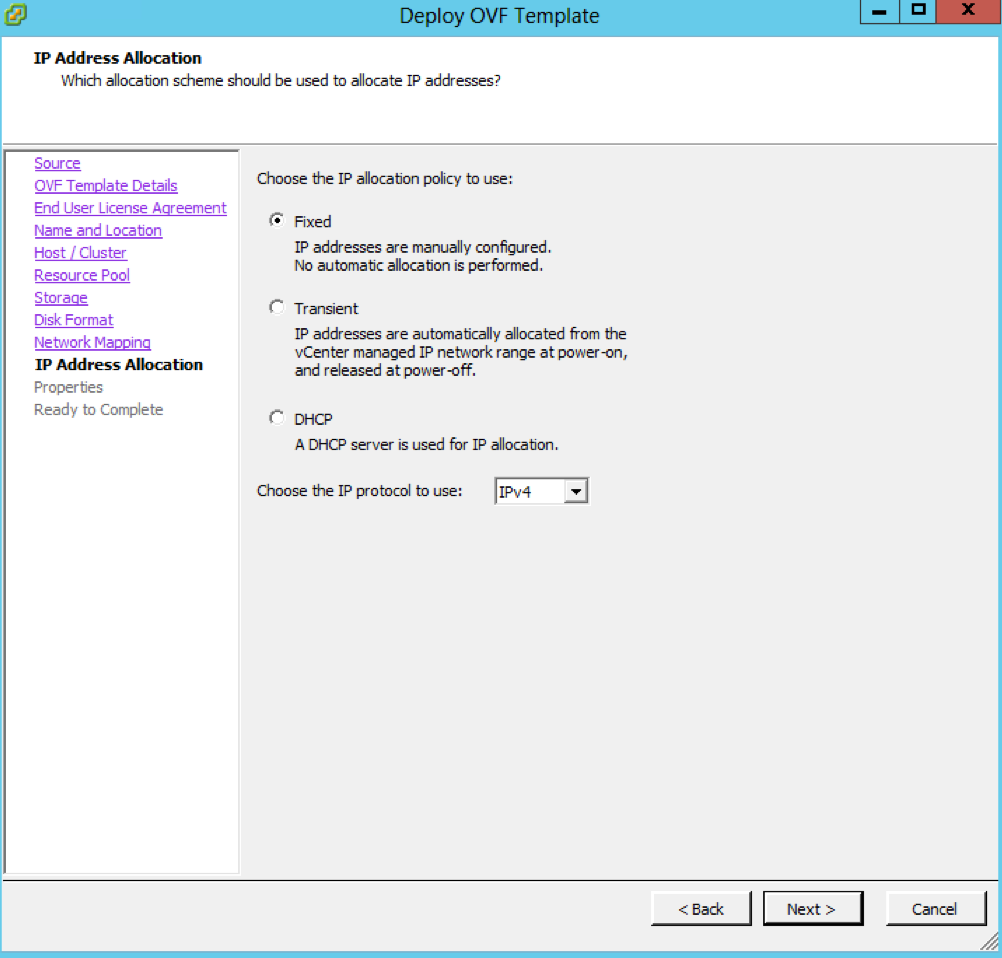
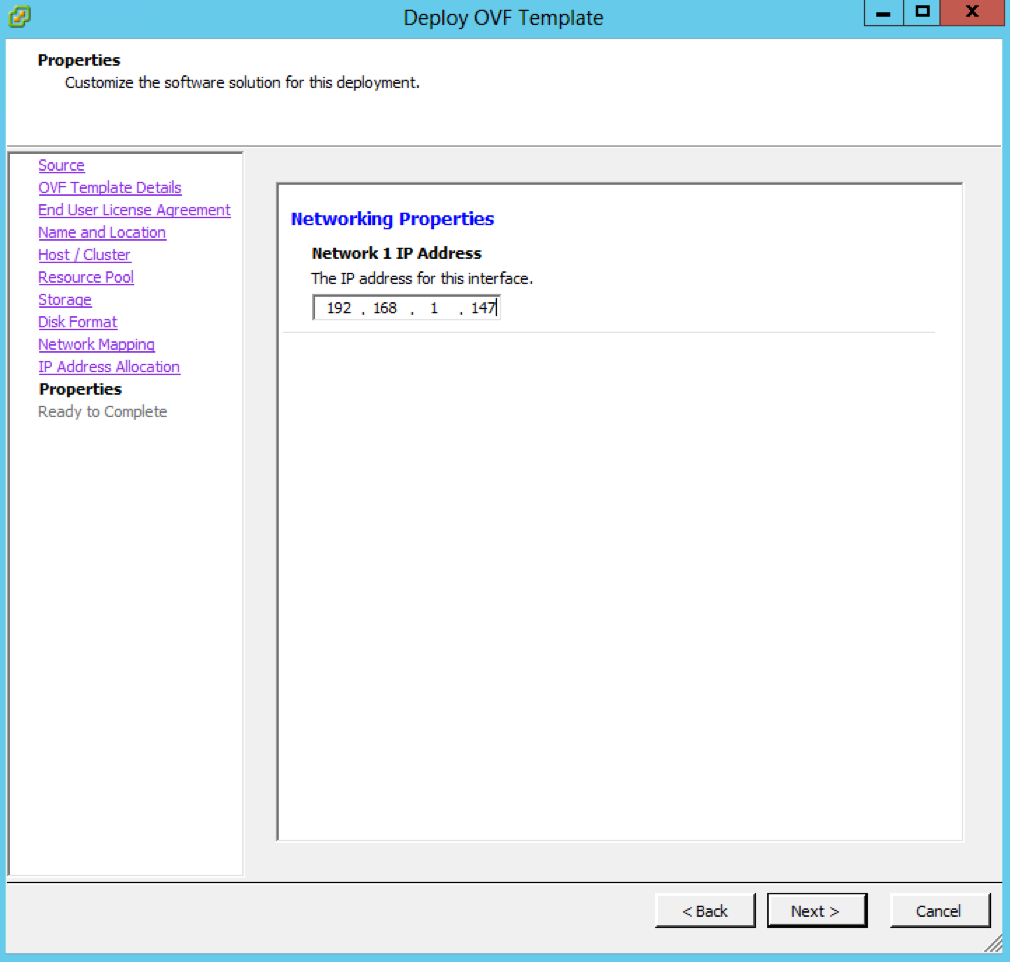
  • Import the OVF into vCenter and follow the wizard to set all the relevant configuration information. Note: You will need to set a root password and a default password for the vmware user account in the wizard in order to access the configuration page
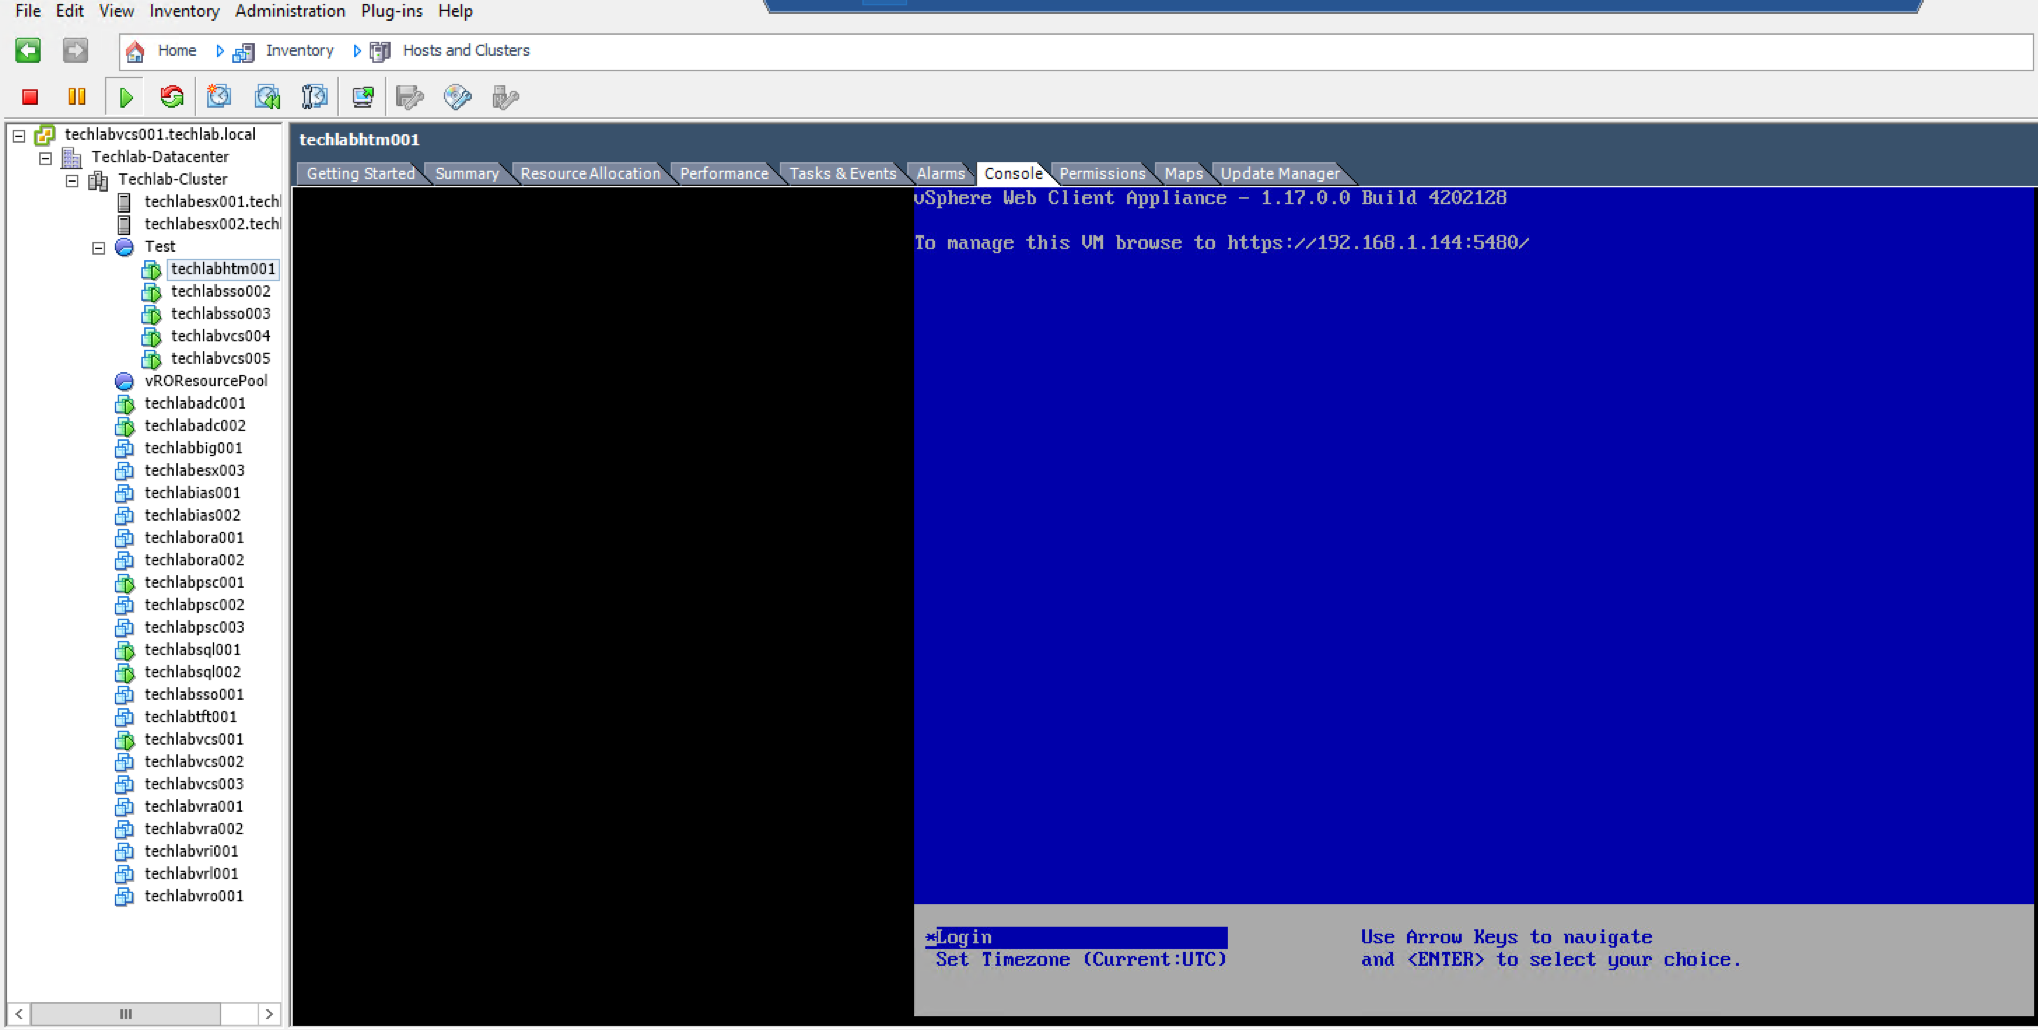
  • Power on the vCO appliance
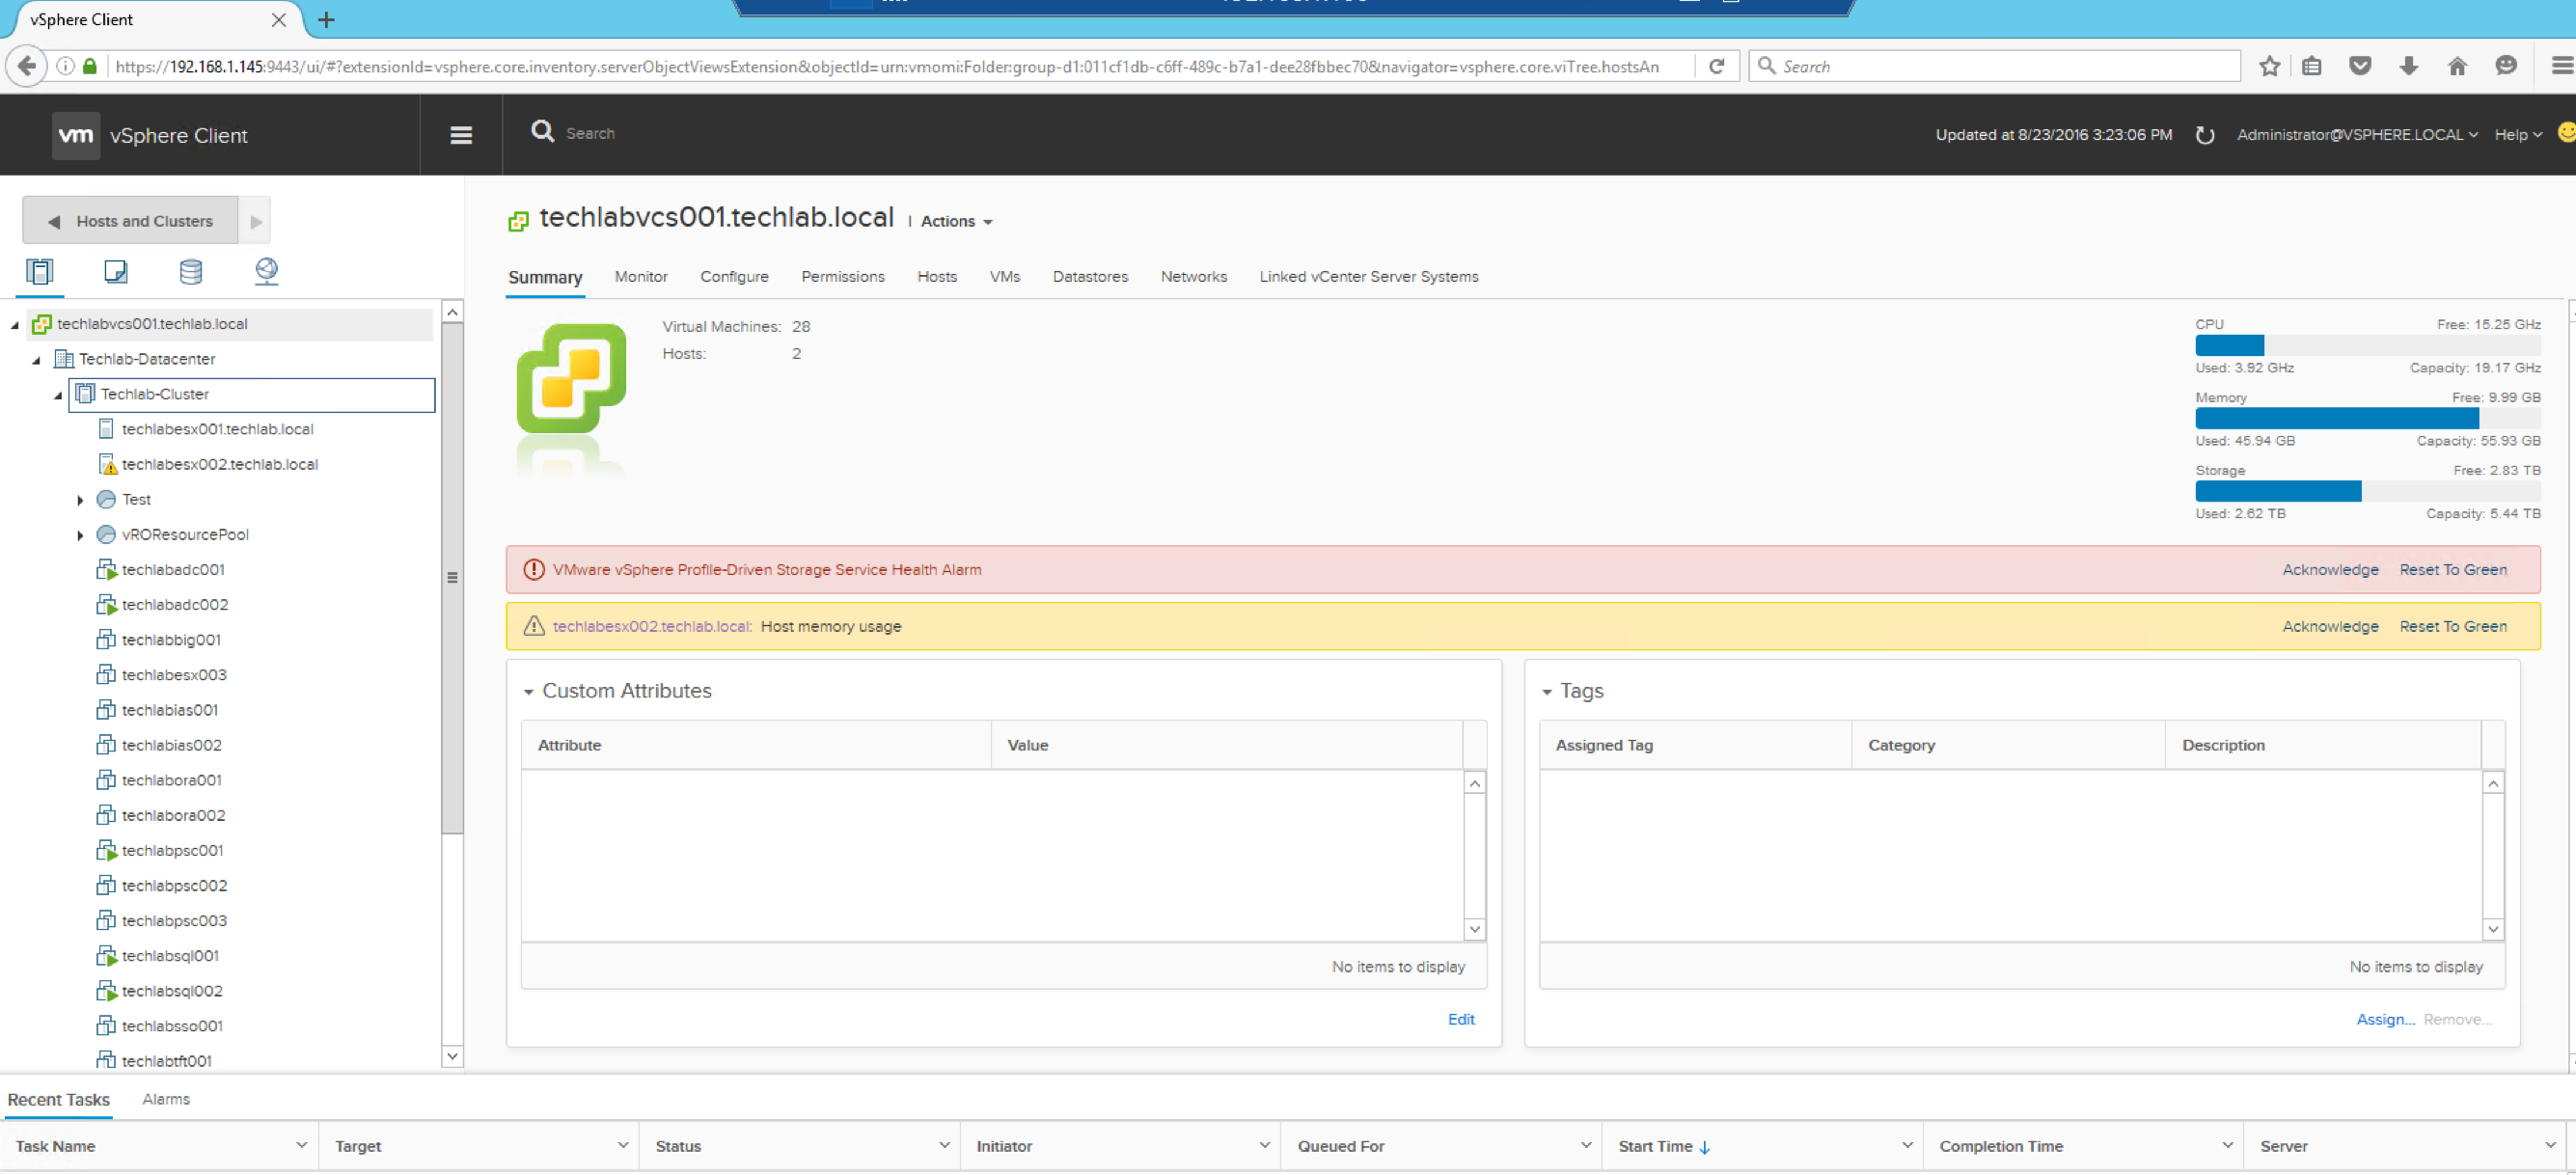
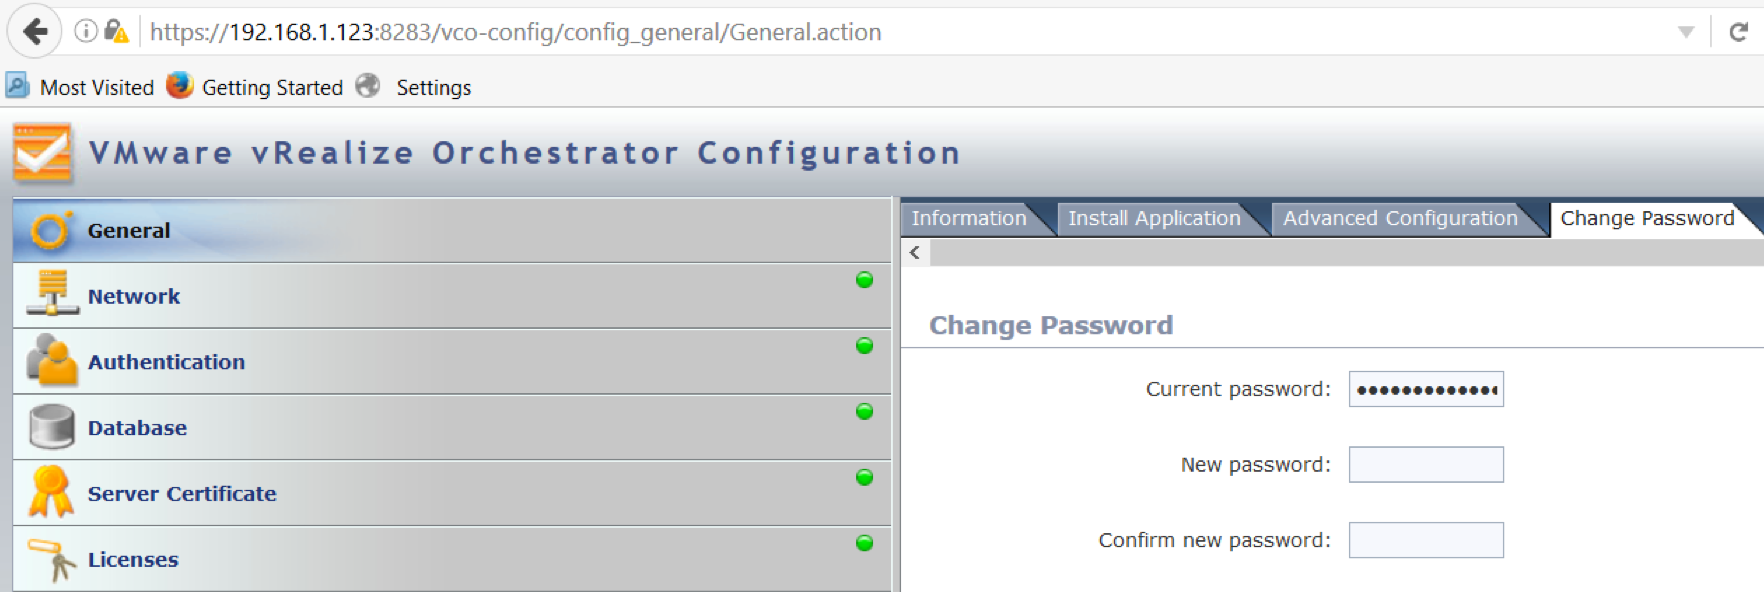
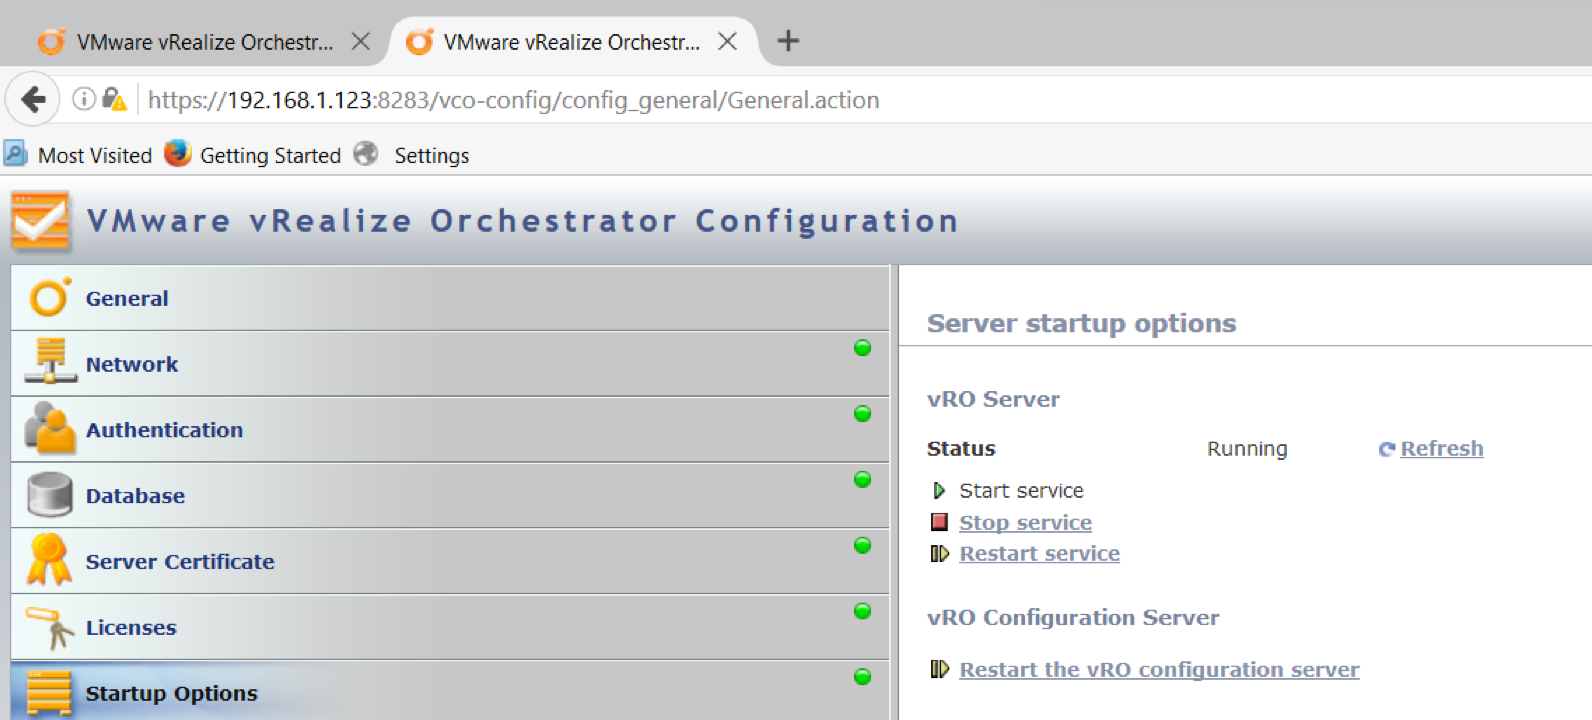
  • Navigate to the vCO Config Page = https://192.168.1.123:8283 and log in with the account vmware and the password you set during installation
  • In the General Page you can reset the vmware account password if you wish

screen-shot-2016-11-14-at-11-22-37

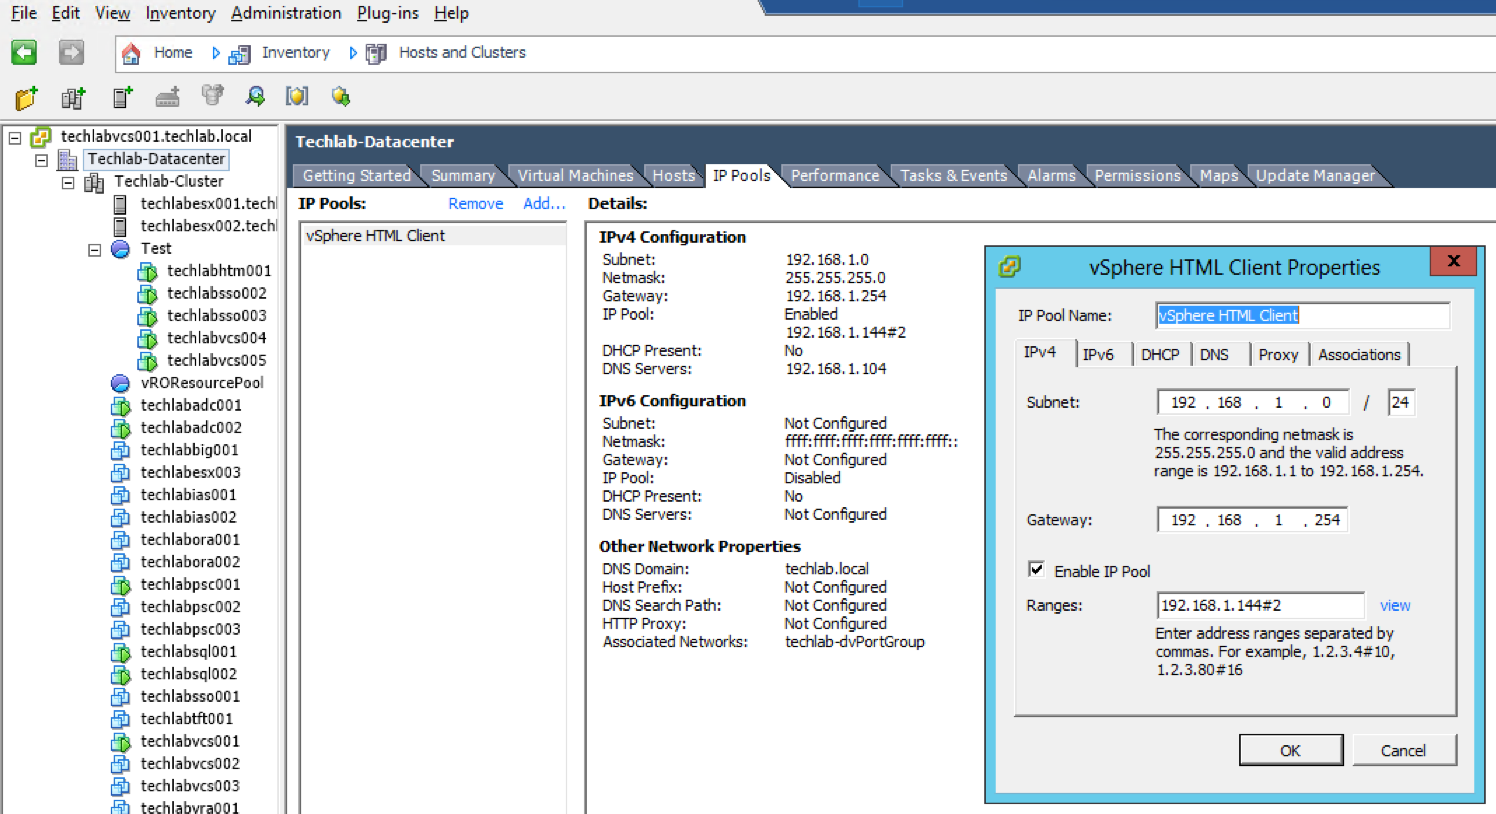
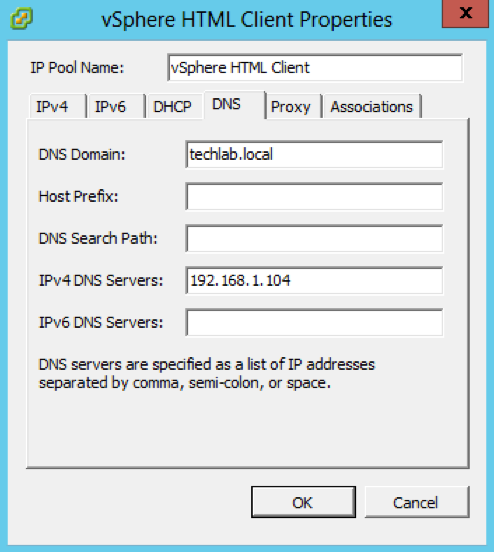
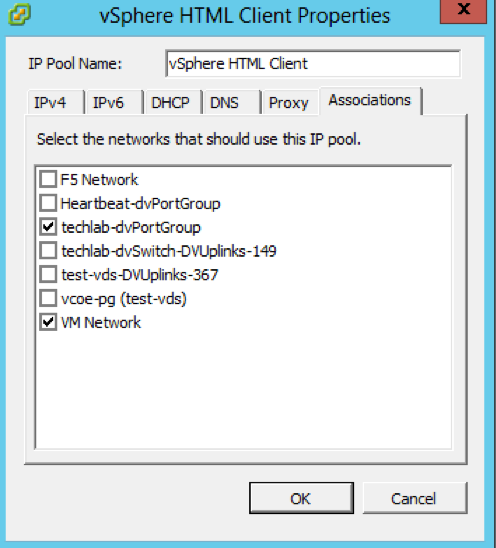
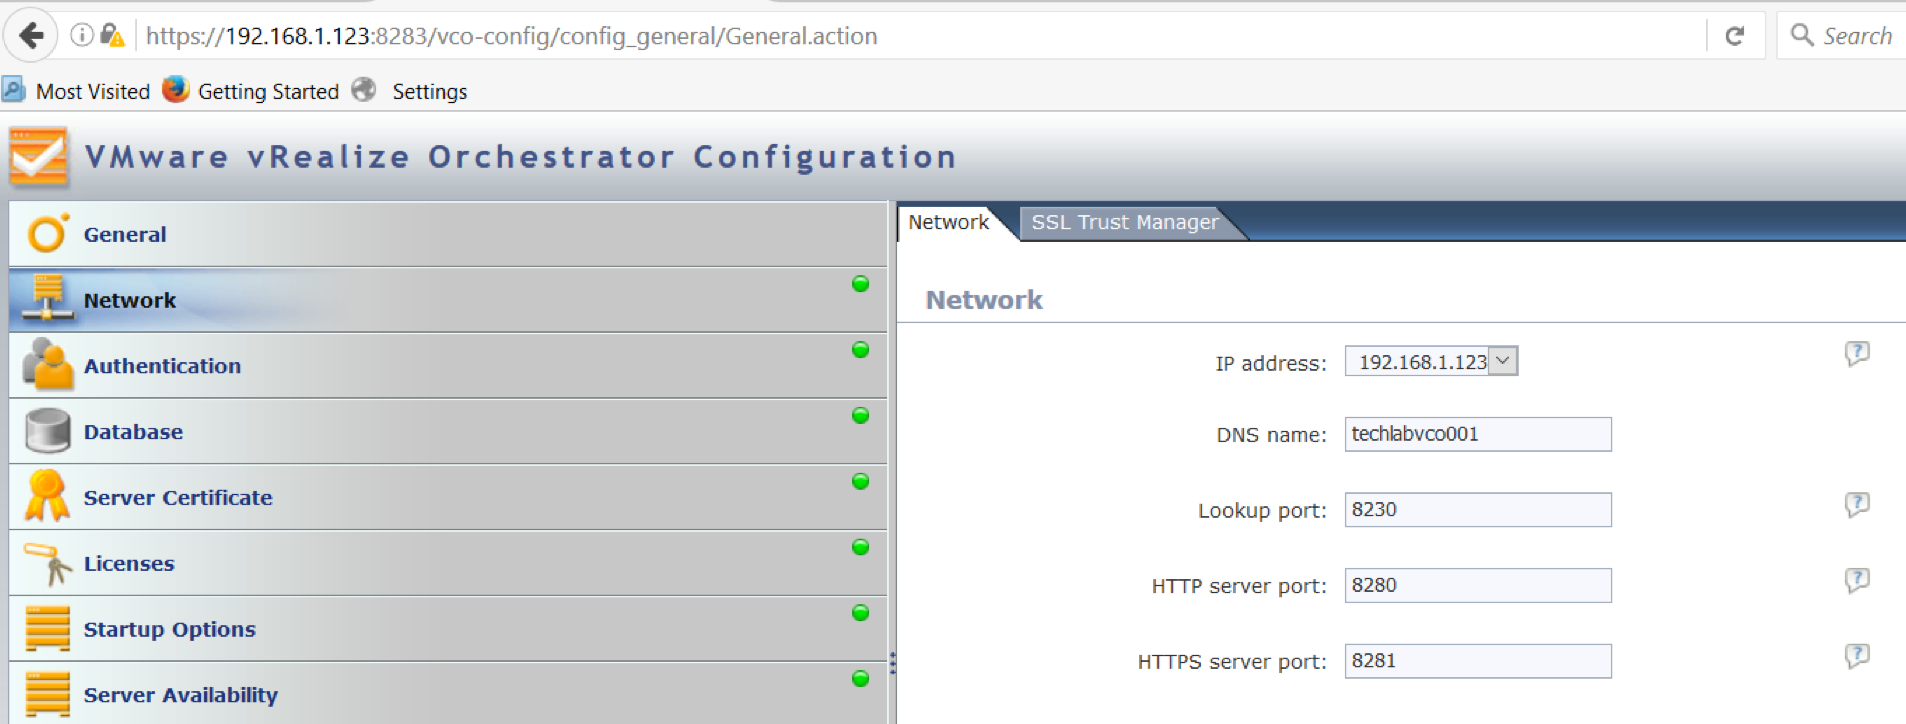
  • Click on Network and check all the details are correct

screen-shot-2016-11-14-at-11-23-57

  • You will need to put in an authentication source (LDAP, Active Directory etc) This is required as you will need to have authentication sources to log in to the Orchestrator client

screen-shot-2016-11-14-at-11-24-54

screen-shot-2016-11-15-at-09-09-24

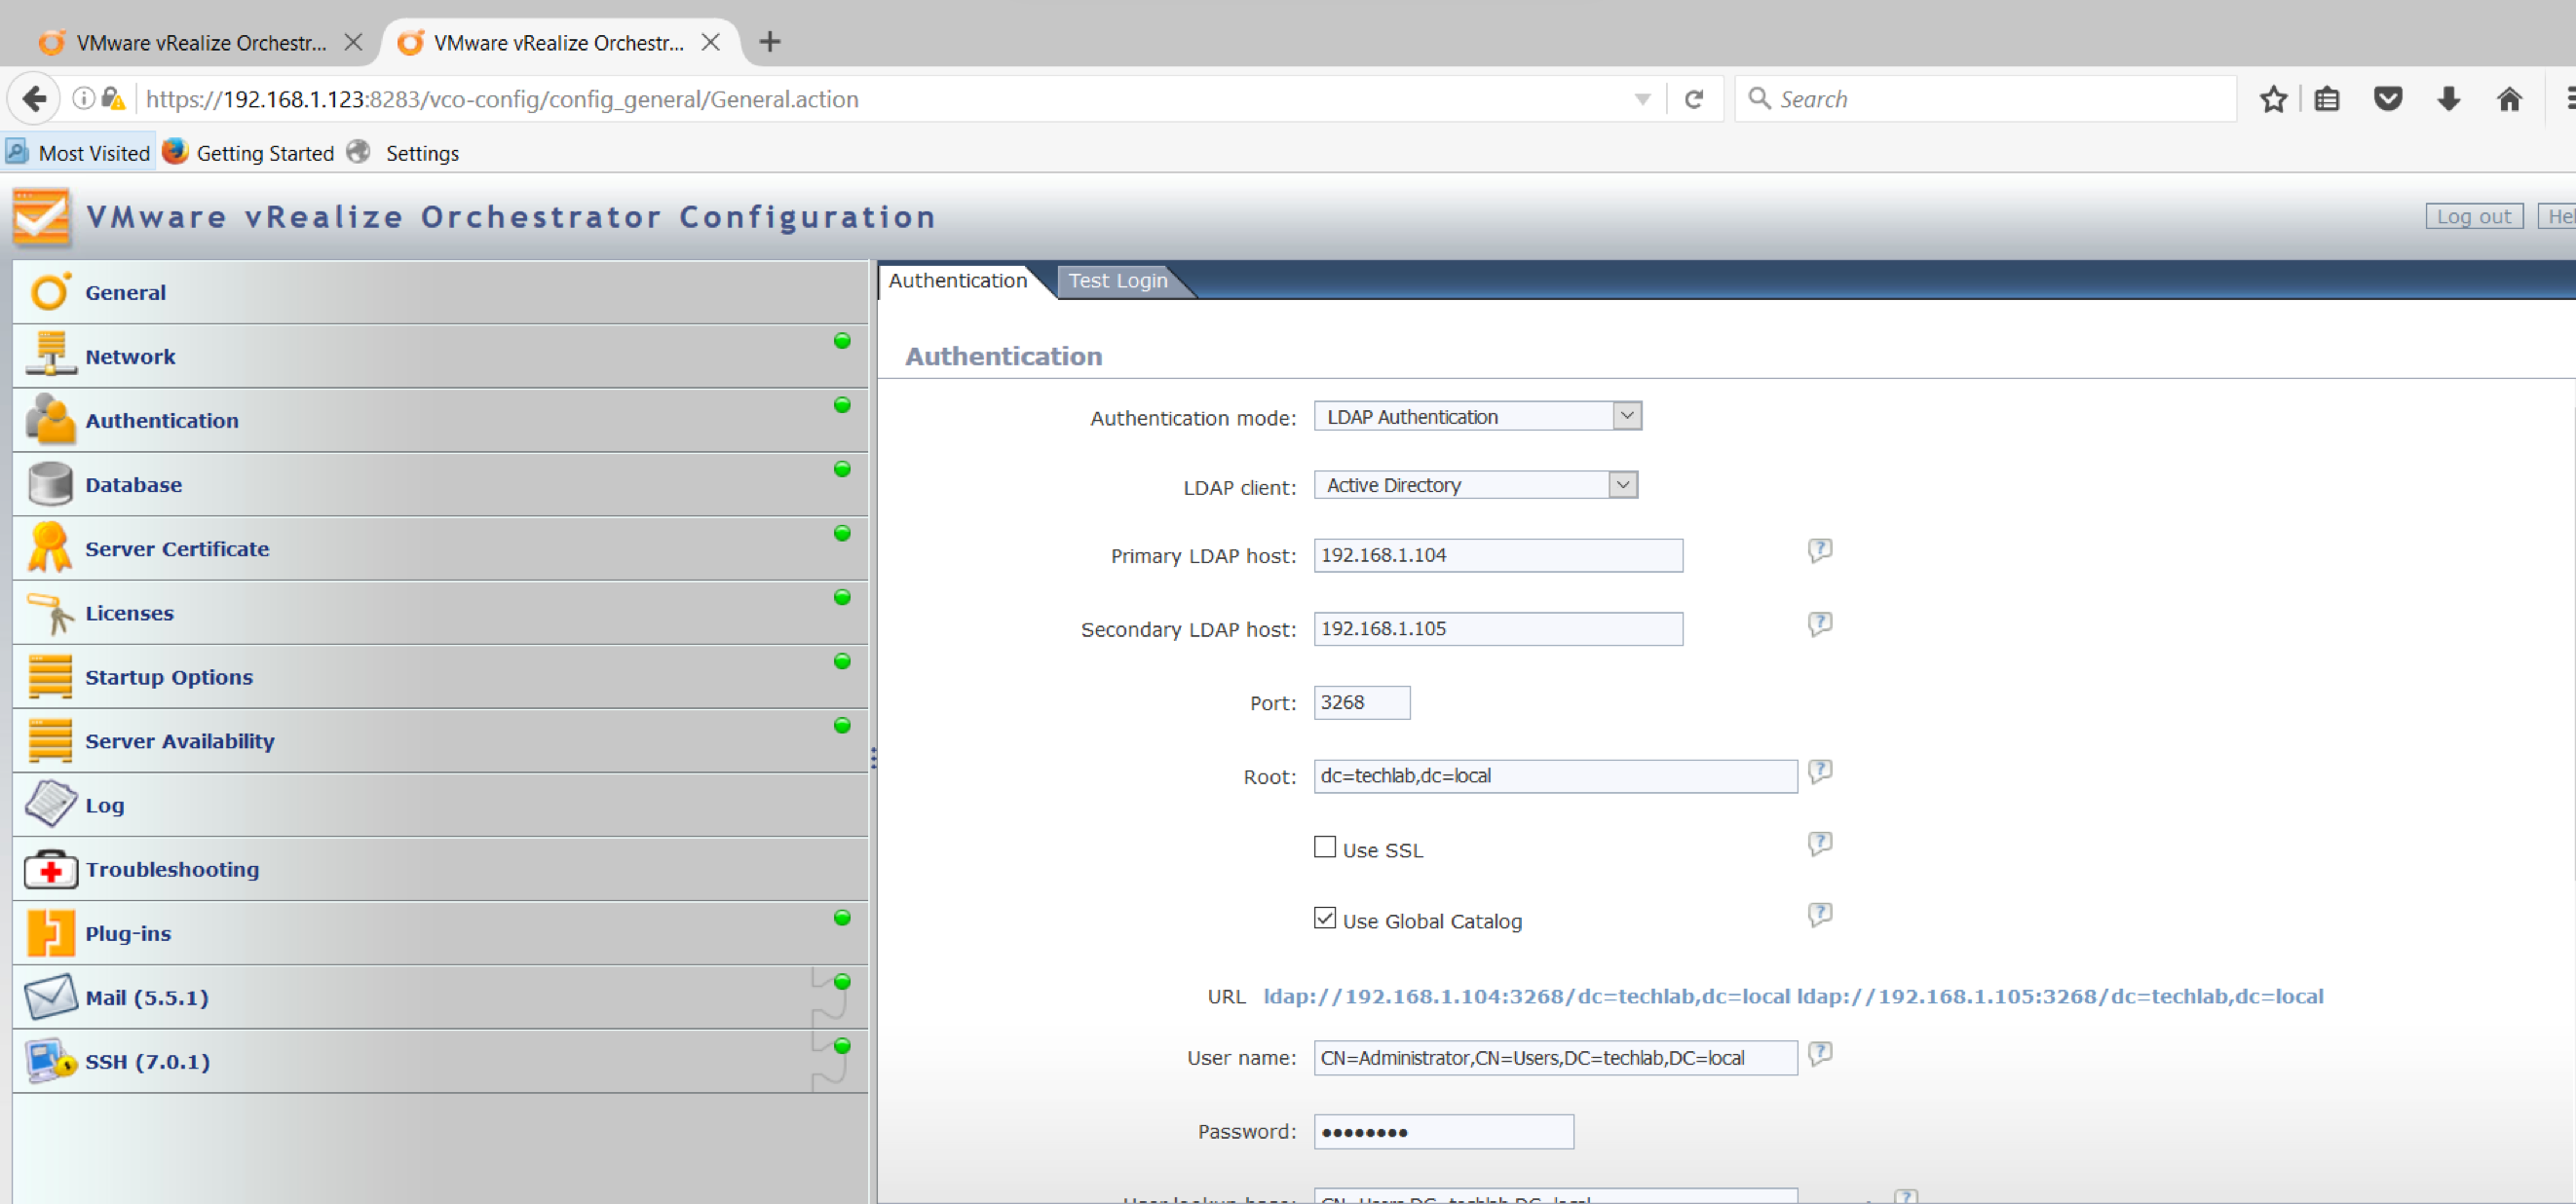
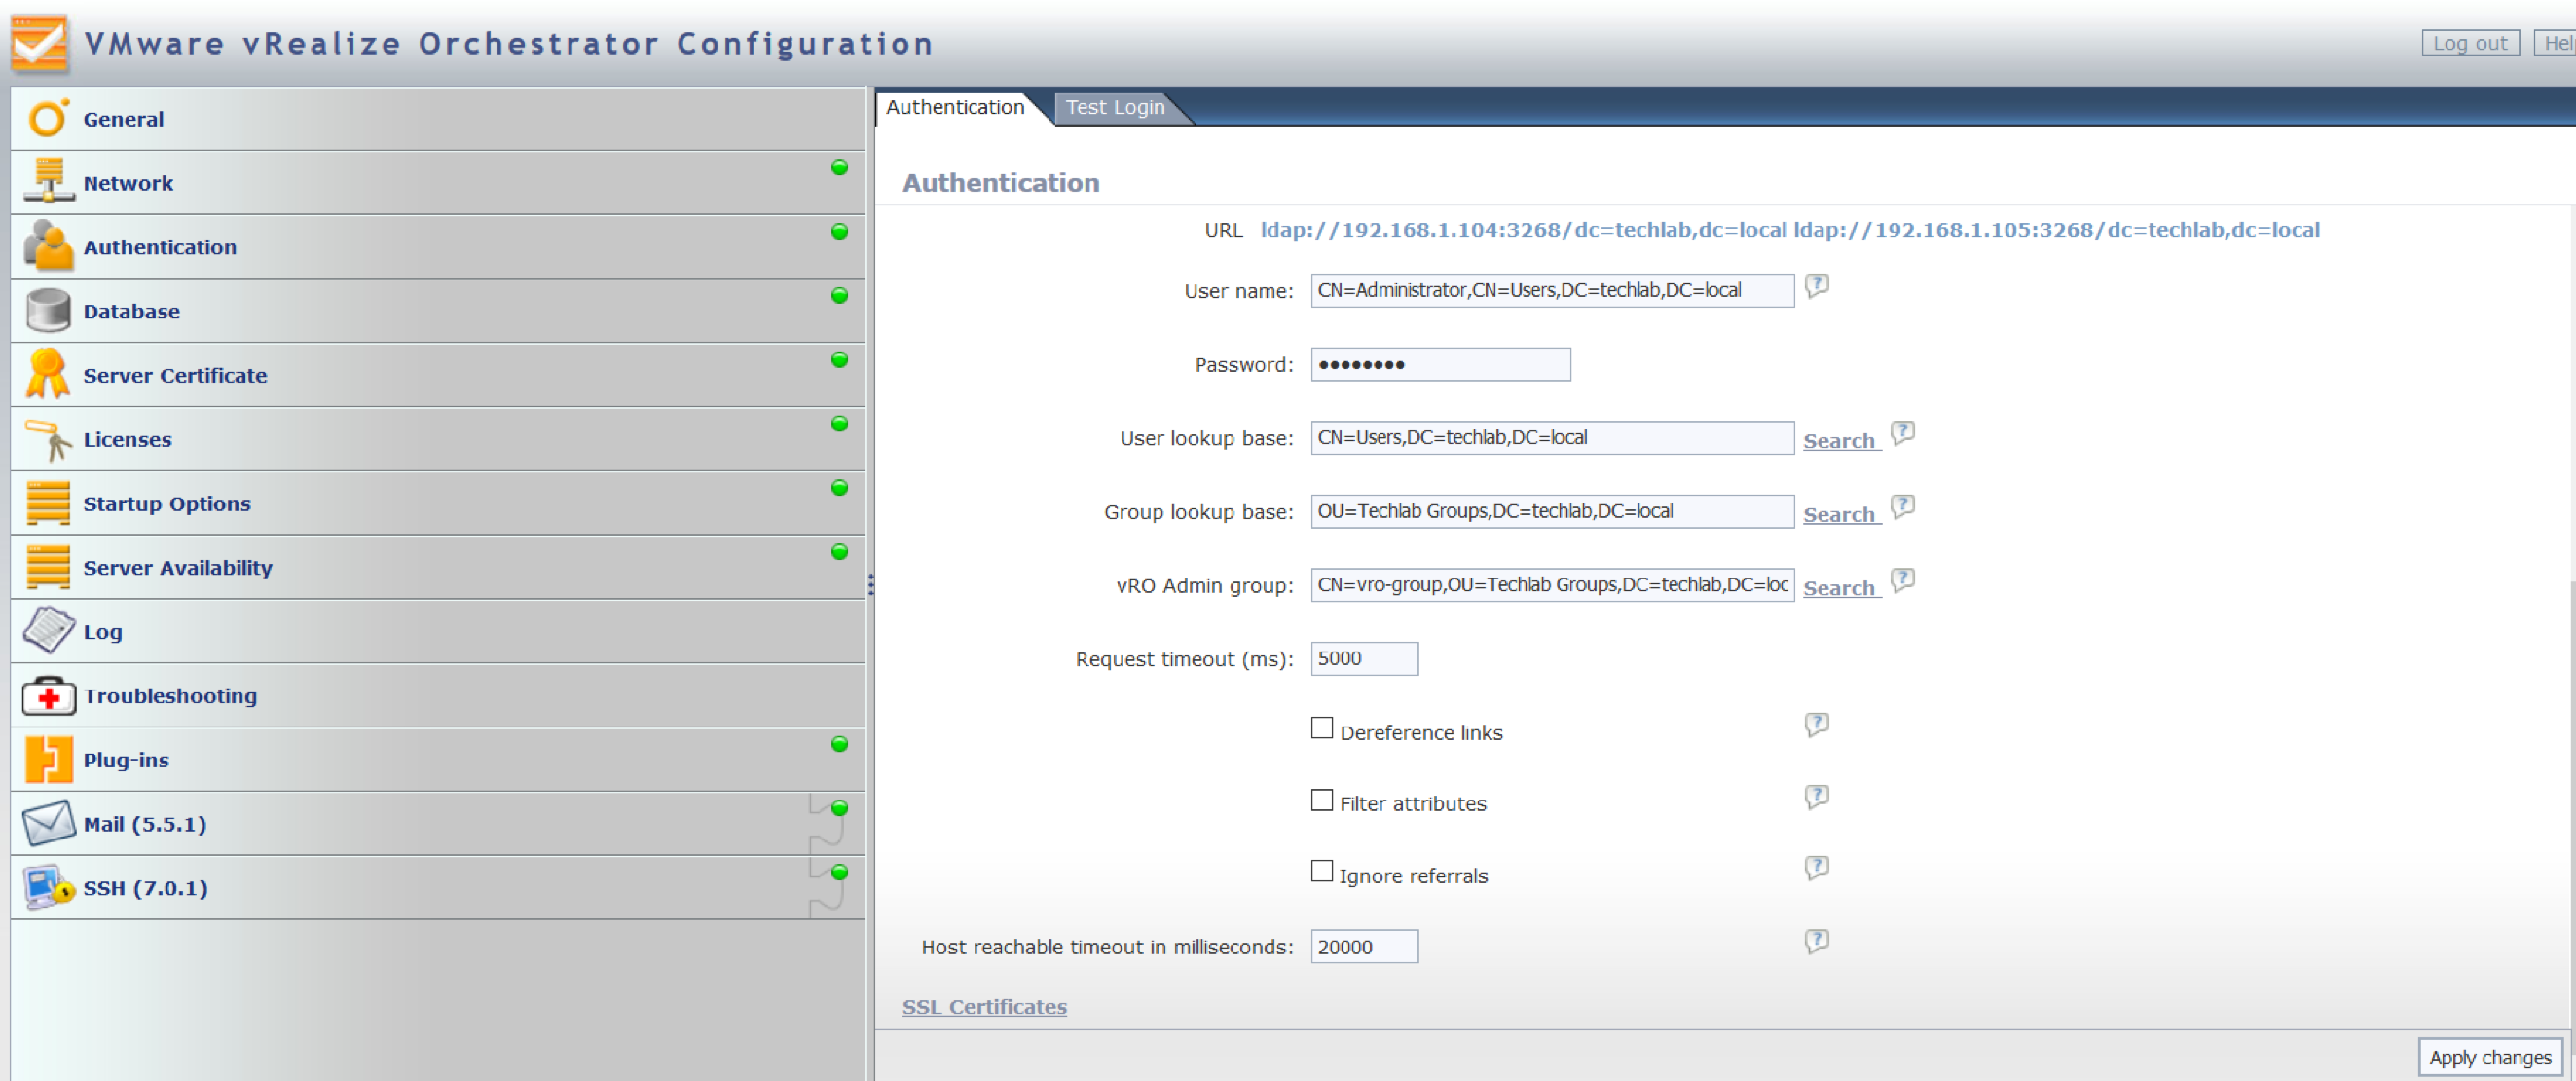
  • After configuring an authentication source, you may need to restart the vRO Server and the vRO Configuration Server.

screen-shot-2016-11-14-at-11-26-36

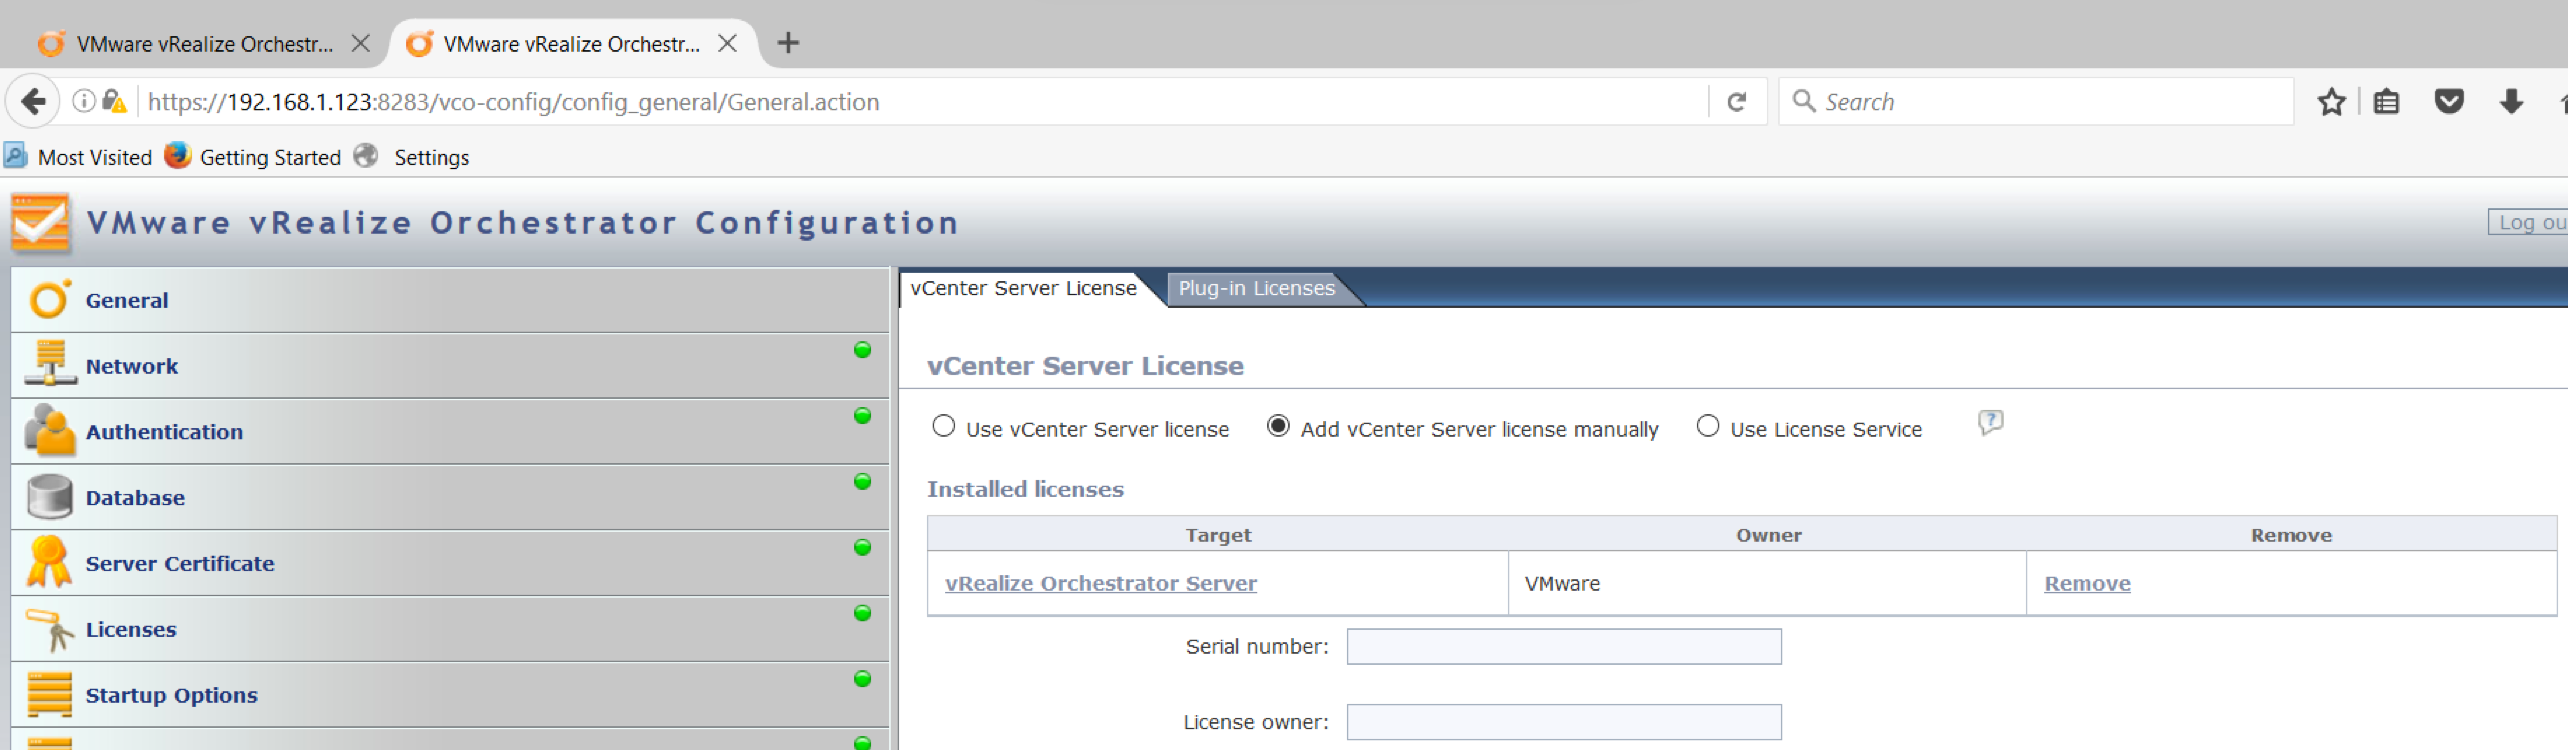
  • Add your license in. Options are below

screen-shot-2016-11-14-at-11-34-05

  • Check all other options and configure as relevant. Basically everything should look green.
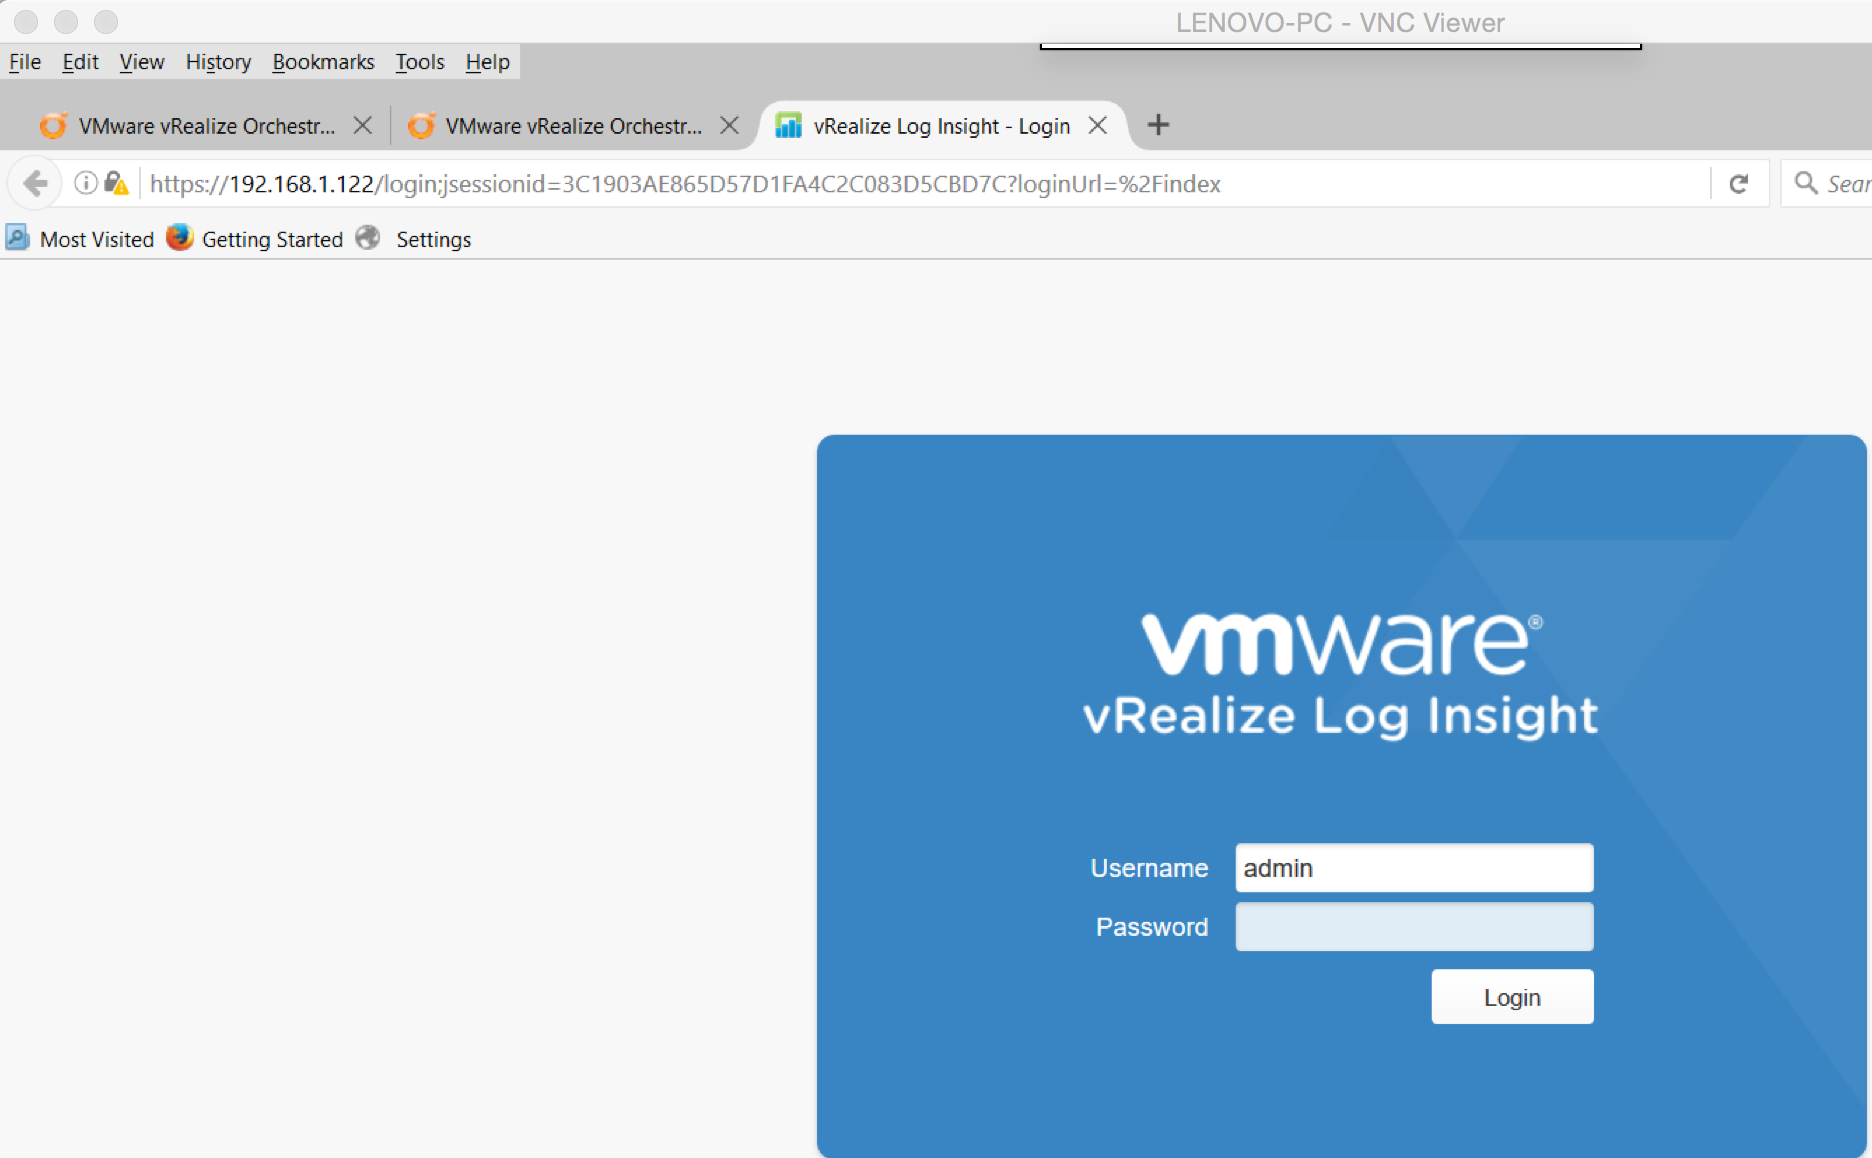
  • Next Log into Log Insight

screen-shot-2016-11-14-at-11-38-08

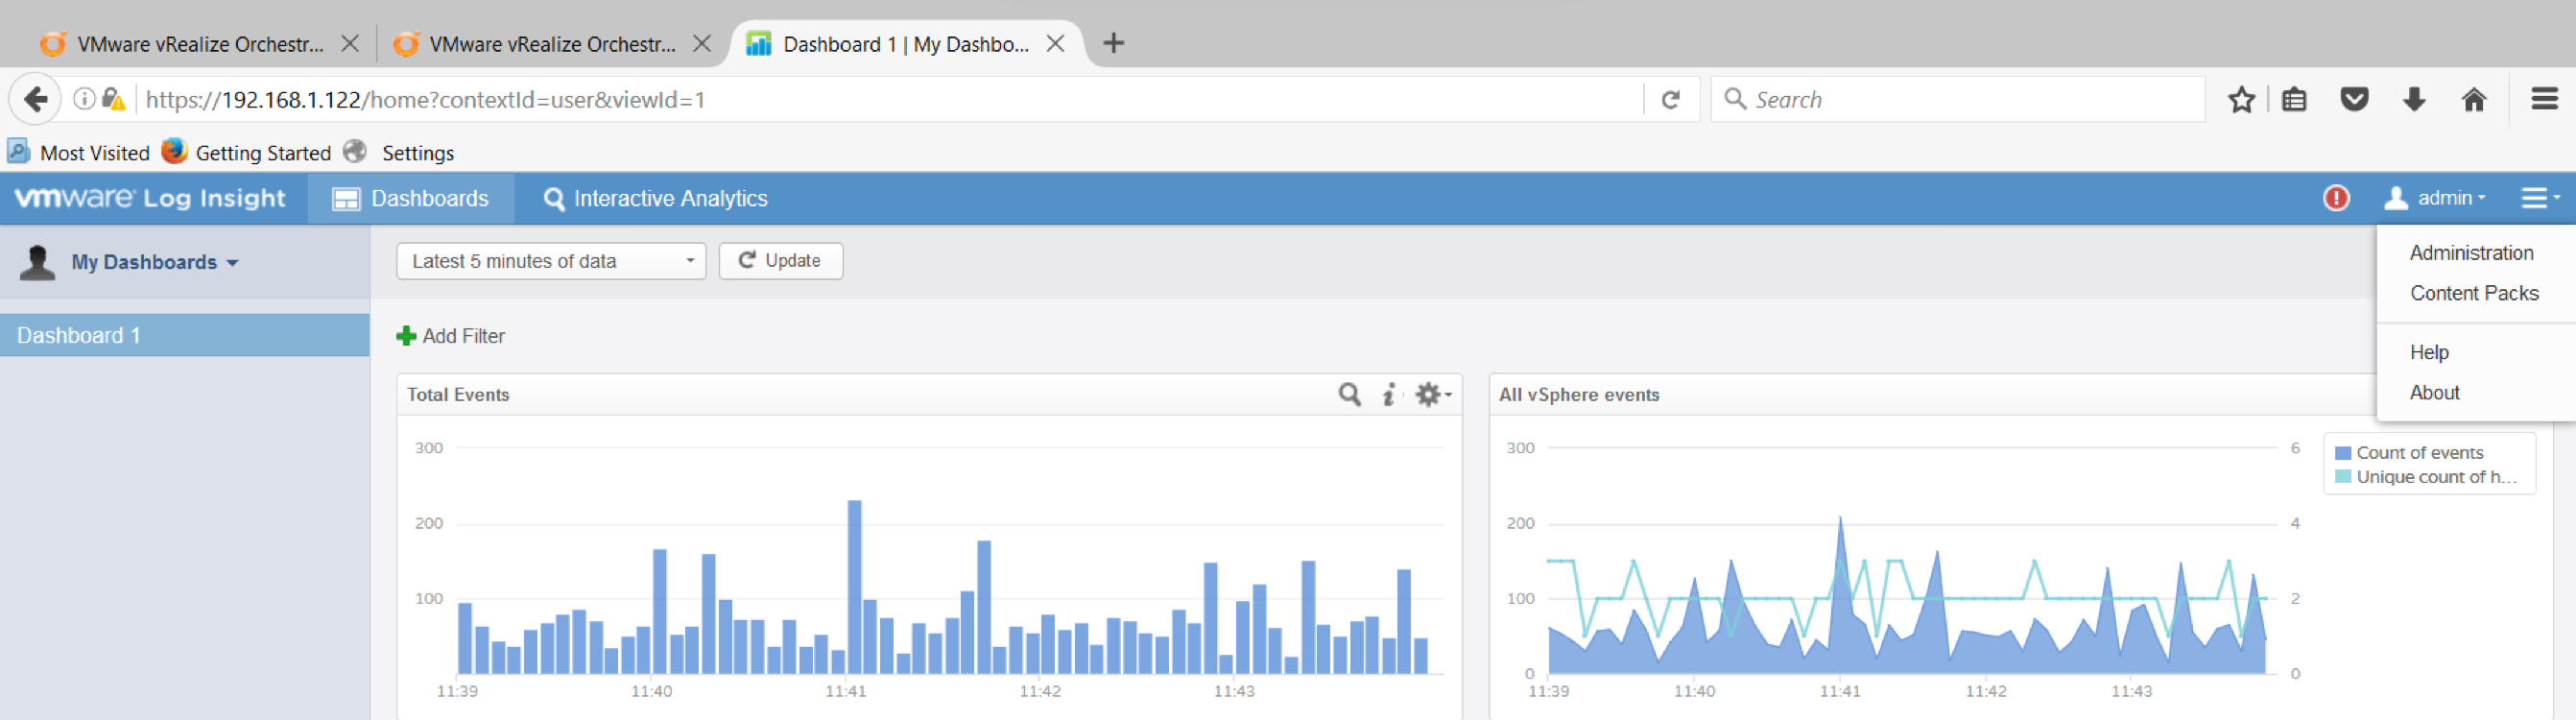
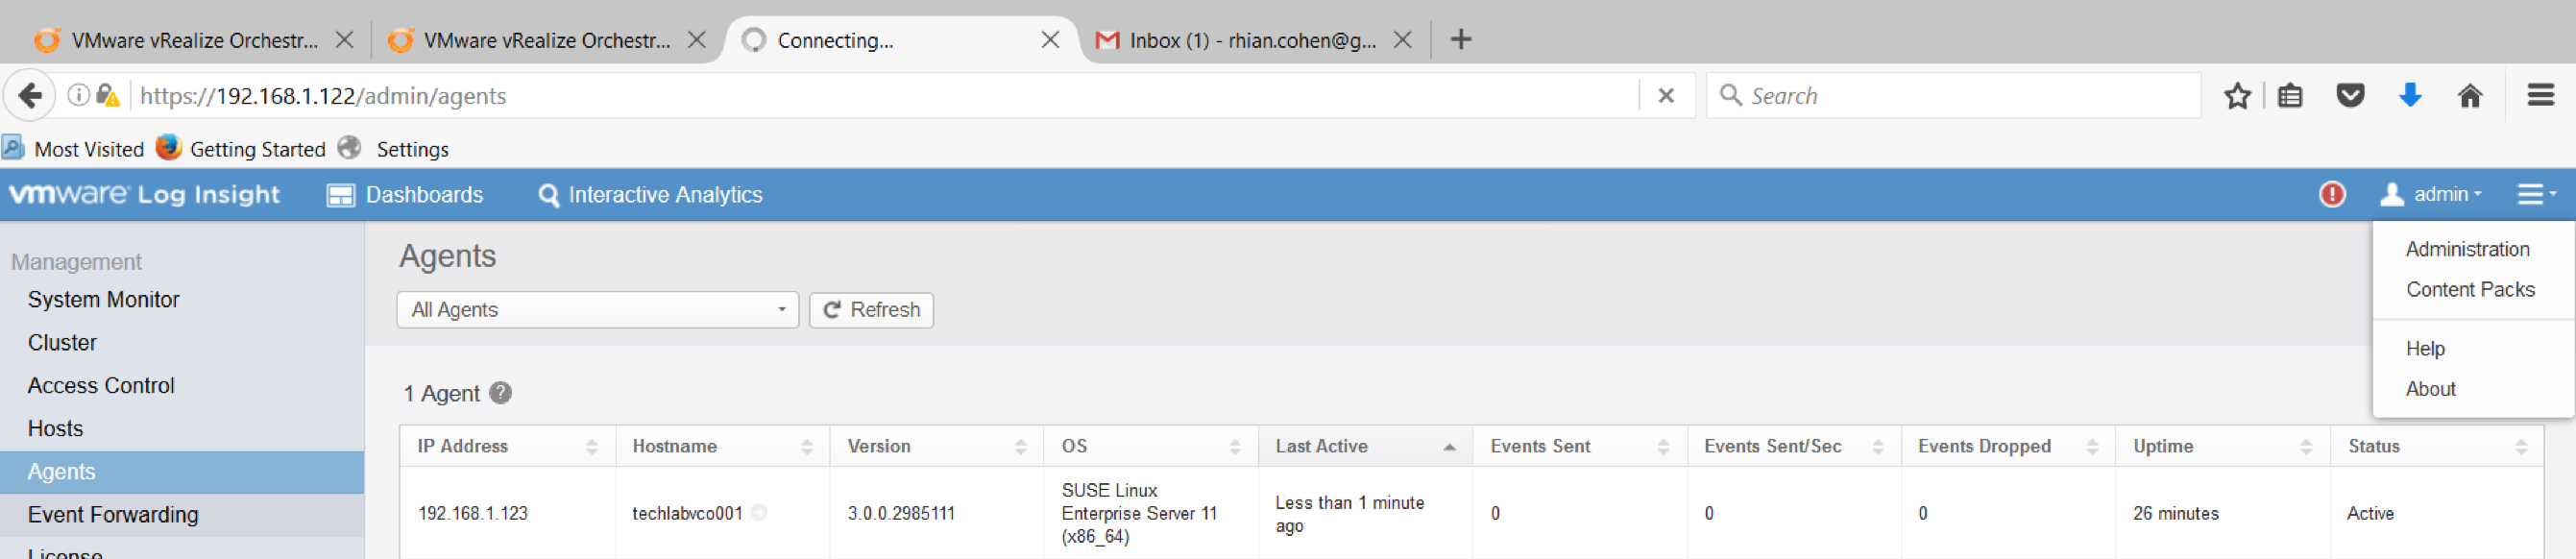
  • Click on the Administration icon (Top right in Log Insight)

screen-shot-2016-11-14-at-11-44-31

  • Click on Agents

screen-shot-2016-11-14-at-13-15-50

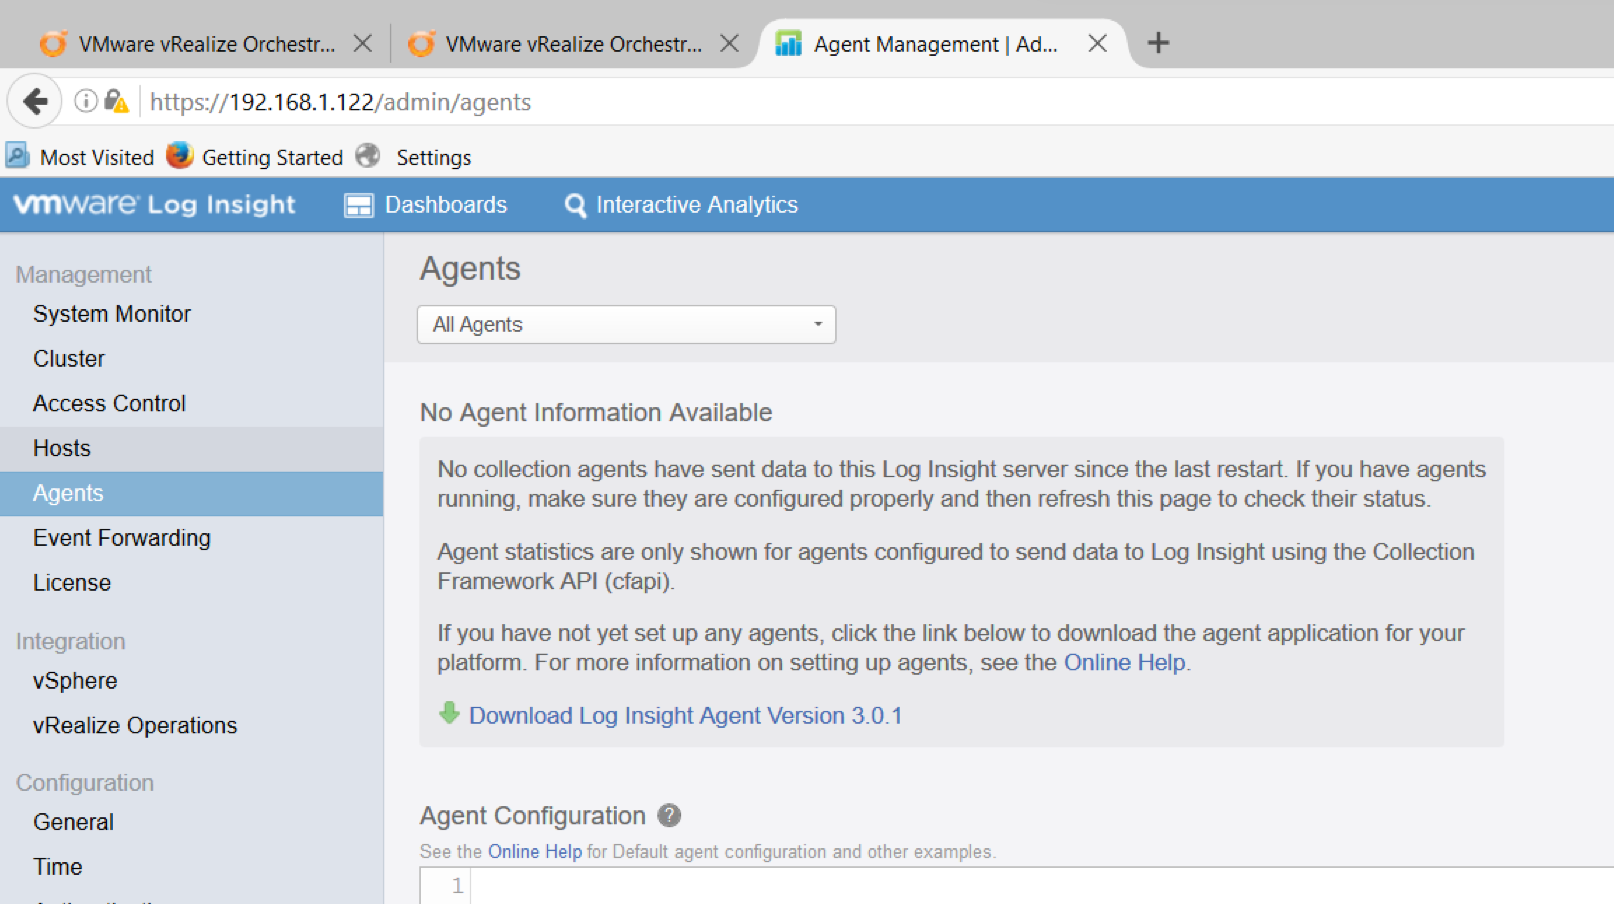
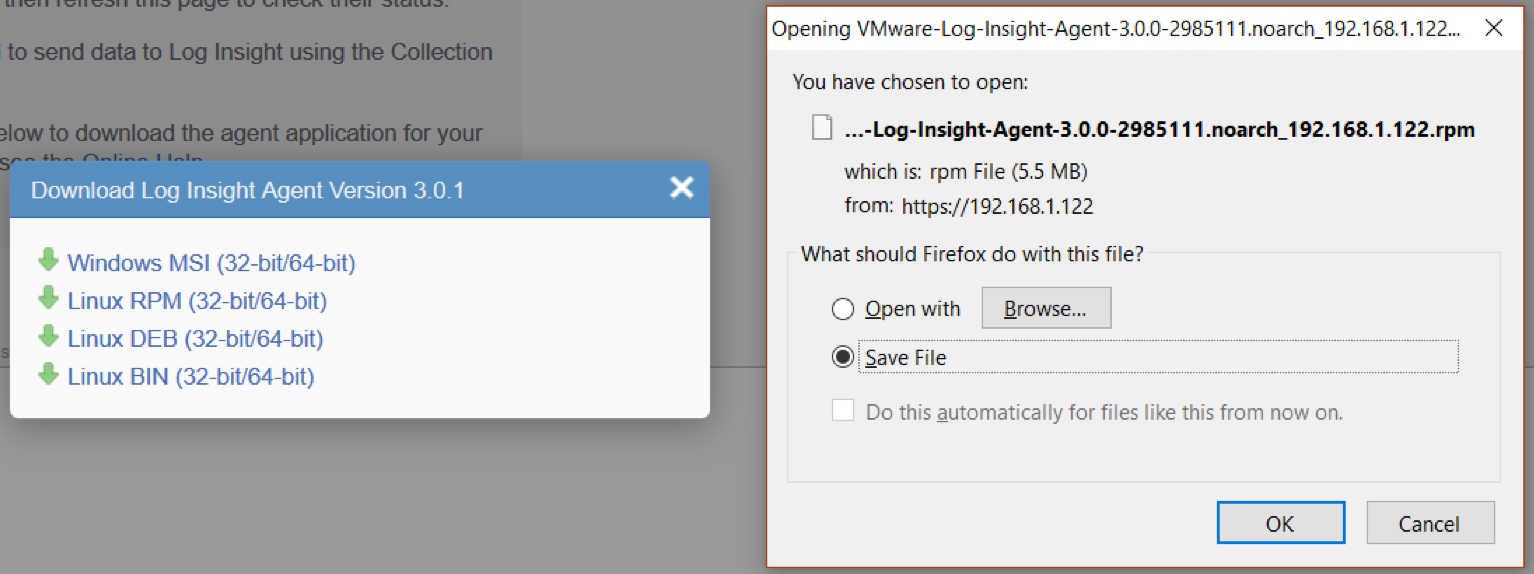
  • Click on Download Log Insight Agent Version 3.0.1
  • Choose Linux RPM

screen-shot-2016-11-14-at-13-17-11

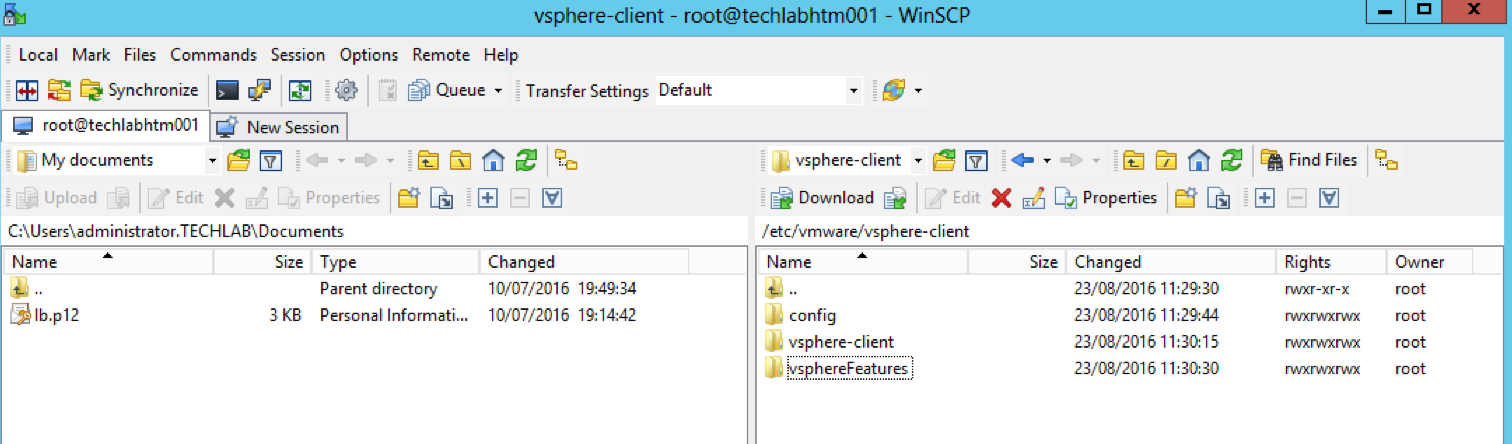
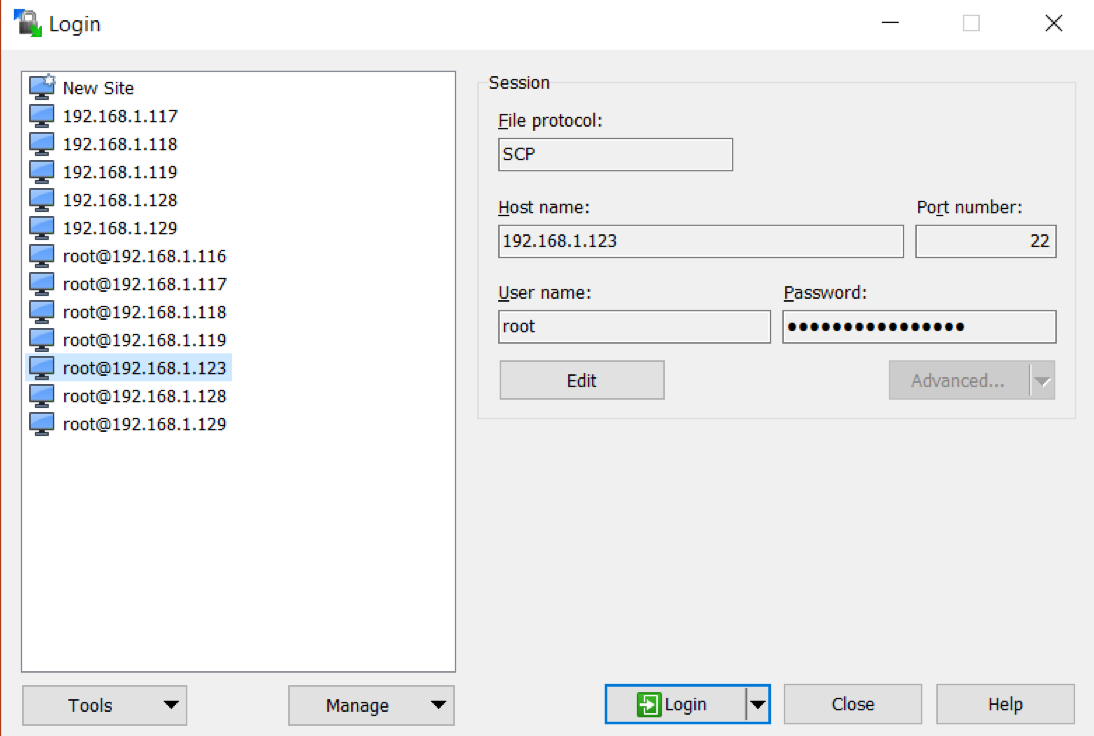
  • Using Winscp, log into the vCO appliance

screen-shot-2016-11-14-at-13-21-03

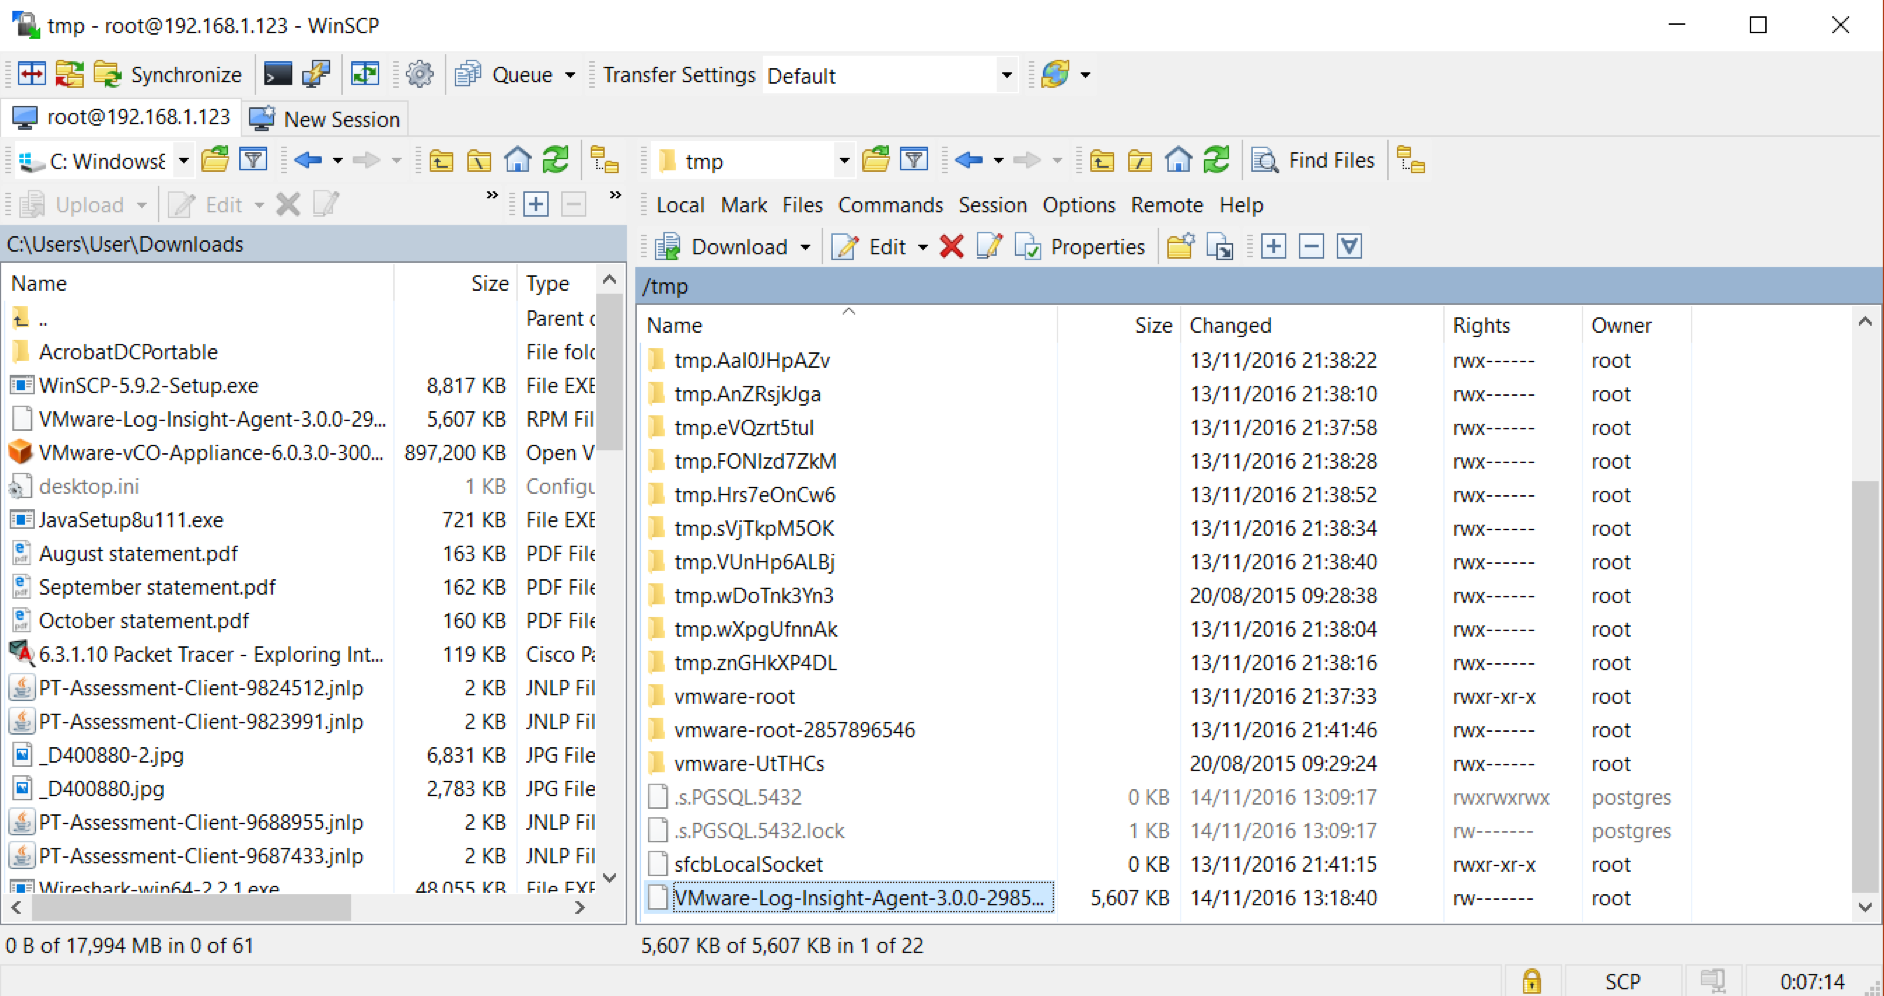
  • We now need to copy the Linux Log Insight agent to a directory on the vCO server
  • Copy the agent to the /tmp folder

screen-shot-2016-11-14-at-13-29-06

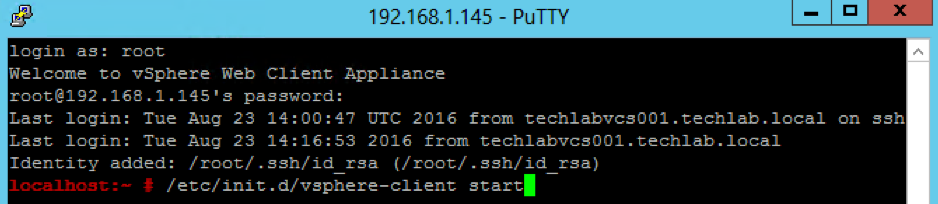
  • Putty in to the vCO box
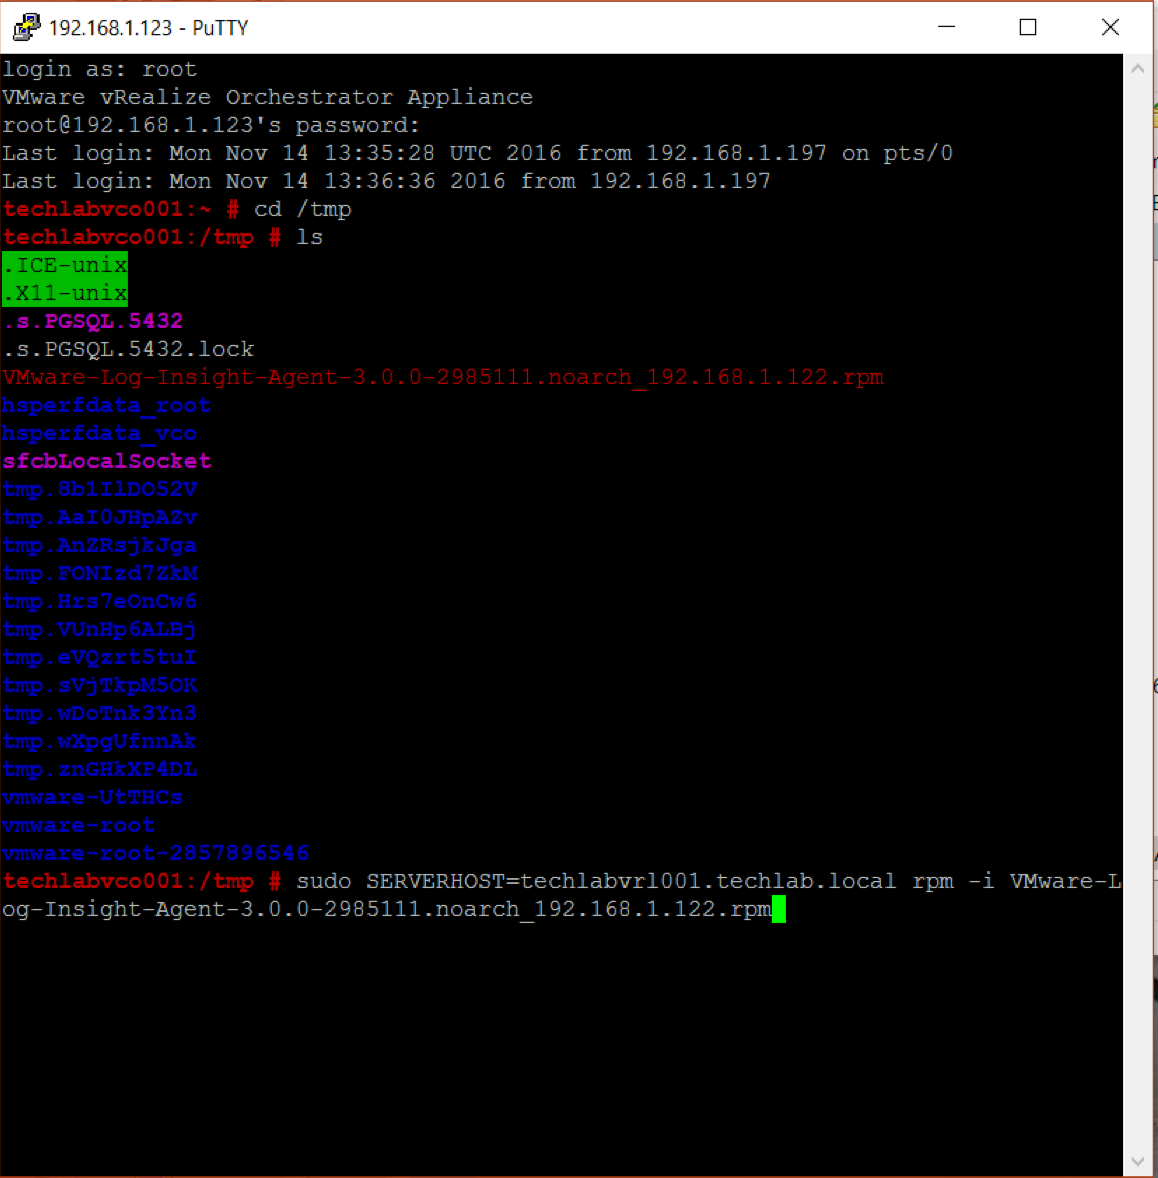
  • Switch to the /tmp folder – cd /tmp
  • To set the target vRealize Log Insight server during installation run the sudo command and replace hostname with the IP address or hostname of the vRealize Log Insight server.
  • sudo SERVERHOST=hostname rpm -i VMware-Log-Insight-Agent-VERSION-BUILD_NUMBER.rpm
  • In my case
  • sudo SERVERHOST=techlabvrl001.techl;ab.local rpm -i VMware-Log-Insight-Agent-3.0.0-2985111.noarch_192.168.1.122.rpm

screen-shot-2016-11-14-at-13-39-25

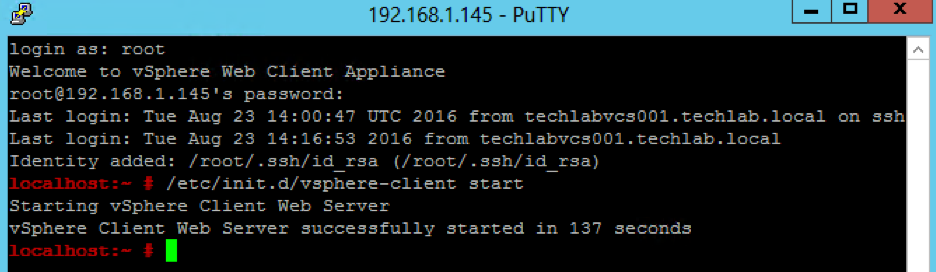
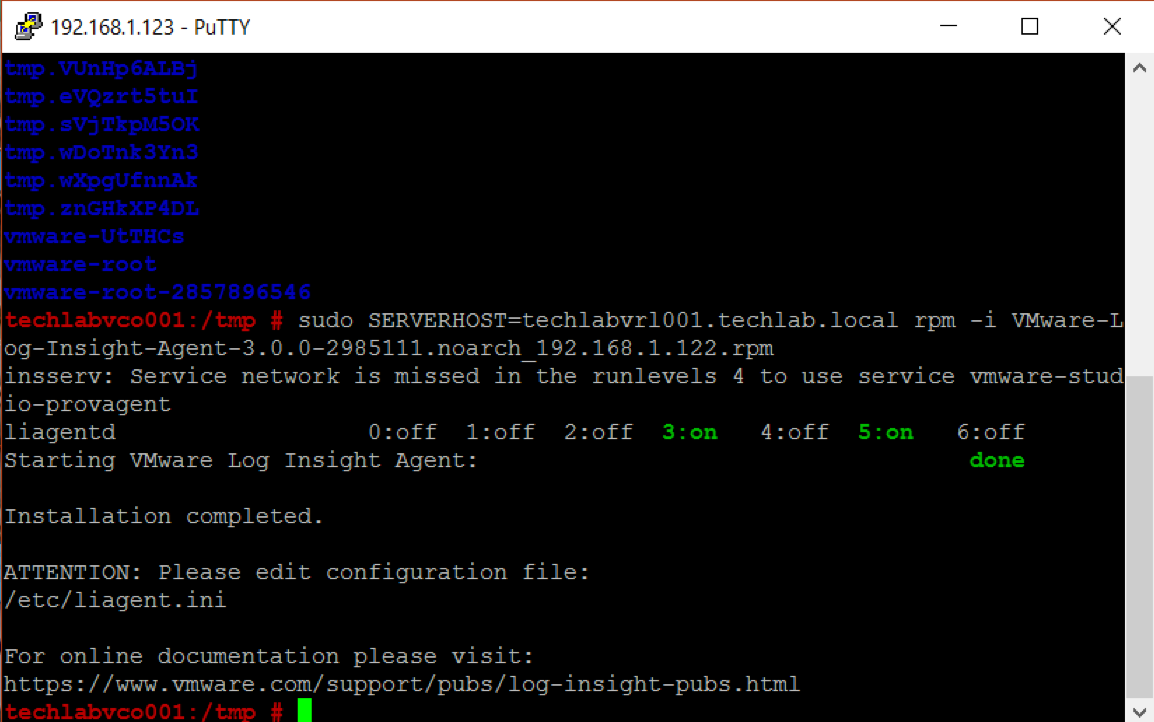
  • You should see the following

screen-shot-2016-11-14-at-14-03-03

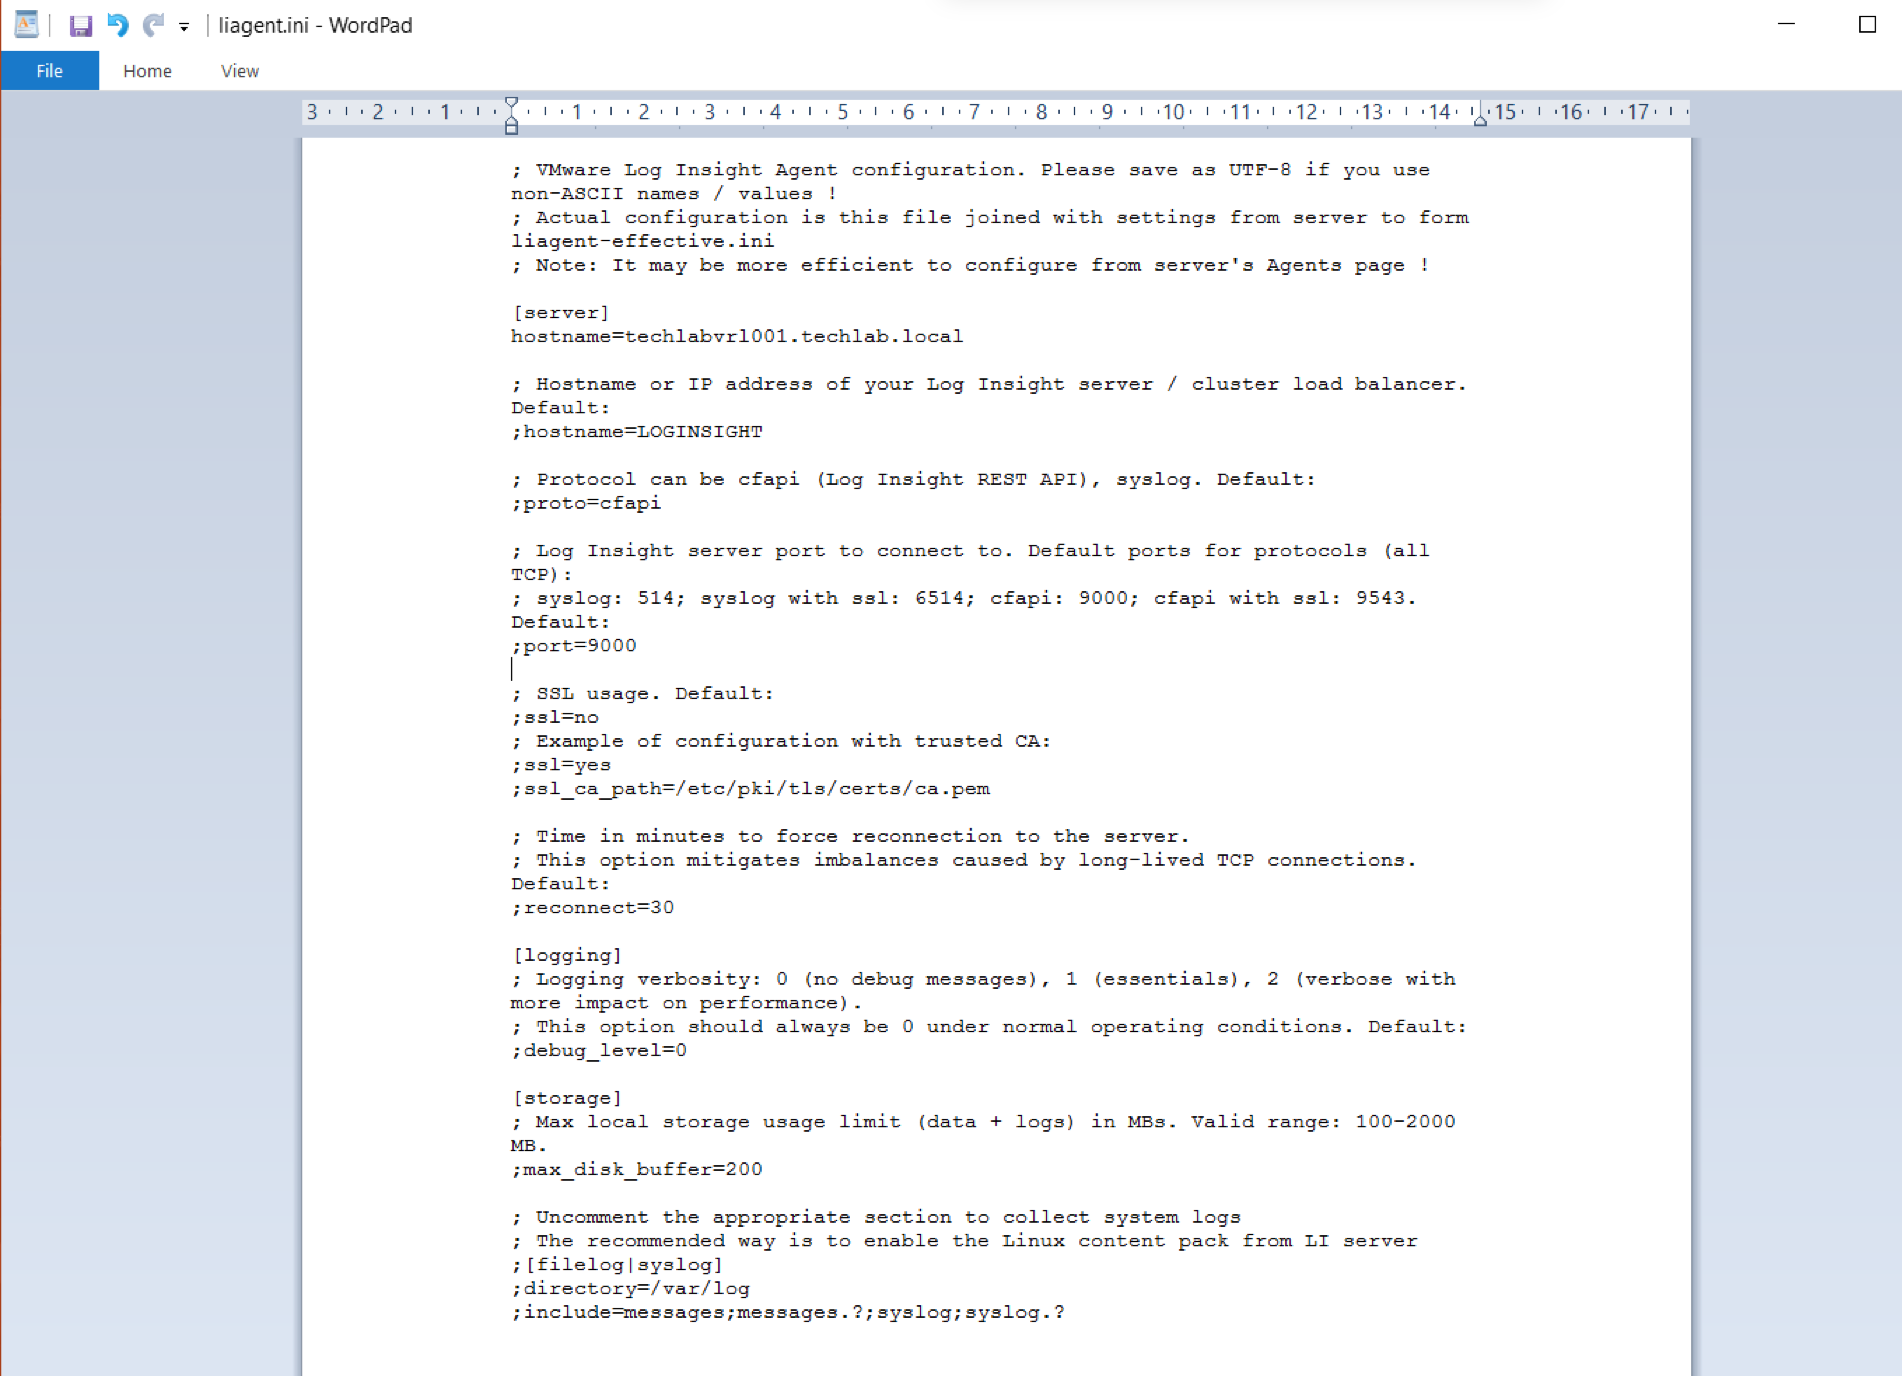
  • Go back into WinSCP and open the file liagent.ini from /etc/liagent.ini
  • Check the LogInsight hostname has been added in and check all other options. We will not be modifying this liagent file as the recommended way to modify these settings is via the Linux Content Pack which needs to be imported into Log Insight and configured from within here. Instructions below in further steps

screen-shot-2016-11-14-at-14-22-57

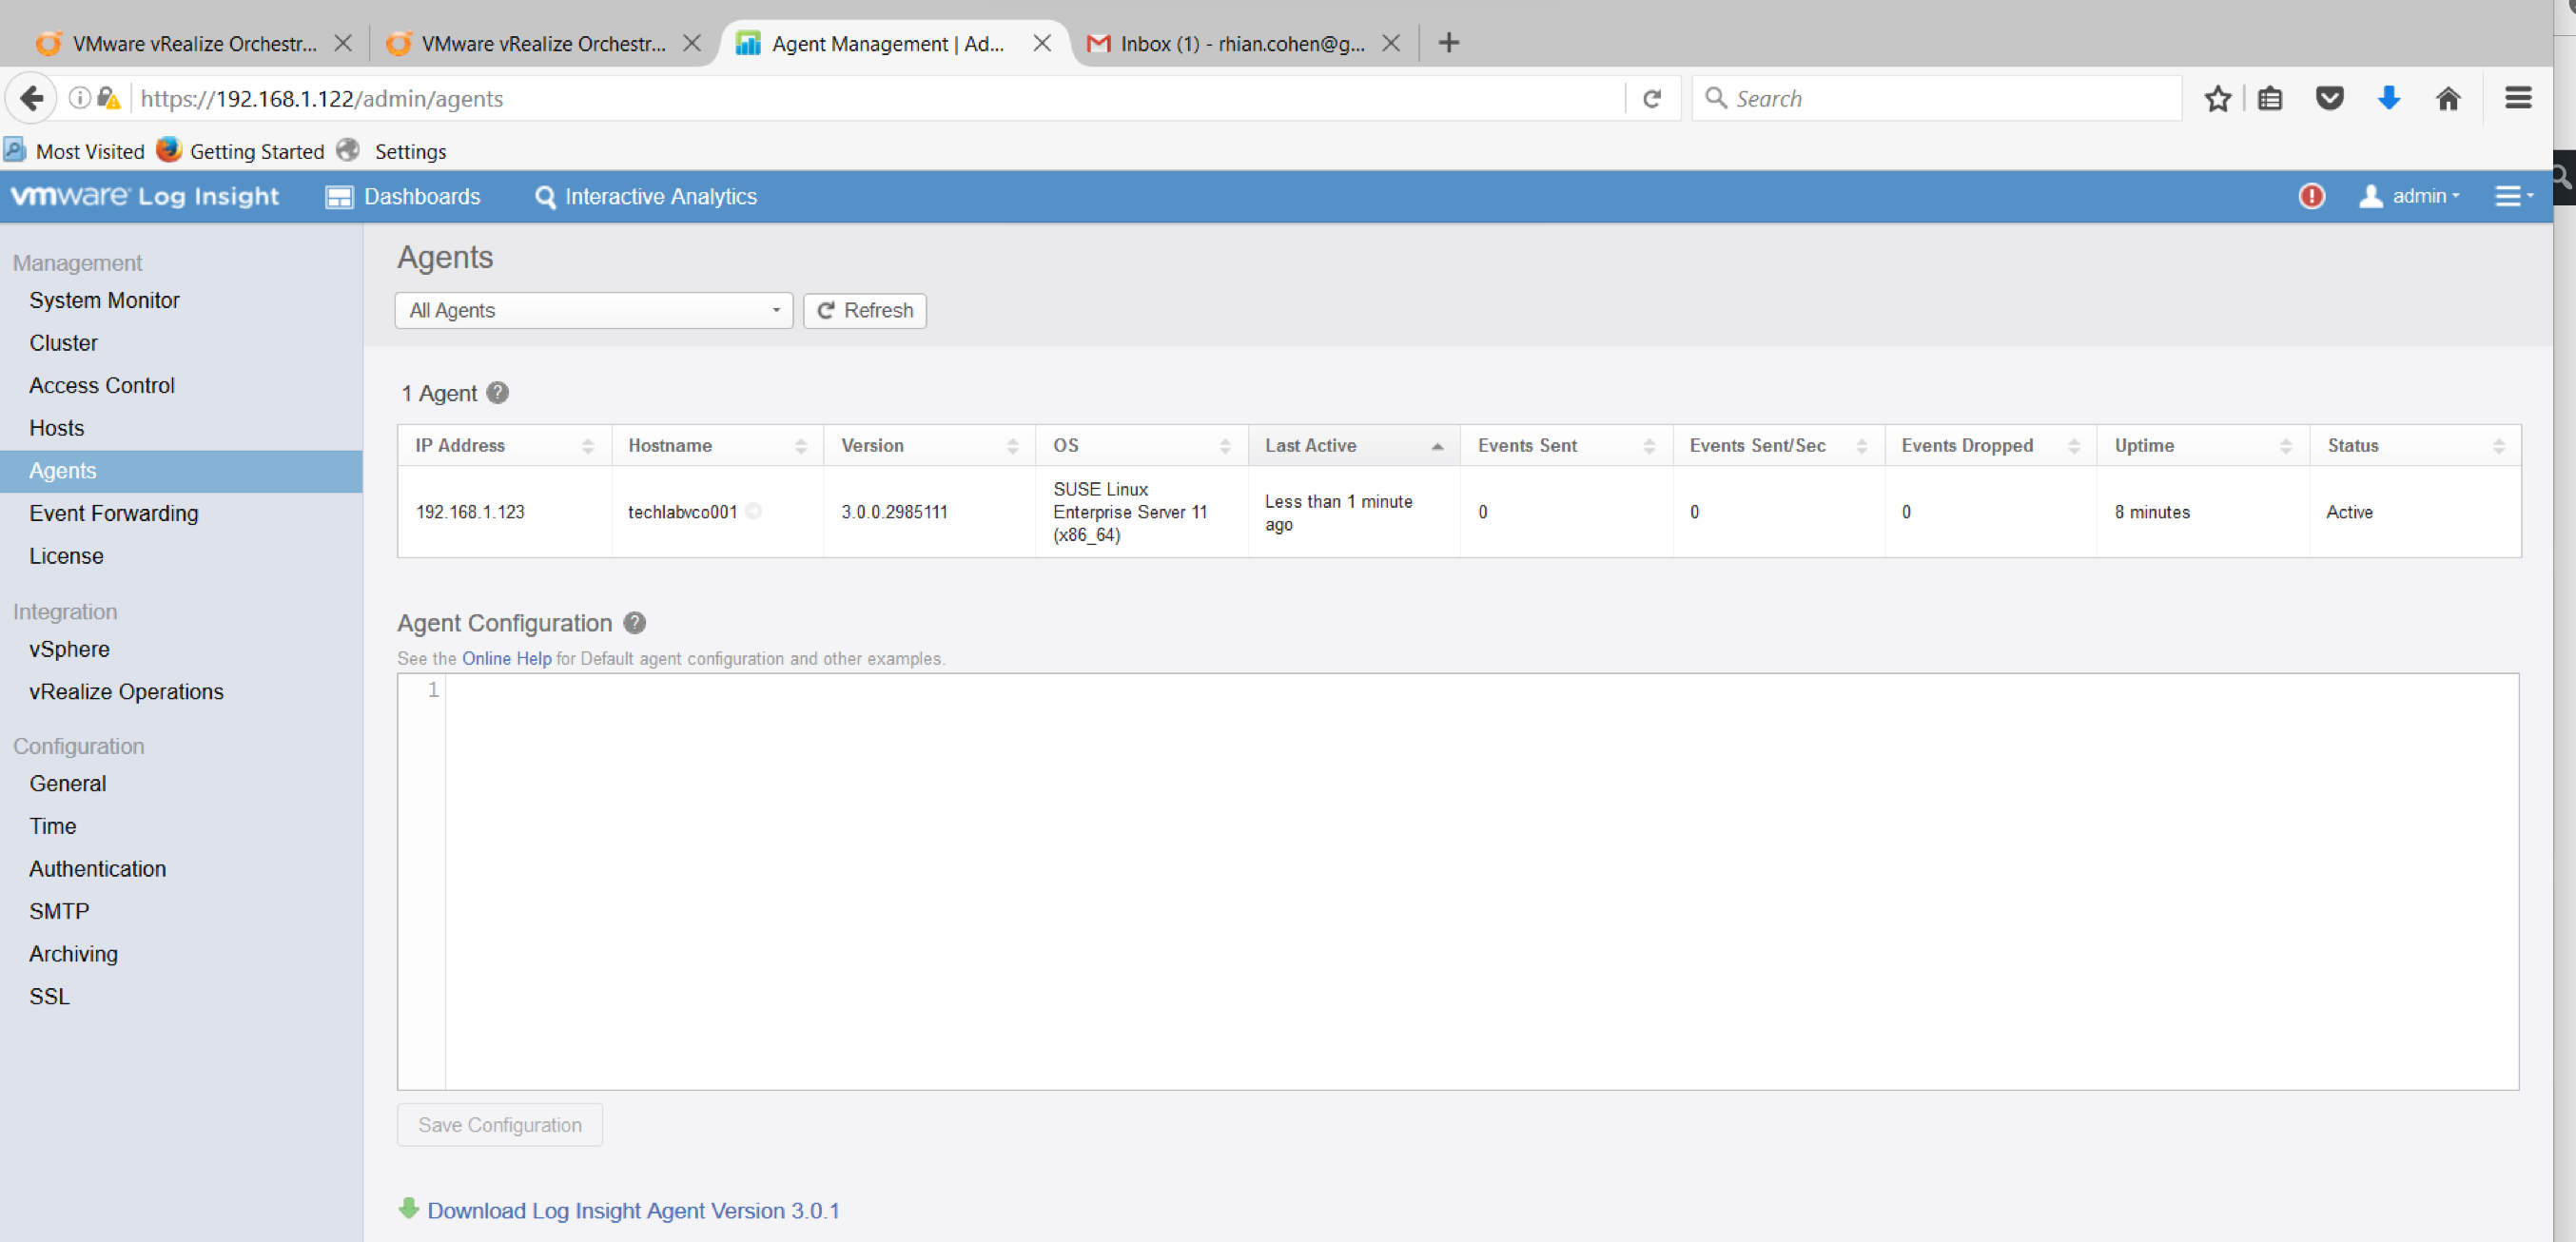
  • Go back into Log Insight and refresh the page and check the agent has been picked up.

screen-shot-2016-11-14-at-14-24-08

Next we need to install the Linux Content Pack – Linux__v1.0.vlcp currently

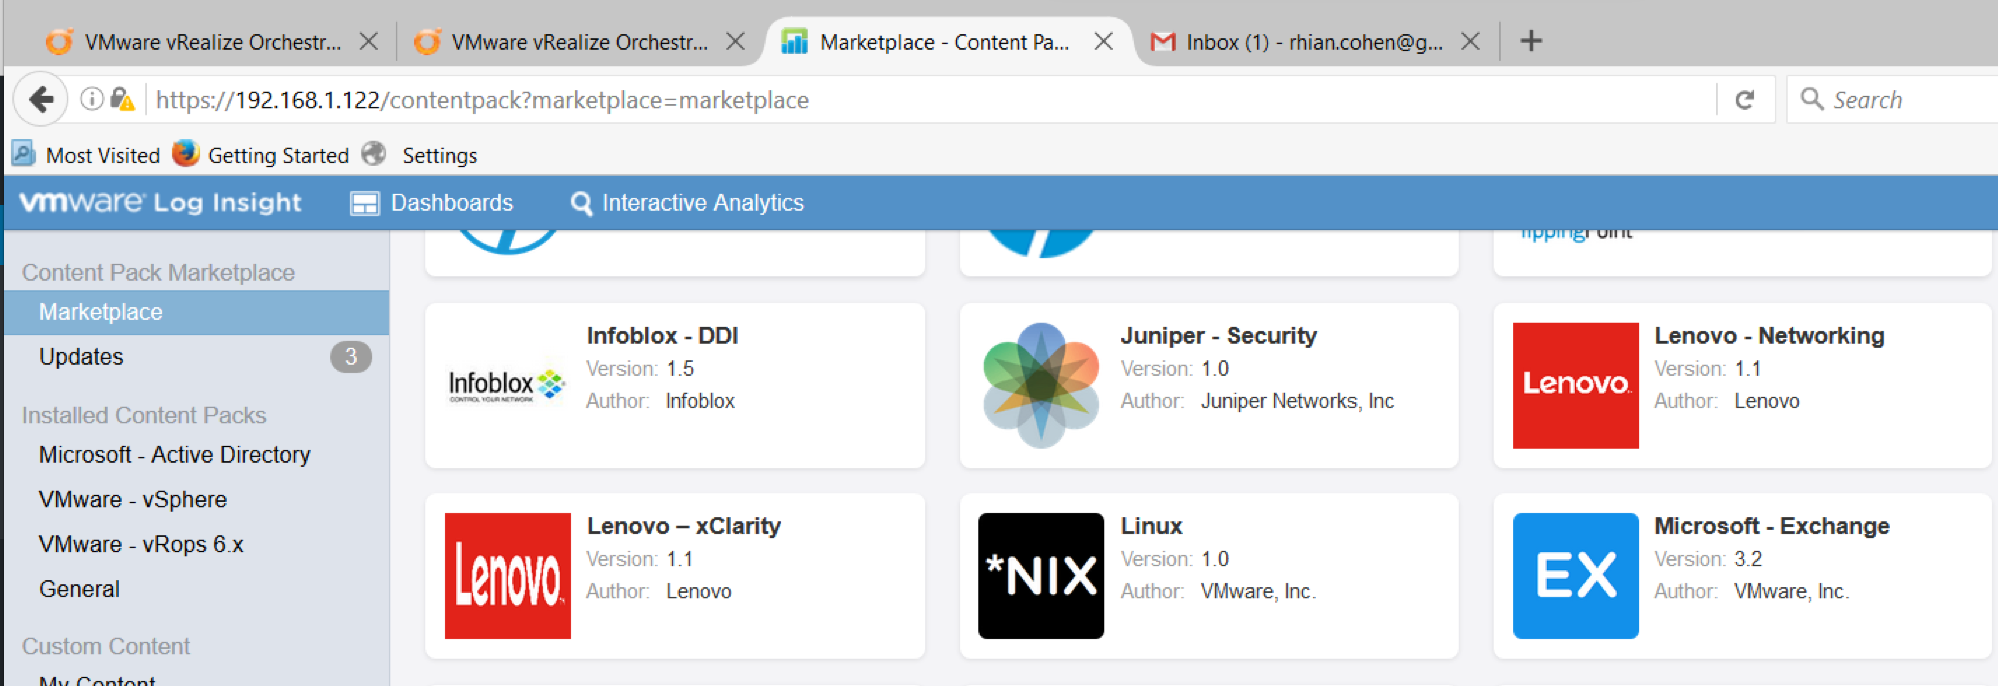
  • Go to the Administration icon and click on Content Packs

screen-shot-2016-11-14-at-14-34-25

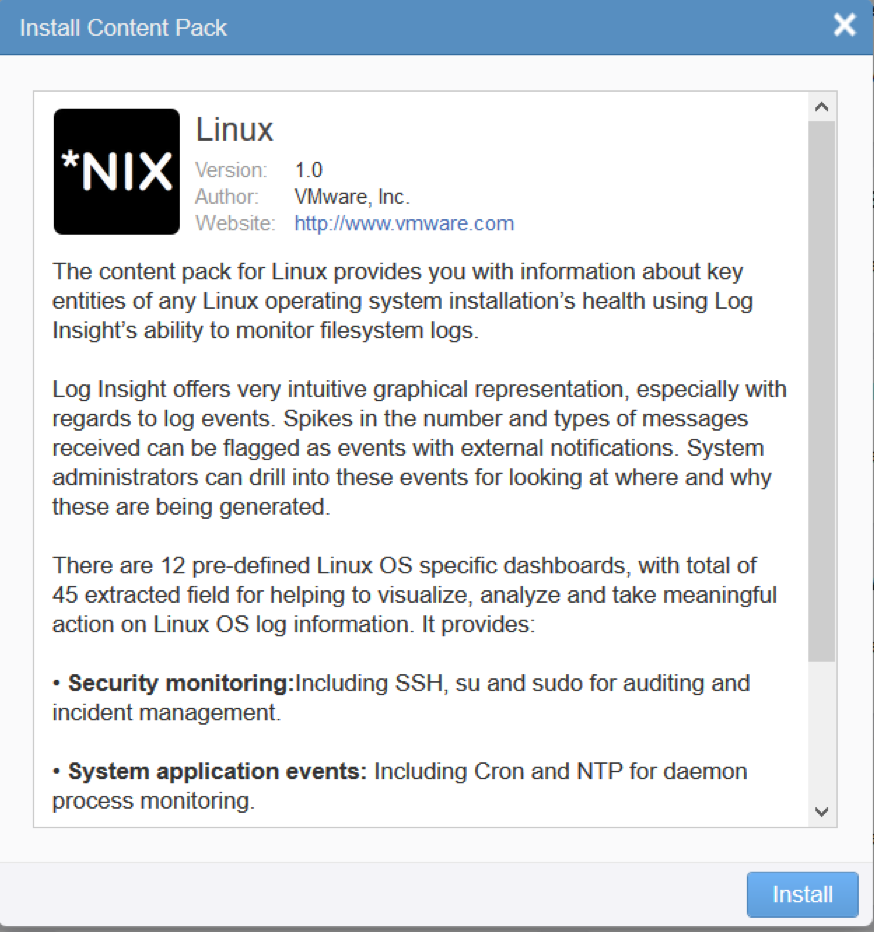
  • Find the Linux Content Pack

screen-shot-2016-11-14-at-14-36-40

  • When you click on the Content Pack, the below information will come up

screen-shot-2016-11-14-at-14-37-30

  • Click Install and the below message will come up

screen-shot-2016-11-14-at-14-39-31

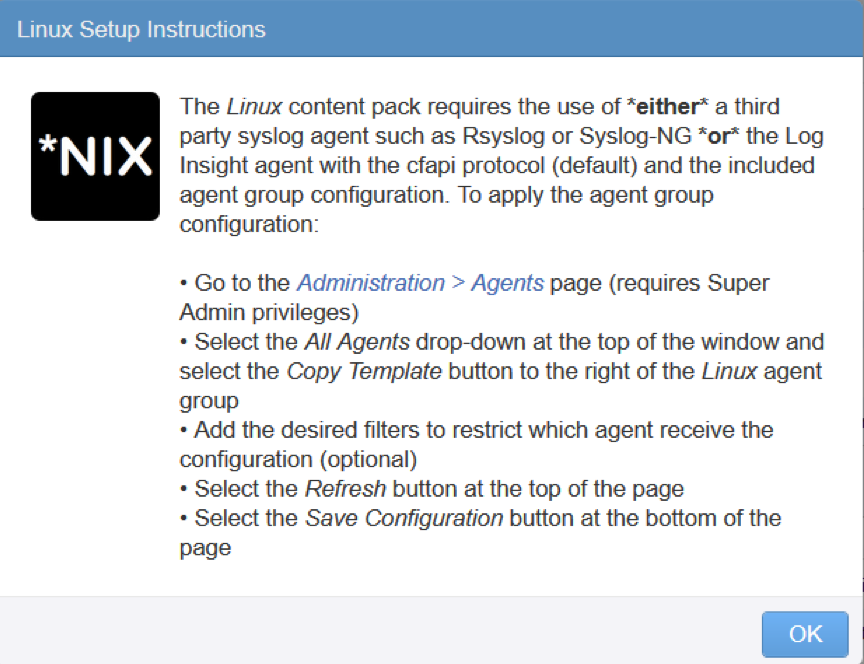
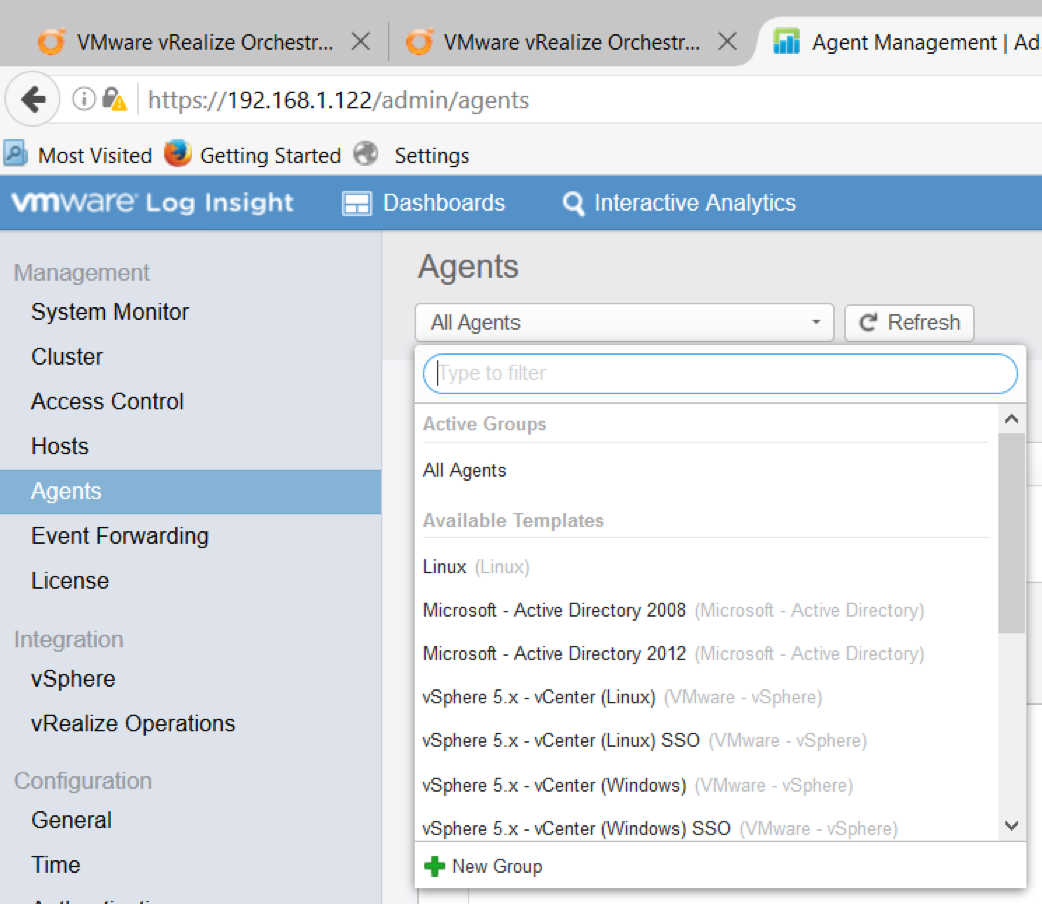
  • Now that you have installed the content pack you can create groups with specific configurations. Go back to Administration > Agents and create your first group for Linux computers.
  • Select Linux in the pull-down menu and click on the copy template button (2 rectangles). (Note you can’t see the 2 triangles until you hover over the agent)

screen-shot-2016-11-14-at-14-45-06

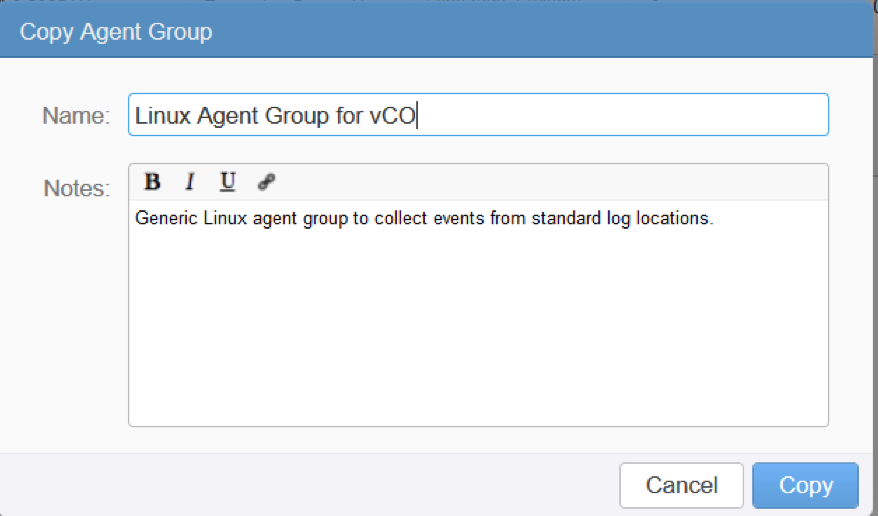
  • Put a name in for the agent group

screen-shot-2016-11-14-at-14-46-49

  • Adjust the filter to reflect what machine/machines you want to use
  • In this case I have just added a filter for the hostname of my vCO server

screen-shot-2016-11-14-at-14-48-11

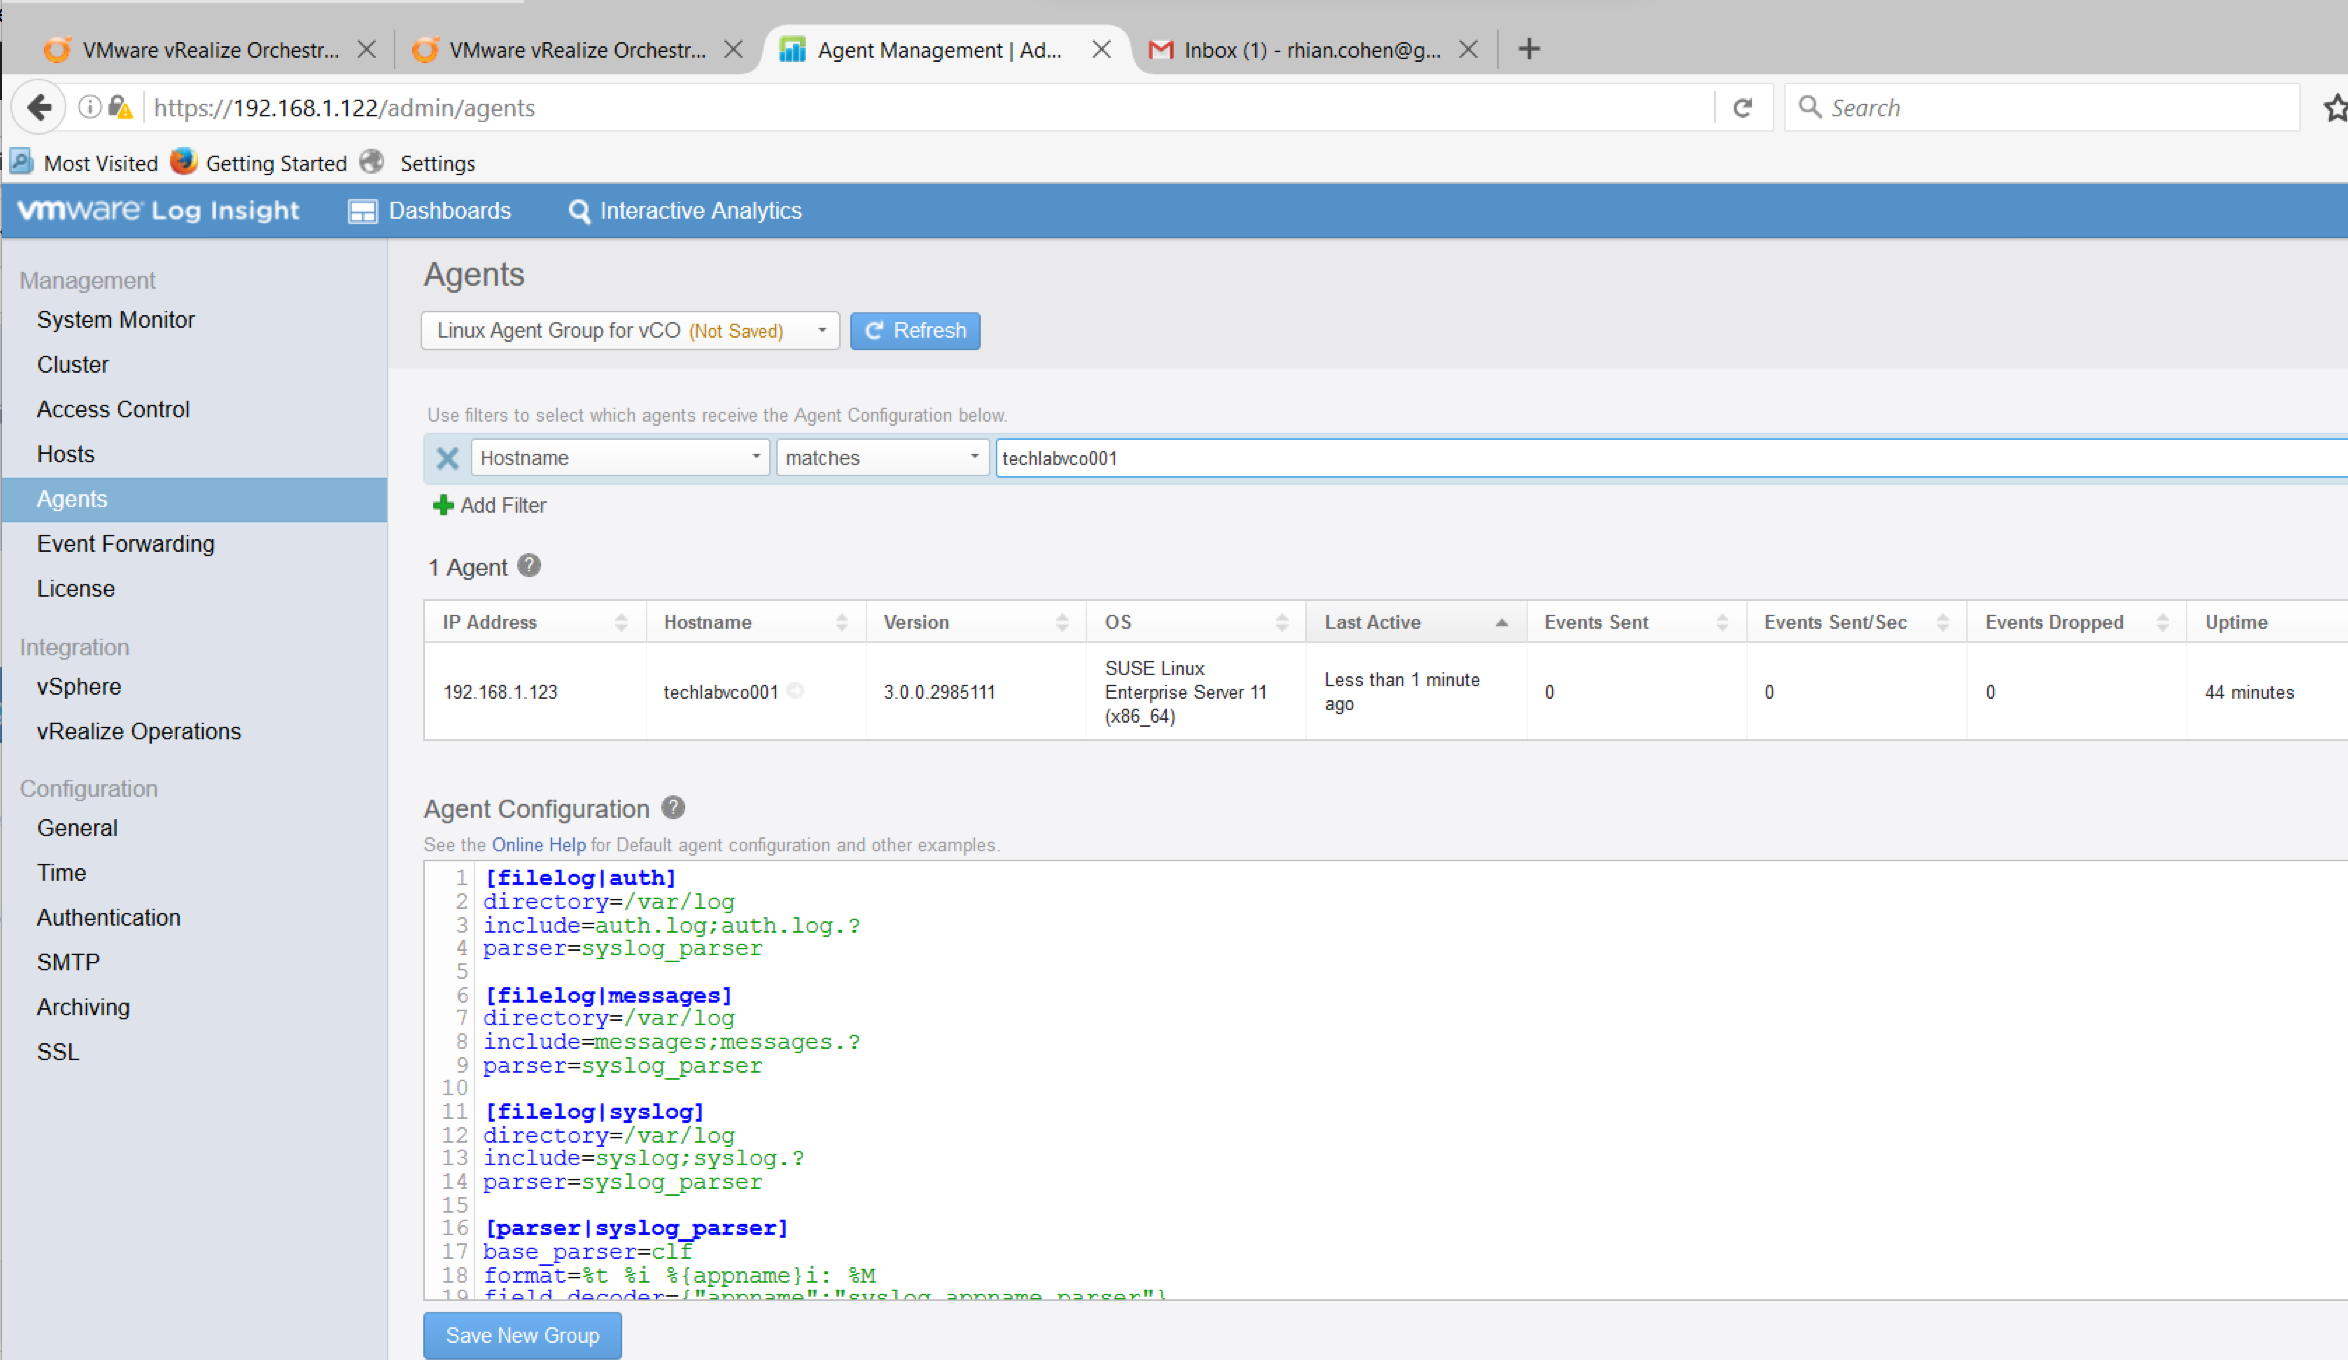
  • This adds the following to the Agent Configuration for the agent on your Linux machines.
  • If you want to view the Orchestrator Workflow Information then you need to add another section in the Agent Configuration (

[filelog|vmw-vco-scripting-lo]
directory=/var/log/vmware/vco/app-server
include=scripting.log
parser=syslog_parser

screen-shot-2016-11-14-at-17-07-48

  • Click Save New Group
  • Log into the Orchestrator client and test a Workflow (I used Add an Active Directory Server and Remove an Active Directory Server but you could try anything)

screen-shot-2016-11-15-at-09-17-19

  • You should then see the below Workflow being logged in log Insight if you filter by vCO hostname

screen-shot-2016-11-14-at-17-10-37

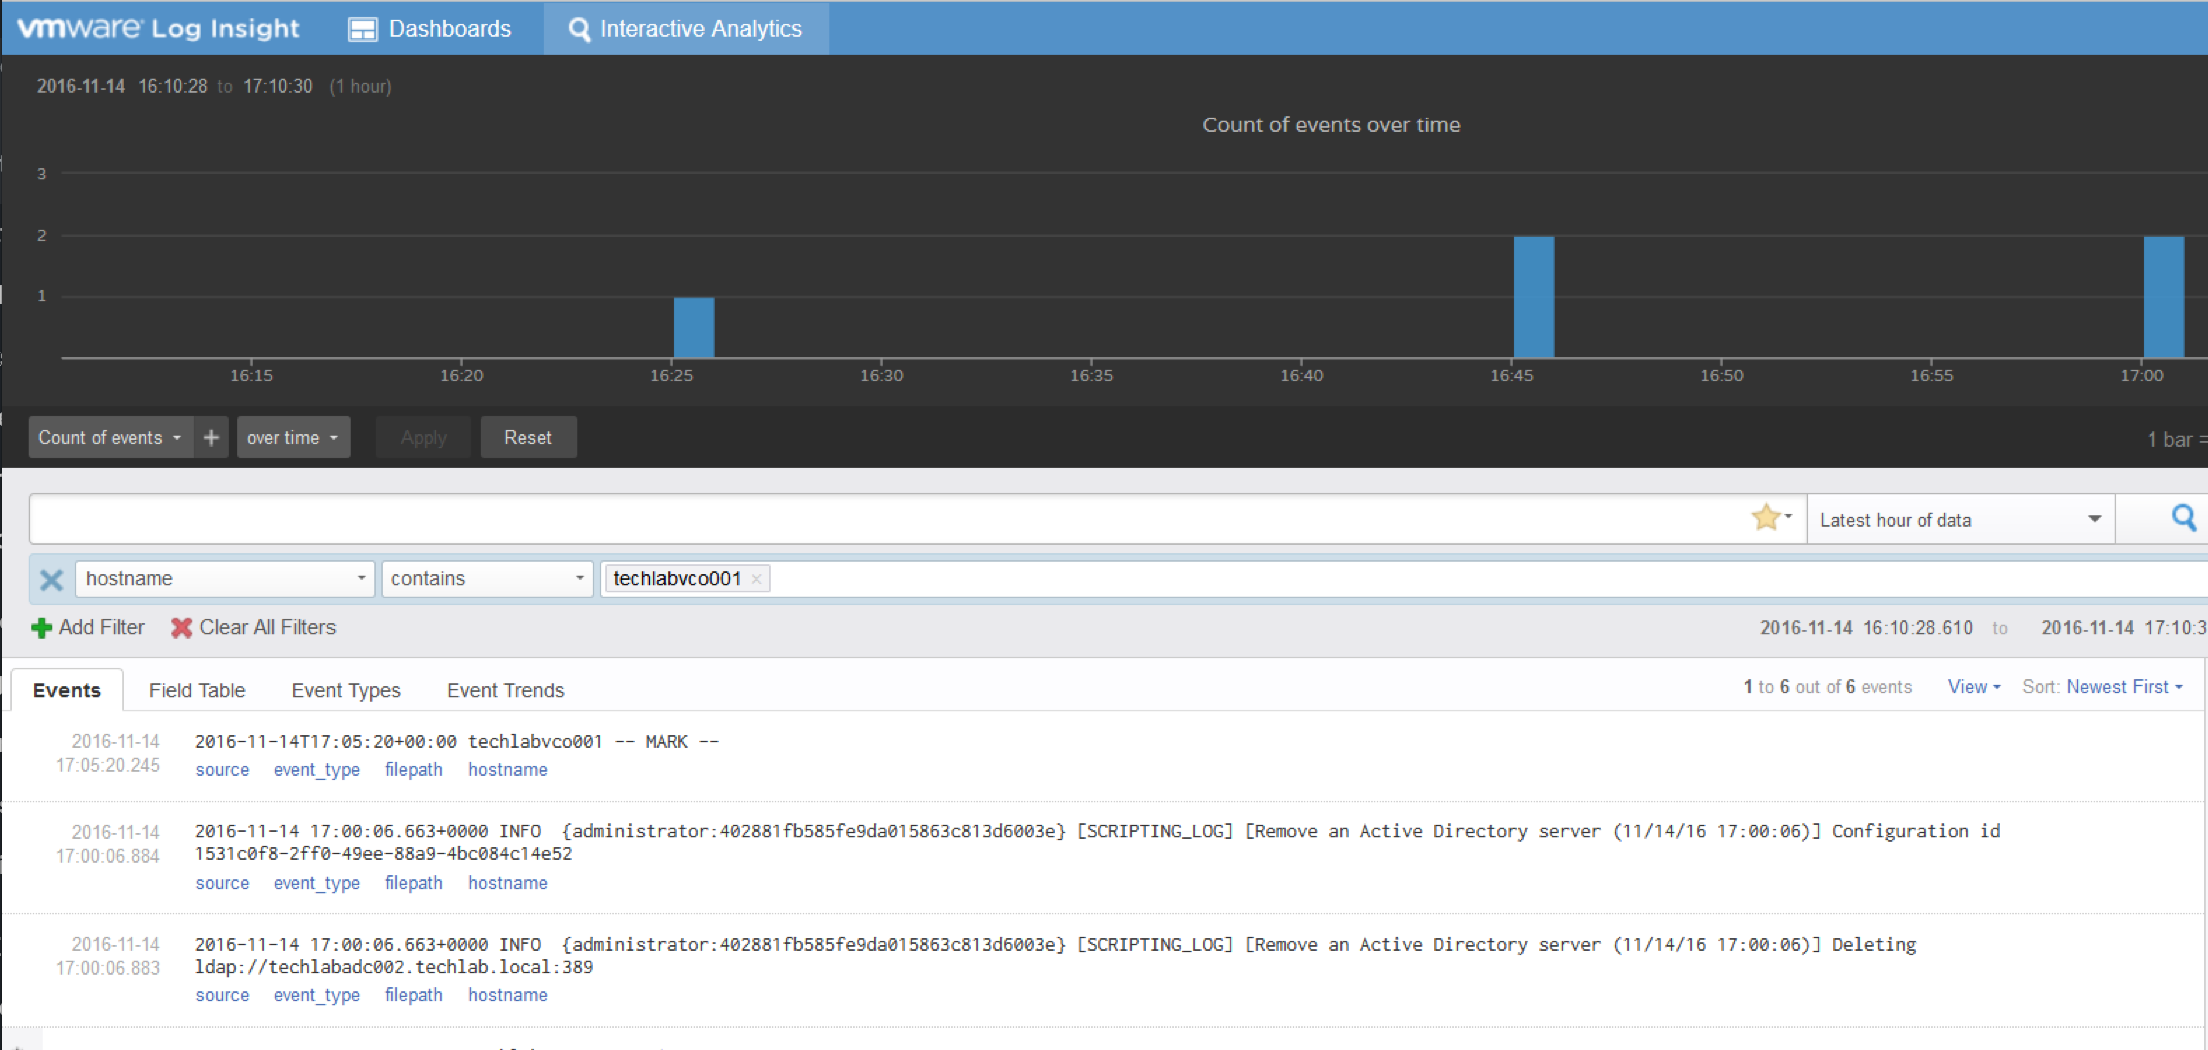
  • Voila, you have logging set up for the vCO in Log Insight

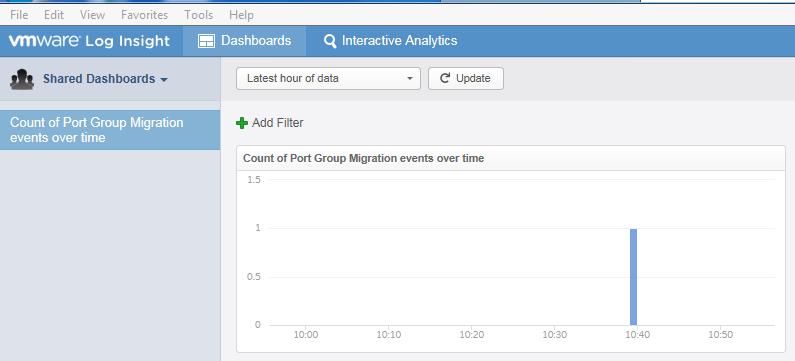
Adding queries to Dashboards

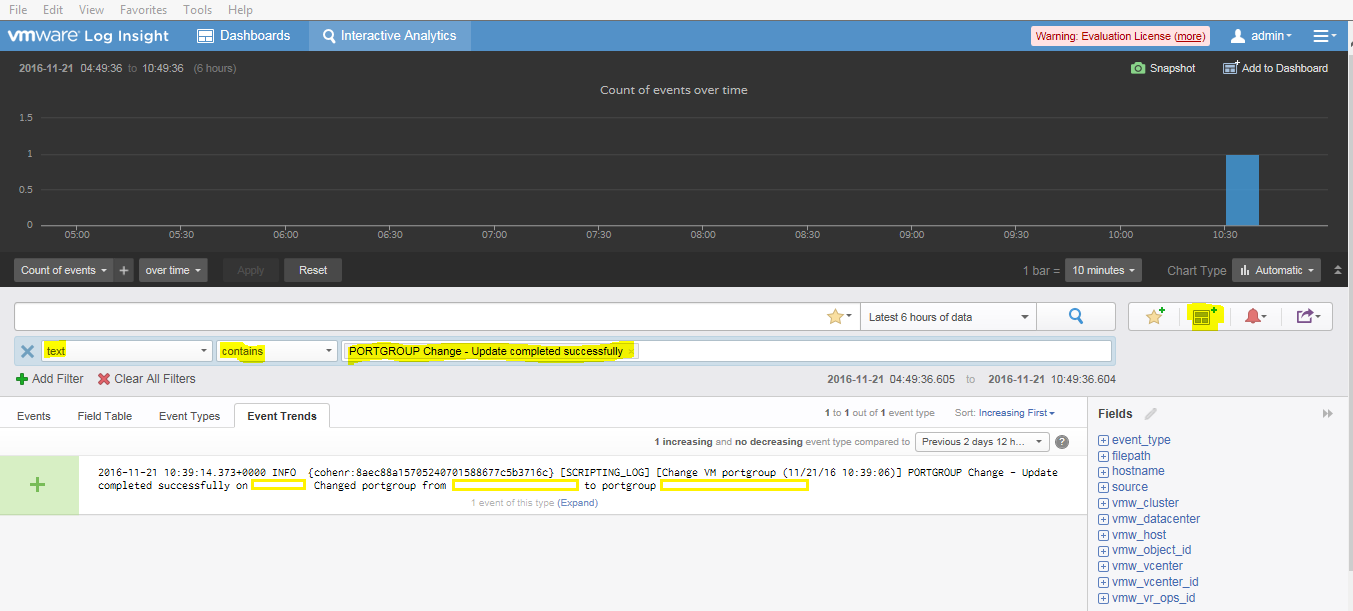
  • We were using a Workflow which changed VM vDS Port Groups. Within this Workflow, it is set to output a string to the scripting log called PORTGROUP Change – Update completed successfully
  • We can create a favourite query using this query text contains PORTGROUP Change – Update completed successfully – See highlighted below
  • You can now add this query to a Dashboard. Whilst in the query, you can click on the icon to the right (highlighted in yellow) which means Add current query to dashboard

dashboard

  • Fill in the Dashboard details and then you should be able to view this anytime and adjust the time over which work has taken place

dashboard2

vSphere HTML 5 Web Client Fling

tools-icon

vSphere HTML 5 Web Client

The vSphere HTML5 Web Client is here! It is written using HTML5 and Javascript

The following features are available at the moment

  • VM Power Operations (common cases)
  • VM Edit Settings (simple CPU, Memory, Disk changes)
  • VM Console
  • VM and Host Summary pages
  • VM Migration (only to a Host)
  • Clone to Template/VM
  • Create VM on a Host (limited)
  • Additional monitoring views (Performance charts, Tasks, Events)
  • Global Views (Recent tasks, Alarms–view only)

This Fling has been designed to work with your existing vSphere 6.0 environments. The new client is deployed as a new VM from the downloadable OVA.  Currently the installation instructions are command line-based, but VMware are working on a GUI installation and plan to release it as an update to this Fling once it is ready.

Download and Information

https://labs.vmware.com/flings/vsphere-html5-web-client

System requirements

  • 2 vCPU, 4 GB RAM, 14 GB
  • An existing VC6.0 installation (VCSA or Windows). The H5 client appliance will need 4 GB RAM, 2 vCPUs and the hard disk will grow up to 14 GB
  • Recommended browsers: Chrome, Firefox, IE11. Others may work, with some functional or layout issues.
  • Windows vCenter: Was tested with a vCenter on Windows Server 2012 R2, but should work with other versions as well.

Instructions

Note: I have a Windows 2012 R2 server running vCenter Server 6 and a Windows 2012 R2 server running an external PSC version 6. There are different instructions for running different vCenter/PSC setups.

First of all download the H5 Client Deployment Instructions and Helpful Hints.

  • Download the OVA and server-configure.bat

Screen Shot 2016-08-23 at 11.35.34

  • In vCenter, go to File > Deploy OVF Template

Screen Shot 2016-08-23 at 12.07.38

  • Check OVF Template details

Screen Shot 2016-08-23 at 12.08.37

  • Accept the License Agreement
  • Put in a name and Location

Screen Shot 2016-08-23 at 12.09.30

  • Choose a host and cluster

Screen Shot 2016-08-23 at 12.10.15

  • Select the Resource Pool if any

Screen Shot 2016-08-23 at 12.11.03

  • Choose your storage

Screen Shot 2016-08-23 at 12.11.43

  • Check Disk Format

Screen Shot 2016-08-23 at 12.12.24

  • Check VM Networking and choose a Port Group

Screen Shot 2016-08-23 at 12.13.03

  • Choose IP Address allocation

Screen Shot 2016-08-23 at 12.13.45

  • Put in an IP address

Screen Shot 2016-08-23 at 12.14.28

  • Click Finish

Screen Shot 2016-08-23 at 12.15.34

  • I then had to create an IP Pool in vCenter
  • Click on the Datacenter object > IP Pools

Screen Shot 2016-08-23 at 12.17.09

  • Click on the tabs and fill in the relevant information. In my case I needed to add some DNS and Association information to associate this resource pool with my networks and in particular the network my HTML 5 client is going to be on

Screen Shot 2016-08-23 at 12.18.27

Screen Shot 2016-08-23 at 12.19.26

  • Power on the VM
  • If you click on the console, you should see the below screen

Screen Shot 2016-08-23 at 14.09.20

  • SSH or WINScp as root into the H5 client appliance VM (Note: Username is root and password is demova)
  • Create the following folders

Screen Shot 2016-08-23 at 12.37.00

Screen Shot 2016-08-23 at 12.36.19

  • Copy the provided ‘server-configure.bat’ to any directory on the vCenter and PSC for Windows. (This file is one of the Fling downloads on the top left) NOTE: If you have installed vCenter into any folder other than default (%PROGRAMFILES%), the script may not find the appropriate files. You will need to edit the file and replace the two references to %PROGRAMFILES% with the appropriate path so that the “KEYTOOL” and “VECS_CLI” paths line up. These two variables are at the top of the file.
  • You may also need to change this at the end of the file to the correct path (this is for the ds.properties file): SET CLIENT_DIR=%PROGRAMDATA%\VMware\vCenterServer\cfg\vsphere-client
  • My PSC was all installed on the C Drive but I had my vCenter installed on the D Drive so I had to change the file below which is highlighted in yellow to my correct path

html5fling1

  • Run the server-configure.bat on your PSC server as Administrator
  • The store.jks and webclient.properties file will be created
  • Ignore the Creating ds.properties error message

Screen Shot 2016-08-23 at 15.11.17

  • Copy the files store.jks and webclient.properties which are generated to the below locations
  • /etc/vmware/vsphere-client/store.jks
  • /etc/vmware/vsphere-client/vsphere-client/webclient.properties
  • In the Windows VC machine, open an Administrator Command Prompt and run the ‘server-configure.bat’ script. The following files will get generated:

Screen Shot 2016-08-23 at 15.18.12

  • Copy the ds.properties file to H5 client virtual appliance at the following location
  • /etc/vmware/vsphere-client/config/ds.properties
  • Log into the H5 appliance and run this command to start the server:
  • /etc/init.d/vsphere-client start

Screen Shot 2016-08-23 at 15.23.06

  • It should come up and say started in xxx seconds

Screen Shot 2016-08-23 at 15.27.14

  • Once the installation steps above are completed, point your browser to this URL, and log in with your normal vCenter credentials:
  • https://H5_Appliance_Address:9443/ui

Screen Shot 2016-08-23 at 15.30.15