Previously I did a blog on an older version of HCIBench from 2017. It looks like a lot has changed and I now need to run it again for the company I’m working for to test the performance of vSphere/vSAN 6.7U3 with and without vSAN encryption. This blog details the process in my lab but I will publish the results of running the tests on an enterprise system with all flash Intel Optane SSD disks over a 25Gbps network with some of the fastest technology components currently available. Should be interesting 🙂
HCIBench Information
https://flings.vmware.com/hcibench
What is HCIBench?
HCIBench stands for “Hyper-converged Infrastructure Benchmark”. It’s an automation wrapper around the open source benchmark tools: Vdbench and Fio that make it easier to automate testing across a HCI cluster. HCIBench aims to simplify and accelerate customer POC performance testing in a consistent and controlled way. The tool fully automates the end-to-end process of deploying test VMs, coordinating workload runs, aggregating test results, performance analysis and collecting necessary data for troubleshooting purposes.
HCIBench is not only a benchmark tool designed for vSAN, but also could be used to evaluate the performance of all kinds of Hyper-Converged Infrastructure Storage in vSphere environment.
This tool is provided free of charge and with no restrictions. Support will be provided solely on a besteffort basis as time and resources allow, by the VMware vSAN Community Forum.
Per the VMware EULA, users who want to publicly share their testing results are requested to submit their hardware configuration, methodology, parameter files and test results for review before publication at vsanperformance@vmware.com
Requirements
- Web Browser:
IE8+, Firefox or Chrome - vSphere 5.5 and later environments for both HCIBench and its client VMs deployment
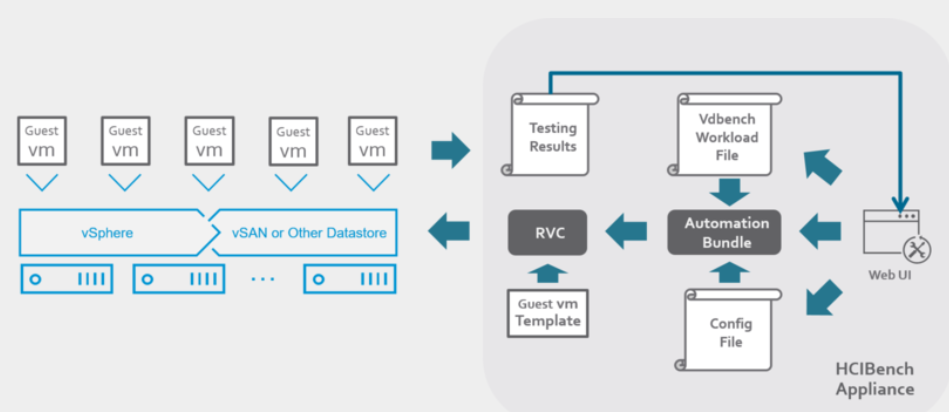
HCIBench Architecture
HCIBench is specifically designed for running performance tests against a shared datastore in VMware vSphere®. It generates a test workload using either Vdbench or Fio. HCIBench is delivered in the form of an Open Virtualization Appliance (OVA).
The Controller VM contains the following components:
- Ruby vSphere Console (RVC) Graphite Container
- Grafana Container
- vSAN Observer
- Automation bundle
- Configuration files
- Fio binary
- Linux test VM template
The Controller VM has all the needed components installed. The core component is RVC (https://github.com/vmware/rvc) with some extended features enabled. RVC is the engine of this performance test tool, responsible for deploying guest VMs, conducting Vdbench or Fio runs, collecting results, and monitoring vSAN by using vSAN Observer..
HCIBench VM Specification
Controller VM
- CPU: 8 vCPU
- RAM: 8GB
- OS VMDK: 16GB
- Operating system: Photon OS 1.0
- OS Credential: user is responsible for creating the root password when deploying the VM.
- Software installed: Ruby 2.3.0, Rubygem 2.5.1, Rbvmomi 1.8.2, RVC 1.8.0, sshpass 1.05, Apache 2.4.18, Tomcat 8.54, JDK 1.8u102, Fio 3.1.2, Graphite 1.15, Grafana 6.0.2, Python 3.5
Guest VM
- CPU: 4 vCPU
- RAM: 8 GB
- OS VMDK: 16GB
- OS: Photon OS 1.0
- OS Credential: root/vdbench
- Software installed: JDK 1.8u102
- SCSI Controller Type: VMware Paravirtual
- Data VMDK: number and size defined by use
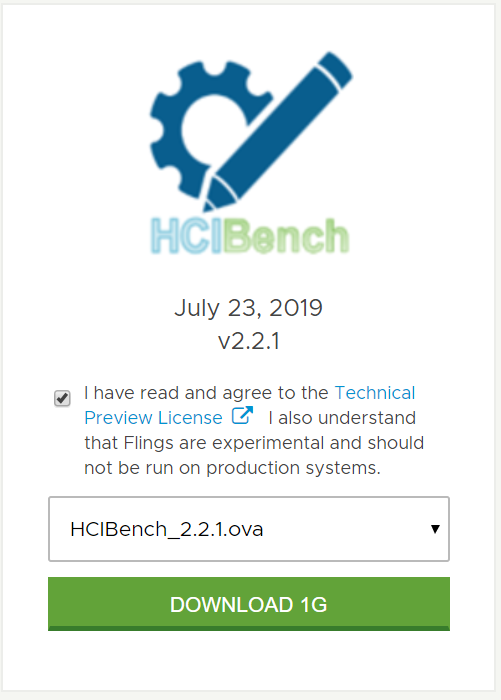
HCIBench and PDF User Guide download – Download from the webpage
Deploying the HCIBench OVF
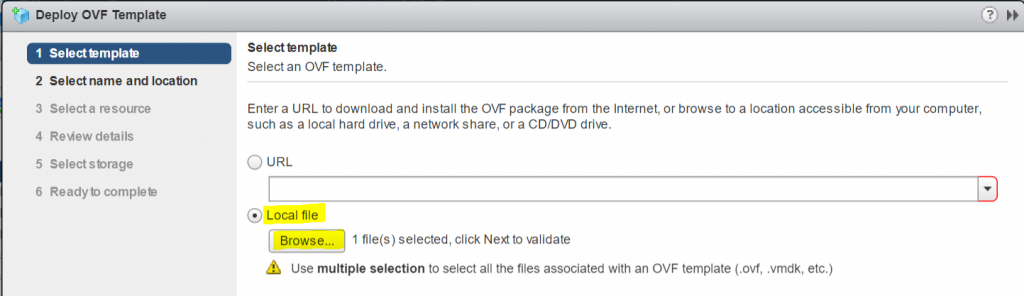
- Select a cluster or host and click Deploy OVF Template
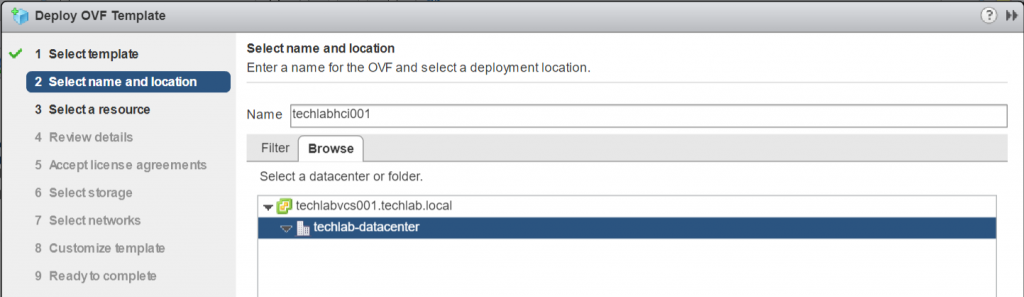
- Put in a name and select Datacenter or folder
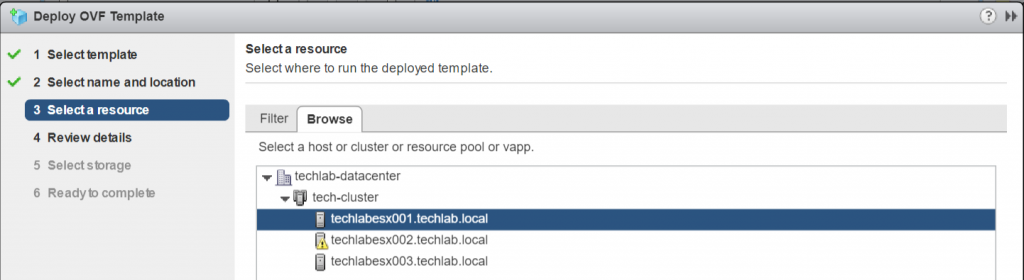
- Select where to run the OVF
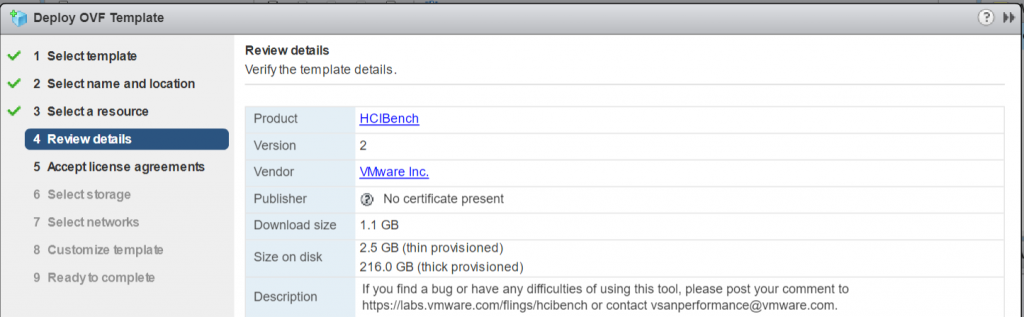
- Review the details
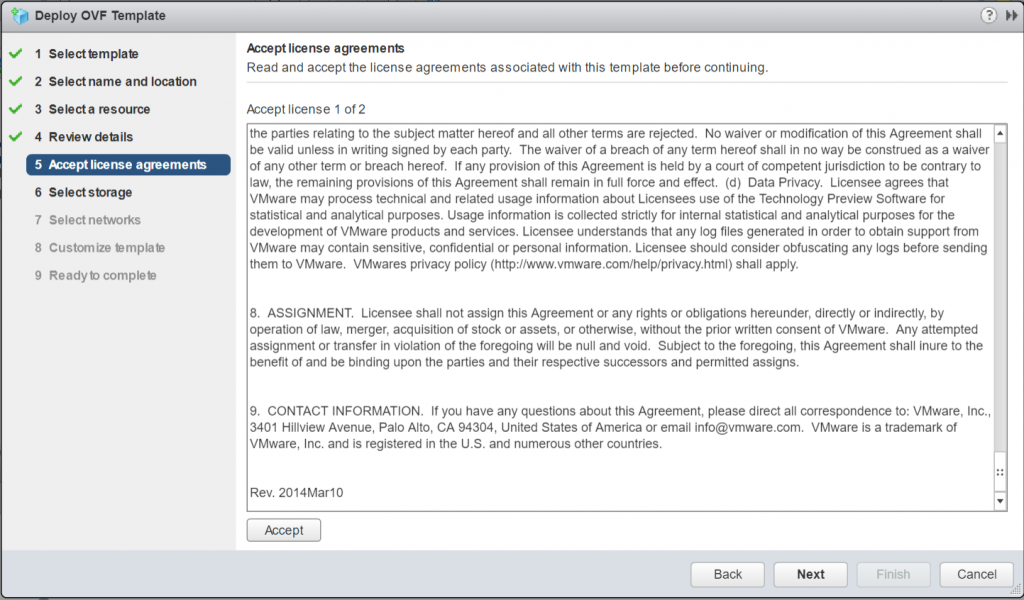
- Accept the License agreement
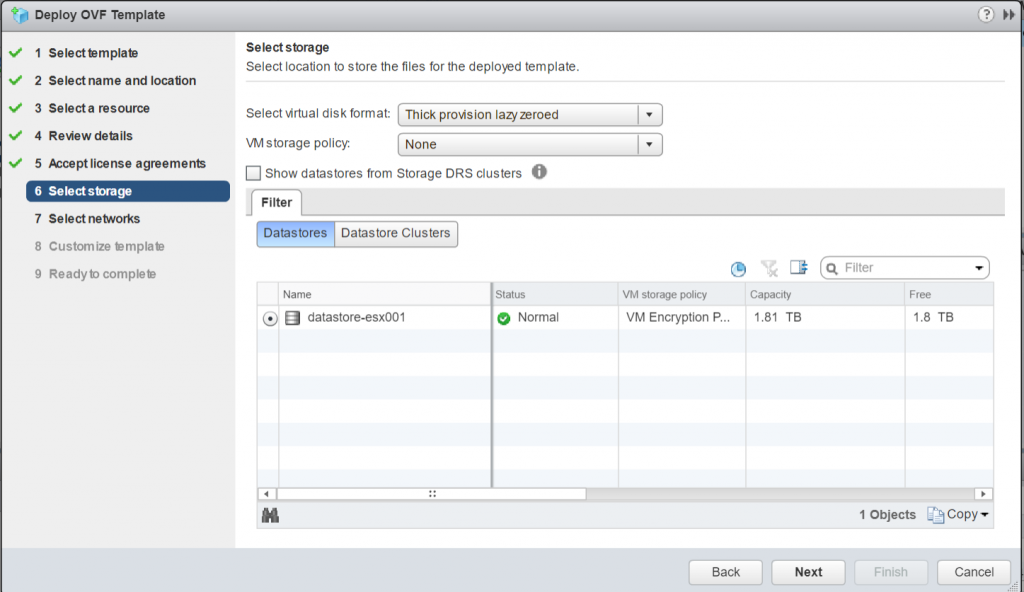
- Select Storage
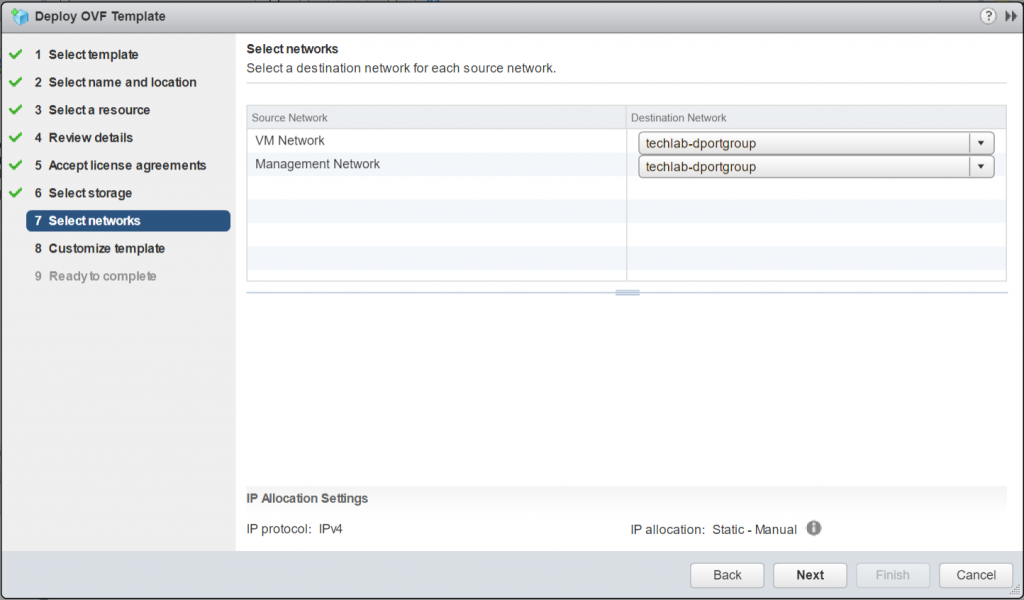
- Select Networks. Map the “Management Network” to the network through which the HCIBench will be accessed. If the network prepared for Guest VM does not have the DHCP service, map the “VM Network” to the same network; otherwise, ignore the “VM Network
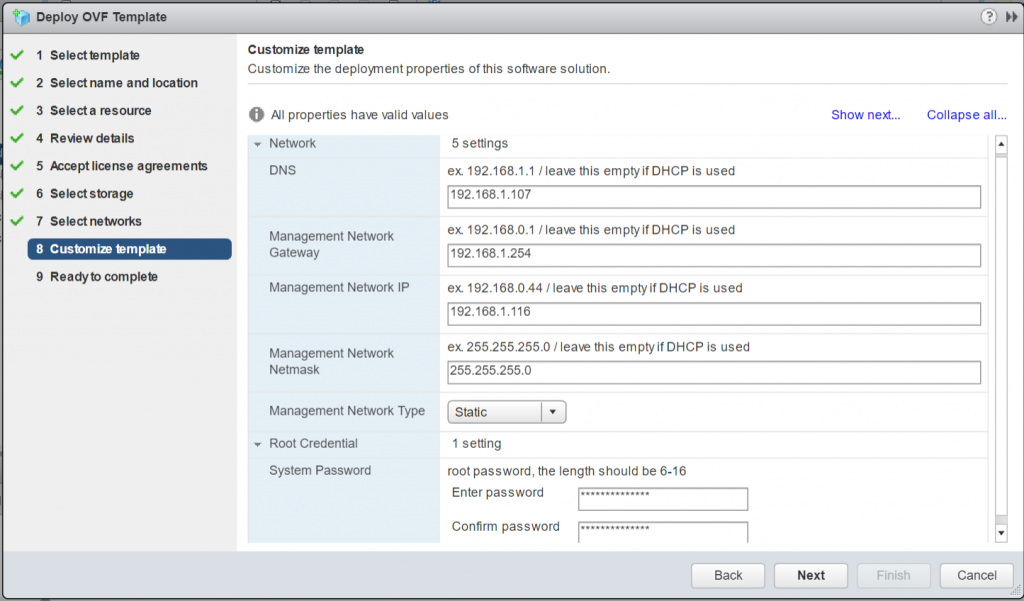
- On the Customize template page, enter a system password for HCIBench. If the HCIBench management interface uses DHCP, the network information should be left blank. If HCIBench uses a specific address, select static on the management network and then enter the desired network configuration.
- Check the final page and click Finish
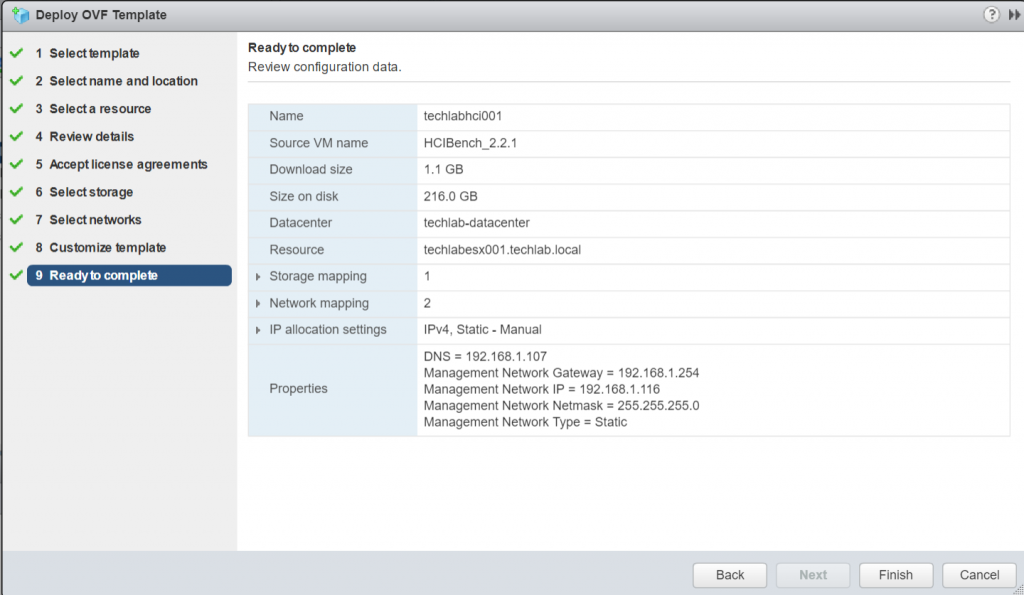
- Note: During the installation process, you need to download the Vdbench binaries directly from the Oracle website one time only if you choose Vdbench as the workload generator. While the use of Vdbench is unrestricted, Oracle does not provide redistribution rights in their license. If you choose to use Fio, you do not need to do anything because we already have the Fio binary included. I’m just going to leave it as Fio
- Once this is deployed, navigate to https://<HCIBenchserver>:8443/ to start configuration and have a look at the tests. Before accessing the configuration page, the root user ID and password must be used to authenticate to prevent unauthorized access to HCIBench.
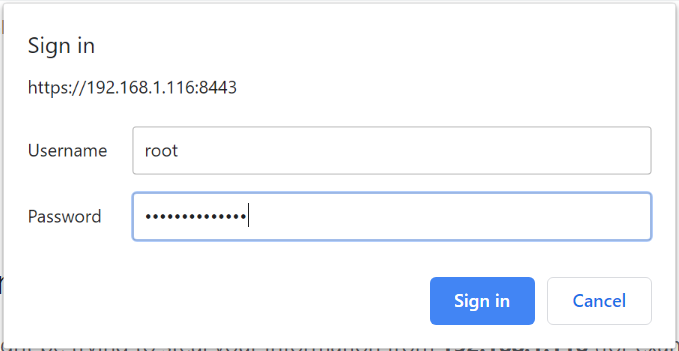
- This will log you in to the main configuration page
There are 4 main sections in this configuration page
- vSphere environment
- Benchmarking Tool
- Guest VM configuration
- Testing Configuration
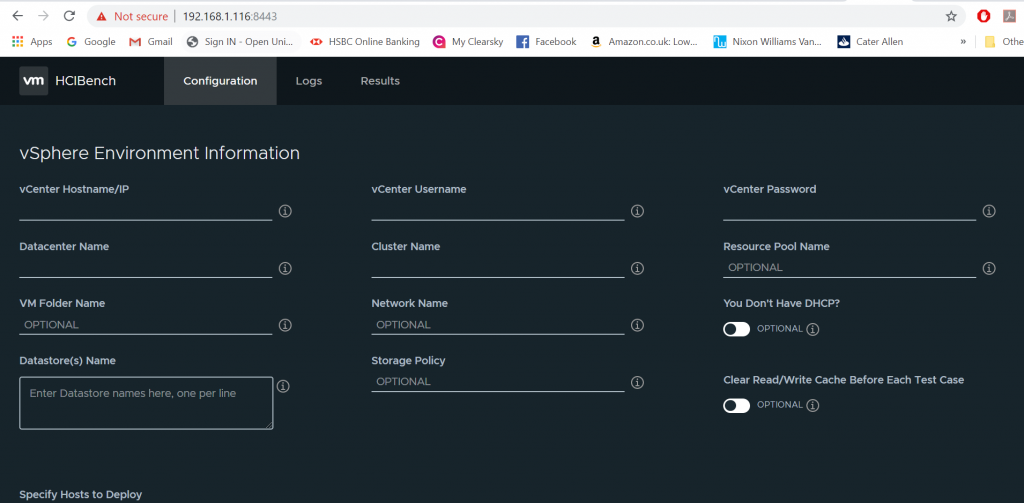
vSphere Environment Testing
In this section, all fields not marked “OPTIONAL” are required. You must provide the vSphere environment information where the target cluster is configured, including vCenter IP address, vCenter credential, name of the Datacenter, name of the target Cluster, and name of the Datastore. If you are testing on VMC environment or want to specify the resource pool or VM folder to deploy guest VMs, you should fill those fields as well.
- Network Name defines which network the guest VMs should use. If not specified, the default value is VM Network.
- You Don’t Have DHCP? Instructs HCIBench to set static IPs for guest VMs and use the “VM Network” NIC to communicate with the guest VMs. If it is checked, you can find a static IP prefix from the list on the right handside. Make sure the prefix you choose is NOT being used in the guest VM Network
- Datastore Name specifies the datastores that are tested against and all the guest VMs are deployed on. You need to enter the name of the datastore. Testing multiple datastores in parallel is also supported. You can enter the datastore names one per line. In this cases, the virtual machines are deployed evenly on the datastores. For example, if you enter two datastores and 100 virtual machines, 50 virtual machines will be deployed on each datastore
- Specify Hosts to Deploy allows you to specify particular hosts to deploy guest VMs on, when this parameter checked, you will need to fill up the host(s) in the target cluster you want to have the VMs deployed on; if this is not checked, VMs will be deployed on all the hosts in the target cluster in round-robin manner. In general, it’s only needed when you want to deploy guest VMs onto part of the hosts within the cluster
- Storage Policy allows you to specify the name of a Storage Policy that is applied to the clinet VMs and all the virtual disks.
- Clear Read/Write Cache Before Each Testing is the option designed for vSAN users to flush the cache tier before each test case, ESXi Host Username and Host Password must be specified if this box is checked. Also, you will need SSH access from HCIBench to all the ESXi hosts in the vSAN Cluster. This option requires that all the ESXi hosts have the same username and password.
- Reuse VMs If Possible allows user to reuse the guest VMs in the cluster if they are existing and compatible with the VM specification. If not compatible, existing guest VMs will be deleted and new VMs will be deployed. Compatible means the existing VMs can be found and access from HCIBench; the specified VM Prefix is same with existing VMs; Number of VMs, Number of Disks are not greater than the existing VMs and Size of Data Disk is same with the existing VMs, Vdbench or Fio binaries installed properly
- EASY RUN is specifically designed for vSAN users, by checking this, HCIBench is able to handle all the test configurations below by identifying the vSAN configuration. EASY RUN helps to decide how many guest VMs should be deployed, the number and size of virtual disks of each VM, the way of preparing virtual disks before testing. The Guest VM Configuration and Testing Configuration sections below will be hidden if this option is checked. Once EASY RUN is checked, you can select the following one to four workload profiles to run:
- 4K, 70% Read, 100% Random test to simulate the most common workloads.
- 4K, 100% Read, 100% Random test to show the best realistic I/O per second of this given configuration.
- 8K, 50% Read, 100% Random test to simulate the OLTP workloads.
- 256K, 100% Write, 100% Sequential test to show the best realistic Throughput of this given configuration
Benchmarking Tool

HCIBench can use Fio or Vdbench as the performance workload generator, if Vdbench is selected, you need to download and upload the Vdbench zip to HCIBench. To do so, click Download Vdbench. After the download is completed, you should upload the zip file. And the server will automatically put the Vdbench zip to /opt/output/vdbench-source. This step is a once-for-all action. The following screen disappears from the page after you upload the Vdbench file successfully
Guest VM Configuration

In this section, the only required parameter is Number of VMs that specifies the total number of guest VMs to be deployed for testing. If you enter multiple datastores, these VMs are deployed evenly on the datastores. The rest parameters are optional
- VM Name Prefix specified the prefix of the VM Name. The default value is depending on the benchmarking tool selection, if Fio is selected, the value here will be hci-fio; when Vdbench is selected, the value will be hci-vdb. Also, you can change the prefix as you want.
- The Number of Data Disk parameter specifies how many virtual disks to be tested are added to each guest VM. The default number is eight.
- The Size of Data Disk parameter specifies the size (GB) of each VMDK to be tested. The total number of simulated workload instances is Number of VM * (times) Number of Data Disk. The default number is ten
Testing Configuration

- Test Name parameter is the name of the test, by specifying this parameter, for example “DemoTest”, HCIBench will create a local directory with the same name in “/opt/output/results/” on the Controller VM for storing collected results from all guest VMs and statistics produced by vSAN Observer. If not specified, a name “resultsTIMESTAMP” will be generated and the same name directory will be created under “/opt/output/results”. All the test cases results could be browsed at http://HCIBench_IP/results, or click the Results tab on the navigation bar.
- For the Workload Parameter File, If a parameter file is uploaded or generated to the controller before, it already exists in HCIBench. In this case, you can select the existing Vdbench or Fio parameter file from the drop-down list depending on which workload you selected. You can also refresh the drop-down list by clicking the REFRESH button. After you finish generating a parameter file or uploading a parameter file, click the REFRESH button and it makes the file displayed in the drop-down list without refreshing the entire page to avoid user-input loss. Delete the parameter file by clicking the DELETE button.You have two options to add parameter file into the drop-down list:
Generate a Workload parameter file by yourself
Under the section Select a Workload parameter files, click ADD, which redirects you to the workload generation page seen in the below screenprint, the title of this page is dependenton the tool selection you made earlier, if you had Fio selected, the title is Fio Parameter Generation. No matter which tool you selected, the input fields are the same. All the fields without “OPTIONAL” are required. After clicking SUBMIT, click REFRESH to update the drop-down list.
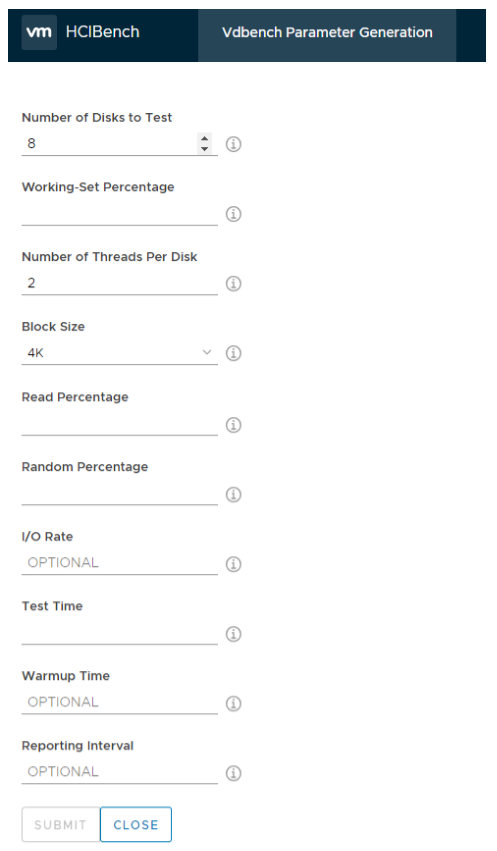
- Number of Disk to Test: – Note: The value of Number of Data Disk in the guest VM Specification section must match the value of Number of Disks to Test defined in the parameter files. For example, if you specify to create 10 data disks per guest VM, 10 raw disks are created. Therefore, in the parameter files, the same number or less of disks are expected. Since we are using Photon OS, beware the first data disk starts from /dev/sda, the last disk is the OS disk
- Working Set Percentage: This is the percentage of data changing
- Number of Thread Per Disk: Specifies the maximum number of concurrent I/O per Disk. Usually test with 1 or 2 threads
- Block Size: – vSan has a native 4k block size. If you know what is your average block size is based on some performance analysis that you have completed you can change this value.
- Read Percentage: Specifies the read percentage of the workload
- Random Percentage: Specifies the random percentage of the workload
- I/O Rate: If not specified the rate is unlimited. If you specify 4000 I/Os then each single VM will have 4000 I//Os maximum
- Test Time: How long the test will run for in seconds. This value will be overwritten by the time in the main UI if they are not the same.
- Warm Up Time: HCI bench will always ignore the first interval of results from the total. If you want to add additional warm-up time to allow the cache drives to fill up sufficiently you can add additional warm-up time here. This time will be appended to test time. Workloads will take a while for the cache to warm up before achieving a consistent performance
- Reporting Level: This parameter specifies the duration in seconds in each reporting interval. If you were running a particularly long Test over a number of days the amount of data that would be collected would be significant. by sampling the data at regular intervals it makes the data size more manageable
Other options
- Users can choose whether to intialize the data VMDKs of guest VMs. There are two options of storage initialization, ZERO and RANDOM. RANDOM is particularly for storage that has de-duplication enabled, if the storage that is tested against does not have de-duplication enabled, use ZERO instead to initialize storage to avoid first-write penalty.
- The Testing Duration parameter is for overriding the elapsed value in parameter files. This parameter defines the test duration for each run. If not specified, each test run uses its own elapsed value.
- When the Clean up VMs parameter is checked, all the guest VMs are removed after all the testing is completed; otherwise, all the VMs are preserved
Options at the bottom

Save Configuration:
Press the SAVE CONFIG button to save the parameter configuration settings. If the configuration setting is not saved and the page is refreshed, the system will read the previous-saved parameter configuration. Until you successfully saved the config, the VALIDATE CONFIG and START TEST buttons are disabled to enforce you save your configuration before validating or starting testing.
Configuration Validation
After completing the tool configuration, you can validate all settings by clicking the VALIDATE CONFIG button. This step checks if all the required information is correctly provided. Additionally, it validates basic environment sanity including whether vSAN is enabled in the cluster, whether the hosts specified belong to the cluster and can access the vSAN datastore. Furthermore, this function estimates the storage usage by all guest VMs on the vSAN datastore and alert if it exceeds 80 percent of the usable capacity after deployment
Monitoring the test during the run
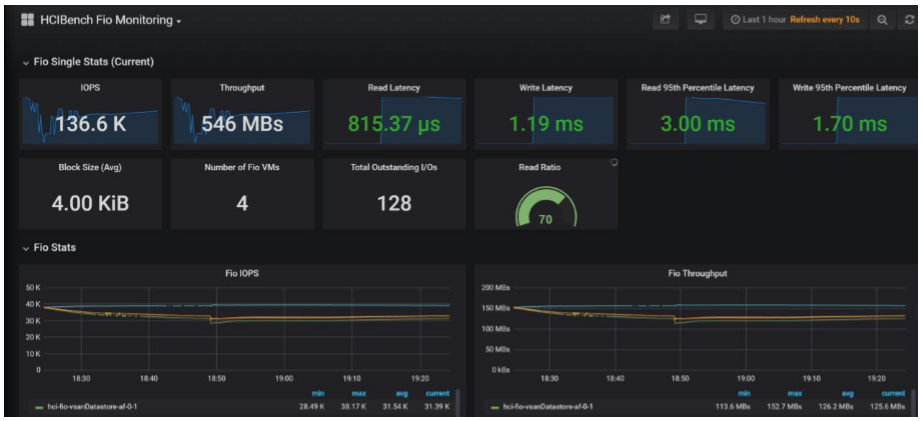
During the testing, you can monitor the live performance from guest VMs showed up in Grafana by clicking HERE TO MONITOR, which lands you on Grafana page: http://HCIBench_IP:3000 to monitor the live performance, and to reduce the space utilization on the disk, the graph is only available while the testing is running
Viewing Test Results
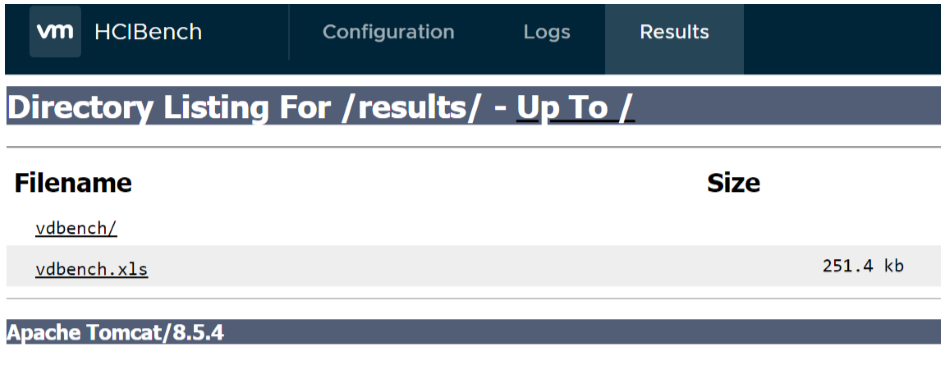
After the Vdbench or Fio testing is completed, the test results are collected from all the guest VMs. You can view the results at http://HCIBench_IP/results in a web browser, or click the Results tab to review it
Each of the subdirectories in “/opt/output/results/TestName” directory uses the name of the userdefined parameter file, and contains all original results produced by each Vdbench or Fio instance and vSAN Observer data.
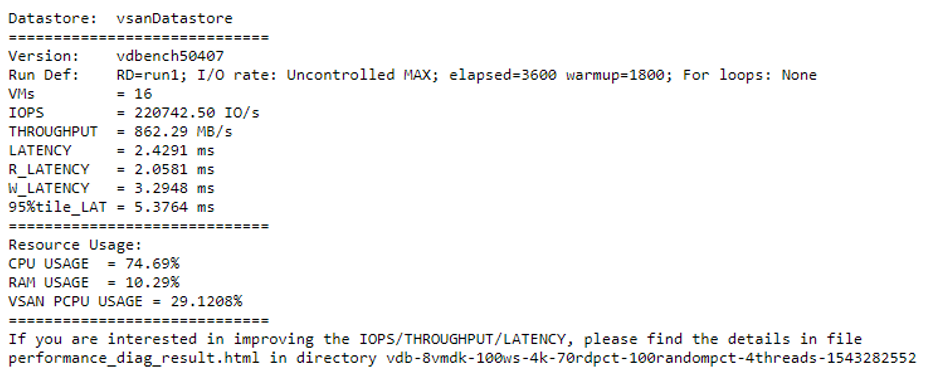
The aggregated result of one test run is summarized in the text file with the name -res.txt, containing the datastore’s name and four statistics: number of VMs used for testing, IOPS, throughput, latency details, and host resource consumption. If vSAN is enable, the CPU used by vSAN will also be calculated.
You can find all of the original result files produced by Vdbench or Fio instances inside the subdirectory corresponding to a test run. In addition to the text files, there is another subdirectory named iotesthcibench/fio-vm inside, which is the statistics directory generated by vSAN Observer. Also, you should be able to find the following files:
HCIBench-VERSION-logs.tar.gz: HCIBench pre-validation and testing logs.
hcibench.cfg: HCIBench configuration parameters
vdbench.cfg/fio.cfg: Vdbench/Fio parameter profile
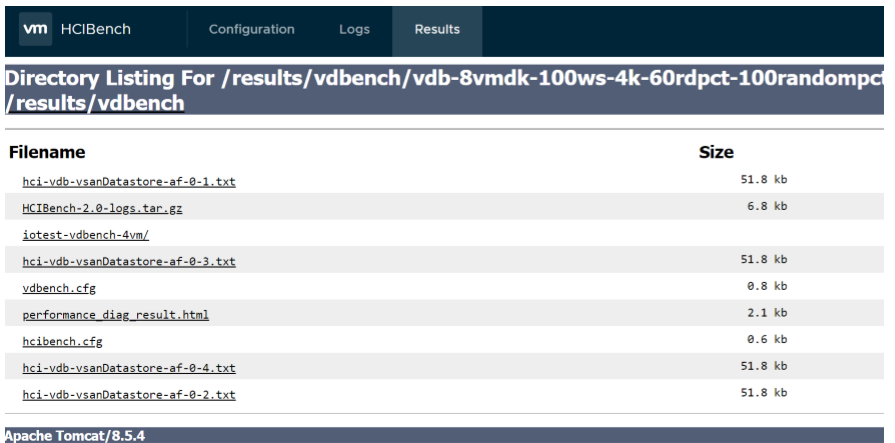
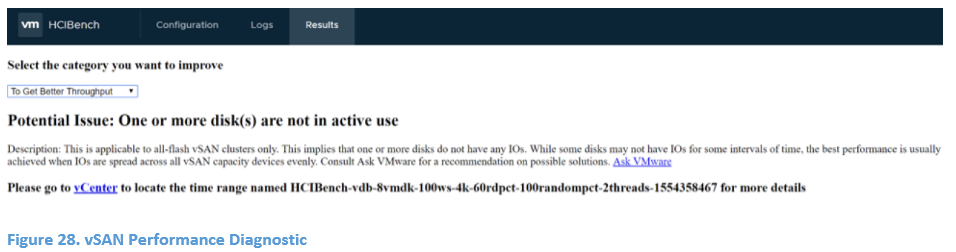
performance_diag_result.html:
If testing against vSAN 6.6U1 or later and using HCIBench 1.6.6 or later releases, turning on CEIP (Customer Experience Improvement Program) and vSAN Performance Service, each HCIBench run will send the testing results as well as the testing configuration to VMware Cloud to help user to analyze the potential issue that blocks from achieving a certain goal (maximum IOPS, maximum throughput, or minimum latency). Users are able to land to the specific vCenter page and the KB article of any potential issues detected from the hyperlink provided in this file.
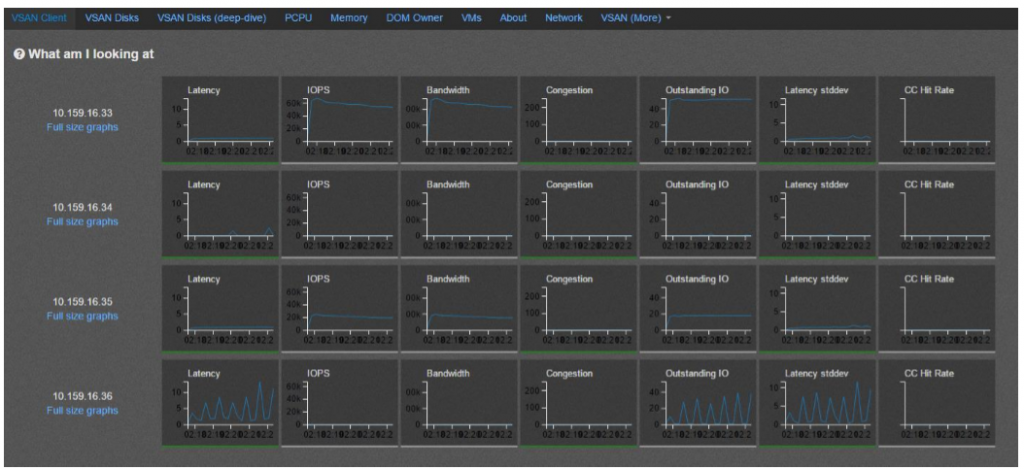
Open the stats.html file inside the statistics directory, you can find the vSAN performance statistics for debugging or evaluating purposes.
Downloading Test results
Download the test results by clicking the SAVE RESULT button. The latest test result details are zipped to a file and you can download the file to your local client.