
vRA Distributed deployment.
This series will cover a larger distributed deployment of vRealize Automation 6.2.3
Software required
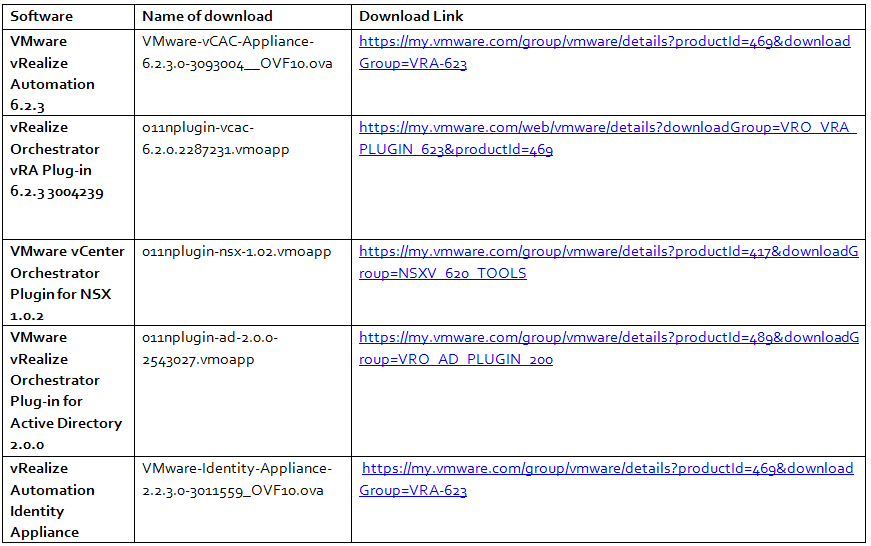
Components
Only the Identity and vRA appliances are covered in this blog. The rest will be covered in the series to follow.
- 1 x Identity appliance
- 2 x vRA appliances (Postgres Database only)
- 2 x IaaS servers
- 2 x Manager Servers
- 1 x Orchestrator appliance
- 1 x F5 Load Balancer
Important
- DNS must be configured for all servers/appliances you use and test it
- Whatever you use for time sync must be identical for all servers/appliances you use
F5 Load Balancer setup and information
- http://kaloferov.com/blog/configuring-vrealize-automation-load-balancing-using-f5-big-ip/
Certificates
Please follow one of my other blogs for generating and importing certificates into vRA appliances and servers
http://www.electricmonk.org.uk/2015/12/03/installing-vra-6-x-certificates/
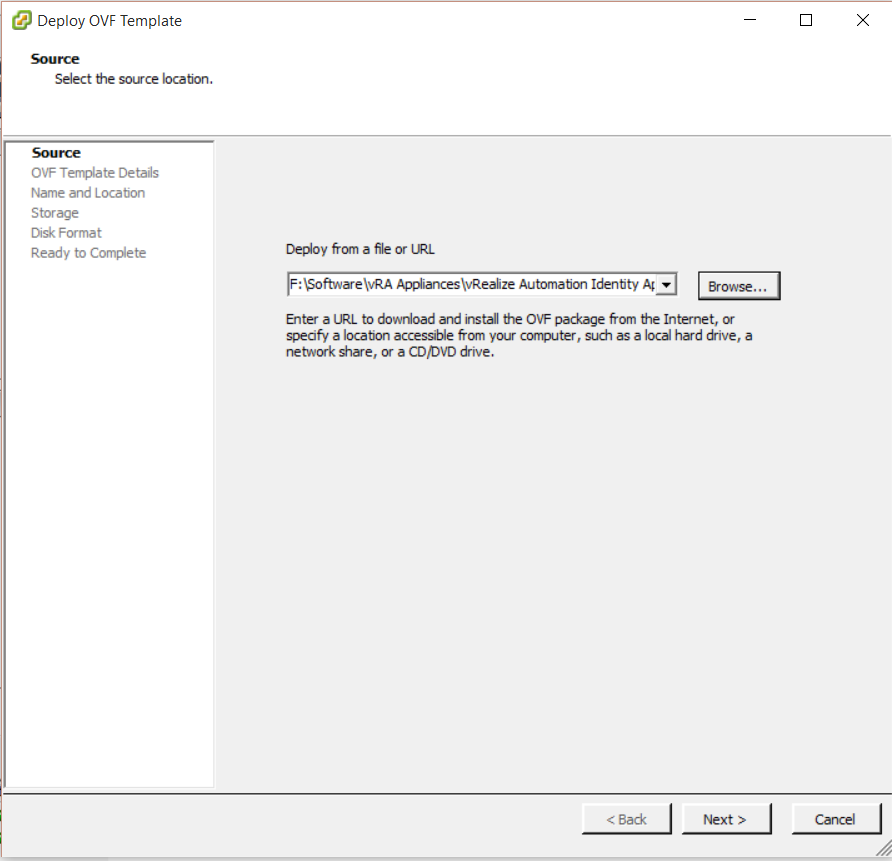
Step 1 – Deploying the Identity Appliance
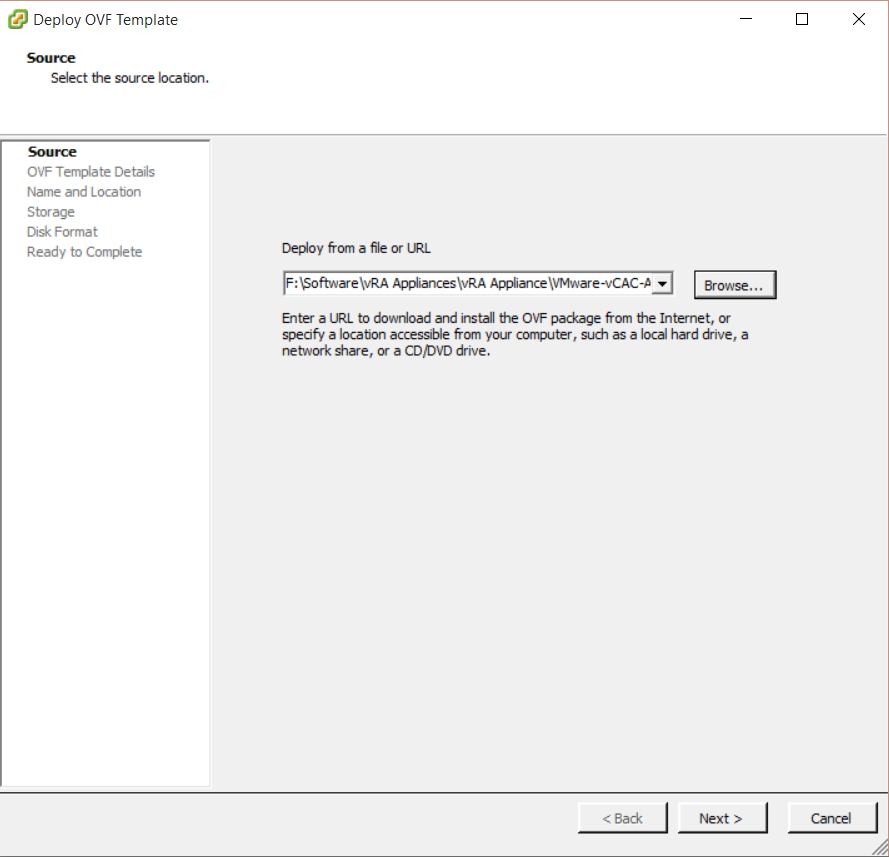
- In the vSphere client or web client select File > Deploy OVF Template
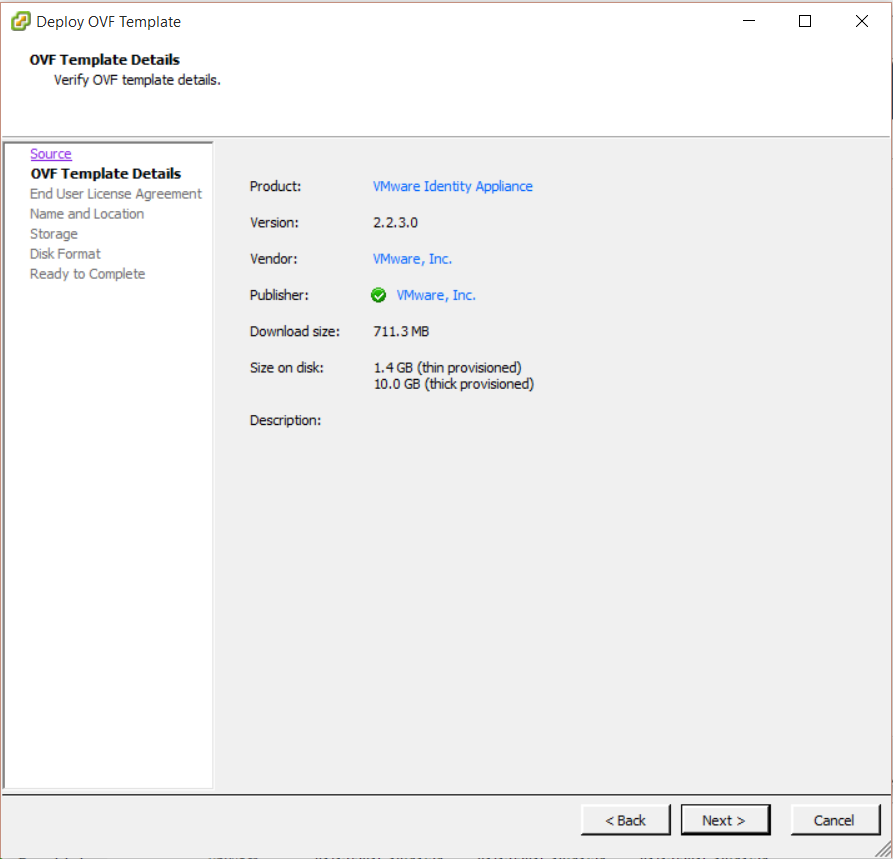
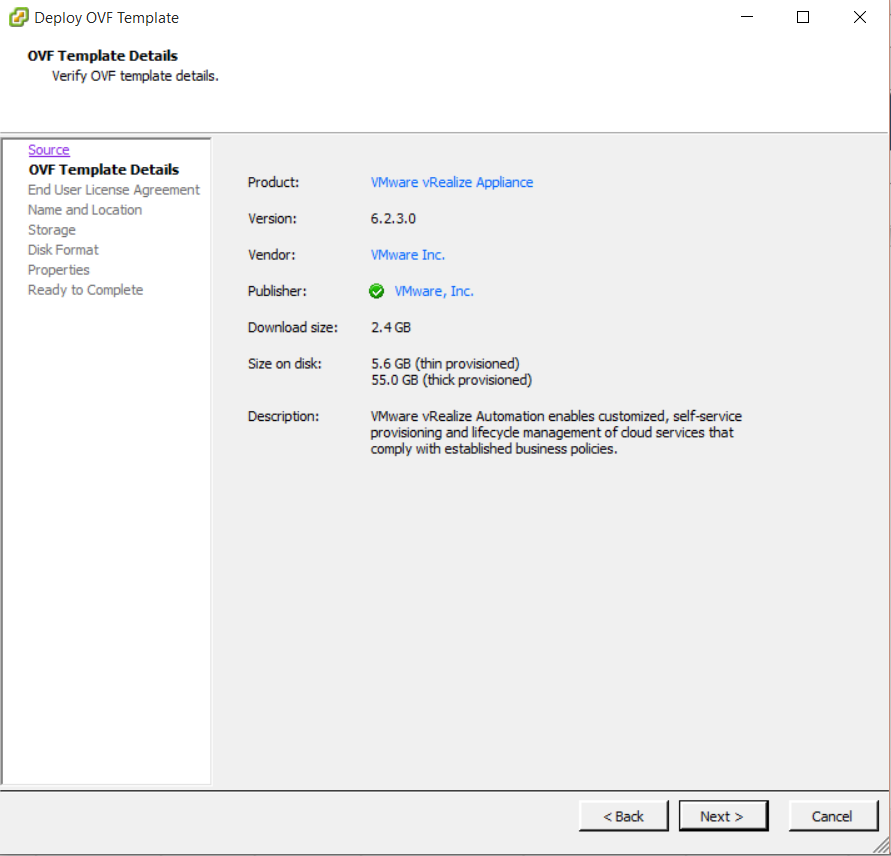
- Check the details
- Accept the license agreeement
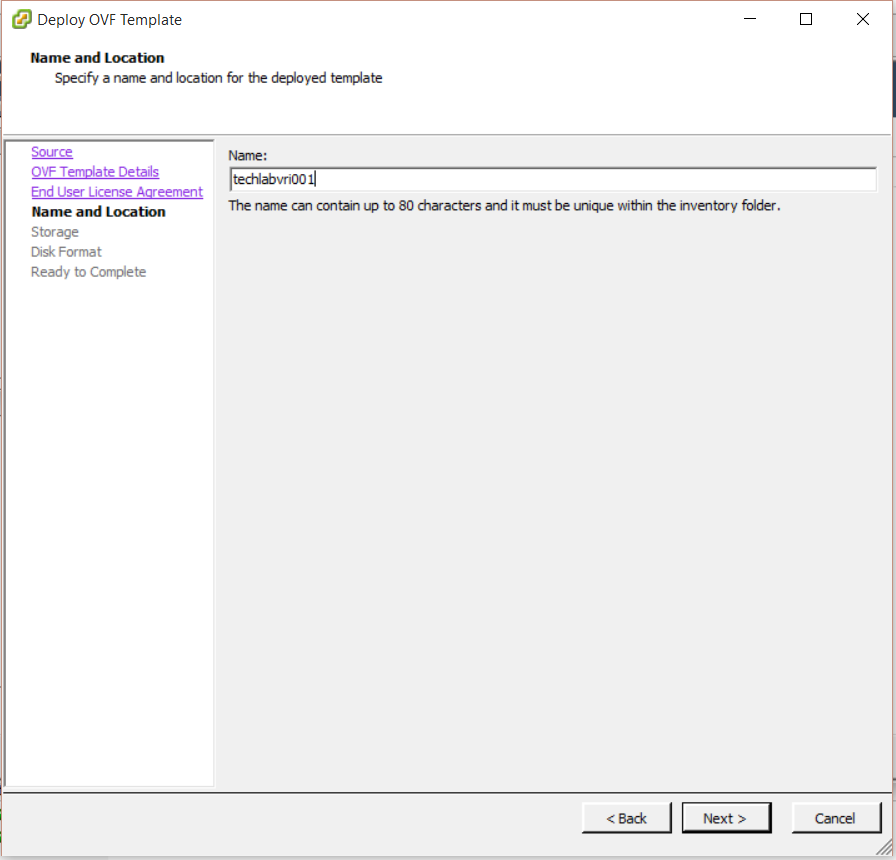
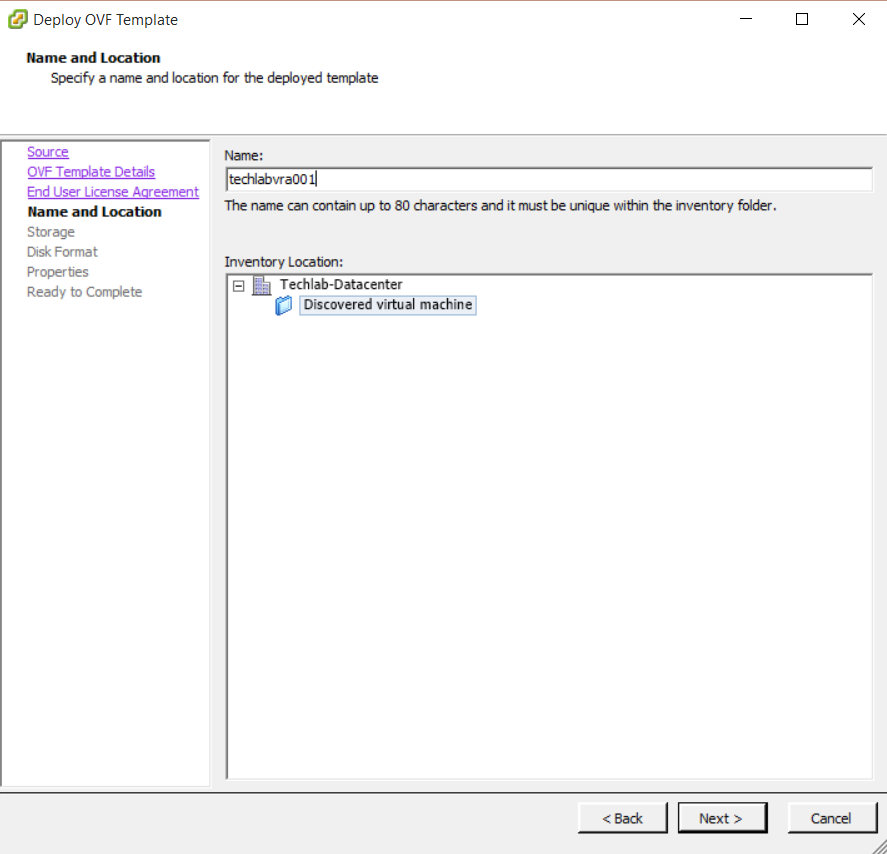
- Put in a name for the vRA Identity appliance
- Choose your storage
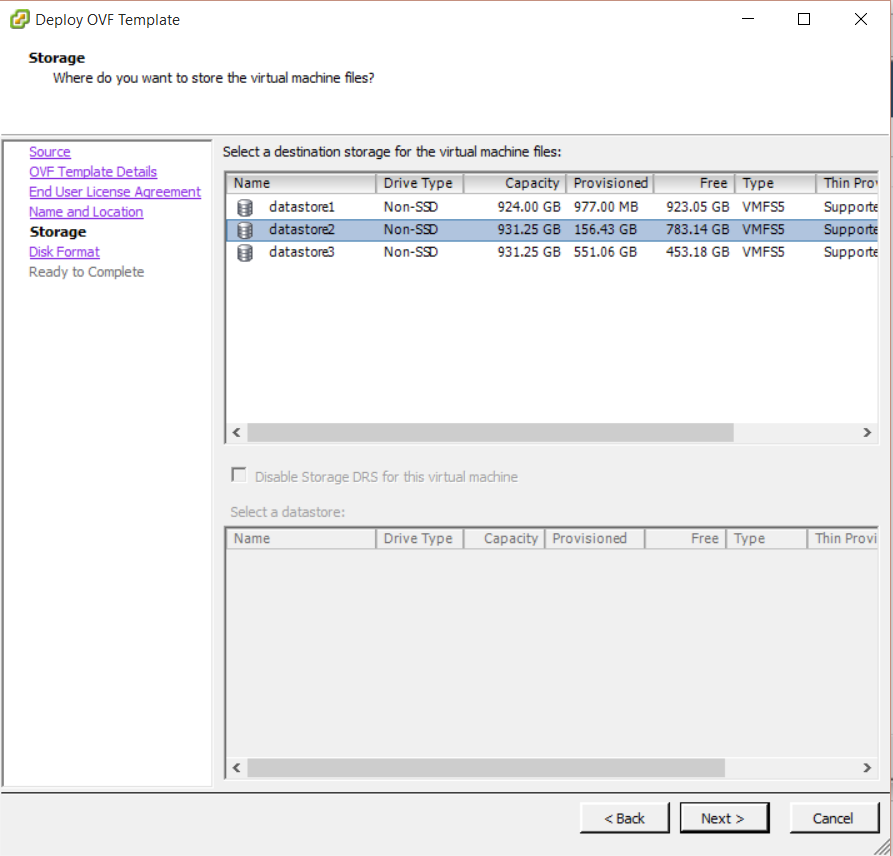
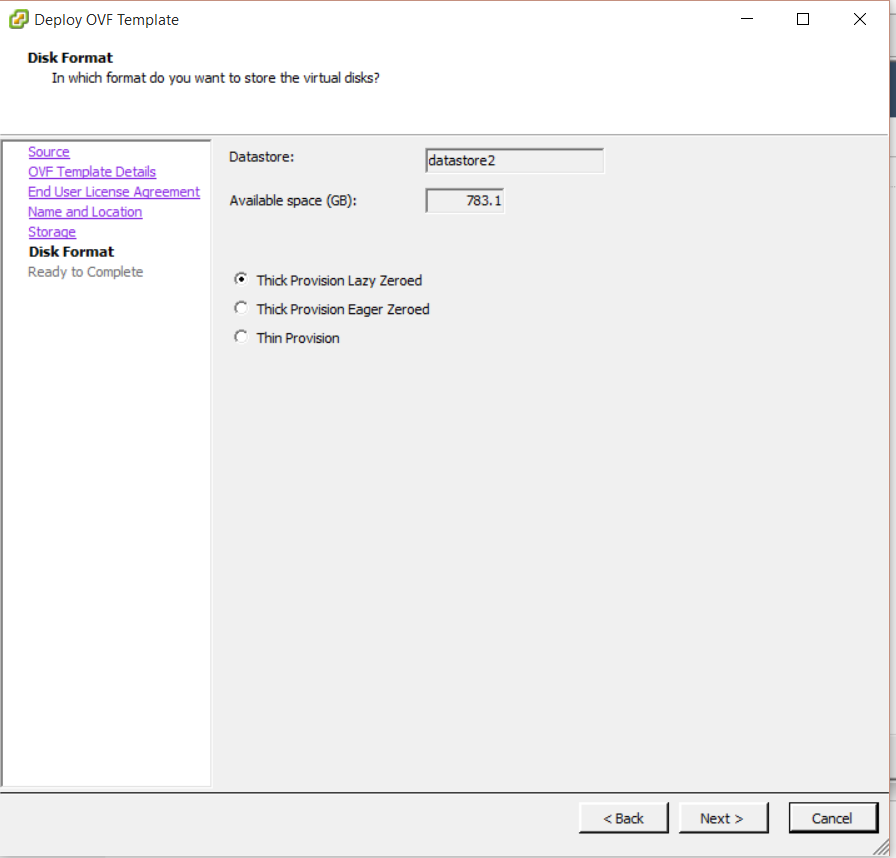
- Leave the defaults for storage
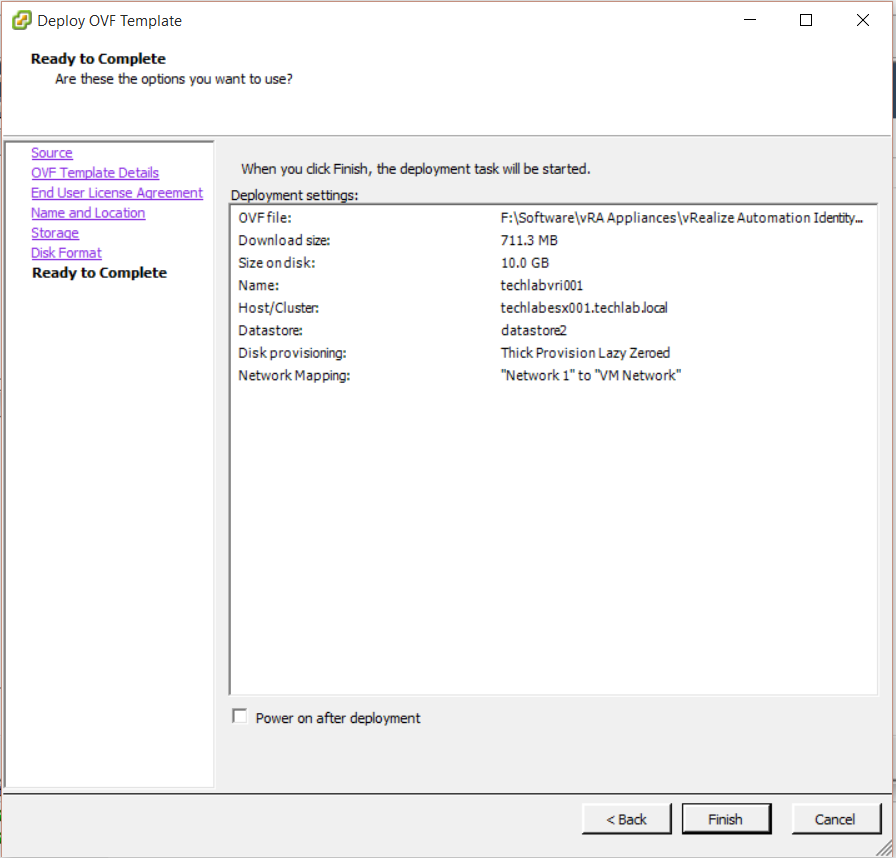
- Check the details and click Finish
- Note: The identity appliance cannot be clustered but can be put on a vSphere HA cluster to provide redundancy in the event of hardware failure but not in the event of the Identity appliance having an issue.
- You may need to go into the vCenter console for the machine and set a root password
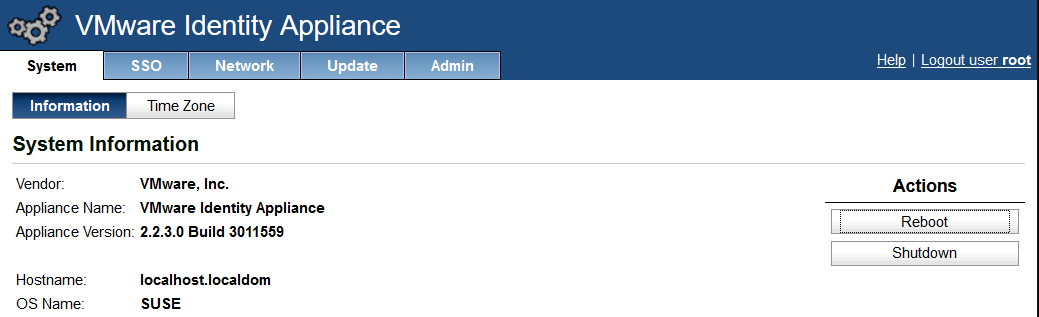
- You will then see this screen where you can see the web browser link to log into the Identity appliance
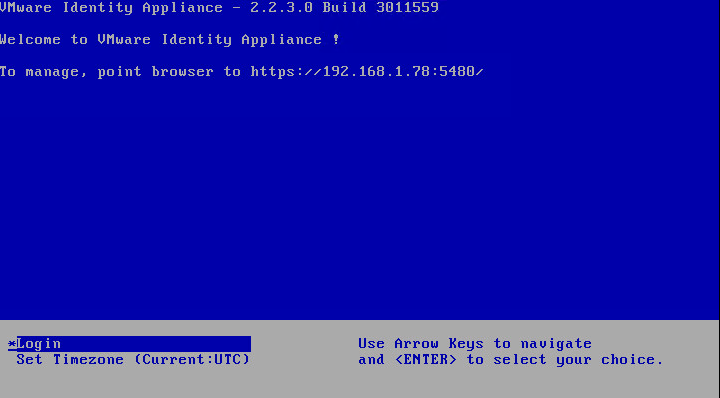
- Log into the web link
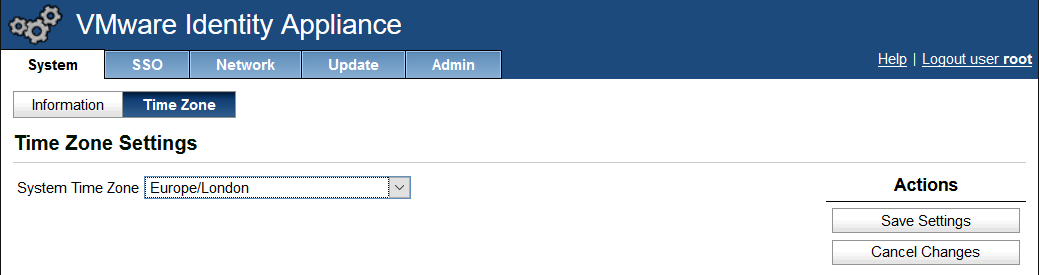
- Set the time zone
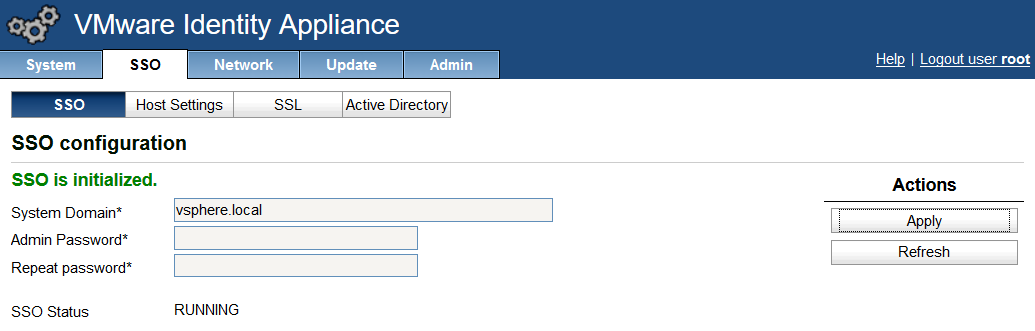
- Set the SSO password
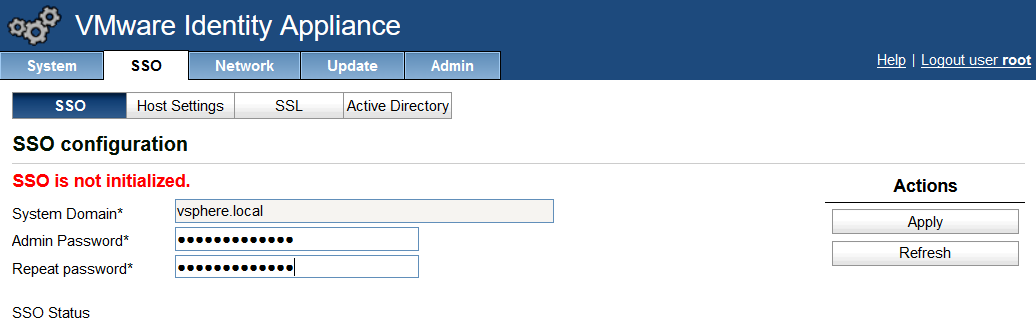
- It should then look like the below screenprint
- Click on host settings and put in the name of the identity appliance
- Make sure there is a DNS entry for the identity appliance

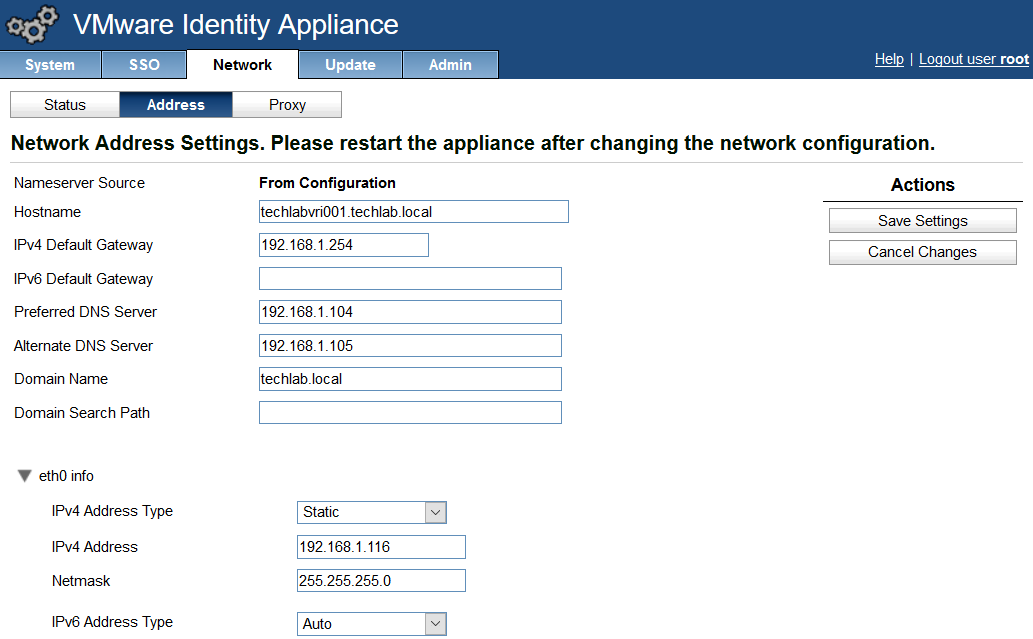
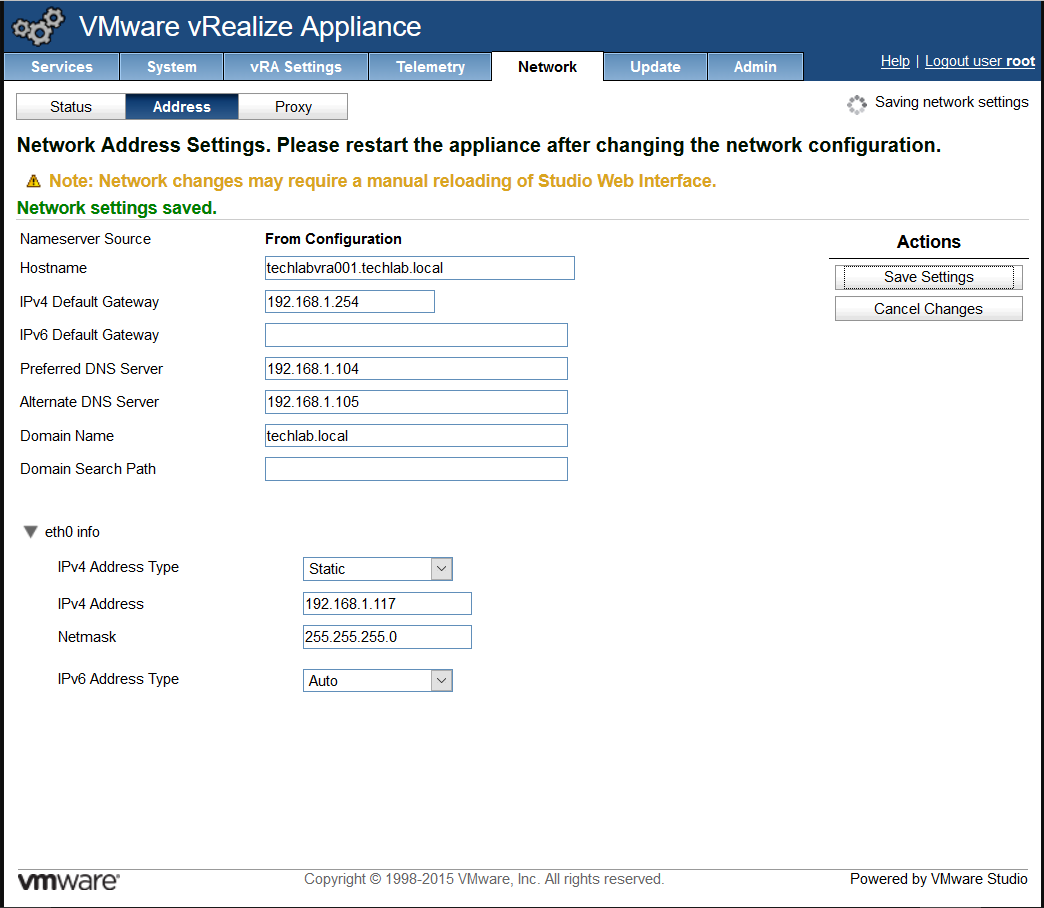
- Click on Network then the Address tab and put in the relevant details
- You will then need to reboot and relogin
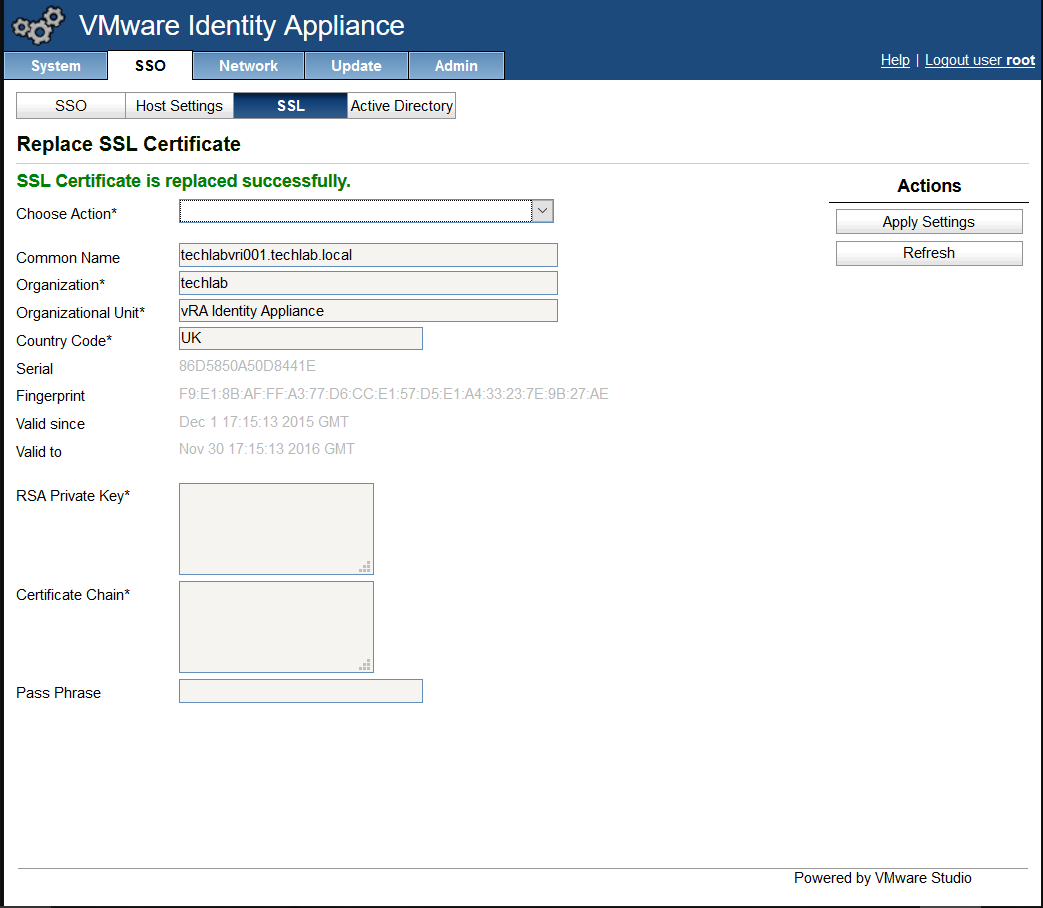
- Next click on SSO > SSL
- Generate a certificate for now. Example below
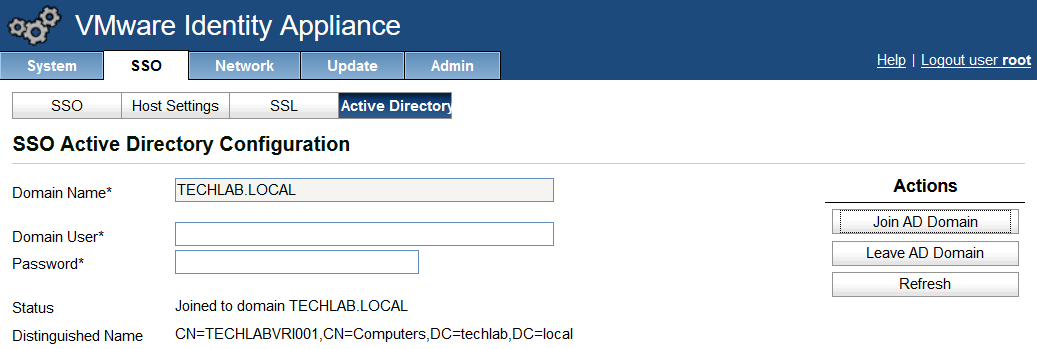
- Click on Active Directory and put in your details

- It will then look like the below
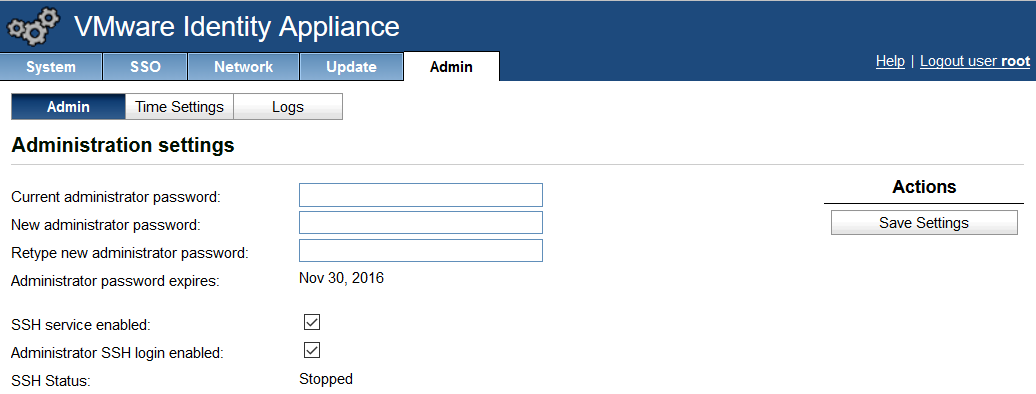
- Go to the Admin tab and click Admin
- Tick SSH service enabled and Administrator SSH login enabled
- Click on Time settings and adjust if you have a time server. I left mine on Use host time
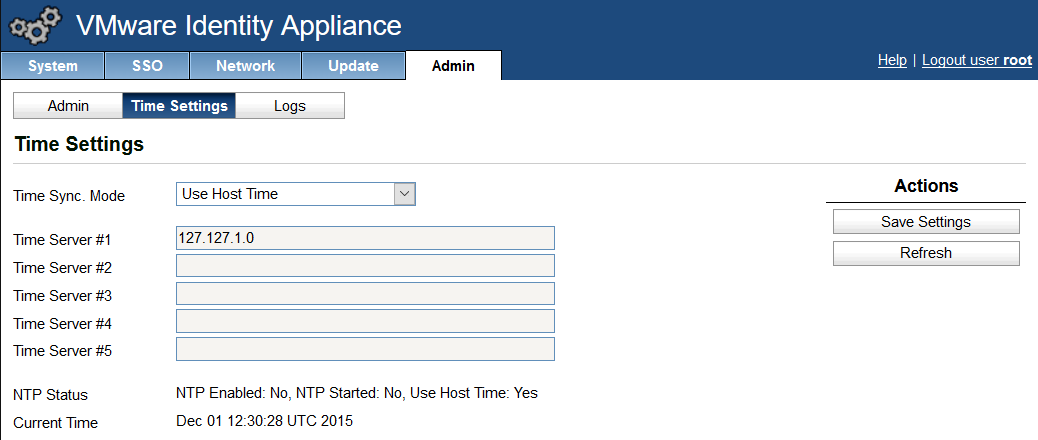
- This should now be complete.
- Note: You may want to adjust the CPU and RAM depending on customer requirements
- Note. It might be wise at this point to shutdown the appliance and take a snapshot
Step 2 Deploy 2 vRealize Automation Appliances
Note: Follow the below steps for each appliance
- In the vSphere client or vSphere Web Client click File > Deploy OVF template
- Check the details
- Accept the license agreement
- Put in a name
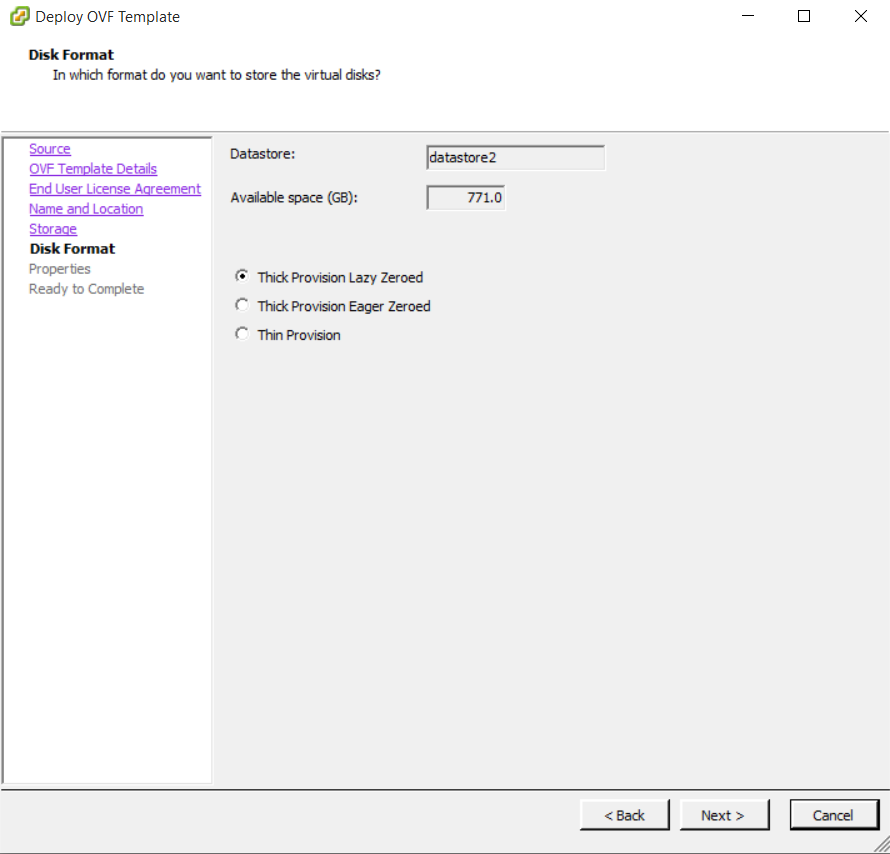
- Choose your storage

- Choose your storage options
- Next you will need to type in the hostname, ssh enabled, IP address, subnet mask, gateway and DNS servers

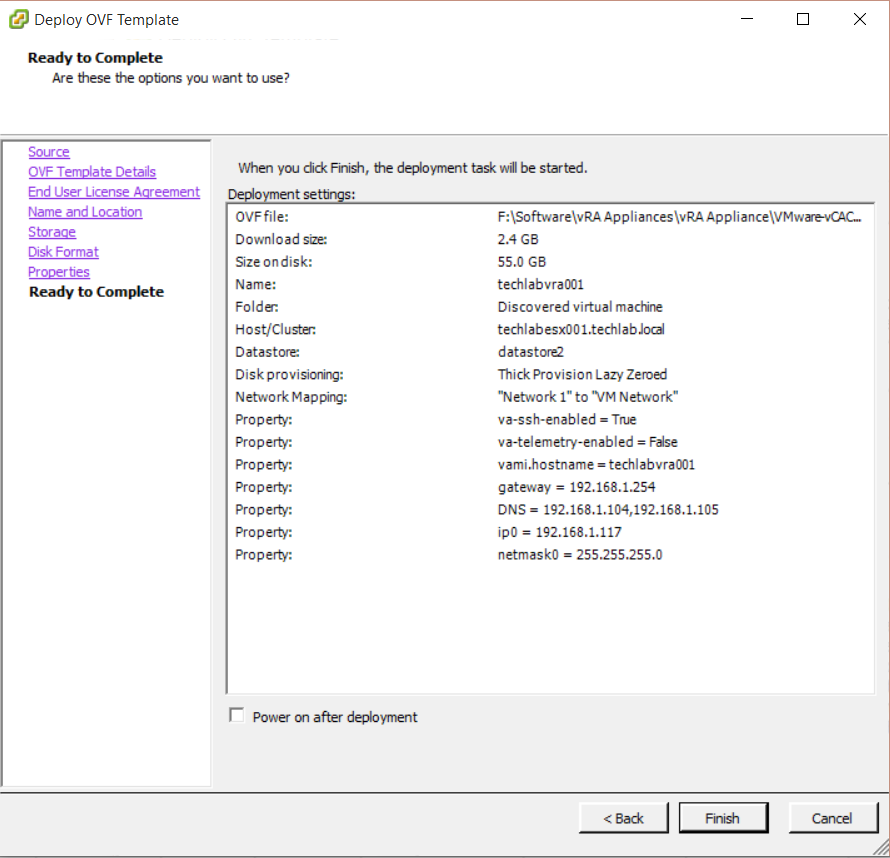
- Click Next and check all your details
- Once this is deployed, make sure you have a DNS entry added
- Log into the appliance
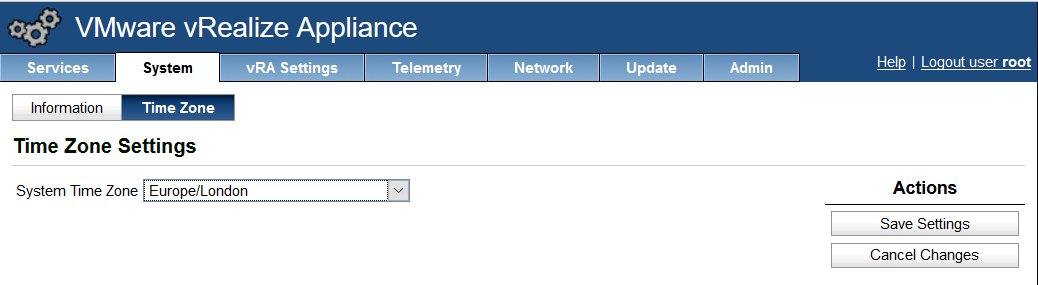
- Change the time settings first
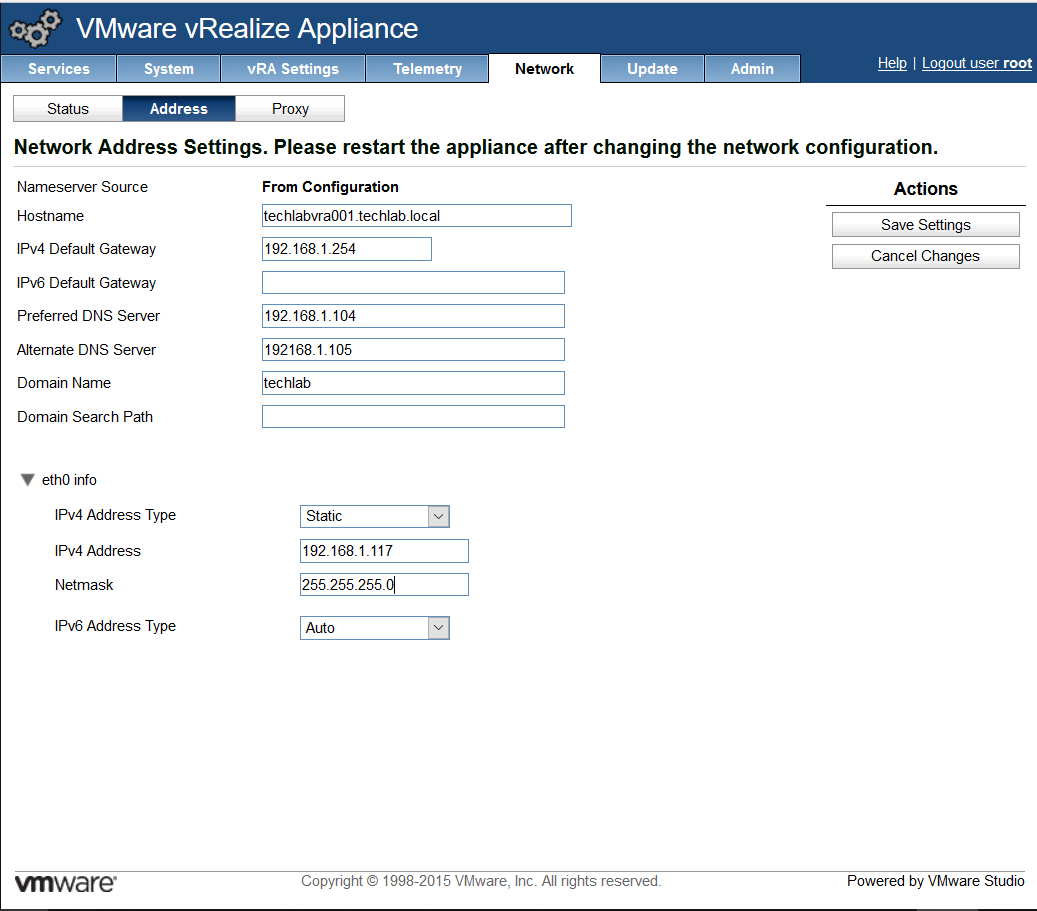
- Click on the Network tab and select Host Settings.
- Fill in your details
- Reboot the appliance
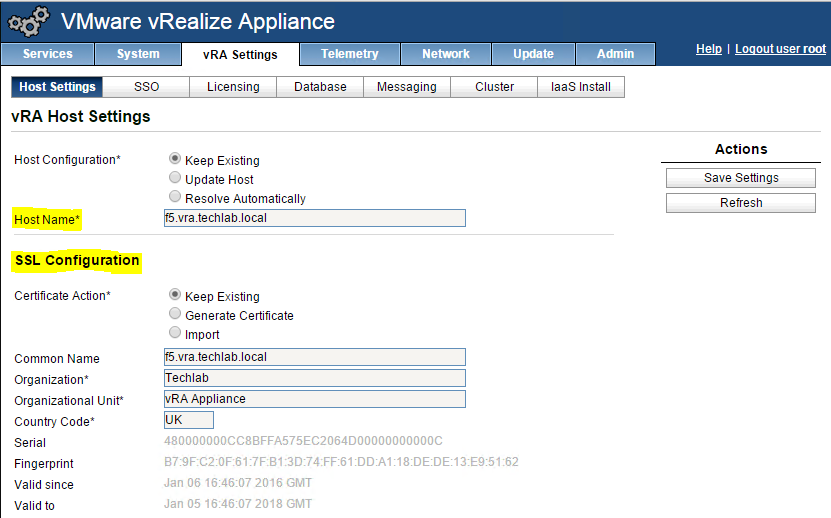
- Click on the vRA Host Settings
- Add in your host settings – this should be your load balanced name
- Import your certificate in which should have been pre-created from the instructions in my previous vRA certificate blog
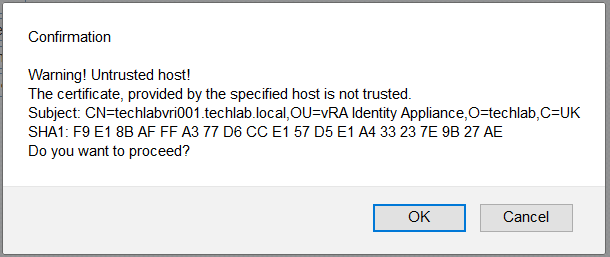
- Click on SSO
- Put in the SSO details (The identity appliance details)
- If everything is ok then you will see a certificate message
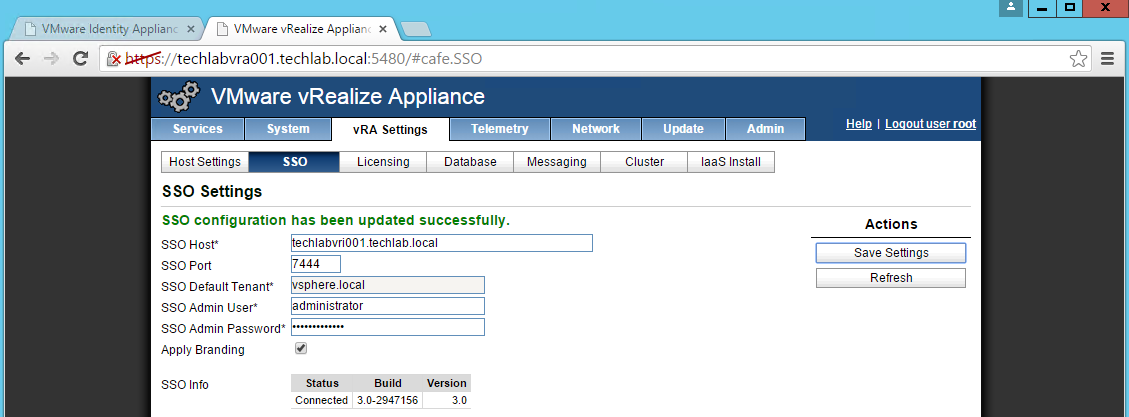
- Click Save Settings and note the SSO seems to take a long time

- You should see the following
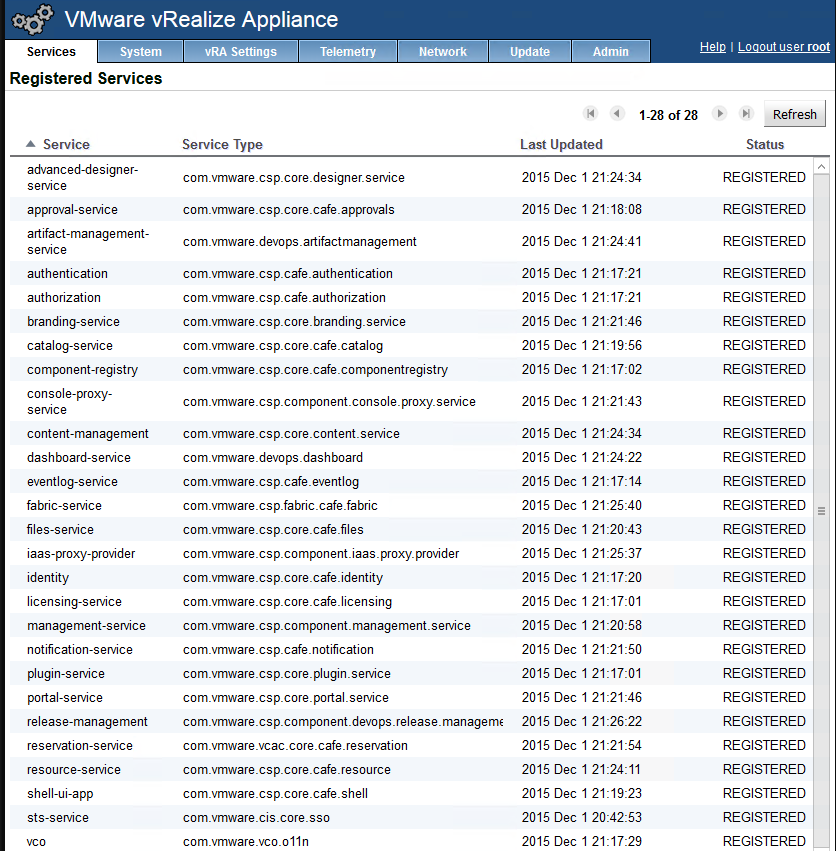
- You should slowly see the services begin to come up
- Note: To monitor service startup run the following command:
- tail -f /var/log/vcac/catalina.out
- Do exactly the same process on the second appliance
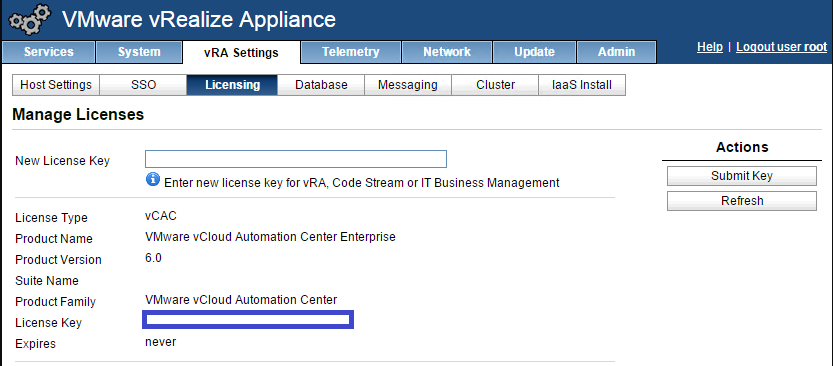
- Add your license in – Go to vRA Settings > Licensing
- Next please go to Part 2 for the Postgres clustering of the vRA appliances
Licensing Problems
I had an issue where my license suddenly became invalid which was a little bizarre as it is test non expiring one.
However I followed the steps in the below article on both appliances and it came back fine
Thanks @ vmguru 🙂
https://www.vmguru.com/2015/09/downgrade-the-vrealize-automation-license/

