
Configuration and Management
So in Part 2 I set up the following
- 1 x Windows 2012 SQL Server
- 1 x VMware vRA 6.2.2 appliance
- 1 x Windows 2012 Datacenter IaaS Sever
- 1 x vCenter 5.5 server providing SSO capabilities to vRA
- Make sure the IaaS server is patched.
Configuration Start
Setting up User accounts and tenants
- Log into vRA by opening a web browser and typing in https://vcac-appliance-name.domain.name/shell-ui-app (The default tenant)
- Log in using the administrator@vsphere.local SSO account
- You should now see the following page showing the default tenant vsphere.local. Ignore the second tenant for now. It is one I set up to work with vR Business.
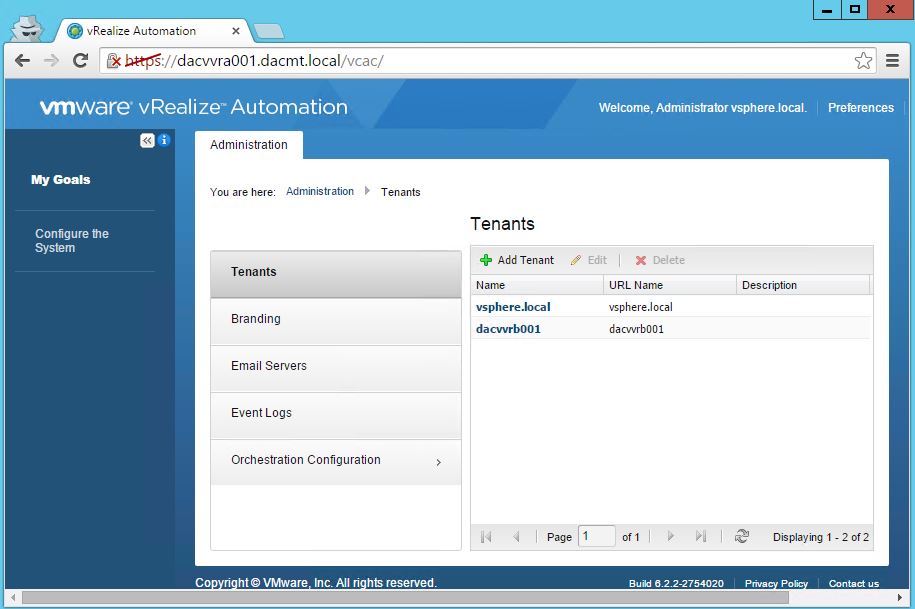
vRA can be a Single Tenant or Multi-Tenant application. A tenant is an organizational unit in a vRA deployment. A tenant can represent a business unit in an enterprise or a company that subscribes to cloud services from a service provider. Each tenant has it’s own dedicated configuration although some system-level config is shared across tenants.
The system administrator – administrator@vsphere.local can create additional tenants.
Each tenant has a unique URL to the vRA console where the default is
- https://vcac-appliance-name.domain.name/shell-ui-app
while mutli-tenant resources will be given a URL such as
- https://vra-appliance-domain-name/shell-ui-app/org/tenant-name.
The default tenant is the only tenant that supports native Active Directory authentication; all other tenants must use Active Directory over LDAP or OpenLDAP
Tenant Services
- Non Tenanted
Non tenanted items are visible and consumable by all tenants
- Endpoints
- Compute Resources
- Reservations
- Managed machines
- Networking
- Machine Prefixes
- Build profiles
- Data Dictionary
- Tenanted
Tenants requiring exclusive access to their own build profiles, machine prefixes and non tenanted objects may require their own vRA instance
- Catalog
- Approvals
- Entitlements
- Tenant identity store
- Branding
- Advanced Service Designer
In a single tenant configuration, everything is handled at the default instance. This includes system wide configurations. Tenant administrators can manage users and groups, configure tenant-specific branding, notifications, business policies, and catalog offerings. The system administrator account is always administrator@vsphere.local, while the tenant administrator must be a user in one of the tenant identity stores, such as username@mycompany.com
In a multi-tenant environment, the system administrator creates new tenants for each organization that uses the same vRA instance. Tenant users log in to the vRA console at a URL specific to their tenant. There are 2 different deployments which we will not go into further
- Default tenant-managed multitenancy
- Individual tenant-managed multitenancy
Configuring the default tenant
- Highlight vSphere.local and click edit
- Click Identity Store and click Edit
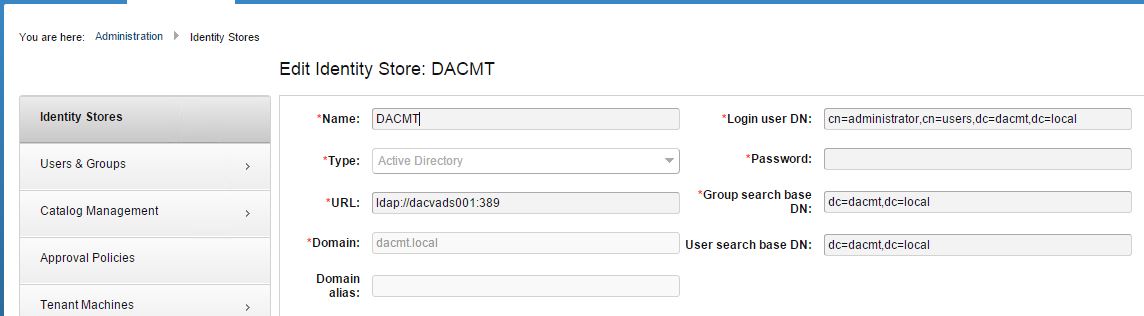
- Test Connection and click Update
- Add your tenant admin account and infrastructure admin account. Note I have created AD accounts which are distinguishable as these vRA accounts.
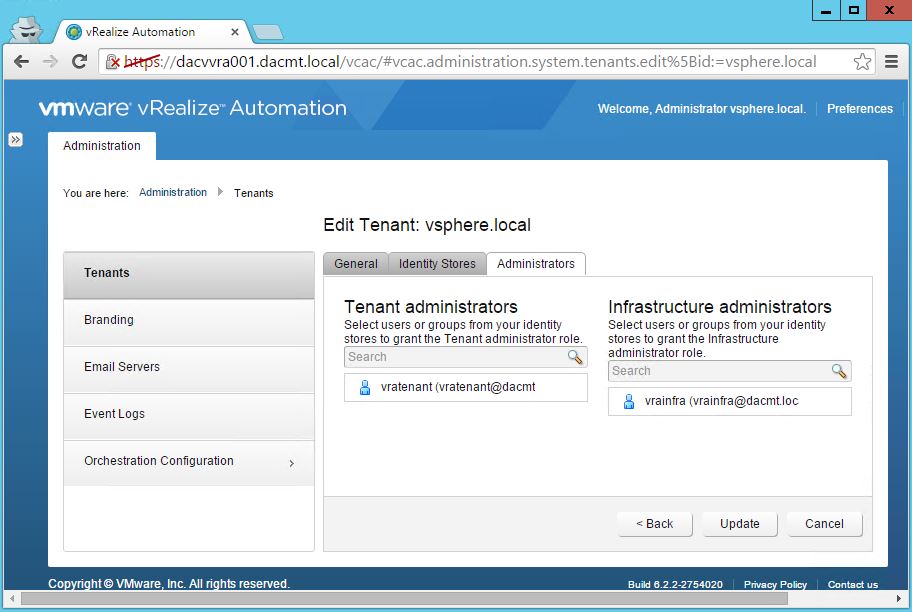
- Click Update
- Your default tenant is complete
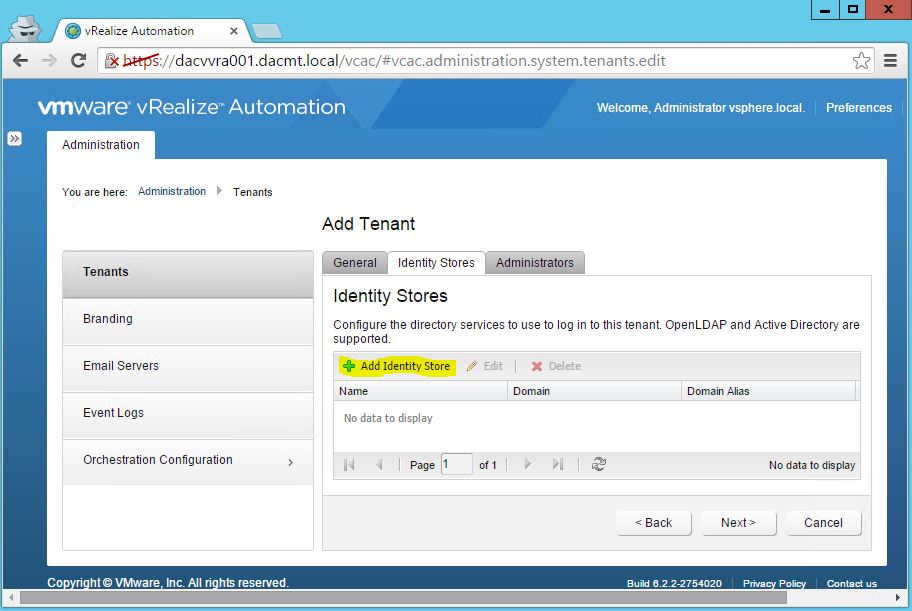
Adding a second tenant
- Click Add tenant and you will see this screen
- As an example I am creating a developer tenant

- Click Submit and Next
- Click Add identity store
- Fill in the details – example below
- Click Test Connection
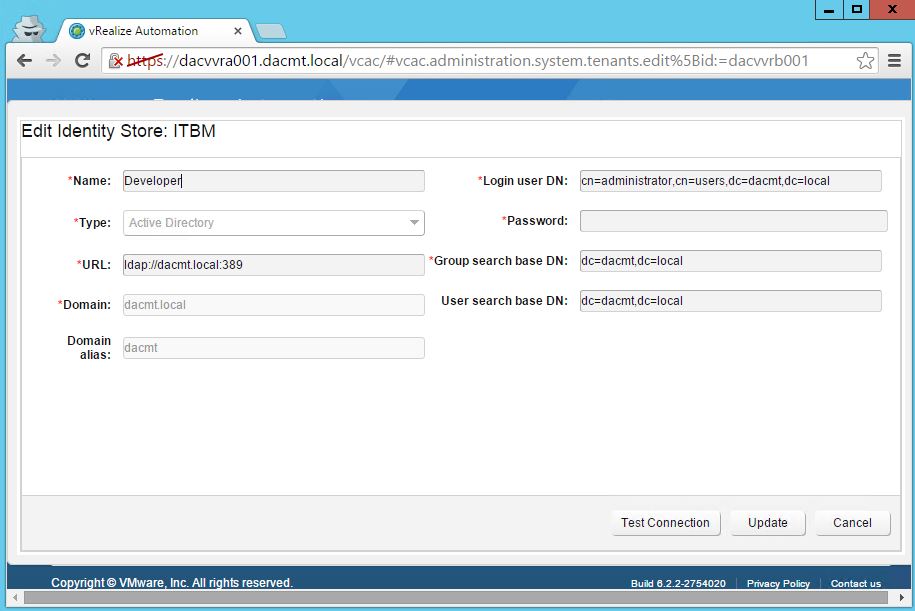
- Click Add
- Click Submit and Next
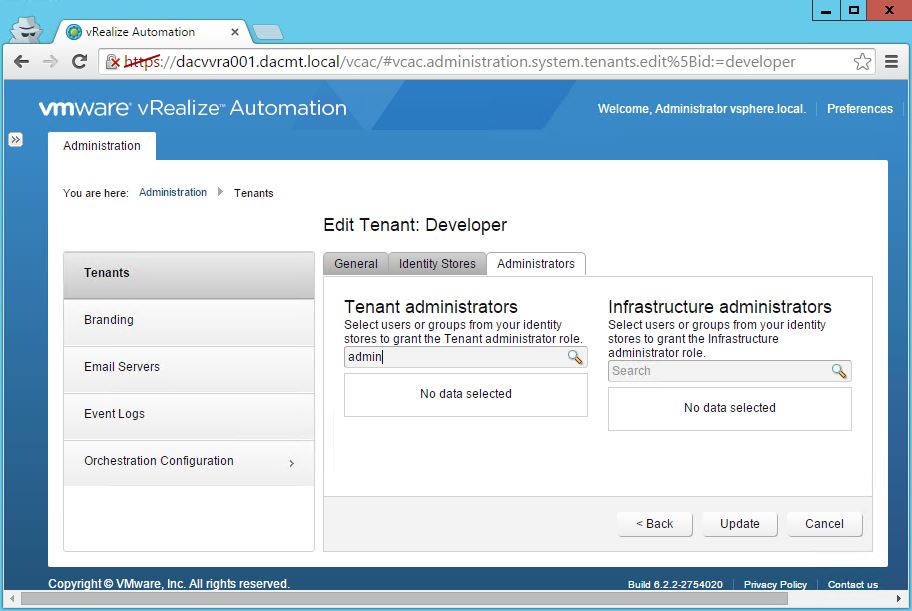
- Type in the username for your Tenant Adminstrators and Infrastructure Administrators
- Click Update
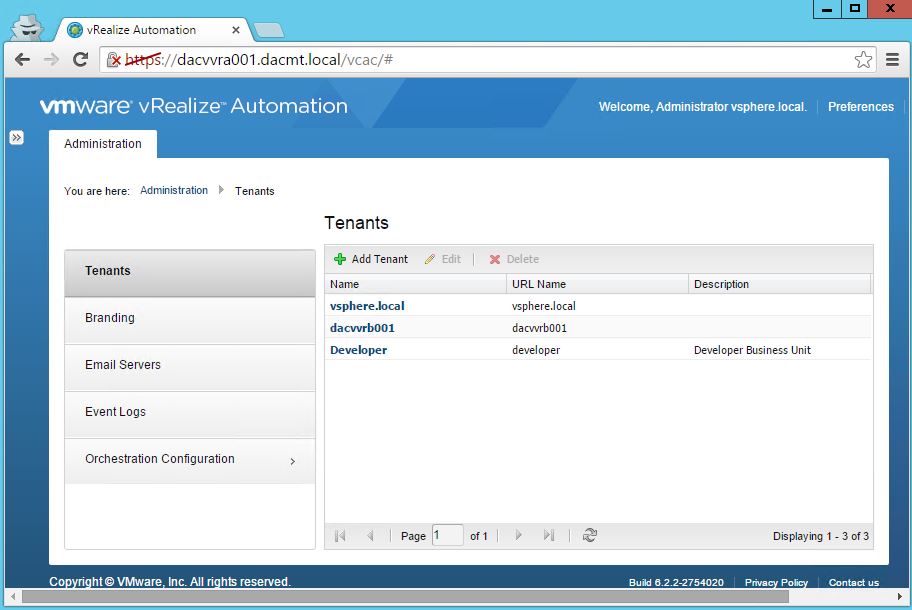
- You will now see your Developer tenant
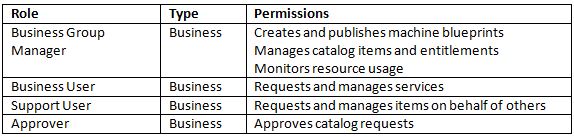
vRA Roles recap
- System-wide roles
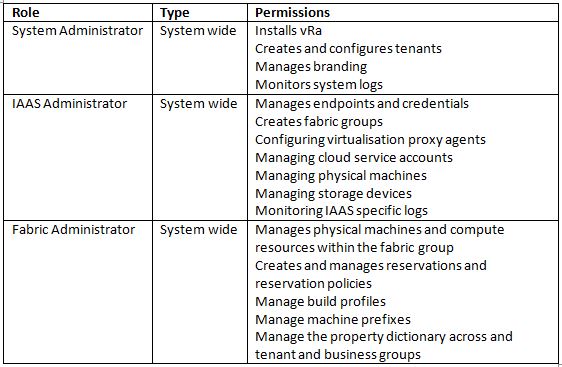
- Tenant Roles
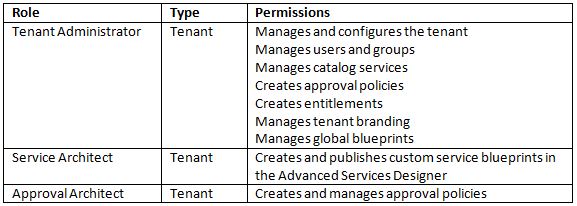
- Business Group Roles
Licensing
Before doing anything make sure you have licensed you vRA
- Log in as your Infrastructure account
- Go to Infrastructure > Administration > Licensing
- Add your license and click OK

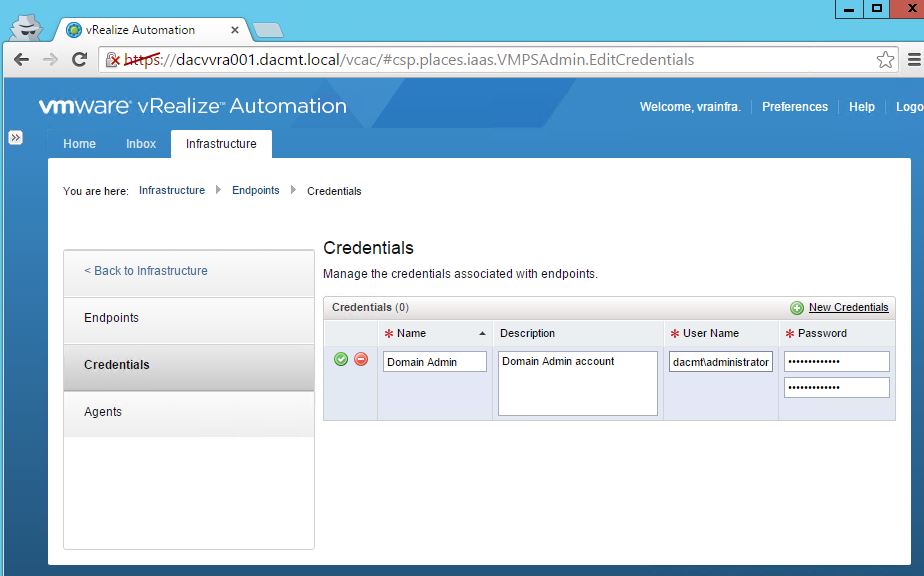
Creating an endpoint credential prior to creating an endpoint
- Log into your vRA console using the IAAS Admin account and click on the Infrastructure tab
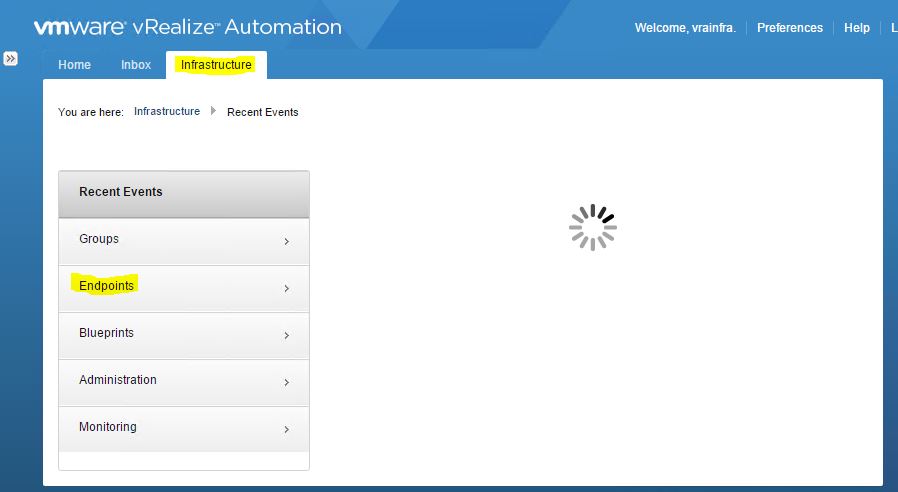
- Click on Endpoints then click on Credentials > New Credentials
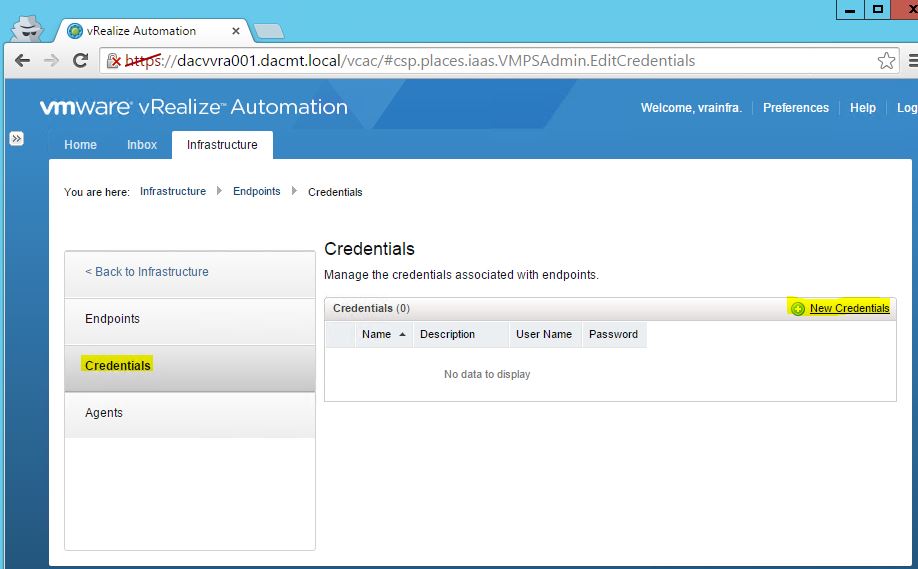
- I put in my domain admin account details and clicked the green tick
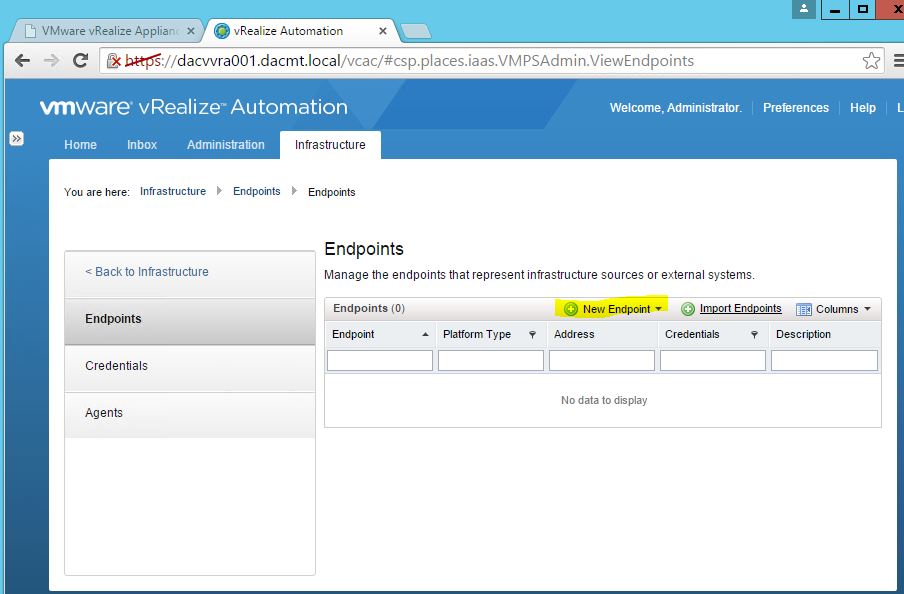
Endpoints
Endpoints are the infrastructure points which are consumed by vRA. IAAS Administrators can manage endpoints and vRA uses DEMs (Distributed execution managers) or agents to communicate with these endpoints.
Endpoints can be
- vCenter
- Open Stack
- vCo
- vApp vCloud Director
- vCloud Hybrid Service
- SCVMM
- Amazon EC2
- RHELV
- Physical machines
- Communication with storage devices which use Netapp FlexClone technology
Endpoints
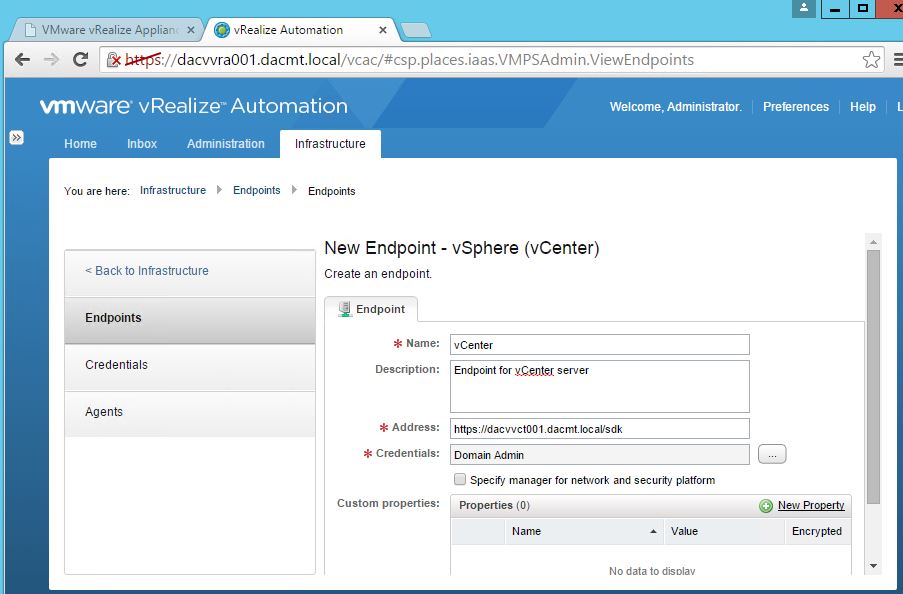
- Next click on Endpoints > New endpoint > Virtual > vSphere (vCenter)
- Put in a name. E.g. vCenter
- Put in a description
- Put in the address as https://your-vCenter-Server/sdk
- Select the credentials
- Click OK
- You should now see your endpoint
- Note: Different endpoints need the credentials being put in the correct format (user@domain or domain\user) Check the vendor documentation
- Note: Additional configuration is necessary when configuring an endpoint for vSphere which is supported by an underlying network platform such as vCloud networking or VMware NSX
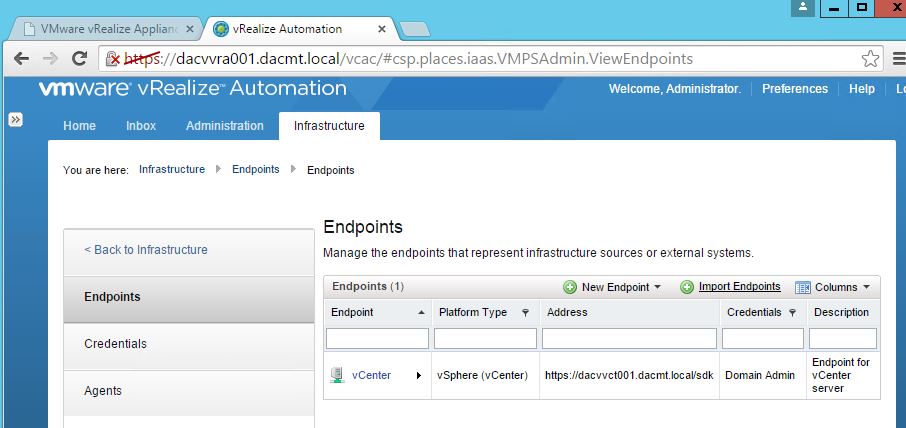
- At this point I recommend restarting the vCloud Automation Center Agent service on the IaaS server or restarting the IaaS server altogether especially if in the next step, you find you can’t see your cluster resource like I couldn’t to start with!!
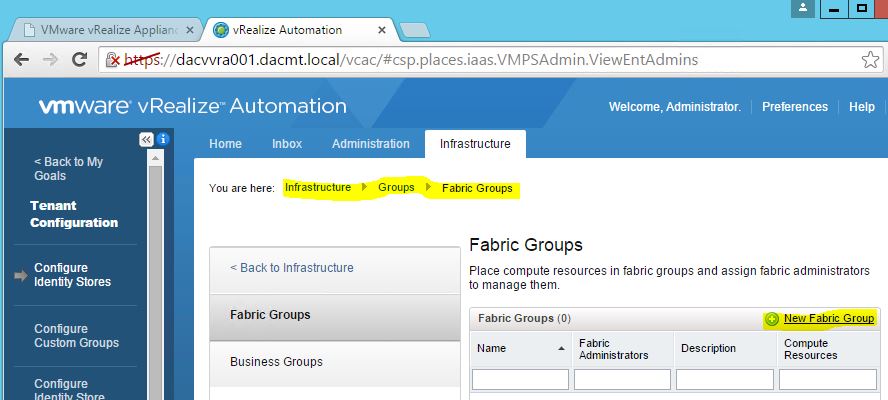
Fabric Groups
The fabric contains all the compute resources which are discovered by the end point which is then organized into fabric groups for provisioning
Fabric groups are created in a tenant but their resources are available to all userswho belong in business groups in all tenants. Large enterprises might create fabric groups to reflect physical locations and smaller enterprises might just have one fabric group
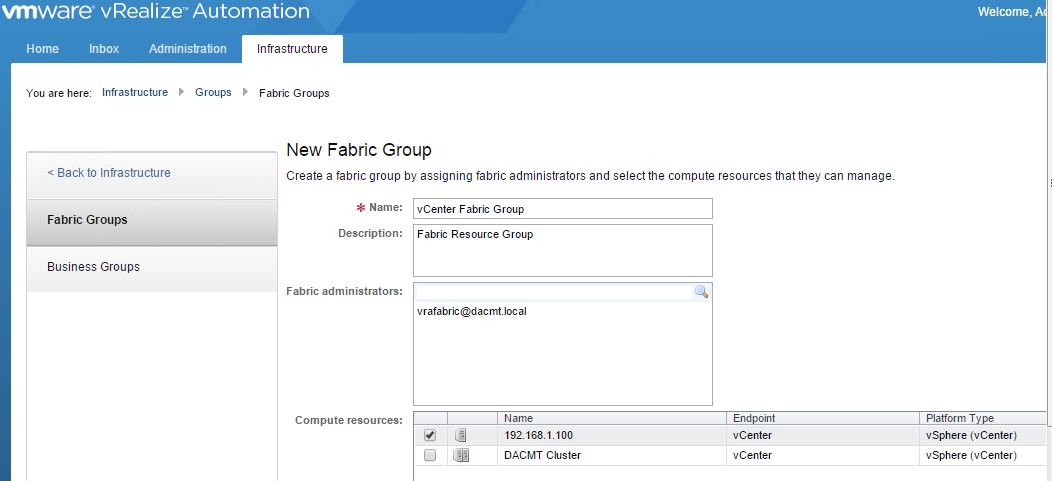
- Navigate to Infrastructure > Group > Fabric Groups. Click on New Fabric Group on the right hand side. The IAAS Admin creates fabric groups and assigns a fabric admin
- Enter your Fabric details and choose a compute resource
- If you gave fabric admin to the same user you are logged in as then you need to log out and in again
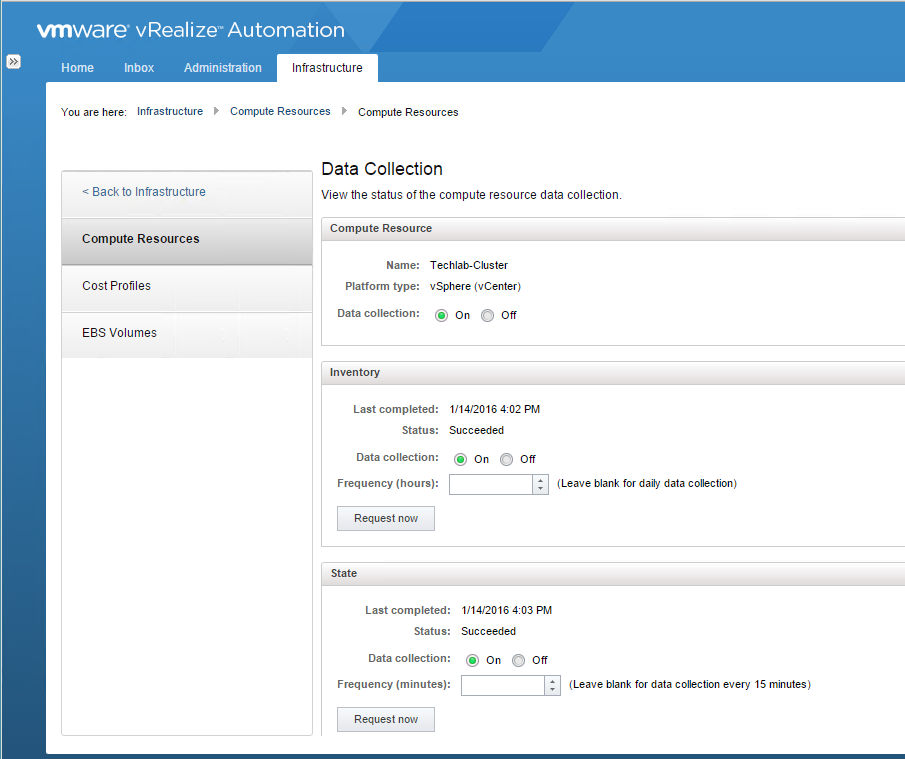
- I then go to Infrastructure > Compute Resources > Computer Resources and hover over my compute resource and select Data Collection
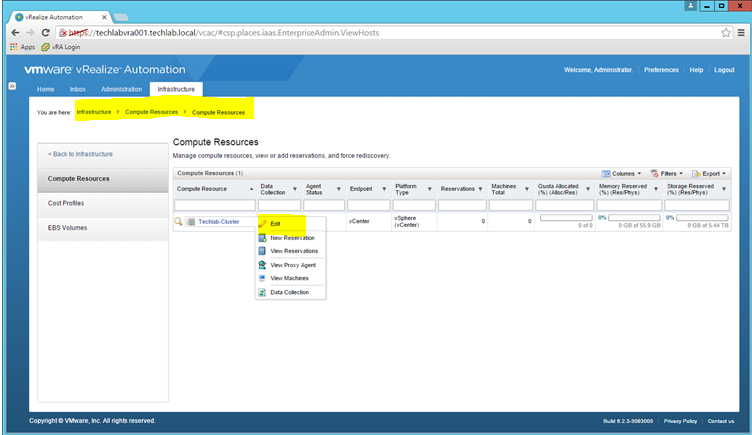
- Check the status of the Compute Resource Data Collections
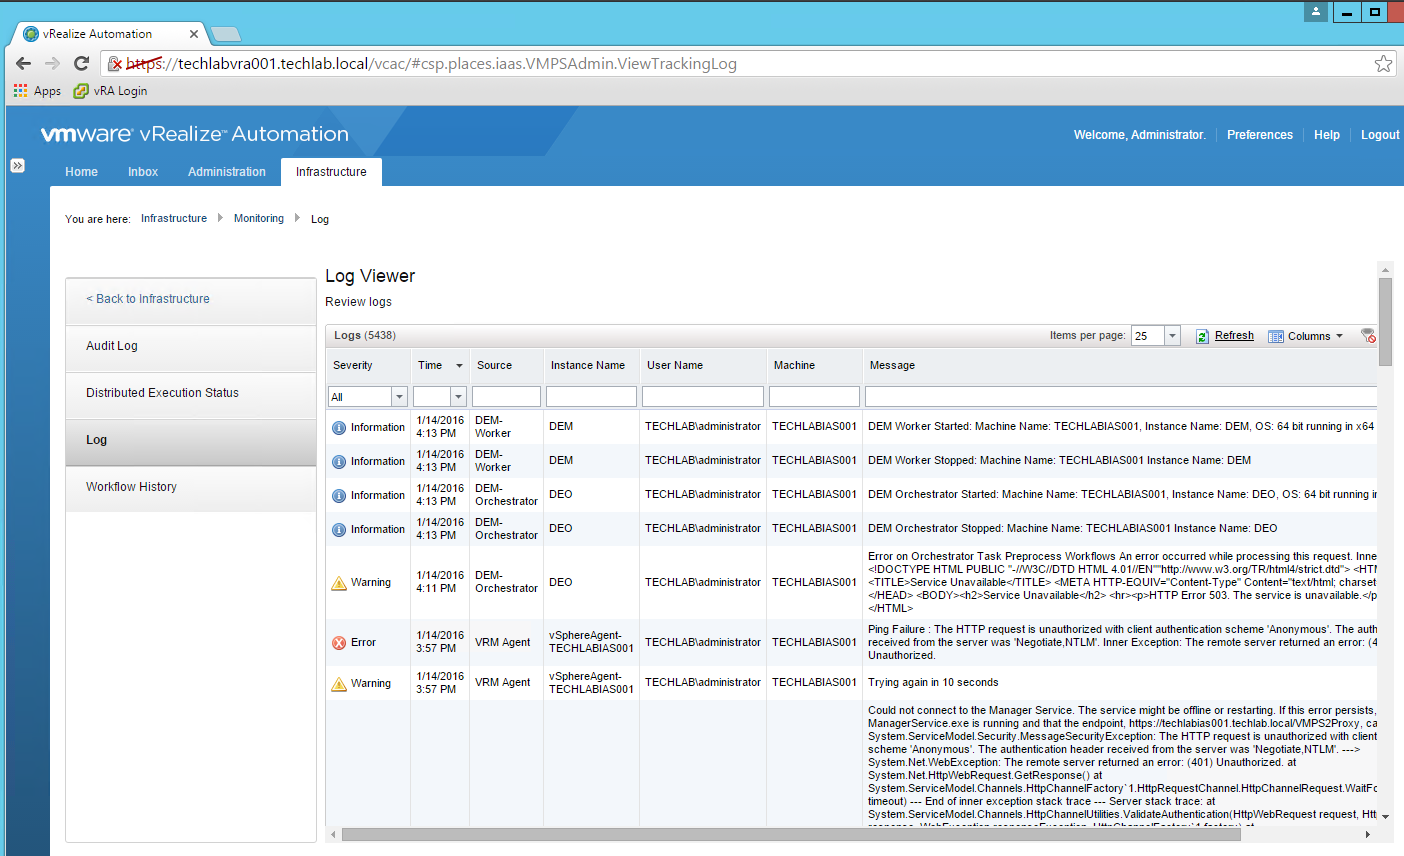
- It’s also worth checking Infrastructure > Monitoring > Log as you can see below I had some IIS issues which I had to sort and DEO and DEM issues
Machine Prefixes
Machine prefixes are used to create names for machines provisioned through vCloud Automation Center. Tenant administrators and business group managers select these machine prefixes and assign them to provisioned machines through blueprints and business group defaults
Fabric Admins create machine prefixes and these prefixes are shared across all tenants. Every blueprint must have a machine prefix or use a default machine prefix
- Go to Infrastructure > Blueprints > Machine Prefixes.
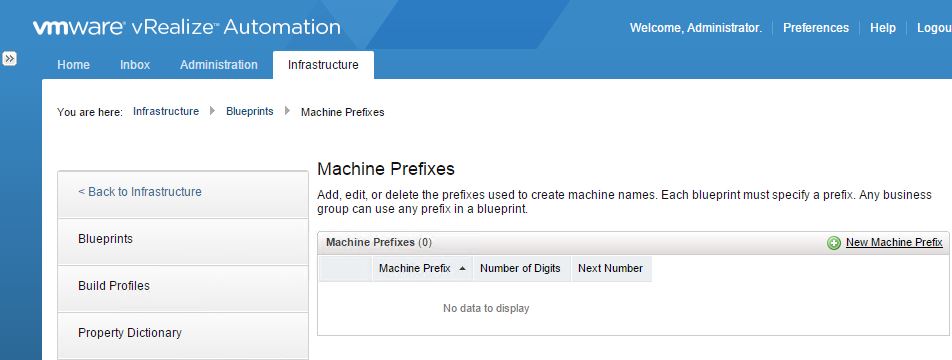
- Click on New Machine Prefix on the right hand side
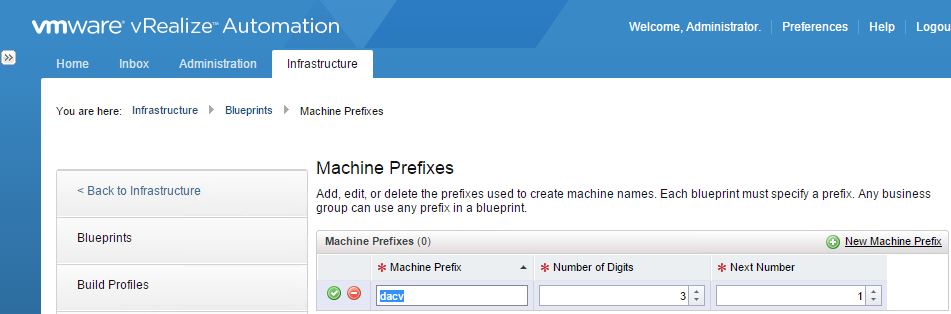
- Machine prefixes must conform with DNS with no special characters and Windows OS’s must not exceed 15 characters
Business Groups
A business group links a set of resources or services to a set of users in a department or OU and is created by the tenant admin. In order to request machines a user must be a member of a business group
- Go to Infrastructure > Groups > Business Groups, fill in the required detail
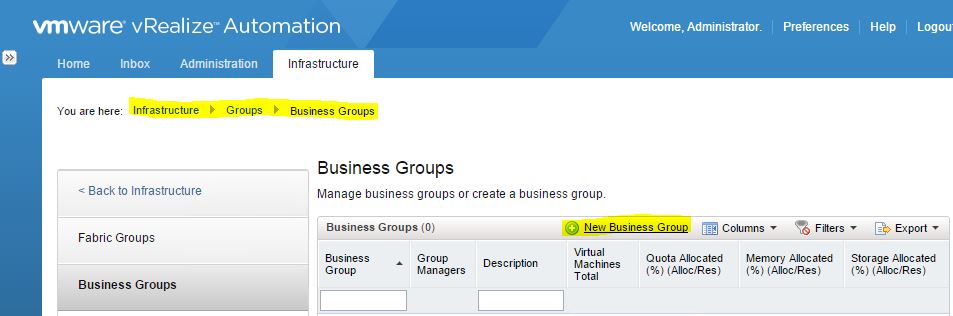
- Click New Business Group
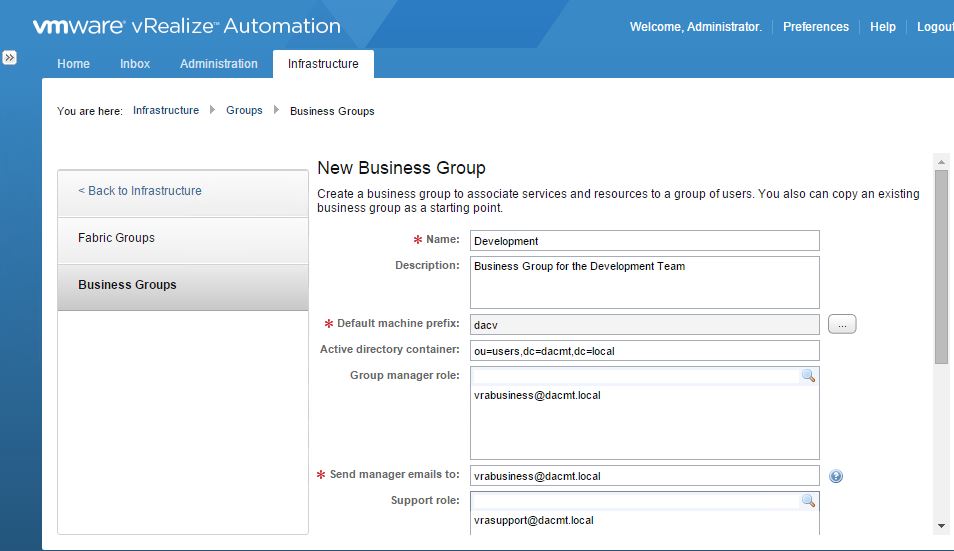
- The Business Group manager can see all the machines which have been built and manage the groups’s blueprints
- Multiple entries must be separated with commas. For example, JoeAdmin@mycompany.com,WeiMgr@mycompany.com.
- Support users can work for another user
- Normal users will just be able to see blueprints in the catalog
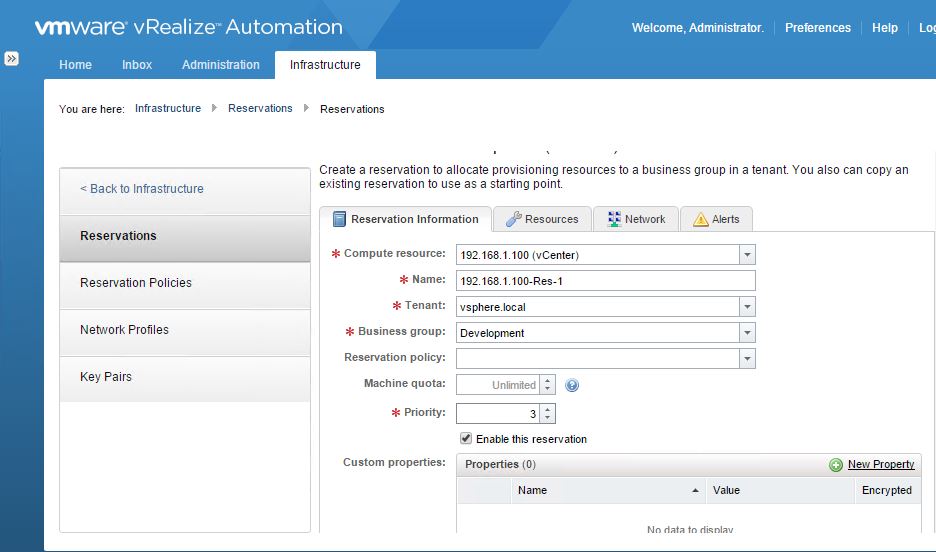
Reservations
A reservation is a share of the CPU, Memory, storage and networking resources from a fabric group and reserved for use by a business group. No relation to vSphere relations
- Each reservation is for one business group
- Business groups can have multiple reservations on a single compute resource
- Each business group can have multiple reservations on compute resources of a different type
- Reservations may also define priorities, policies an quotas that determine machine placement
Types
- Virtual – Allocates resources on compute resource for use by the business group
- Physical – Set of physical machines reserved for use by a business group
- Cloud – Provides access to the provisioning services of a cloud services account
Reservation Policies
- A reservation can only belong to one policy
- You can add multiple reservations to a reservation policy
- You can assign a reservation policy to more than one blueprint
- A blueprint can have only one reservation policy
- Can be used for tiering
Creating a reservation
- Go to Infrastructure > Reservations > Reservations

- Click New Reservation > Virtual > vSphere (vCenter)
- Select the Compute Resource and select the value you set up previously. Some values will automatically populate
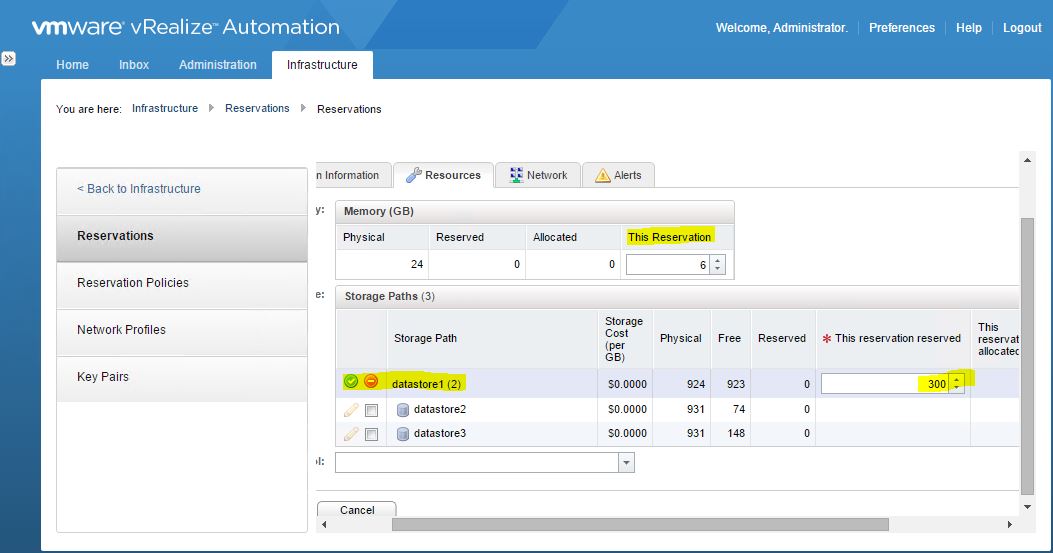
- Click the Resources tab
- Fill in your memory reservation
- Select the datastore(s) you want to use and the reseravtion of storage you want to use. Don’t forget to tick the green button
- Click on Network
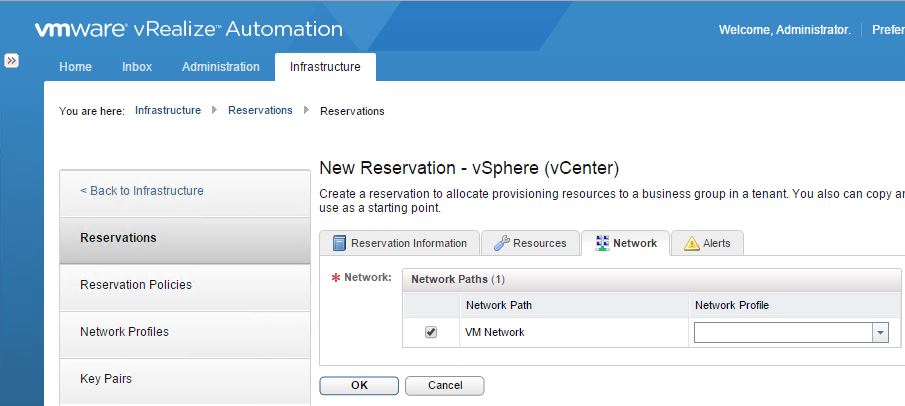
- Choose your networks
- If you choose a network profile, it can allow machines to be assigned specific addresses. The profiles must be configured with IP addresses which can be used
- Click the Alerts tab
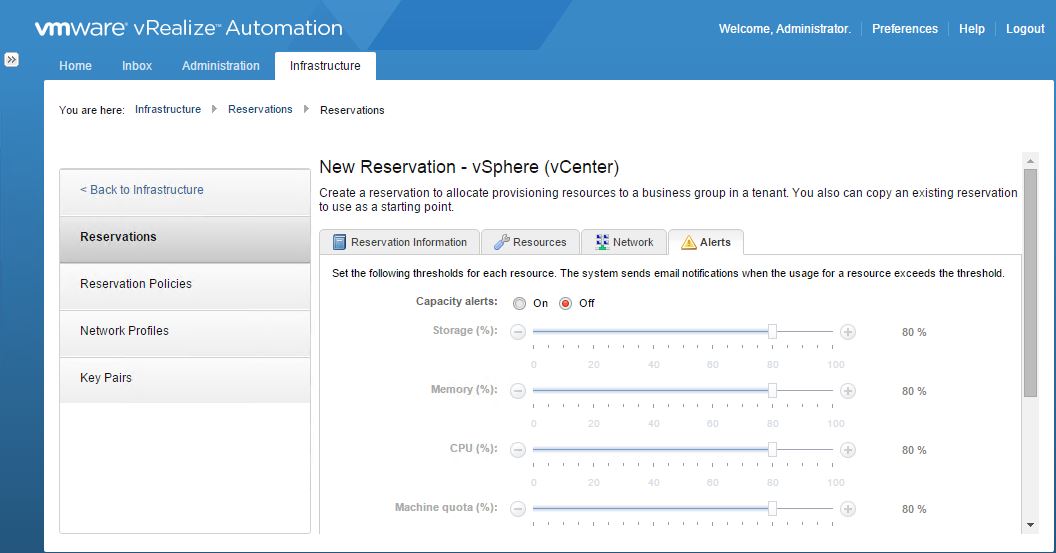
- Alerts are optional and you can put in recipients and schedule how often you want reminders to be sent out
Creating Reservation Policies
- Go to Infrastructure > Reservations > Reservation Policies
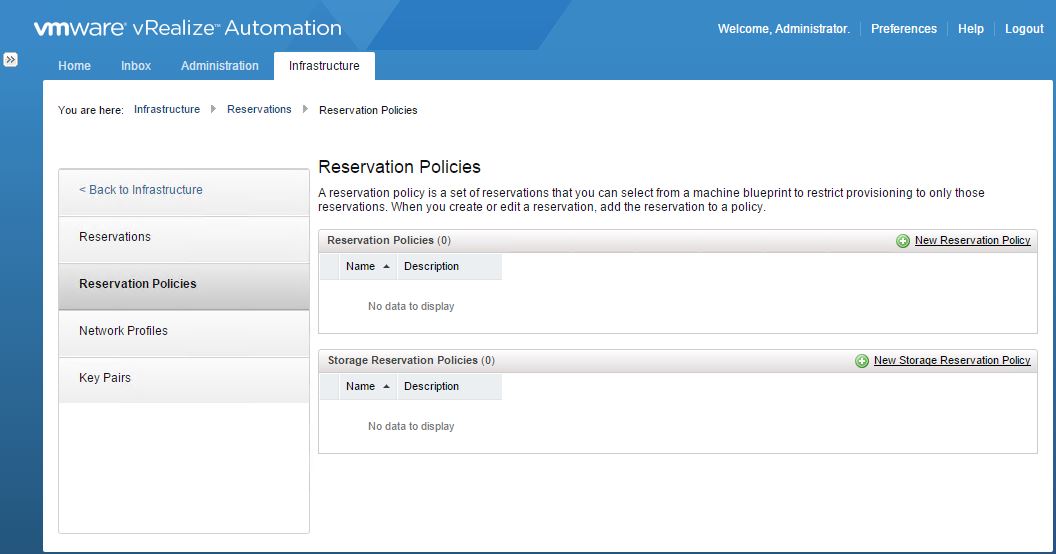
- Click New Reservation Policy
- Fill in the details. For example you could set up policies for High end compute, mid range compute and low end compute etc
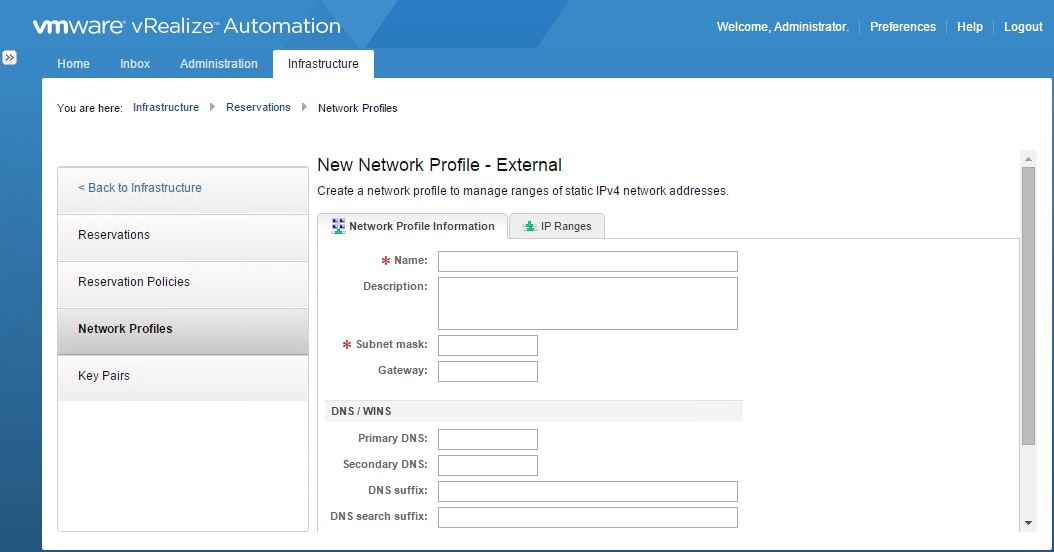
A quick look at network profiles
- Go to Infrastructure > Reservations > Network Profiles
- Select New network profile
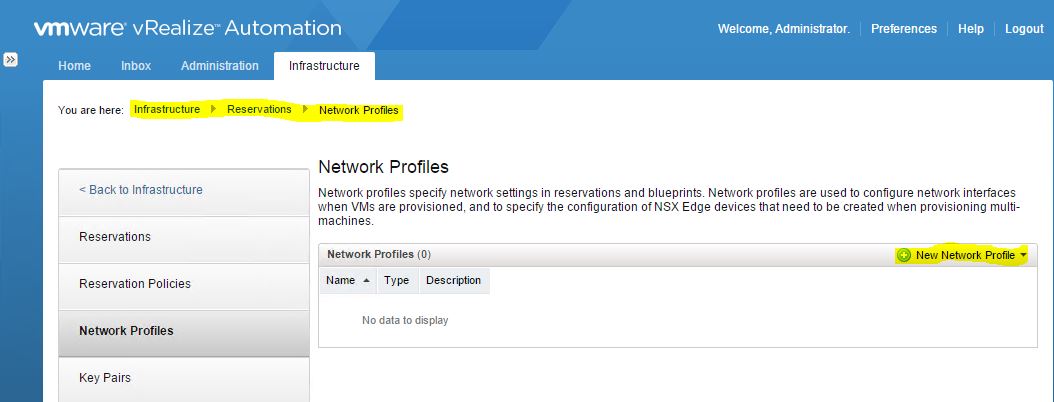
- Fill in your details as appropriate
A quick overview of DEMs and Agents
DEMs are used for provisioning and managing machines on
- VMware vCloud Director and VMware Hybrid Service
- RHELv Manager
- Microsoft System Center Virtual Machine Manager
- Amazon Web Services
- Physical server management interfaces (Dell/Cisco/IBM)
Agents are used for provisioning and managing machines and services on
- Hypervisor proxy agents (vSphere, Citrix, Xen and Hyper-V)
- External provisioning infrastructure
- Virtual desktop infrastructures
- WMI (Windows management instrumentation)
DEMS
Can be installed as orchestrator or worker DEMs
DEM Orchestrator
- Monitors and manages the DEM worker status so if a worker fails the orchestrator DEM moves the workflow to another DEM worker instance
- Schedules workflows
- Ensures only one instance of a scheduled workflow is running at any one time
- Generates workflow history for reporting
- One DEM orchestrator is always the active one. It is recommended to install an additional orchestrator instance on another machine for redundancy
DEM Workers
- DEM workers communicate with the external systems to execute workflows
- Dem workers must be able to communicate with external firewalls
- The minimum installation installs the required DEMs and default vSphere Proxy agent. Additional proxy agents such as Hyper V and Xen server can be installed post installation.
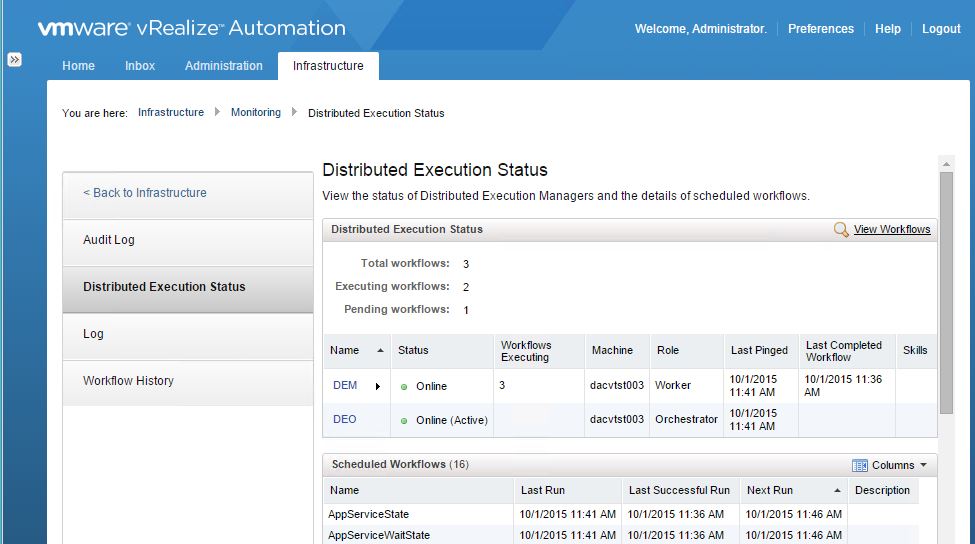
Checking the DEM status
- Go to Infrastructure > Monitoring > Distributed Execution Status
Agents
vRA uses agents to integrate with the following external systems. Endpoints must be configured before the agents are started and the endpoint and agent name has to match.
Agents are installed under Program Files (x86) > VMware > vCAC > Agents > agentname with the config being stored in VRMAgent.exe.config in the same folder
Hypervisor proxy agents
- vCenter
- Citrix Xenserver
- Hyper-V
Integration agents
- External provisioning agents (Integration with Citrix Provisioning server)
- VDI (Used to register provisioned machines with a VDI Connection Broker)
- WMI
Setup an additional vSphere Agent (for more than 1 vCenter instance)
- Right click on setup_vcac-va-hostname.domain.name@5480.exe and “Run as Administrator”. We have the same installer screen as before
- Accept the EULA and click next
- Log into your appliance with the root credentials
- Now we want to choose Custom Install. Click on Proxy Agents. Click Next
- Enter the username and password you plan on using as your service account to run this service.
- Configure the agent details
- Select vSphere from the Agent Type Drop Down
- Type in an agent name. All agent names must be unique and there cannot be two alike.
- Type the FQDN of the server with the Manager Service (this was a complete install done on the iaas box)
- Type the FQDN of the server with the Manager Web Service (this was a complete install done on the iaas box)
- Type in the complete Endpoint address as well as port.
- Click Finish.
Thank you for following Part 3 of the vRA series. The next series will be Part 4 which will cover Blueprints and Catalog Services.

