What is Windows Firewall with Advanced Security in Windows?
Windows Firewall with Advanced Security in Windows® 7, Windows Vista®, Windows Server® 2008 R2, and Windows Server® 2008 is a stateful, host-based firewall that filters incoming and outgoing connections based on its configuration. While typical end-user configuration of Windows Firewall still takes place through the Windows Firewall Control Panel, advanced configuration now takes place in a Microsoft Management Control (MMC) snap-in named Windows Firewall with Advanced Security. The inclusion of this snap-in not only provides an interface for configuring Windows Firewall locally, but also for configuring Windows Firewall on remote computers and by using Group Policy. Firewall settings are now integrated with Internet Protocol security (IPsec) settings, allowing for some synergy: Windows Firewall can allow or block traffic based on some IPsec negotiation outcomes.
Windows Firewall with Advanced Security supports separate profiles (sets of firewall and connection security rules) for when computers are members of a domain, or connected to a private or public network. It also supports the creation of rules for enforcing server and domain isolation policies. Windows Firewall with Advanced Security supports more detailed rules than previous versions of Windows Firewall, including filtering based on users and groups in Active Directory, source and destination Internet Protocol (IP) addresses, IP port number, ICMP settings, IPsec settings, specific types of interfaces, services, and more.
Windows Firewall with Advanced Security can be part of your defense in depth security policy. Defense in depth is the implementation of a security policy that uses multiple methods to protect computers and all components of the network from malicious attacks.
Protection must extend from the network perimeter to:
- Internal networks
- Computers in the internal network
- Applications running on both servers and clients
- Data stored on both servers and clients
Windows Firewall with Advanced Security provides a number of ways to implement settings on both local and remote computers. You can configure Windows Firewall with Advanced Security in the following ways:
- Configure a local or remote computer by using either the Windows Firewall with Advanced Security snap-in or the Netsh advfirewall command.
- Configure Windows Firewall with Advanced Security Group Policy settings by using the Group Policy Management Console (GPMC) or by using the Netsh advfirewall command.
Rules
Firewall rules from different sources are first merged together. Rules can be stored on the local computer, or in a variety of Group Policy objects (GPOs).
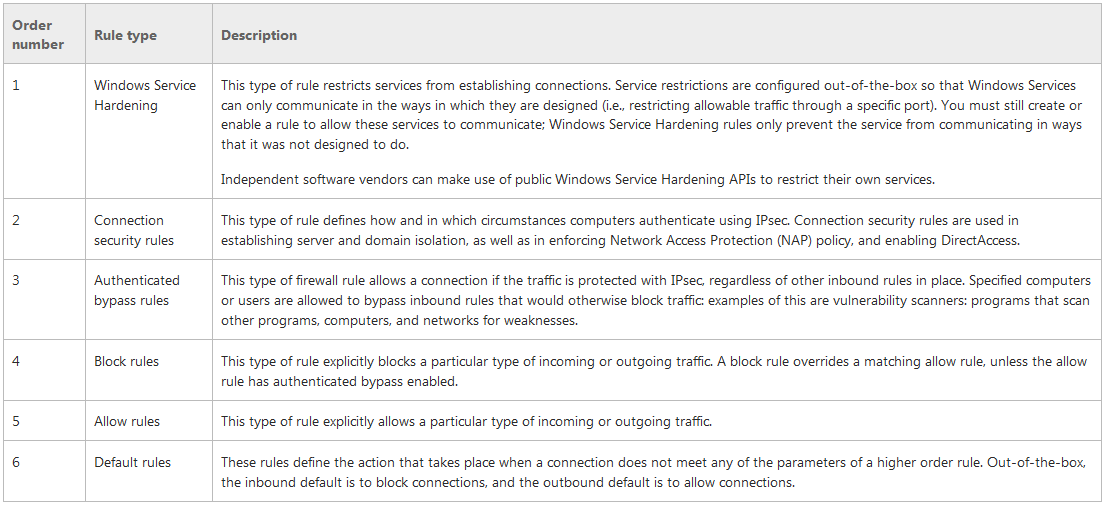
Windows Firewall with Advanced Security uses a specific order in which firewall rule evaluation takes place.
This order is as follows:
Example Firewall Tasks
One task we were asked to was to block our TEST Terminal Servers from being able to connect to DFS Shares on a DEV DFS Server. Below is a list of points to bear in mind.
- It is best to control Server Firewall Rules by Group Policy
- The GPO needs to apply to a Computer OU containing the DEV Server
- The DEV Server can be put in the scope of the GPO
- We could have an option to turn the Firewall on and then block servers
- We could have an option to turn the Firewall off and then allow servers
- We could use inbound rules blocking the DFS Ports – TCP Port 445 (SMB) TCP Port 135 (RPC) TCP Port 139 (NetBIOS Session Service) UDP Port 137 (NetBIOS Name Resolution) UDP Port 138 (NetBIOS Datagram Service)
- If you set up Inbound Rules, you then need to set the scope which includes setting the Local Server IP Address (The DEV DFS Server) and the Remote Servers IP Addresses (The servers you want to block)
Useful Link for showing what ports applications use
http://technet.microsoft.com/en-us/library/cc875824.aspx
Example 1 (Turn Firewall On and Allow connections but block TEST Servers)
- Open Group Policy Management
- Right click on DEV DFS Server OU and select Create a GPO in this domain , and Link it here
- Put in a name
- Right click on new GPO and select Edit
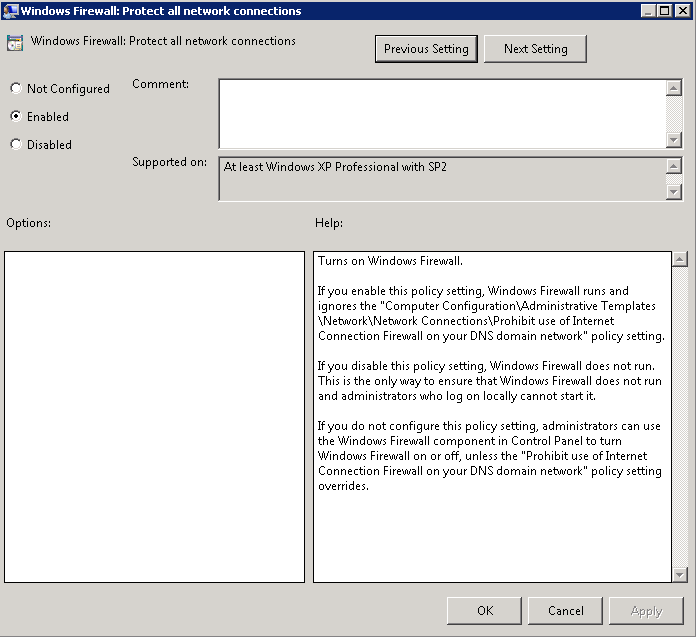
- Navigate to Computer Configuration > Polices > Administrative Templates > Network > Network Connections > Windows Firewall > Domain Profile and Enable Windows Firewall: Protect all network connections
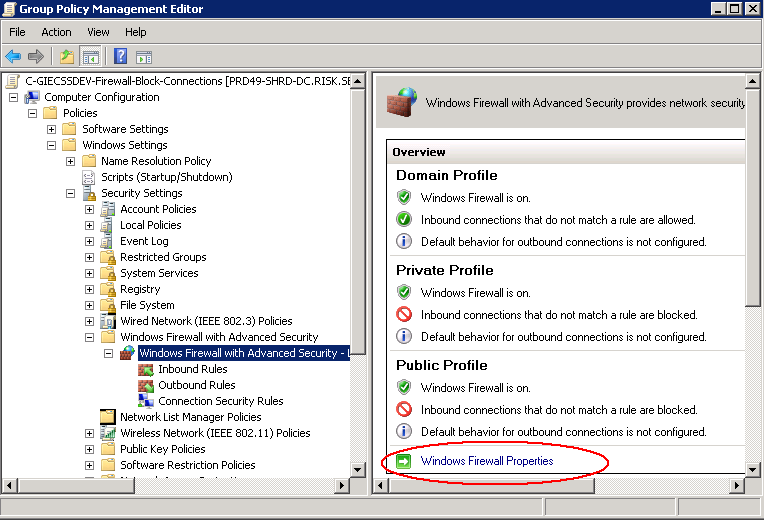
- Navigate to Computer Configuration > Polices > Windows Settings > Security Settings > Windows Firewall with Advanced Security
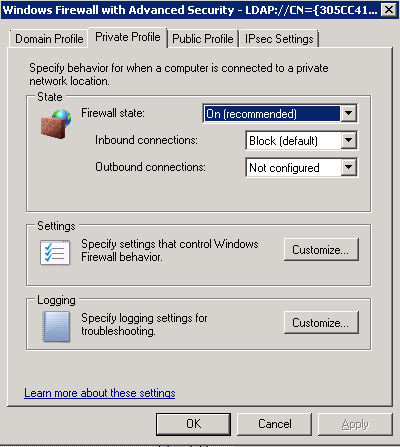
- Click on Windows Firewall Properties (See Circled below)
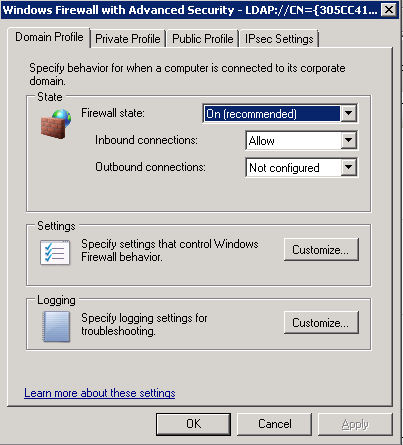
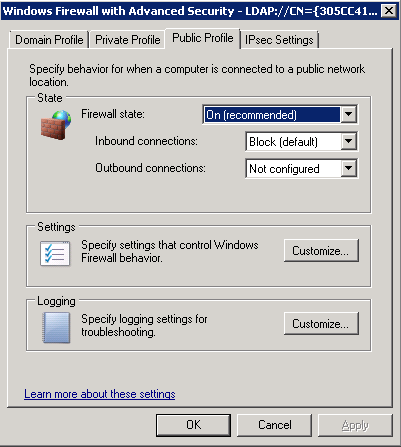
- Go through Domain Profile, Private Profile and Public Profile and set the following options for each one
- Navigate to Computer Configuration > Polices > Windows Settings > Security Settings > Windows Firewall with Advanced Security > Inbound Rules
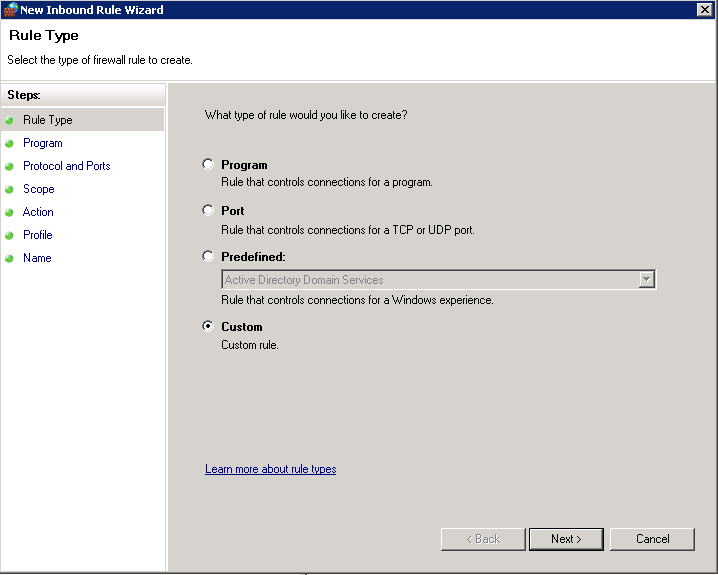
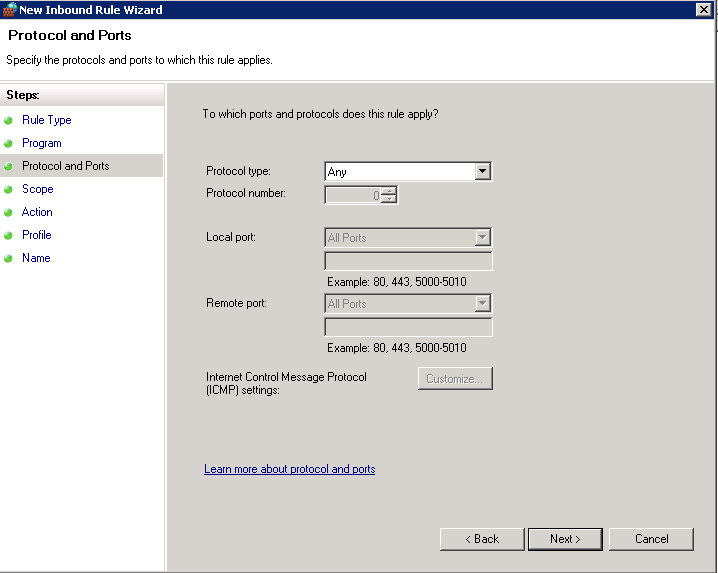
- Right clicked on Inbound rule > Selected New inbound rule > Select Custom
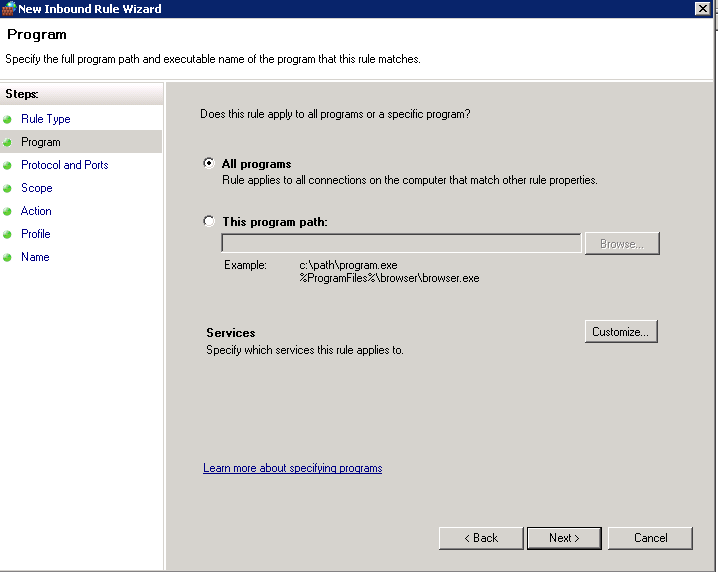
- Choose Any for Protocol Type
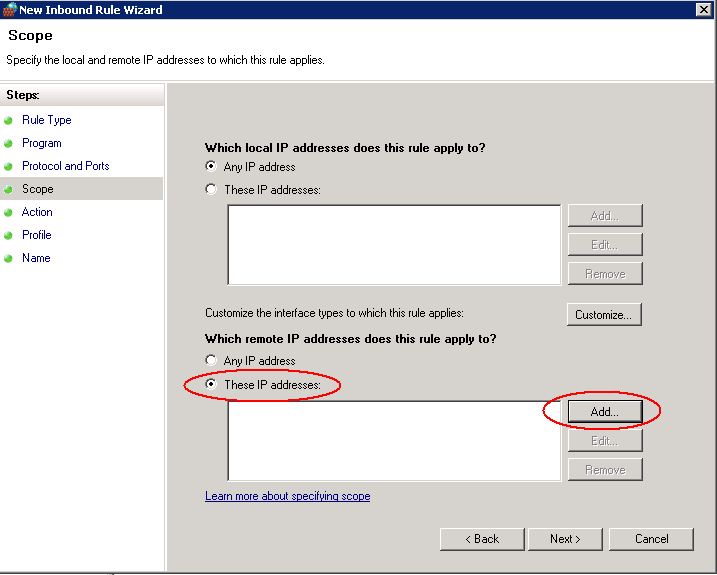
- In Scope, leave the Local IP Addresses as Any IP Address and then for the Remote IP Addresses, put in the IP Addresses of the servers you want to block
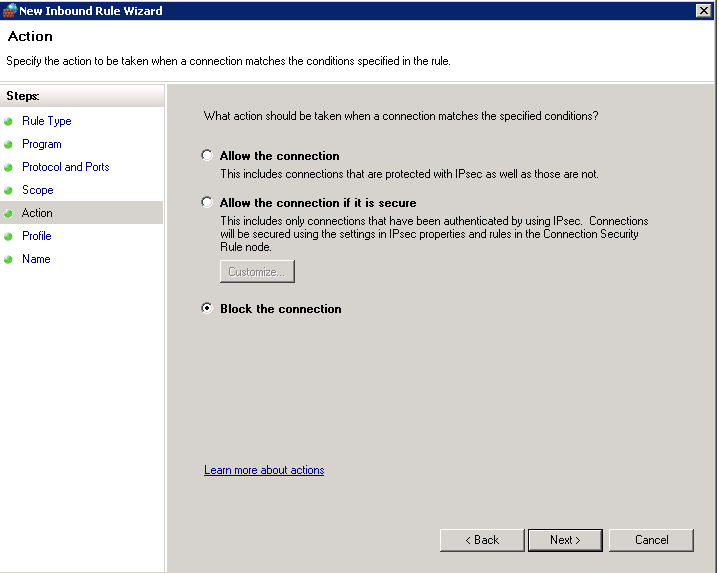
- Choose Block as your Action
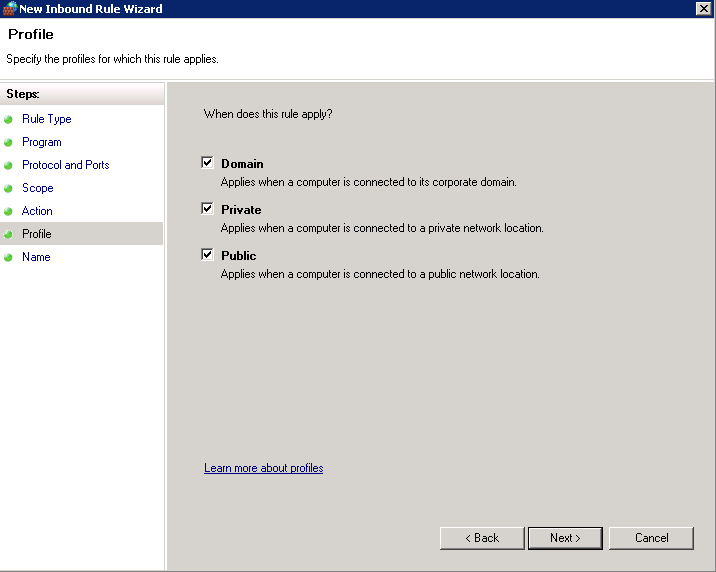
- Apply the rule to all Profiles
- Put in a Rule Name and Description
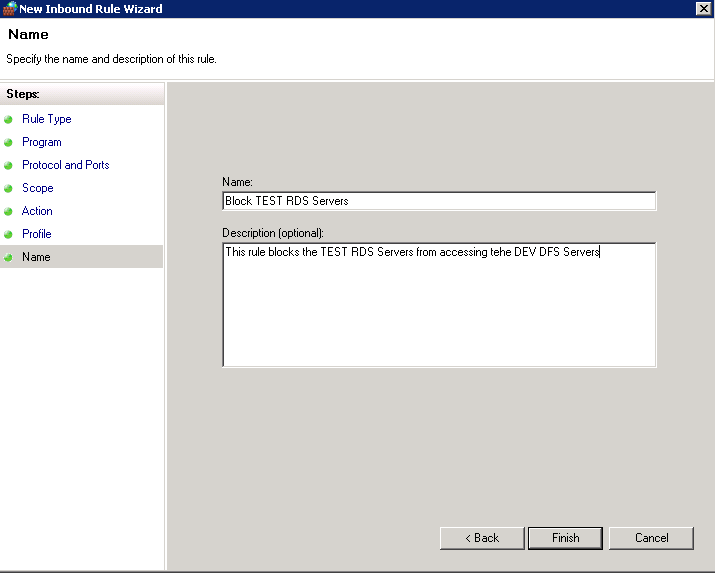
- Click Finish
- Test accessing a DFS Share from a blocked server. It should be blocked

The second way of doing this
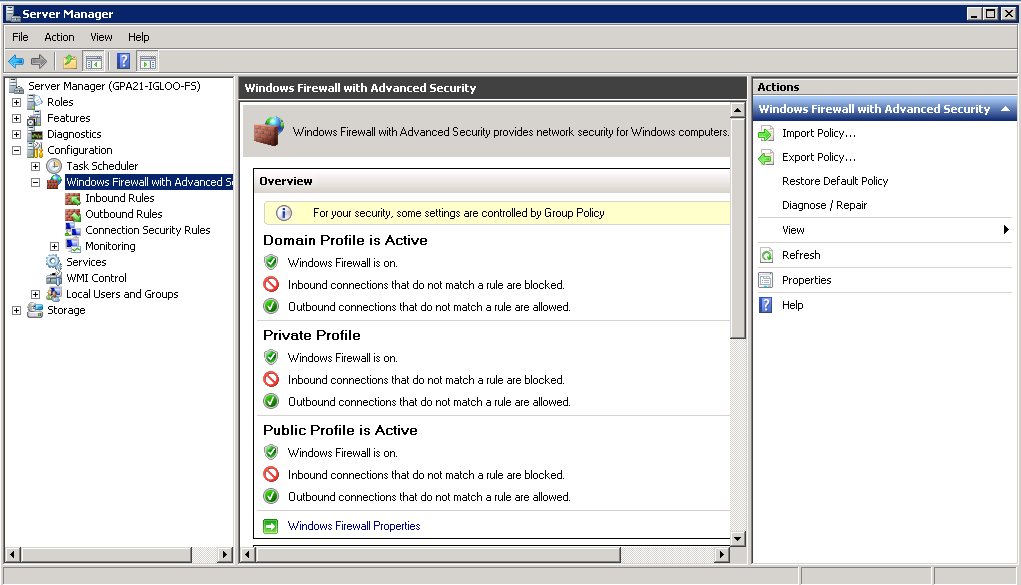
The second way of doing this is a kind of reverse way of doing this by turning the Windows Firewall on through Group Policy which by default should look like the below on a DFS Server when GPO is applied so you are blocking incoming connections but then you modify the Group Policy to only allow certain networks to use File and Printer Sharing.
- Next log into Group Policy Management Console
- Create a new GPO and attach it to your DFS Servers
- Put the DFS Servers in the scope of the GPO
- Now adjust the following settings
- Computer Configuration > Policies > Windows Settings > Security Settings > Windows Firewall with Advanced Security > Domain Profile > Firewall State (Turn On)
- Computer Configuration > Policies > Windows Settings > Security Settings > Windows Firewall with Advanced Security > Domain Profile >Inbound Connections (Block Default)
- Computer Configuration > Policies > Windows Settings > Security Settings > Windows Firewall with Advanced Security > Domain Profile > Outbound Connections (Allow Default)
- Computer Configuration > Policies > Windows Settings > Security Settings > Windows Firewall with Advanced Security > Private Profile > Firewall State (Turn On)
- Computer Configuration > Policies > Windows Settings > Security Settings > Windows Firewall with Advanced Security > Private Profile >Inbound Connections (Block Default)
- Computer Configuration > Policies > Windows Settings > Security Settings > Windows Firewall with Advanced Security > Private Profile > Outbound Connections (Allow Default)
- Computer Configuration > Policies > Windows Settings > Security Settings > Windows Firewall with Advanced Security > Public Profile > Firewall State (Turn On)
- Computer Configuration > Policies > Windows Settings > Security Settings > Windows Firewall with Advanced Security > Public Profile >Inbound Connections (Block Default)
- Computer Configuration > Policies > Windows Settings > Security Settings > Windows Firewall with Advanced Security > Public Profile > Outbound Connections (Allow Default)
- Computer Configuration > Administrative Templates > Network > Network Connections > Windows Firewall > Domain Profile > Windows Firewall: Protect all network connections (Enable)
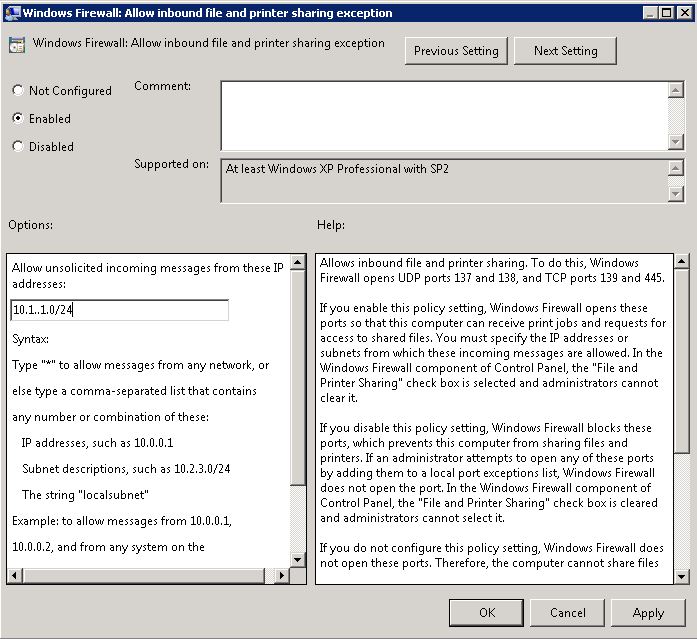
- Computer Configuration > Administrative Templates > Network > Network Connections > Windows Firewall > Domain Profile > Windows Firewall: Allow inbound file and printer sharing (You will need to enable this and then put in the network which is allowed to access this)
- Computer Configuration > Administrative Templates > Network > Network Connections > Windows Firewall > Domain Profile > Windows Firewall: Allow inbound Remote Desktop Connections
- And then test this from a network you want to block from your DFS Servers etc
- Voila 🙂