
Within AutoDeploy, we sometimes need to update our base ESXi image and this blog will go through the process to do this. We use the HPE Custom Image for VMware ESXi 6.5 U2 Offline Bundle currently but what if we want to add a security patch?
Steps
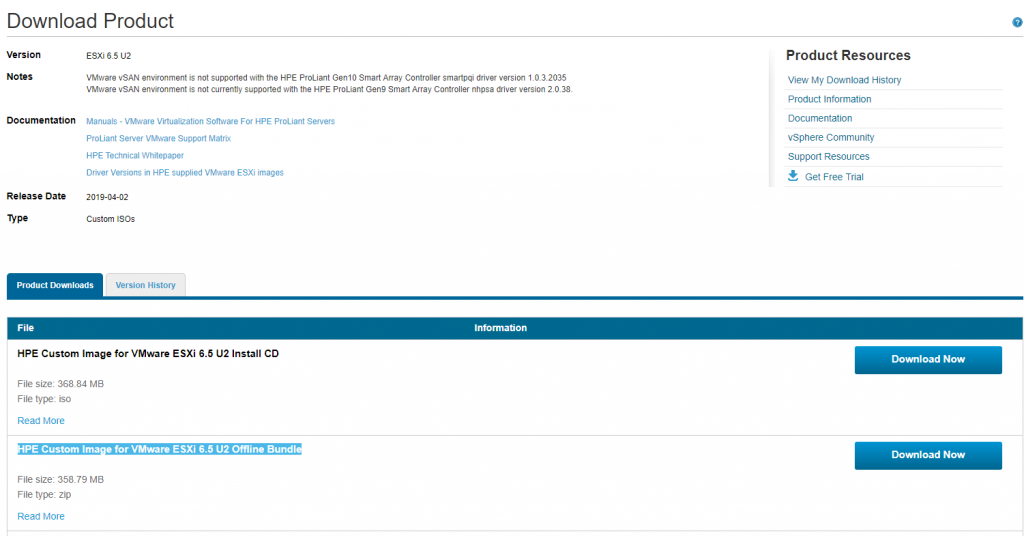
a) Download the VMware-ESXi-6.5.0-Update2-10719125-HPE-Gen9plus-650.U2.10.4.0.29-Apr2019-depot from myvmware.com
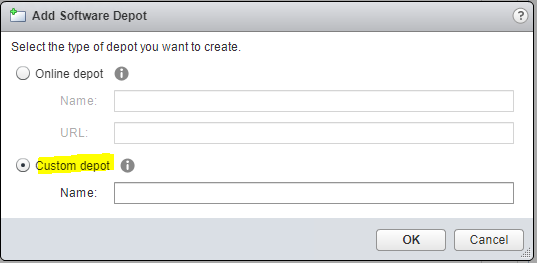
b) Click the icon to add a new Software depot and add a name
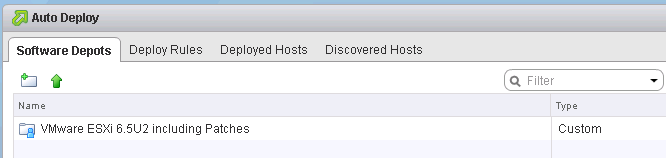
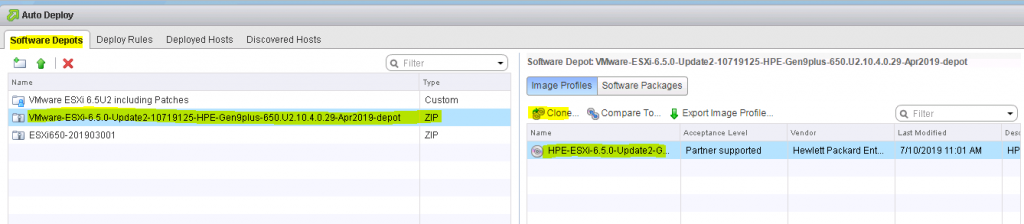
We now see our Software Depot named VMware ESXi 6.5U2 including Patches
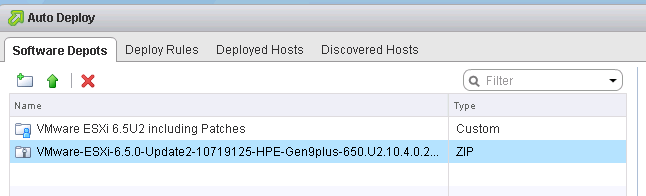
Click the green up arrow to upload the VMware-ESXi-6.5.0-Update2-10719125-HPE-Gen9plus-650.U2.10.4.0.29-April2019-depot into the Software Depots within AutoDeploy.
d) Log into VMware’s Patch portal
https://my.vmware.com/group/vmware/patch#search
There are filters which allow you to select the type of update and severity including information about the patch
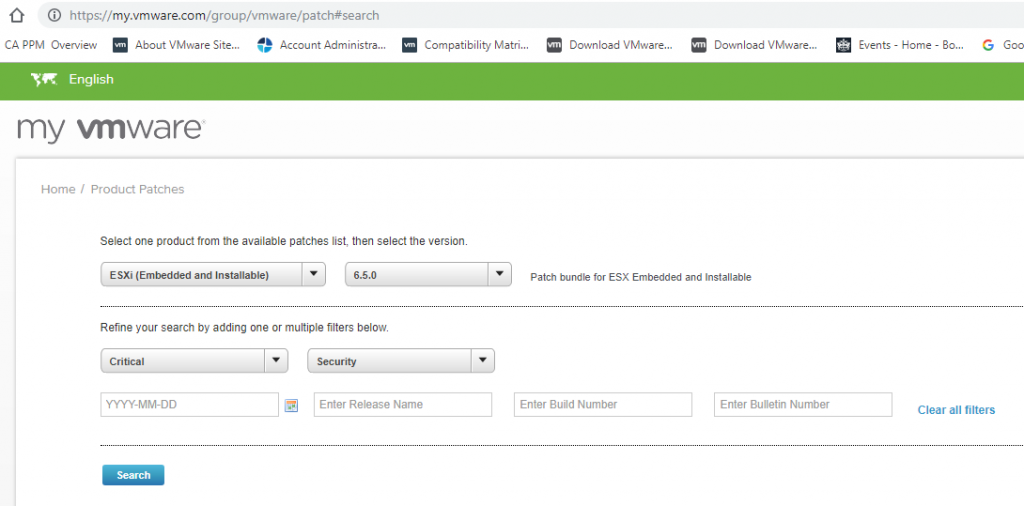
We will download the latest critical security patch
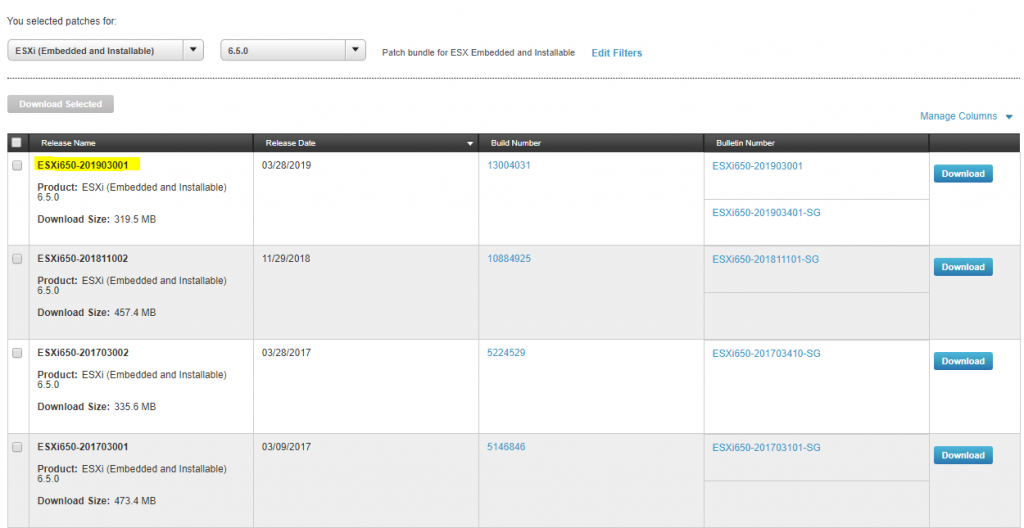
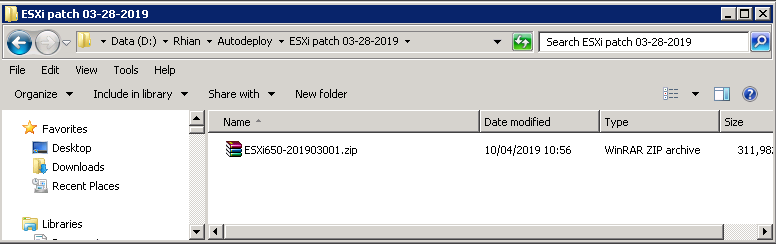
It downloads as a zip file
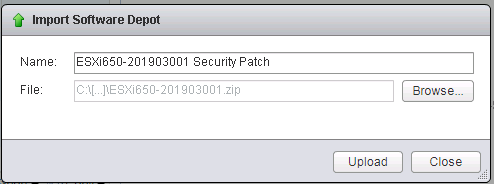
Upload this file into AutoDeploy. On the Software Depots tab and click the green up arrow to upload the patch zip file
f) We are now going to clone the VMware-ESXi-6.5.0-Update2-10719125-HPE-Gen9plus-650.U2.10.4.0.29-Apr2019-depot
Click on the VMware-ESXi-6.5.0-Update2-10719125-HPE-Gen9plus-650.U2.10.4.0.29-Apr2019-depot. Under Image Profiles select the vendor image and click Clone. We are cloning the vendor image to replace the updated VIBs.
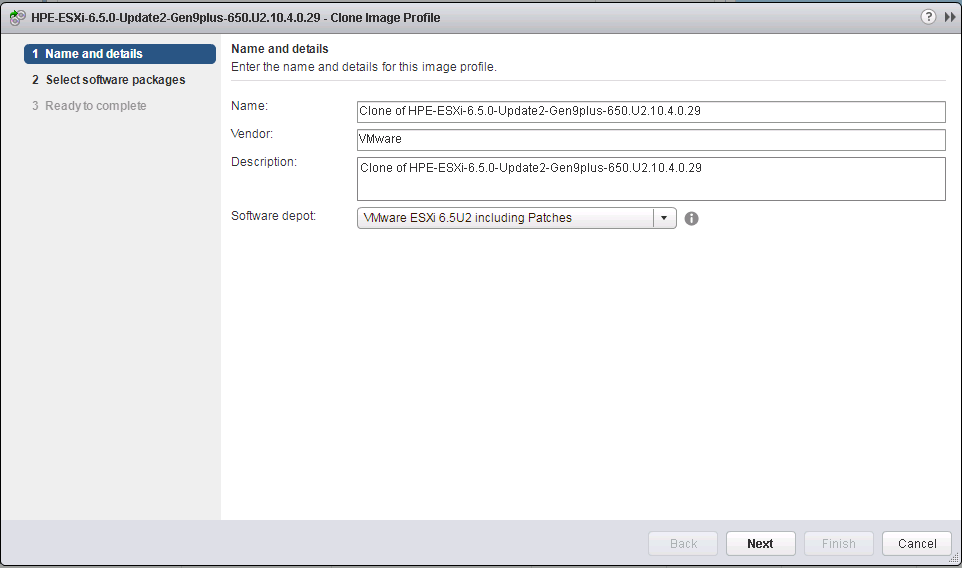
Fill in the Name, Vendor and description. Choose your newly created software depot
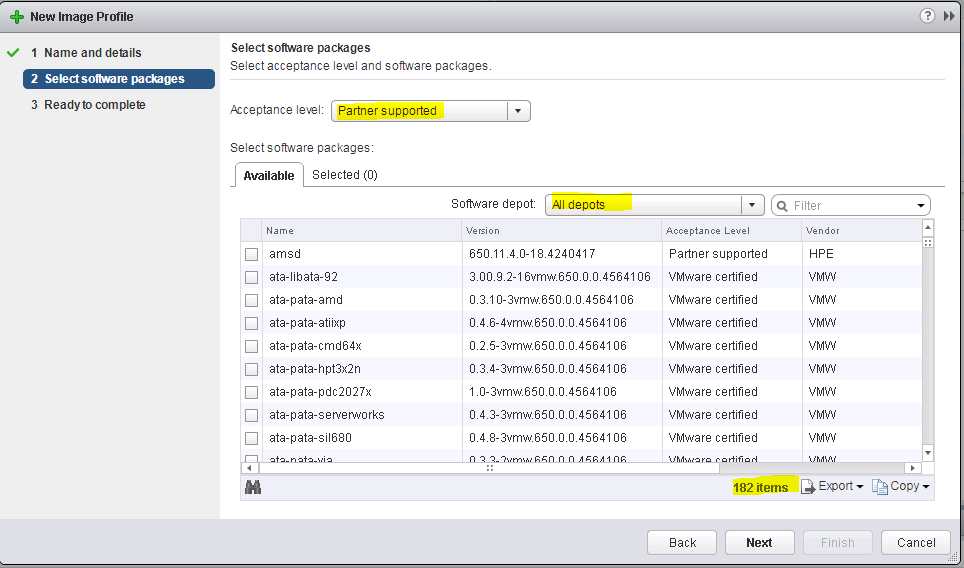
Choose Partner Supported from the drop-down
g) Leave this box for a minute as we need to check the bulletins associated with the security patch we downloaded – Link below for reference
https://docs.vmware.com/en/VMware-vSphere/6.5/rn/esxi650-201903001.html
What we see in this bulletin is the vibs which are updated
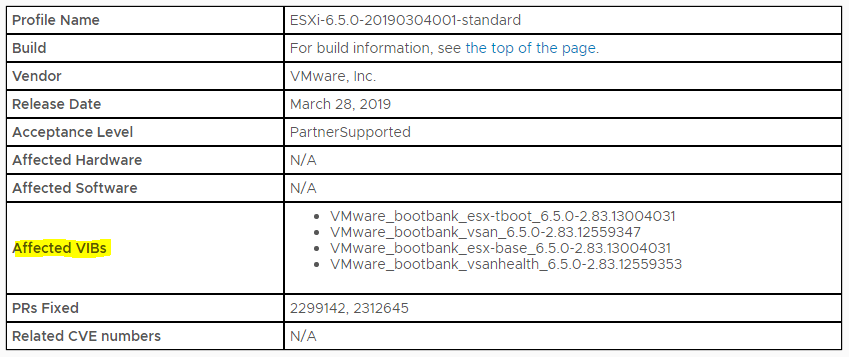
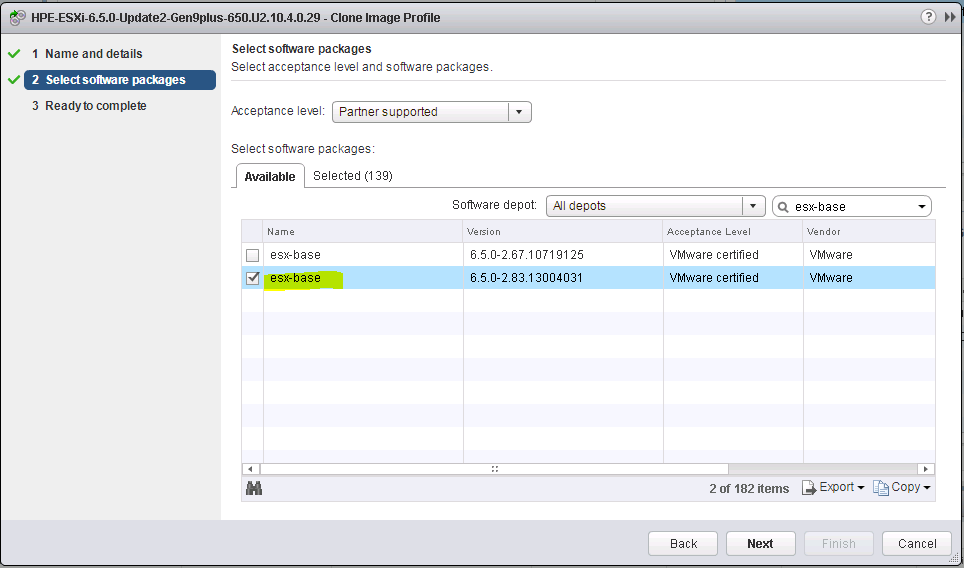
h) Use the search function in the clone wizard to find each of the updated VIBs. Un-select the existing version and select the new version to add it to the build. In the example below I have unticked the older version and ticked the newer version

Do the same for the other 3 affected VIBs. Uncheck the older one and tick the newer one

Check the final screen and click Finish
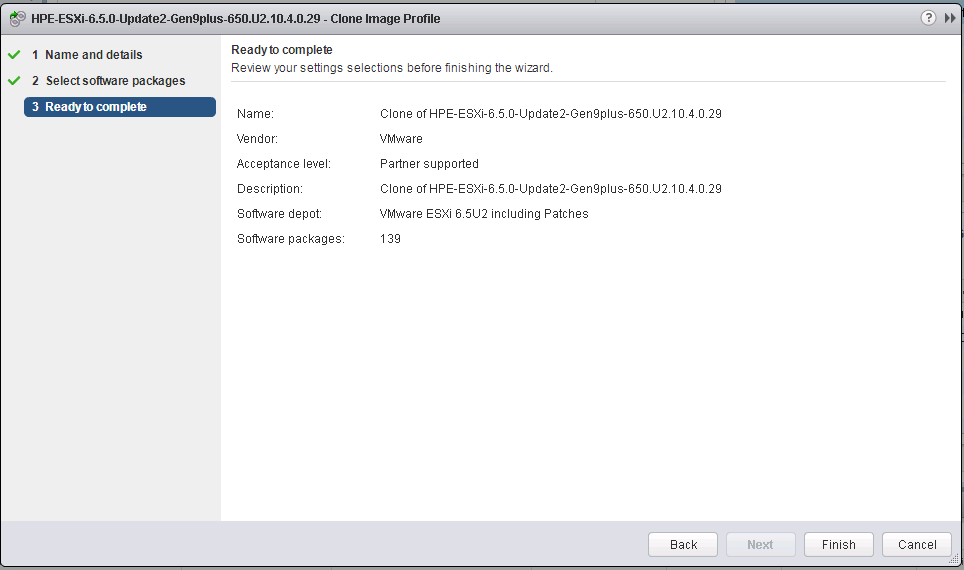
You should now be able to click on your software depot – VMware ESXi 6.5U2 including patches and see the Cloned Image Profile which contains the security patch

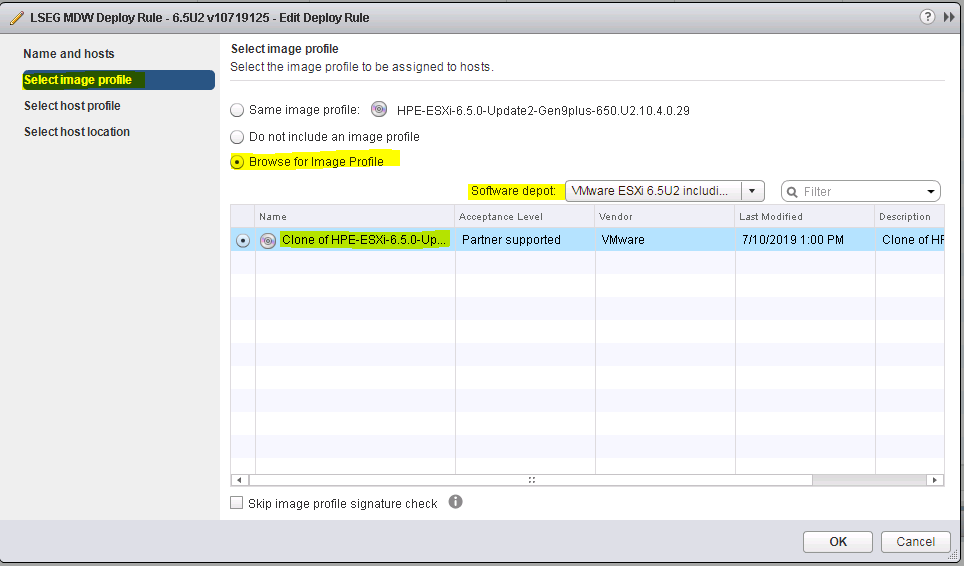
i) Now we can add our patched Image Profile into an AutoDeploy Rule
I’m not going to go through the whole process of creating a rule but as you can see below, I can now edit the deploy rule (must be deactivated to edit)

You can then select the software depot which will contain the patched ESXi image with the security patch
j) If you are updating an existing Deploy Rule then you will need to use PowerCLI to connect to the vCenter and run the below command to refresh the Autodeploy cache before rebooting a host and testing the image applies correctly
You can either do a single command on a host you want to test or run a command which updates all the hosts at once. In order to repair a single host to do a test we can use the below piped command. If you get an empty string back then the cache is correct and ready to use the new image
Test-DeployRuleSetCompliance lg-spsp-cex03.lseg.stockex.local | Repair-DeployRuleSetCompliance

Or you can use the piped command below runs the same command on all hosts
foreach ($esx in get-vmhost) {$esx | test-deployrulesetcompliance | repair-deployrulesetcompliance}

k) Reboot a host and test the image applies correctly

