
This is a quick guide to installing Microsoft Failover Clustering on VMware vSphere 4.1 on 2 VMs across the 2 hosts
Pre-Requisites
- Failover Clustering feature is available with Windows Server 2008/R2 Enterprise/Data Center editions. You don’t have this feature with the Standard edition of Windows Server 2008/R2
- You also need a form of Shared Storage (FC)
- To use the native disk support included in failover clustering, use basic disks, not dynamic disks and format as NTFS
- Setup 1 Windows 2008 R2 Domain Controller Virtual Machine with Active Directory Services and a Domain
- Setup 1 x Windows Server 2008 R2 Virtual Machine for Node 1 of the Windows Cluster with 2 NICs
- Setup 1 x Windows Server 2008 R2 Virtual Machine for Node 2 of the Windows Cluster with 2 NICs
Instructions
- Make sure all Virtual Machine are joined to the domain
- Make sure all Virtual Machines are fully updated and patched with the latest S/W updates
- You may need to adjust your Windows Firewall
- On the first network adapter rename this as Public and on the second adapter, rename this as Private or MSCS Heartbeat
- On the first network adapter, add the static IP address, Subnet Mask, Gateway and DNS
- On the second network adapter, just add the IP Address and Subnet Mask
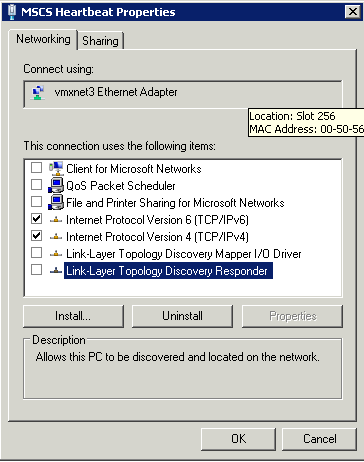
- Go back to the original screen and untick the following boxes
- Clear the Client for Microsoft Networks
- Clear the File and Printer Sharing
- Clear QOS Packet Scheduler
- Clear Link Layer Toplogy checkboxes
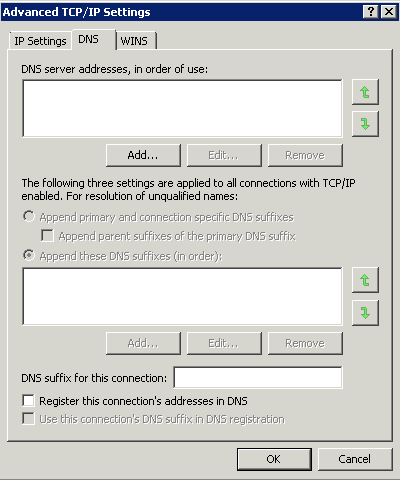
- Click Properties on Internet Protocol Version 4 (TCP/IPv4)

- Click the DNS tab and clear the Register this Connection’s Addresses in DNS
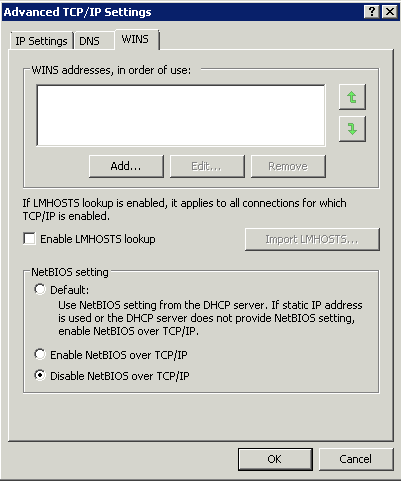
- Select the WINS tab and clear the Enable LMHOSTS Lookup checkbox
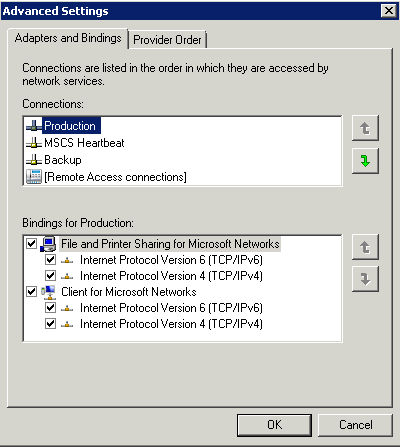
- After you configured the IP addresses on every network adapter verify the order in which they are accessed. Go to Network Connections click Advanced > Advanced Settings and make sure that your LAN connection is the first one. If not click the up or down arrow to move the connection on top of the list. This is the network clients will use to connect to the services offered by the cluster.
Adding Storage
I am assuming that your Storage Admin has already pre-created the LUNs that we are going to assign
- Go to vCenter and click Edit Settings
- Select Add > Select Hard Disk
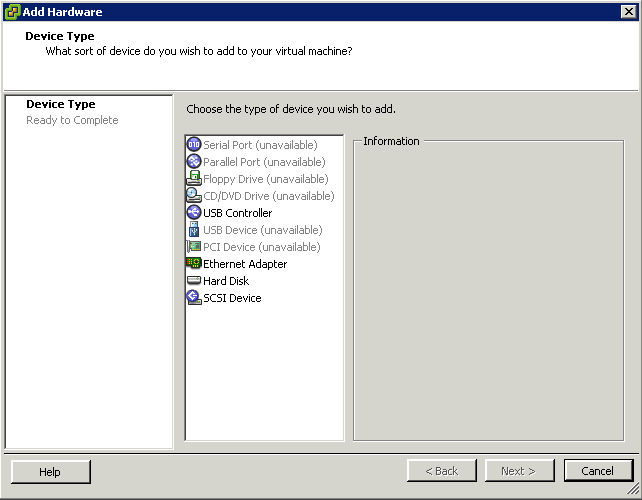
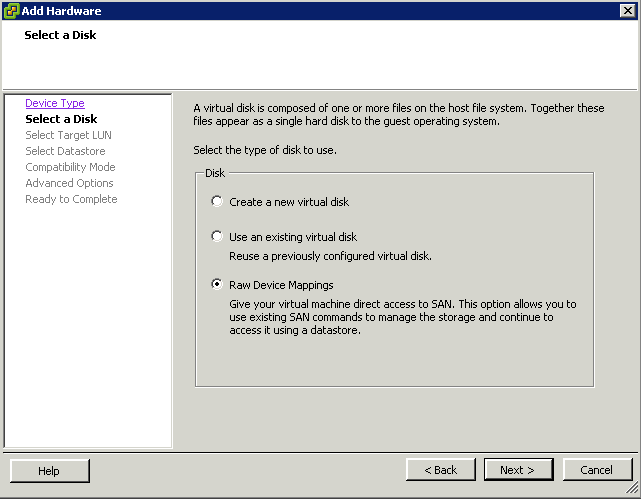
- Select Raw Device Mapping
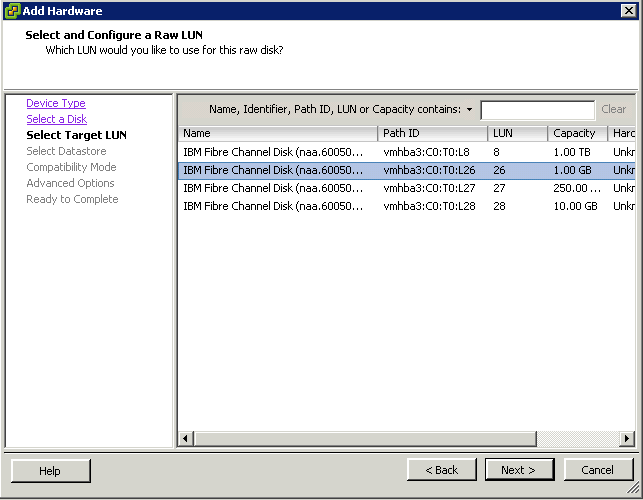
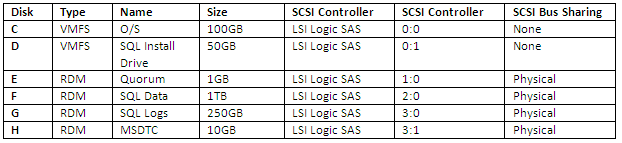
- You will see that there are 4 LUNs available. This is because I want to set up Microsoft Failover Clustering with SQL Failover clustering and I need 4 disks for the Quorum, SQL Data, SQL Logs and MSDTC
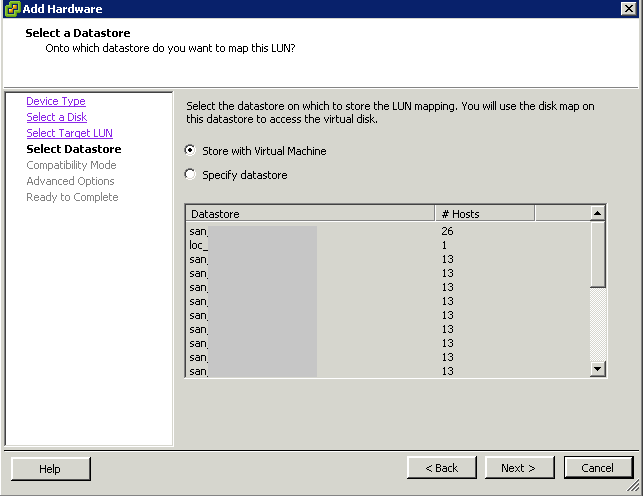
- Select to store with the Virtual Machine. When an RDM is used, a small VMDK file is created on a VMFS Datastore and is a pointer to the RDM. This will be used when you configure the 2nd node in the cluster
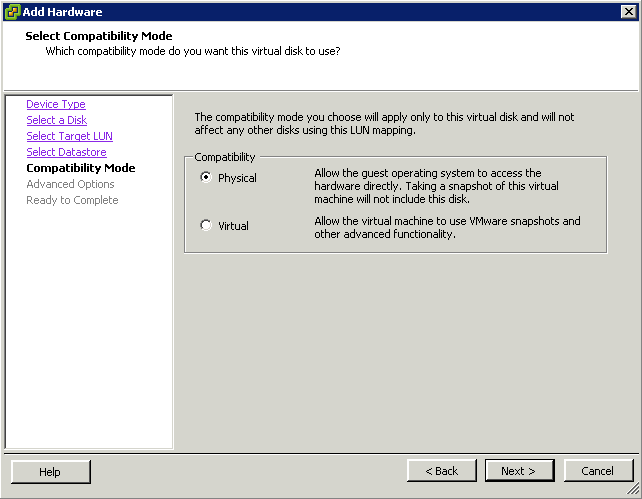
- Select Compatibility Mode. Physical Compatibility Mode is required for Microsoft Failover Cluster across hosts
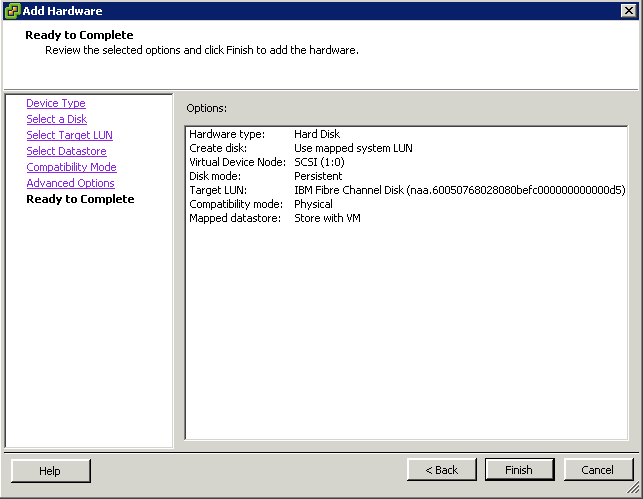
- Review and Finish
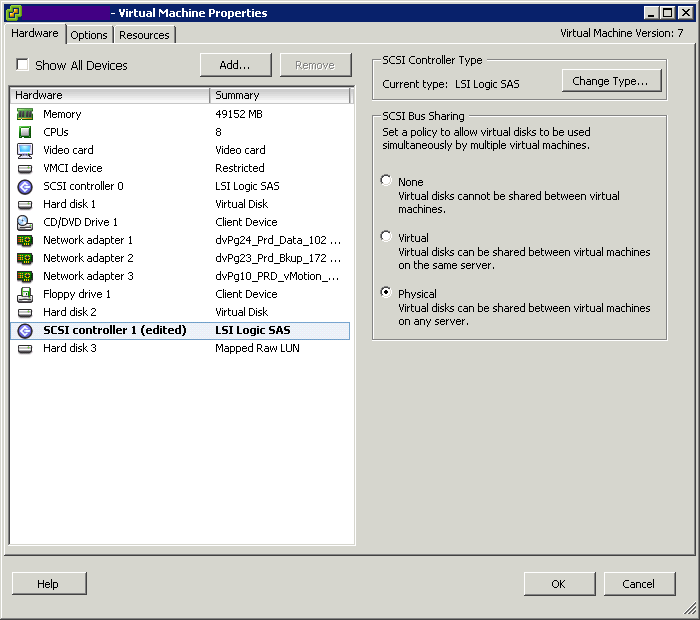
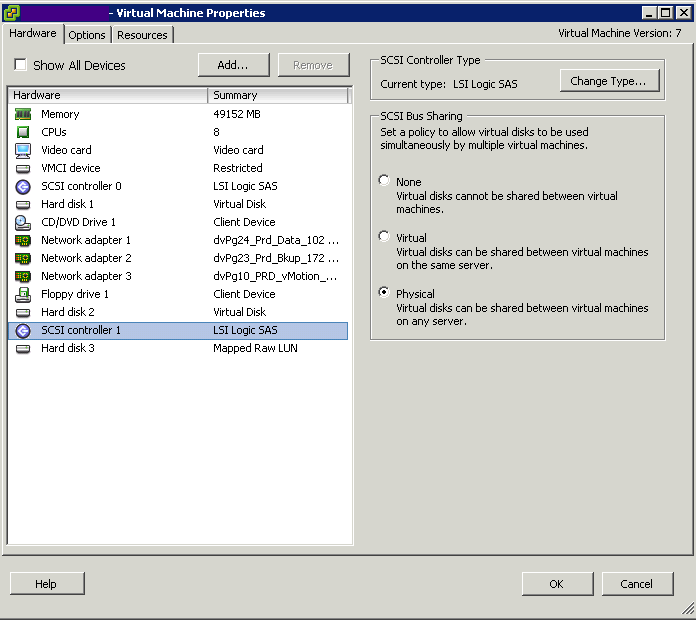
- Because you added the new disk as a new device on a new bus, you now have a new virtual SCSI controller which will default to the recommended type, LSI Logic SAS for Windows 2008 and Windows 2008 R2
- In Edit Settings, you need to click on the newly created SCSI Controller and select Physical for SCSI Bus Sharing. This is required for failover clustering to detect the storage as usable
- You now need to repeat this action for all RDMs you need to add
- When you have finished adding all the RDMs you should see the following in Edit Settings for the VM

- You should now have the following setup to work with
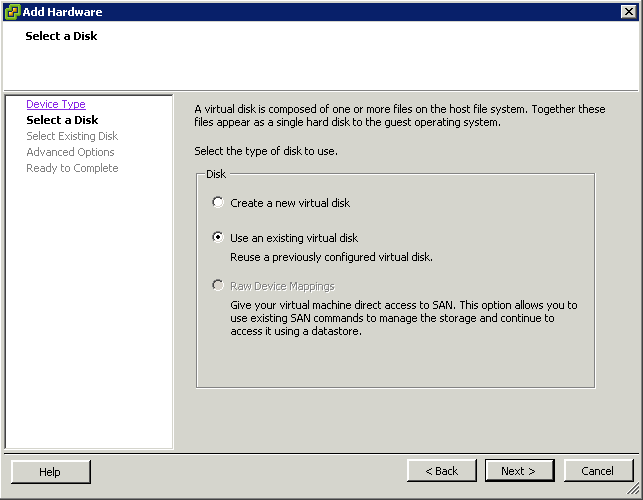
- Next we need to add the RDMs to the second VM which is a slightly different procedure
- Click Edit Settings on the 2nd VM and Add Hard Disk
- Select Choose and existing Virtual Disk
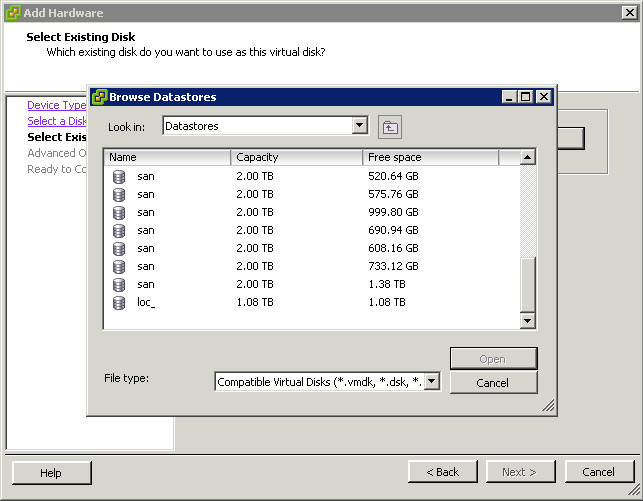
- To select the RDM Pointer file browse to the datastore and folder for the VM where you created the pointer file on the first VM
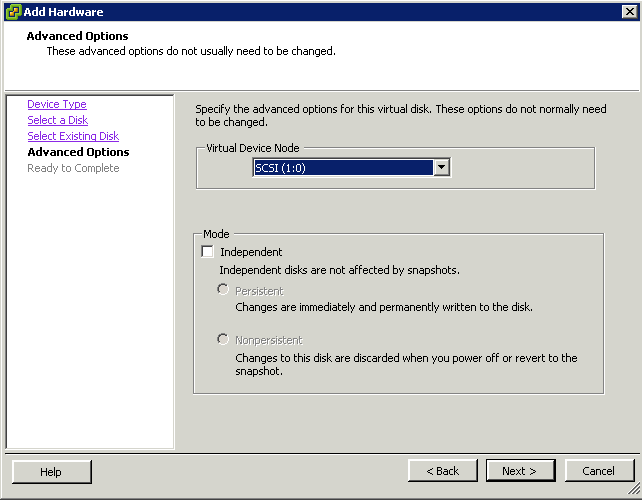
- Select the same SCSI Virtual Device Node you setup on the first VM for the first RDM
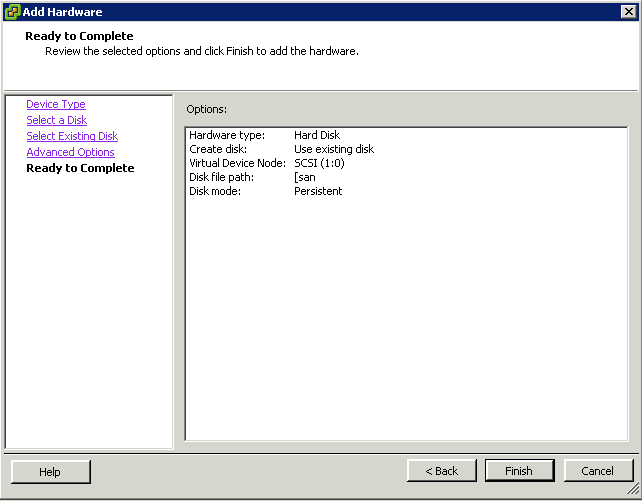
- Review Settings and make sure everything is correct
- Next you will need to set the SCSI Bus Sharing Mode to Physical and verify that the type is LSI Logic SAS
- You now need to do the same for all the disks that have been added
- Check everything looks correct and this is your storage setup
Configuring the storage on the VMs
- Power on Node/VM1
- Connect to Node1/VM1
- Launch Server Manager and navigate to Disk Management under Storage
- In Disk Manager you will see the new disks as being offline
- Right click each disk and select Online and if necessary right click again and select Initialise Disk then select the MBR partition type
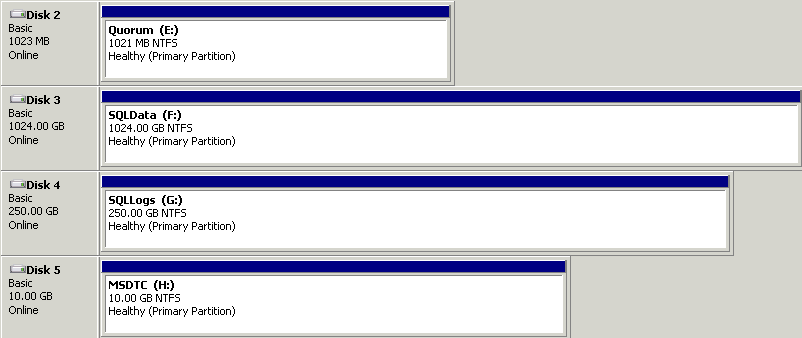
- Create a simple volume on all 4 disks which should then look like the below
- Next Power on and log into Node2/VM2
- Open Disk Management and right click each disk and select Online. Once the Disks are online you will see the volume labels and status
- If the disks have been assigned the next available drive letters then you will need to change the drive letters to match the letters you assigned on Node1/VM1
- The disks will now look identical to Node1/VM1
Install Microsoft Failover Clustering
You will need to install Failover Clustering on both nodes as per below procedure
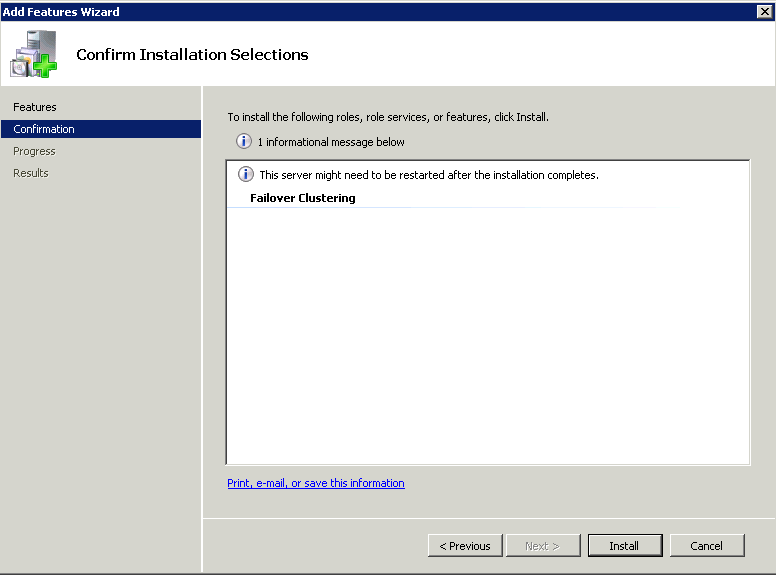
- Open Server Manager > Add Features > Failover Clustering
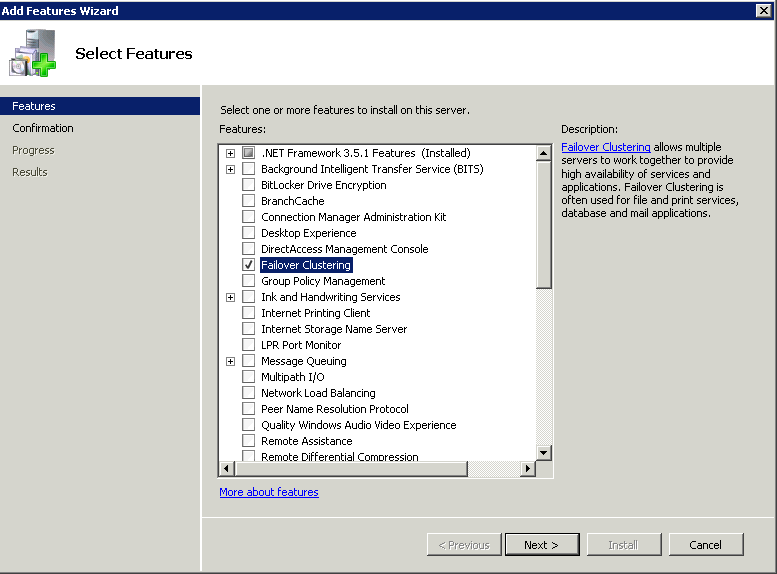
- Click Install
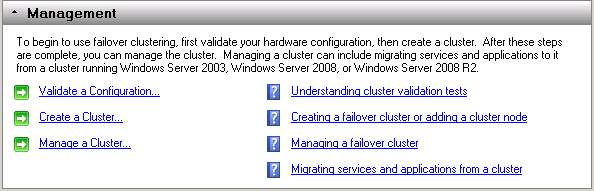
- On the first Node1/VM1 click Start > Administrative Tools > Failover Cluster Manager
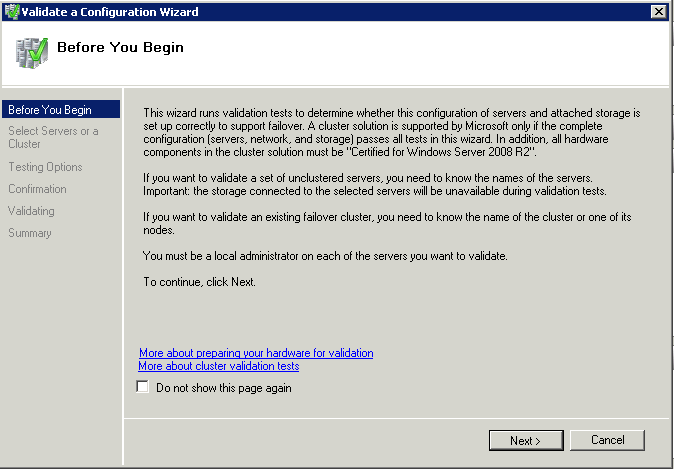
- Click on Validate a Cluster
- Validation will run a variety of tests against your virtual hardware including the storage and networking to verify if the hardware is configured correctly to support a failover cluster. To pass all tests, both nodes must be online and the hardware must be configured correctly
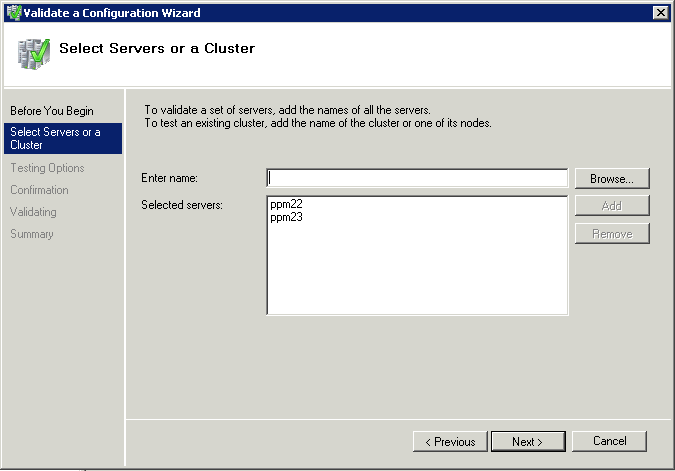
- Select your 2 Nodes/VMs
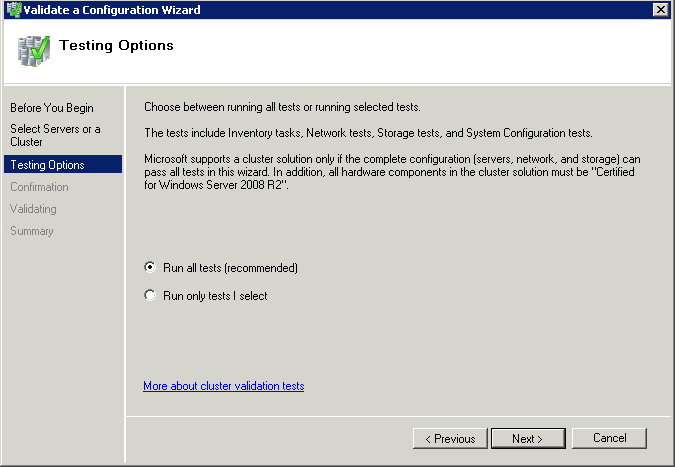
- Click Next and Run all Tests
- Verify the server names and check the tests
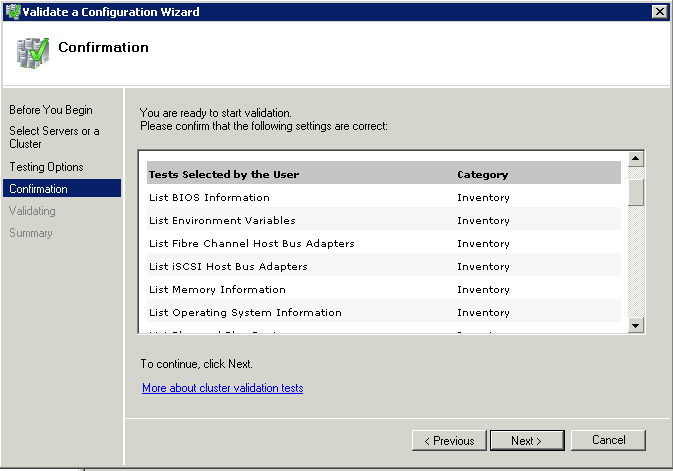
- Click Run and the tests will begin
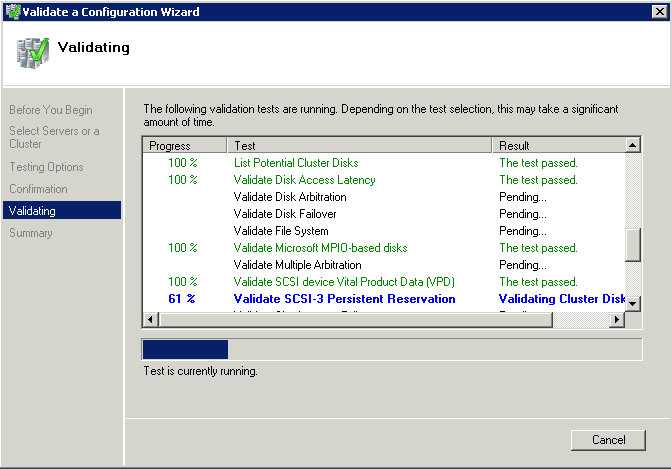
- Your configuration is now validated and you can check the reports for anything which is incorrect
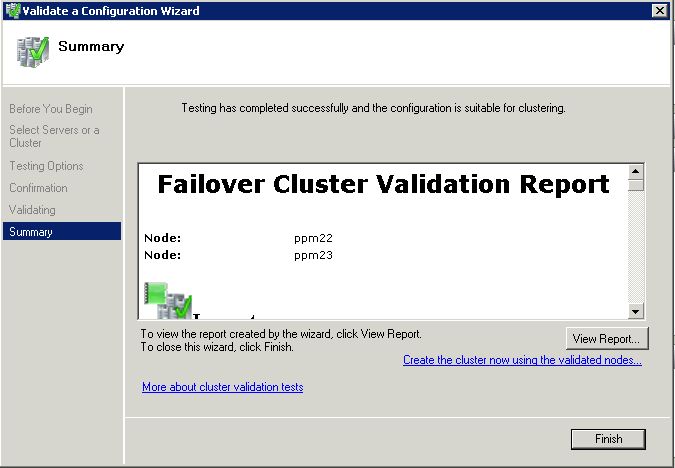
- Click Create the cluster now using the validated nodes
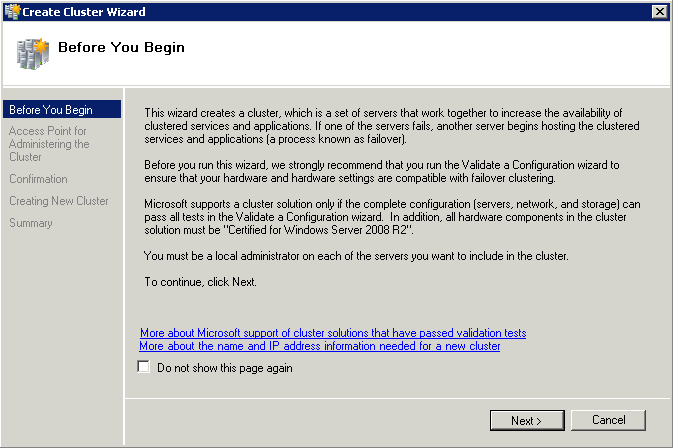
- Type a name for your cluster
- Type an IP Address for the Cluster IP
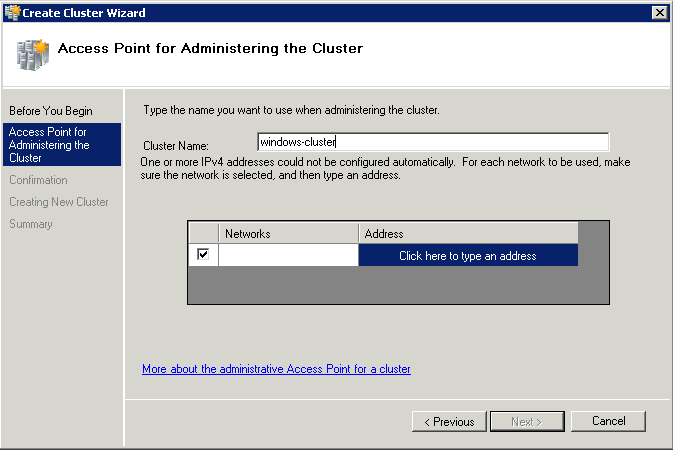
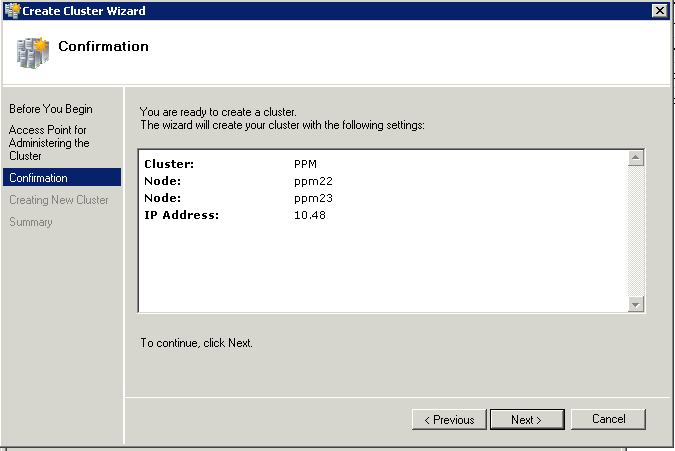
- Check details are all correct and click Create
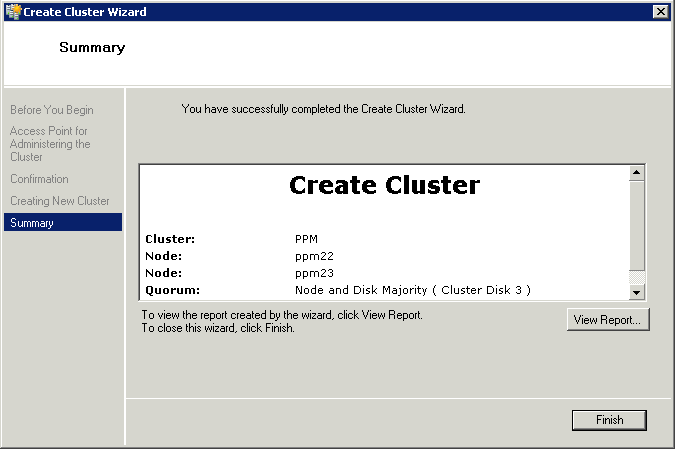
- Finish and check everything is setup OK
- If you want to install SQL Server clustering, we will need to install a MSDTC Service
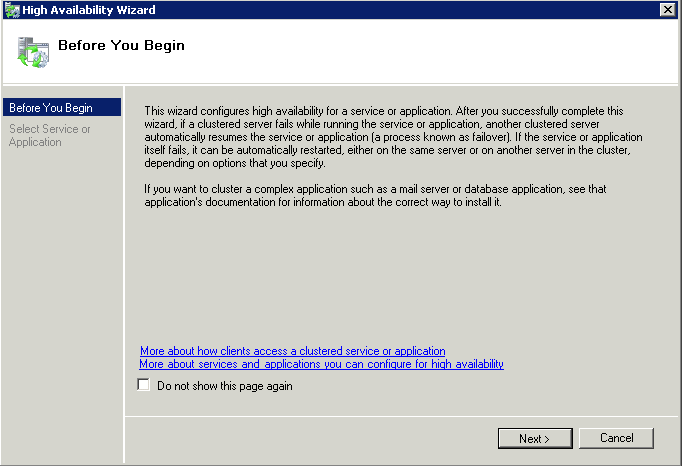
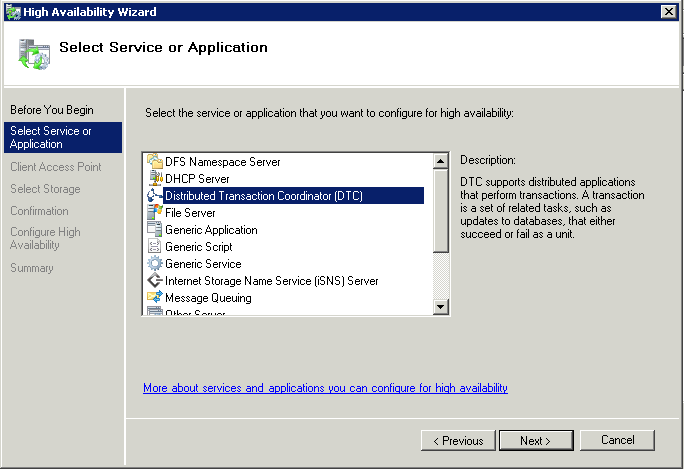
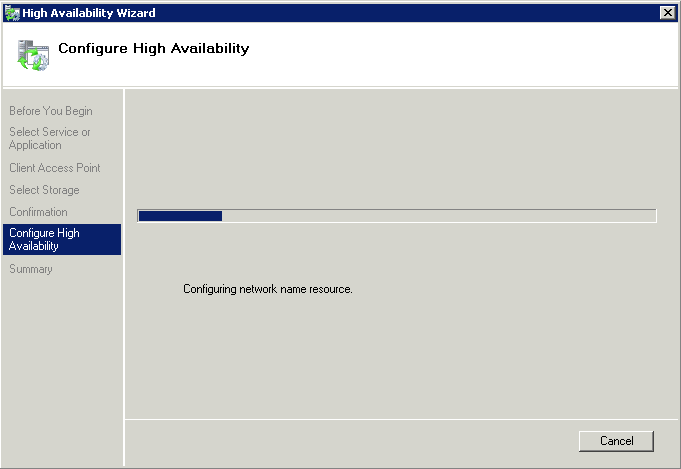
- Go to Services and Applications – right click and select “Configure a service or application
- Click Next and select DTC
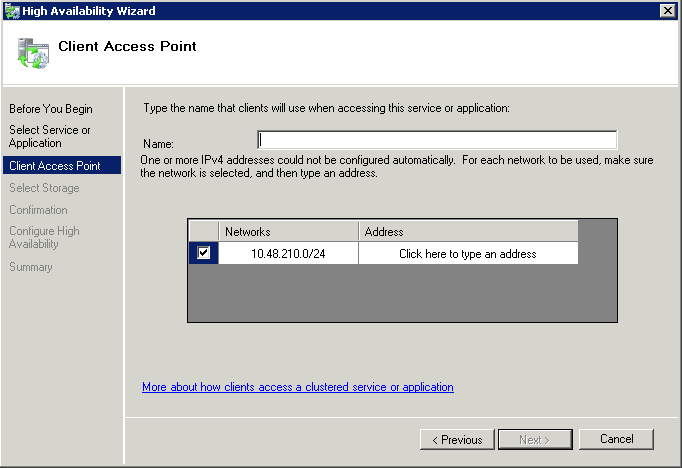
- Put in a name and IP Address for the DTC
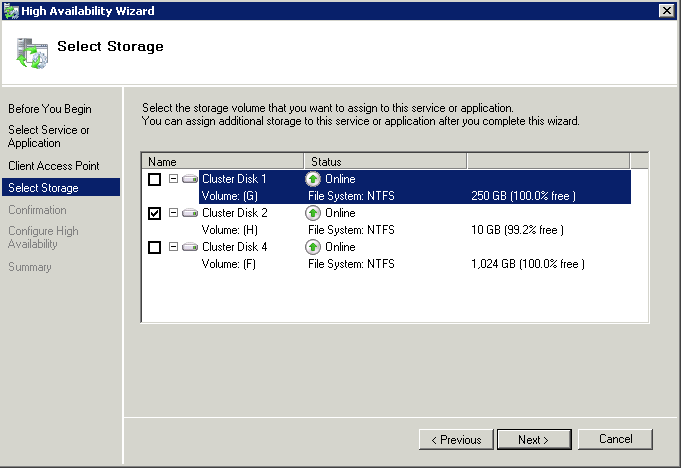
- Click Next and select the storage you created for the MSDTC
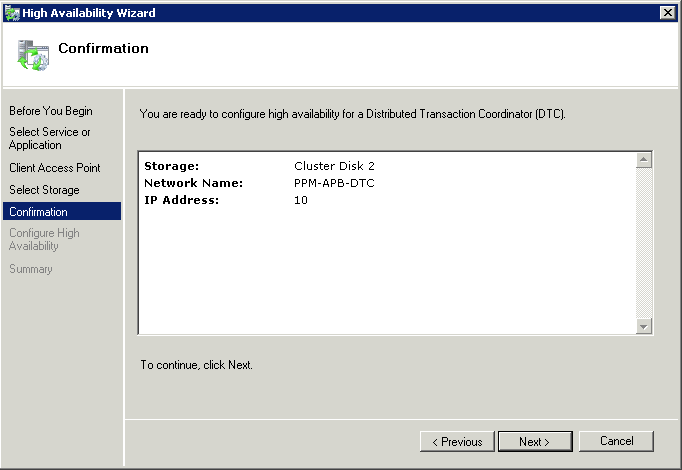
- Click Next and Review the confirmation
- Click Next and the MSDTC Service will be created
- Finish and make sure everything was setup successfully
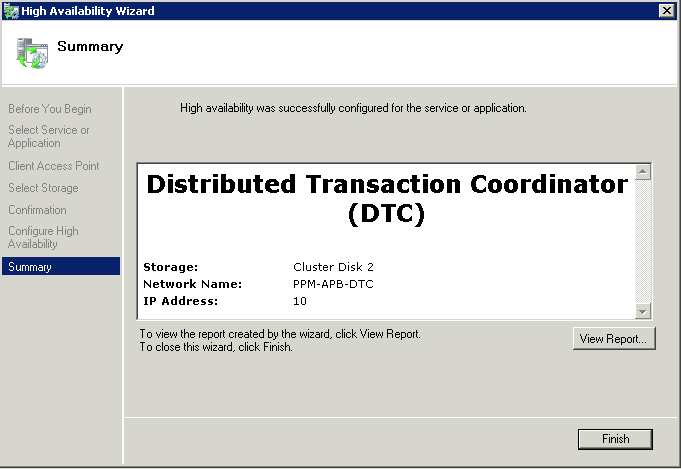
- Congratulations, you have now set up your Windows Failover Cluster
- Check that your Windows Cluster IP and your MSDTC IP are listed in DNS
To set up SQL Server Failover Clustering
http://www.electricmonk.org.uk/2012/11/13/sql-server-2008-clustering/


