What is vRA7?
VMware vRealize Automation 7 sets a new standard in cloud automation by radically changing how fast and easy it is to automate the delivery of IT services and thereby accelerating your time to value. This major update has a simplified architecture and includes an installation wizard, the unified blueprint model, and enhanced NSX support.
IT organizations can use VMware vRealize™ Automation to deliver services to their lines of business.
vRealize Automation provides a secure portal where authorized administrators, developers or business users can request new IT services and manage specific cloud and IT resources, while ensuring compliance with business policies. Requests for IT service, including infrastructure, applications, desktops, and many others, are processed through a common service catalog to provide a consistent user experience.
You can improve cost control by using vRealize Automation to monitor resource and capacity usage. For further cost control management, you can integrate vRealize Business Advanced or Enterprise Edition with your vRealize Automation instance to expose the cost of cloud and virtual machine resources, and help you better manage capacity, cost, and efficiency
Support Documentation
https://www.vmware.com/support/pubs/vrealize-automation-pubs.html
New Features
http://pubs.vmware.com/New Features
Support Matrix
https://www.vmware.com/pdf/vrealize-automation-70-support-matrix.pdf
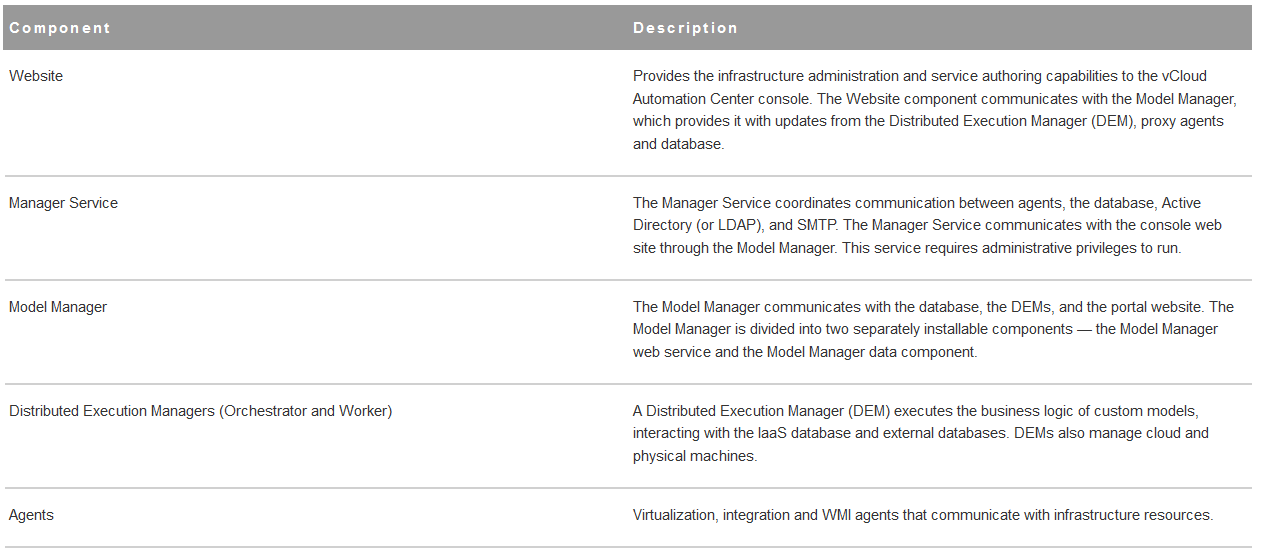
Reference Architecture
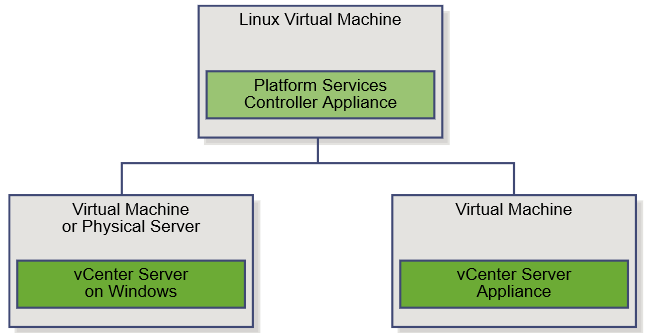
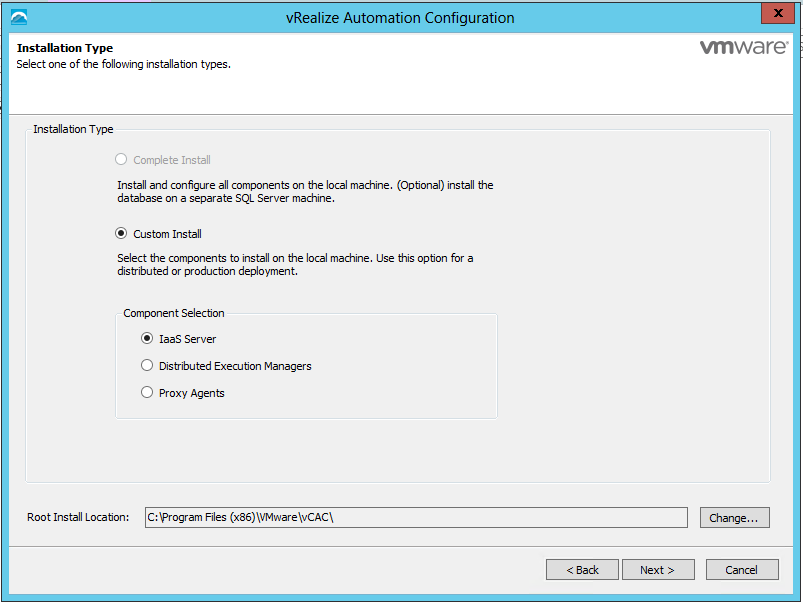
Installing vRealize Automation (Minimal Install in lab)
Choose a minimal installation to deploy a proof of concept (PoC) or development environment with a basic topology. Choose an enterprise installation to deploy a production environment with the topology best suited to your organizational needs
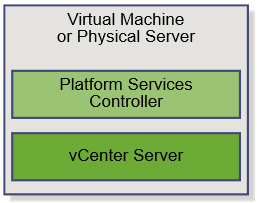
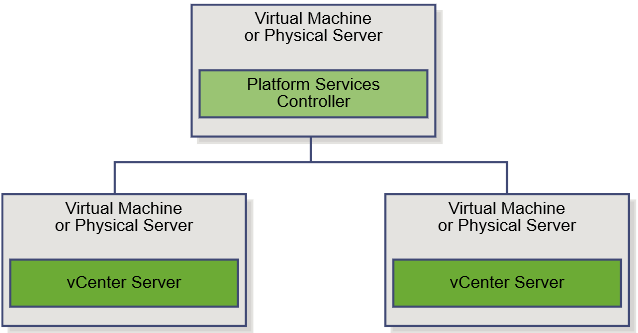
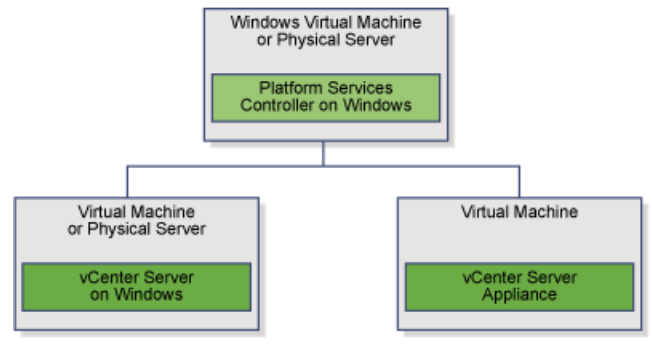
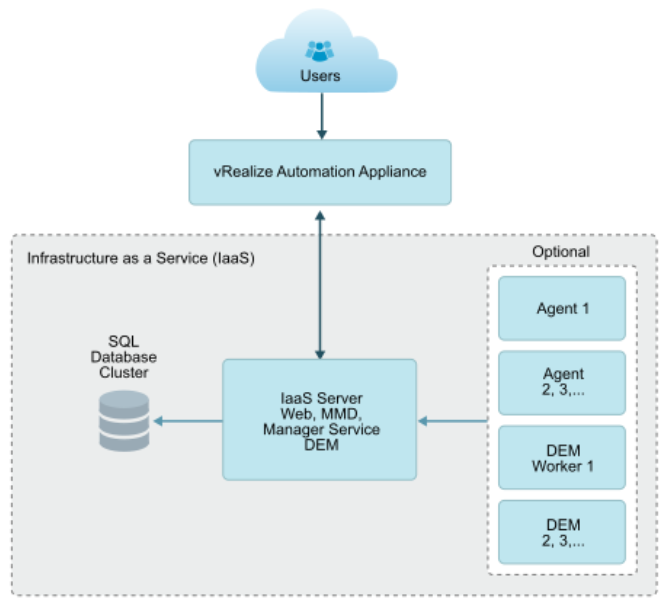
To complete a minimal deployment, a system administrator installs the vRealize Automation appliance and Infrastructure as a Service (IaaS) components.
|
■
|
vRealize Automation appliance includes the Web console interface and support for single sign-on capabilities. It is installed as a virtual appliance. |
|
■
|
Infrastructure as a Service (IaaS) is installed on a Windows Server machine. |
|
■
|
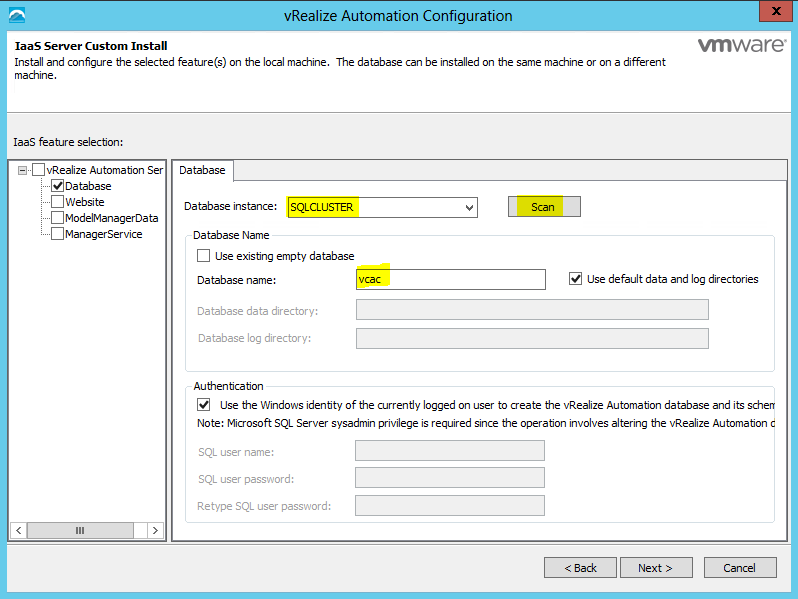
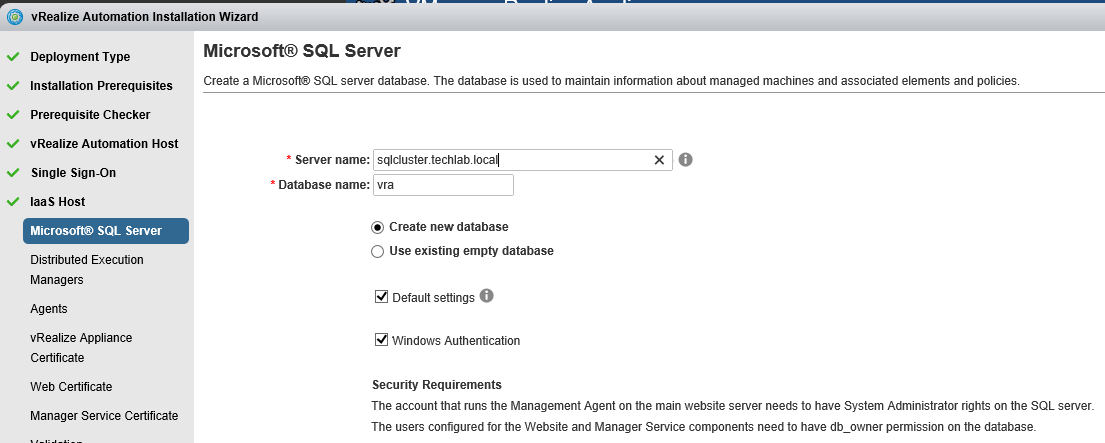
The IaaS uses an SQL database that can be installed on the same machine as IaaS or on its own server. |
The following figure shows the relationship and purpose of components of a minimal installation.
Step 1 DNS
- vRealize Automation requires the system administrator to identify all hosts by using a fully qualified domain name (FQDN).
- In a distributed deployment, all vRealize Automation components must be able to resolve each other by using a FQDN.
- The Model Manager Web service, Manager Service, and Microsoft SQL Server database must also be able to resolve each other by their Windows Internet Name Service (WINS) name. You must configure the Domain Name System (DNS) to resolve these host names in your environment.
- So I created an A record in DNS for my vRA7 appliance and an A record in DNS for my IaaS Server
Step 2 Check minimum hardware requirements
- Your deployment must meet minimum system resources to install virtual appliances and minimum hardware requirements to install IaaS components on the Windows Server.
- For operating system and high-level environment requirements, including information about supported browsers and operating systems, see the vRealize Automation Support Matrix.
- The Hardware Requirements table shows the minimum configuration requirements for deployment of virtual appliances and installation of IaaS components. Appliances are preconfigured virtual machines that you add to your vCenter Server or ESXi inventory. IaaS components are installed on physical or virtual Windows 2008 R2 SP1, or Windows 2012 R2 servers. An Active Directory is considered small when there are up to 25,000 users in the OU to be synced in the ID Store configuration. An Active Directory is considered large when there are more than 25,000 users in the O

Step 3 Browser Considerations
Some restrictions exist for browser use with vRealize Automation.
|
■
|
vRealize Automation does not support Compatibility View mode for Internet Explorer 10 on Windows 7 platforms. If you are unable to log in to appliance management consoles or you receive an error on the SSO tab when using Internet Explorer 10, use the Developer Tools to set the browser mode to Internet Explorer 7. |
|
■
|
Multiple browser windows and tabs are not supported. vRealize Automation supports one session per user. |
|
■
|
VMware Remote Consoles provisioned on support a subset of vRealize Automation-supported browsers. |
For operating system and high-level environment requirements, including information about supported browsers and operating systems, see the vRealize Automation Support Matrix
Step 4 Password requirements
- The vRealize Automation administrator password cannot contain a trailing “=” character.
- Verify that the adminstrator password you assign during installation does not end with an “=” character. Such passwords are accepted when you assign them, but result in errors when you perform operations such as saving endpoints
Step 5 Database requirements
- The vRealize Automation administrator password cannot contain a trailing “=” character.Verify that the adminstrator password you assign during installation does not end with an “=” character. Such passwords are accepted when you assign them, but result in errors when you perform operations such as saving endpoints
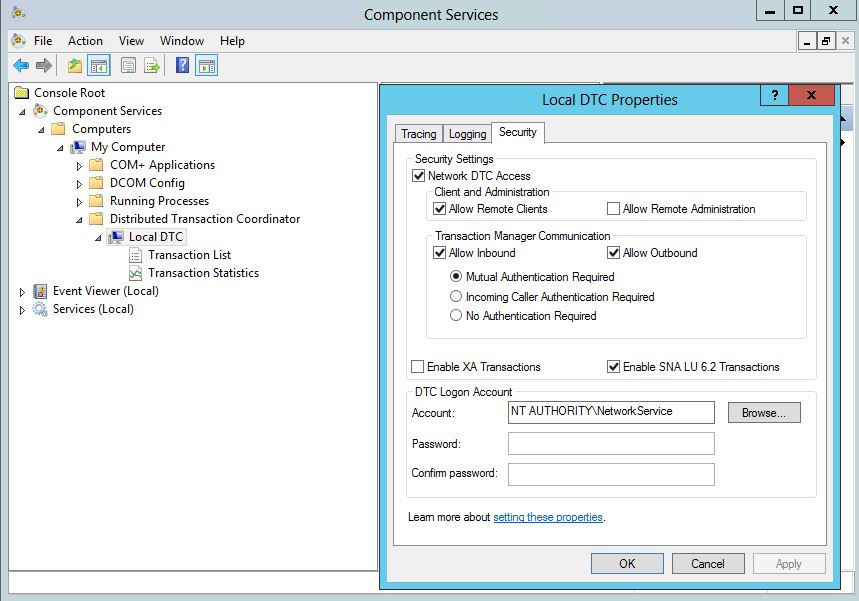
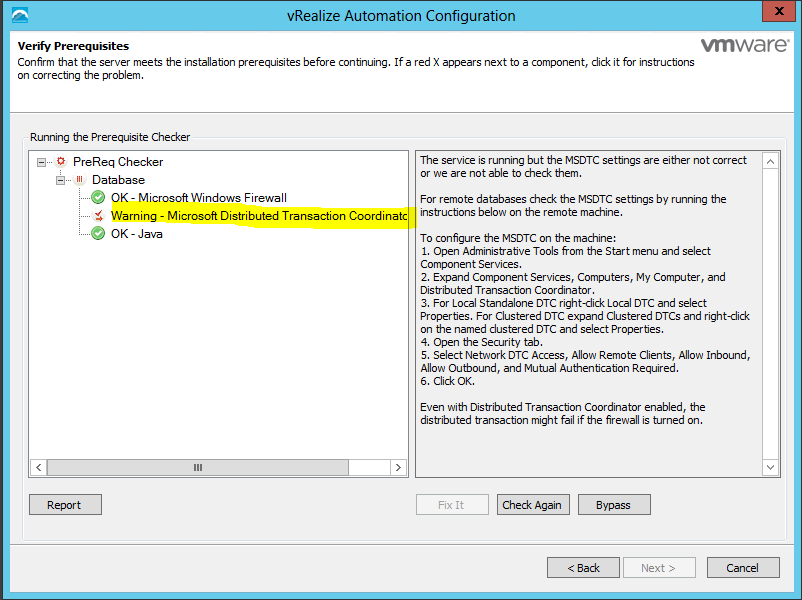
- If you clone an IaaS node, install MS DTC on each node after it has been cloned. When you clone a node that has MS DTC installed, its unique identifier is copied to each clone, which causes communication to fail. See Error in Manager Service Communication for further information.
- The database can reside on the IaaS (Windows) server host or on a remote host.
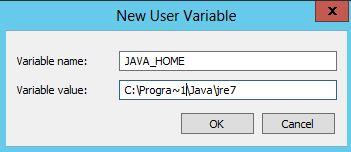
- Java-related requirements apply for databases on the IaaS (Windows) server host. They do not apply for external databases.
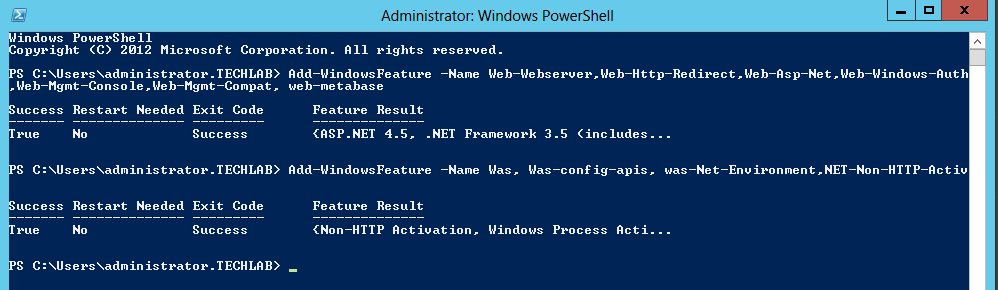
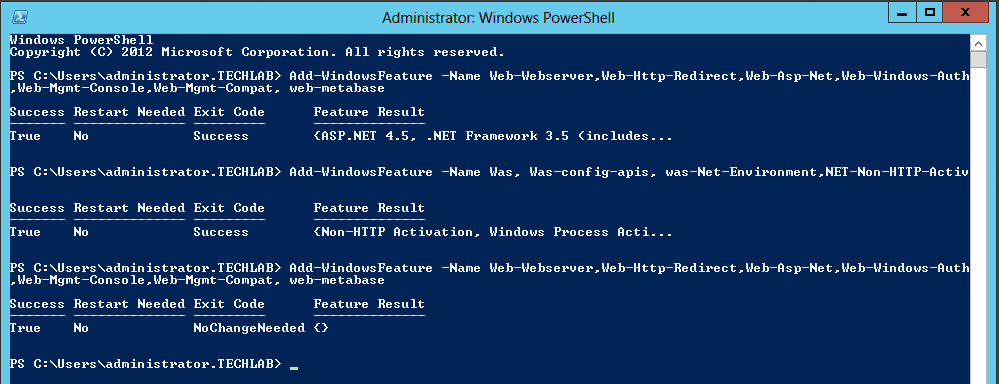
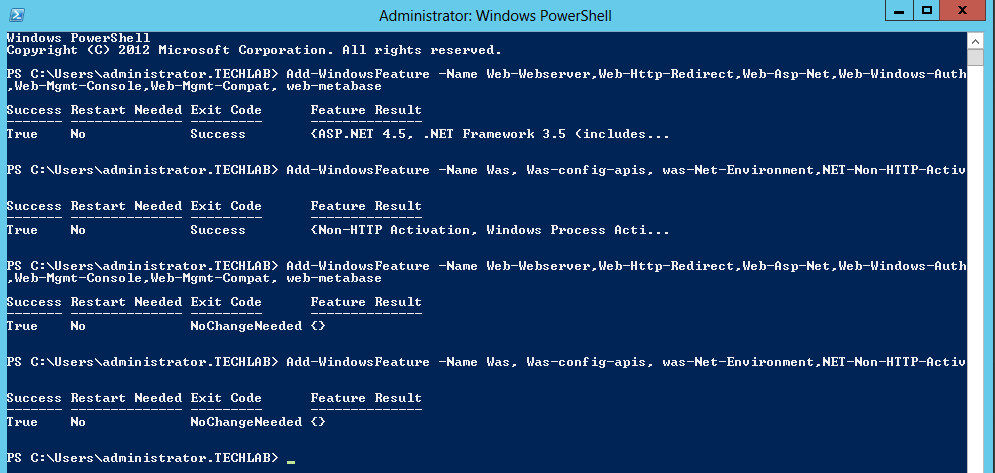
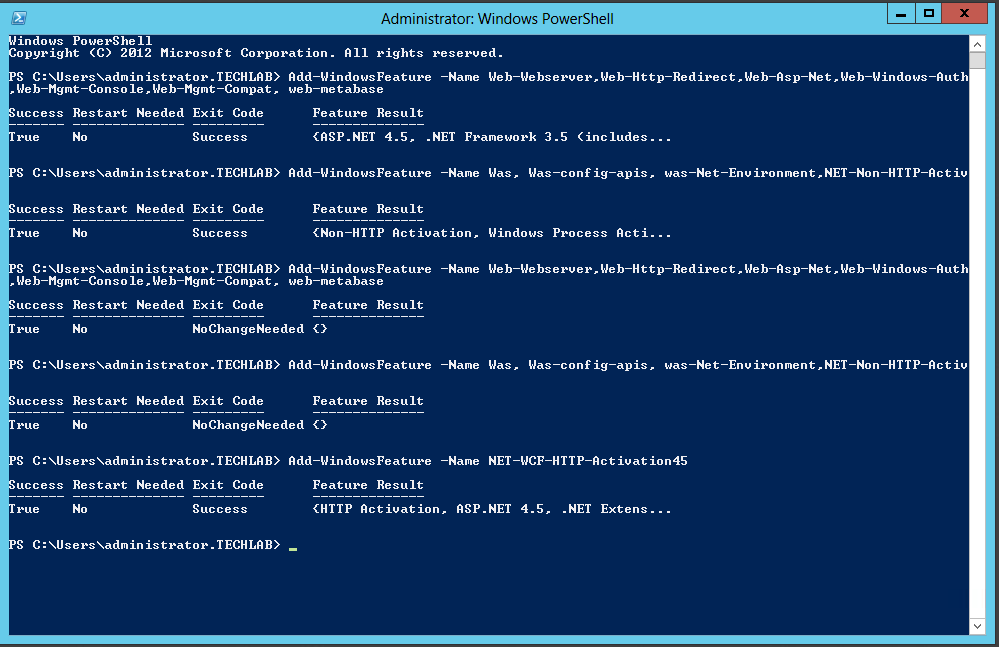
Step 6 IaaS Server requirements
You can use the following script to install all pre-requisites on your IaaS server but do a double check of everything first
https://github.com/vtagion/Scripts/blob/master/vRA%206.2%20PreReq%20Automation%20Script.ps1
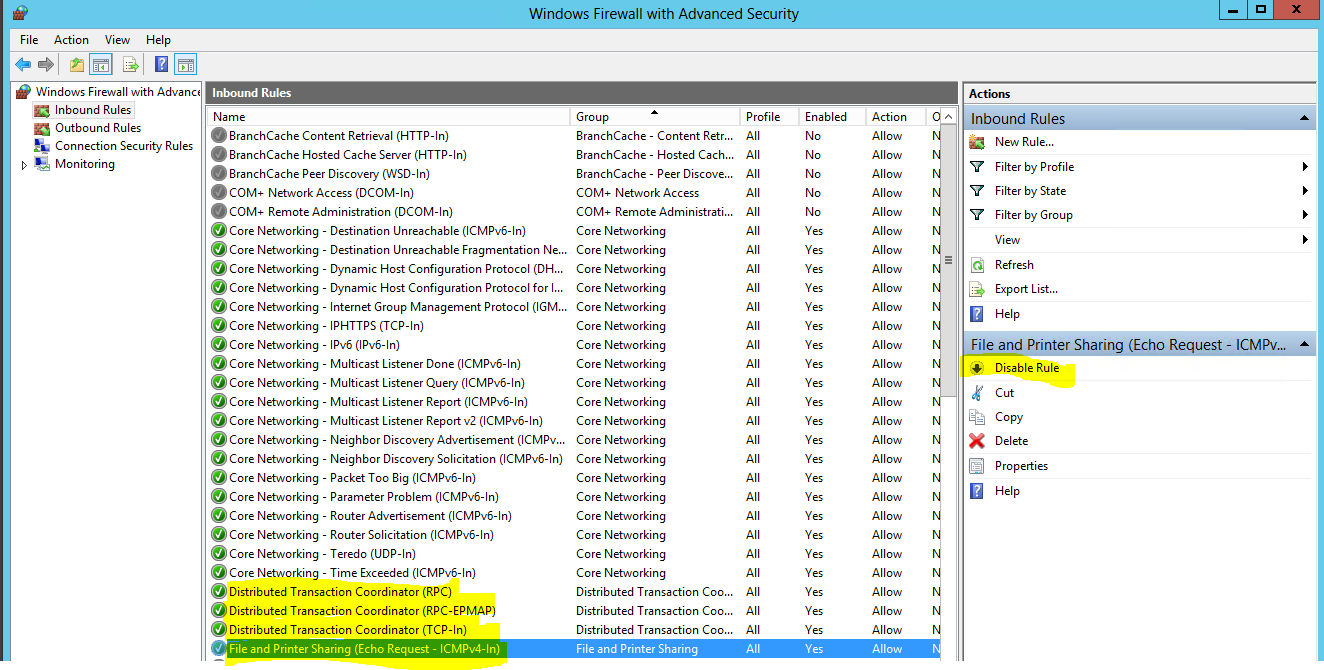
Step 7 Port requirements
vRealize Automation uses designated ports for communication and data access.
- Although vRealize Automation uses only port 443 for communication, there might be other ports open on the system.
- Because open, unsecure ports can be sources of security vulnerabilities, review all open ports on your system and ensure that only the ports that are required by your business applications are open
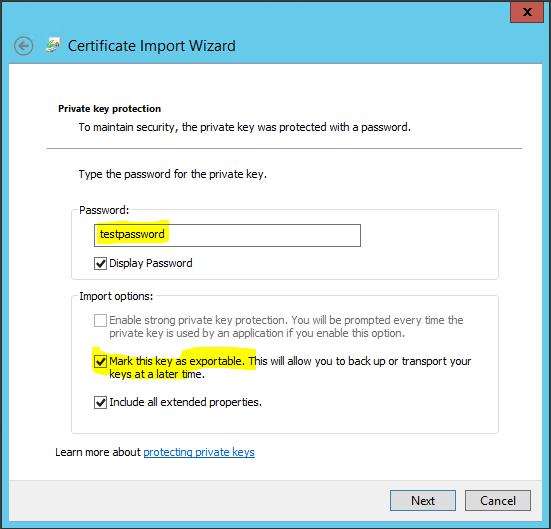
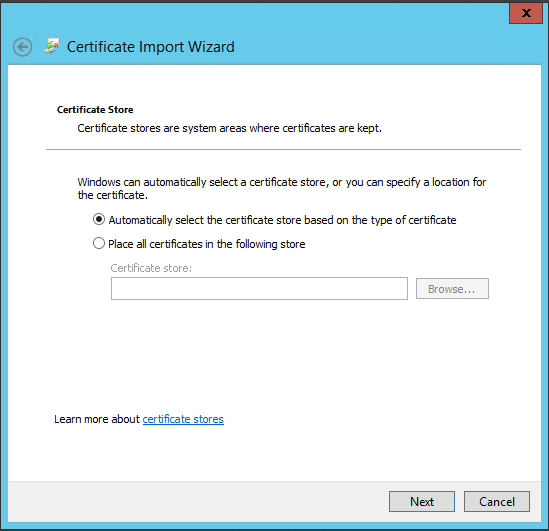
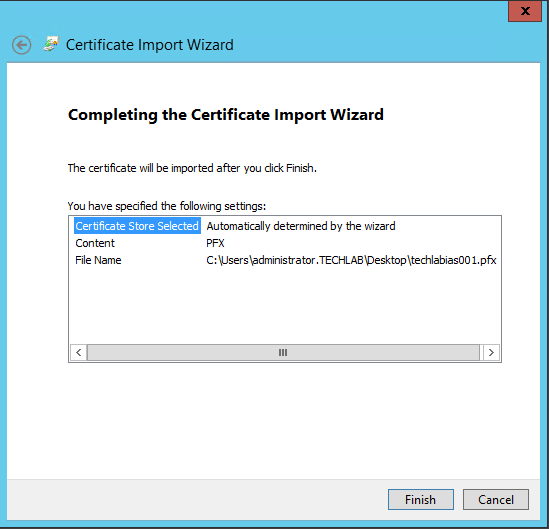
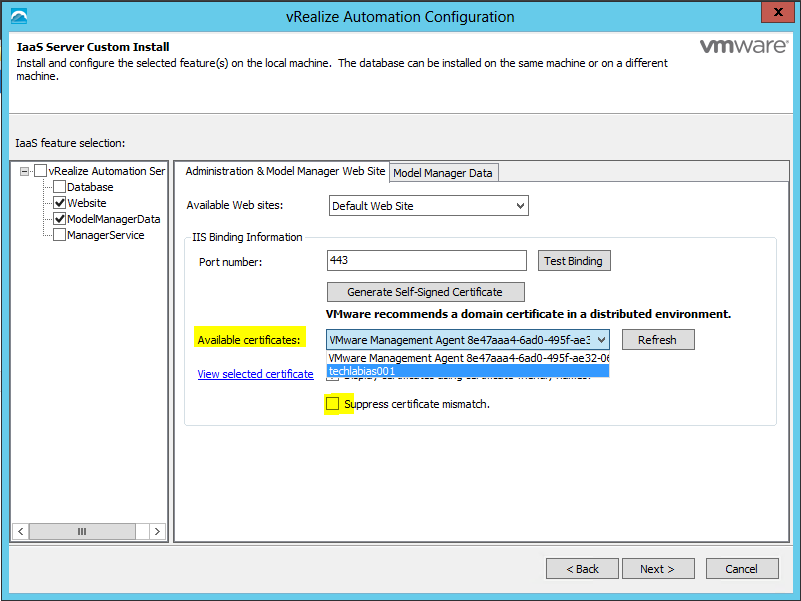
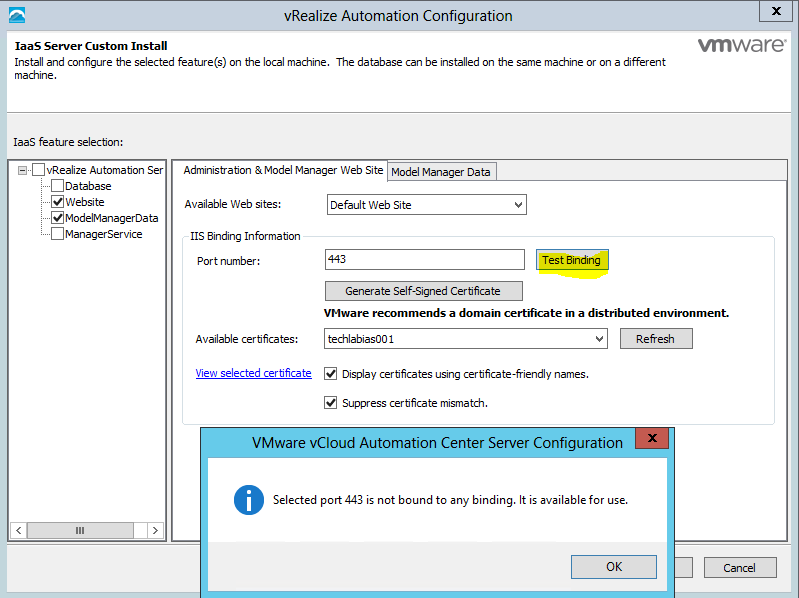
Step 8 Certificates
vRealize Automation uses SSL certificates for secure communication among IaaS components and instances of the vRealize Automation appliance. The appliances and the Windows installation machines exchange these certificates to establish a trusted connection. You can obtain certificates from an internal or external certificate authority, or generate self-signed certificates during the deployment process for each component.
For important information about troubleshooting, supportability, and trust requirements for certificates, see the VMware knowledge base article at http://kb.vmware.com/kb/2106583.
You can update or replace certificates after deployment. For example, a certificate may expire or you may choose to use self-signed certificates during your initial deployment, but then obtain certificates from a trusted authority before going live with your vRealize Automation implementation
A system administrator must set up accurate timekeeping as part of the vRealize Automation installation.
Installation fails if time synchronization is set up incorrectly.
Timekeeping must be consistent and synchronized across the vRealize Automation appliance and Windows servers. By using the same timekeeping method for each component, you can ensure this consistency.
For virtual machines, you can use the following methods:
|
■
|
Configuration by using Network Time Protocol (directly) |
|
■
|
Configuration by using Network Time Protocol through ESXi with VMware Tools. You must have NTP set up on the ESXi. |
Step 10 Deploy the vRealize Automation appliance
Note: If you have to cancel out of the wizard and when you log back in to the appliance, the wizard doesn’t automatically come up then you can do the following
- ssh into the appliance and run vcac-vami installation-wizard activate
- Put /#wizard.wizard at the end of the vRA portal address
Follow the instructions below
| 1 |
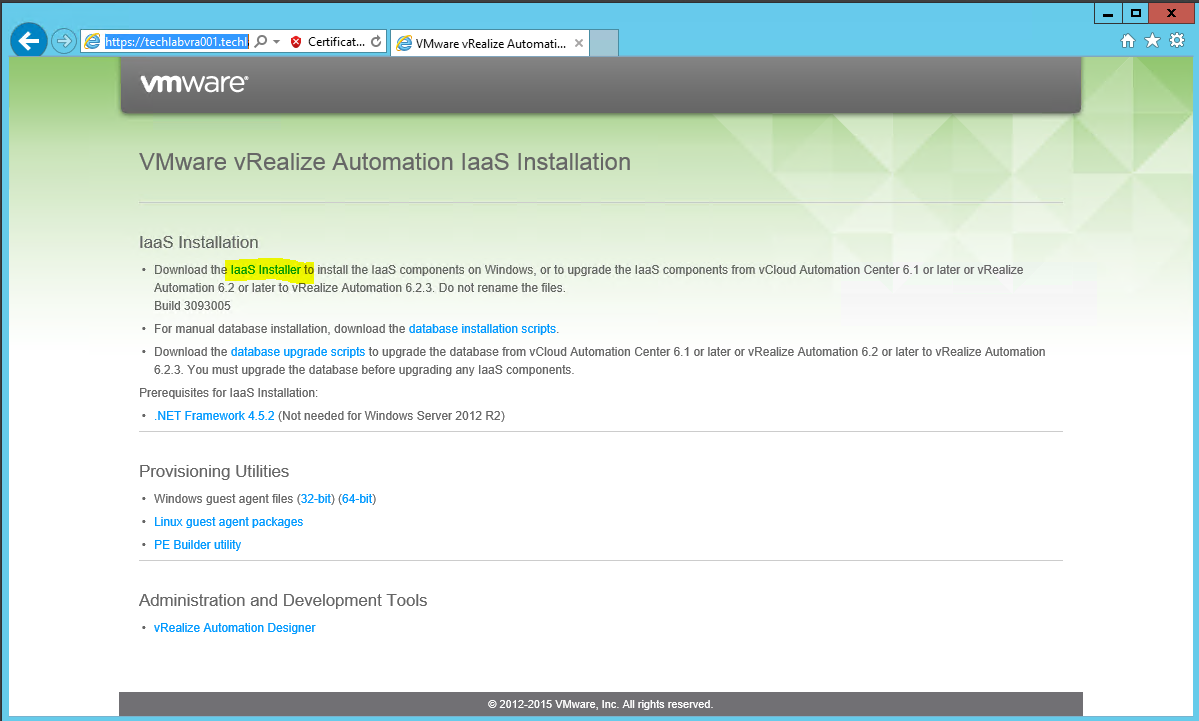
Download the vRealize Automation appliance from the VMware Web site. Click here Optionally on the same page you can download the VMware vRealize Orchestrator appliance |
|
2
|
Log in to the vSphere client as a user with system administrator privileges. |
Procedure
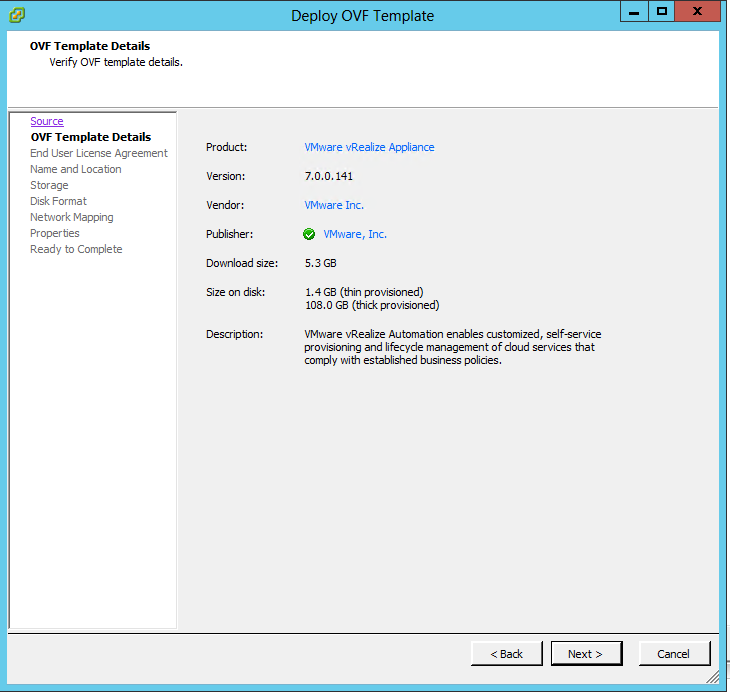
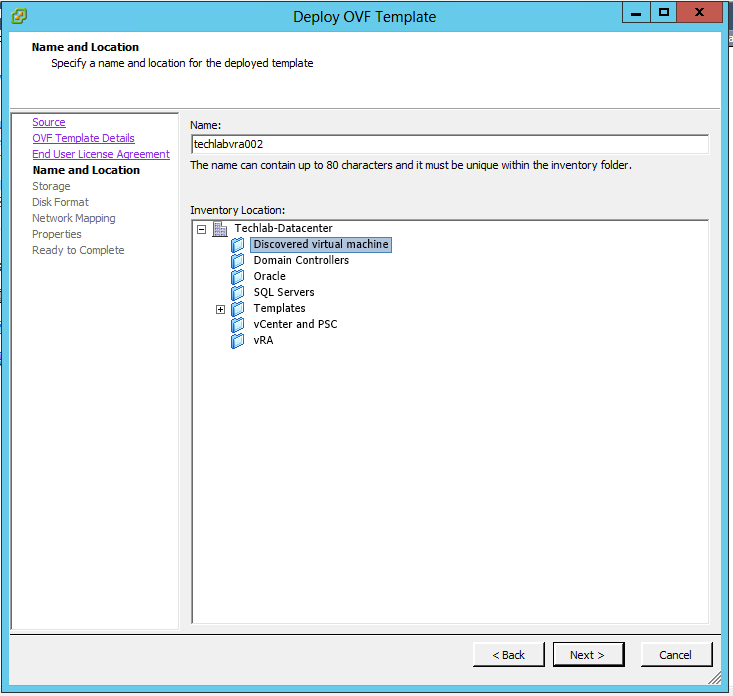

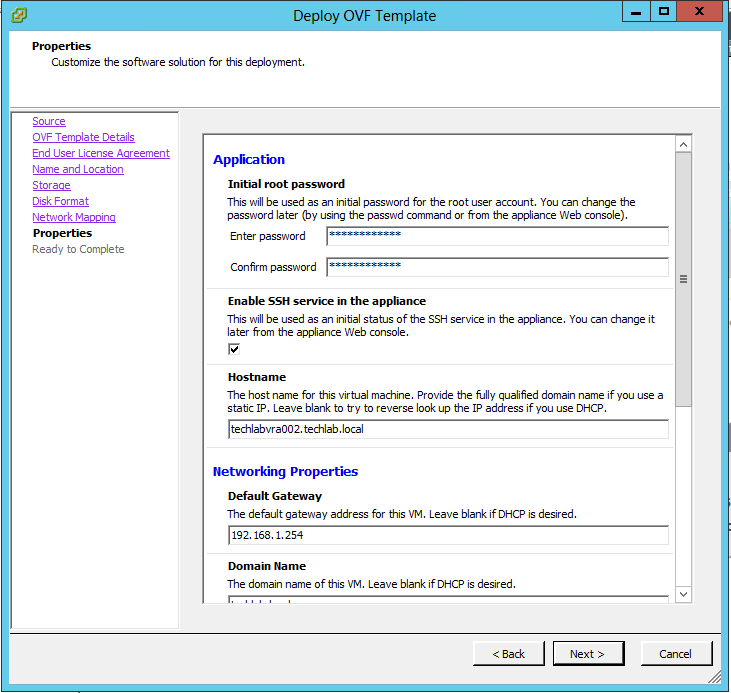

Step 11 Run the Installation Wizard for a Minimal Deployment
|
1
|
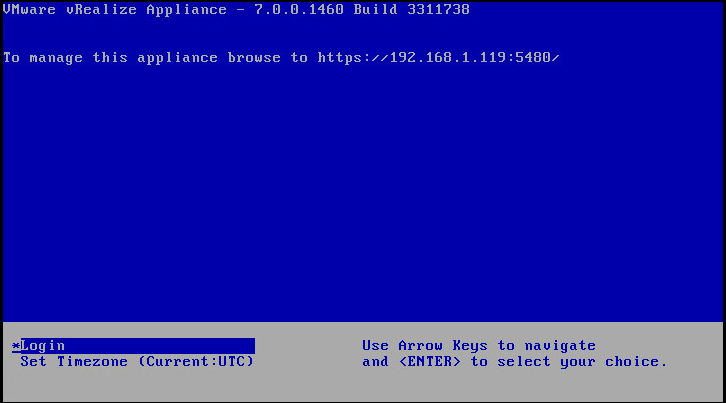
Open a Web browser. |
||||||
|
2
|
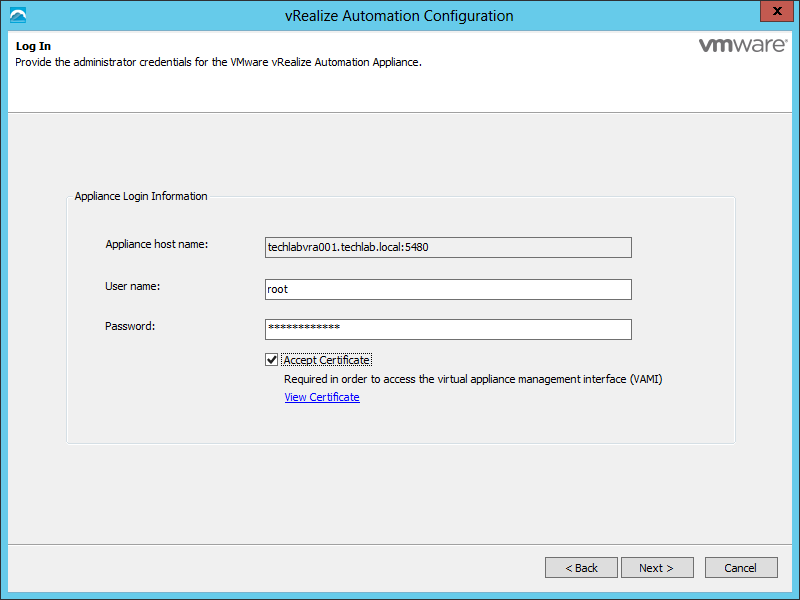
Navigate to the vRealize Automation appliance management console by using its fully qualified domain name, https://vra-va-hostname.domain.name:5480/. |
||||||
|
3
|
Log in with the user name root and the password you specified when the appliance was deployed. |
||||||
|
4
|
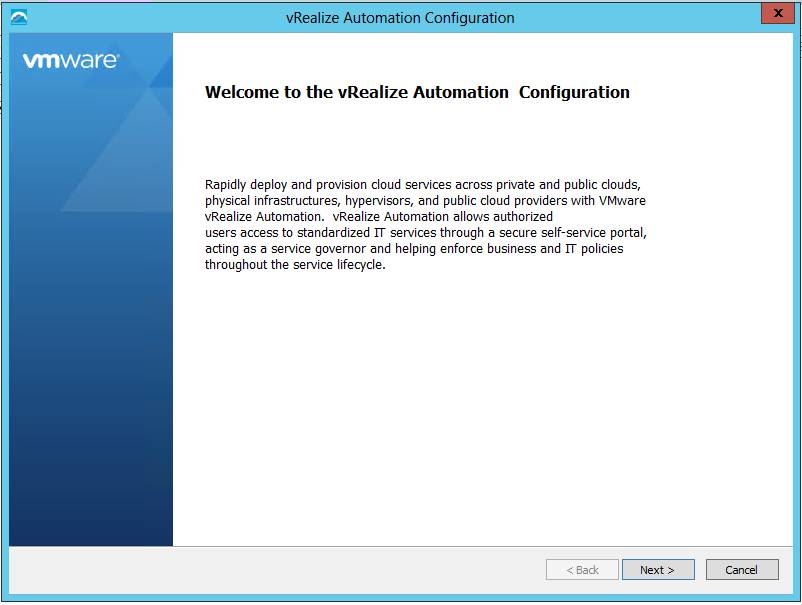
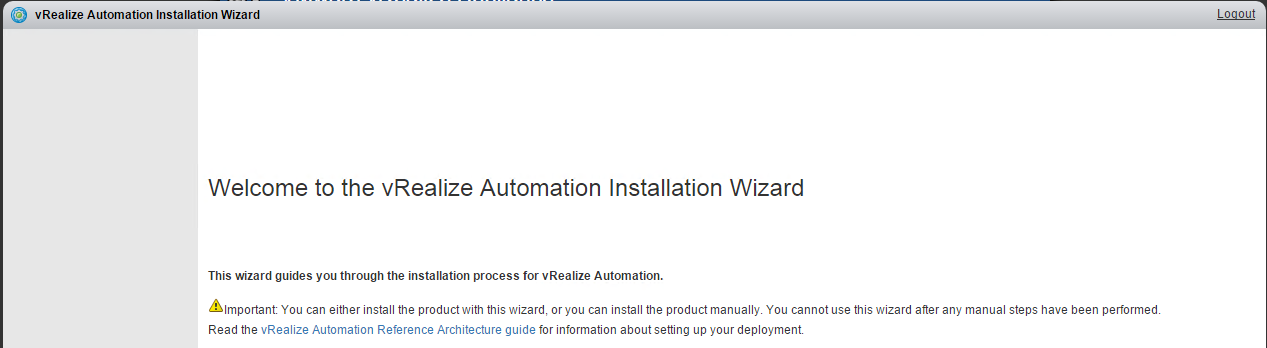
When the Installation Wizard appears, click Next.
|
||||||
|
5
|
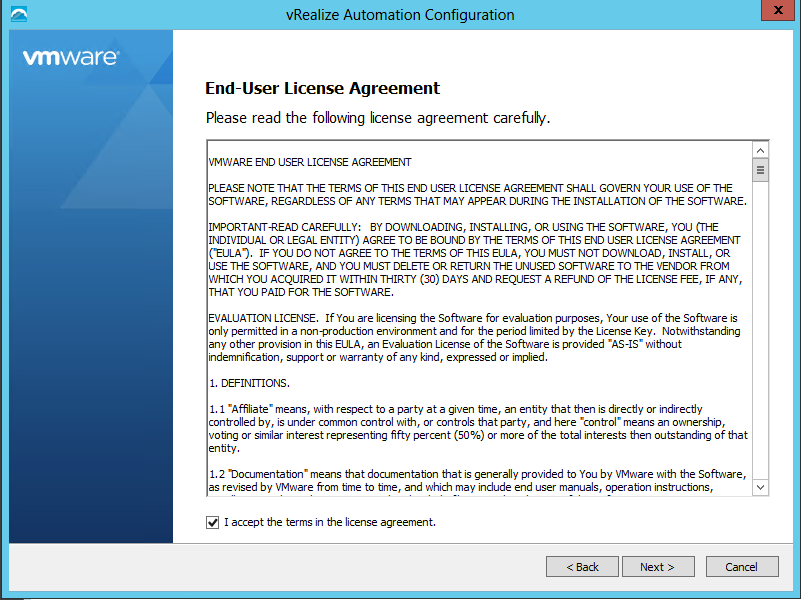
Accept the End User License Agreement and click Next. |
||||||
|
6
|
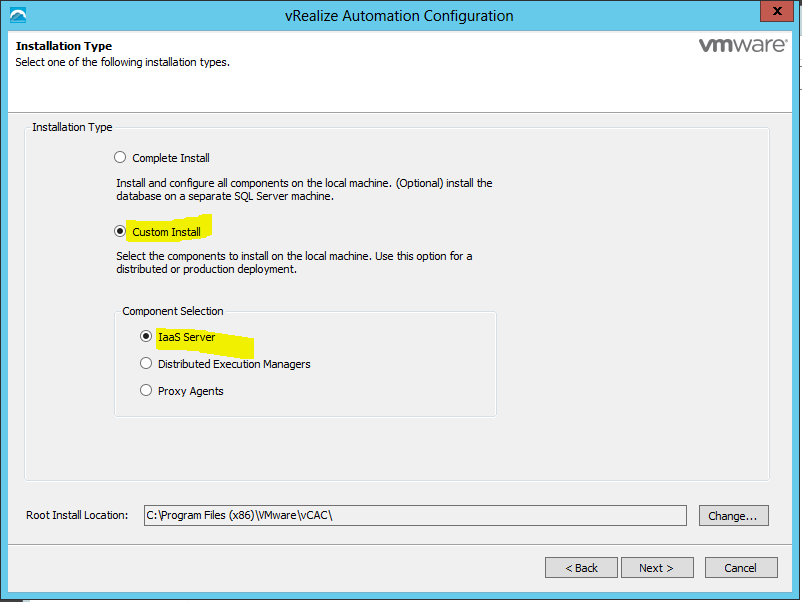
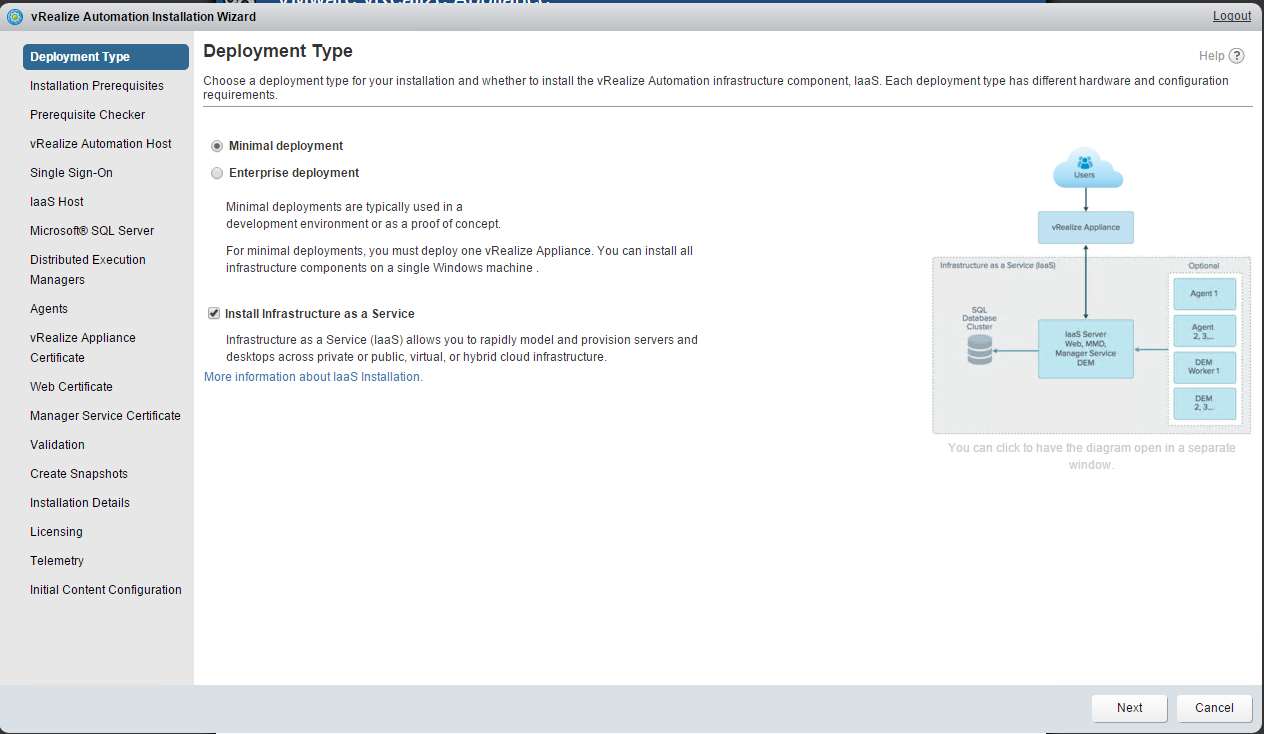
Select Minimal Deployment and Install Infrastructure as a Service on the Deployment Type screen and click Next.
|
||||||
|
7
|
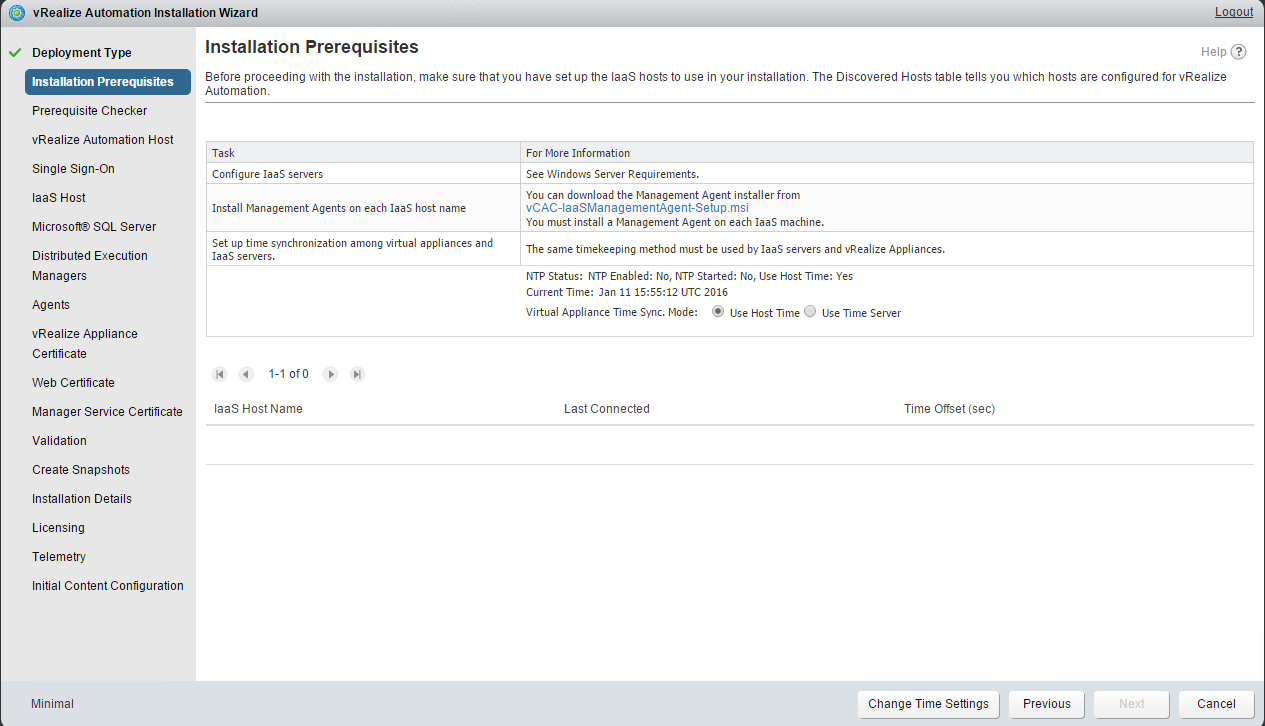
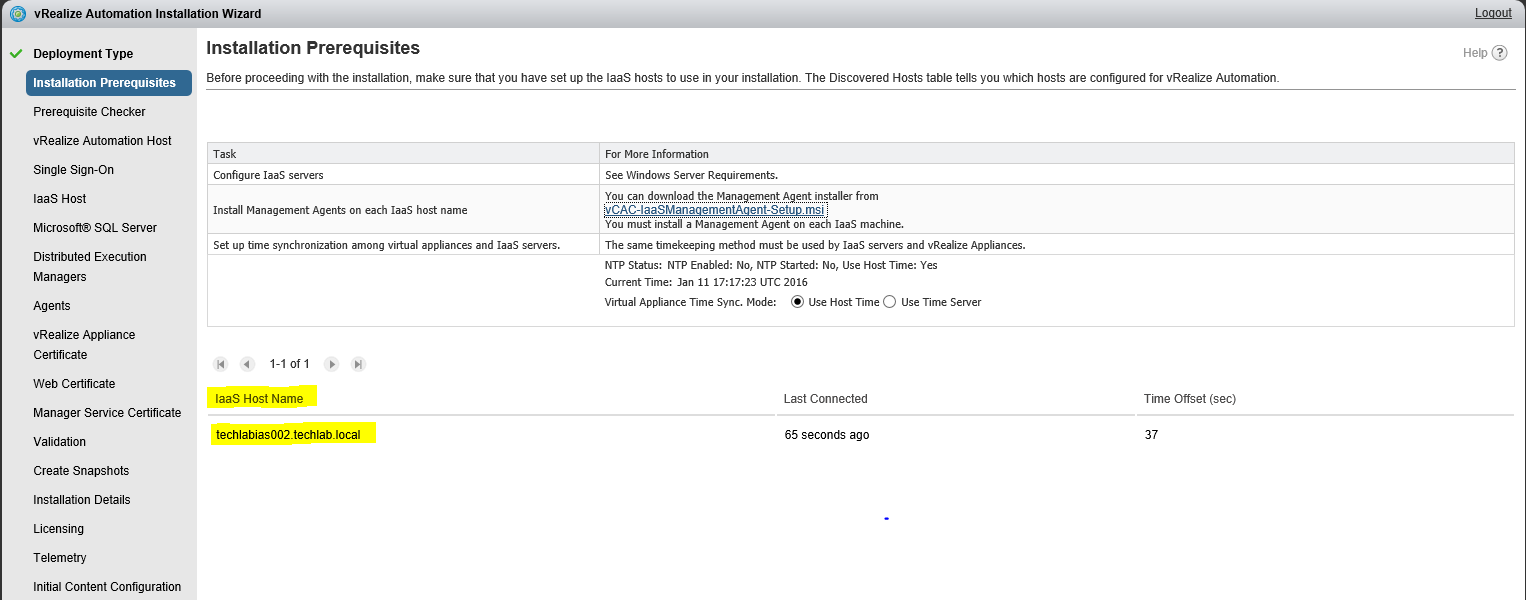
Check that the prerequisites listed on the Installation Prerequisites page have been met and that the Windows servers on which you installed a Management Agent are listed.
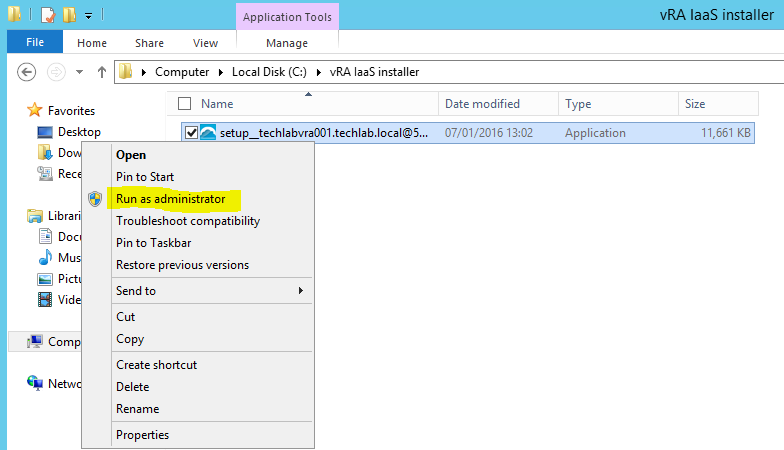
Click the link and obtain the Management Agent software and install this agent on your IaaS server
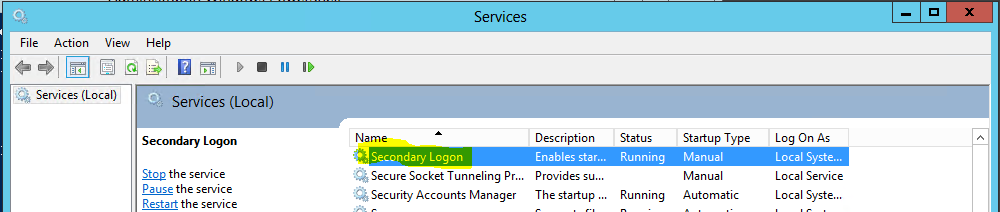
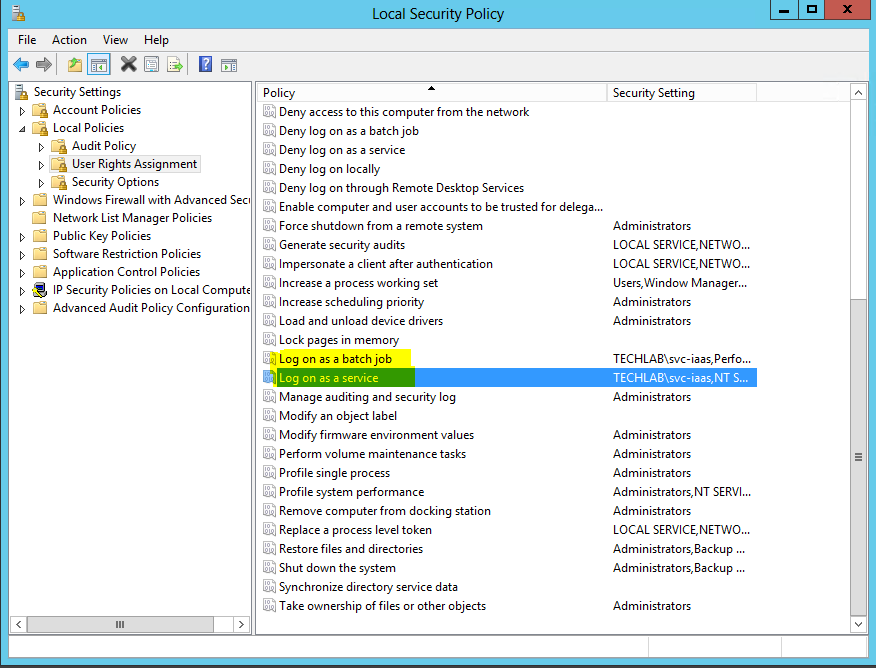
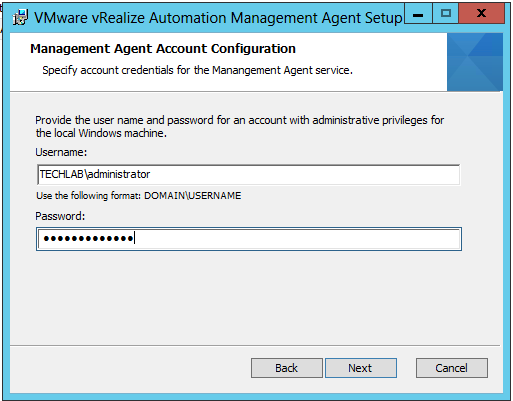
The Mangement Agent executes work items which are issued by the VAMI. the context under whom the management agent is running executes the installer. Certificate changes can now be performed from the VAMI for infrastructure machines as well and this is handled by the management agent The Management agent requires a direct connection to 5480 on all virtual appliances. It becomes aware of all the appliances in the system after the initial connection is established to the first VA. It is also used for log collection and telemetry etc. The next screen will ask you for account information that has administrative rights on your IaaS Server. This account will be used to install services and additional pre-requisite software
Once the installer finishes, go back to your wizard. Notice that at the bottom of the screen you were on, there is now an IaaS Server listed. Set your NTP settings (THIS IS VERY IMPORTANT !) and click next
|
||||||
|
8
|
If needed, you can change the timekeeping method for your vRealize Automation appliance. Click Change Time Settings, if you make changes. |
||||||
|
9
|
Click Next. |
||||||
|
10
|
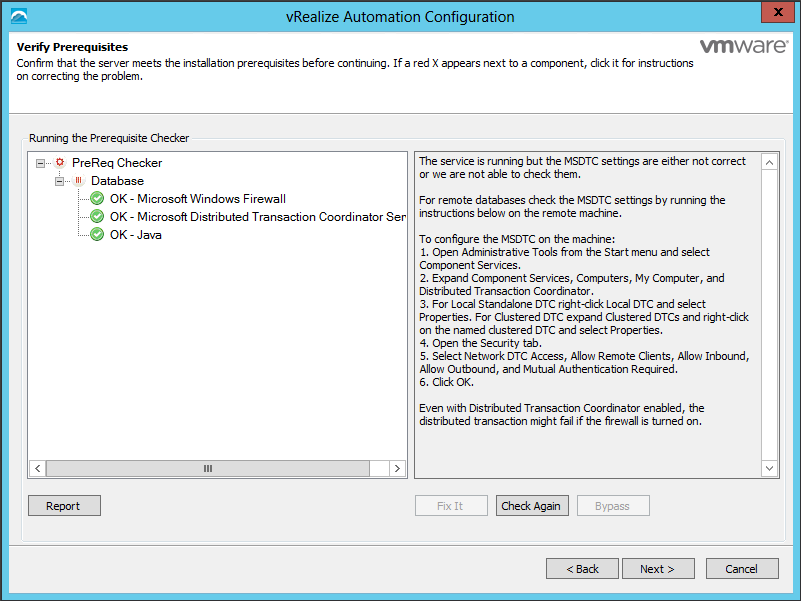
Click Run on the Run the Prerequisite Checker screen to verify that the Windows servers in your deployment are correctly configured for vRealize Automation use. Because this step runs remotely, it can take several minutes for the step to run.
|
||||||
|
11
|
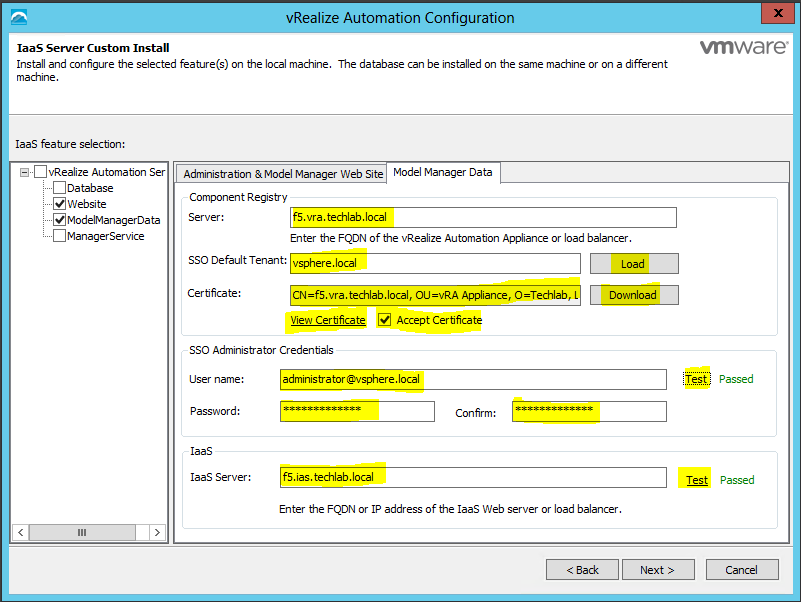
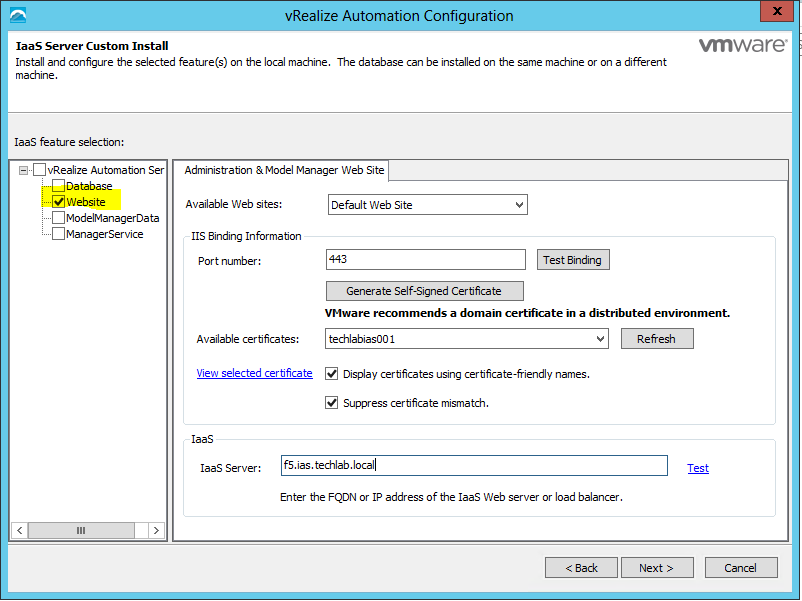
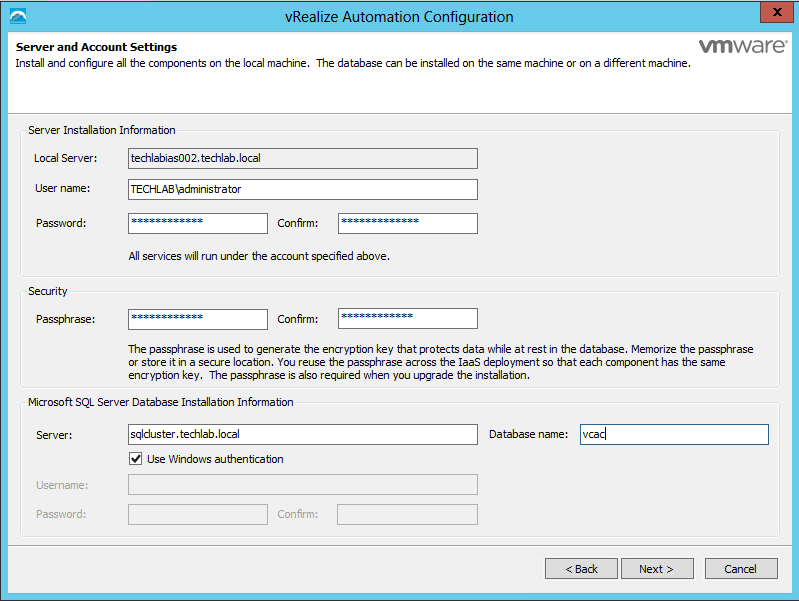
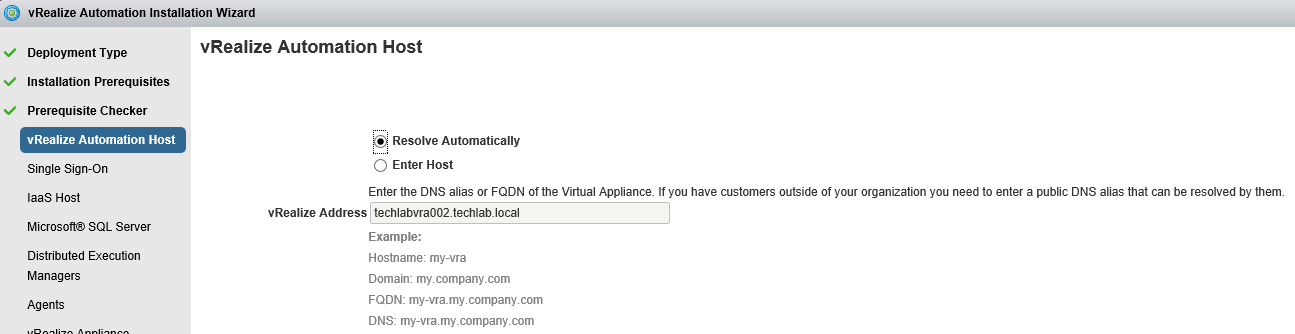
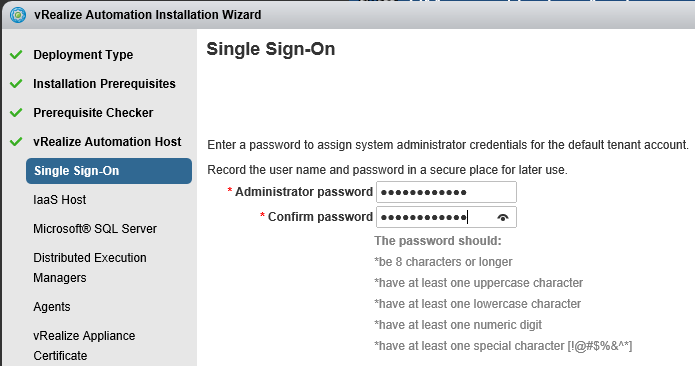
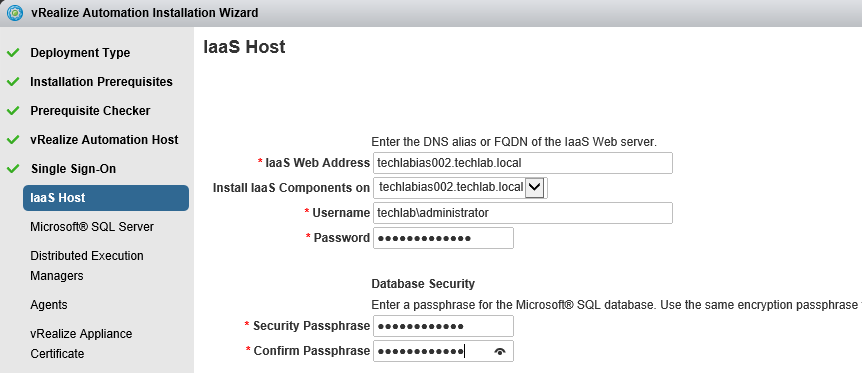
Proceed through the next screens, supplying the requested information to configure your deployment components, including the Web server, Manager Service, Distributed Execution Manager, vSphere proxy agent, and certificate information. Additional information is available from the Help buttons. DNS of the vRA appliance
SSO Password
IaaS server details
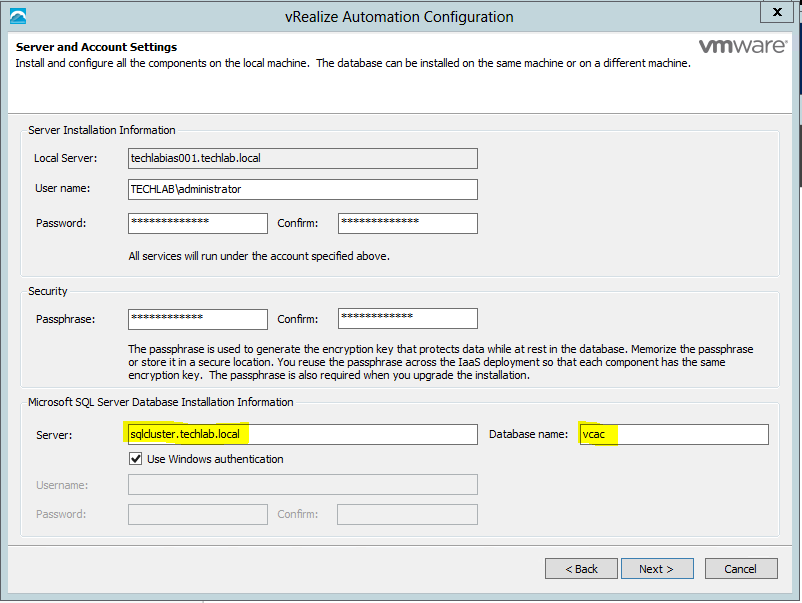
Database Information
DEM Information
Agents Information
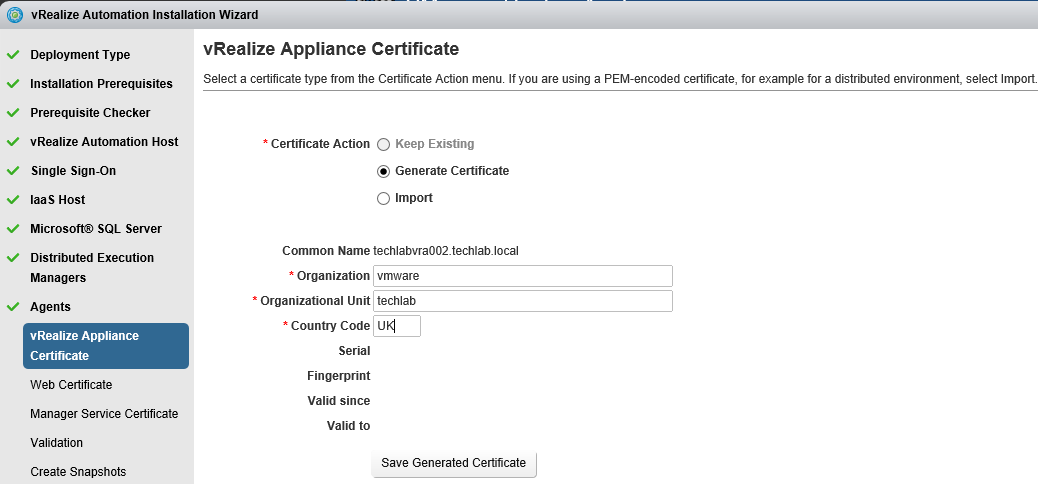
vRealize Appliance Certificate
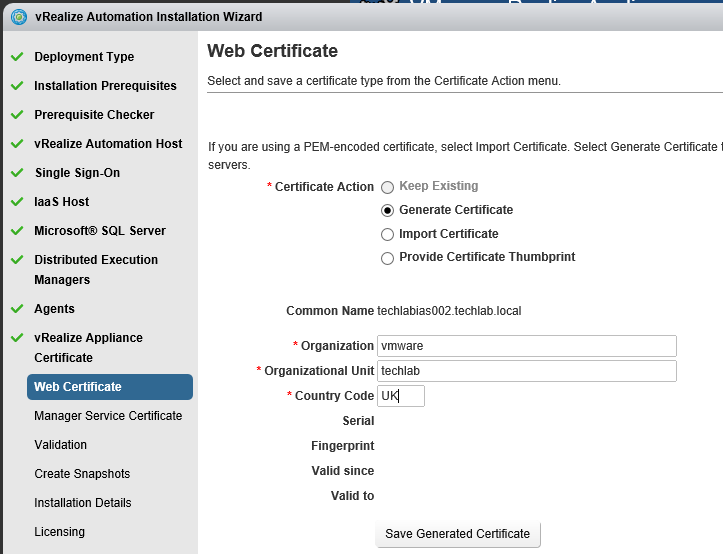
Web Certificate
Manager Service Certificate
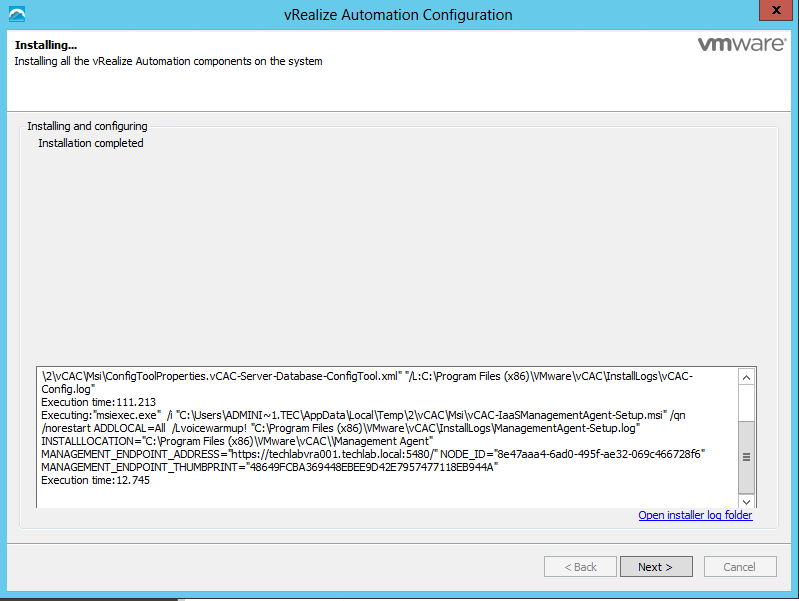
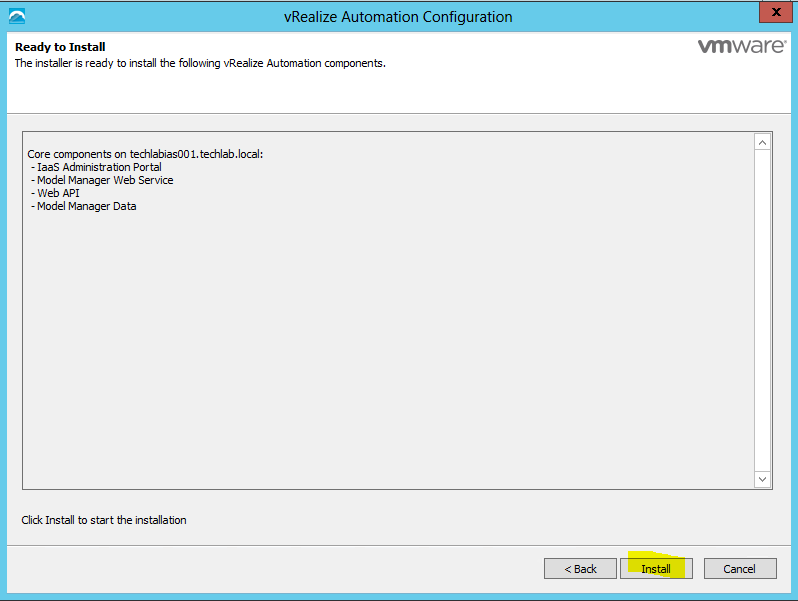
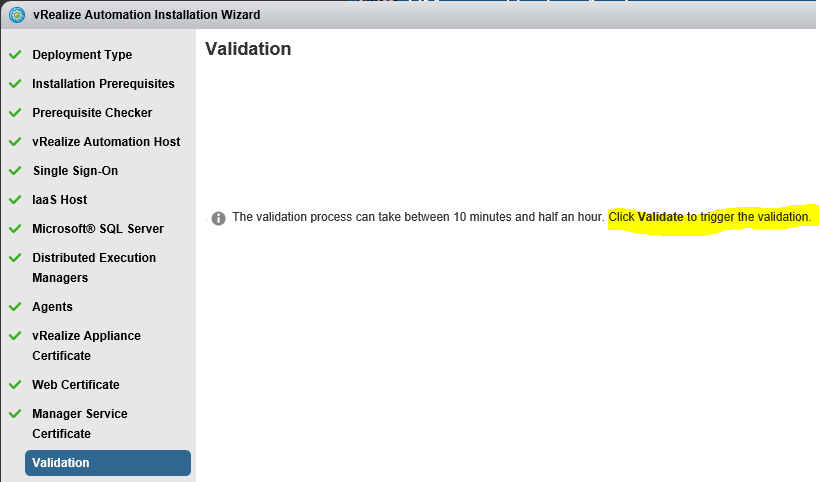
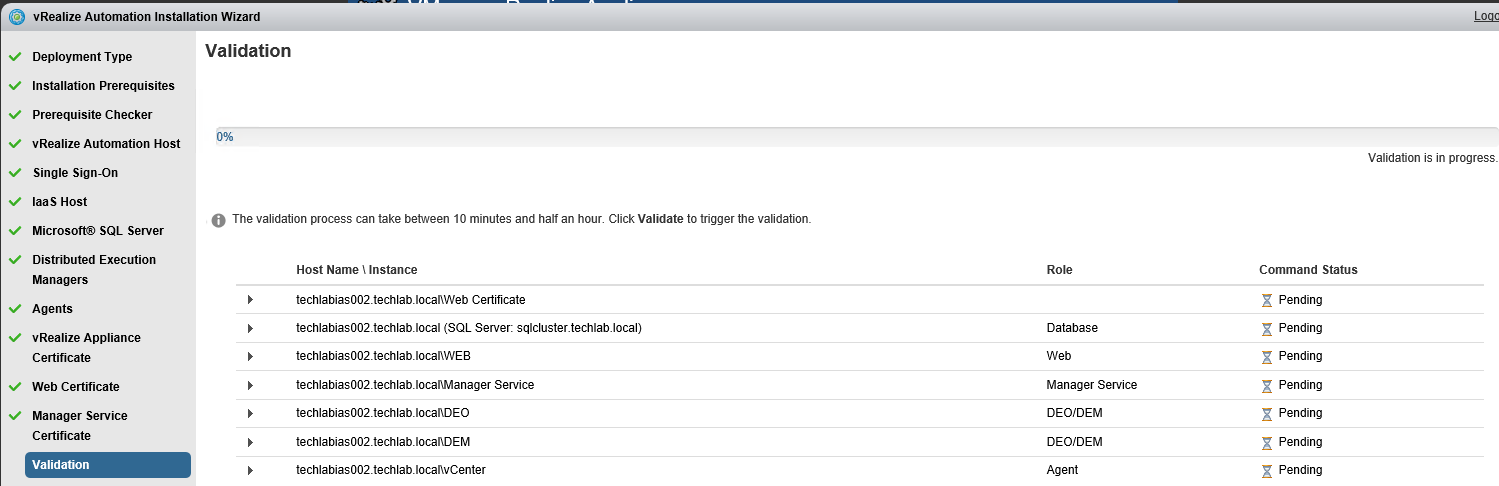
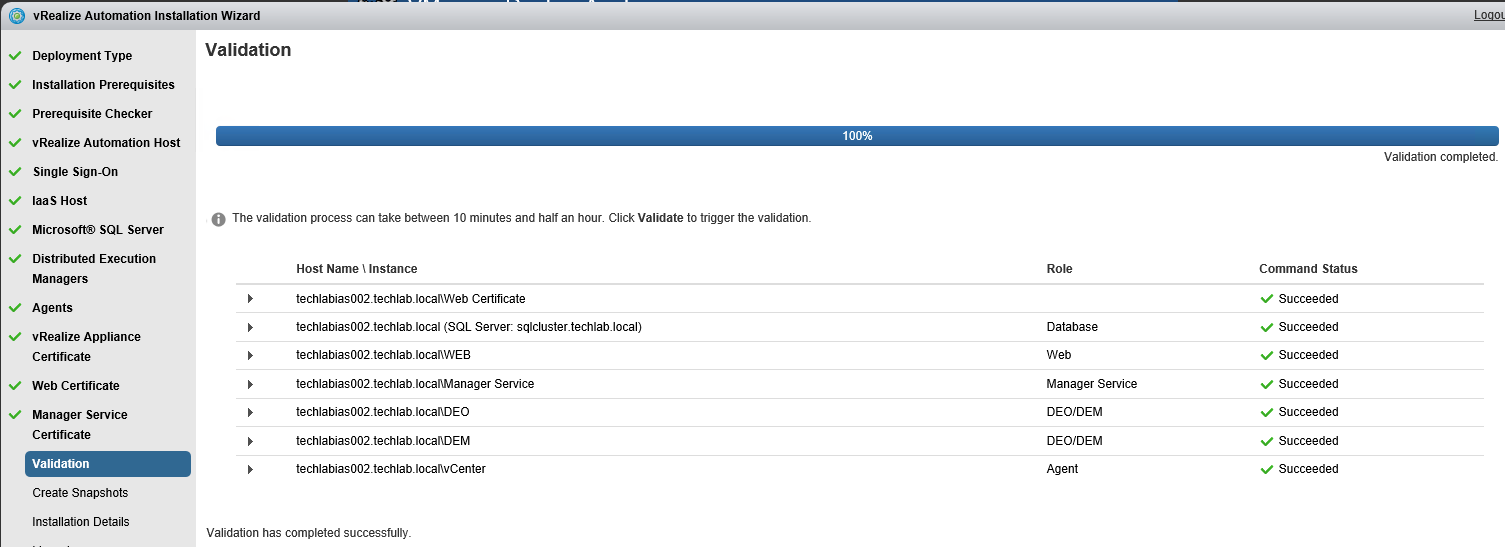
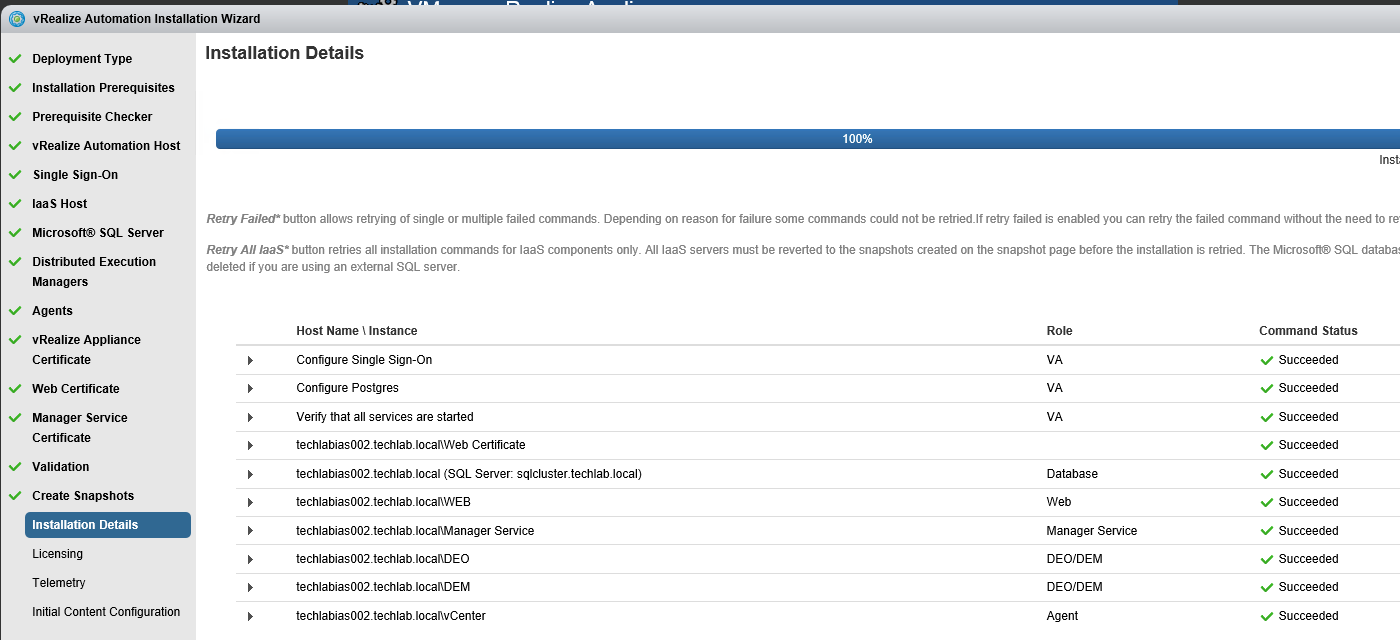
Validate: Click Validate – Can take between 10 minutes and half an hour
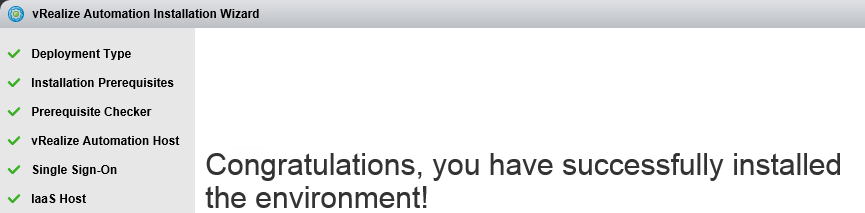
Hopefully you should then see
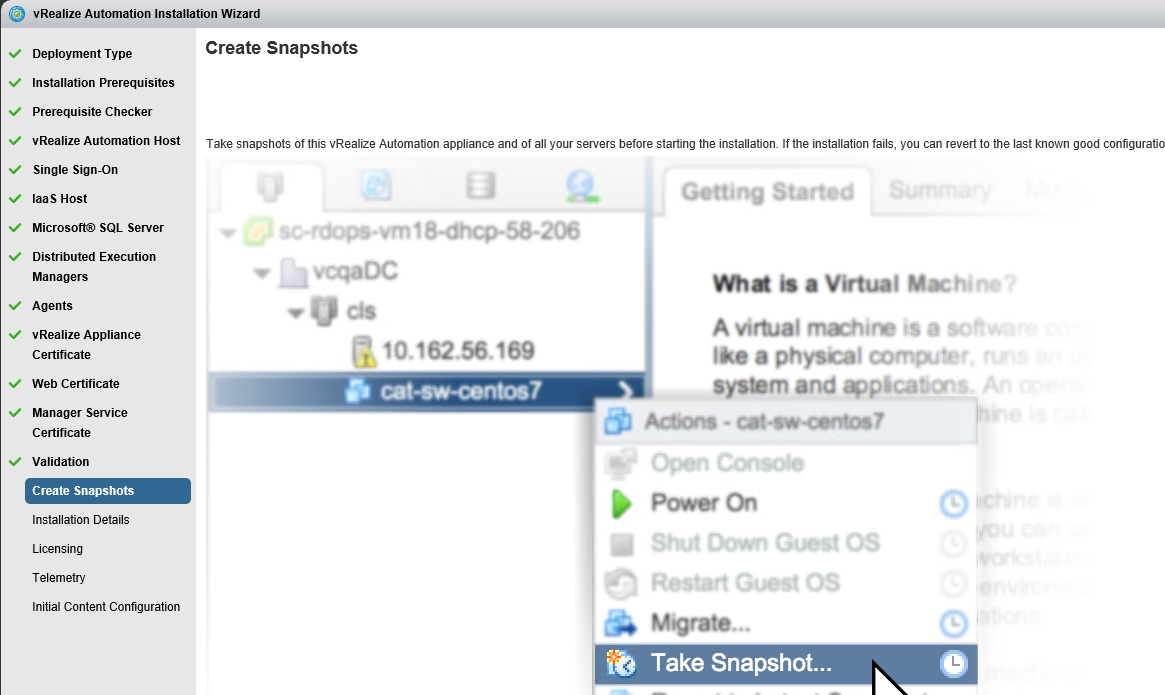
A reminder to take snapshots
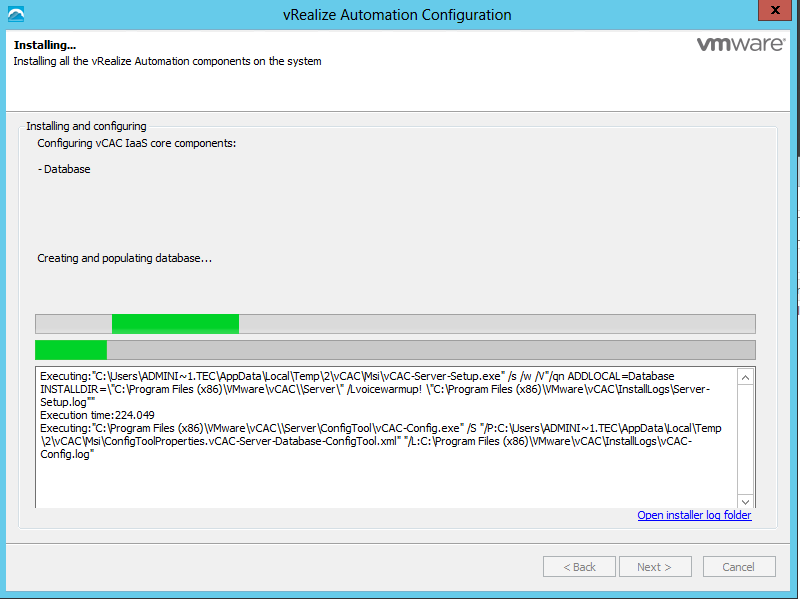
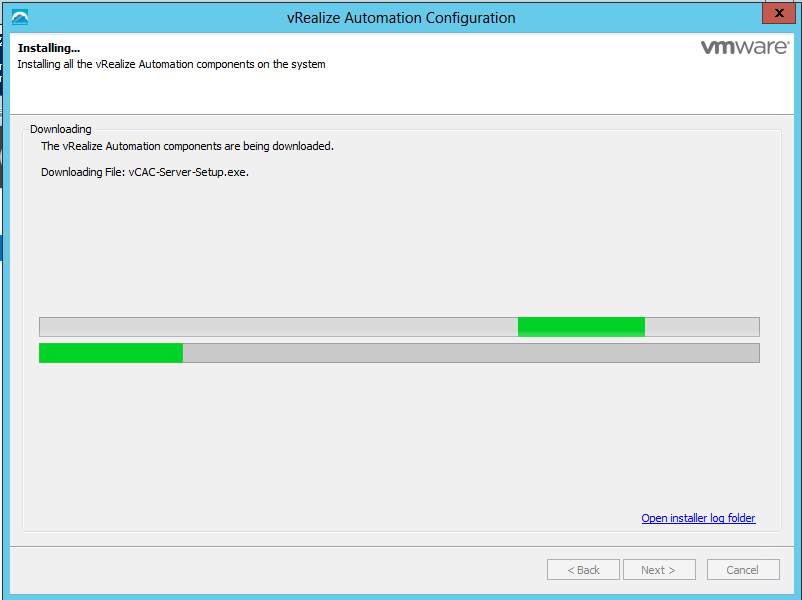
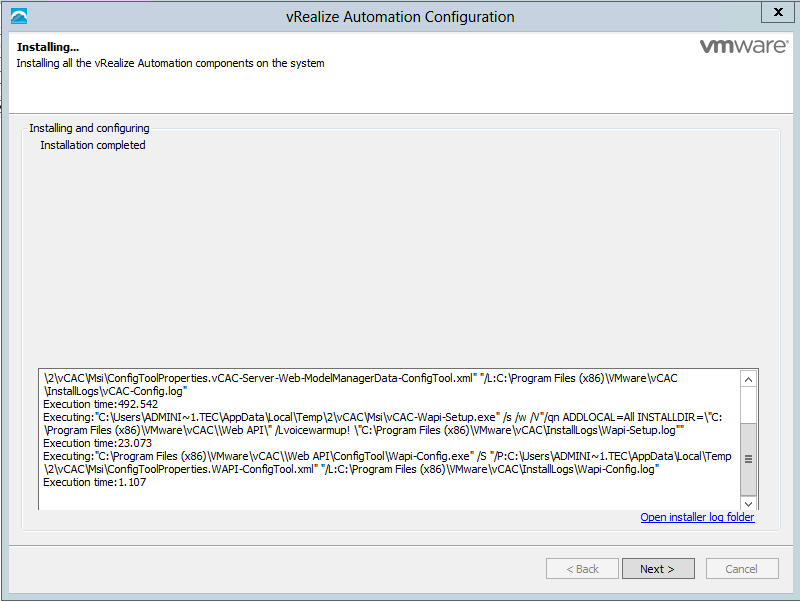
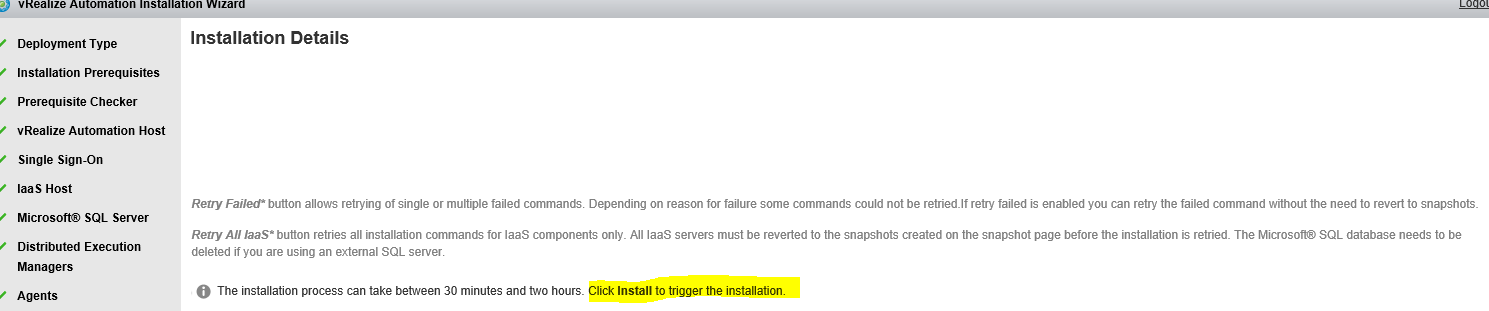
Read the message and click Install The installation can take between 30 minutes and one hour
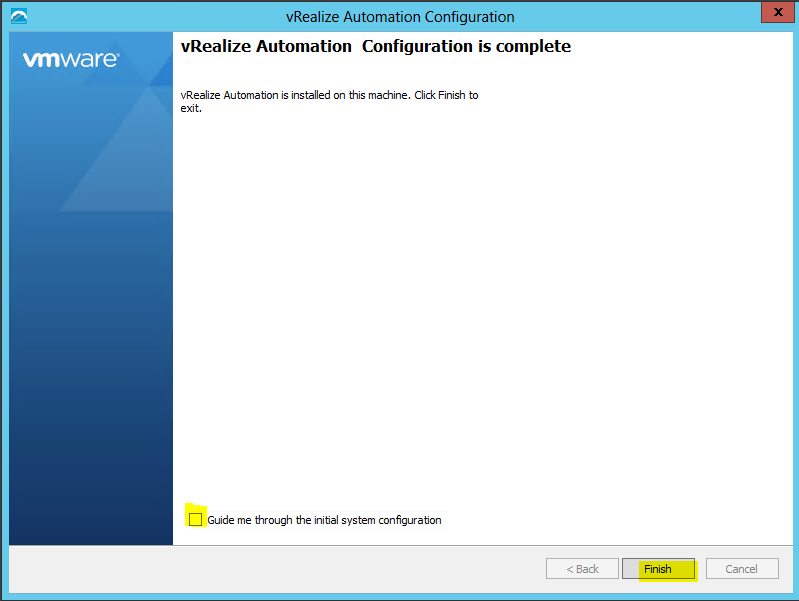
And hopefully should say completed
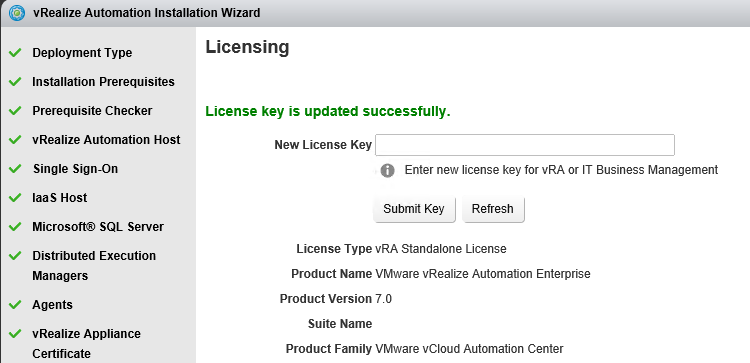
Update the license key
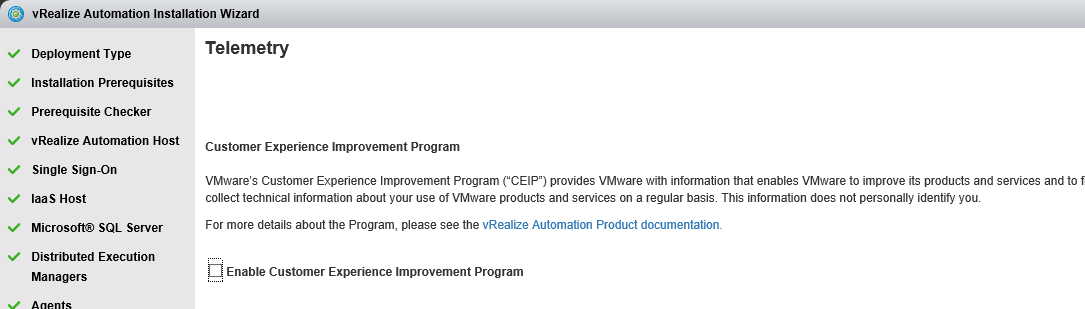
Choose Telemetry settings
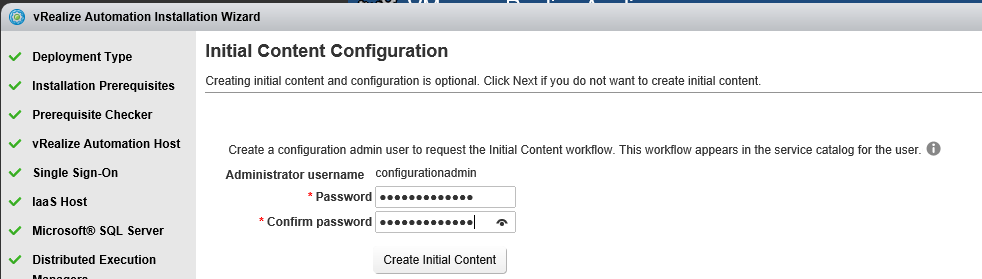
Initial Content creation Optionally, you can start an initial content workflow for a vSphere endpoint.
A configuration admin user is created and a configuration catalog item is created in the default tenant. The
configuration admin is granted the following rights:
What to do next
|


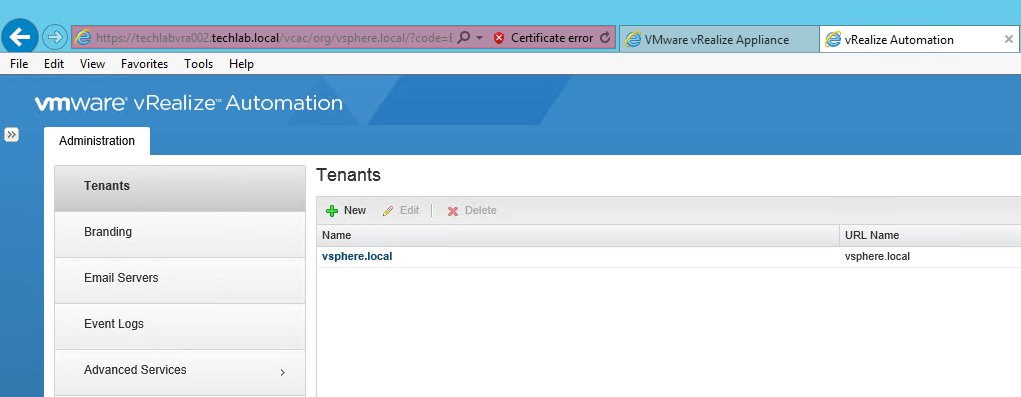
Step 12 – Login using the configurationadmin account or administrator
Note you don’t have to put administrator@vsphere.local in, just administrator and your SSO password
- Type https://vra-appliance-fqdn/vcac