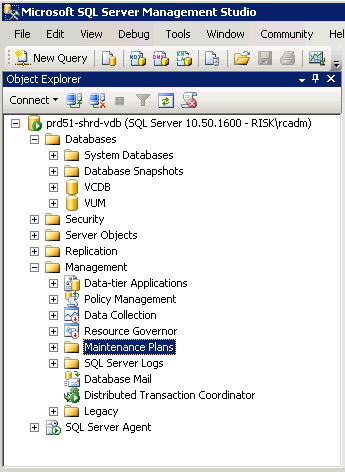
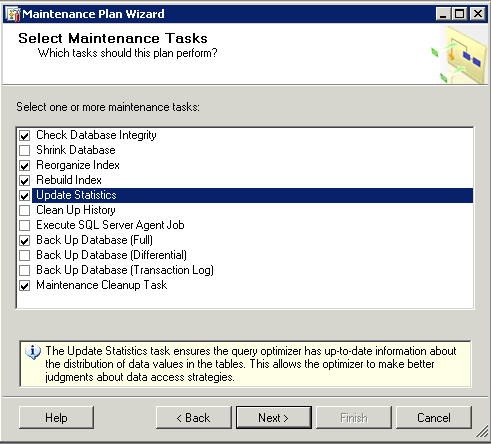
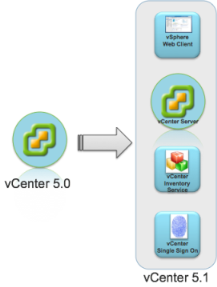
Architectural Changes
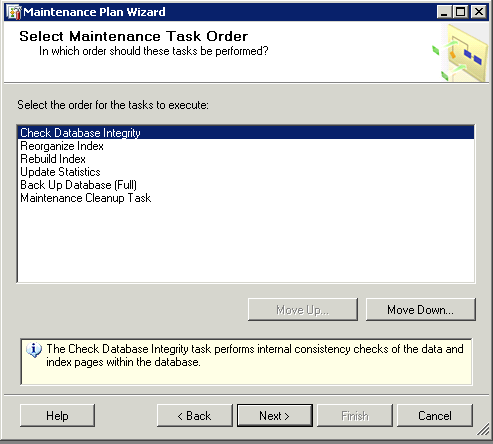
The vCenter Server 5.1 release includes significant architectural changes. You must understand these changes before attempting to freshly install or upgrade to vCenter Server 5.1 from older versions of the product. There are four separate services that constitute the vCenter Server 5.1 platform. These are below and must be installed in order
- vCenter Single Sign On (SSO)
- vCenter Inventory Service
- vCenter Server
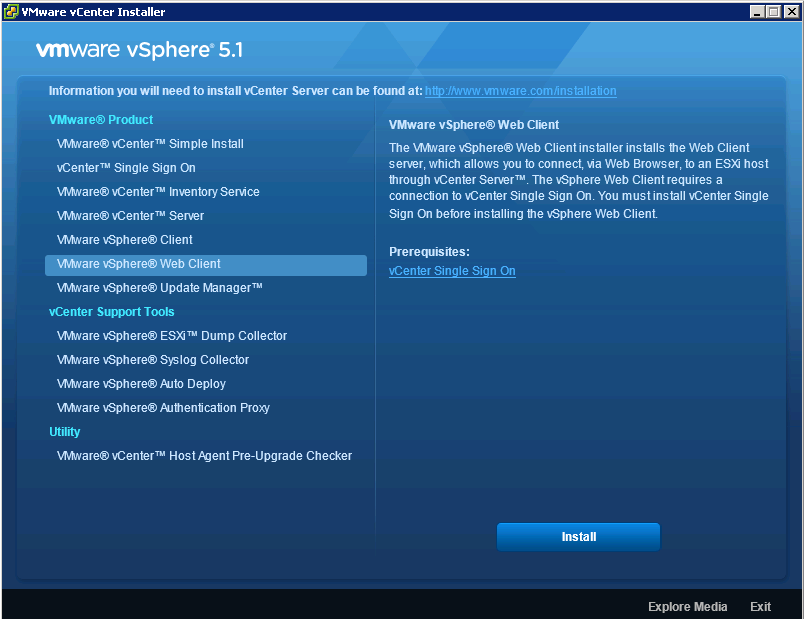
- vSphere Web Client
Pre Requisites
Before installing vCenter Server 5.1, vSphere 5.1 requires you to install vCenter Single Sign On and install the Inventory Service. You can install vCenter Single Sign On, Inventory Service, and vCenter Server all on a single host machine using the vCenter Server Simple Install option. This option is appropriate for small deployments.
Alternatively, you can install vCenter Single Sign On, vCenter Inventory Service, and vCenter Server separately to customize the location and configuration of the components. (I found this to be the best way)
You also need Adobe Flash installed for the vSphere Web Client
If you are running vCenter as a Virtual Machine in Workstation then you will need at least 2GB RAM or more!
This blog will focus on installing vCenter Single Sign On, Inventory Service, and vCenter Server all on a single host machine running Windows Server 2008 R2 Enterprise
Instructions
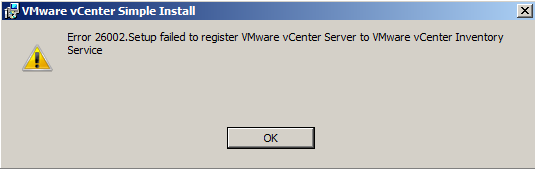
Note: It may be best to install each component separately. I encountered a few errors when I went through the Simple Install Method. See screenprint below
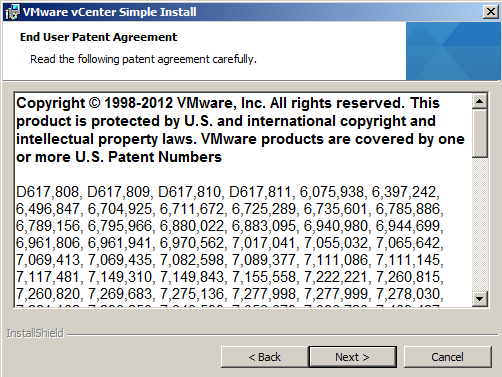
- Download the ISO or installer from the VMware website
- Make sure you have the .NET Framework installed
- Attach the ISO or run the installer on your designated vCenter Server
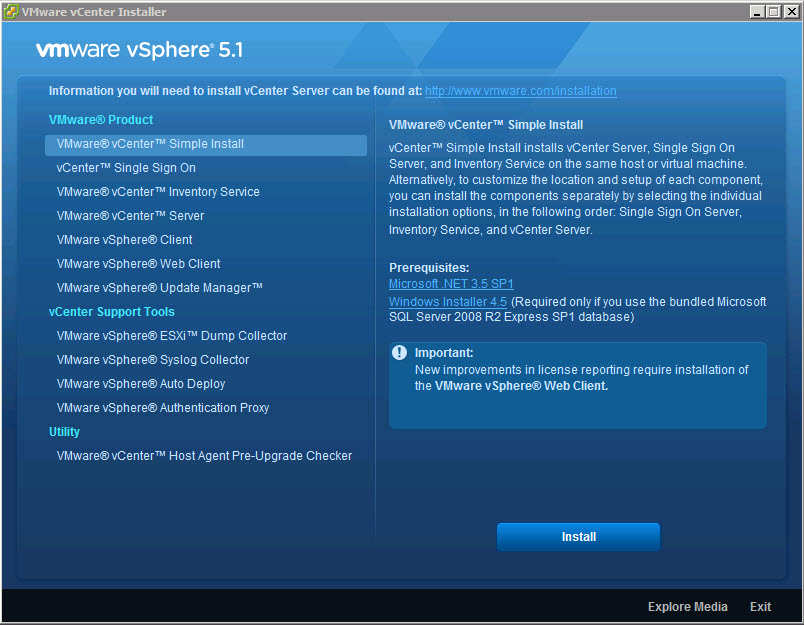
- Select VMware vCenter Server Simple Install and Click Install
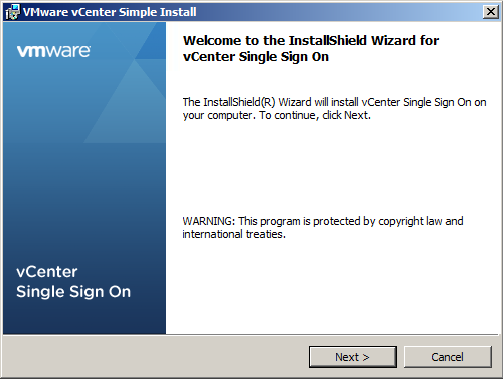
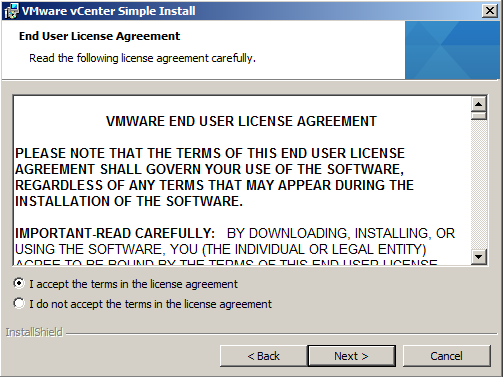
- Select I accept the terms in the license agreement and click Next
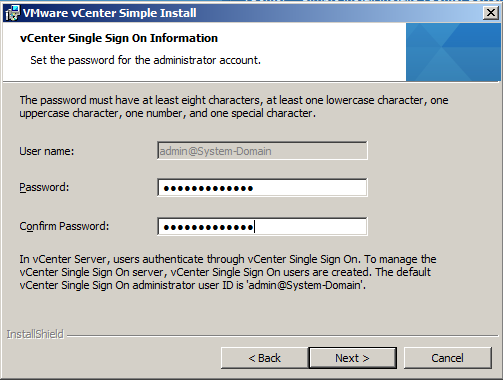
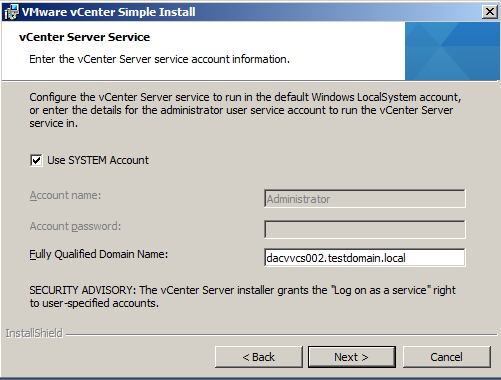
- Put in a Strong Password and click Next. This is a local account not tied to AD or the Windows host. After SSO is installed, you can configure it for one or more LDAP/AD server and other identity sources.
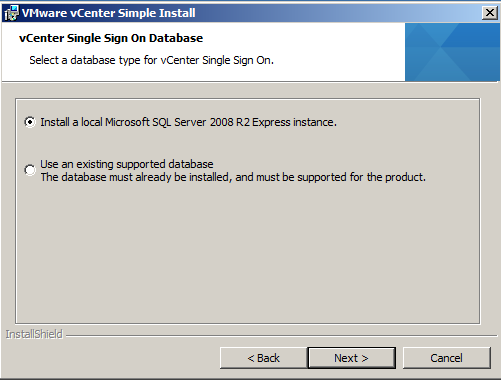
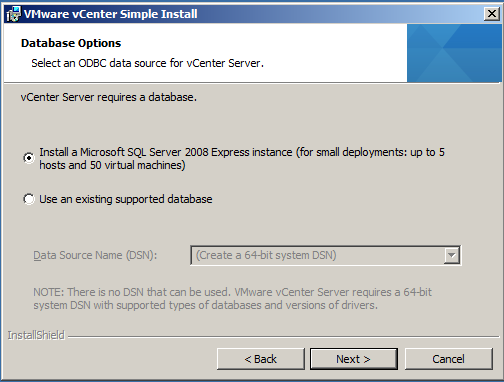
- For this demo, we will just be using the Express Instance
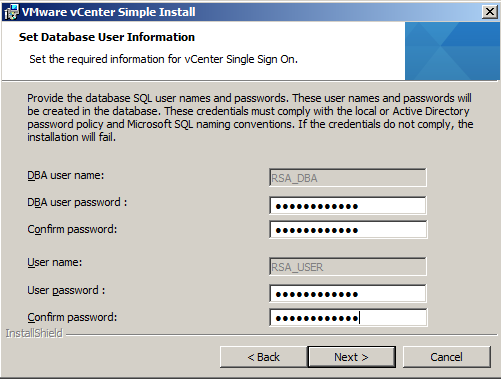
- Put in the passwords for the RSA_USER and RSA_DBA accounts
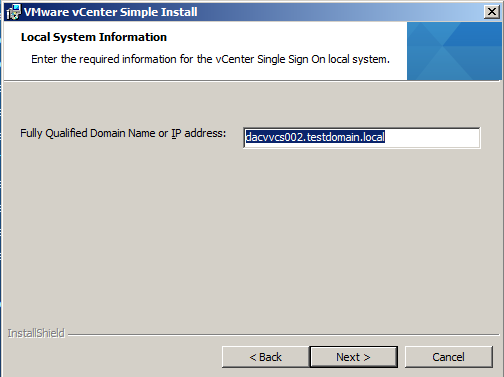
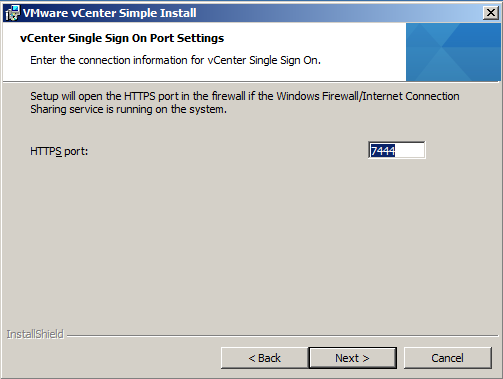
- The FQDN should be in here automatically. If you get an error saying nslookup cannot perform a lookup against this address then check your DNS server
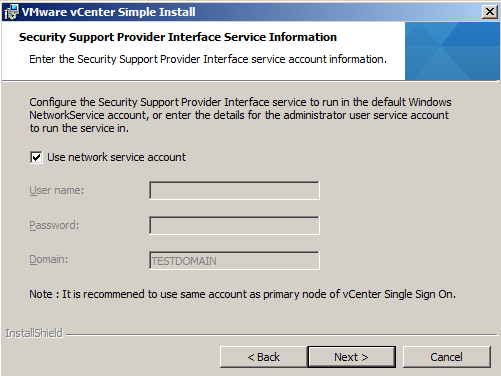
- Use Network Service Account or put in a Username and Password
- Click Next
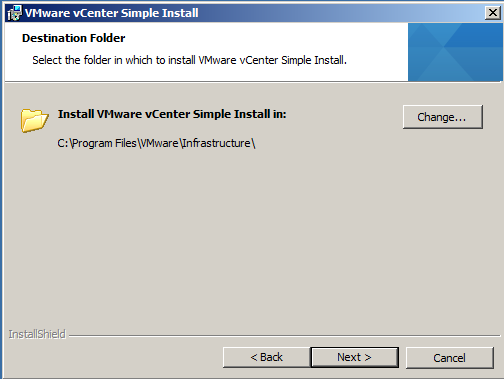
- Choose the location to save into and click Next
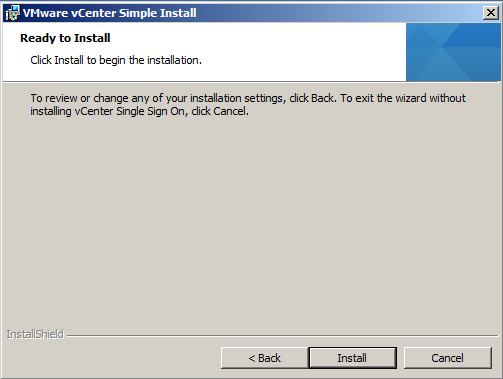
- Click Install and allow SQL DB to be installed and SSO
- When this has finished you will get the screen below
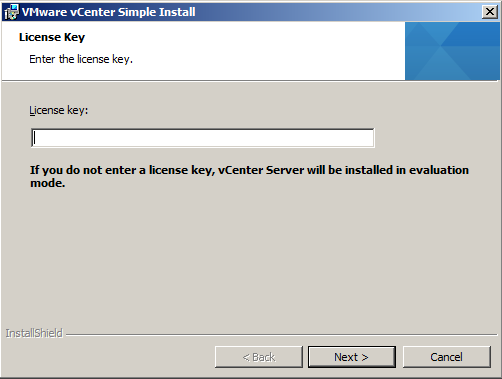
- Put in a license key or just click Next if you are using it in Evaluation Mode
- Click Install and then Finish
- Install the vSphere 5 Web Client (Just follow the prompts)
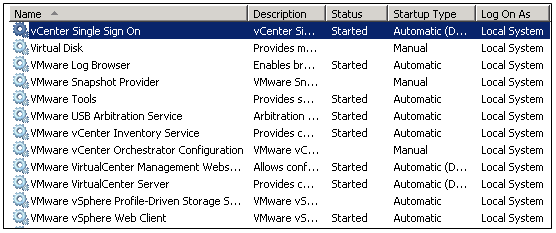
- Next check all the vCenter and Webservices and SSO are running
- Install the vSphere 5 client
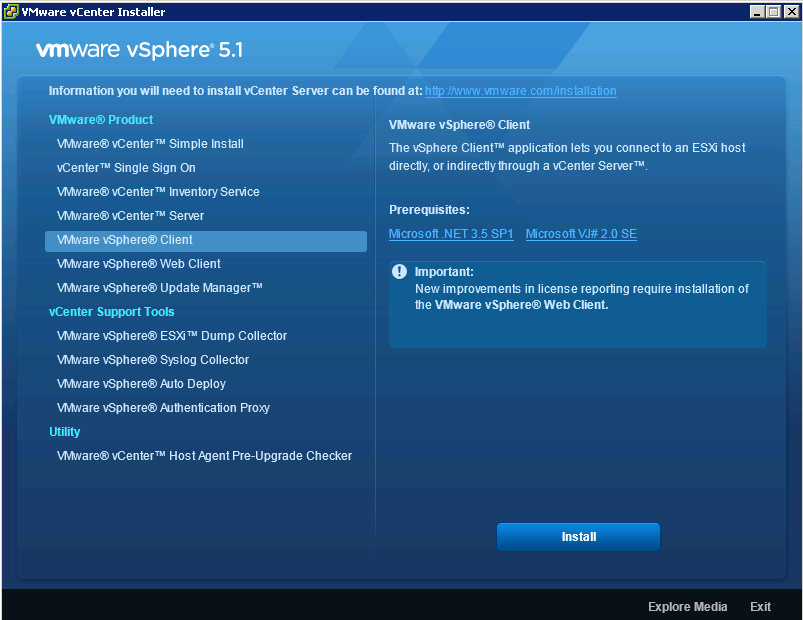
- Make sure you have downloaded and installed Adobe Flash
- Just a quick point, make sure your vCenter Server has +2GB RAM or things just don’t work very well especially if you are running SSO, Inventory and vCenter on the same box as a test
- You also may need to adjust your firewall for port 9443
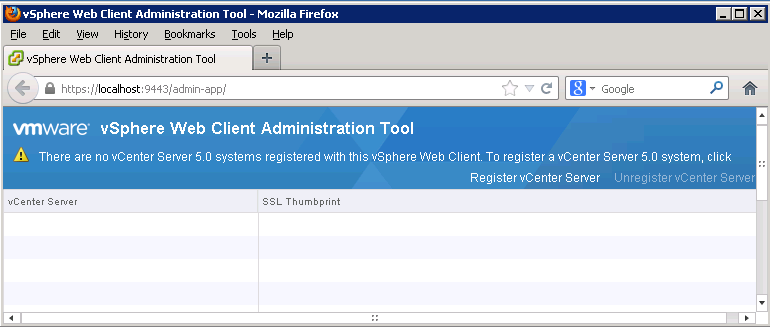
- If you are running 5.1 rather than 5.0, it is best to log into the vSphere Web Client first before on https://localhost:9443/vsphere-client/ using your SSO Login admin@System-Domain + inital setup password before logging into the vSphere Web Admin Assistant on https://localhost:9443/admin-app or you will get an error such as the below
The vSphere Web Client Administration Tool only supports registration of vCenter
Server version 5.0. For newer versions, the vCenter Server system must be regi
stered with the Lookup Service to allow the vSphere Web Client to discover the s
ystem.
- Log into vSphere web client as admin (admin@System-Domain, this is the default user added during install of vcenter)
- Go to Administration -> SSO Users and Groups
- Go to Groups tab and click on __Administrators__
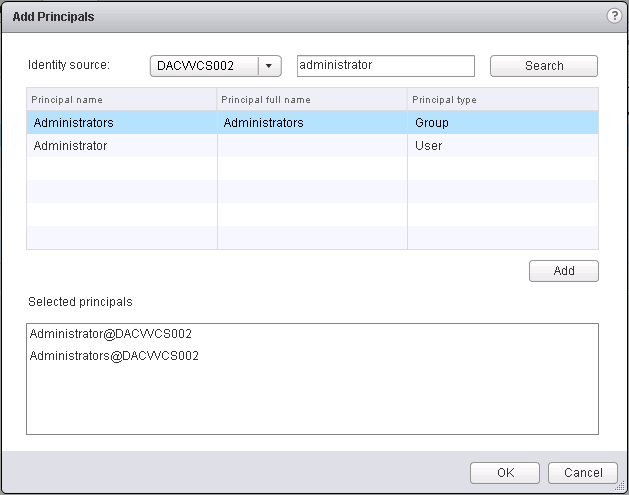
- Click on the little man icon to Add Principals
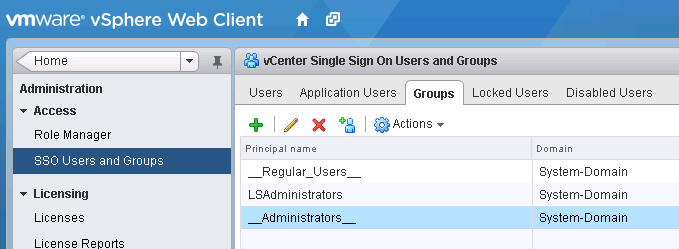
- Select the local vCenter server as the identity source and search for a local user. See Screenprint) you can add your Admins Group or any other group
- Then add that user and click OK.
- Log in as the local user.
- You should see the vCenter listed after you log in, if not, you may need to reboot.
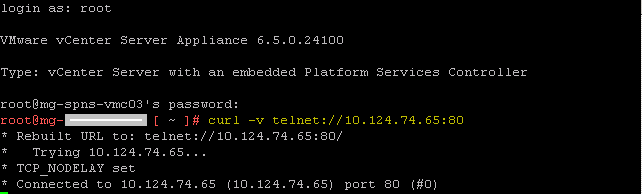
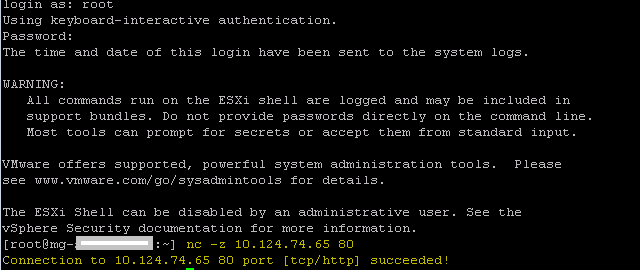
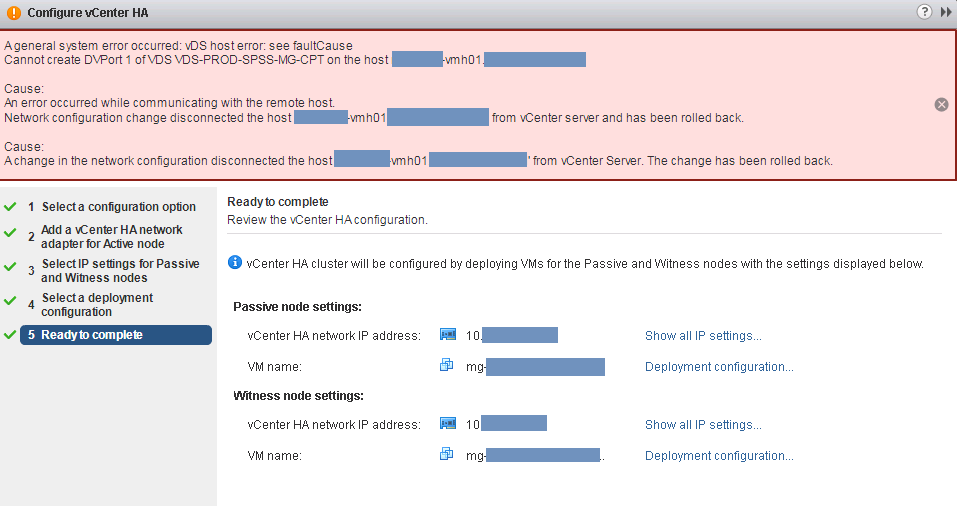
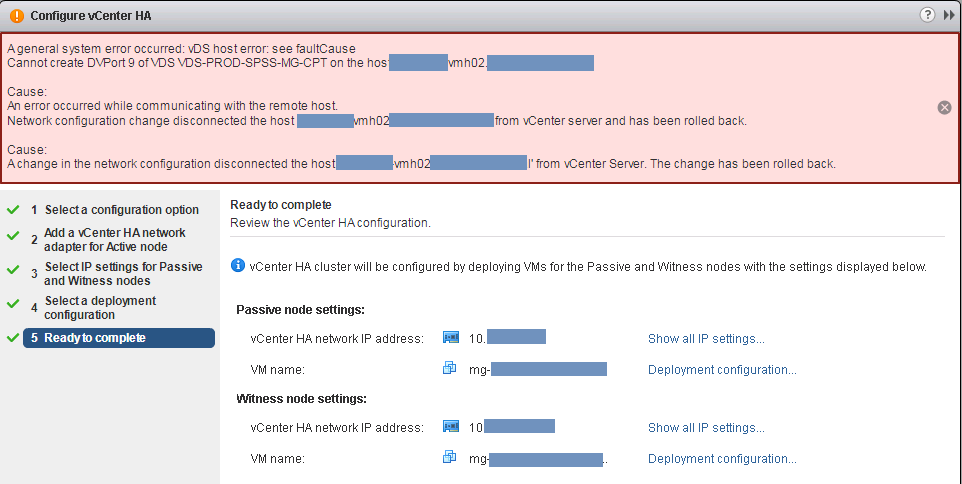
Useful VMware KB for troubleshooting known certificate error
http://blogs.vmware.com/kb/2012/10/implementing-ca-signed-ssl-certificates-with-vsphere-5-1.html
SSO Issues (Cannot log in using Domain account to vClient etc)
http://blogs.vmware.com/kb/2012/10/vsphere-sso-resources.html
http://longwhiteclouds.com/2012/09/26/vsphere-5-1-gotcha-with-single-sign-on-sso/
- Go to Administration
- Single Sign On and Discovery > Configuration
- Click the + sign to add a new identity source. E.g Active Directory Server.
- Fill in as per your domain. Note my lab domain is dacmt.local
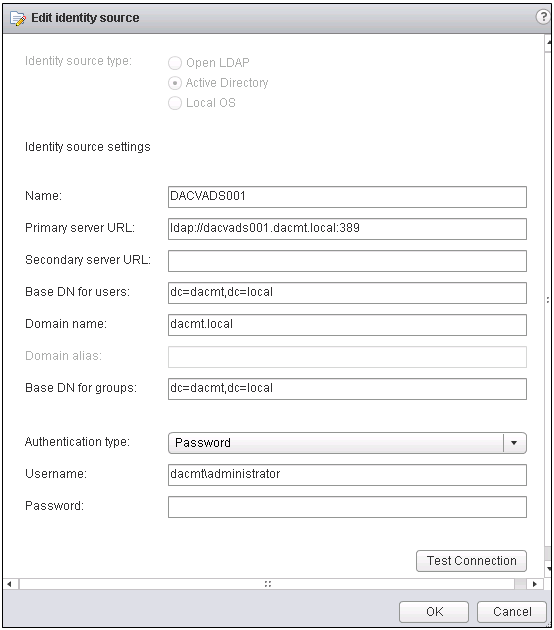
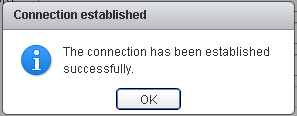
- Click Test Connection
- Wait for it to say Connection successful
- Change the order of the domains so AD is at the top
Registering vCenter Server 5 (Not 5.1)
- Log into the vSphere Web Admin Assistant on https://localhost:9443/admin-app
- Click Register vCenter
- Enter the vCenter FQDN
- Enter the Username and Password
- Enter the vCenter hostname
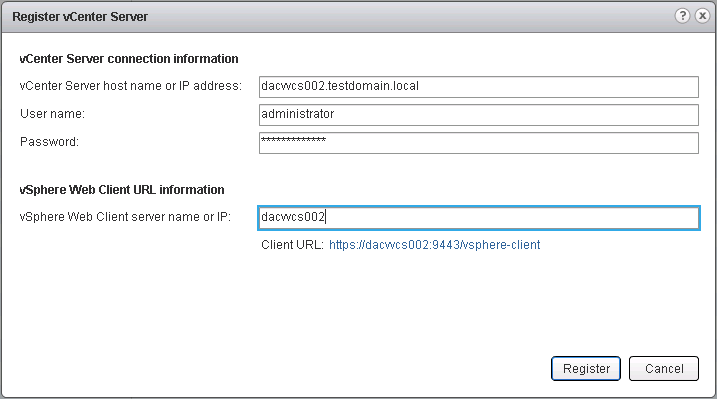
- Click Register
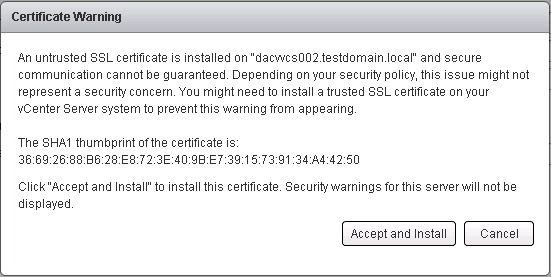
- Accept the certificate
Can you run vCenter 5 on Windows Servers 2012?
vCenter isn’t officially supported on Server 2012
What you will find is that the installation fails just before it tries to install the vSphere Profile-Driven Storage Service.
The reason why
To install that service, the vCenter service needs to be running. However, the vCenter service does not start properly in Windows Server 2012. This is due to a missing dependency. In particular, the VirtualCenter Server service relies on the ProtectedStorage service which was removed from Win8/Server 2012. The work around is the following open regedit and go to \System\CurrentControlSet\Services\vpxd and then open the DependOnService key and remove ProtectedStorage from the list. Reboot the machine and the vCenter service should come alive (might take a while). Then restart only the vCenter installation again once everything has come up (you need to wait for vCenter service to come alive which can take a few minutes). The install will continue from where it kicked off and finish
So the short version is, when the vCenter install fails, go to registry and remove ProtectedStorage dependency from the vpxd service, reboot and it should work. Restart the vcenter install and it will finish as per normal.