
What do we need to build a custom image?
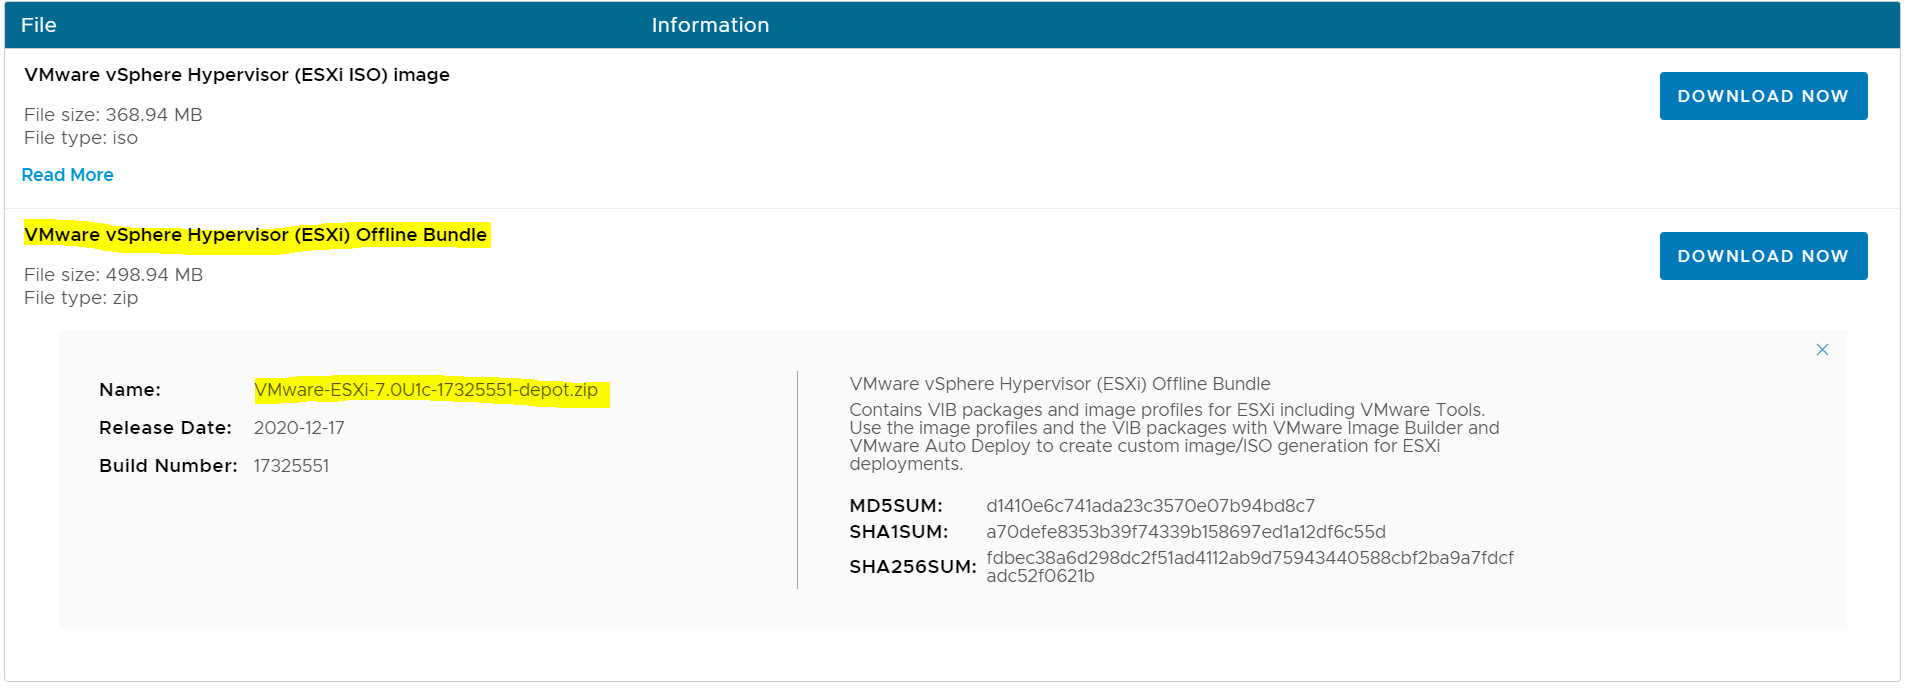
- An ESXi image (Download from myvmware.com) and use the depot zip
- VMware PowerCLI and the ESXi Image Builder module
For more information on setting this up, see this blog. Thanks to Michelle Laverick.
- Other software depots
The vSphere ESXi depot is the main software depot you will need but there are other depots provided by vendors who create collections of VIBs specially packaged for distribution. Depots can be Online and Offline. An online software depot is accessed remotely using the HTTP protocol. An offline software depot is downloaded and accessed locally. These depots have the vendor specific VIBs that you will need to combine with the vSphere ESXi depot in order to create your custom installation image. An example could be HP’s depot on this link
What are VIBS?
VIB actually stands for vSphere Installation Bundle. It is basically a collection of files packaged into a single archive to facilitate distribution. It is composed of 3 parts
- A file archive (The files which will be installed on the host)
- An xml descriptor file (Describes the contents of the VIB. It contains the requirements for installing the VIB and identifies who created the VIB and the amount of testing that’s been done including any dependencies, any compatibility issues, and whether the VIB can be installed without rebooting.)
- A signature file (Verifies the acceptance level of the VIB) There are 4 acceptance levels. See next paragraph
Acceptance levels
Each VIB is released with an acceptance level that cannot be changed. The host acceptance level determines which VIBs can be installed to a host.
VMwareCertfied
The VMwareCertified acceptance level has the most stringent requirements. VIBs with this level go through thorough testing fully equivalent to VMware in-house Quality Assurance testing for the same technology. Today, only I/O Vendor Program (IOVP) program drivers are published at this level. VMware takes support calls for VIBs with this acceptance level.
VMwareAccepted
VIBs with this acceptance level go through verification testing, but the tests do not fully test every function of the software. The partner runs the tests and VMware verifies the result. Today, CIM providers and PSA plug-ins are among the VIBs published at this level. VMware directs support calls for VIBs with this acceptance level to the partner’s support organization.
PartnerSupported
VIBs with the PartnerSupported acceptance level are published by a partner that VMware trusts. The partner performs all testing. VMware does not verify the results. This level is used for a new or nonmainstream technology that partners want to enable for VMware systems. Today, driver VIB technologies such as Infiniband, ATAoE, and SSD are at this level with nonstandard hardware drivers. VMware directs support calls for VIBs with this acceptance level to the partner’s support organization.
CommunitySupported
The CommunitySupported acceptance level is for VIBs created by individuals or companies outside of VMware partner programs. VIBs at this level have not gone through any VMware-approved testing program and are not supported by VMware Technical Support or by a VMware partner.
Steps to create an custom ESXi image
- I have an ESXI 7.0U1c software depot zip file and I am going to use an Intel VIB which I will add into the custom image

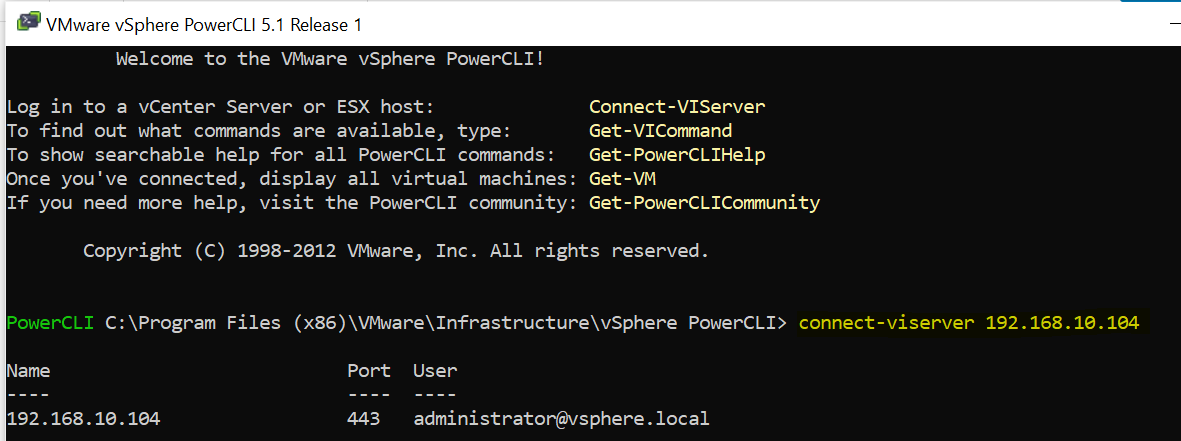
2. Open PowerCLI and connect to your vCenter
Connect-VIServer <vCenterServer>
3. Next I add my vSphere ESXi and Intel software depot zips
Add-EsxSoftwareDepot c:\Users\rhian\Downloads\VMware-ESXi-7.0U1c-17325551-depot.zip
Add-EsxSoftwareDepot c:\Users\rhian\Downloads\intel-nvme-vmd-en_2.5.0.1066-1OEM.700.1.0.15843807_17238162.zip


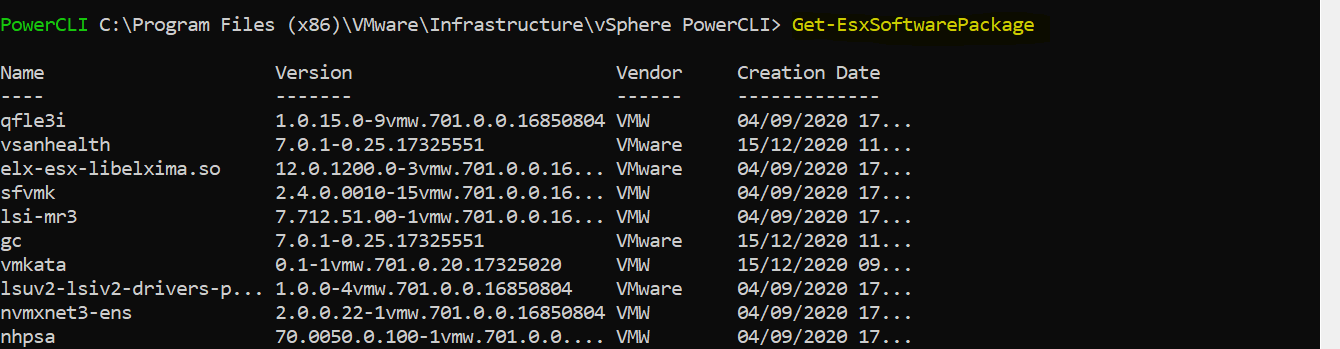
4. If you want to check what packages are available once the software depots have been added.
Get-EsxSoftwarePackage
5. Next we can check what image profiles are available. We are going to clone one of these profiles
Get-EsxImageProfile

6. There are two ways to create a new image profile, you can create an empty image profile and manually specify the VIBs you want to add, or you can clone an existing image profile and use that. I have cloned an existing image profile
New-EsxImageProfile -CloneProfile ESXi-7.0U1c-17325551-standard -name esxi701c-imageprofile -vendor vmware -AcceptanceLevel PartnerSupported
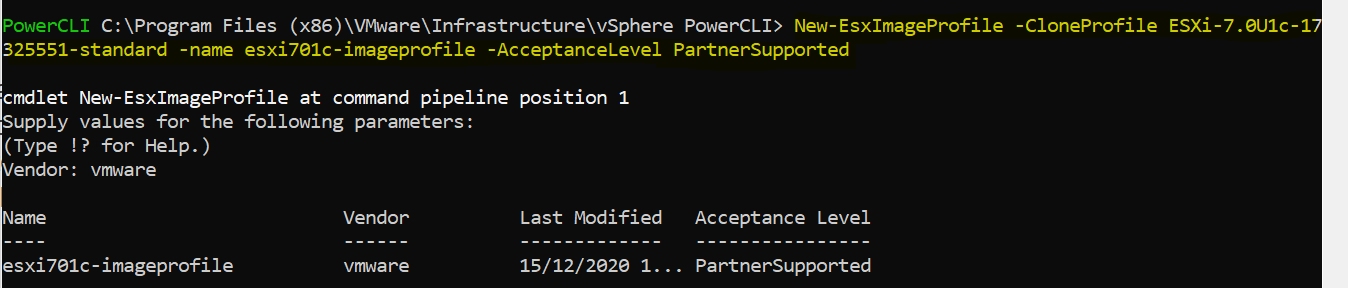
If I do a Get-EsxImageProfile now, I can see the new image profile I created

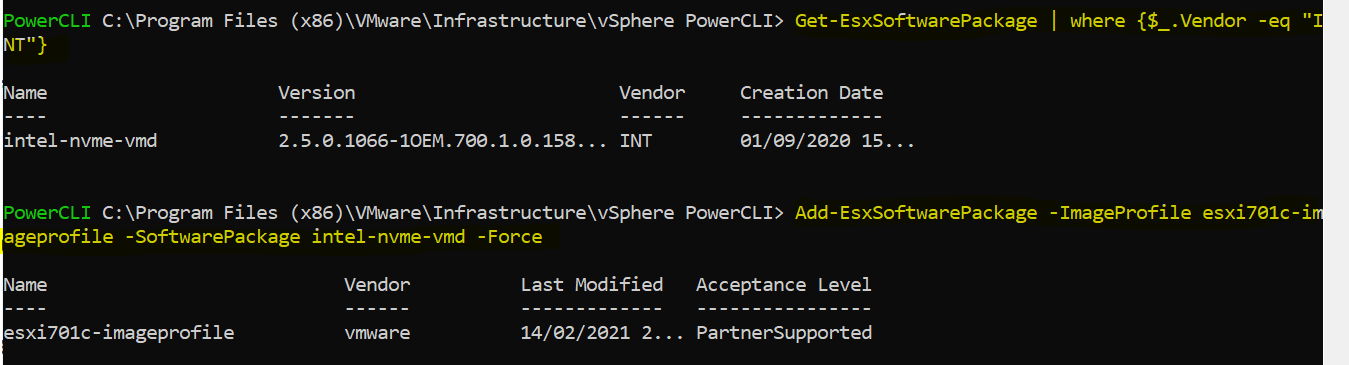
7. Next, I’ll use the Add-EsxSoftwarePackage to add and remove VIBs to/from the image profile. First of all I’ll check my extra Intel package to get the driver name then I will add the software package
Get-EsxSoftwarePackage | where {$_.Vendor -eq “INT”}
Add-EsxSoftwarePackage -ImageProfile esxi701c-imageprofile -SoftwarePackage intel-nvme-vmd -Force
8. We now have the option to export the profile as a zip or an iso.
Export-EsxImageProfile -ImageProfile esxi701c-imageprofile -FilePath c:\Users\rhian\Downloads\esxi701c-imageprofile.zip -ExportToBundle -Force -NoSignatureCheck
Export-EsxImageProfile -ImageProfile esxi701c-imageprofile -FilePath c:\Users\rhian\Downloads\esxi701c-imageprofile.iso -ExportToIso -Force -NoSignatureCheck


9. Just as a note, If you need to change the acceptance level, then you can do so by running the following command before creating the iso or zip. The example below shows changing the imageprofile to the PartnerSupport acceptance level.
Set-EsxImageProfile -AcceptanceLevel PartnerSupported –ImageProfile esxi701c-imageprofile

Useful tip
Typing history in PowerCLI will show you all the commands you have typed. Very handy to check mistakes or save the commands for future use.


