Deploying Orchestrator 6.0.3 into vSphere 6
Software versions in my lab environment
- vCenter v6.0.0, 3018524
- vSphere Hosts v6.0.0, 3029758
- VMware-vCO-Appliance-6.0.3.0-3000579_OVF10.ovf
and
Instructions
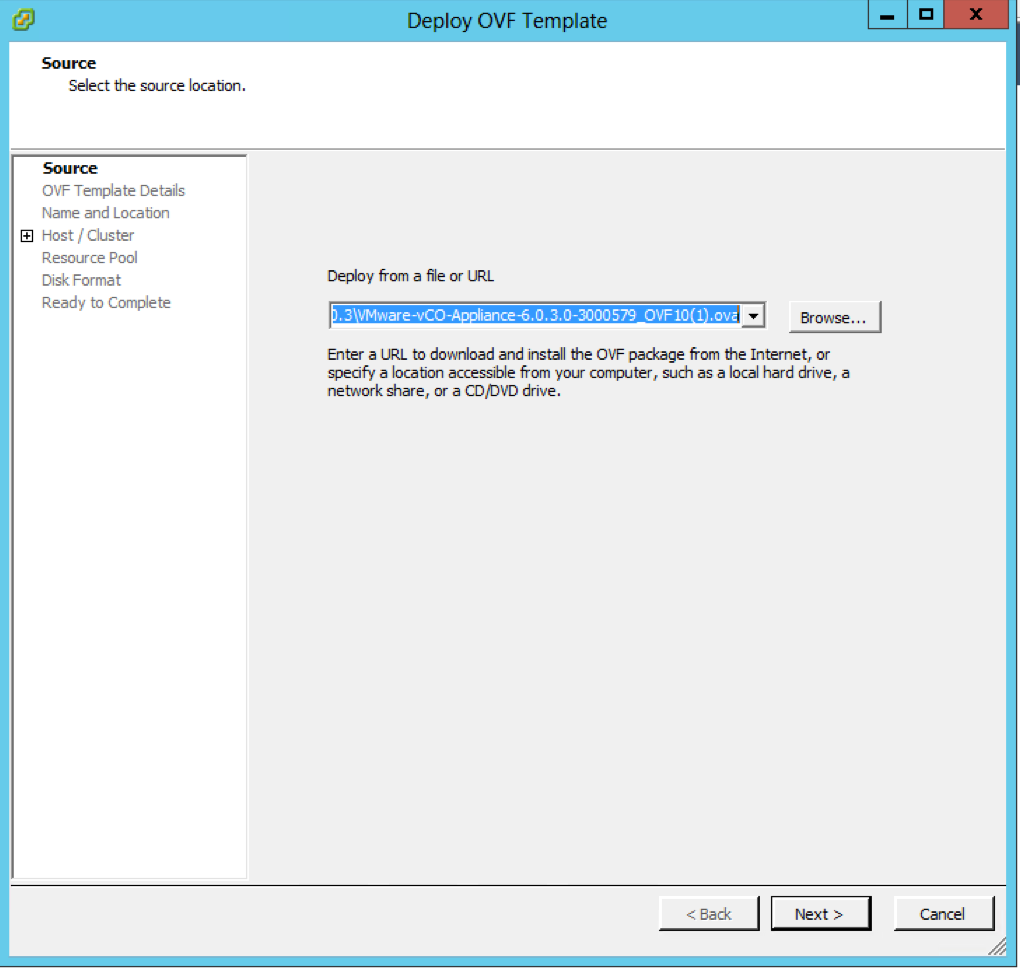
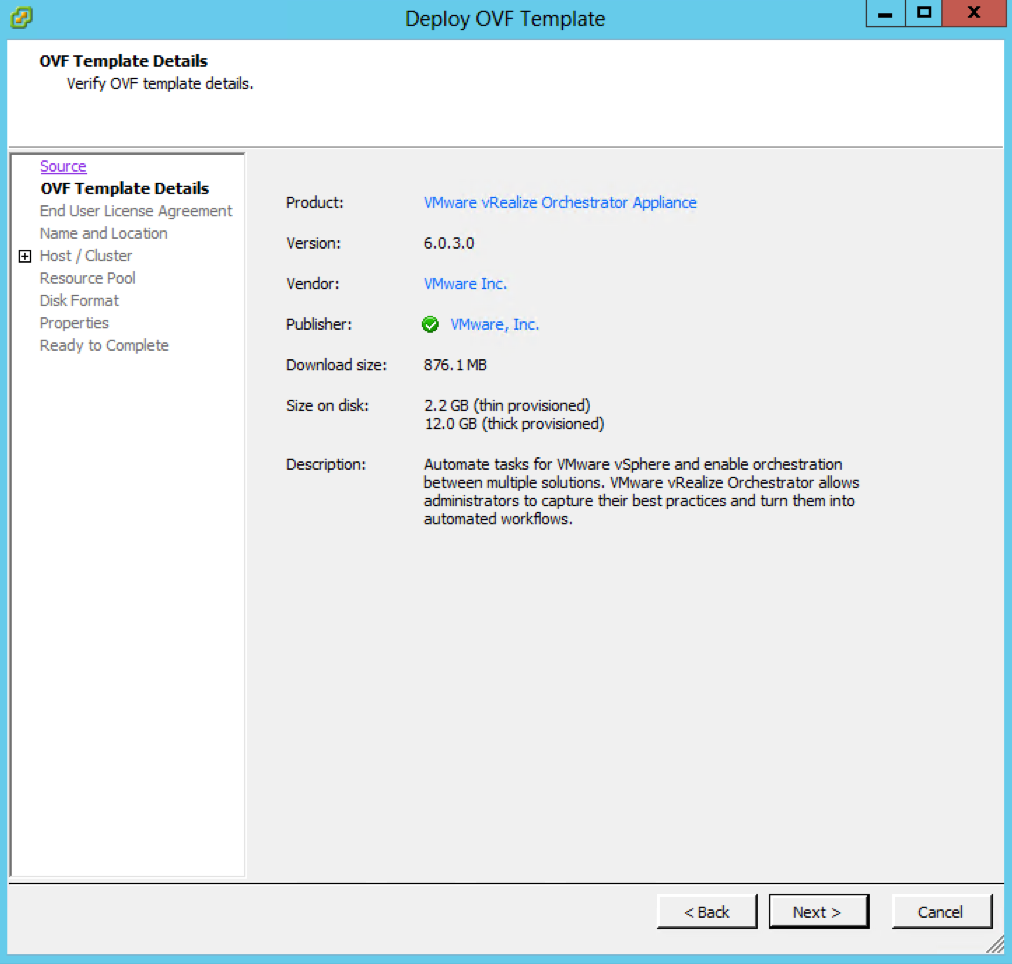
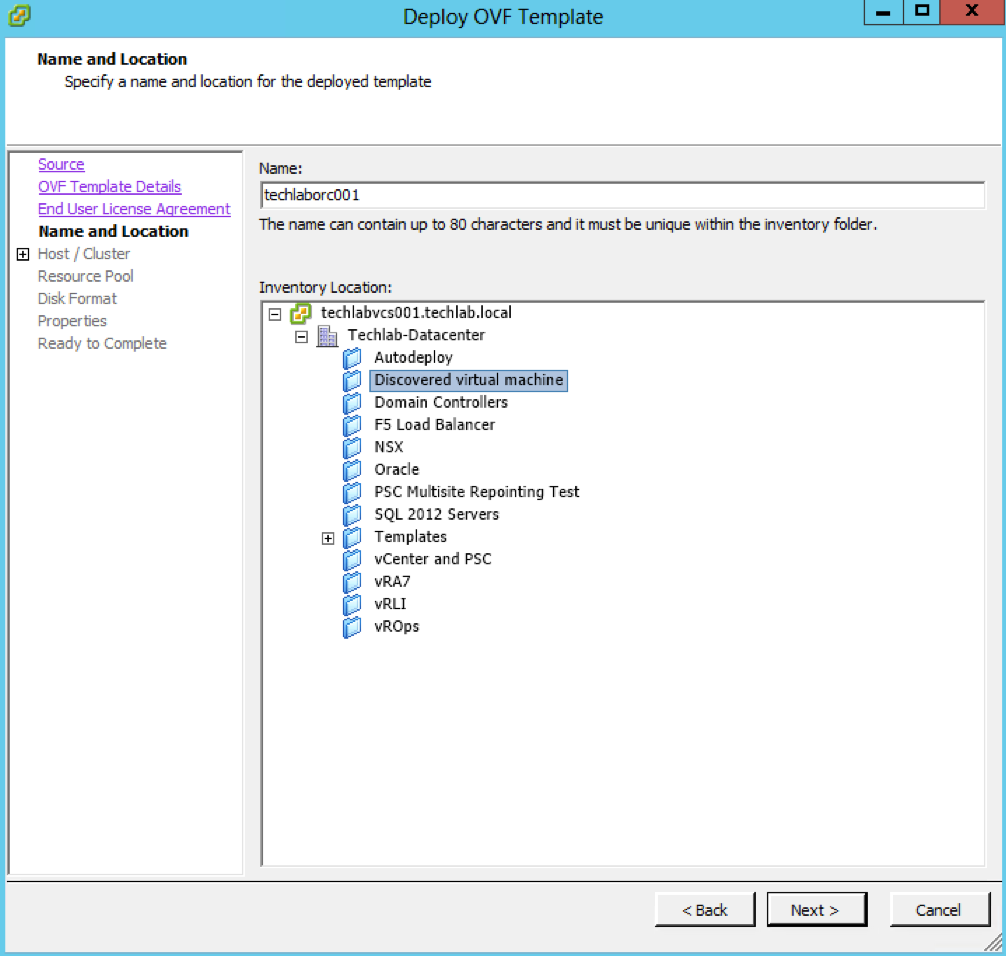
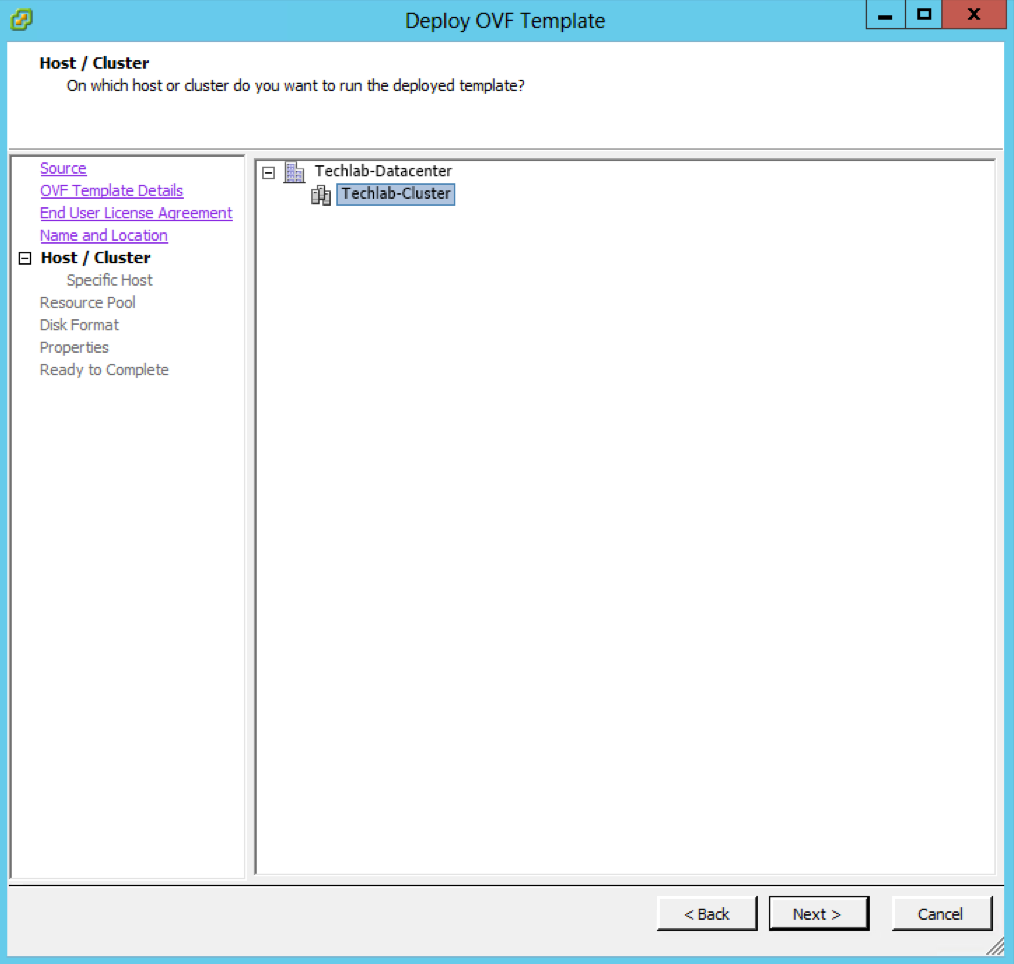
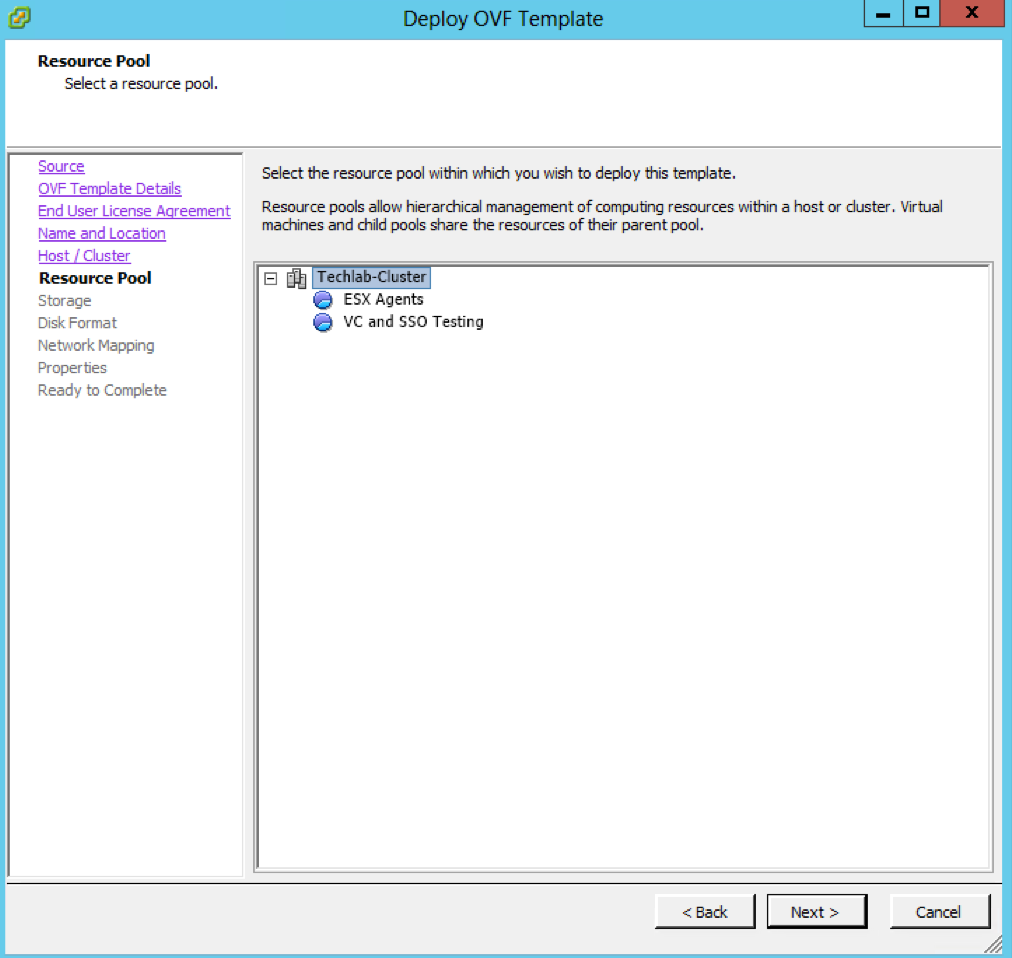
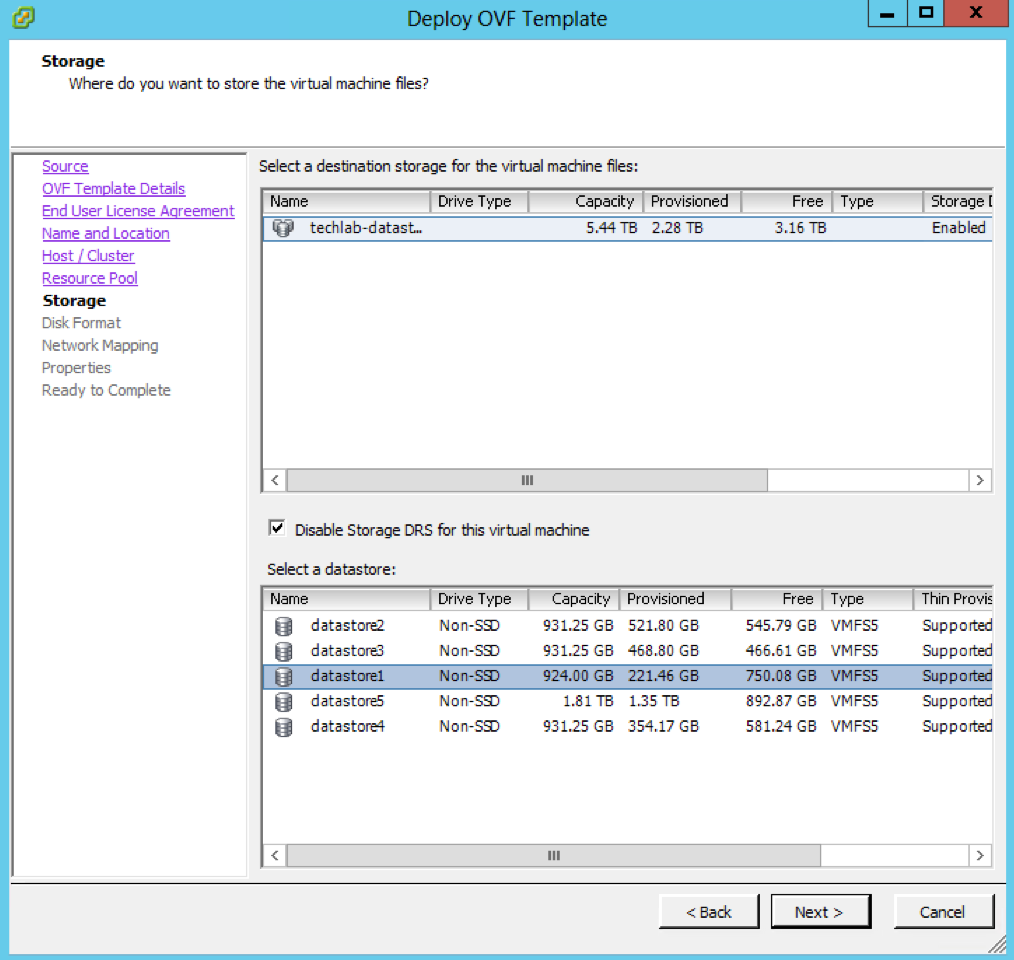
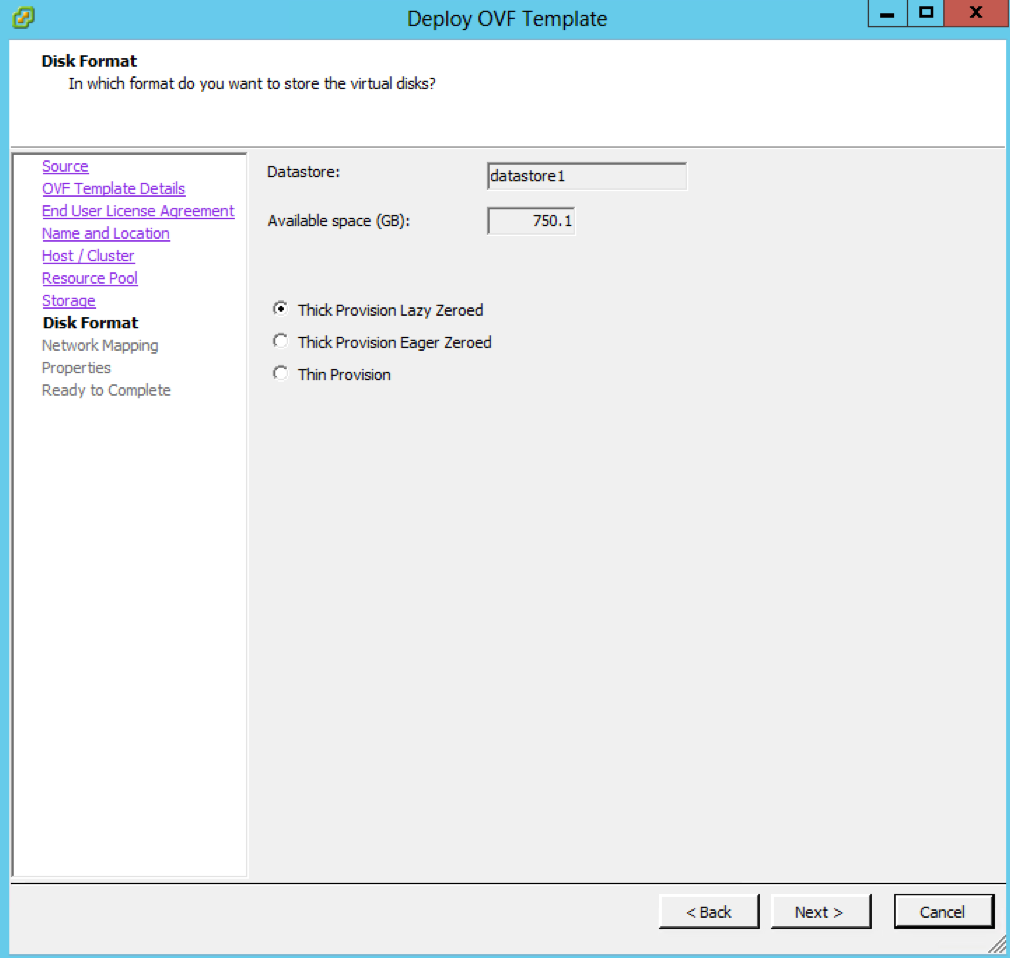
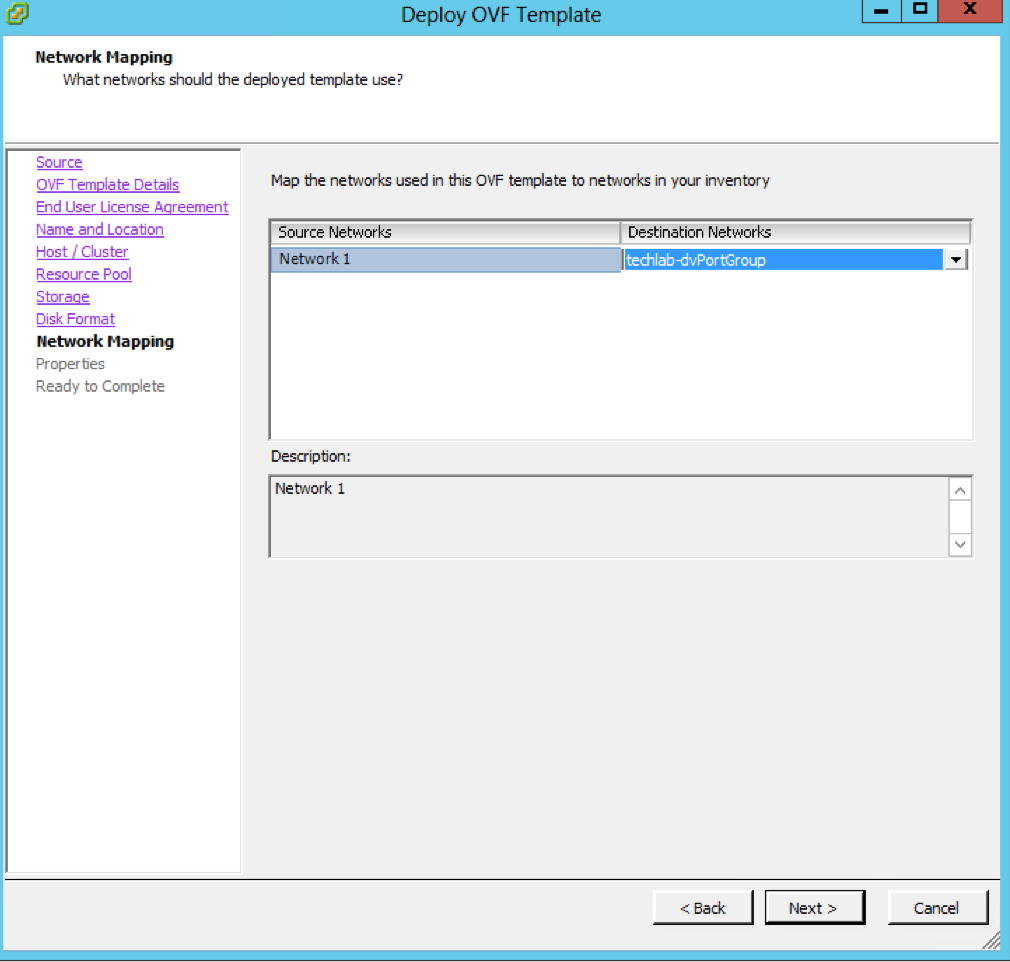
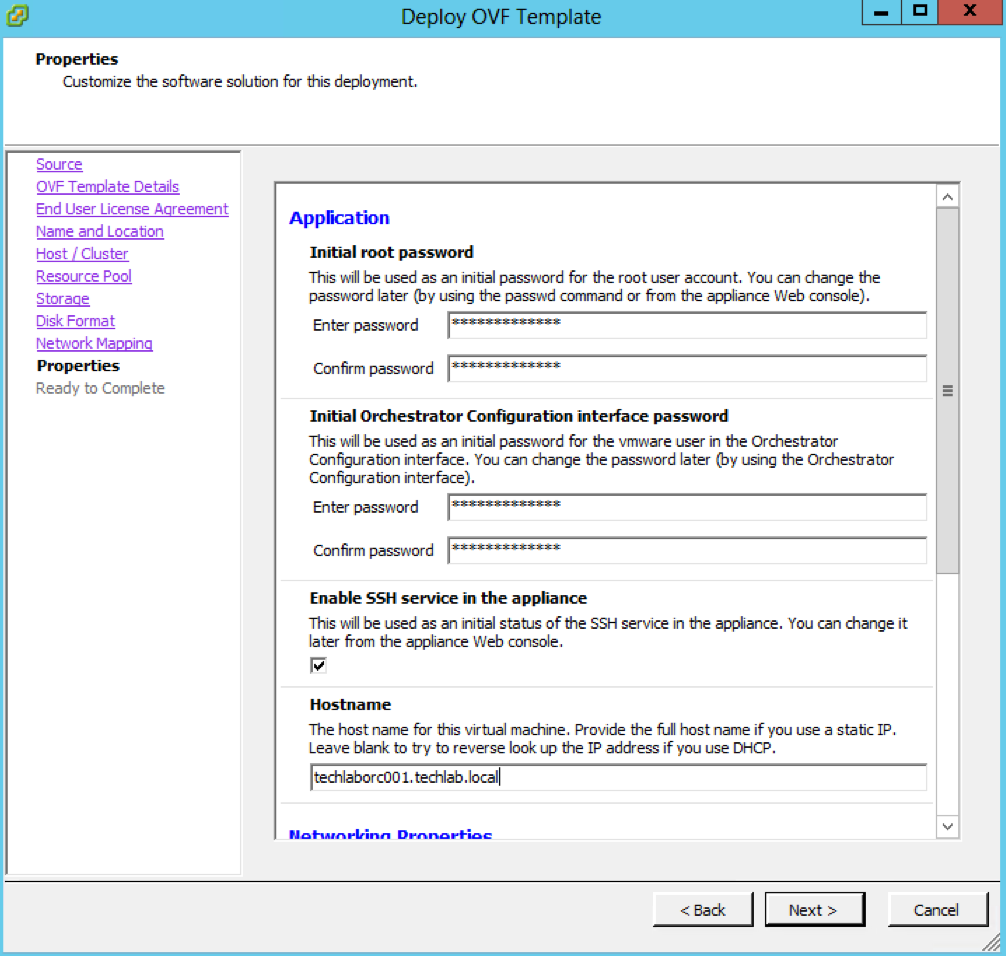
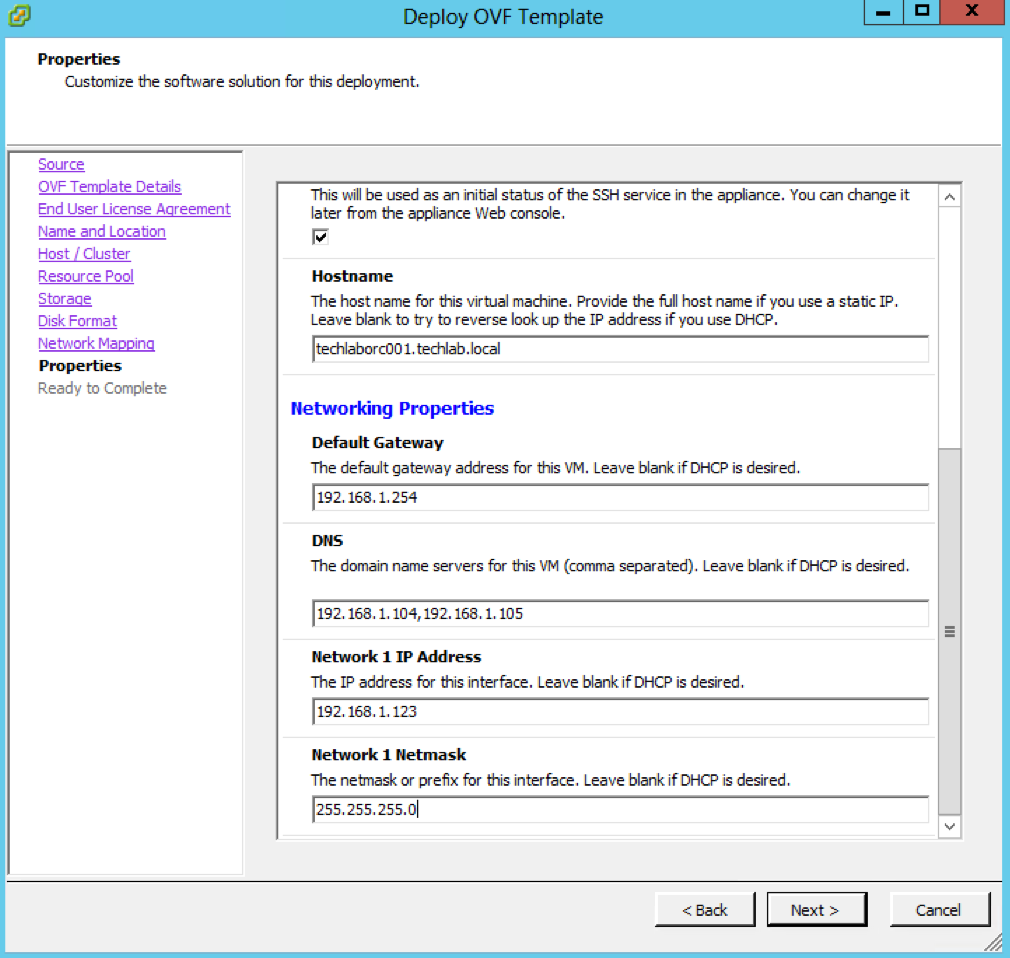
- Download and deploy VMware-vCO-Appliance-6.0.3.0-3000579_OVF10.ovf into vCenter – File > Deploy ovf template
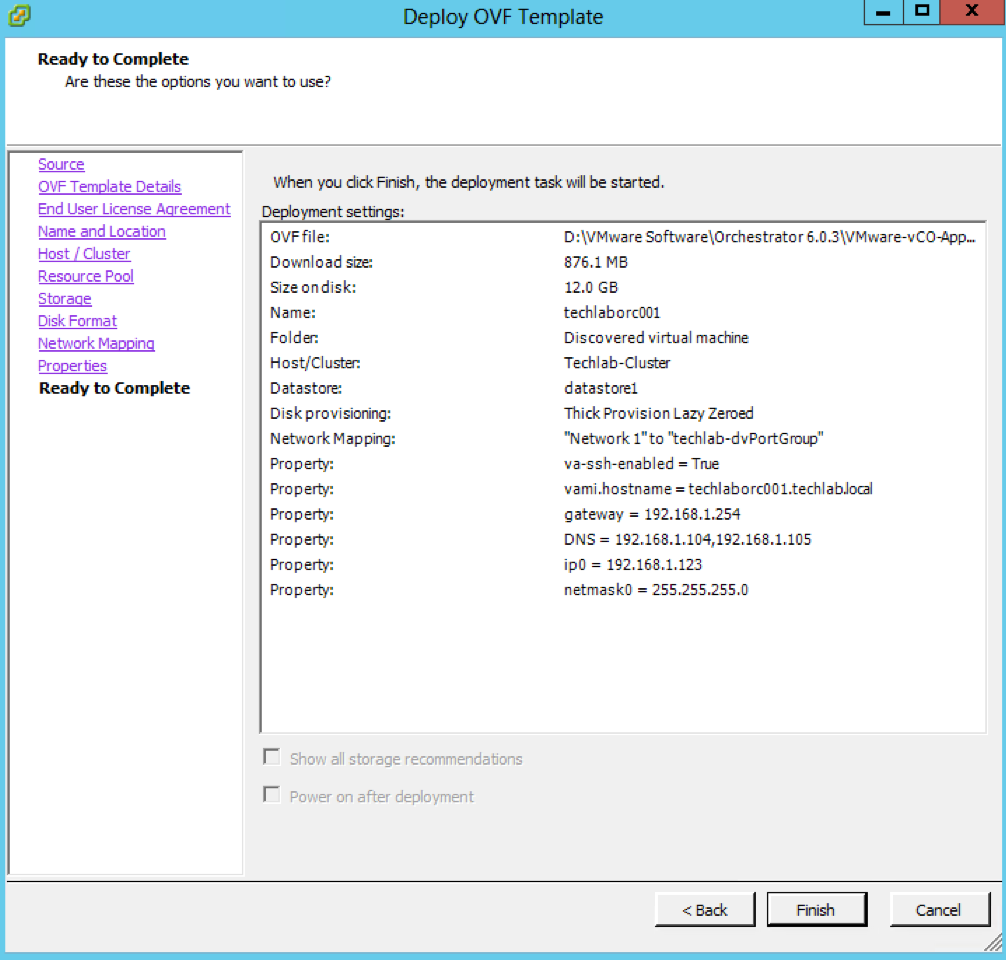
- Power on the VM
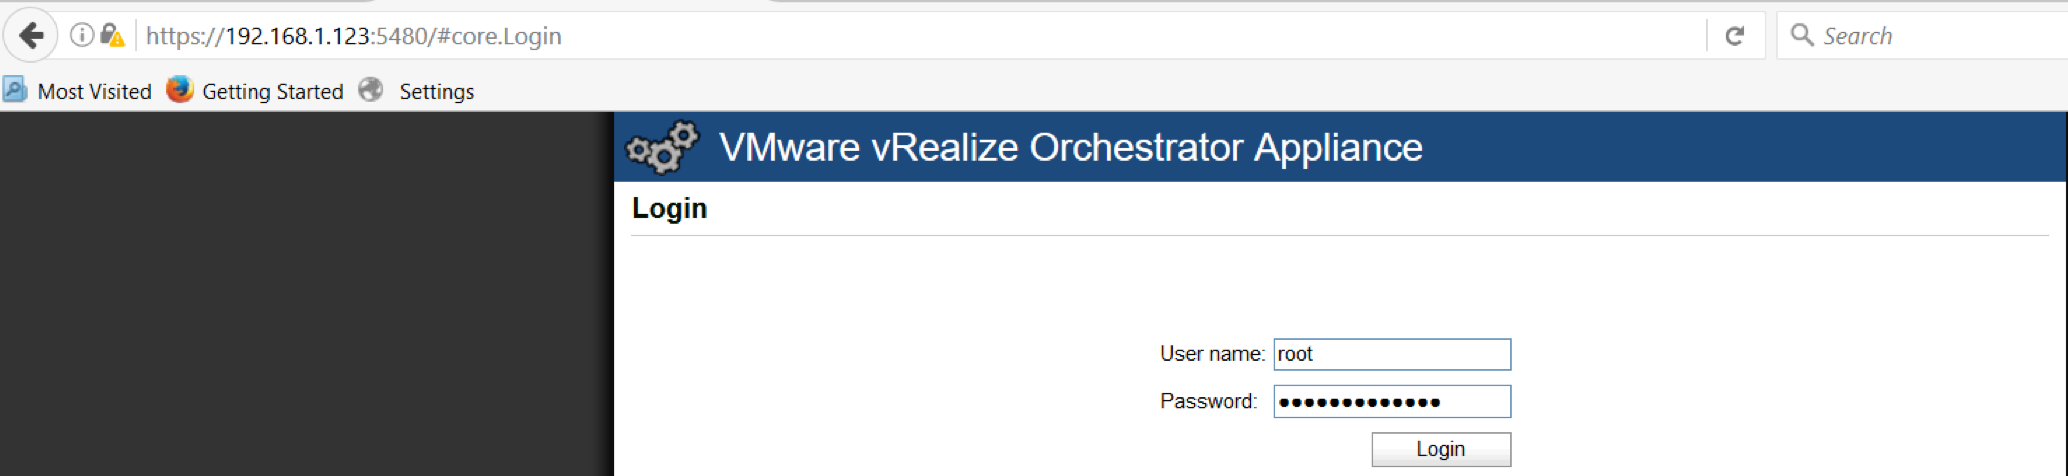
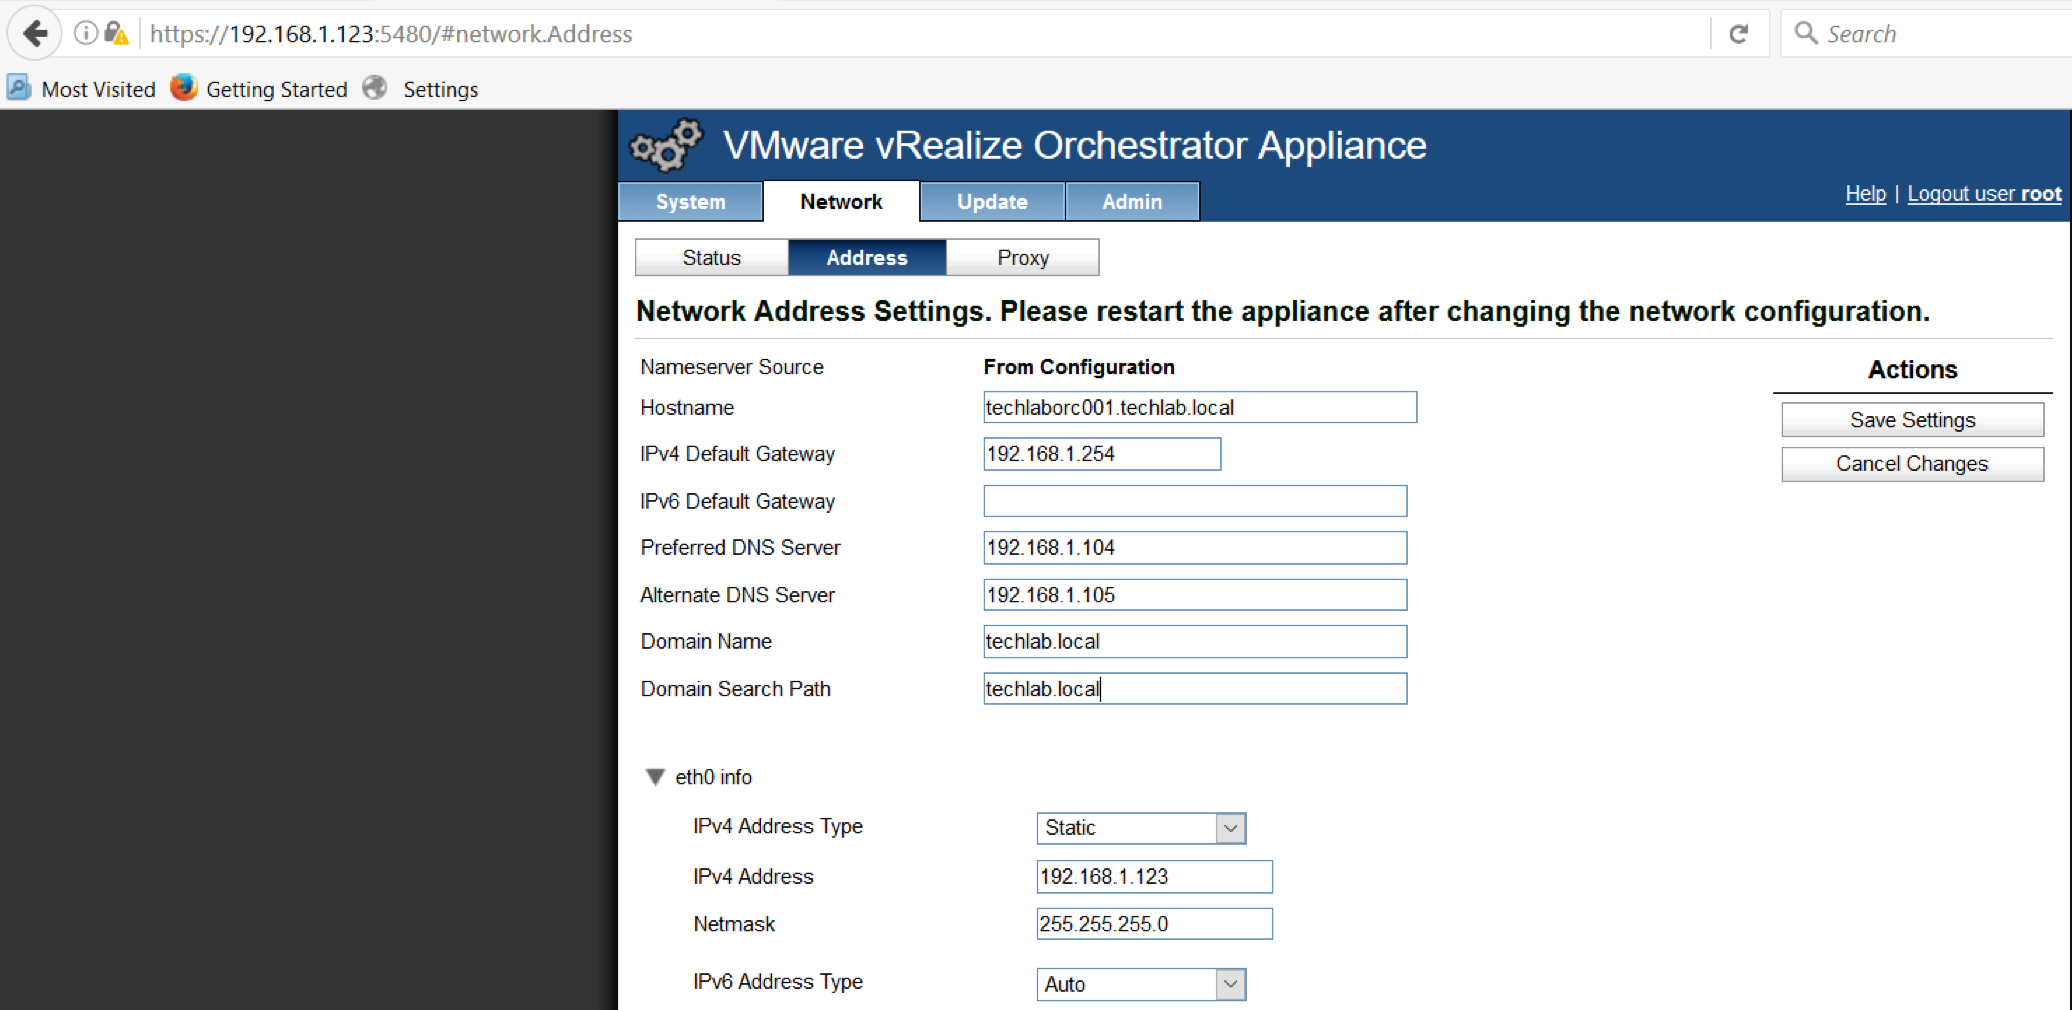
- Log into a web browser using the Orchestrator appliance web address. In my case https://192.168.1.123:5480
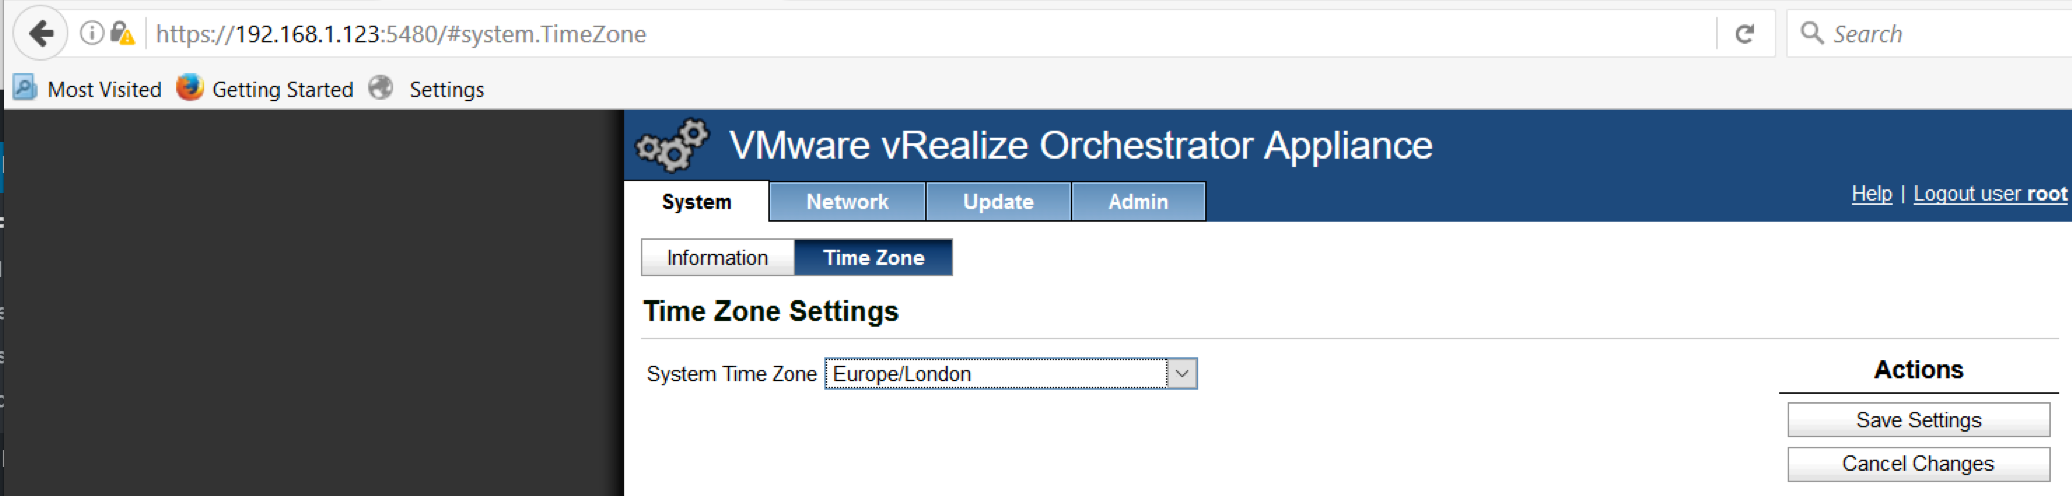
- Change the time zone to Europe/London or whichever your timezone is and click Save Settings
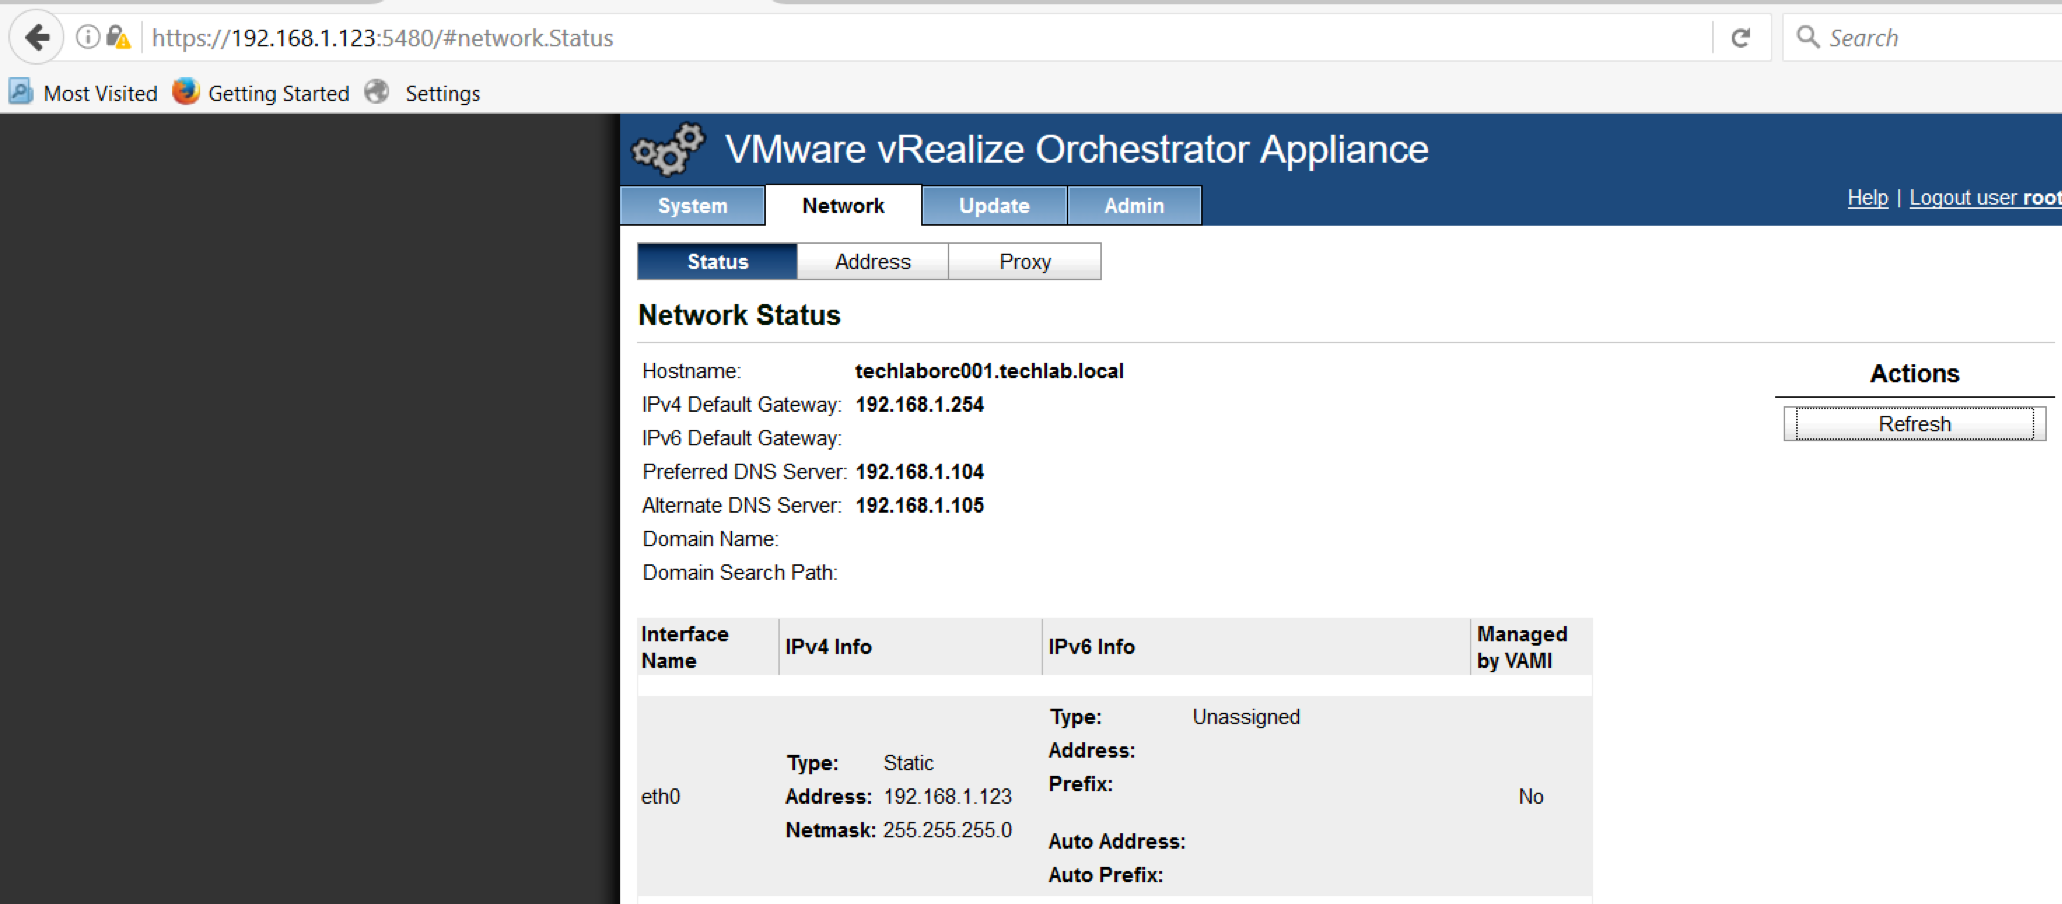
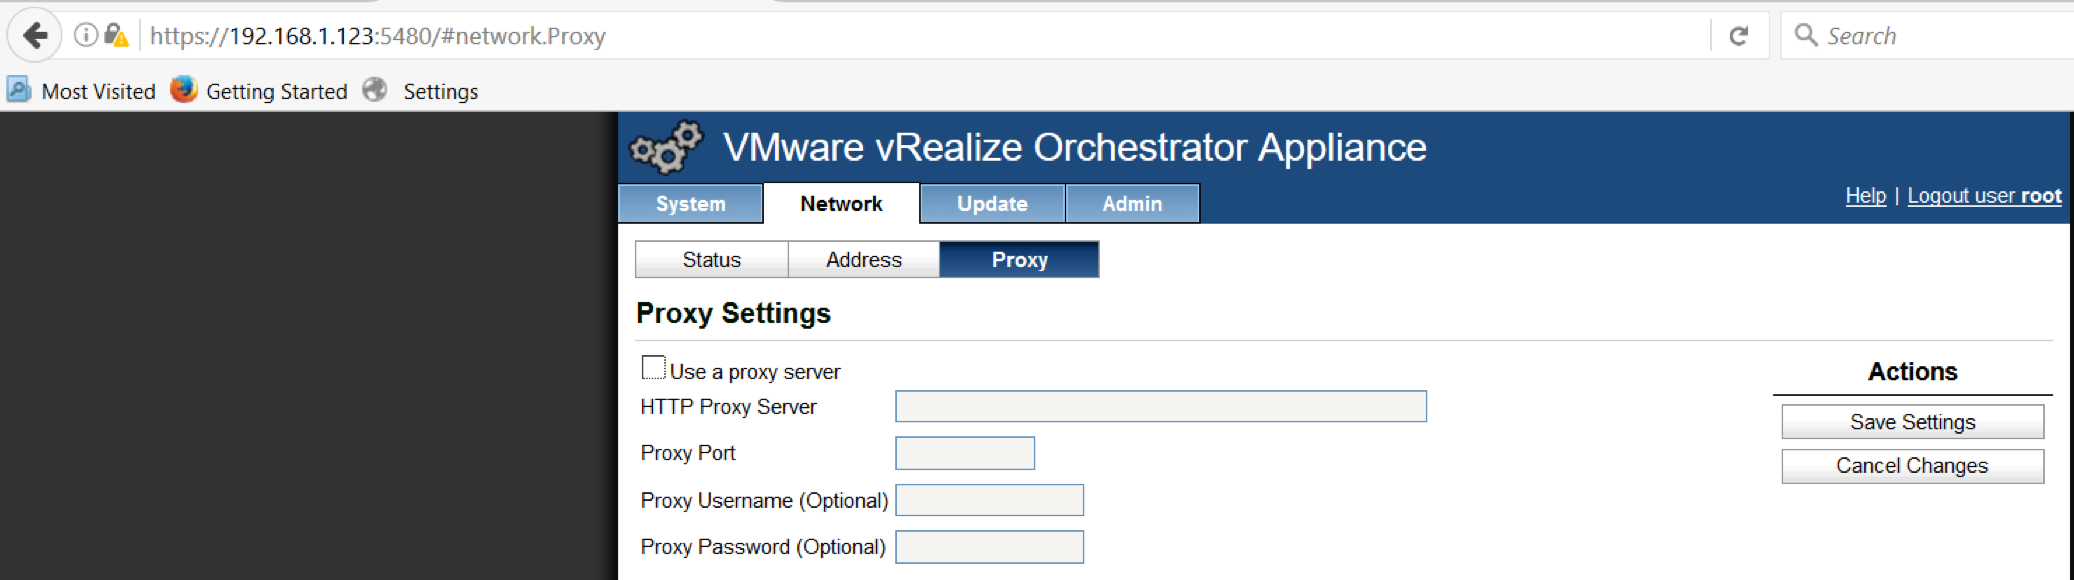
- Click the Network tab and check the settings on the 3 tabs
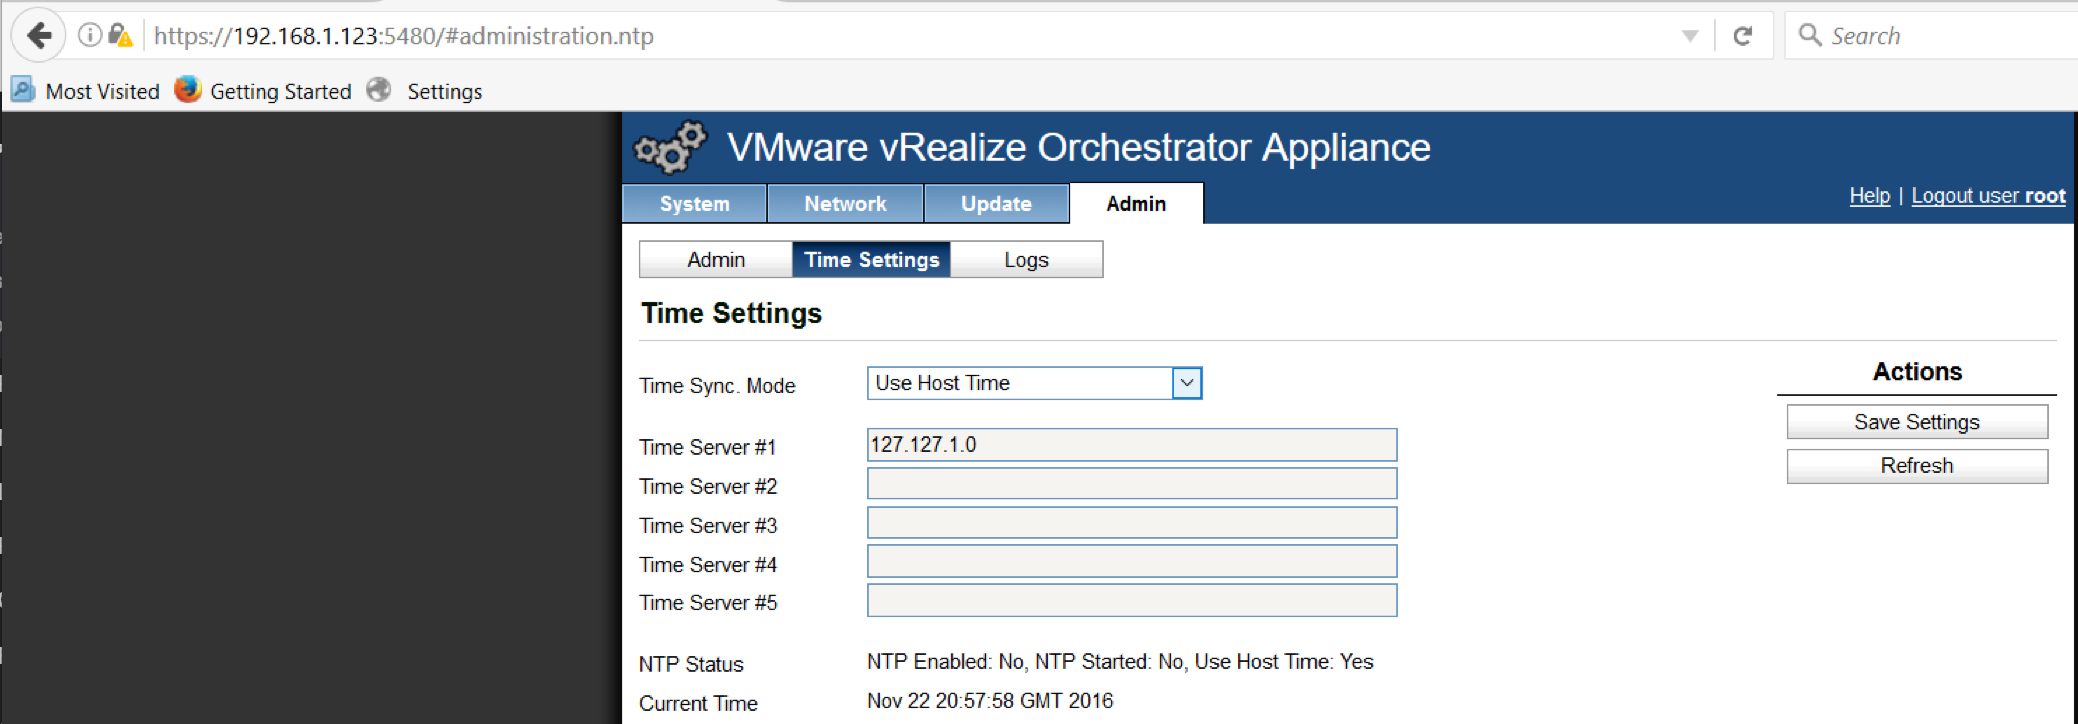
- Click the Admin tab and click Time Settings are correct. I have Use Host Time but you can use Time Server
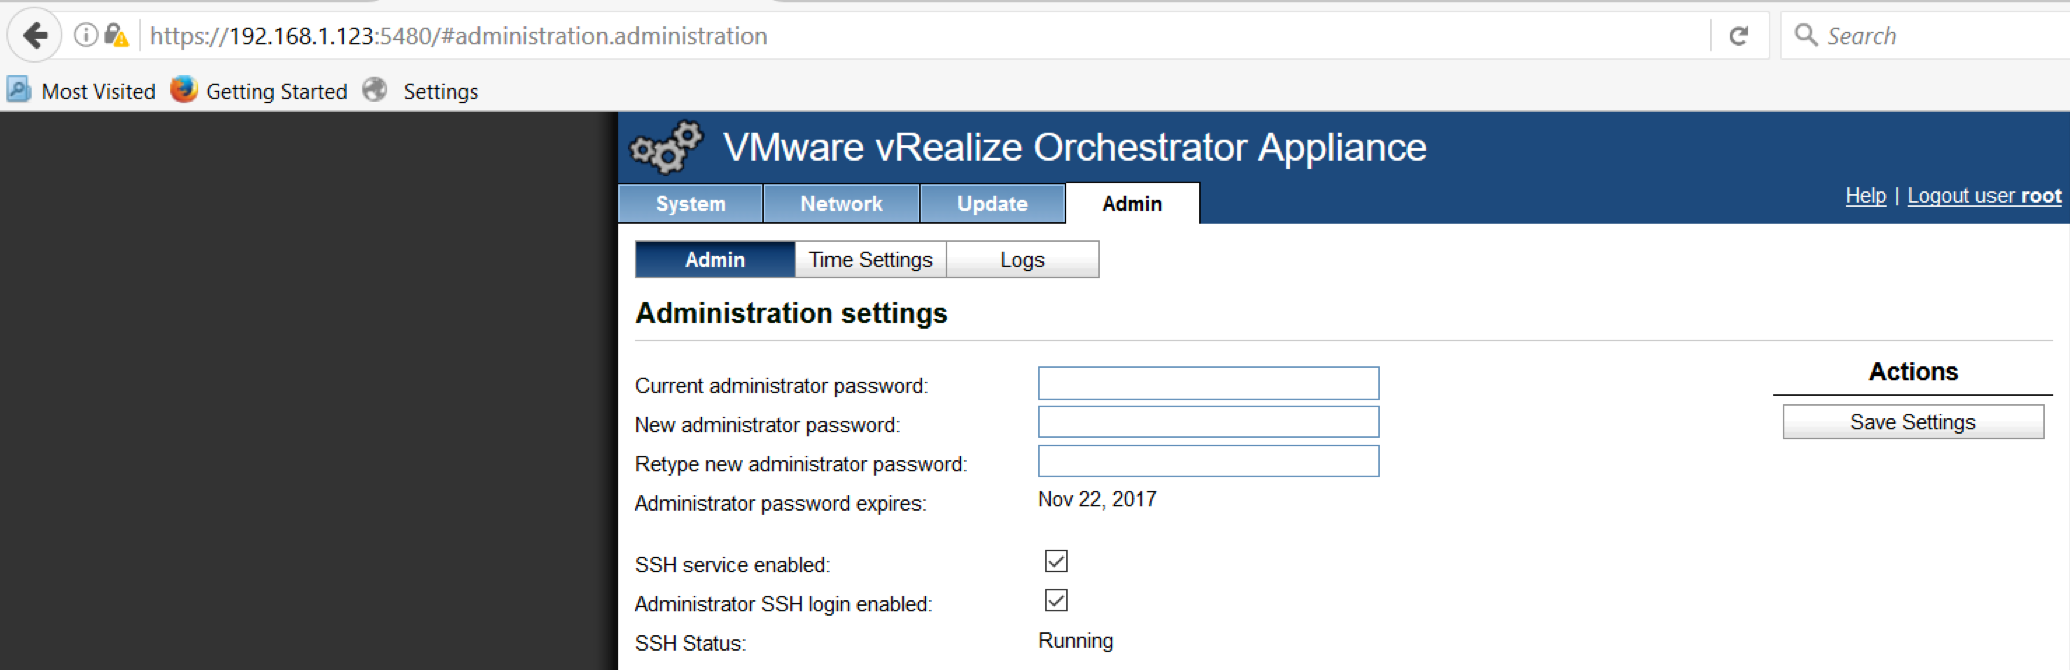
- Click Save Settings
NEXT
- Log into a web browser using the Orchestrator web address. In my case https://192.168.1.123:8283
- Use the vmware username and the password you set up in the OVF deployment
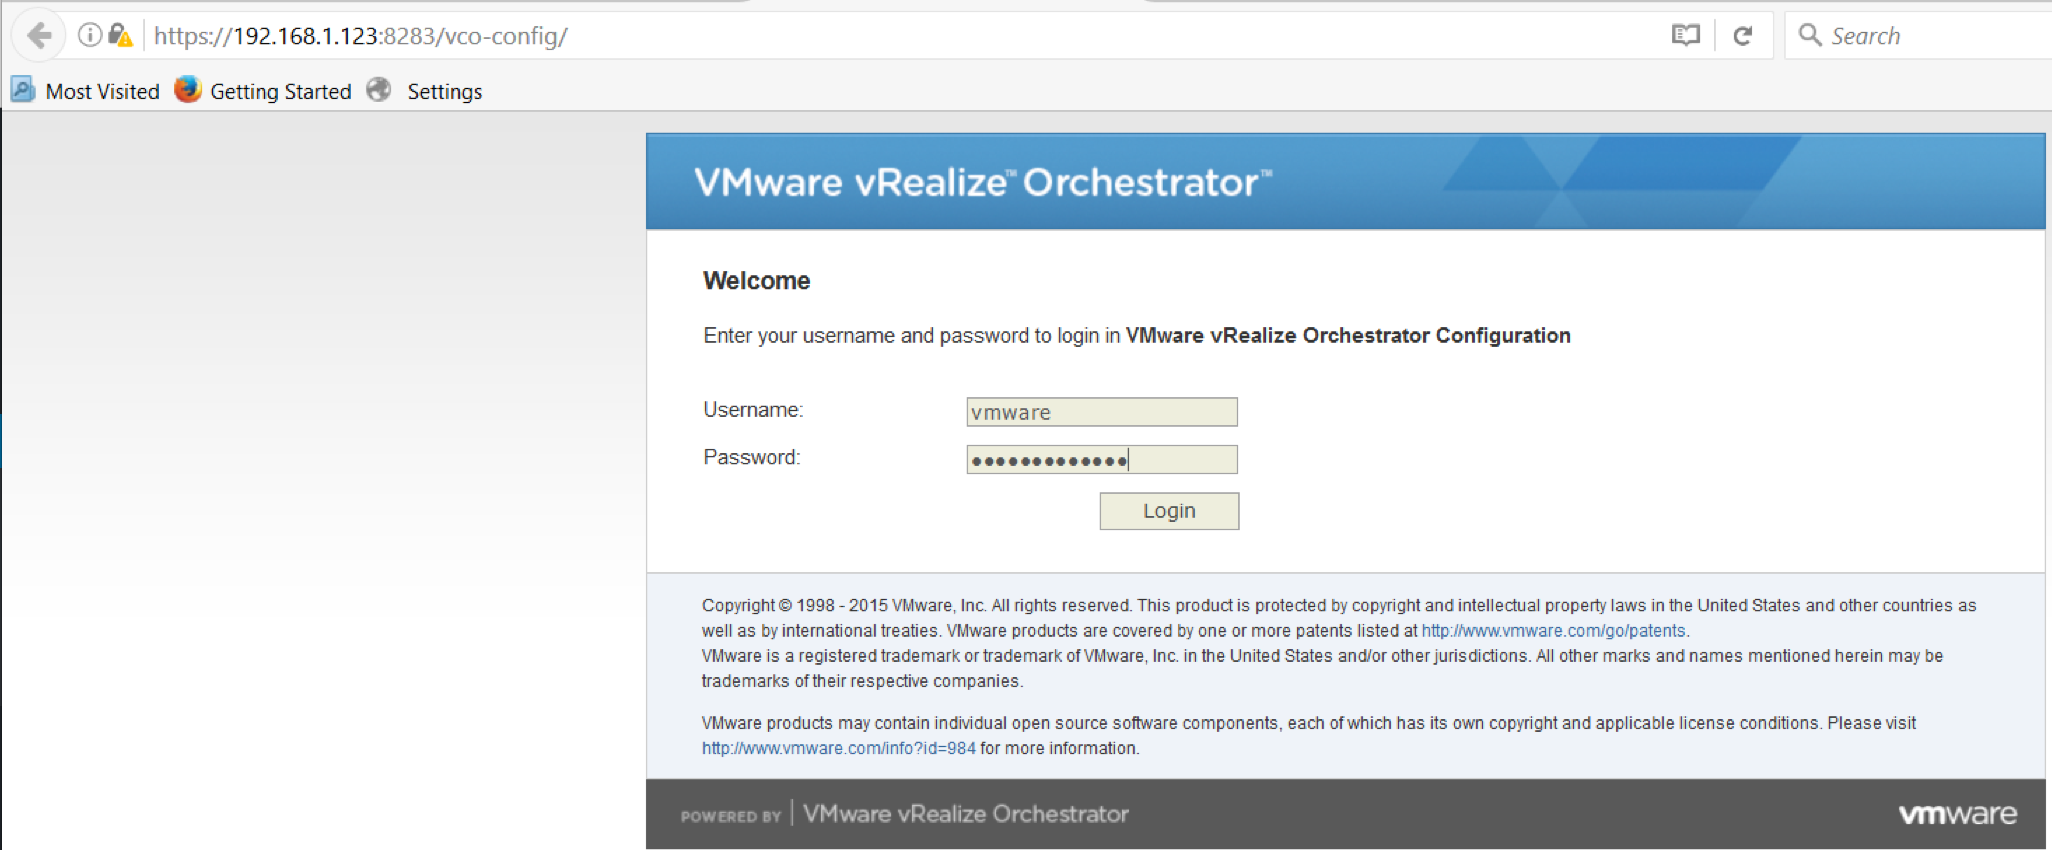
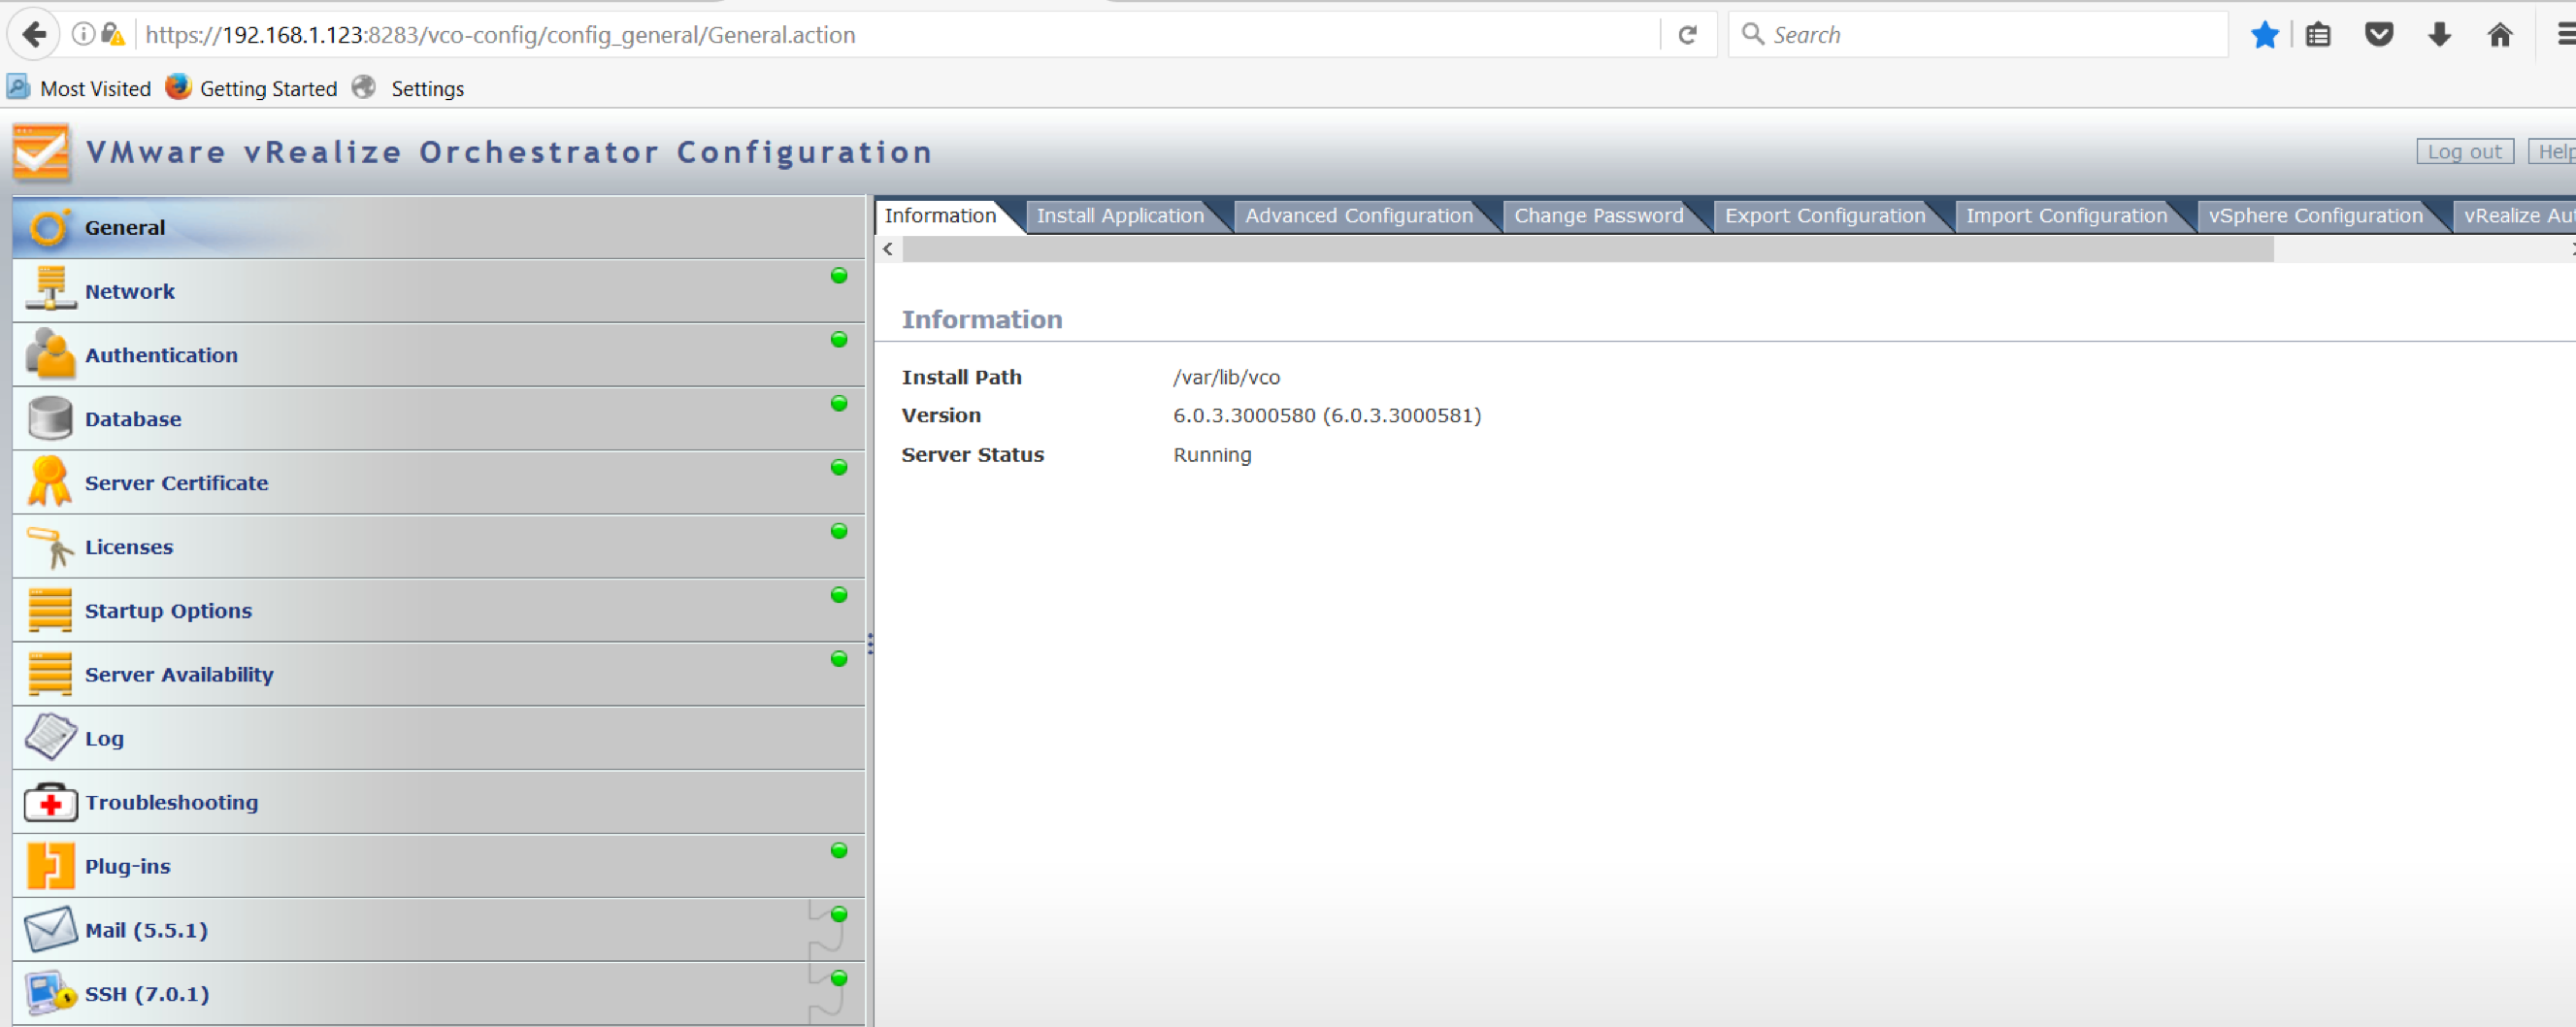
- You will reach the below screen
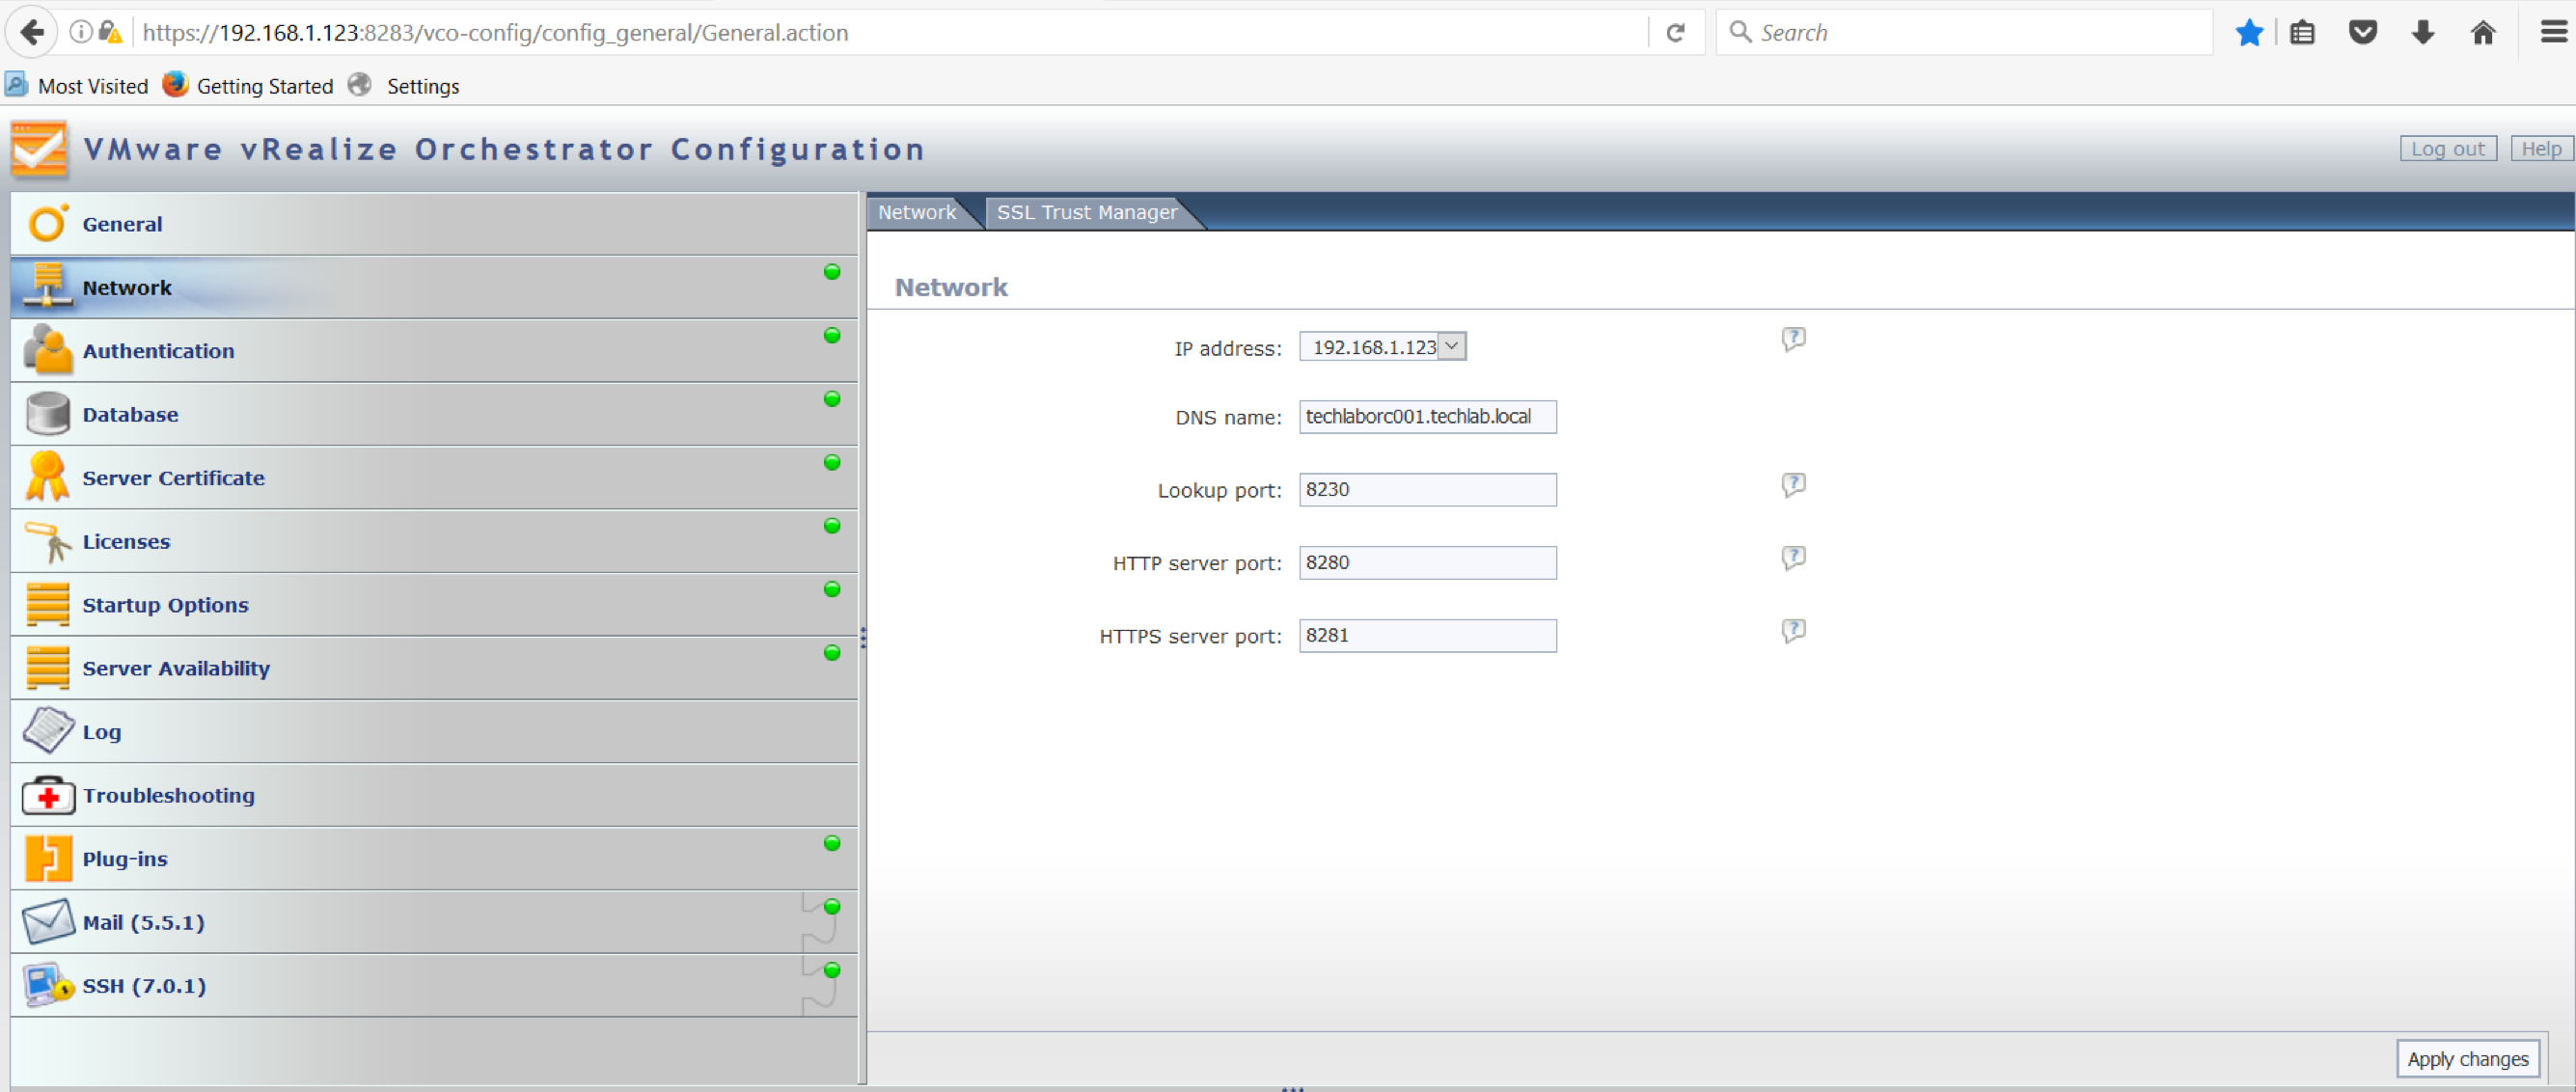
- Click on the Network tab on the left hand side and select your IP Address and check all other details are correct. Click Apply Changes at the bottom right of the screen
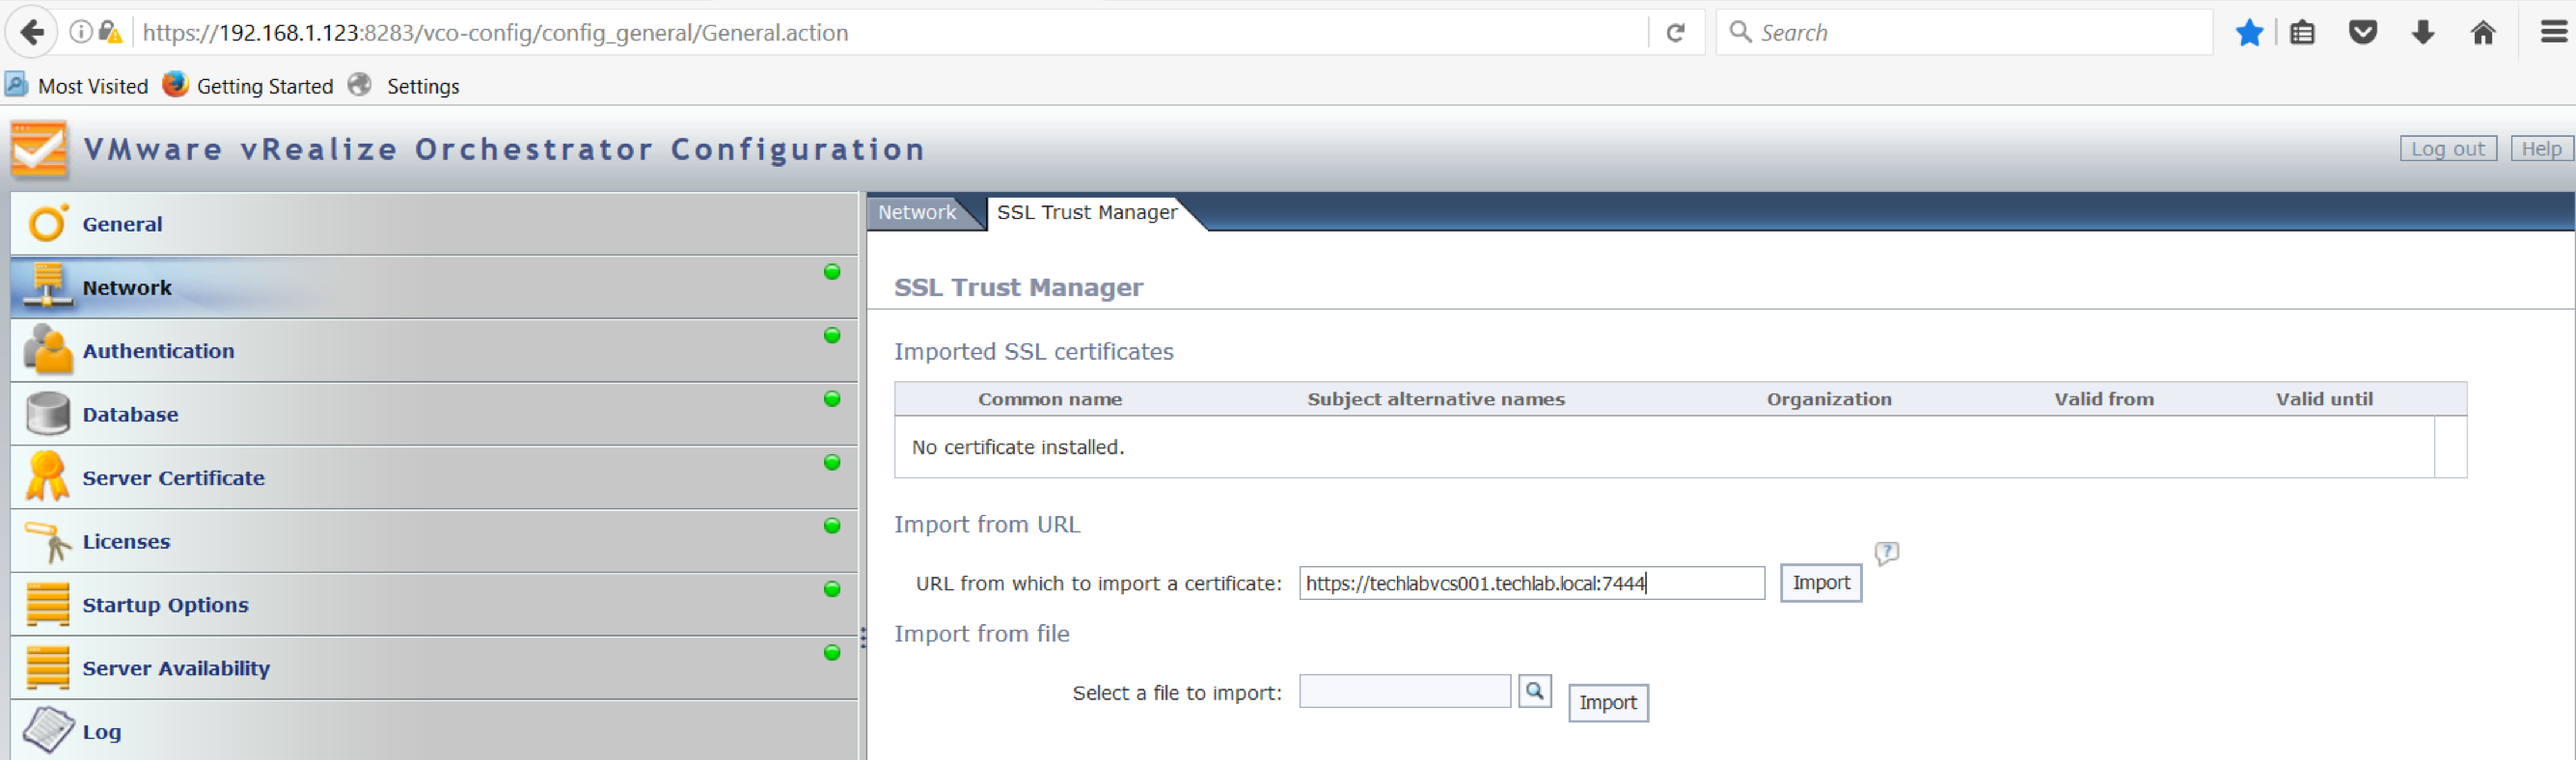
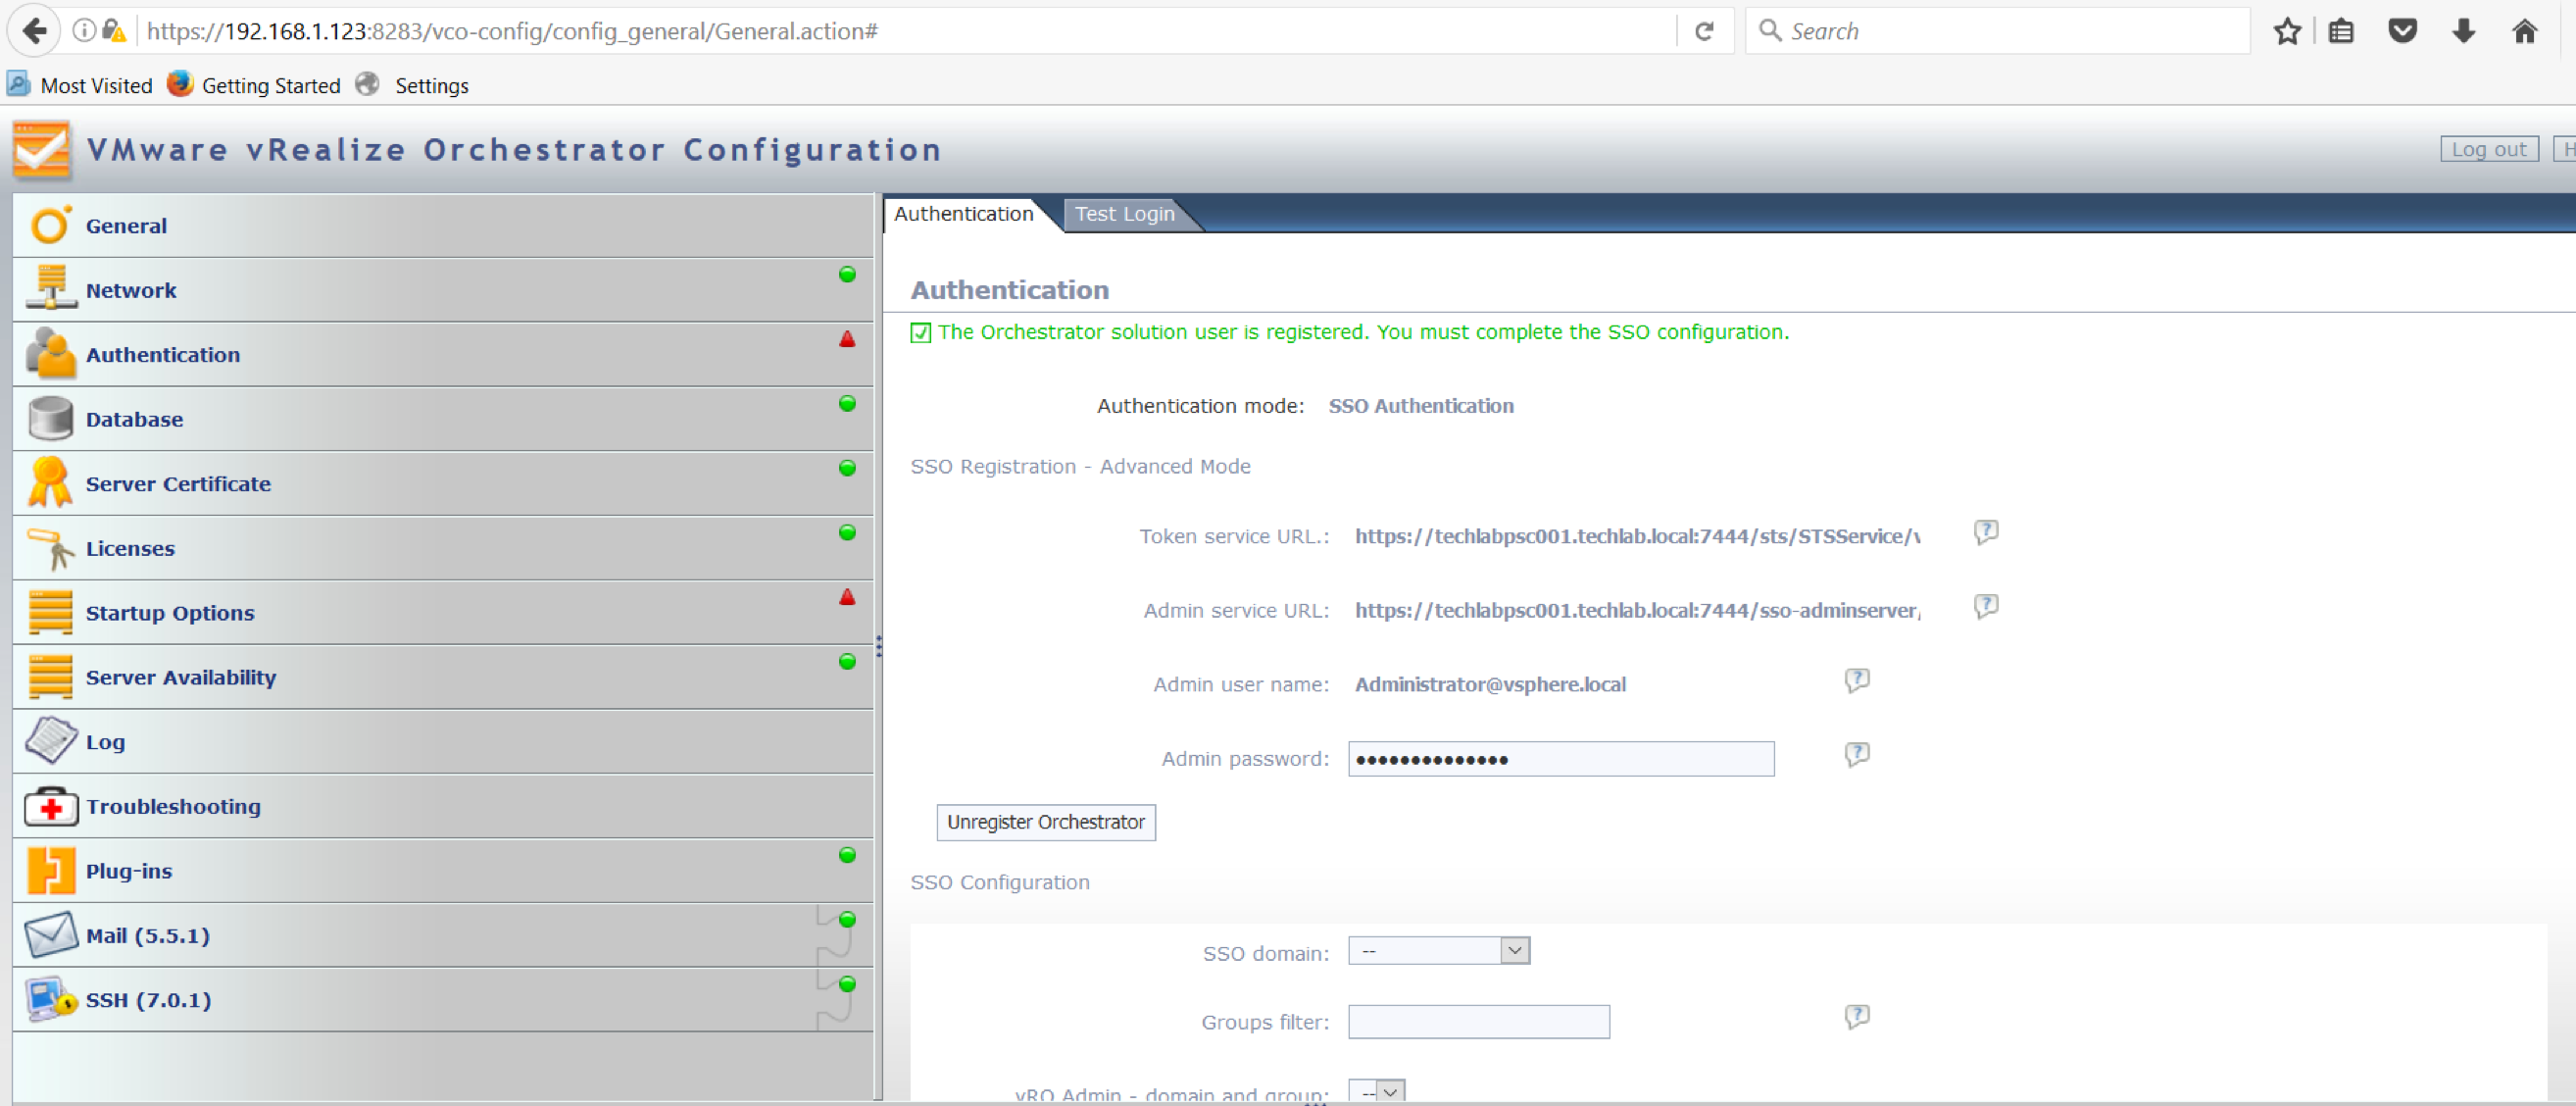
- Click on Authentication and scroll down the screen until you see a link for SSL Certificates. Click on this link

- Put in your vCenter server in the following format – techlabvcs001.techlab.local:7444 and click Import
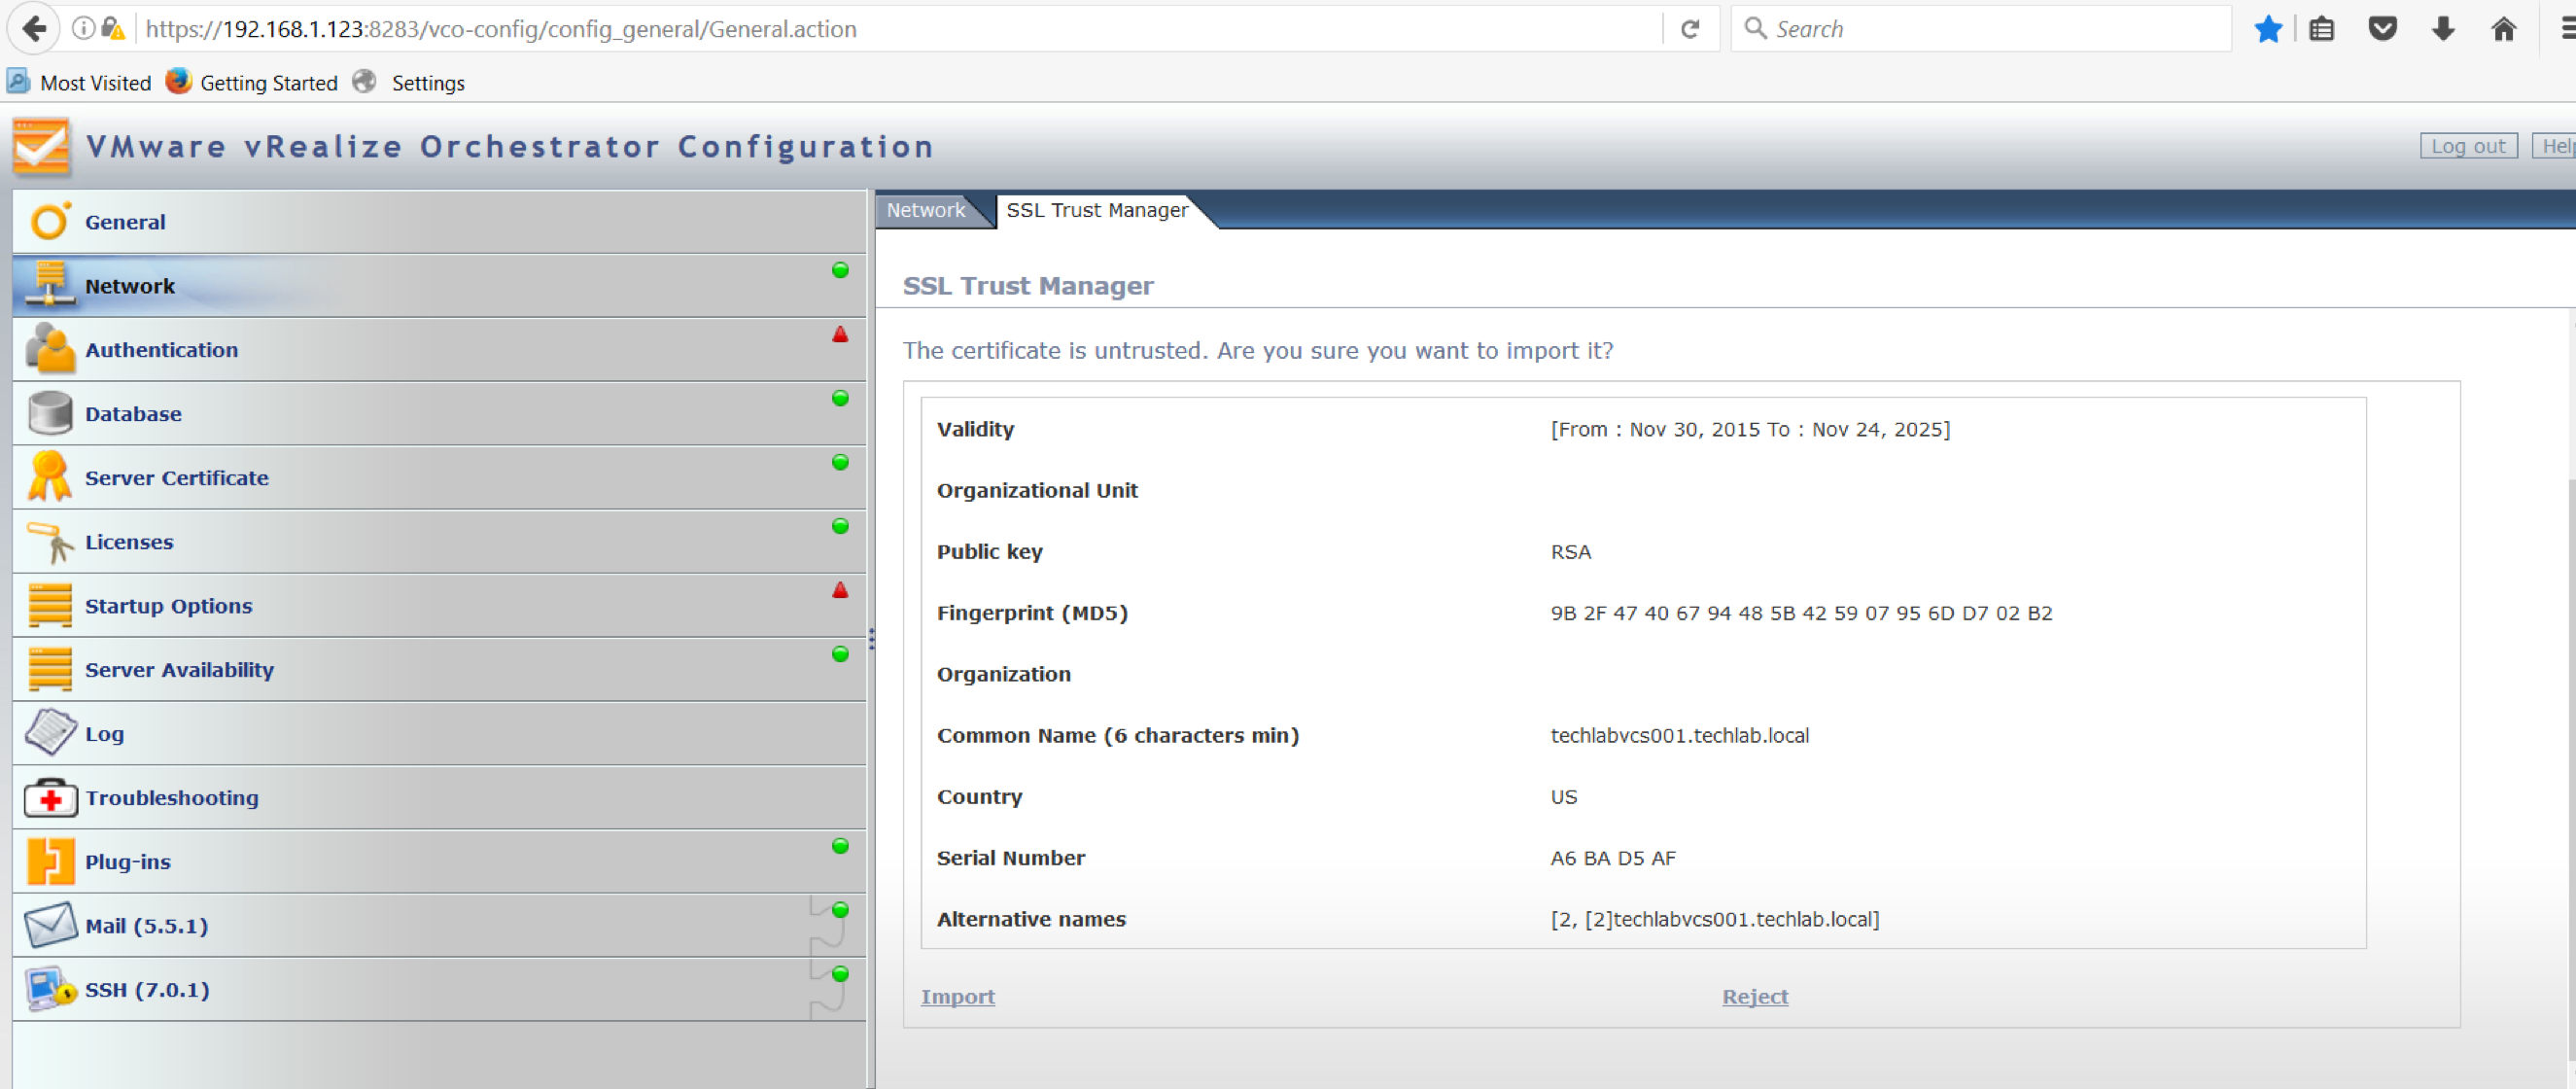
- Put in your Single Sign On/PSC server in the following format – techlapsc001.techlab.local:7444 and click Import
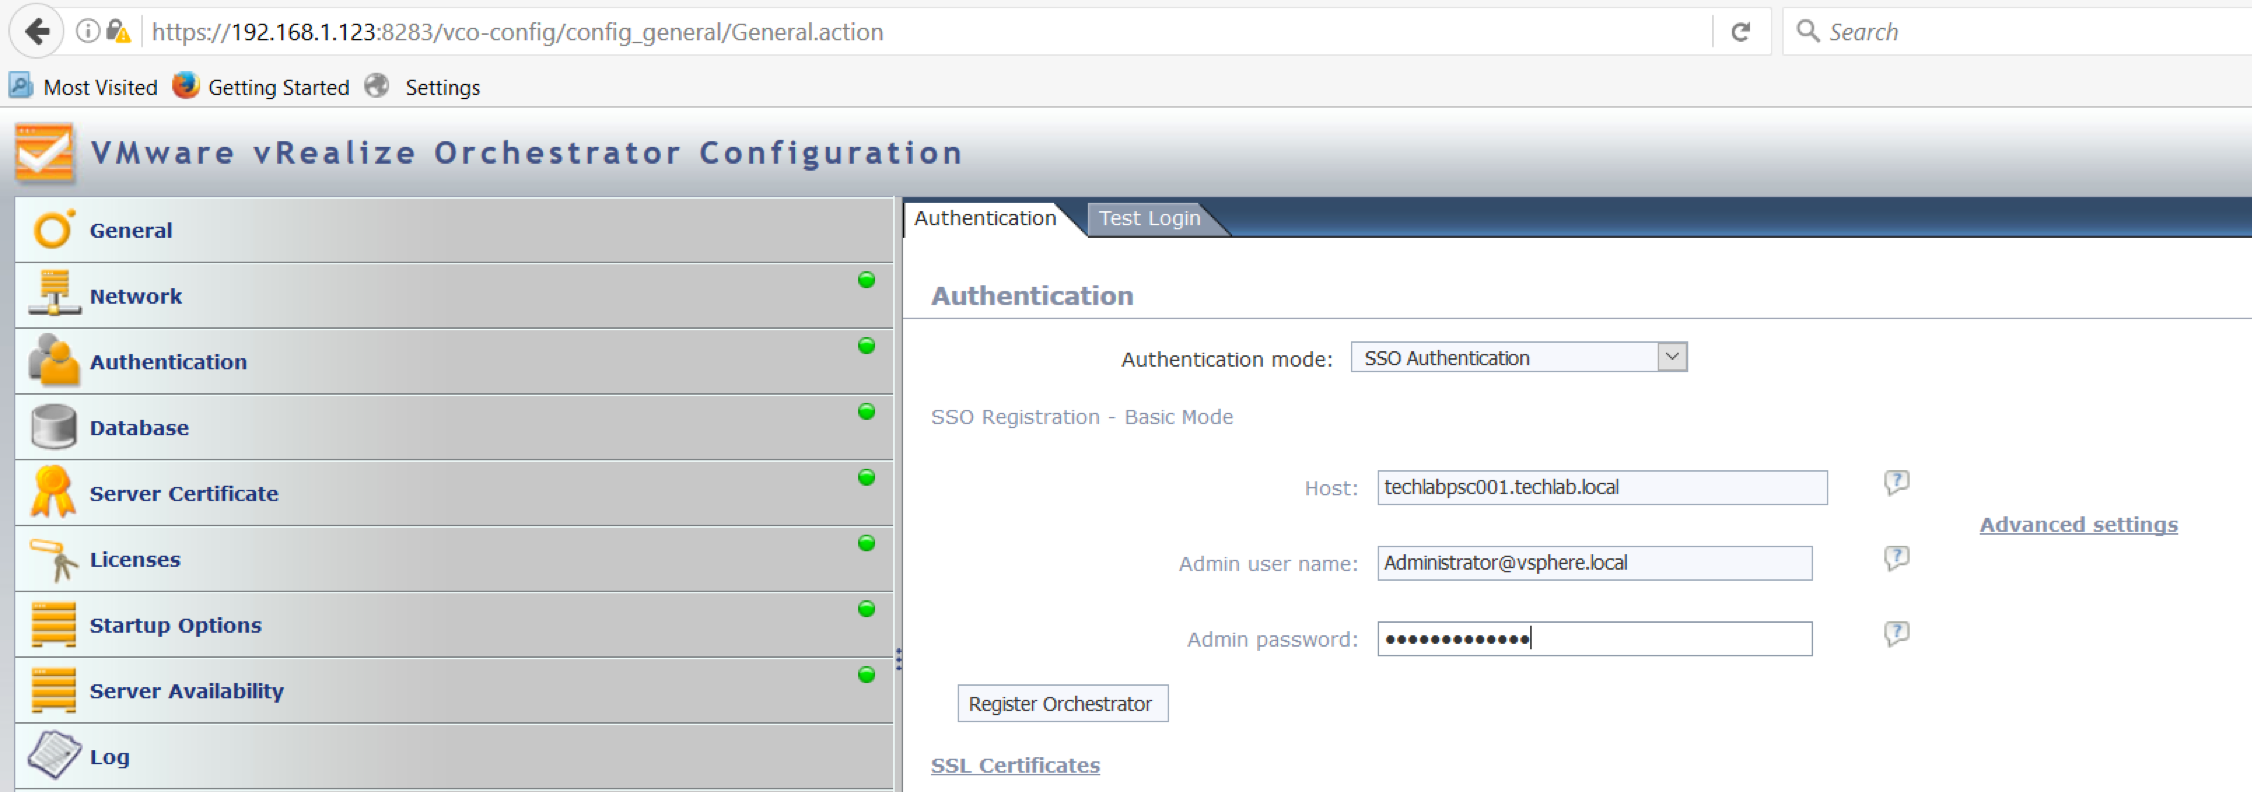
- Go back to the Authentication tab
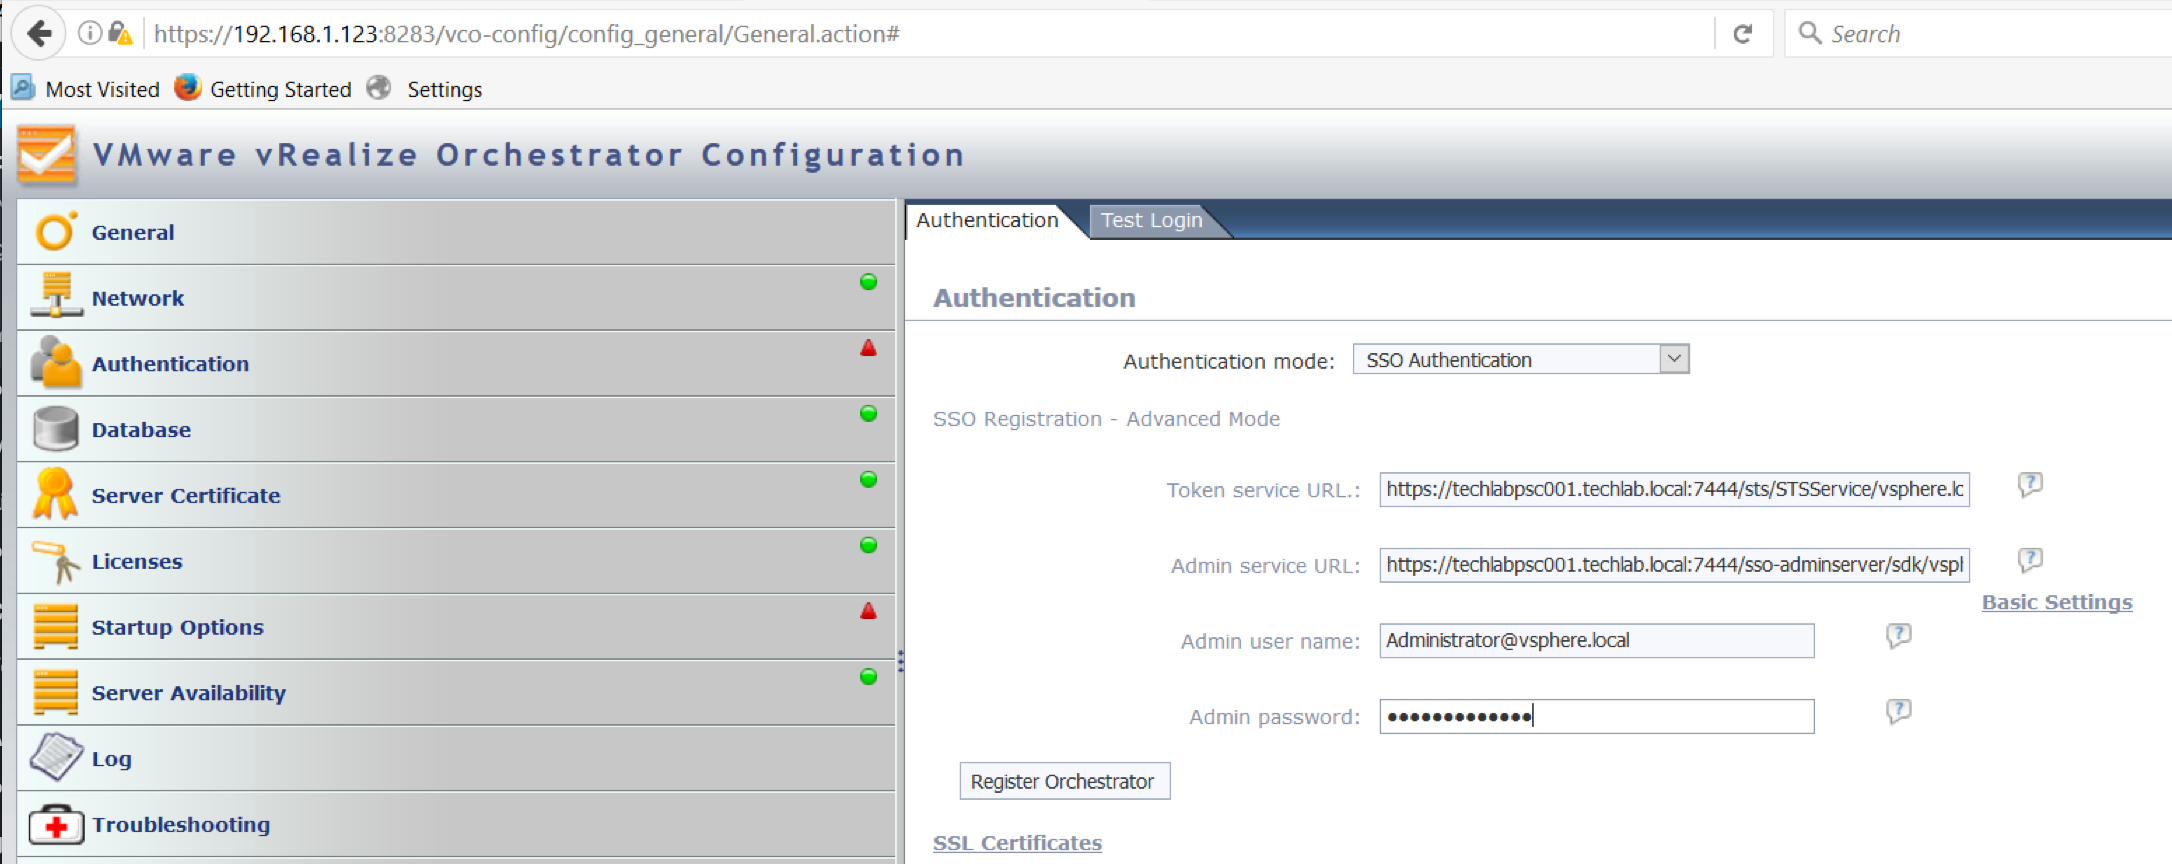
- Put in your Single Sign On server and click Advanced
- put in your Admin username and password
- Click Register Orchestrator
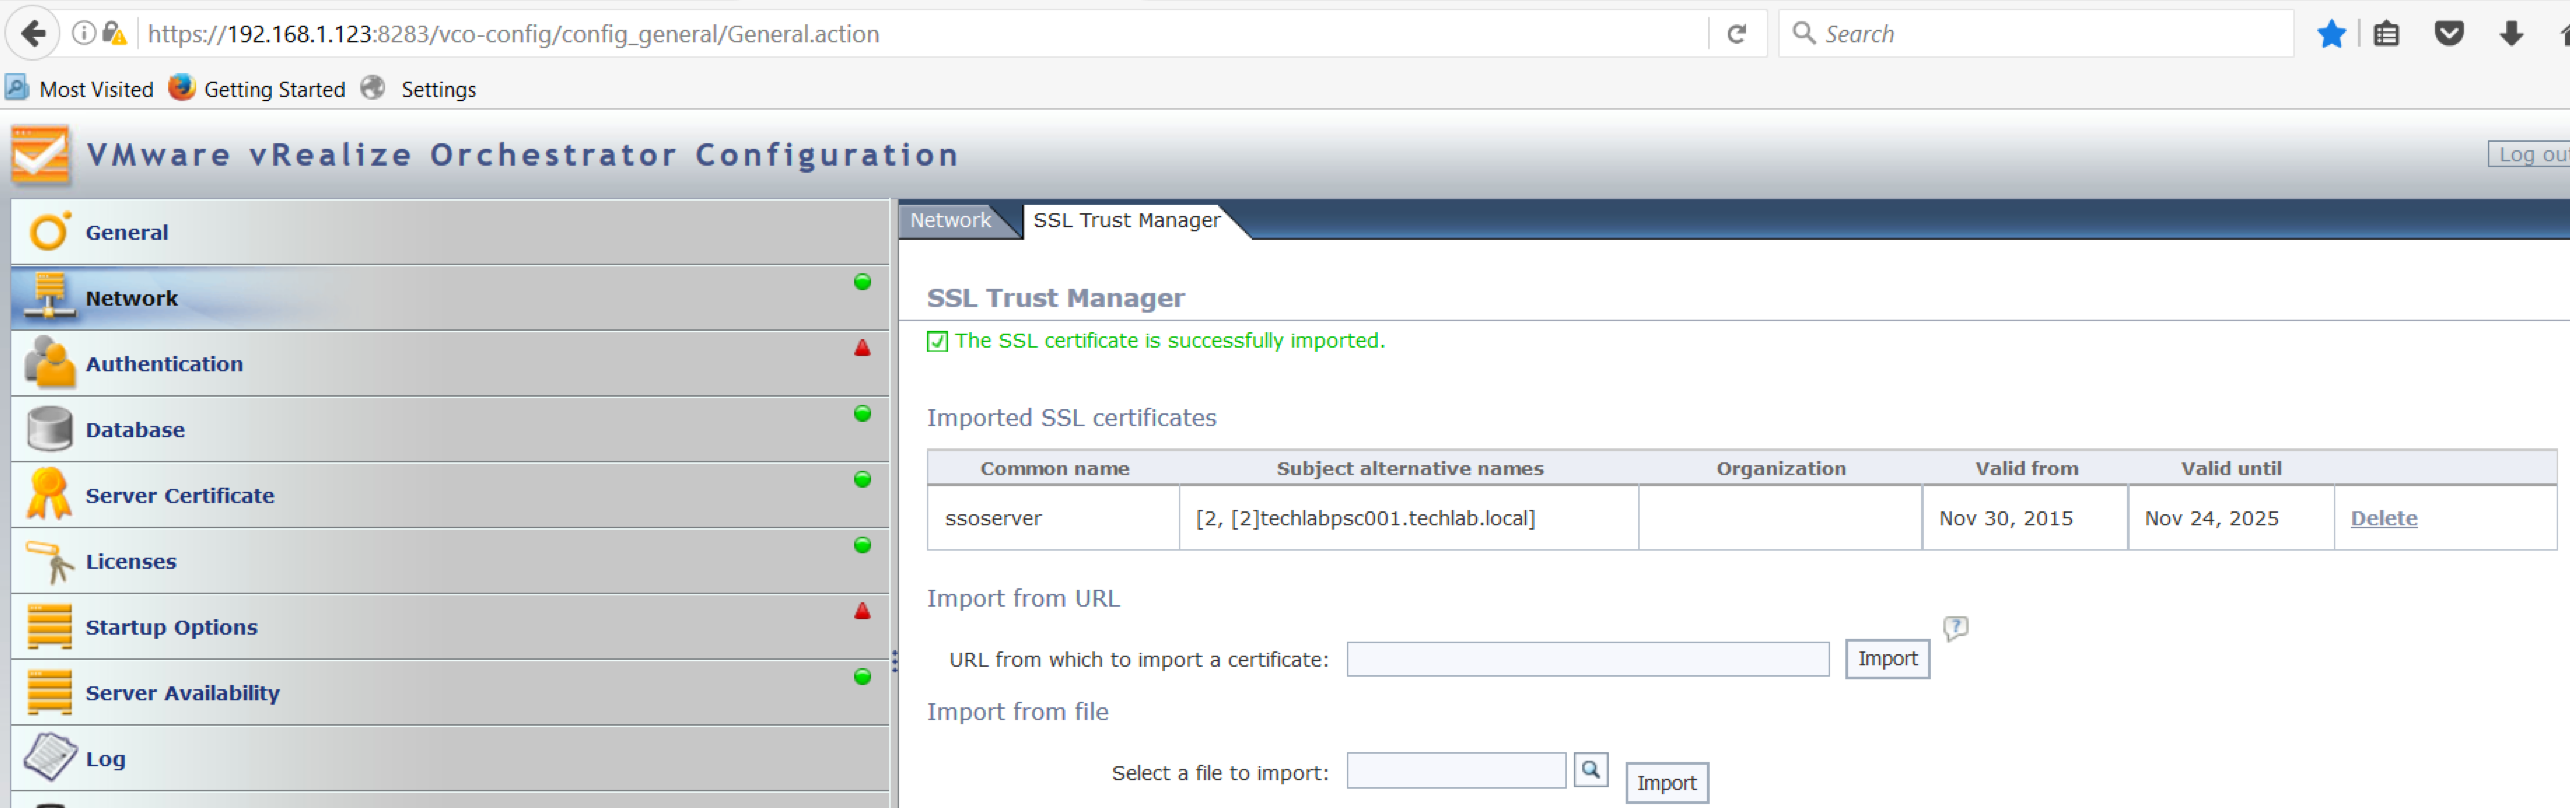
- It should look like the below with further configuration to do
- Choose your SSO Domain which can be the local domain, LAN domain or the vsphere.local domain.
- In my case I chose my main domain techlab.local where I have set up a group called vro-group which contains user accounts I want to use as Admins
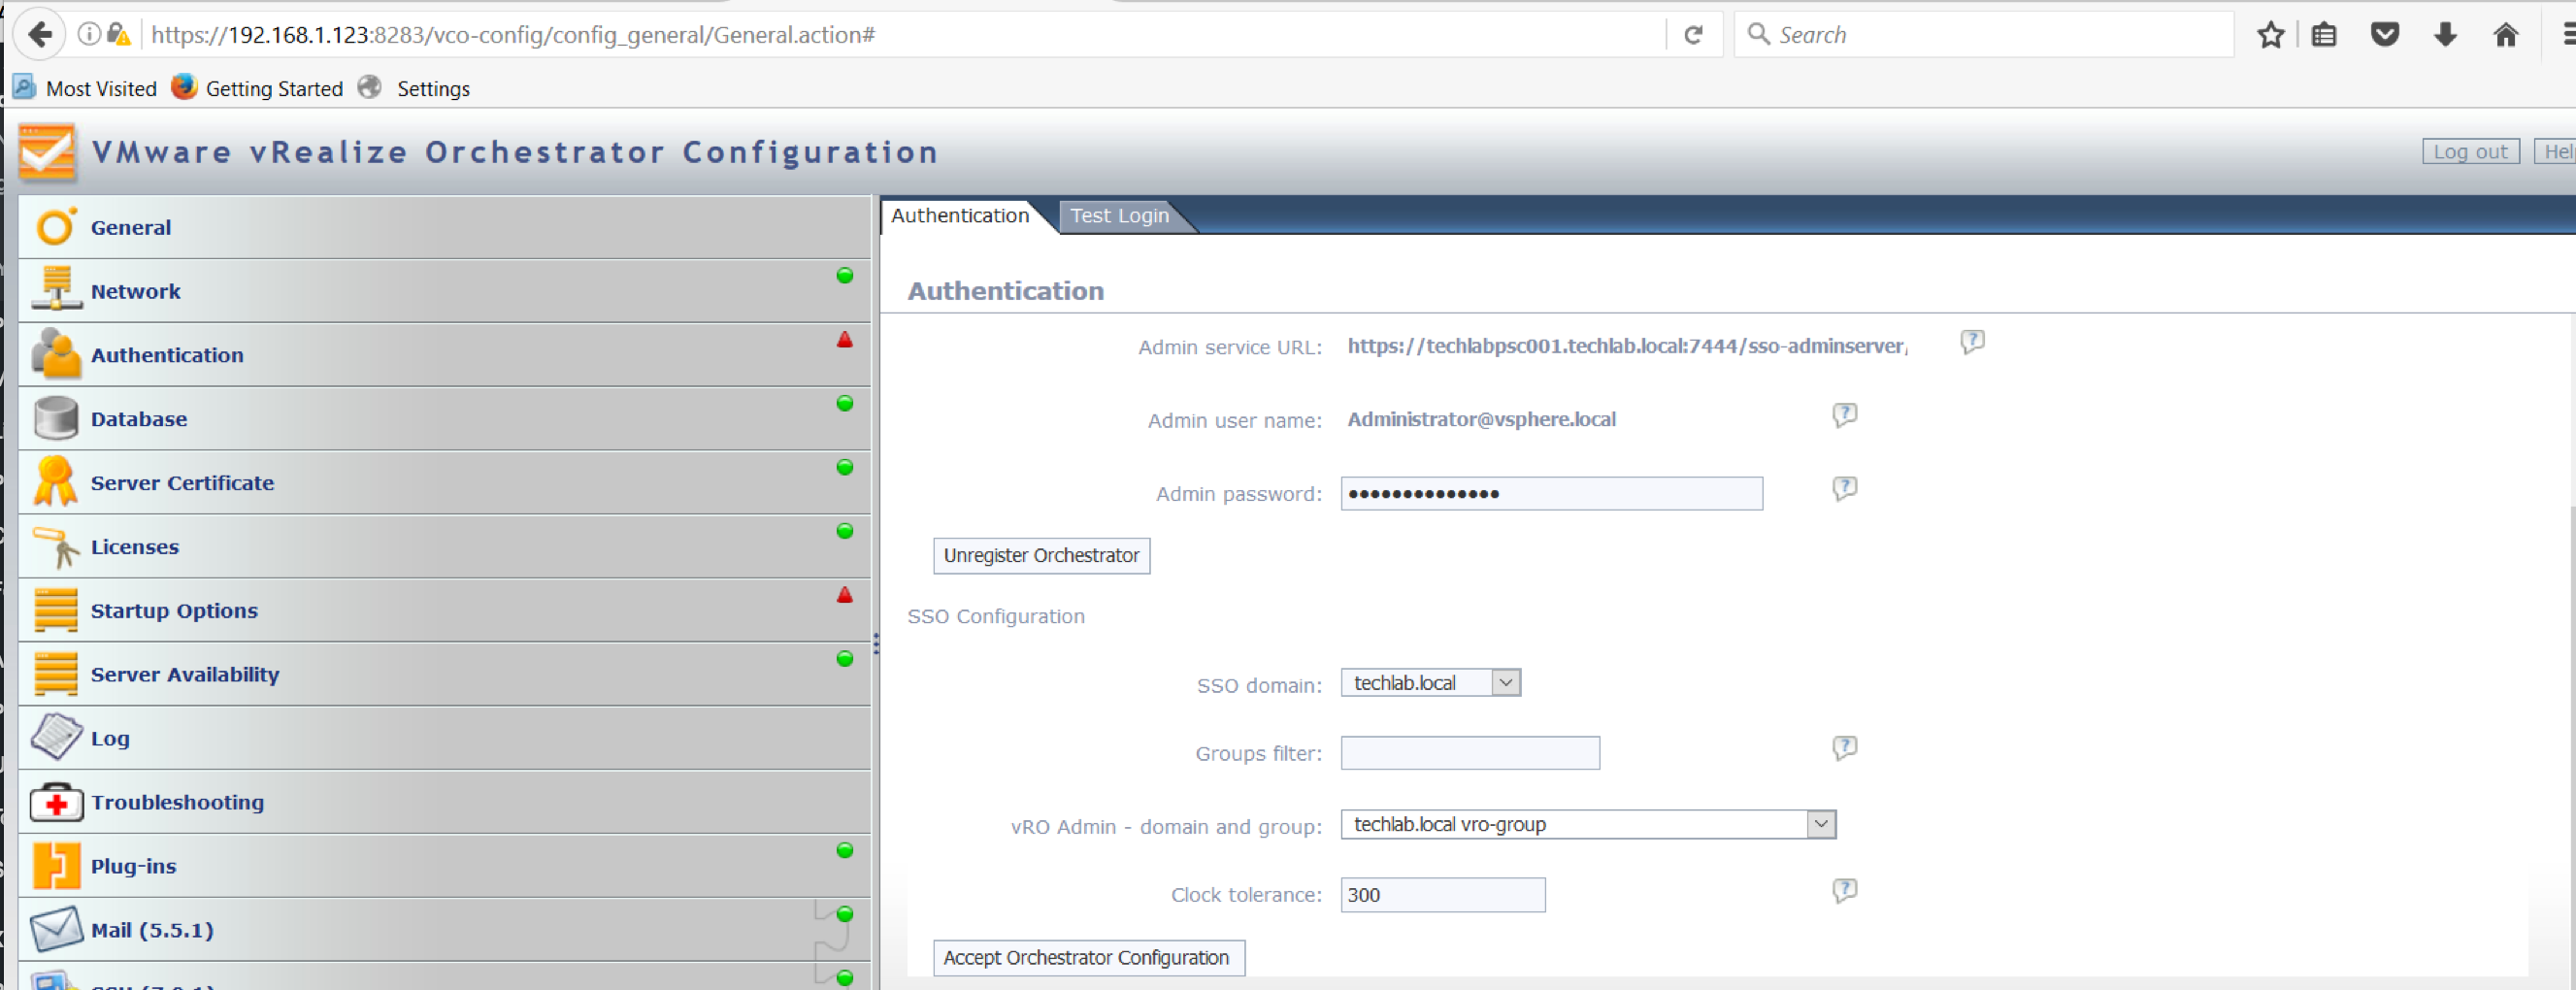
- Click Accept Orchestrator Configuration
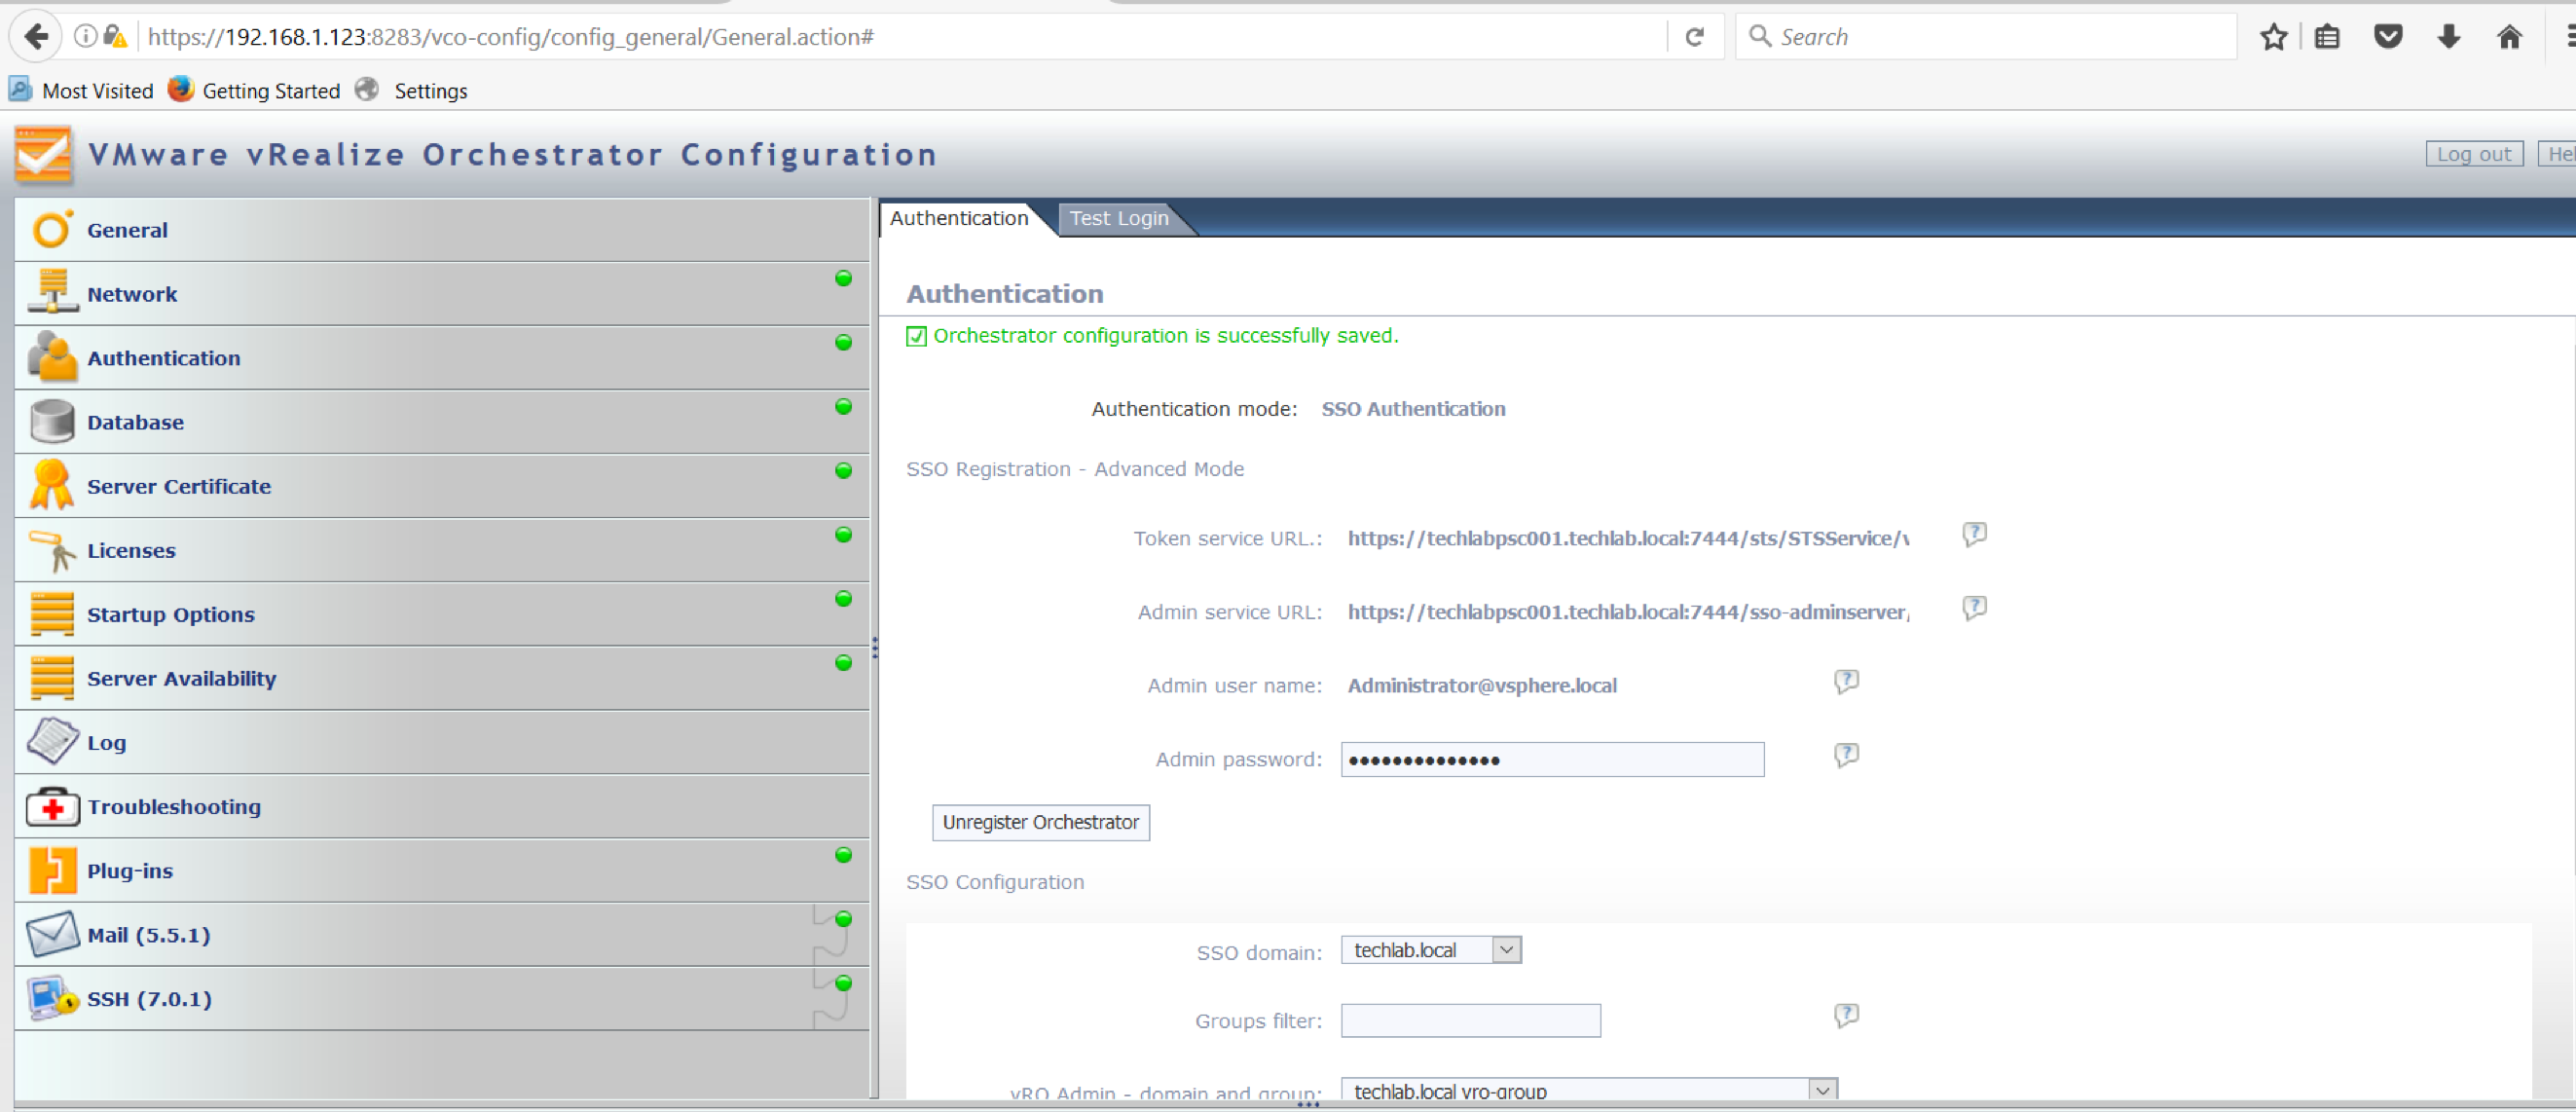
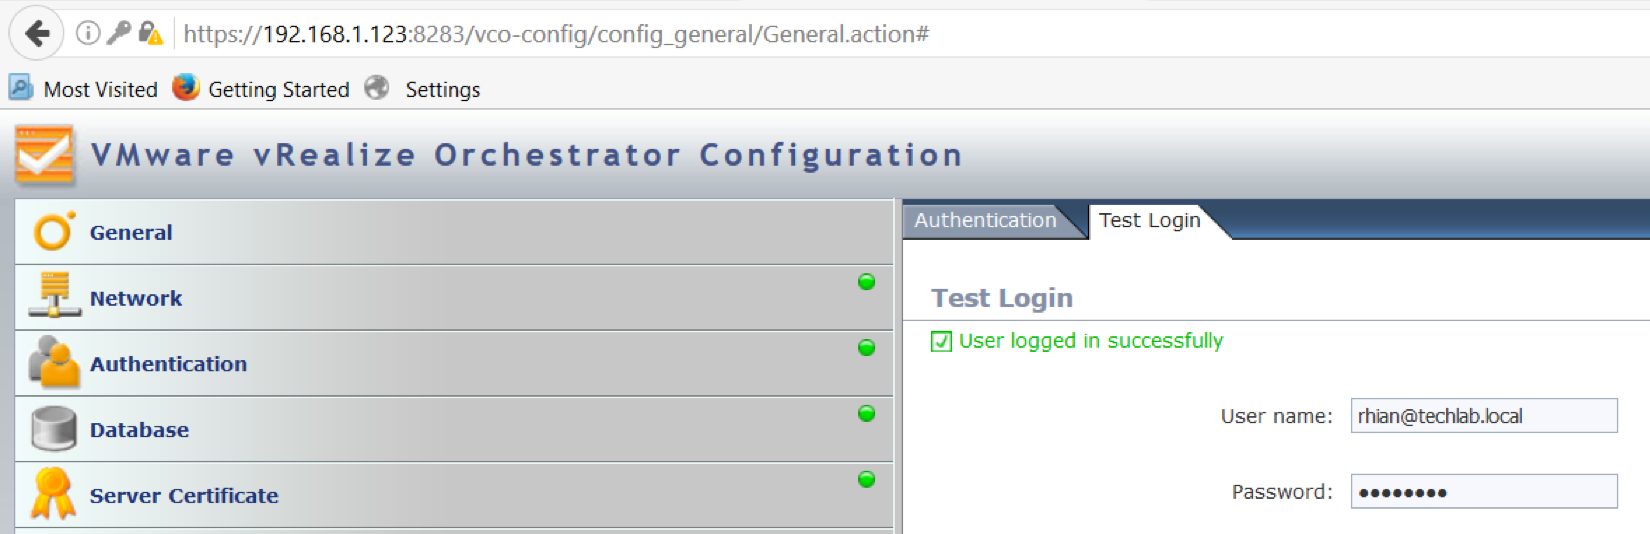
- Click Test login and try one of your users
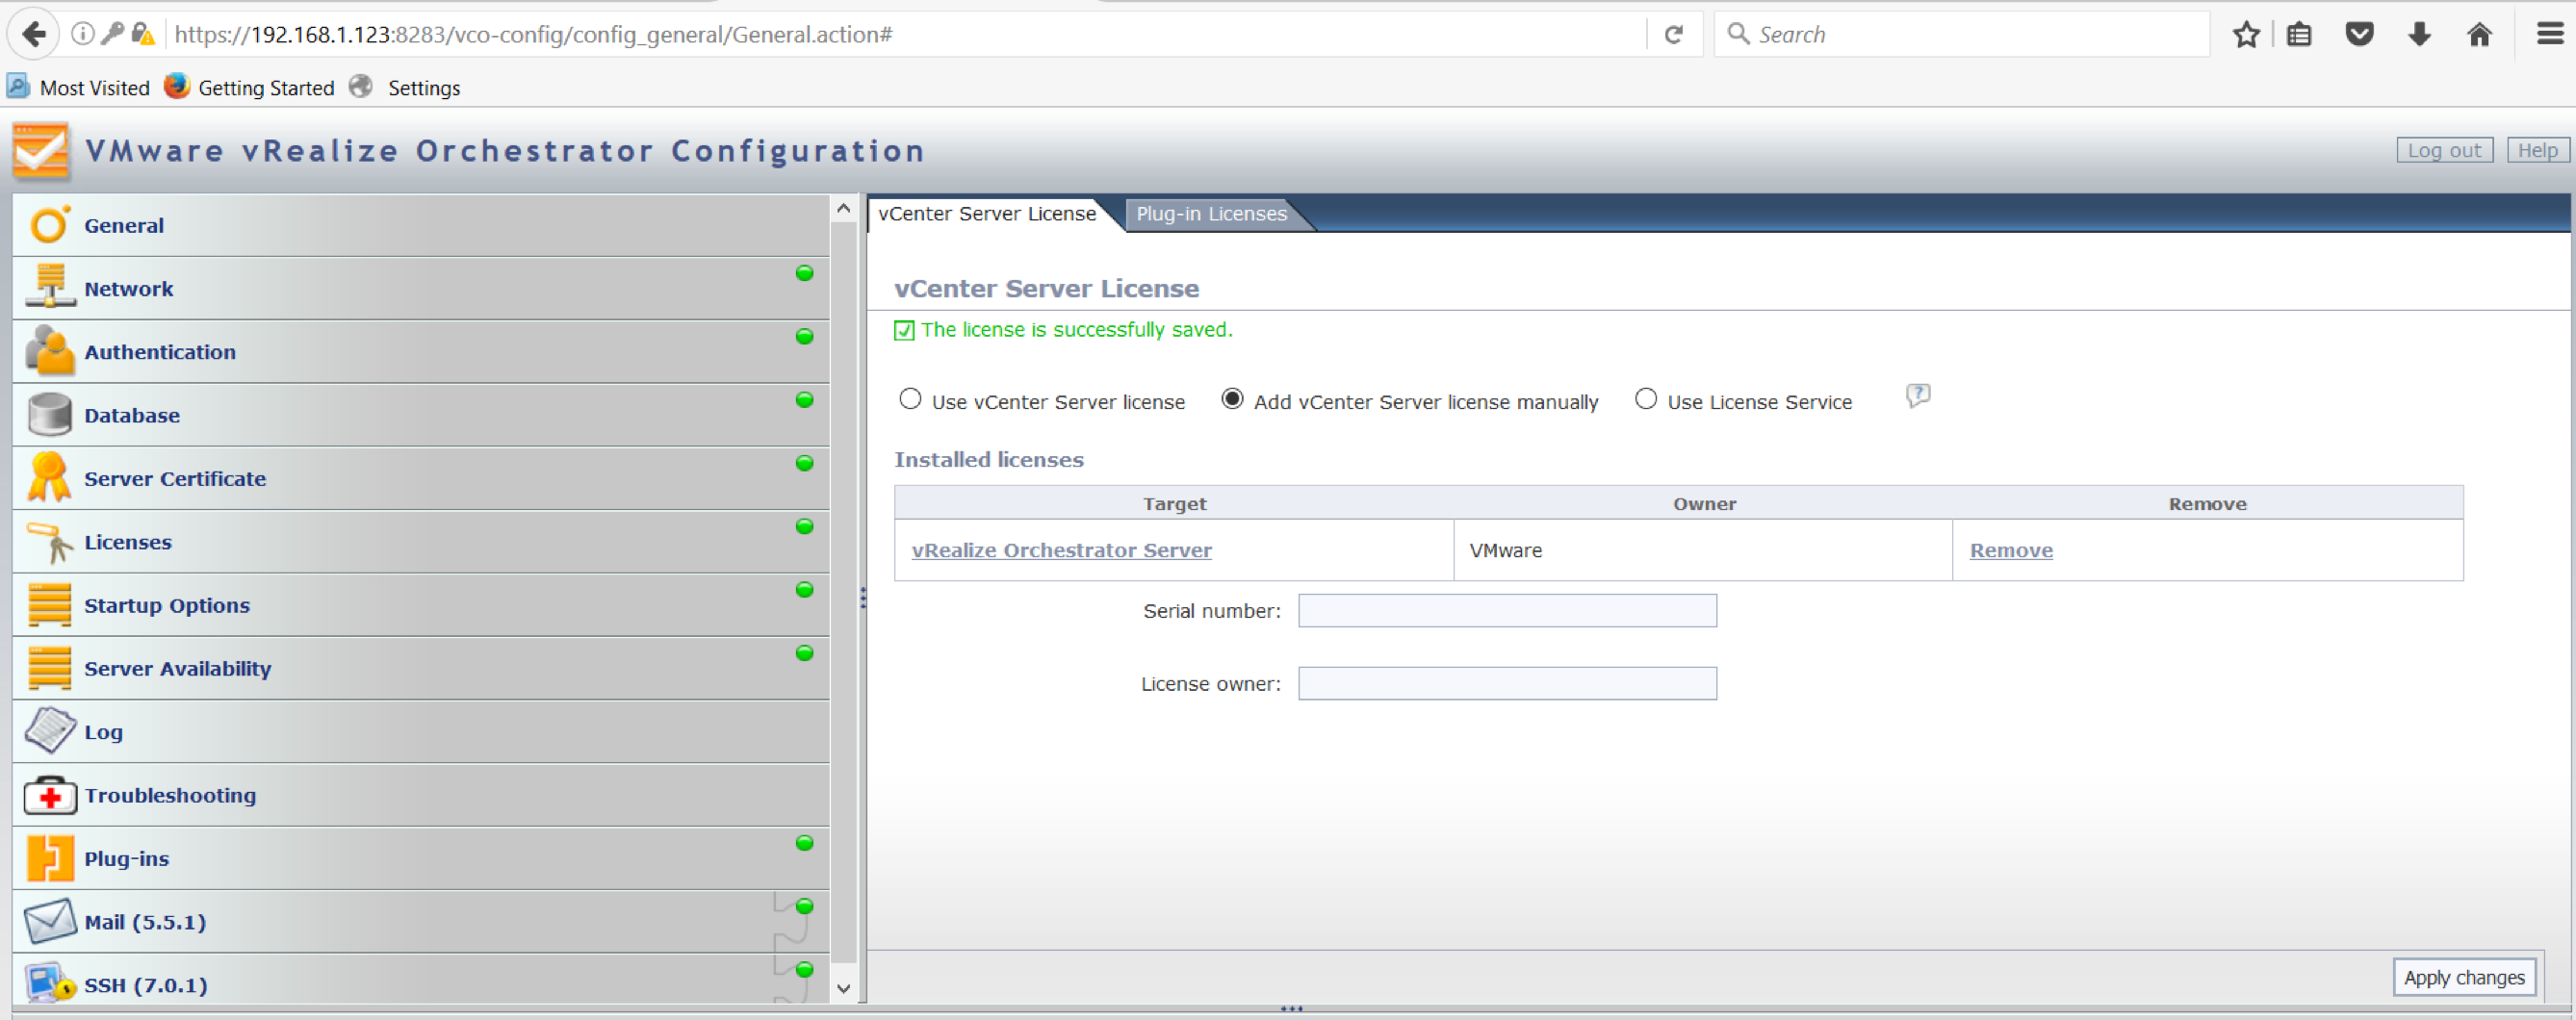
- Check your license
- Check the Plugins are all ok

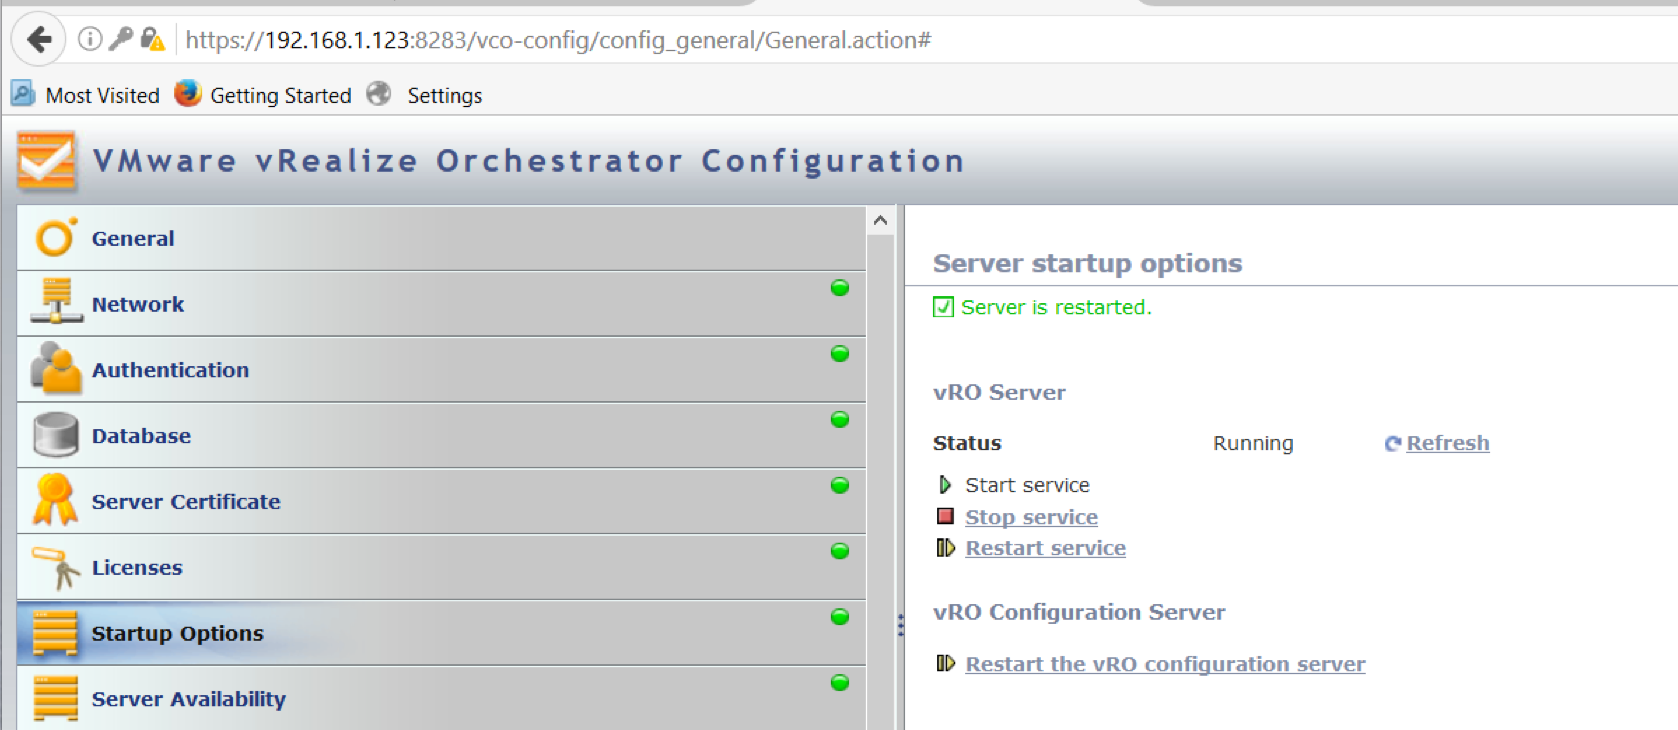
- Click Startup options and restart both services
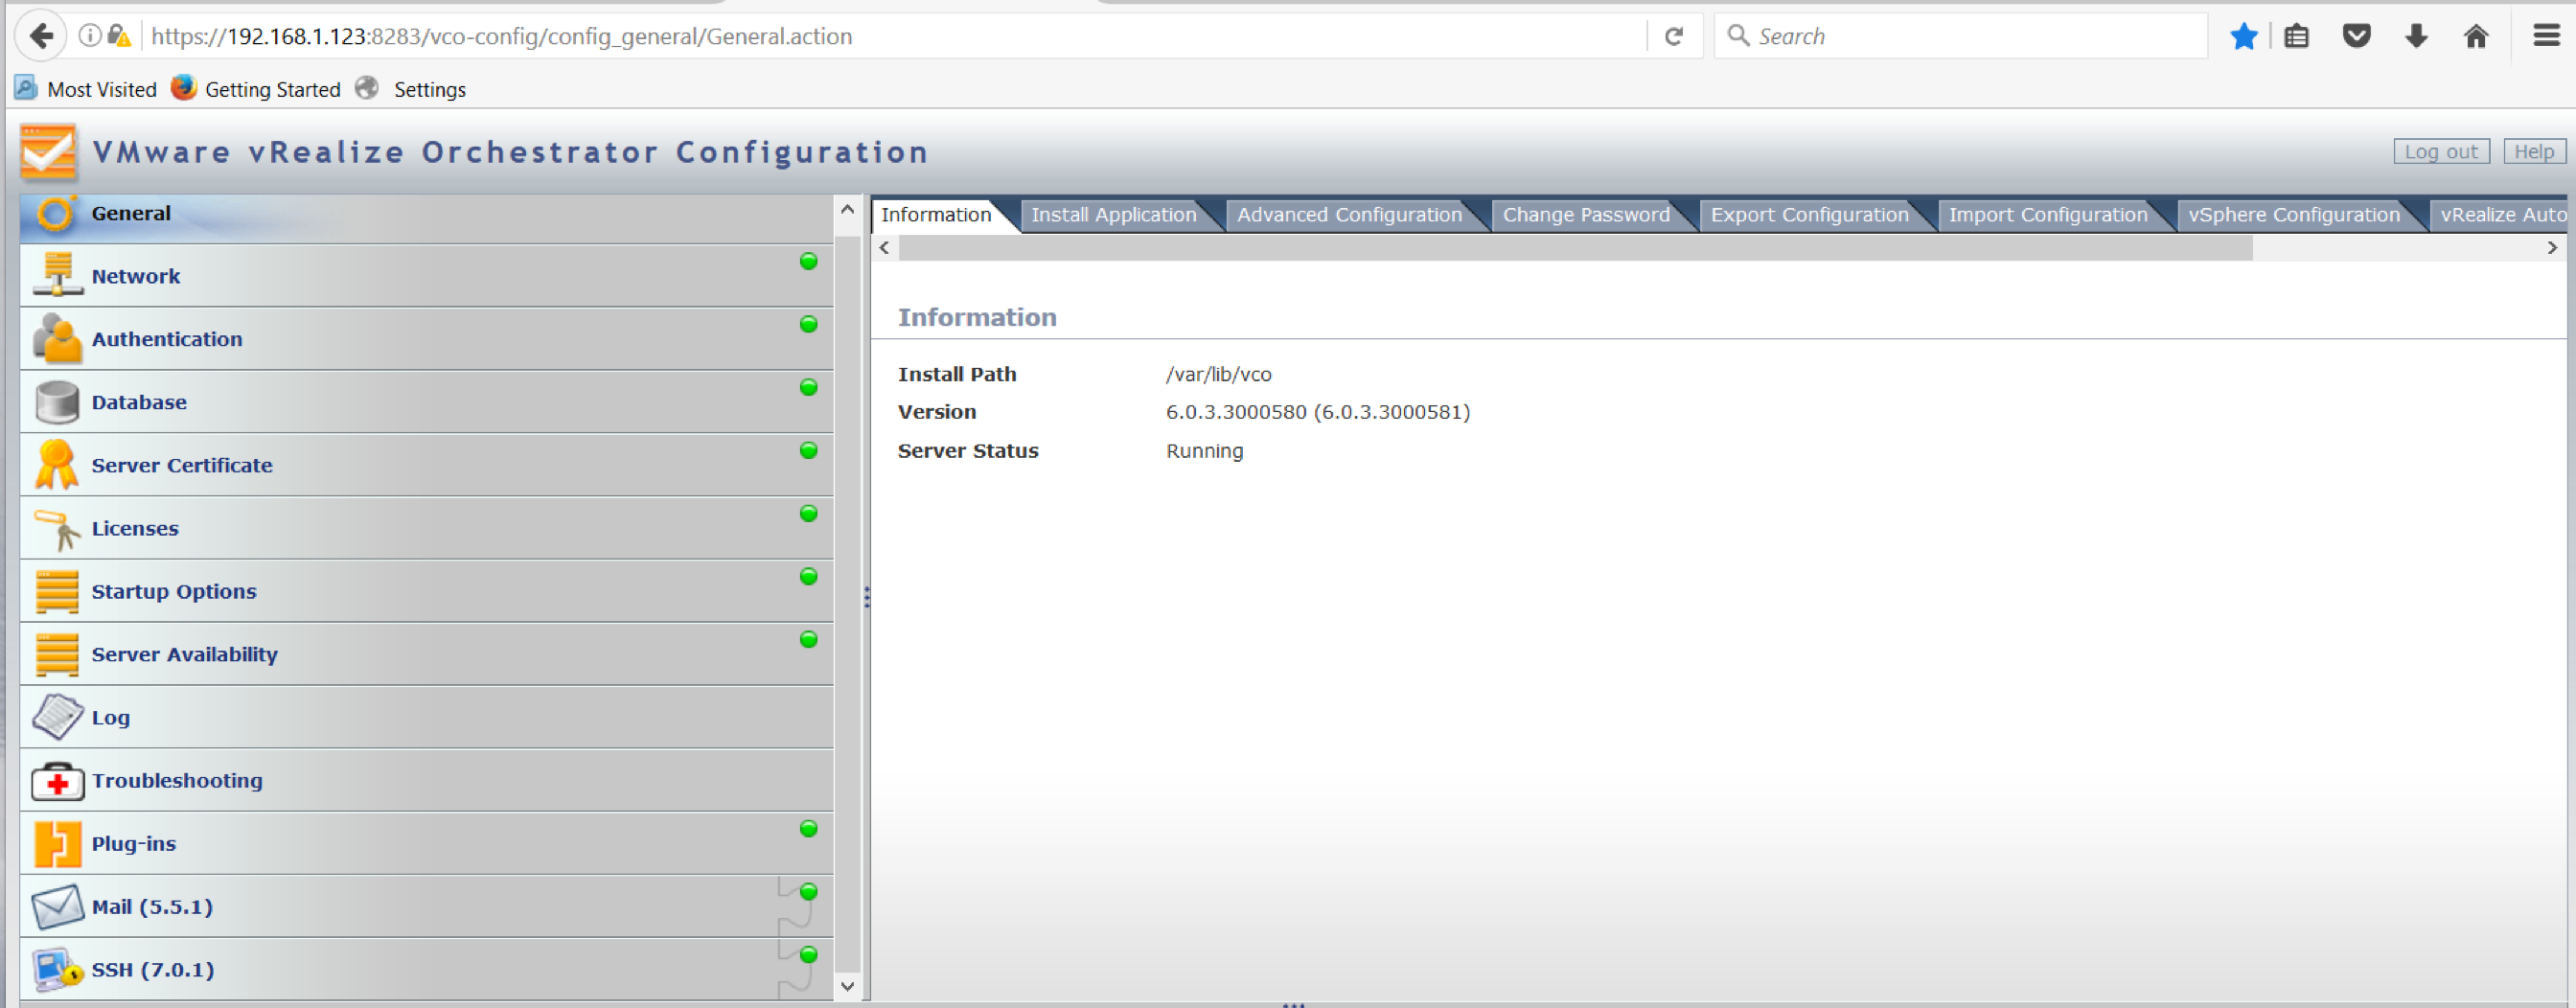
- Log back in and check everything is green
 NEXT
NEXT
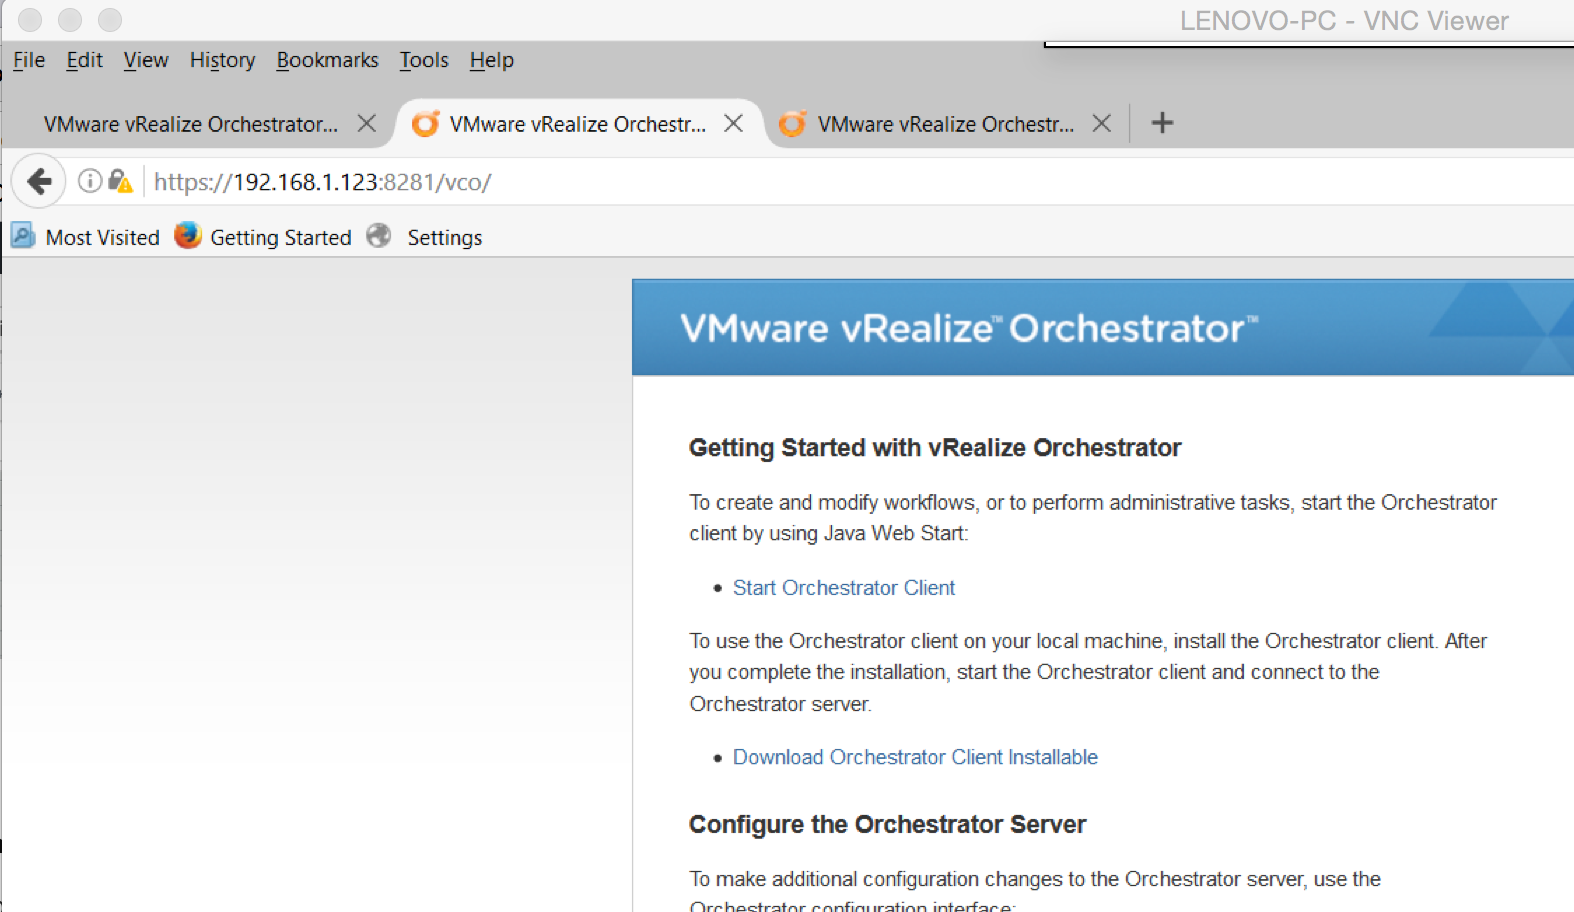
- Open a web page and navigate to your Orchestrator configuration page which in my case is https://techlaborc001.techlab.local:8281
- Click on Start Orchestrator Client
- Click on the drop down to Design
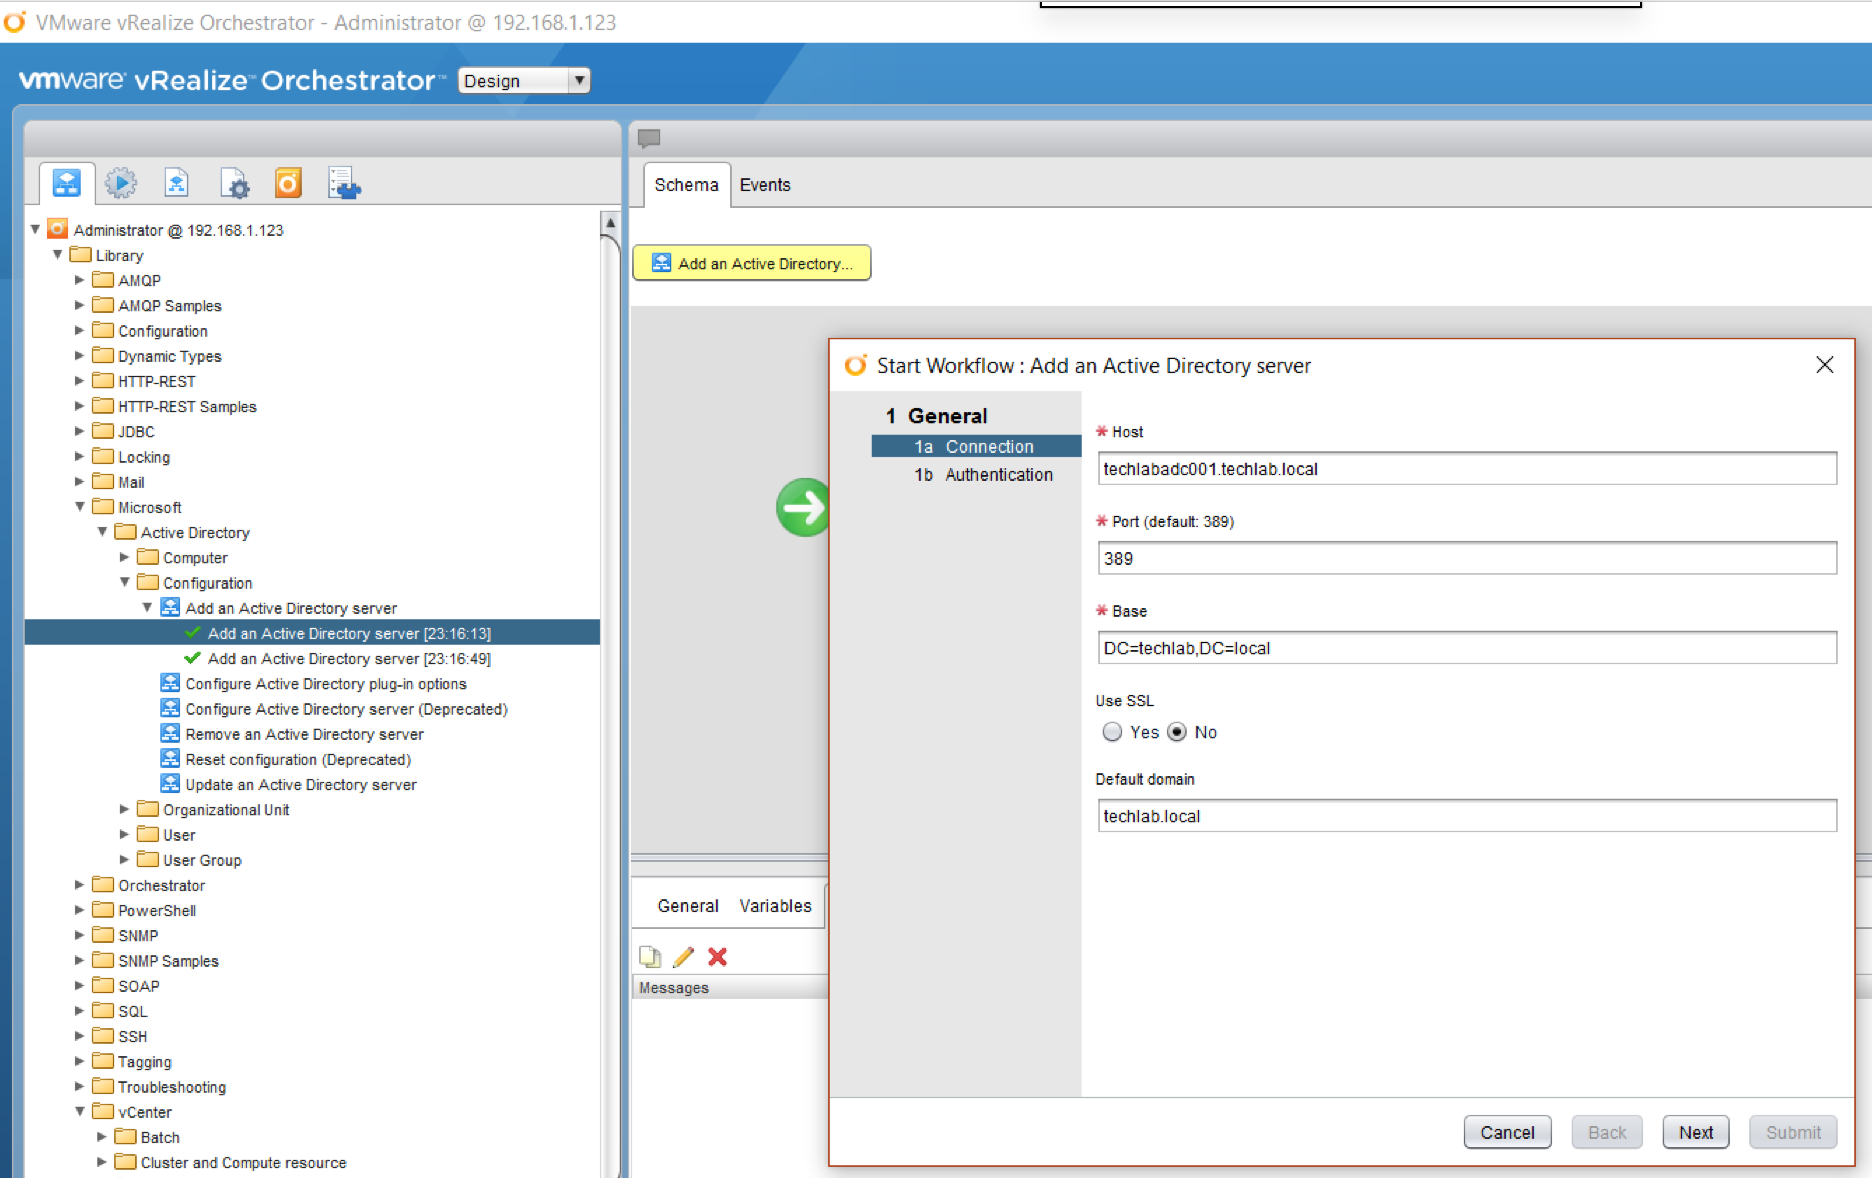
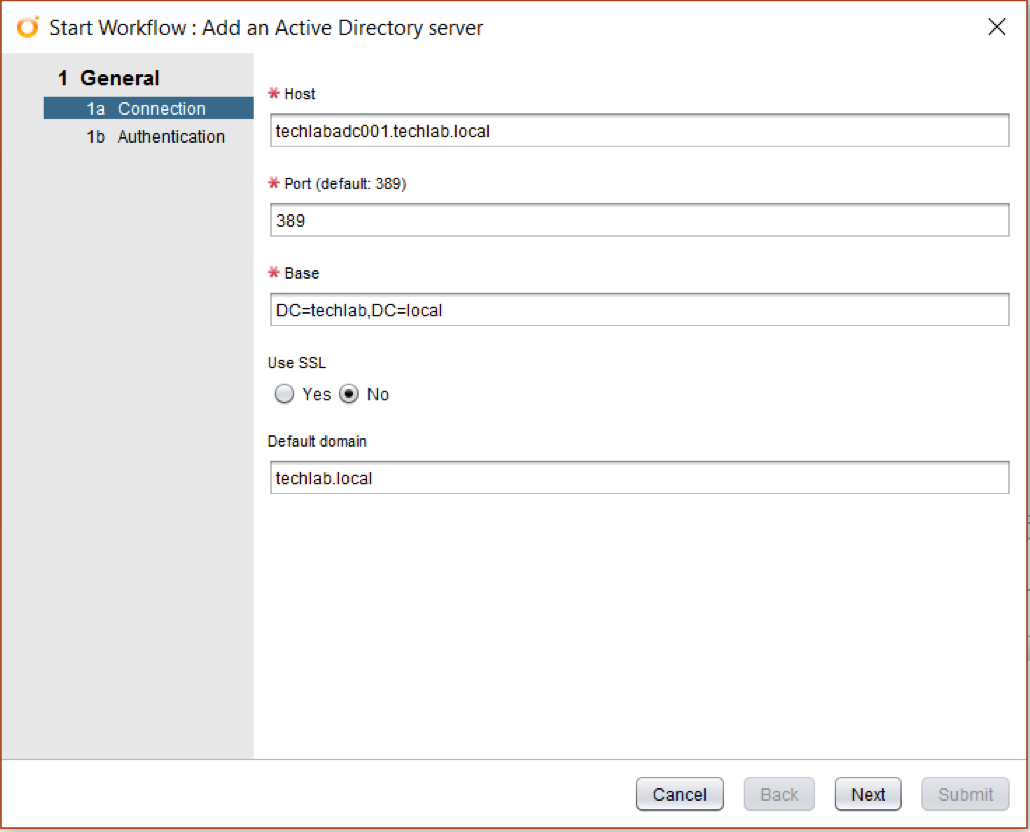
- Navigate to Library > Microsoft > Active Directory > Configuration > Add an Active Directory server
- Add in the relevant details for your AD server and add others as necessary
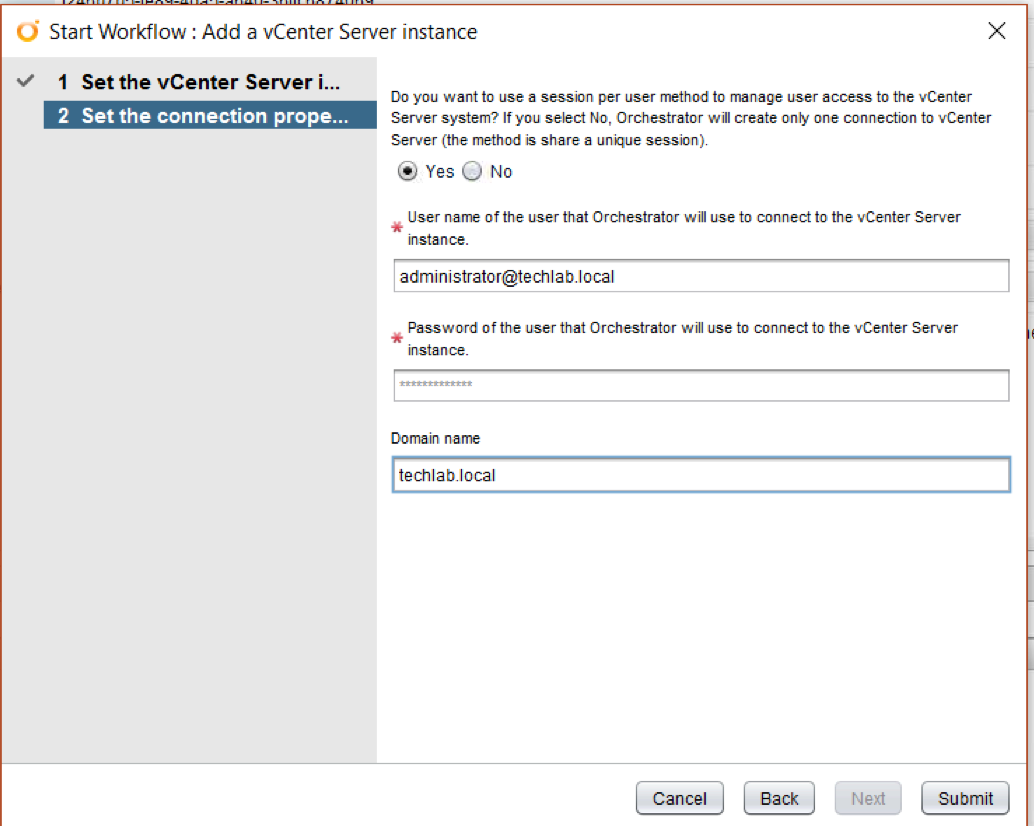
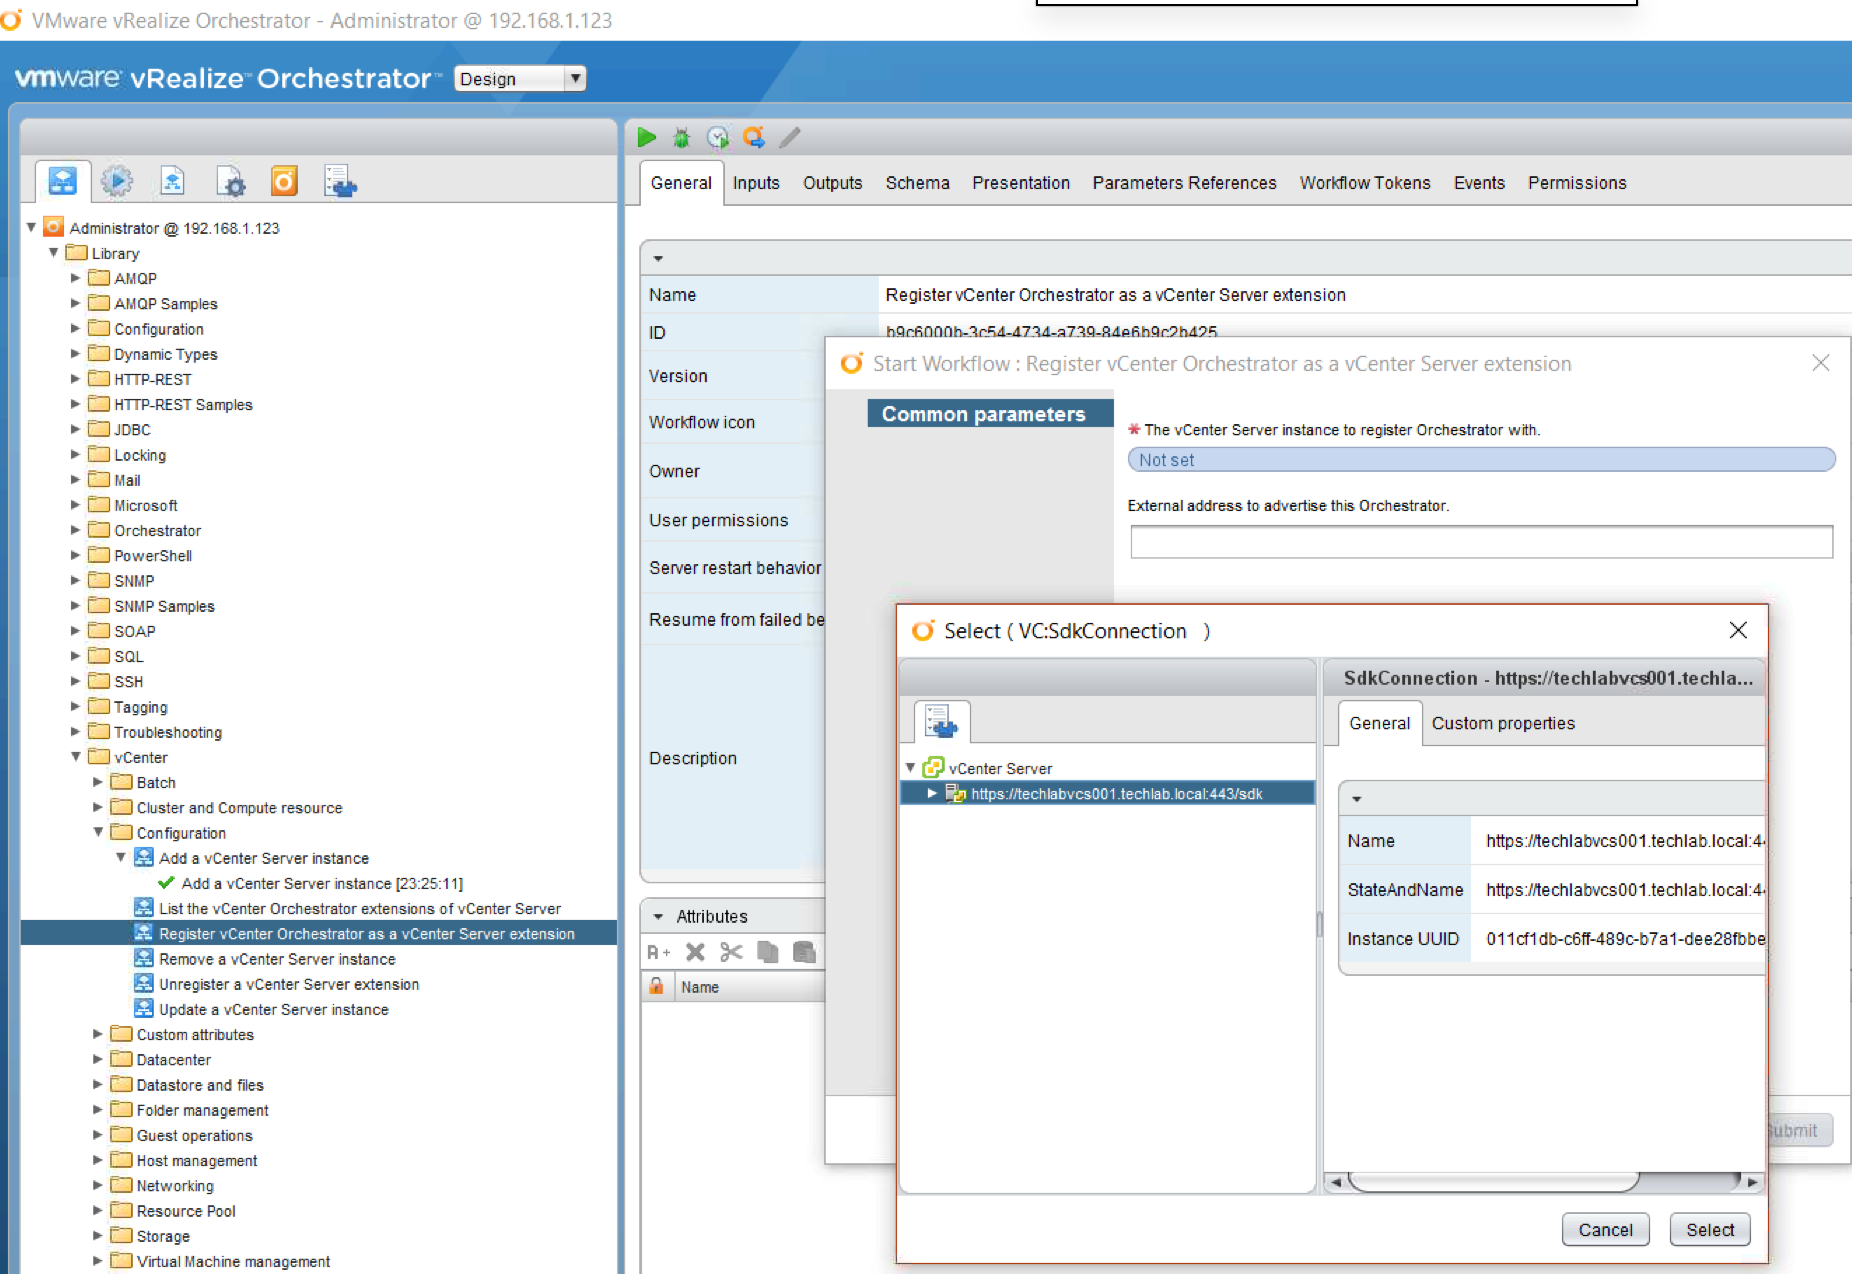
- Next navigate to Library > vCenter > Configuration > Add a vCenter Instance
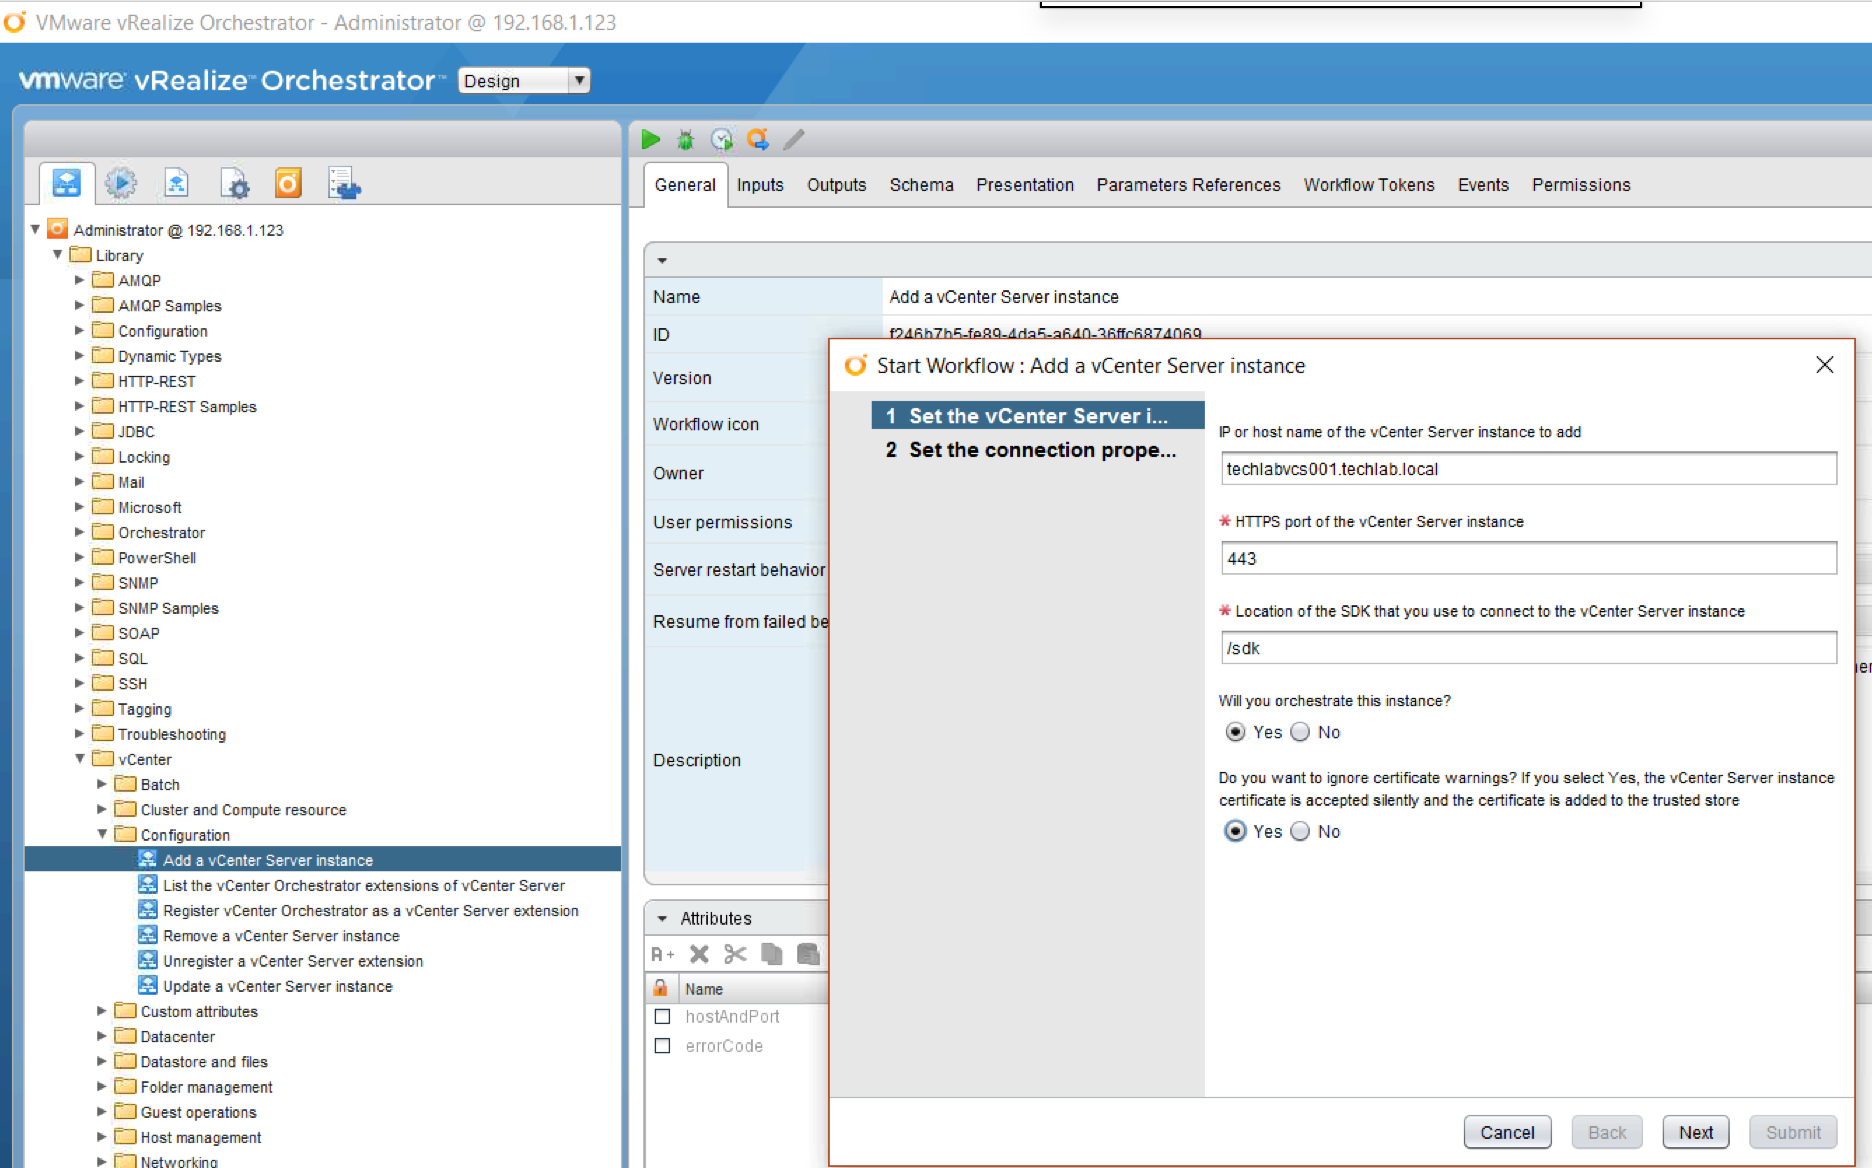
- Click Next and fill in the next screen
- Next we need to run the workflow Register vCenter Orchestrator as a vCenter extension
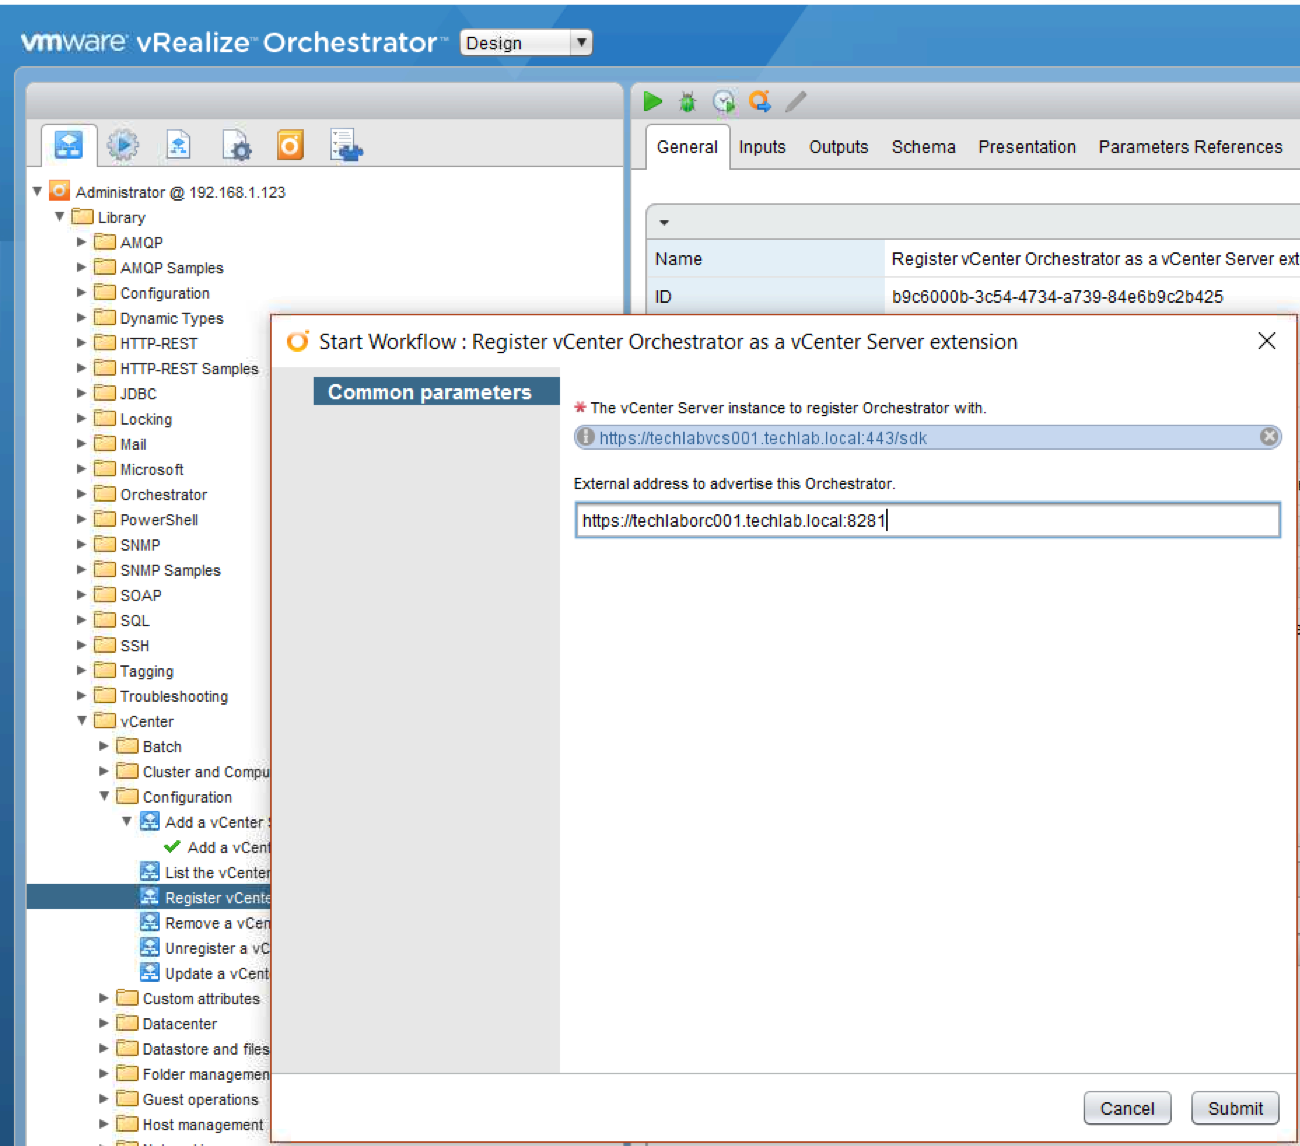
- Next type in the external address to advertise this Orchestrator
- this needs to be for example https://techlaborc001.techlab.local:8281
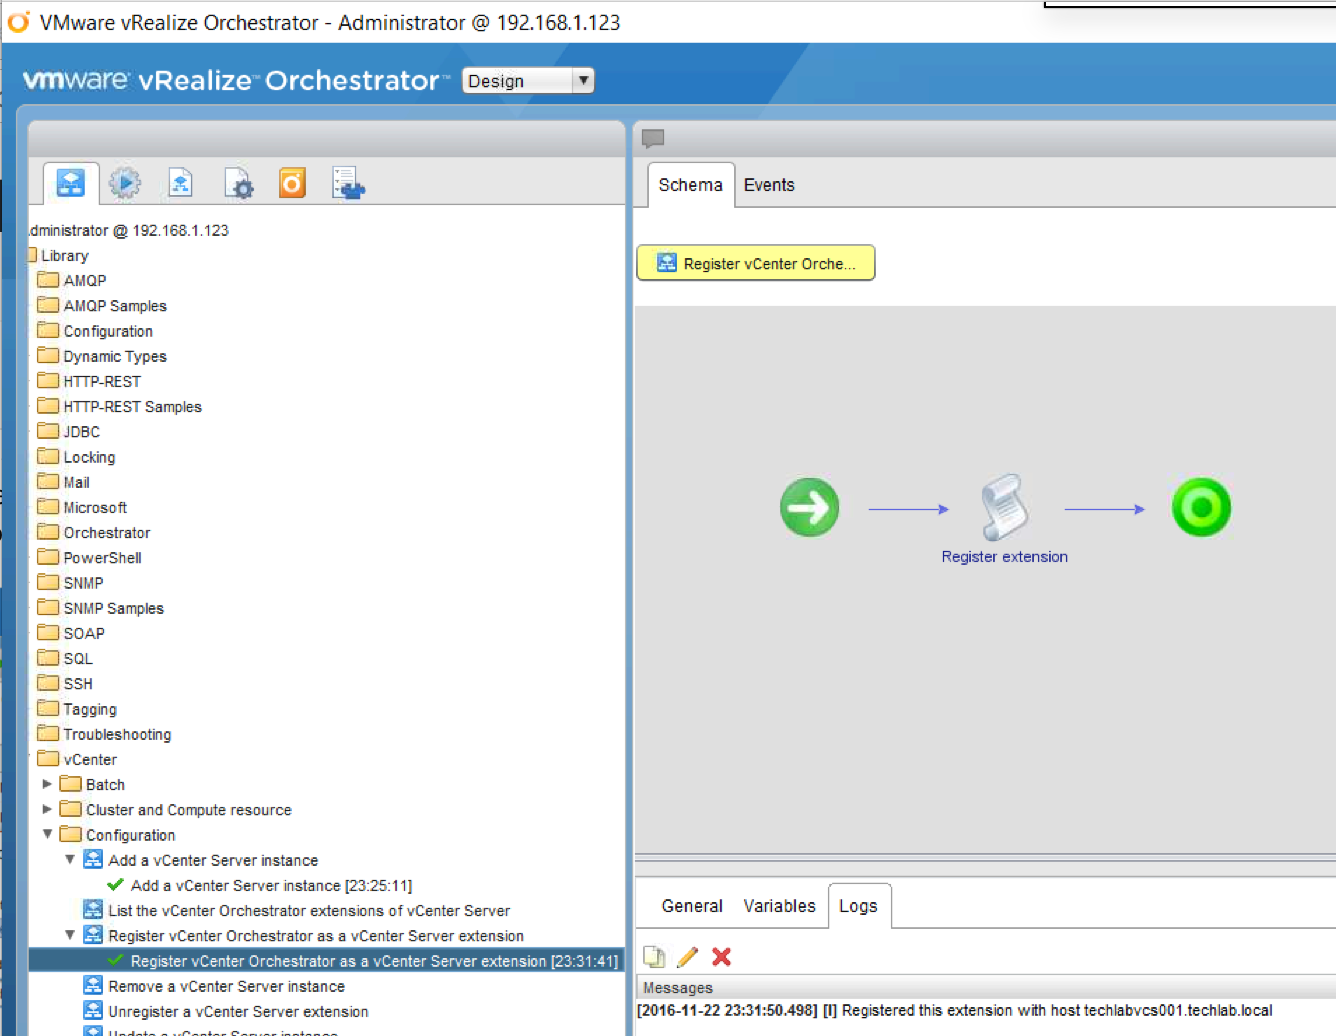
- It should say it has been registered as per below
- We can check it has been registered by opening a web browser and putting in the vCenter server address as per below
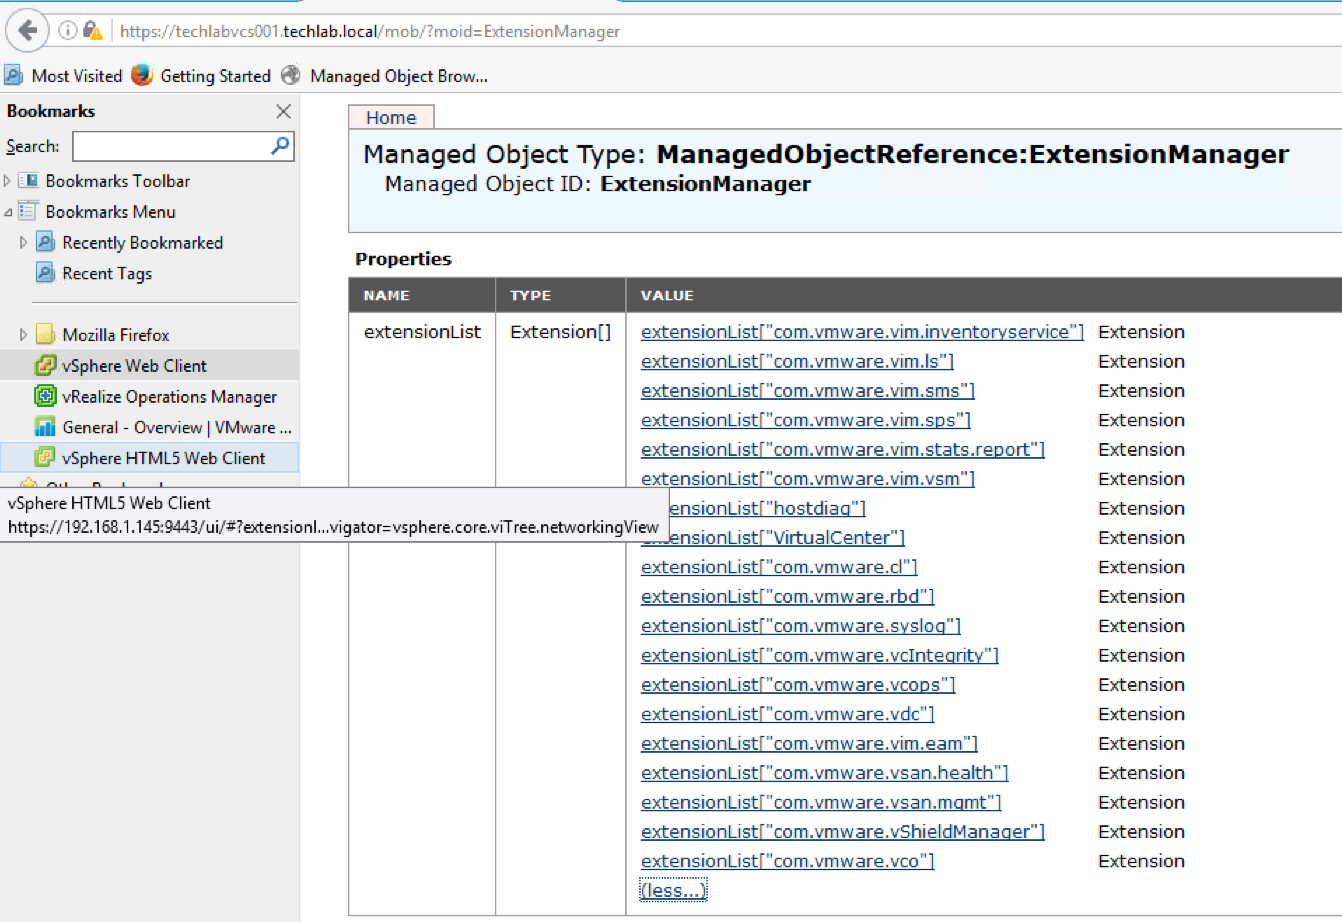
- https://techlabvcs001.techlab.local/mob
- Click on Content
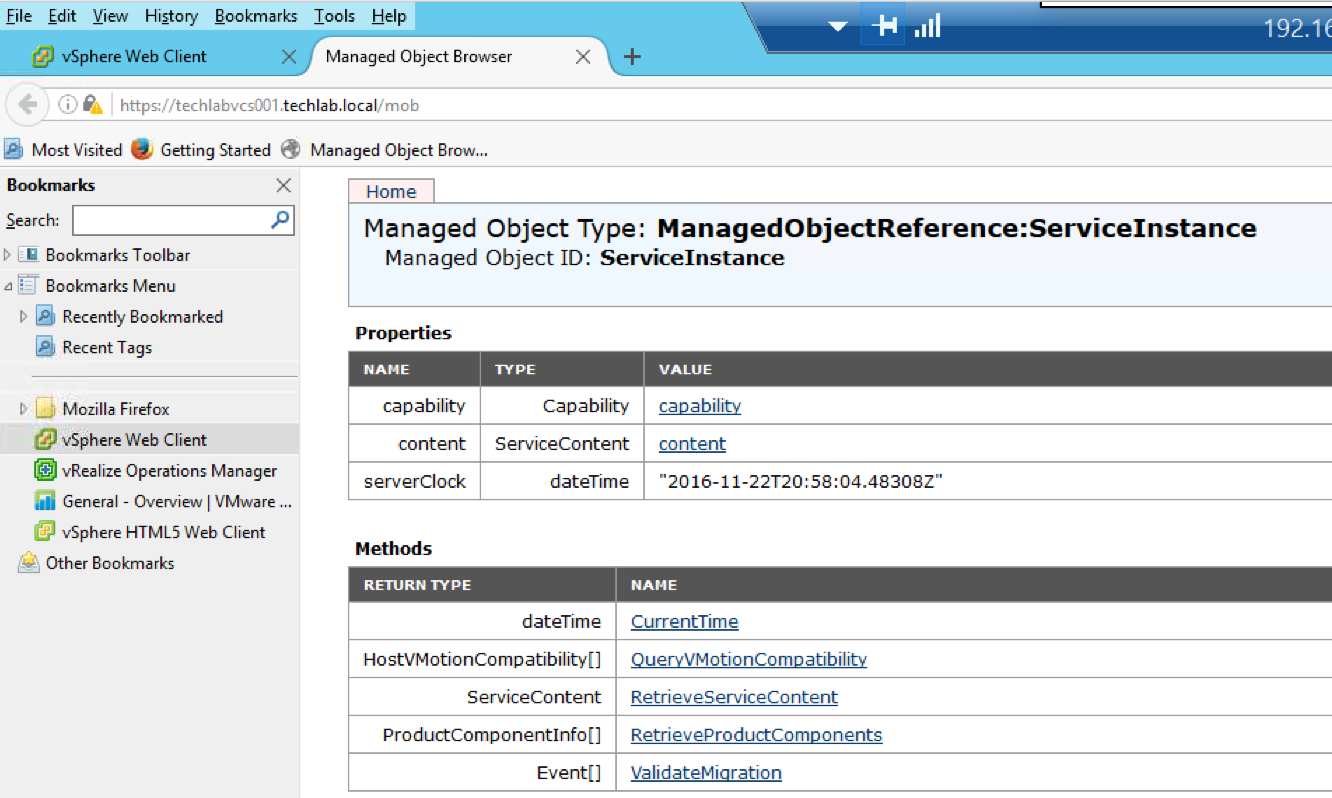
- Click on ExtensionManager

- Look for extensionList[“com.vmware.vco”] which should only exist when the workflow has run correctly.
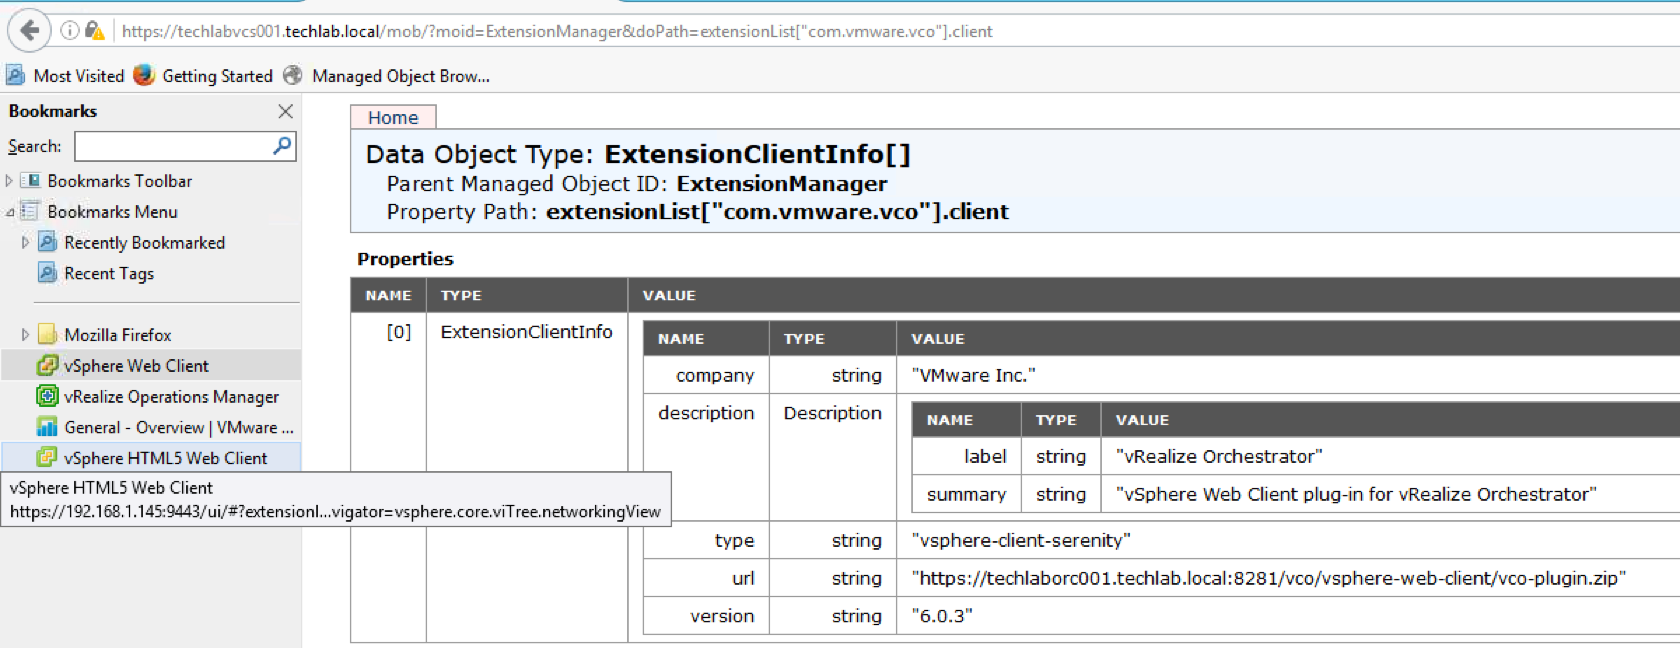
- Click on Client
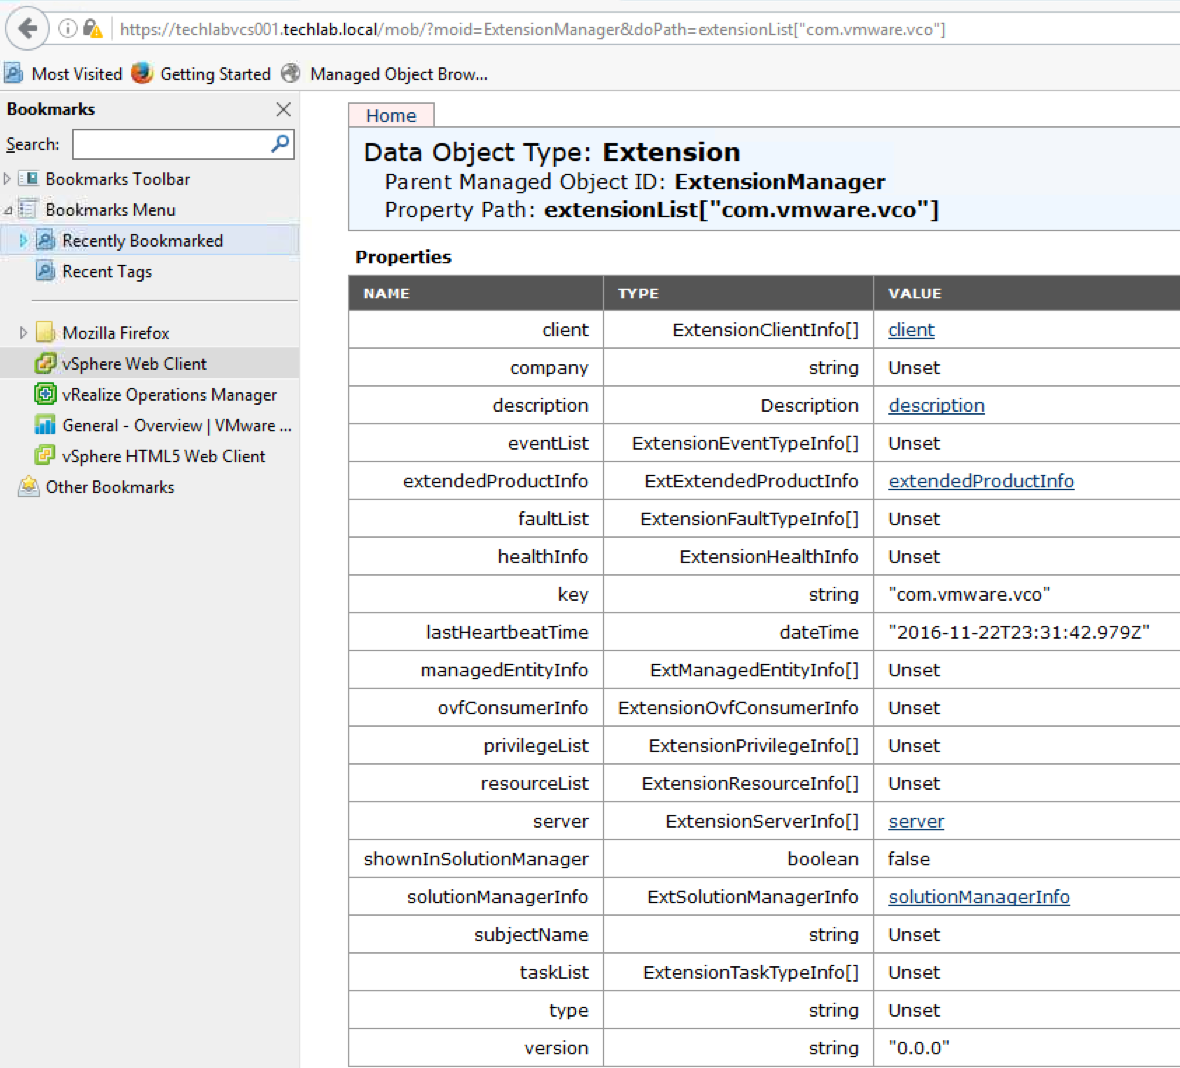
- You should see the below in url string. This will also appear in the Web Client which we’ll see further on in the instructions
- You can put this link into a web browser and it should try and download the zip
- If you need to remove an extension, follow this useful blog below
Removing extensions link http://blog.mwpreston.net/2014/05/02/to-the-point-removing-stranded-vcenter-orchestrator-servers-from-vcenter
- You now need to restart the web client
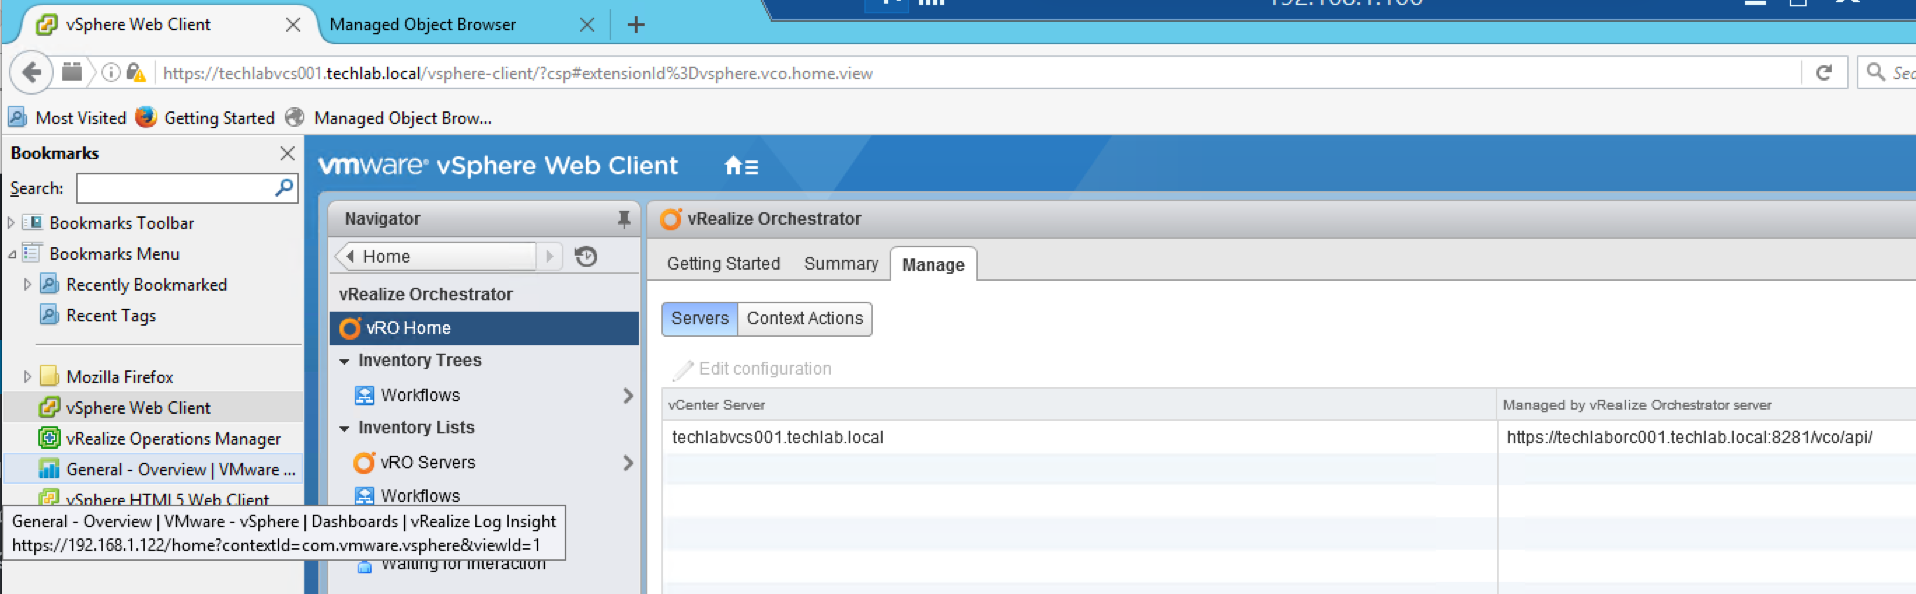
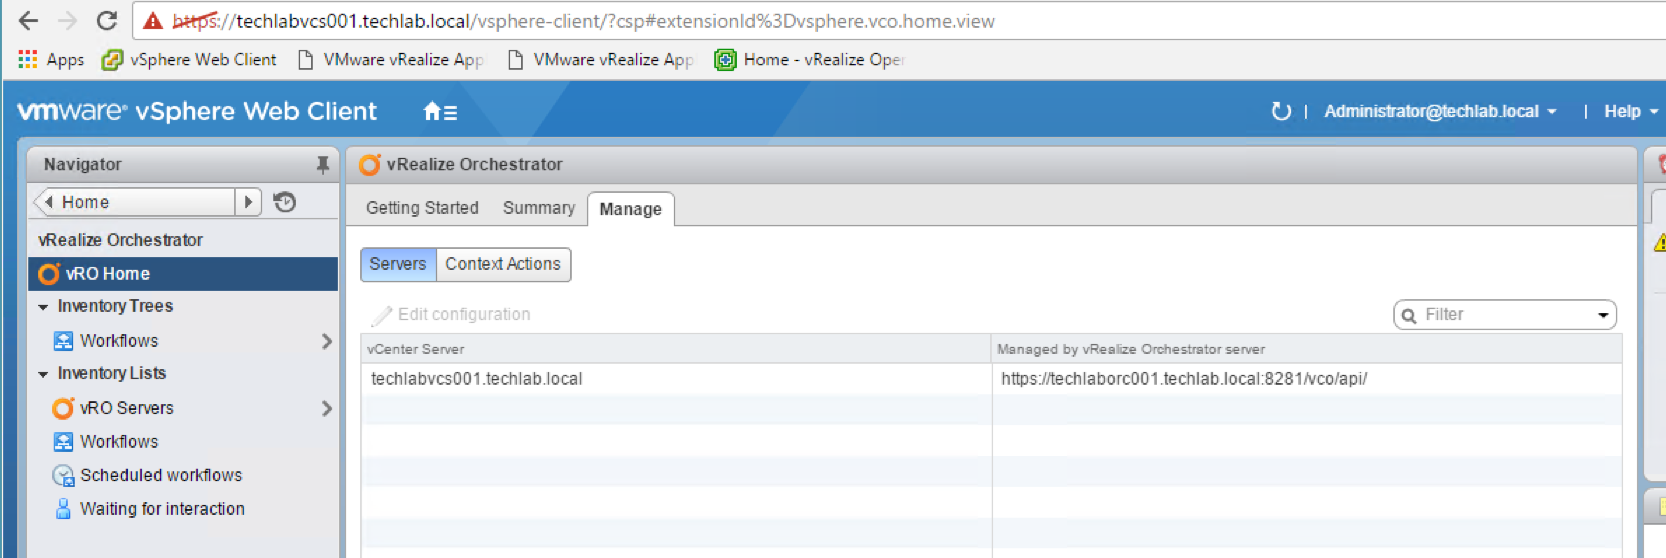
- When the Web Client has restarted and come up again, Go to the Home screen and select the Orchestrator icon
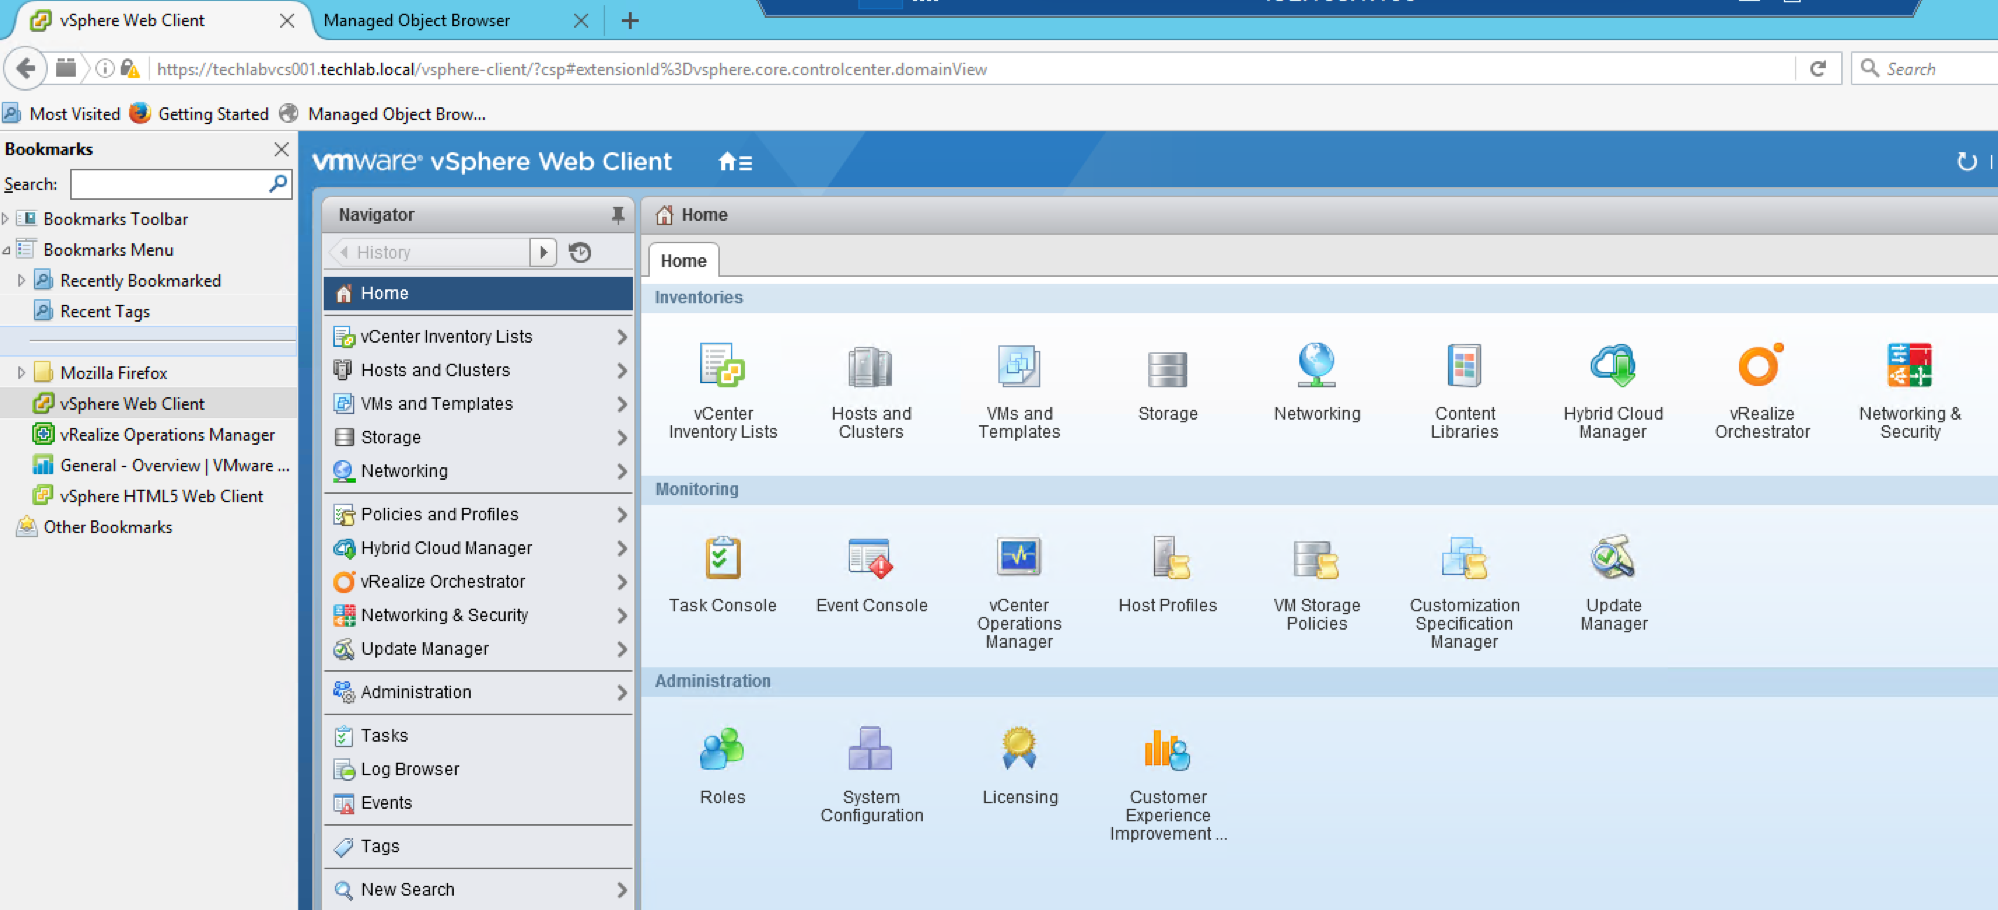
- You should now see the vCenter and the Orchestrator server listed and you’ll see the information which we saw in the mob web page
- If you click on Workflows under Inventory trees, you will see the whole library of workflows
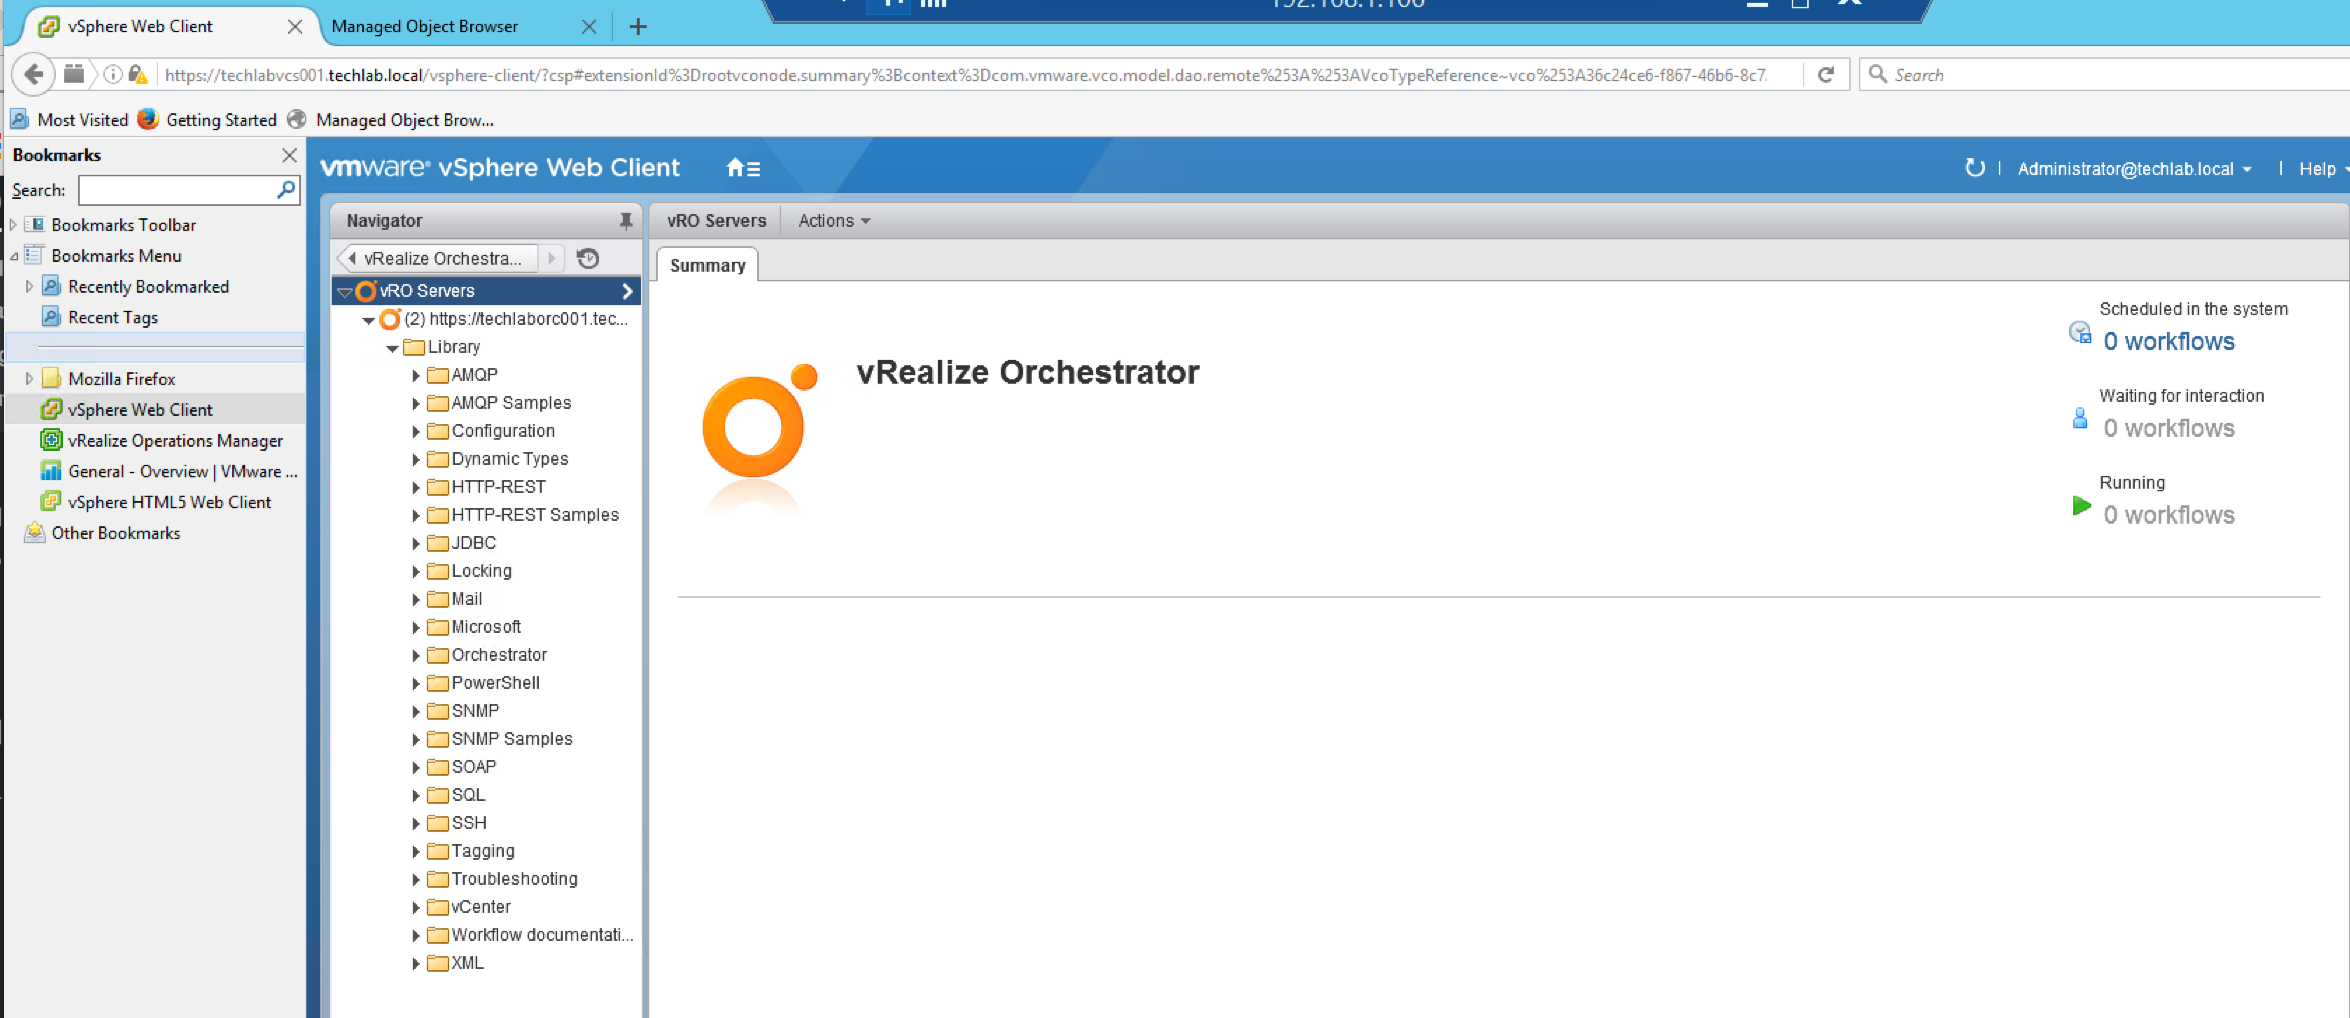
- You can then use the inbuilt workflows or create your own in Orchestrator
- If you run the List the vCenter Orchestrator extensions of vCenter server, you will see it will pop up in the Recent Tasks list at the bottom of vCenter
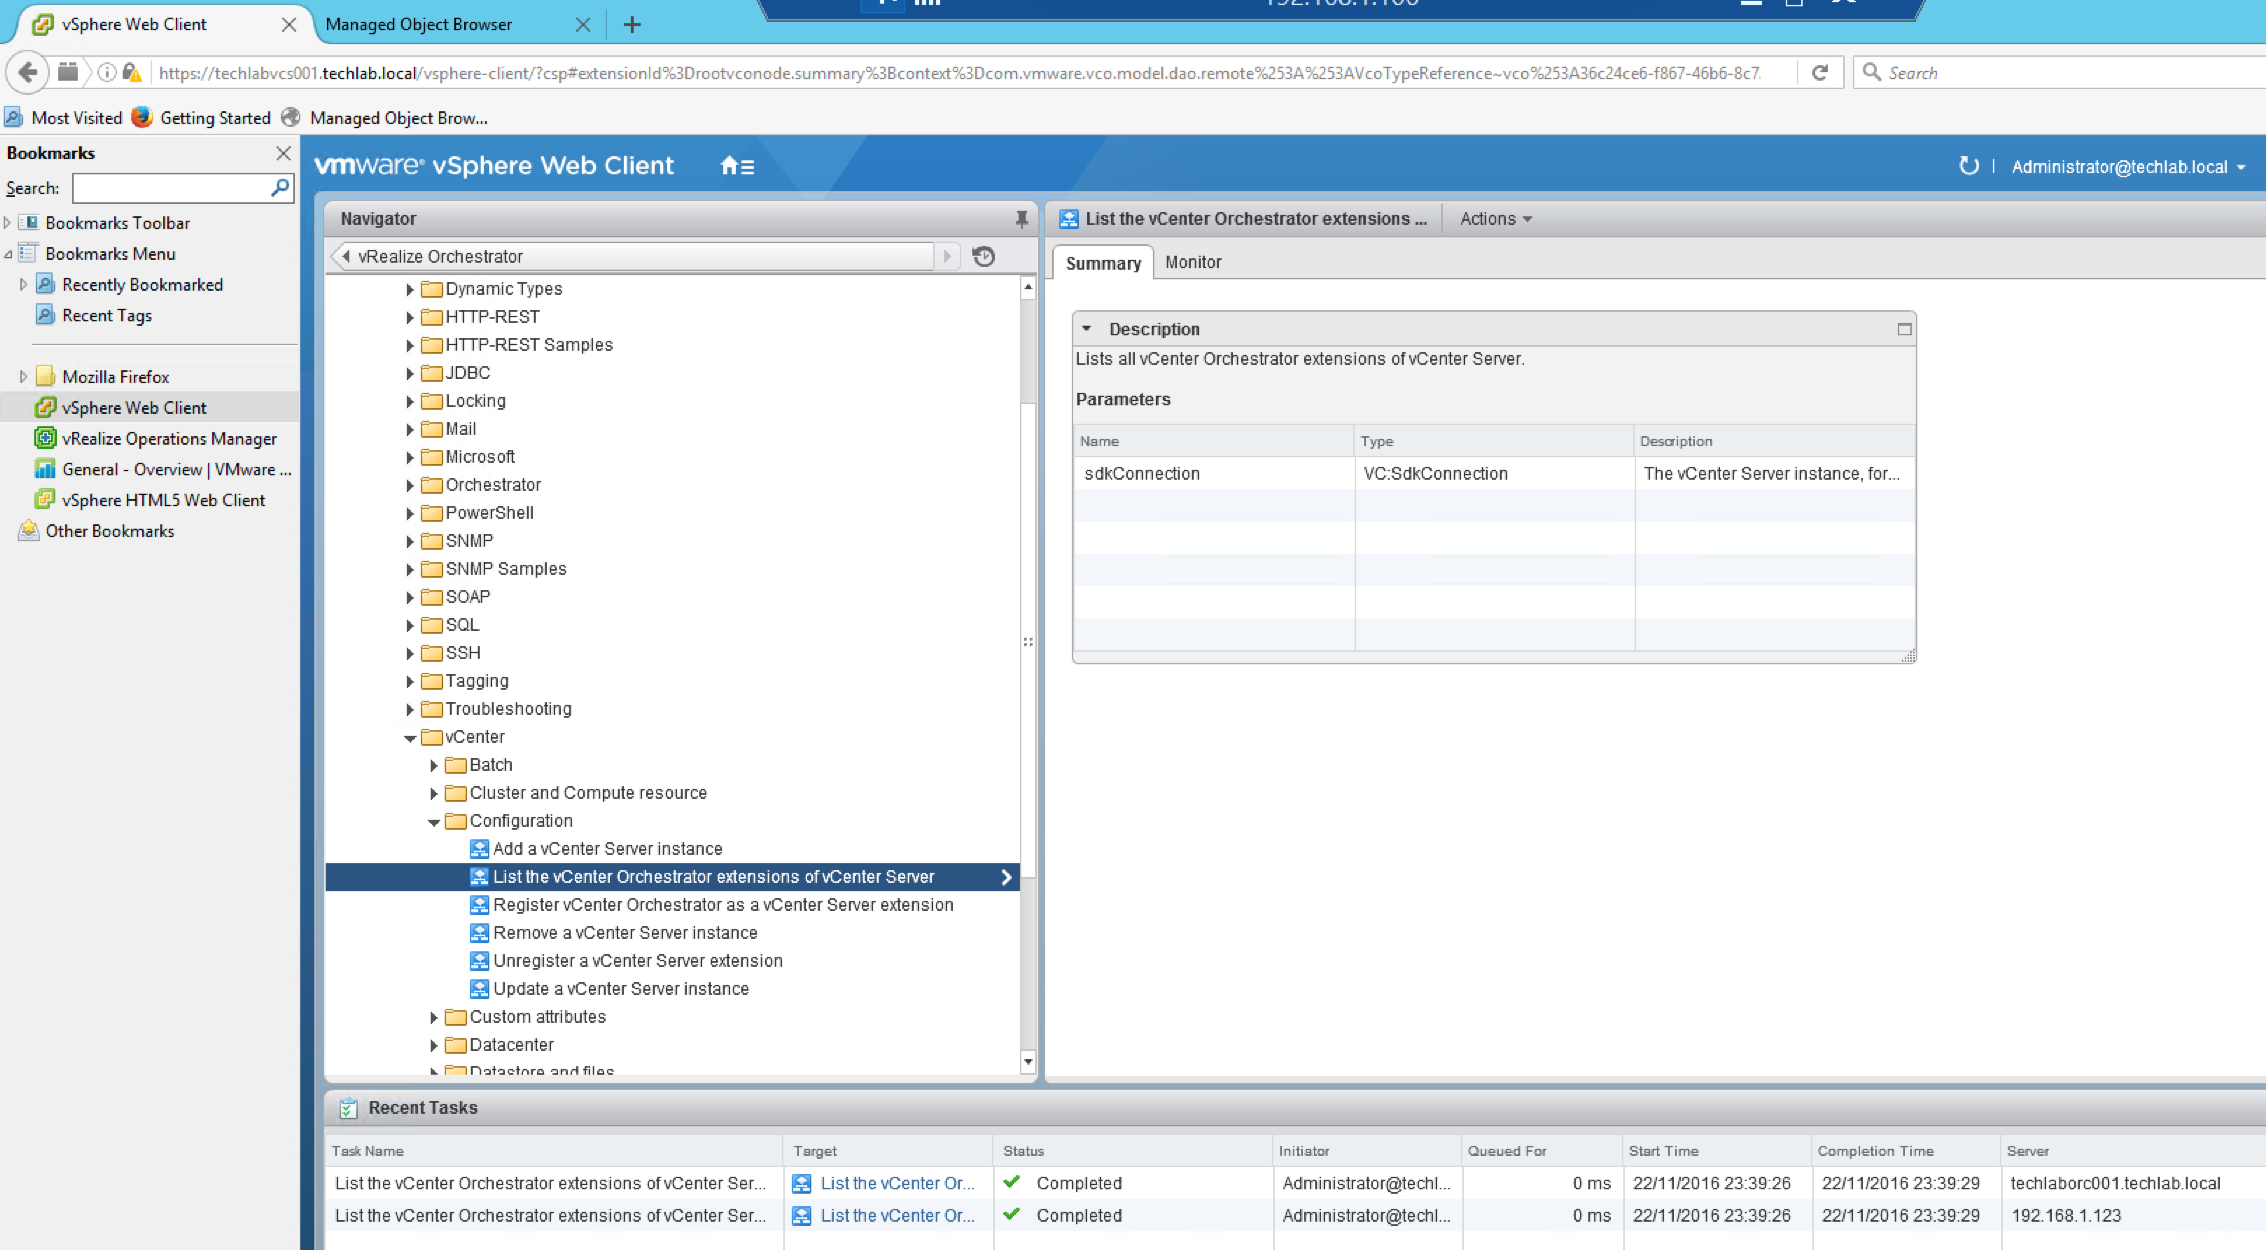
- Pretty funky stuff 🙂
Next
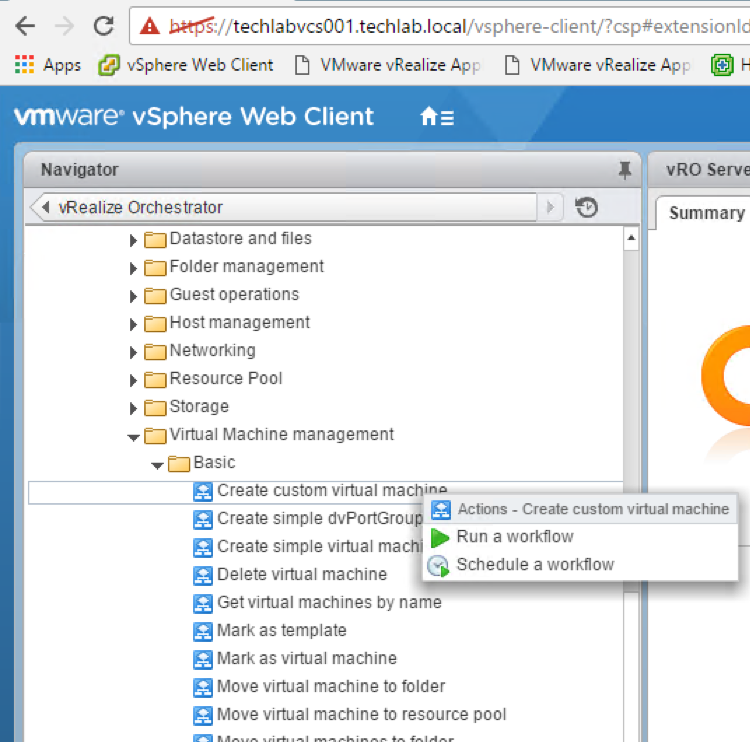
- In the vSphere Web Client > Click Home > Orchestrator, click on the Workflow icon and expand vCenter > Virtual Machine Management > Basic
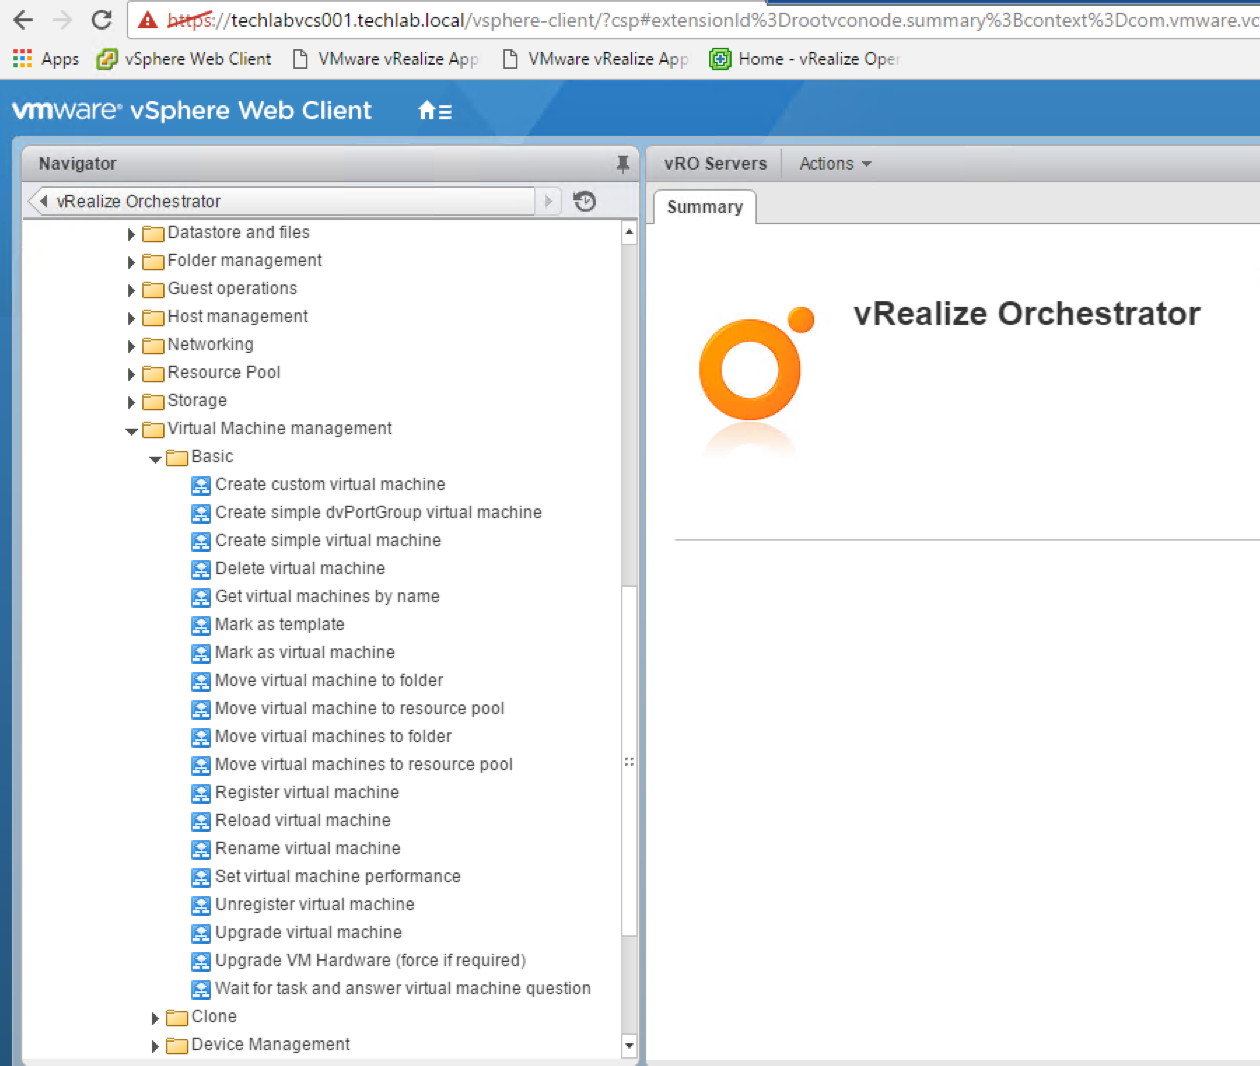
- Right click “Create simple virtual machine”, here is where you can run a workflow directly from within vSphere Web Client.