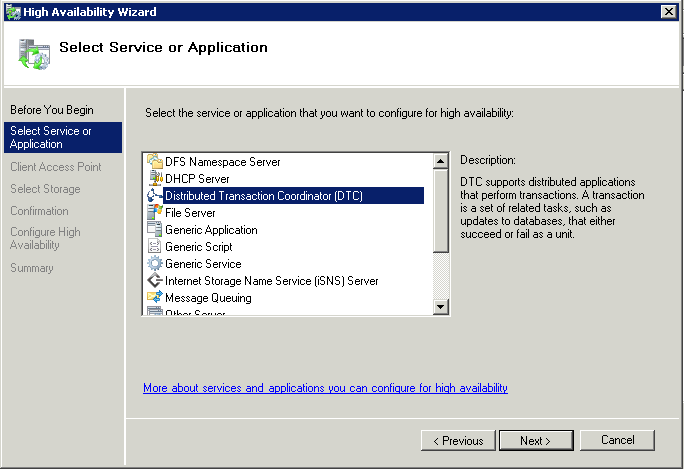
What is a cluster?
A failover cluster is a group of independent computers that work together to increase the availability of applications and services. The clustered servers (called nodes) are connected by physical cables and by software. If one of the cluster nodes fails, another node begins to provide service (a process known as failover). Users experience a minimum of disruptions in service.
Are there any special considerations?
Microsoft supports a failover cluster solution only if all the hardware components are marked as “Certified for Windows Server 2008 R2.” In addition, the complete configuration (servers, network, and storage) must pass all tests in the Validate a Configuration wizard, which is included in the Failover Cluster Manager snap-in.
Note that this policy differs from the support policy for server clusters in Windows Server 2003, which required the entire cluster solution to be listed in the Windows Server Catalog under Cluster Solutions.
Cluster validation is intended to catch hardware or configuration problems before the cluster goes into production. Cluster validation helps to ensure that the solution you are about to deploy is truly dependable. Cluster validation can also be performed on configured failover clusters as a diagnostic tool.
Step by Step Guide
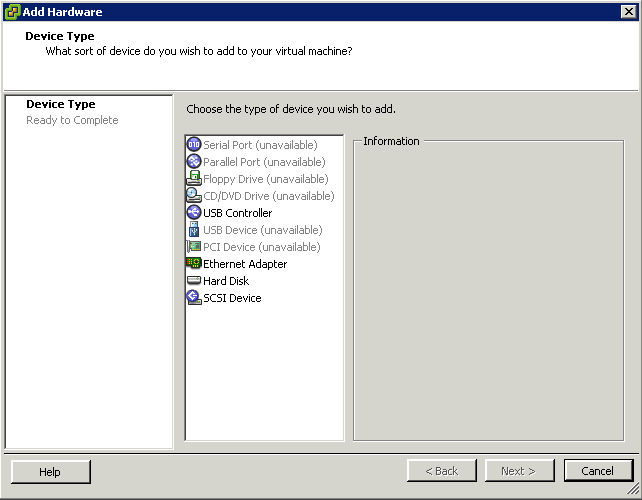
- Run the cluster validation wizard for a failover cluster
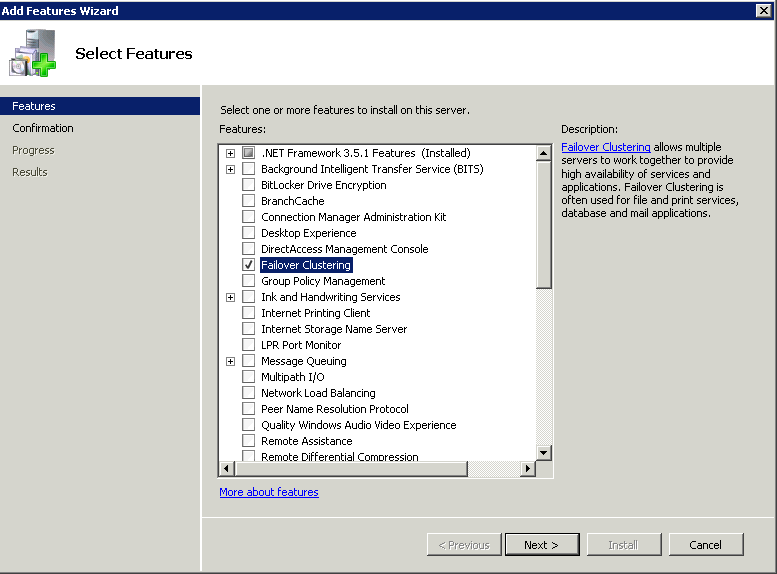
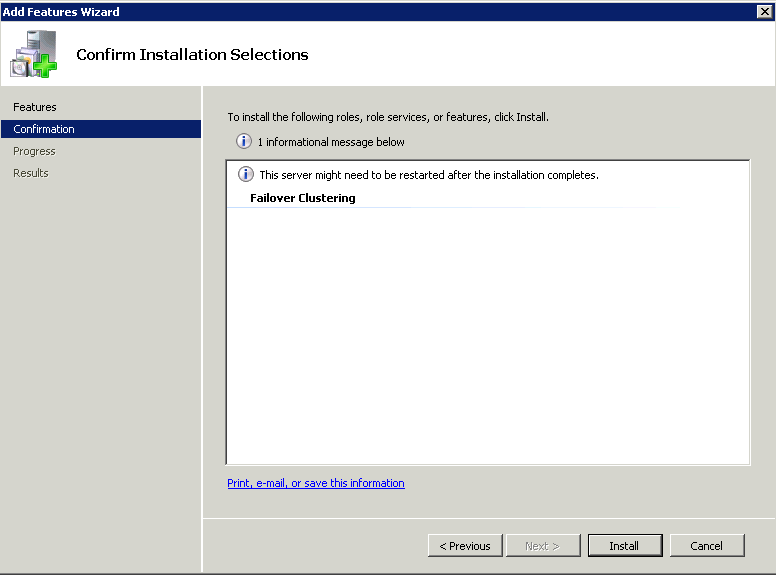
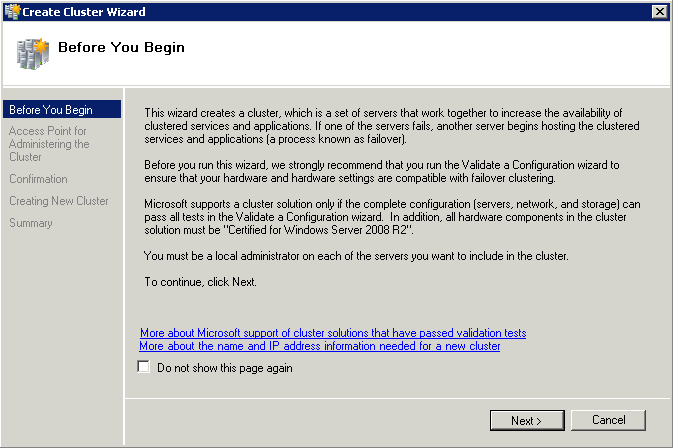
- If the cluster does not yet exist, choose the servers that you want to include in the cluster, and make sure you have installed the failover cluster feature on those servers. To install the feature, on a server running Windows Server 2008 or Windows Server 2008 R2, click Start, click Administrative Tools, click Server Manager, and under Features Summary, click Add Features. Use the Add Features wizard to add the Failover Clustering feature.
- If the cluster already exists, make sure that you know the name of the cluster or a node in the cluster
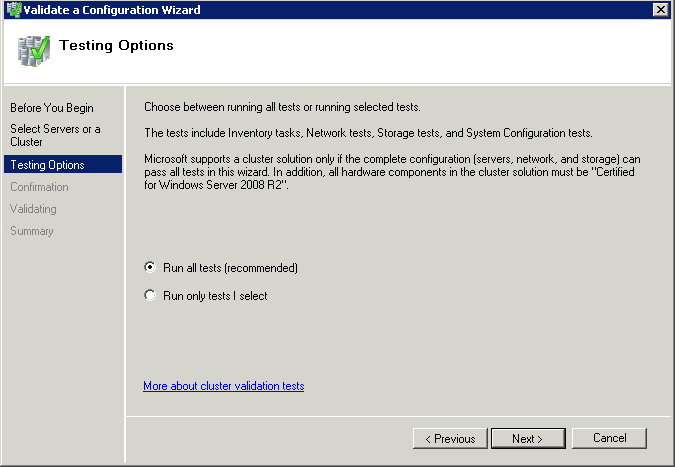
- For a planned cluster with all hardware connected: Run all tests.
- For a planned cluster with parts of the hardware connected: Run System Configuration tests, Inventory tests, and tests that apply to the hardware that is connected (that is, Network tests if the network is connected or Storage tests if the storage is connected).
- For a cluster to which you plan to add a server: Run all tests. Before you run them, be sure to connect the networks and storage for all servers that you plan to have in the cluster.
- For troubleshooting an existing cluster: If you are troubleshooting an existing cluster, you might run all tests, although you could run only the tests that relate to the apparent issue.
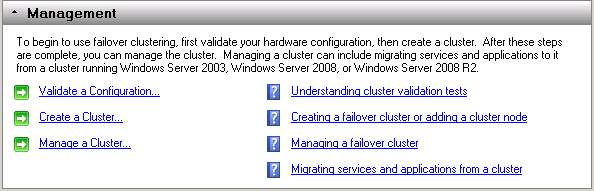
- In the failover cluster snap-in, in the console tree, make sure Failover Cluster Management is selected and then, under Management, click Validate a Configuration.

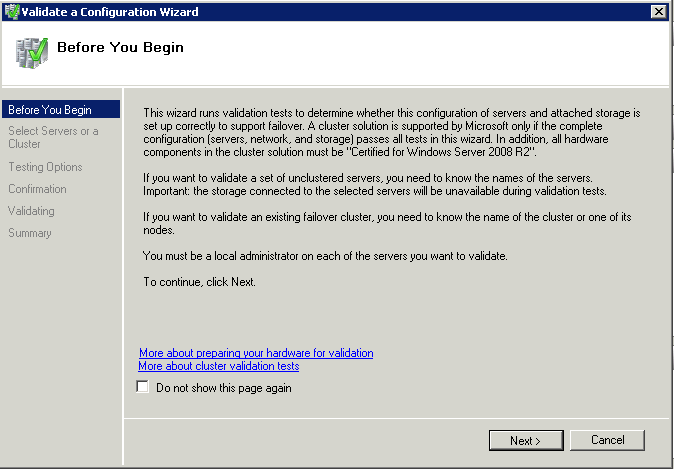
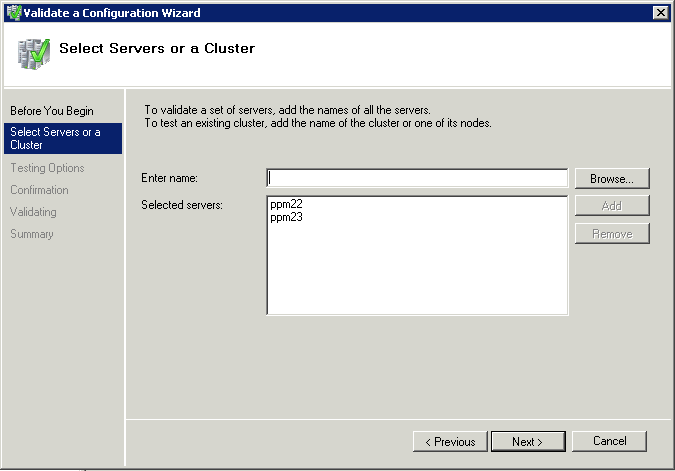
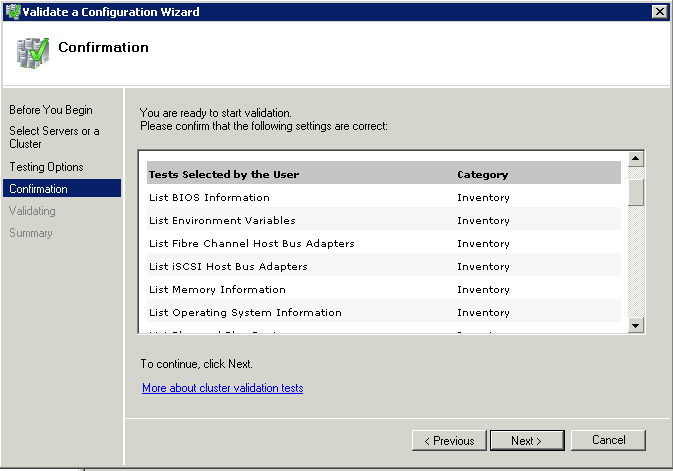
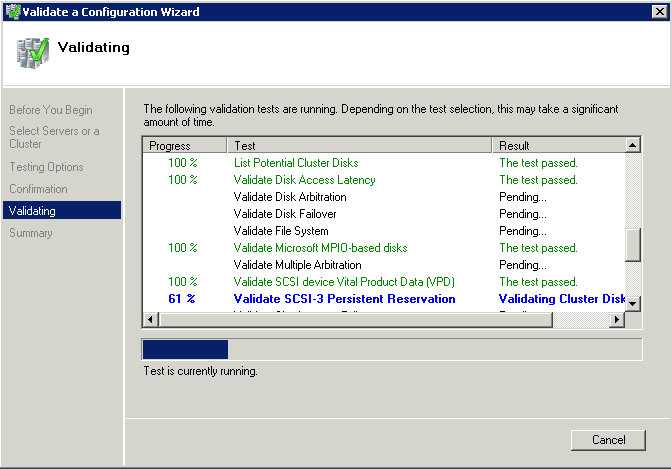
- Follow the instructions in the wizard to specify the servers and the tests, and run the tests.
- Note that when you run the cluster validation wizard on unclustered servers, you must enter the names of all the servers you want to test, not just one.
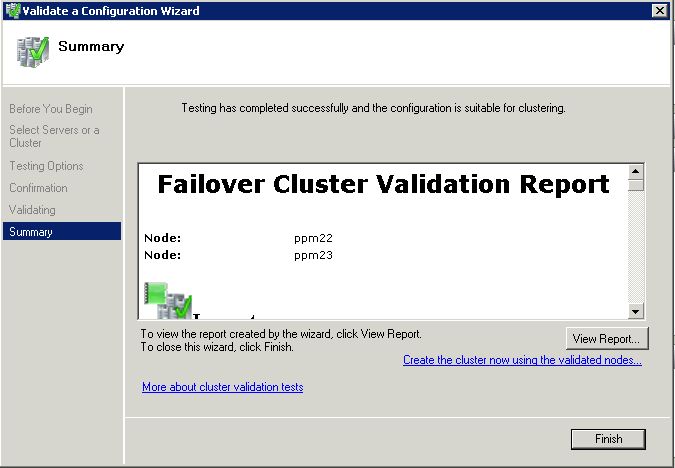
- The Summary page appears after the tests run.
- While still on the Summary page, click View Reportto view the test results.To view the results of the tests after you close the wizard, see SystemRoot\Cluster\Reports\Validation Report date and time.html where SystemRoot is the folder in which the operating system is installed (for example, C:\Windows)
Error Chart

Configuring the Quorum in a Failover Cluster
In simple terms, the quorum for a cluster is the number of elements that must be online for that cluster to continue running. In effect, each element can cast one “vote” to determine whether the cluster continues running. The voting elements are nodes or, in some cases, a disk witness or file share witness. Each voting element (with the exception of a file share witness) contains a copy of the cluster configuration, and the Cluster service works to keep all copies synchronized at all times
Note that the full function of a cluster depends not just on quorum, but on the capacity of each node to support the services and applications that fail over to that node. For example, a cluster that has five nodes could still have quorum after two nodes fail, but each remaining cluster node would continue serving clients only if it had enough capacity to support the services and applications that failed over to it.
Why Quorum is necessary
When network problems occur, they can interfere with communication between cluster nodes. A small set of nodes might be able to communicate together across a functioning part of a network, but might not be able to communicate with a different set of nodes in another part of the network. This can cause serious issues. In this “split” situation, at least one of the sets of nodes must stop running as a cluster.
To prevent the issues that are caused by a split in the cluster, the cluster software requires that any set of nodes running as a cluster must use a voting algorithm to determine whether, at a given time, that set has quorum. Because a given cluster has a specific set of nodes and a specific quorum configuration, the cluster will know how many “votes” constitutes a majority (that is, a quorum). If the number drops below the majority, the cluster stops running. Nodes will still listen for the presence of other nodes, in case another node appears again on the network, but the nodes will not begin to function as a cluster until the quorum exists again.
For example, in a five node cluster that is using a node majority, consider what happens if nodes 1, 2, and 3 can communicate with each other but not with nodes 4 and 5. Nodes 1, 2, and 3 constitute a majority, and they continue running as a cluster. Nodes 4 and 5 are a minority and stop running as a cluster, which prevents the problems of a “split” situation. If node 3 loses communication with other nodes, all nodes stop running as a cluster. However, all functioning nodes will continue to listen for communication, so that when the network begins working again, the cluster can form and begin to run.
Overview of the Quorum Nodes
There have been significant improvements to the quorum model in Windows Server 2008. In Windows Server 2003, almost all server clusters used a disk in cluster storage (the “quorum resource”) as the quorum. If a node could communicate with the specified disk, the node could function as a part of a cluster, and otherwise it could not. This made the quorum resource a potential single point of failure. In Windows Server 2008, a majority of ‘votes’ is what determines whether a cluster achieves quorum. Nodes can vote, and where appropriate, either a disk in cluster storage (called a “disk witness”) or a file share (called a “file share witness”) can vote. There is also a quorum mode called No Majority: Disk Only which functions like the disk-based quorum in Windows Server 2003. Aside from that mode, there is no single point of failure with the quorum modes, since what matters is the number of votes, not whether a particular element is available to vote.
This new quorum model is flexible and you can choose the mode best suited to your cluster.
Important: In most situations, it is best to use the quorum mode selected by the cluster software. If you run the quorum configuration wizard, the quorum mode that the wizard lists as “recommended” is the quorum mode chosen by the cluster software. We only recommend changing the quorum configuration if you have determined that the change is appropriate for your cluster.
There are four quorum modes:
- Node Majority: Each node that is available and in communication can vote. The cluster functions only with a majority of the votes, that is, more than half.
- Node and Disk Majority: Each node plus a designated disk in the cluster storage (the “disk witness”) can vote, whenever they are available and in communication. The cluster functions only with a majority of the votes, that is, more than half.
- Node and File Share Majority: Each node plus a designated file share created by the administrator (the “file share witness”) can vote, whenever they are available and in communication. The cluster functions only with a majority of the votes, that is, more than half.
- No Majority: Disk Only: The cluster has quorum if one node is available and in communication with a specific disk in the cluster storage.
Choosing the Quorum Mode for a particular cluster
|
Description of Cluster
|
Quorum Recommendation
|
|
Odd number of nodes
|
Node Majority
|
|
Even number of nodes (but not a multi-site cluster)
|
Node and Disk Majority
|
|
Even number of nodes, multi-site cluster
|
Node and File Share Majority
|
|
Even number of nodes, no shared storage
|
Node and File Share Majority
|
Node Majority
The following diagram shows Node Majority used (as recommended) for a cluster with an odd number of nodes.In this mode, each node gets one vote. In certain circumstances, you might want to install a hotfix that lets you select which nodes will have votes. This can be useful with certain multi-site clusters, for example, where you want one site to have more votes than other sites in a disaster recovery situation

Node and Disk Majority
The following diagram shows Node and Disk Majority used (as recommended) for a cluster with an even number of nodes. Each node can vote, as can the disk witness.
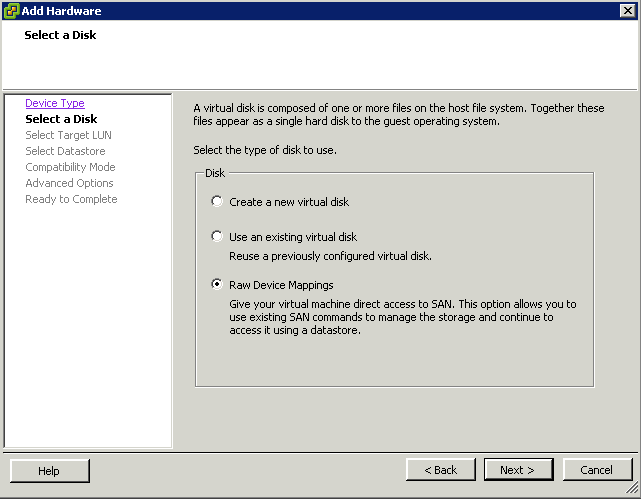
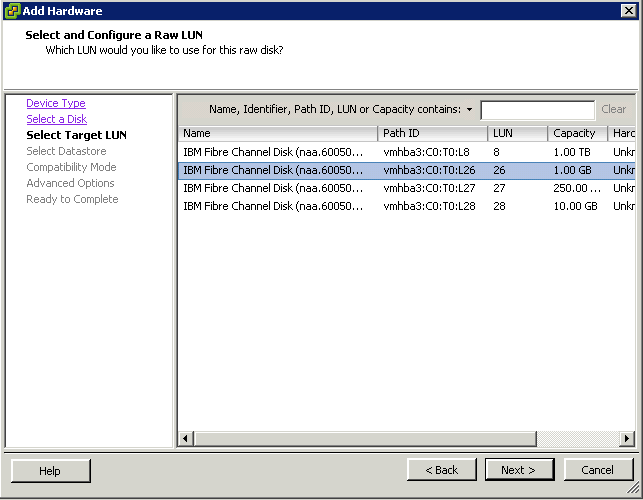
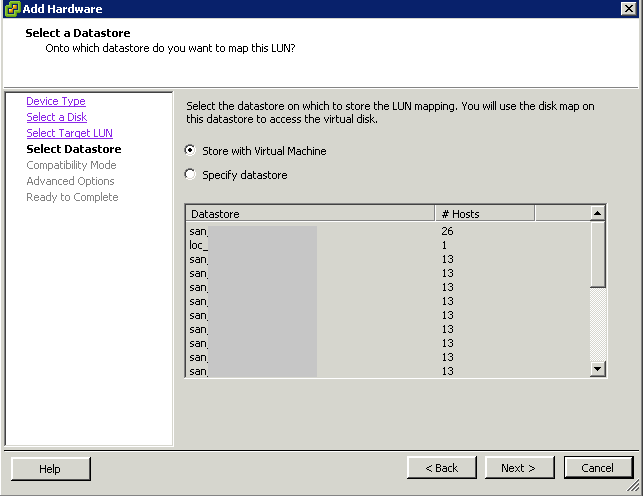
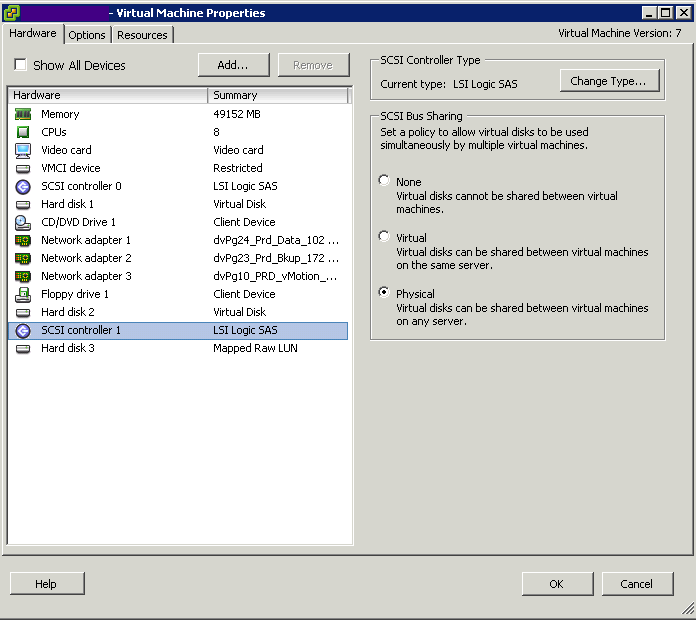
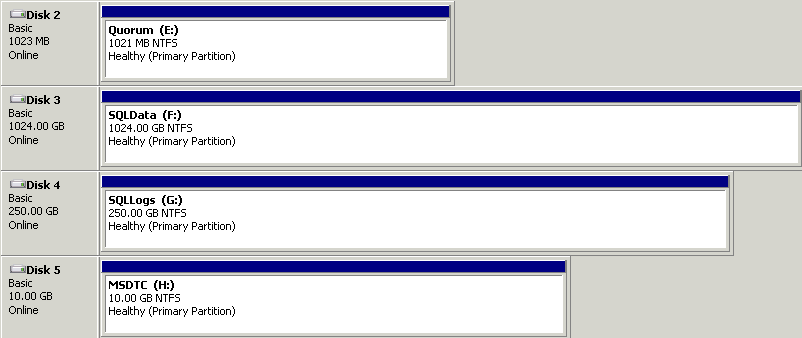
- Use a small Logical Unit Number (LUN) that is at least 512 MB in size.
- Choose a basic disk with a single volume.
- Make sure that the LUN is dedicated to the disk witness. It must not contain any other user or application data.
- Choose whether to assign a drive letter to the LUN based on the needs of your cluster. The LUN does not have to have a drive letter (to conserve drive letters for applications).
- As with other LUNs that are to be used by the cluster, you must add the LUN to the set of disks that the cluster can use. For more information, see http://go.microsoft.com/fwlink/?LinkId=114539.
- Make sure that the LUN has been verified with the Validate a Configuration Wizard.
- We recommend that you configure the LUN with hardware RAID for fault tolerance.
- In most situations, do not back up the disk witness or the data on it. Backing up the disk witness can add to the input/output (I/O) activity on the disk and decrease its performance, which could potentially cause it to fail.
- We recommend that you avoid all antivirus scanning on the disk witness.
- Format the LUN with the NTFS file system.
If there is a disk witness configured, but bringing that disk online will not achieve quorum, then it remains offline. If bringing that disk online will achieve quorum, then it is brought online by the cluster software

Node and File Share Majority
The following diagram shows Node and File Share Majority used (as recommended) for a cluster with an even number of nodes and a situation where having a file share witness works better than having a disk witness. Each node can vote, as can the file share witness.
- Use a Server Message Block (SMB) share on a Windows Server 2003 or Windows Server 2008 file server.
- Make sure that the file share has a minimum of 5 MB of free space.
- Make sure that the file share is dedicated to the cluster and is not used in other ways (including storage of user or application data).
- Do not place the share on a node that is a member of this cluster or will become a member of this cluster in the future.
- You can place the share on a file server that has multiple file shares servicing different purposes. This may include multiple file share witnesses, each one a dedicated share. You can even place the share on a clustered file server (in a different cluster), which would typically be a clustered file server containing multiple file shares servicing different purposes.
- For a multi-site cluster, you can co-locate the external file share at one of the sites where a node or nodes are located. However, we recommend that you configure the external share in a separate third site.
- Place the file share on a server that is a member of a domain, in the same forest as the cluster nodes.
- For the folder that the file share uses, make sure that the administrator has Full Control share and NTFS permissions.
- Do not use a file share that is part of a Distributed File System (DFS) Namespace

No Majority – Disk only
The following illustration shows how a cluster that uses the disk as the only determiner of quorum can run even if only one node is available and in communication with the quorum disk. It also shows how the cluster cannot run if the quorum disk is not available (single point of failure). For this cluster, which has an odd number of nodes, Node Majority is the recommended quorum mode.
- Use a small Logical Unit Number (LUN) that is at least 512 MB in size.
- Choose a basic disk with a single volume.
- Make sure that the LUN is dedicated to the disk witness. It must not contain any other user or application data.
- Choose whether to assign a drive letter to the LUN based on the needs of your cluster. The LUN does not have to have a drive letter (to conserve drive letters for applications).
- As with other LUNs that are to be used by the cluster, you must add the LUN to the set of disks that the cluster can use. For more information, see http://go.microsoft.com/fwlink/?LinkId=114539.
- Make sure that the LUN has been verified with the Validate a Configuration Wizard.
- We recommend that you configure the LUN with hardware RAID for fault tolerance.
- In most situations, do not back up the disk witness or the data on it. Backing up the disk witness can add to the input/output (I/O) activity on the disk and decrease its performance, which could potentially cause it to fail.
- We recommend that you avoid all antivirus scanning on the disk witness.
- Format the LUN with the NTFS file system.
If there is a disk witness configured, but bringing that disk online will not achieve quorum, then it remains offline. If bringing that disk online will achieve quorum, then it is brought online by the cluster software

Viewing the Quorum Configuration
- To open the failover cluster snap-in, click Start, click Administrative Tools, and then click Failover Cluster Management (in Windows Server 2008) or Failover Cluster Manager (in Windows Server 2008 R2).If the User Account Control dialog box appears, confirm that the action it displays is what you want, and then click Continue.
- In the console tree, if the cluster that you want to view is not displayed, right-click Failover Cluster Management or Failover Cluster Manager, click Manage a Cluster, and then select the cluster you want to view
- In the center pane, find Quorum Configuration, and view the description
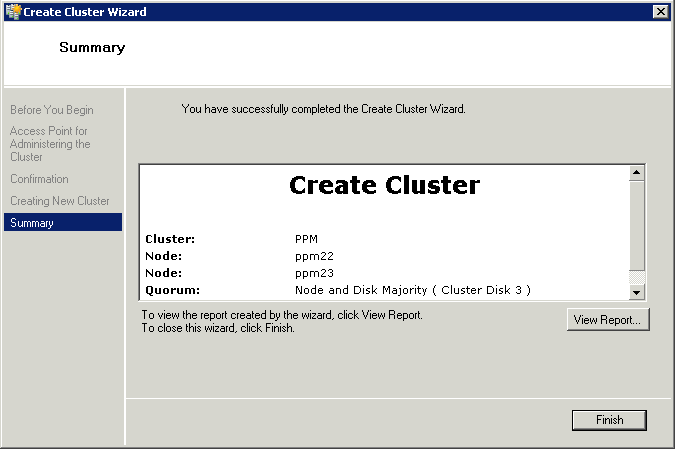
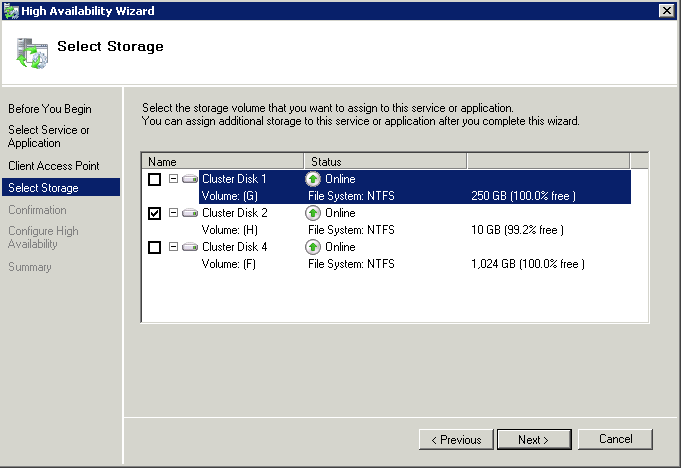
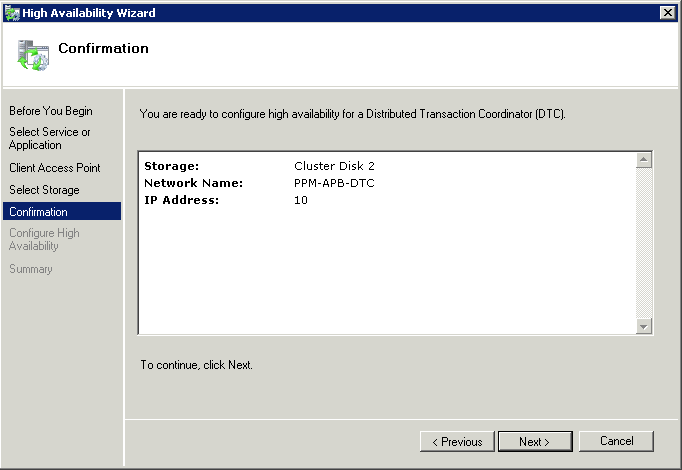
- In the following example, the quorum mode is Node and Disk Majority and the disk witness is Cluster Disk 2.