
What is McAfee Change and Application Control?
Changes in server environments are constantly taking place in many organizations today—and going undetected. It’s a situation that is dangerous, both in terms of security and compliance. McAfee® Change Control delivers continuous, enterprise-wide detection of authorized changes as they occur. It blocks unauthorized changes to critical system files, directories, and configurations while streamlining the implementation of new policies and compliance measures.
Key Advantages
- Gain continuous visibility and real-time management of changes to critical system, configuration, or content files.
- Prevent tampering with critical files and registry keys by unauthorized parties.
- Fulfill the PCI DSS regulation requirement for file integrity monitoring system.
- Easy to get started with out-of the- box FIM rules.
- QSA-friendly reports for easy PCI reporting.
- One-click exclusion feature to avoid tracking irrelevant information.
- Tight policy enforcement via proactively blocking of out-ofprocess and unwanted changes before they occur.
- Integrates with McAfee® ePolicy Orchestrator® (McAfee ePO™) console for centralized IT management.
The Task
Install Change Control or Application Control in the McAfee® ePolicy Orchestrator® (McAfee ePO™) environment. For use with ePolicy Orchestrator 4.6.0 – 5.1.0 Software
Pre-Requisites
- Verify that the McAfee ePO server and database are installed and configured. McAfee ePO is a management tool that installs software and deploys policies on the managed endpoints. It also allows you to monitor client activity, create reports, and store and distribute content and software updates. For instructions, see the ePolicy Orchestrator Installation Guide and ePolicy Orchestrator Product Guide.
- Make sure that the McAfee Agent is installed on each endpoint on which you want to install Change Control or Application Control. McAfee Agent acts as the intermediary between the Solidcore client and McAfee ePO server. It sends data to the client from the McAfee ePO server and vice versa.
- Download the Solidcore extension package from the McAfee Downloads site. The Solidcore extension file is typically named Solidcore_epo_extn_<ver>.<build>.zip.
- Download the Solidcore client package from the McAfee Downloads site. Here are the available Solidcore client packages.
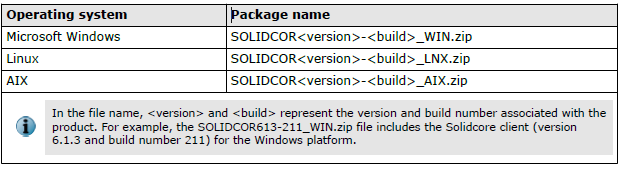
- Make sure that the endpoints on which you need to install the Solidcore client are supported. See KB76459 (for Change Control) and KB73341 (for Application Control)
- Review the KnowledgeBase article (see KB76544) to determine if a precompiled binary is available for your Linux target kernel.
- If a precompiled binary is available for your target kernel, you need not meet any prerequisites and can directly proceed with installation (see Install the Solidcore client on the endpoints).
- If a precompiled binary is unavailable for your target kernel, see Linux installation workflow for information on prerequisites and installation.
- Determine the database sizing requirements for your setup (see KB72753).
- Review the minimum system requirements for Change Control and Application Control (see KB76579).
- Review the release notes to acquaint yourself with the known issues and identify dependencies you need to consider.
Installation Steps
- Install the Solidcore extension. The Solidcore extension integrates with the McAfee ePO console and provides Change Control and Application Control features. The Solidcore extension installs on versions 4.6, 5.0, and 5.1 of the McAfee ePO server.
- Log into your EPO Server
- Make sure that the extension file is stored at an accessible location.
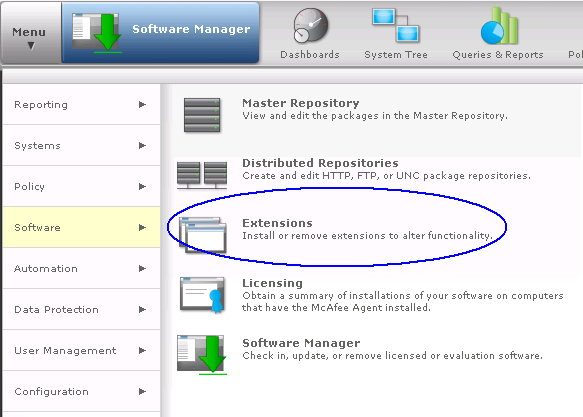
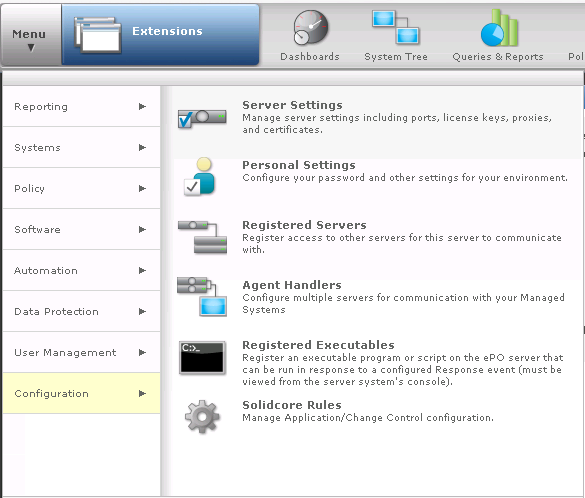
- On the McAfee ePO console, select Menu | Software | Extensions to open the Extensions page.
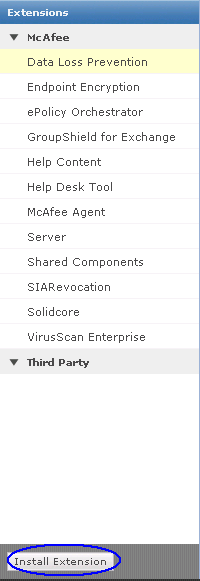
- Click Install Extension.
- Browse and select the Solidcore_epo_extn_<ver>.<build>.zip file, then click OK
- Verify the information on the Install Extension page, then click OK
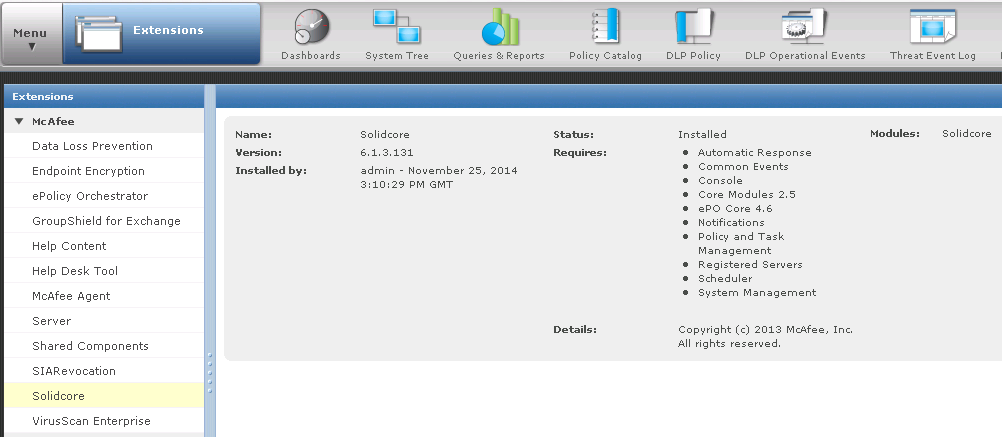
- Verify that the Solidcore product name appears in the Extensions list.
- On the McAfee ePO console, select Menu | Configuration | Server Settings to open the Setting Categories page.
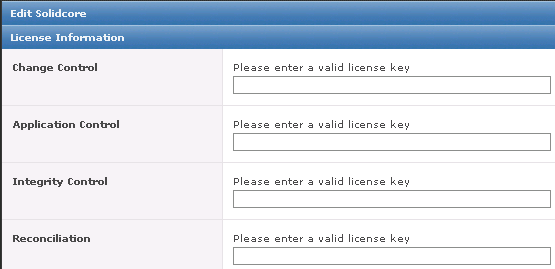
- Select Solidcore, then click Edit to open the Edit Solidcore page.
- Enter the license keys, then click Save. Evaulation Licenses last for 30 days
- Now we need to install the Solidcore client
- The Solidcore client provides change monitoring, change prevention, and whitelisting features on the endpoints on which it is installed. You can install and deploy the Solidcore client on Windows, Linux, and AIX platforms. For all supported platforms, the Solidcore client works well on both physical and virtual machines (VM)
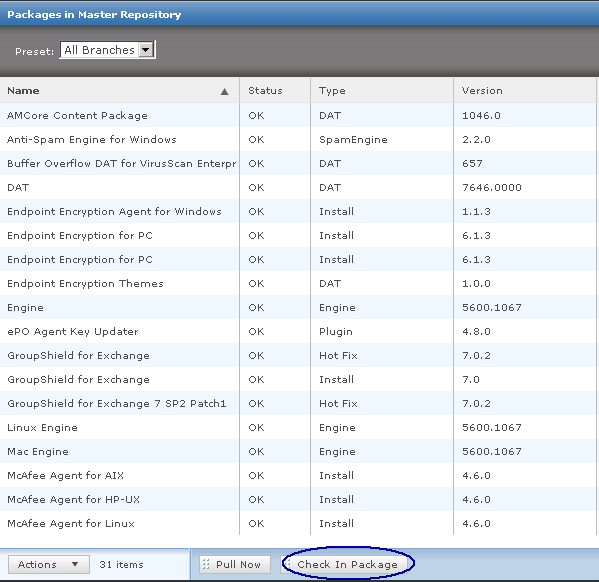
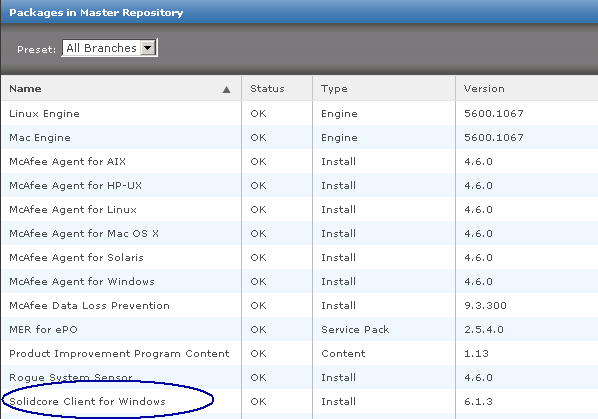
- On the McAfee ePO console, select Menu | Software | Master Repository.
- From the Packages in the Master Repository page, select Actions | Check In Package.
- Set the package type to Product or Update (.ZIP).
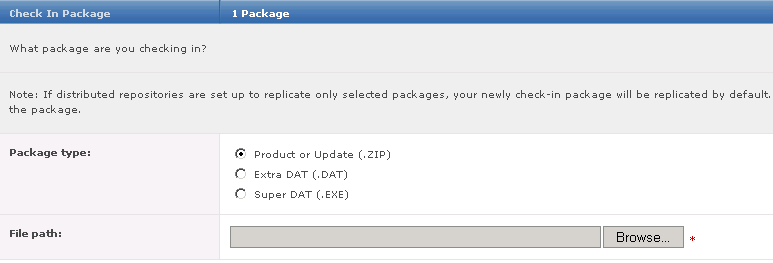
- Browse and select the package zip file and click Next to open the Package Options page.
- Confirm the information.
• Package Info: Verify the package details.
• Branch: Select the desired branch. Set to Current for new products.
• Options: Optionally, select Move the existing package to the Previous branch to move an existing package to
the previous branch.
• Package signing: Indicates if the package is signed by McAfee or is a third-party package. - Click Save to add the package. The new package appears in Packages in Master Repository list.
- Now we need to set up a task to install the Client on a test endpoint
- On the McAfee ePO console, select Menu | Systems | System Tree.
- Perform one of these actions:
• To apply the client task to a group, select a group in the System Tree and switch to the Assigned Client Tasks tab.
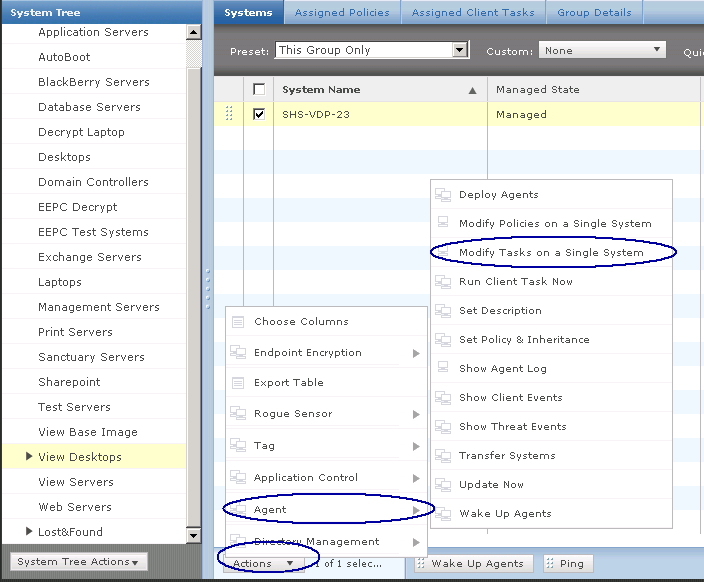
• To apply the client task to an endpoint, select the endpoint on the Systems page and click Actions | Agent | Modify Tasks on a Single System. - I am just testing this on my VDI VM at the moment so I choose the first option as per below screenprint
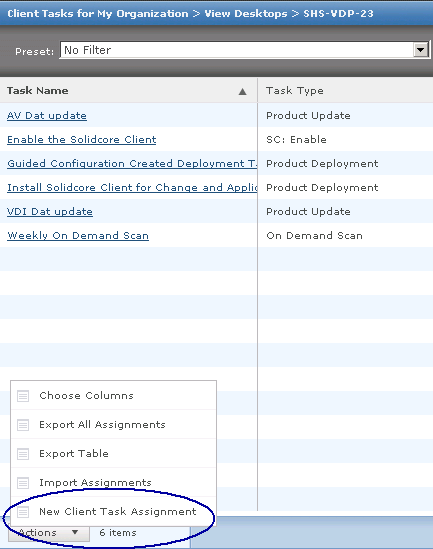
- Click Actions | New Client Task Assignment to open the Client Task Assignment Builder page.
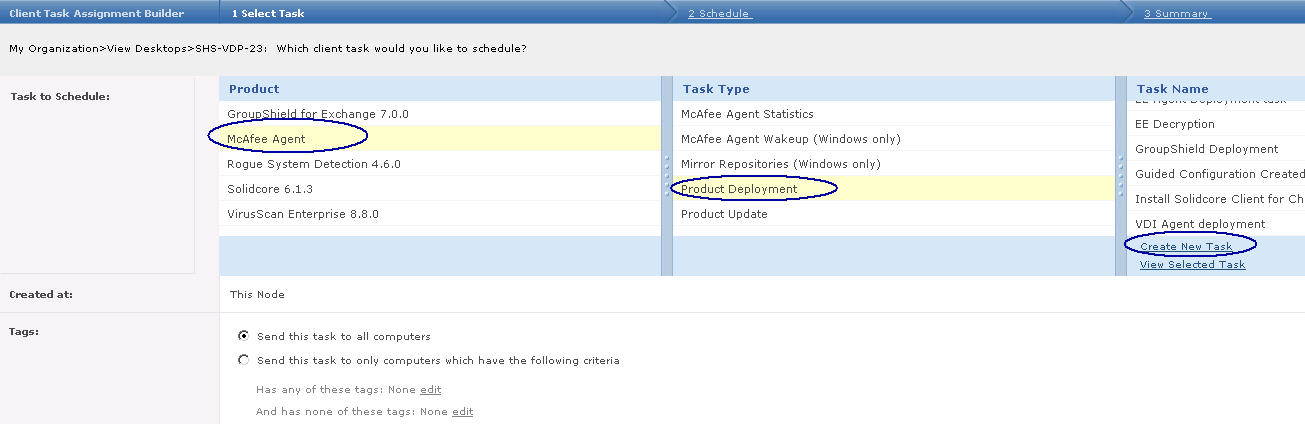
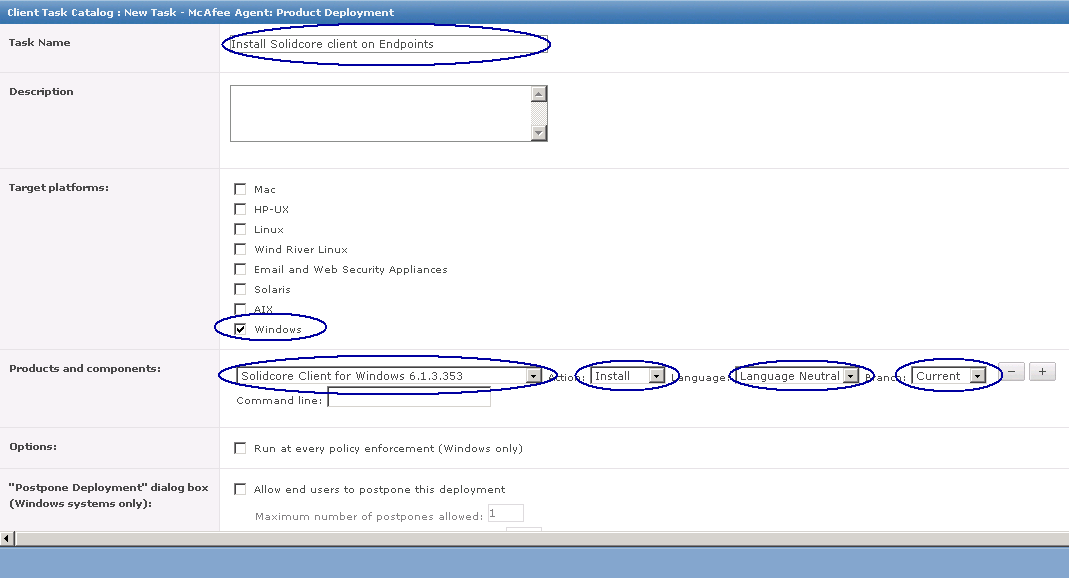
- Select the McAfee Agent product and Product Deployment task type, then click Create New Task.
- Specify the task name and add any descriptive information.
- Select the target platform. For example, when installing the Solidcore client package on the Windows operating system, select Windows as the target platform.
- Specify the component and action.
a Select the appropriate package from the Products and components list.
b Select the Install action.
c Select the language of the package.
d Specify the branch from which to add the package. - Click Save, then click Next to open the Schedule page.
- Specify scheduling details, then click Next.
- Review and verify the task details, then click Save.
- Next select your test VM and click Action > Agent > Run Client Task Now
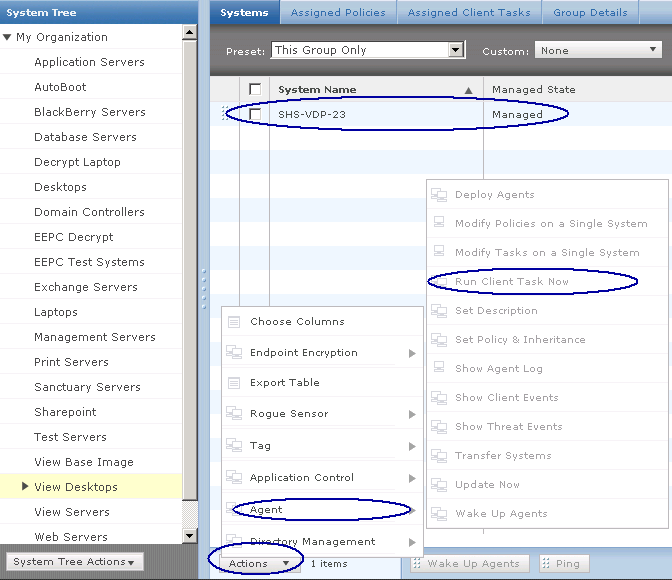
- Choose the following as per the screenprint below
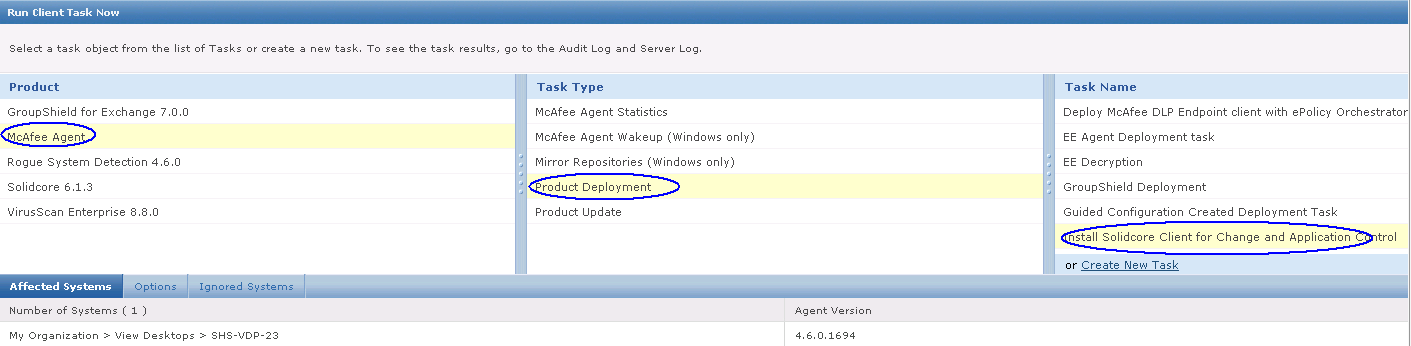
- Click Run Task now and wait until this task completes
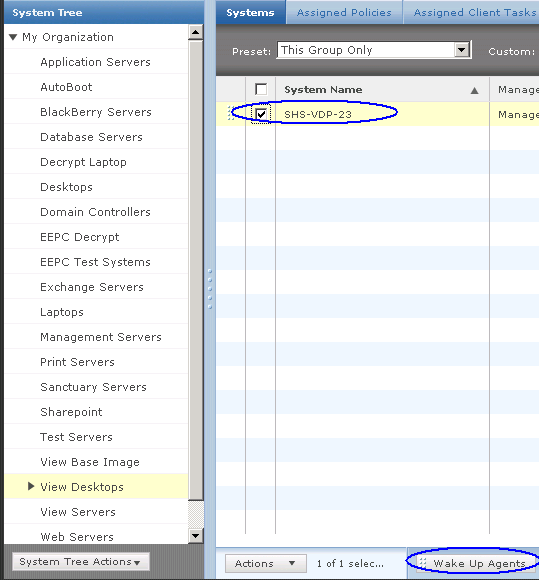
- Note you may need to wake up the agents. Click on your test VM and click Wake up Agents as below
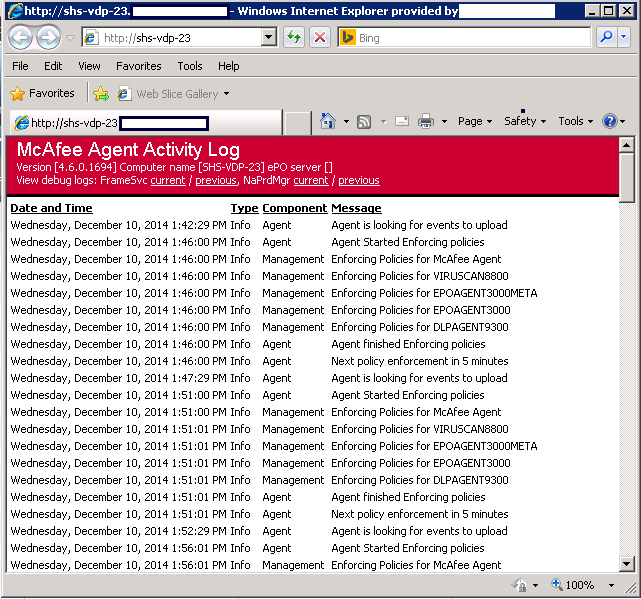
- Now we can check the verify the agent installation by checking the log
- Select Actions | Agent | Show Agent Log to view the agent log for the endpoint.
- We now need to place the Solidcore client in Enabled mode to activate the software.
- On the McAfee ePO console, select Menu | Systems | System Tree.
- Perform one of these actions:
• To apply the client task to a group, select a group in the System Tree and switch to the Assigned Client Tasks tab.
• To apply the client task to an endpoint, select the endpoint on the Systems page and click Actions | Agent | Modify Tasks on a Single System. - Click Actions | New Client Task Assignment to open the Client Task Assignment Builder page.
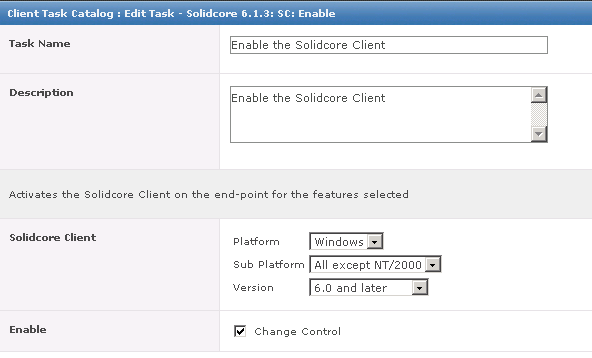
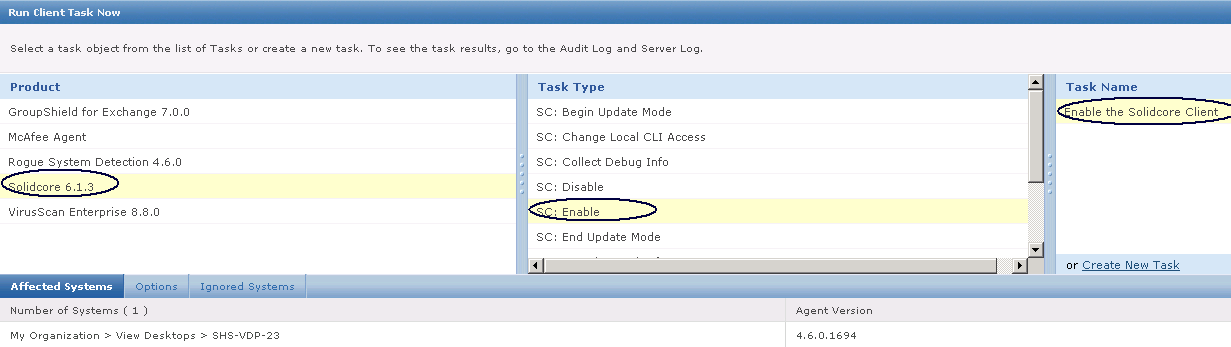
- Select the Solidcore 6.1.3 product and SC: Enable task type, then click Create New Task.
- On the Client Task Catalog page, specify the task name and add any descriptive information.
6 Select these fields.
a Select the platform.
b Select the subplatform (only for the Windows and Unix platforms).
c Select the version (only for the All except NT/2000 subplatform).
d Indicate whether to enable Change Control, Application Control, or both - Click OK and if you go back into it, it should look like the below
- No reboot should be necessary at this point
- Next select your test VM and click Action > Agent > Run Client Task Now and select the following to run the Enable Task
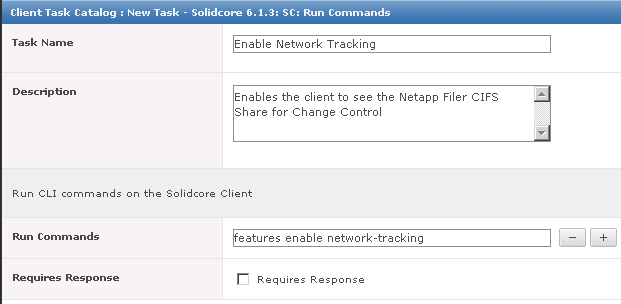
- We now need to create a task that enables network tracking
- Select the endpoint on the Systems page and click Actions | Agent | Modify Tasks on a Single System.
- Click Actions > New Client Task Assignment
- Under Product Select Solidcore 6.1.3
- Under Task Type Select SC: Run Commands
- Under Task Name select to Create new Task
- In Run Commands type features enable network-tracking
- Click Save
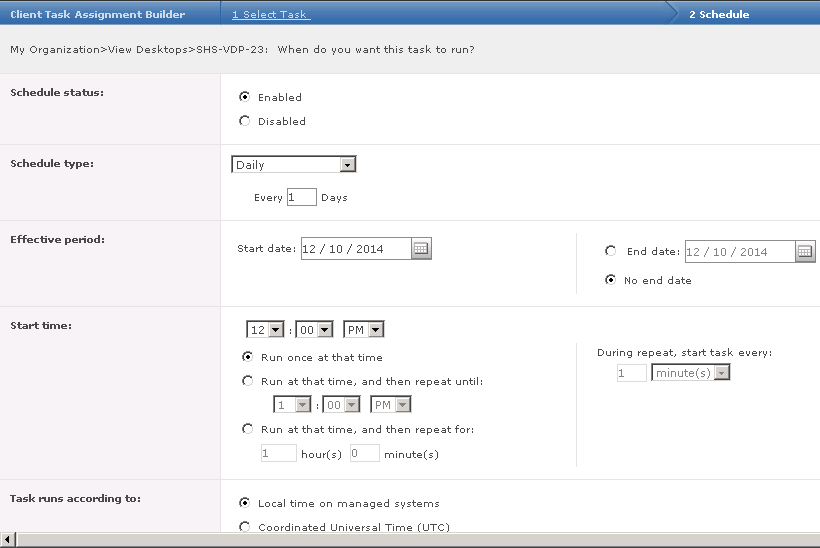
- Set the schedule as per below screen-print
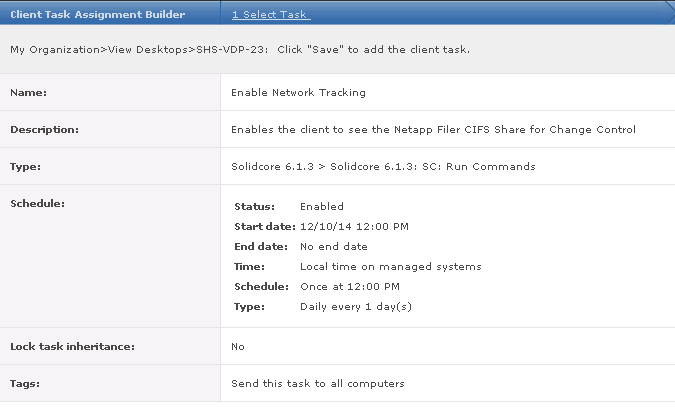
- Click Next and you will see a summary then click Save
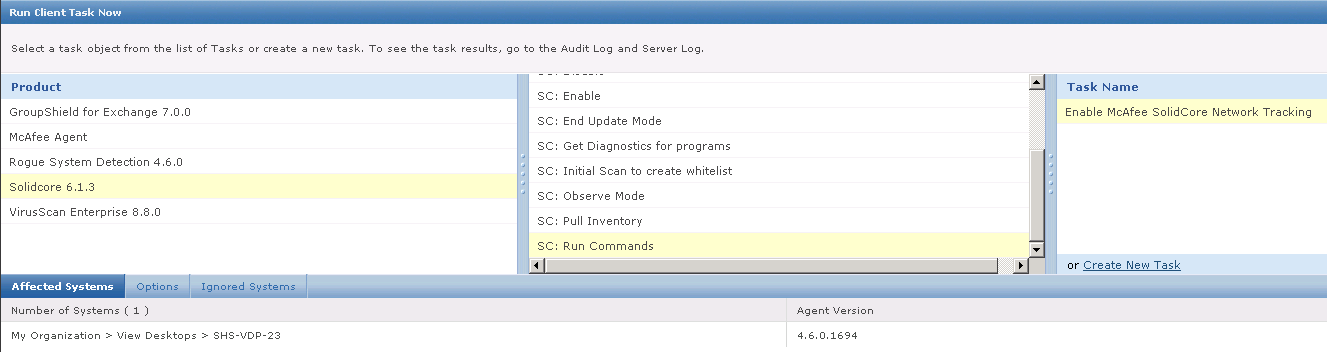
- Next select your test VM and click Action > Agent > Run Client Task Now and select the following to run the Enable Task
- Next we need to create Rule Groups
- A rule group is a collection of rules. Although you can directly add rules to any McAfee ePO-based policy, the rules defined within a policy are specific to that policy. In contrast, a rule group is an independent unit that collates a set of similar or related rules. After you define a rule group, you can reuse the rules within the rule group by associating the rule group with different policies. Also, if you need to modify a rule, simply update the rule in the rule group and the change cascades across all associated policies automatically.
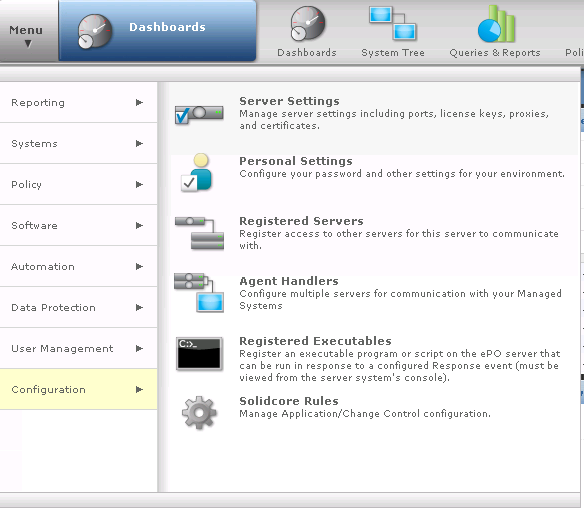
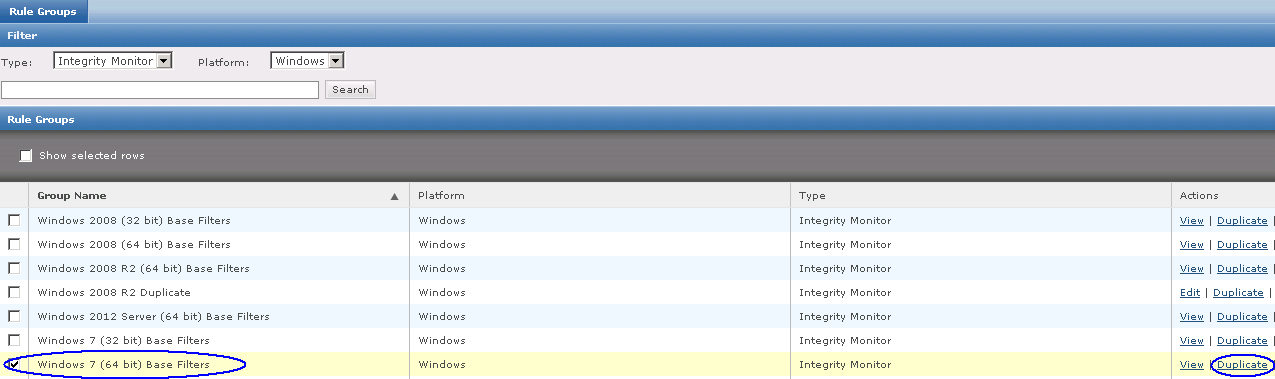
- On the McAfee EPO Console, select Menu > Configuration > Solidcore Rules
- Keep Integrity Rules selected and because we have Windows 7 client machines which have a Netapp CIFS Share mapped on them, I am going to duplicate the Windows 7 (64 bit) Base Filters Rule Group. If you have Windows 2008 file servers, you would duplicate a rule group for these.
- Select the Windows 7 (64 bit) Base Filters Rule Group and click Duplicate
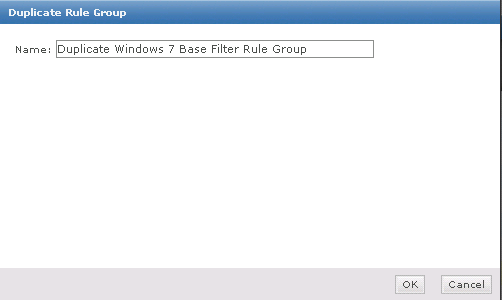
- Put a name in your Rule Group
- Click Edit on your duplicate rule group
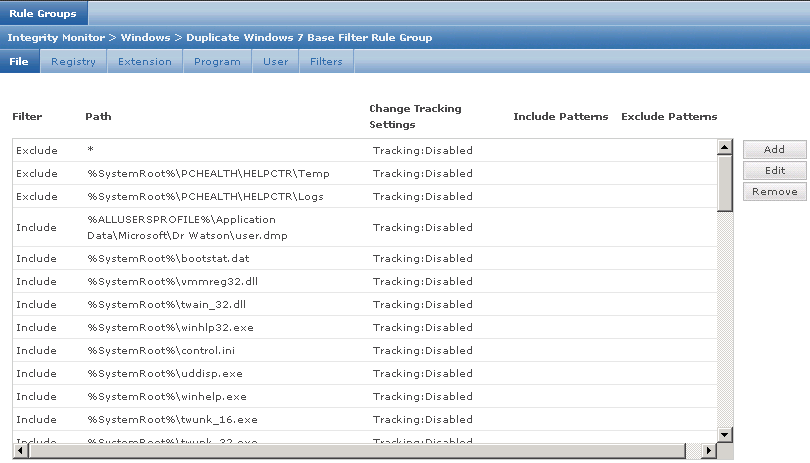
- Have a look through the top options – File, Registry, Extension, Program, User, Filters
- What we are going to do on the File column is click Add and add our Netapp Filer share which is \\nasuser-a\shared\group
- This share is also mapped to our I Drive so I will add this in as well as I:\
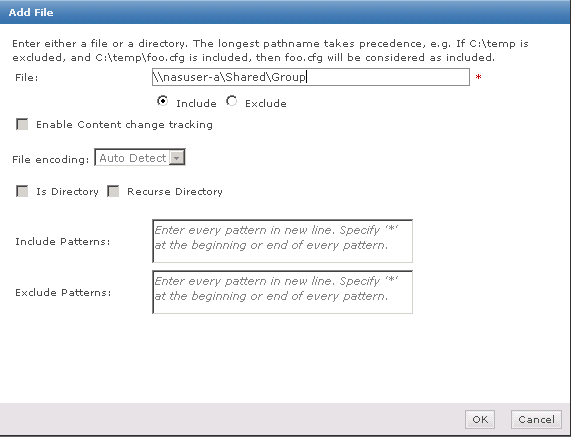
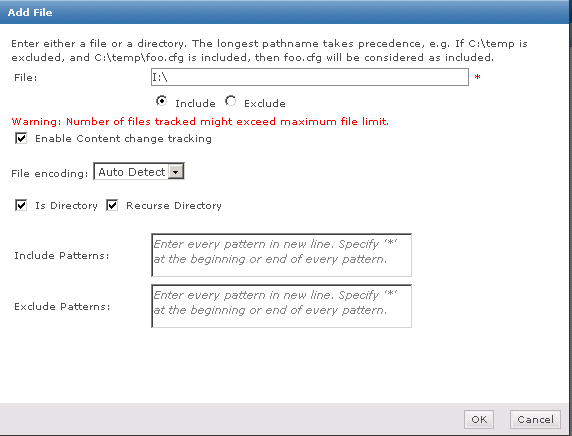
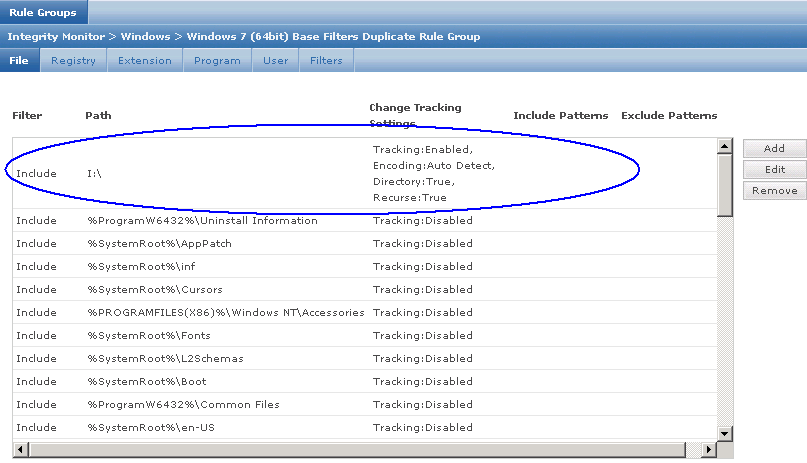
- Click Save Rule Group
- It should now look like the below
- Next within Rule Groups, change from Integrity Control to Change Control
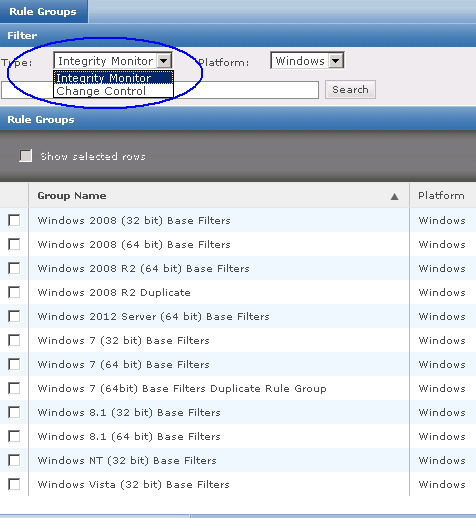
- Click Add Rule Group
- Put a name in and keep Change Control selected and Windows
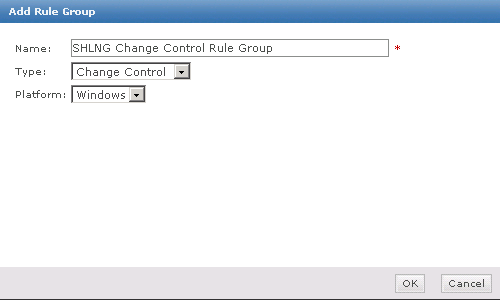
- Click OK and click Save Rule Group
- Next we need to set up an Integrity Policy and a Change Control Policy
- Go to Menu > Policy > Policy Catalog

- Switch to Solidcore 6.1.3 Integrity Monitor and Integrity Monitoring Rules (Windows)

- Click Actions > New Policy and give it a name. You can also duplicate the policy
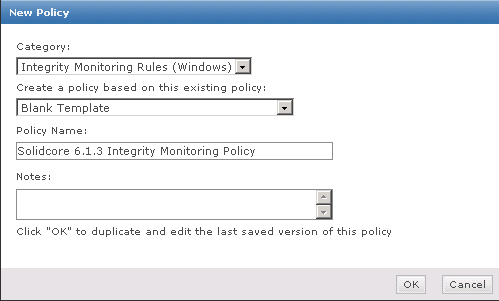
- The Rule Group box will appear. Click Add Rule Group and select your Rule Group
- Click Save
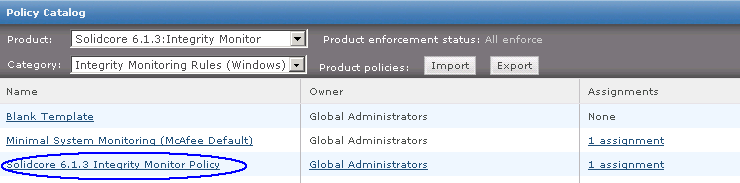
- You should now see your Monitoring Policy as per below screenprint
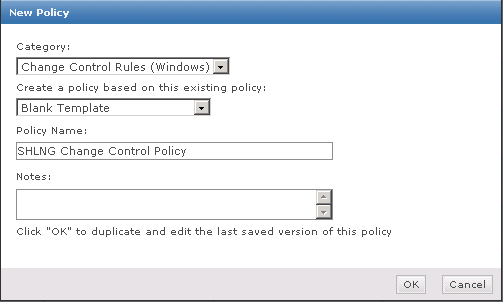
- Next in the Policy Catalog change to Solidcore 6.1.3 Change Control and Change Control Rules (Windows)

- Click Actions > New Policy > Decide whether to create a policy from a blank template and put in a name
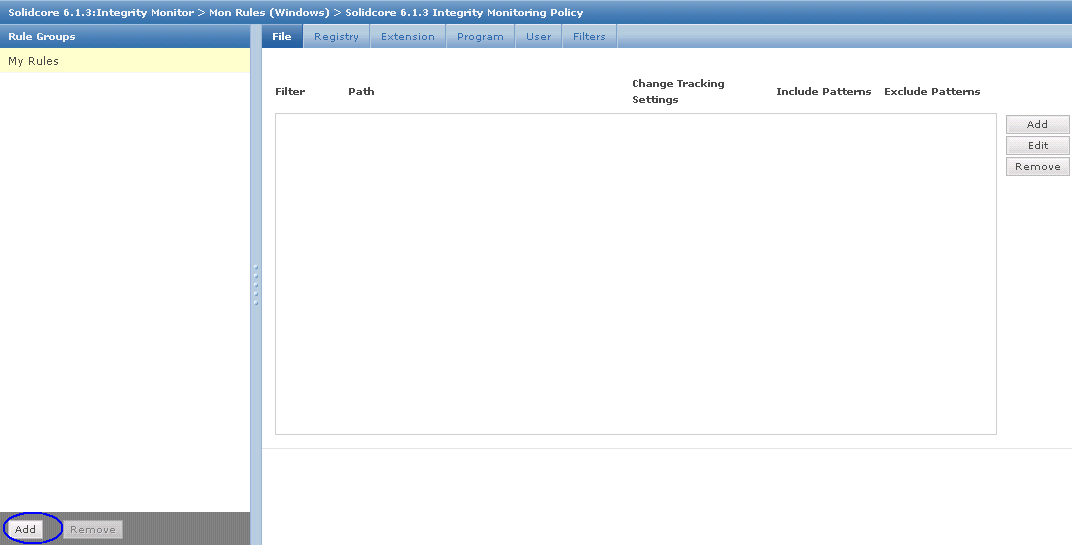
- In the Rules you can add your existing Rule Group or add some test rules under My Rules

- Click Save
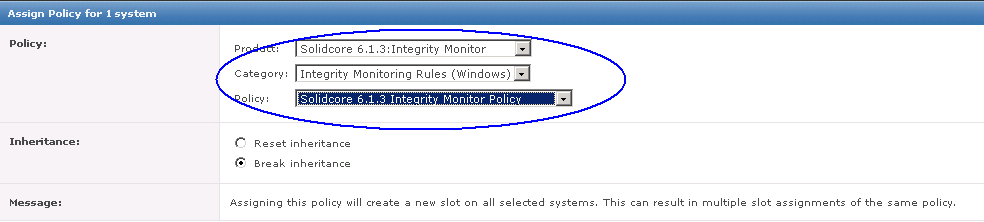
- Go back to System tree and select your test VDI and click on Action > Agent > Set Policy inheritance
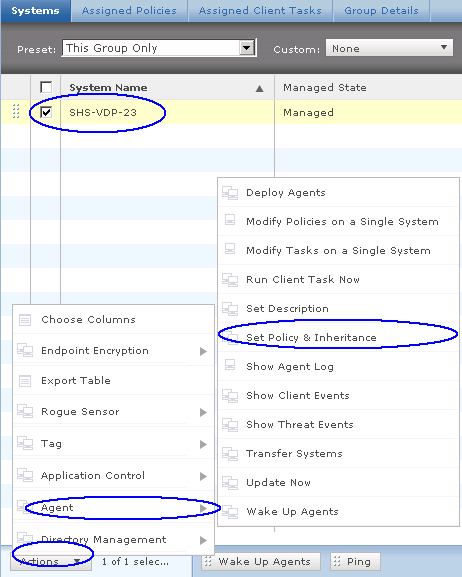
- Choose your Integrity Monitor Policy and Break Inheritance and click Save
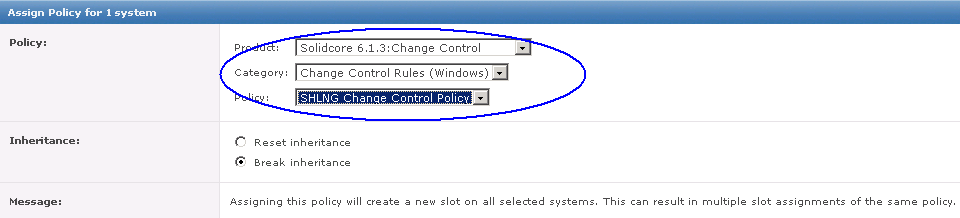
- Next we need to do the same but for the Change Control Policy
- Click Action > Agent > Set Policy and Inheritance
- Choose your Change Control Settings
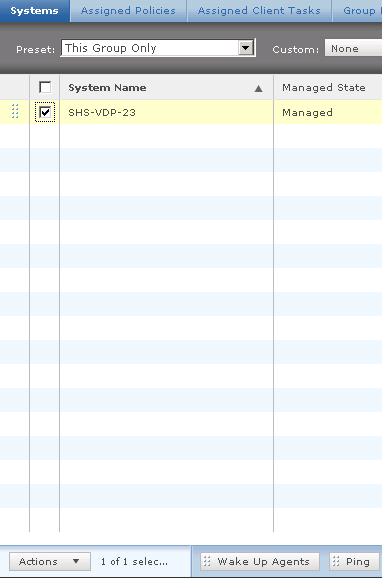
- Go back to System Tree and click on your VDI and select Wake up Agent
- Now we need to log on to our VDI and check some bits and pieces and test accessing a folder and file and see what gets logged within the EPO Console in the Solidcore events
- Once you have edited a file, come back to the EPO and go to Menu > Reporting > Solidcore Events

