
Cost Profiles
Fabric administrators can associate compute resources and physical machines with cost profiles to enable calculation of a machine’s cost. The cost is displayed to machine owners, requesters, approvers, and administrators at various points in the request and provisioning life cycle.
A cost profile includes the following values for daily cost:
|
■
|
Cost per GB of memory capacity specified in the virtual blueprint or installed in the physical machine |
|
■
|
Cost per CPU specified in the virtual blueprint or installed in the physical machine |
|
■
|
Cost per GB of storage capacity as specified in the virtual blueprint (not used for physical machines, because storage attached to physical machines is not discovered or tracked) |
For finer definition of storage cost for virtual machines, you can also associate each known datastore on a compute resource with a storage cost profile. A storage cost profile contains only a daily cost per GB of storage. If you assign a storage cost profile to a datastore, this storage cost overrides the storage cost in the cost profile assigned to the compute resource.
For virtual machines, the machine cost is calculated from the cost profile and storage cost profile on the compute resource, the resources it consumes, and the daily blueprint cost. You can use the blueprint cost to represent a markup for using the machine in addition to the resources that the machine consumes, for example to account for the cost of specific software deployed with that blueprint.
For physical machines, the machine cost is calculated from the cost profile on the machine, the CPU and memory on the machine, and the daily blueprint cost. You can use the blueprint cost to represent such factors as storage cost or additional costs for using the machine.
You cannot apply cost profiles to machines provisioned on Amazon Web Services or Red Hat OpenStack. For machines provisioned on these cloud platforms, the only cost factor is the daily cost in the blueprint from which it was provisioned. The cost for vCloud Director vApps includes any cost profile and storage cost profile on the virtual datacenter and the blueprint cost.
Create a Cost Profile
Fabric administrators can create cost profiles and associate them with compute resources to enable calculation of a machine’s cost.
- Log in to the vRealize Automation console as a fabric administrator
- Select .
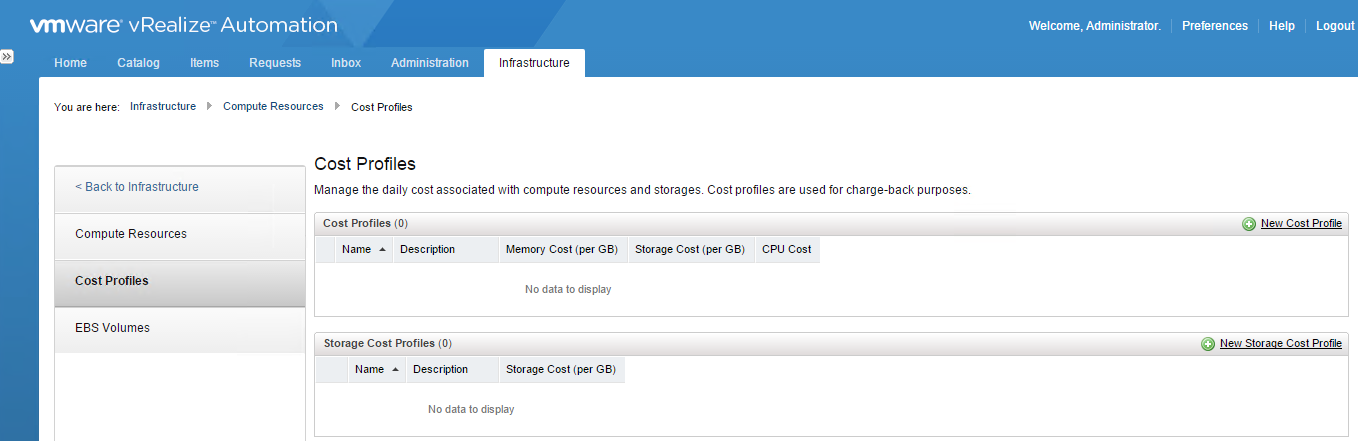
- Click New Cost Profile
- Type new values in for each resource
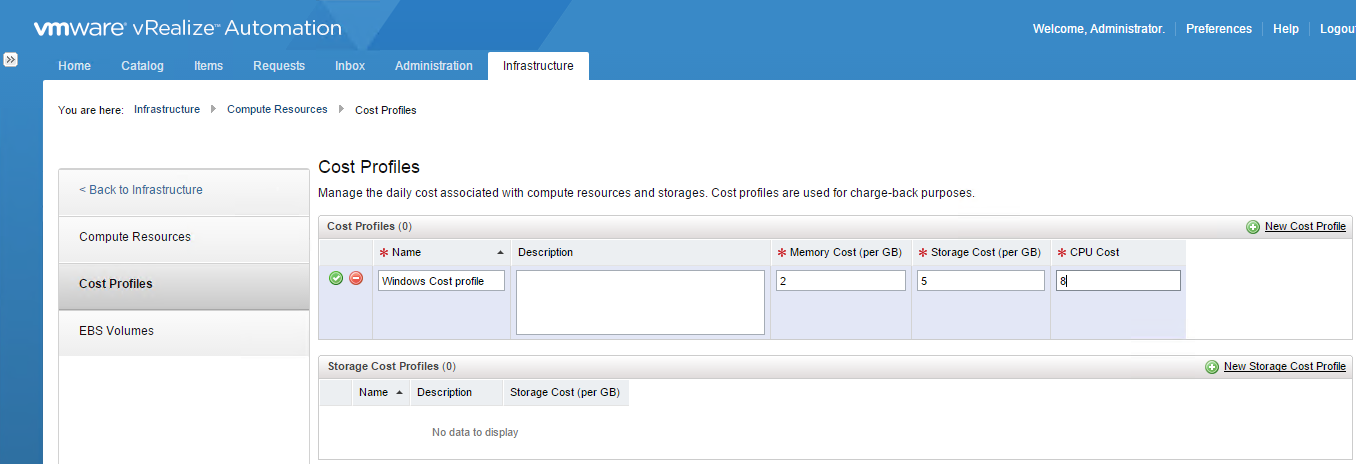
- You can also add a Storage Cost Profile for storage of different performance capabilities such as High, Medium and Low cost storage
Using Custom Properties on Blueprints
You can modify a machine using custom properties throughout the lifecycle of the machine
- Request
- Provision
- Manage
- Retire
As an example they can modify the following
- Specify the WIM image or PE environment image to use for install
- Define the number of cores per socket
- Place the machine in an OU
- Place the machine in an inventory folder in vCenter
- Change the network a machine is attached to
- Update a CMDB
Custom properties can be defined for the following objects
- Business Groups
- Compute Resource
- Build Profiles
- Reservations
- Endpoints
- Blueprints
- Storage
Useful Link
http://www.vmware.com/support/pubs/vcac-pubs.html
Set up Custom Properties
As an example I want to add a custom property to a blueprint which puts my machine in a specific folder in vCenter
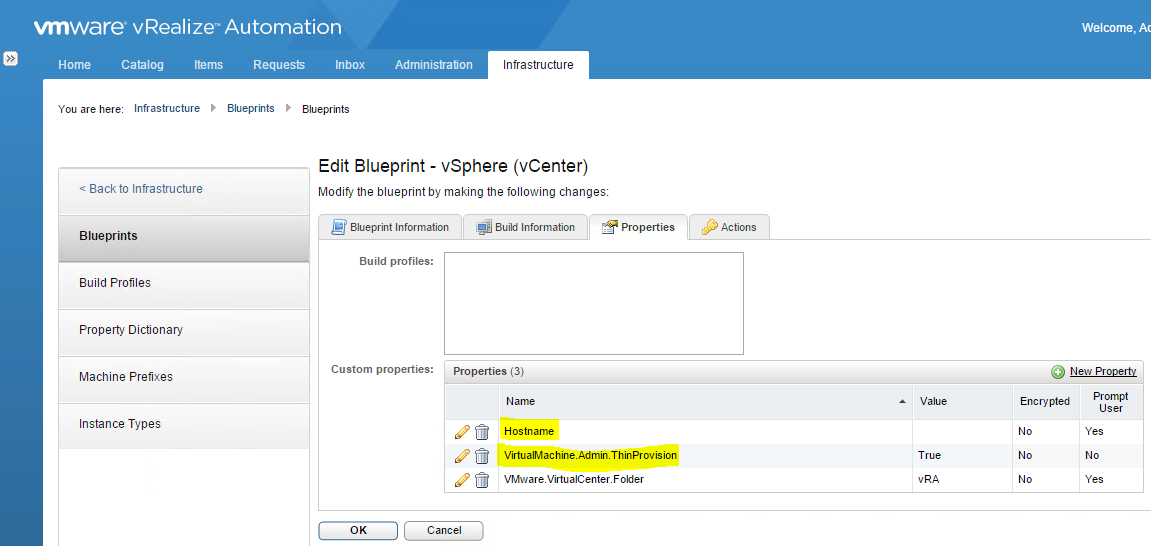
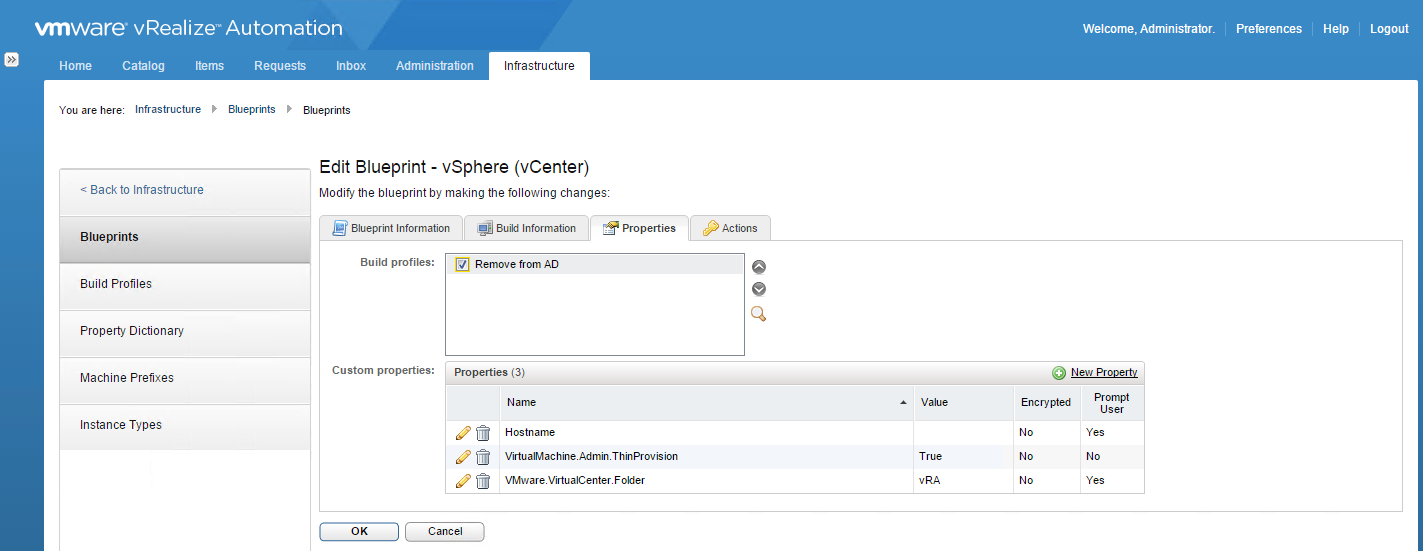
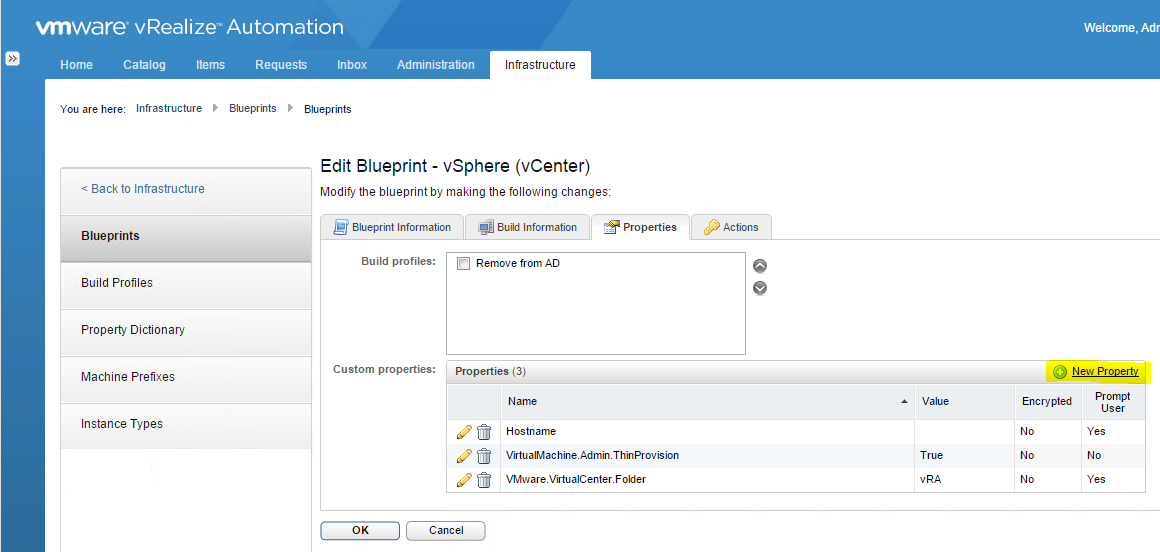
- Go to Infrastructure > Blueprints > Select your blueprint and click Edit
- Click on the Properties tab
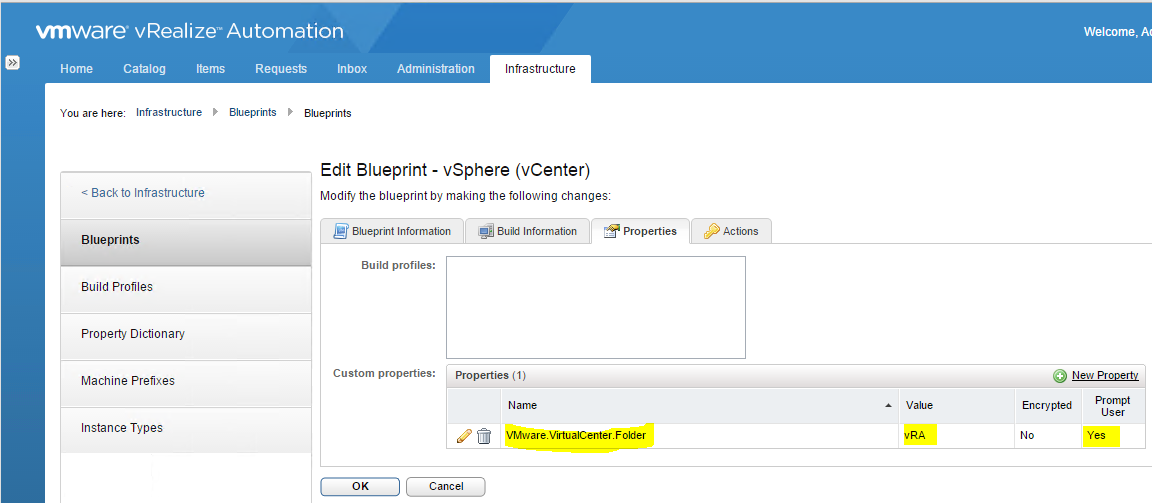
- Add in VMware.VirtualCenter.Folder and type in a name for the inventory folder in vCenter that you want to use which provisioned machines will go into. In my case I have called it vRA.
- Next go to Infrastructure > Groups > Business Groups > Click edit on your business group
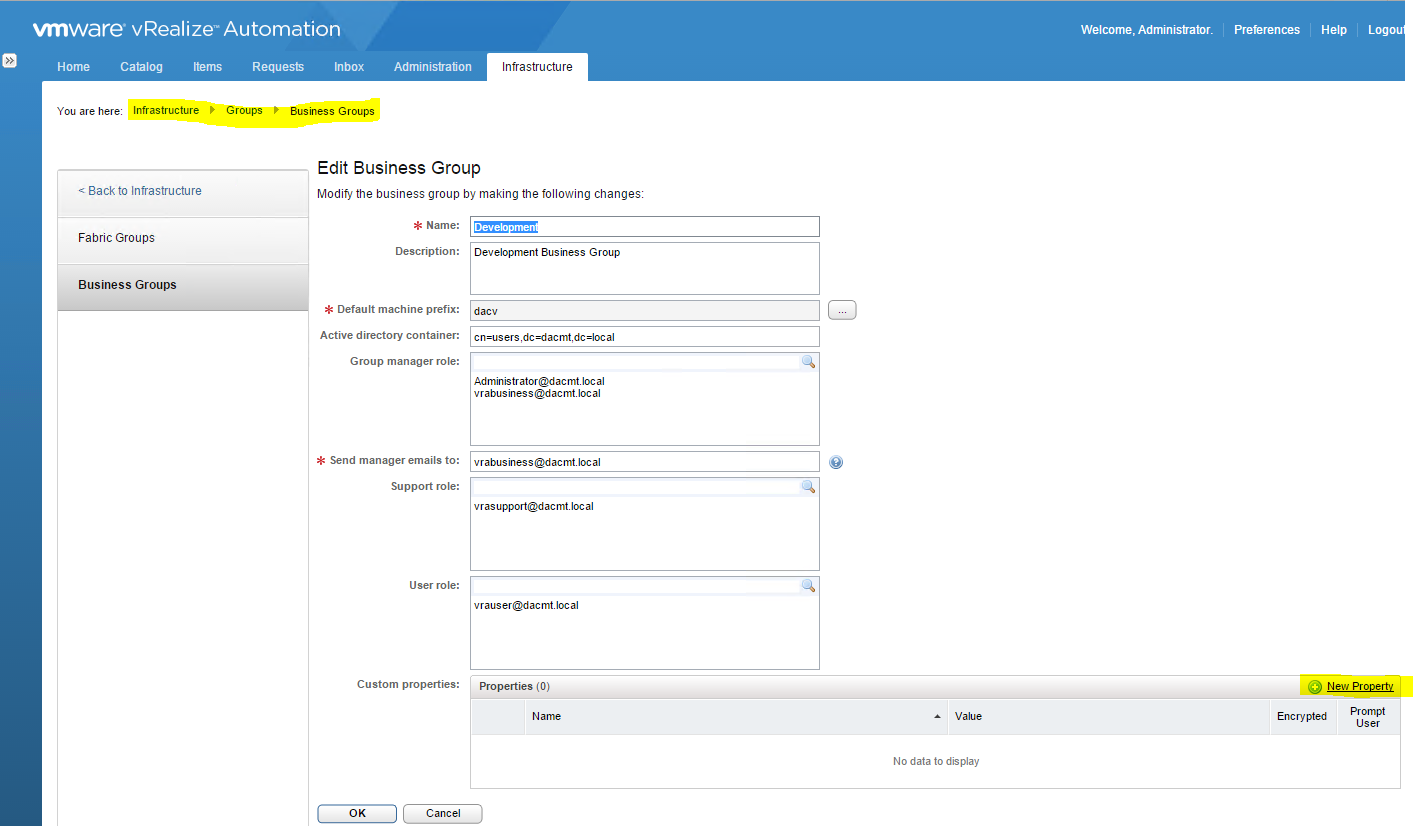
- Click New Property
- Type in the name and value of your custom property.
- Name = VMware.Virtual.Center.Folder
- Value = vRA

- Go to Catalog and request a Virtual Machine again
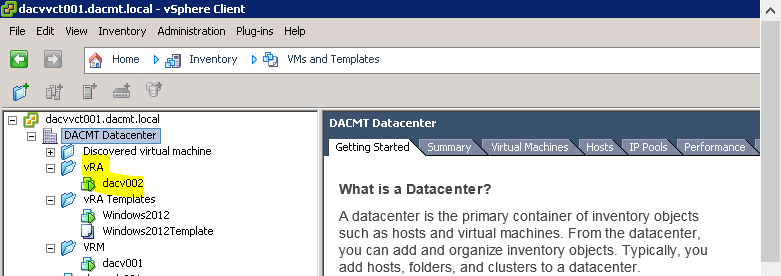
- Once deployed, check vCenter has deployed the machine to the vRA folder and not the vRM folder
Add Location Information
- Go to c:\Program Files (x86)\Vmware\vCAC\Server\Website\XmlData
- Right click DataCenterLocations and click Edit
- Copy the line with Boston in it and paste it underneath
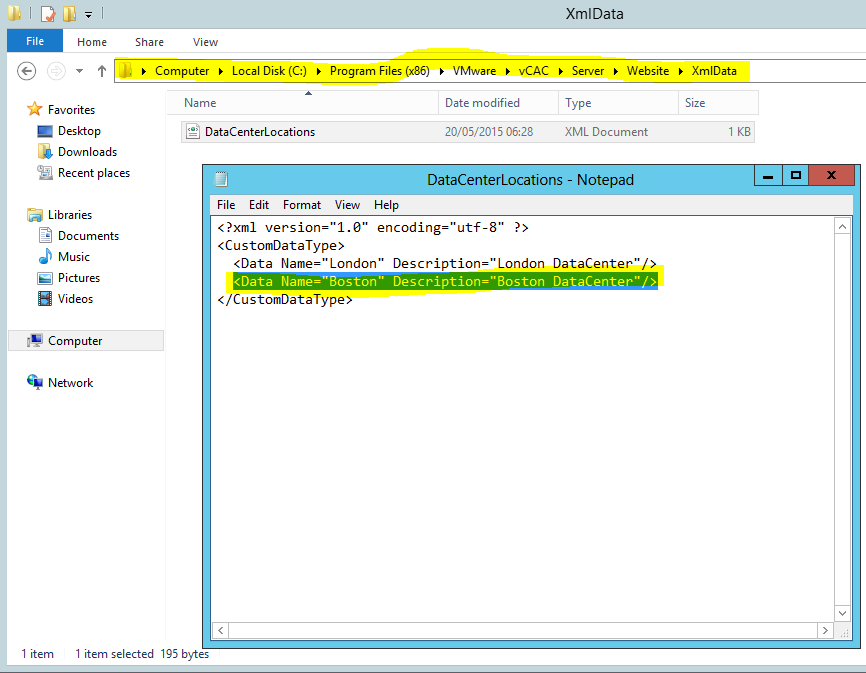
- Change all instances of Bolton with a new location
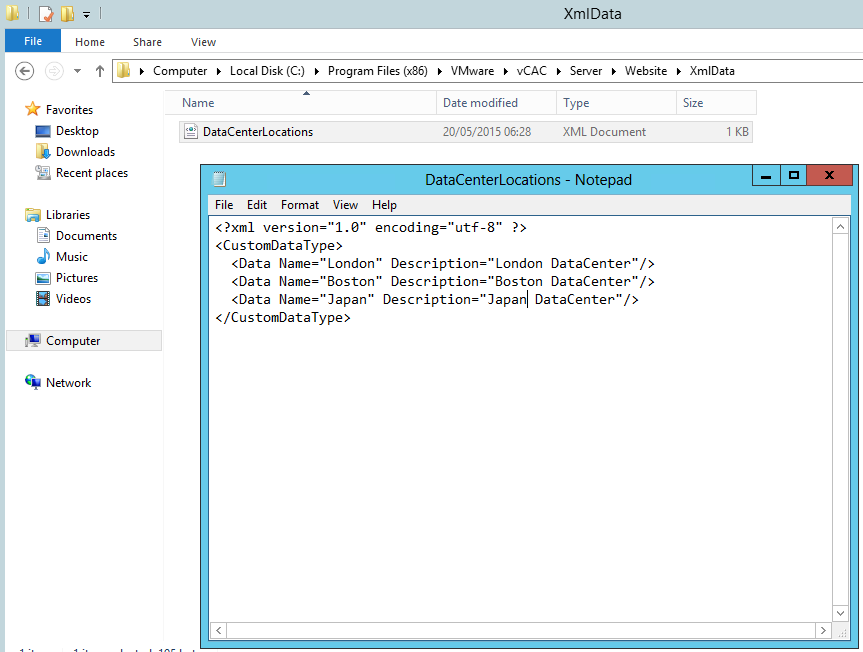
- Save the file
- Go back to your vRA webpage and go to Infrastructure > Blueprints > Blueprints
- Click Edit on your Blueprint
- Click the Display Location on request
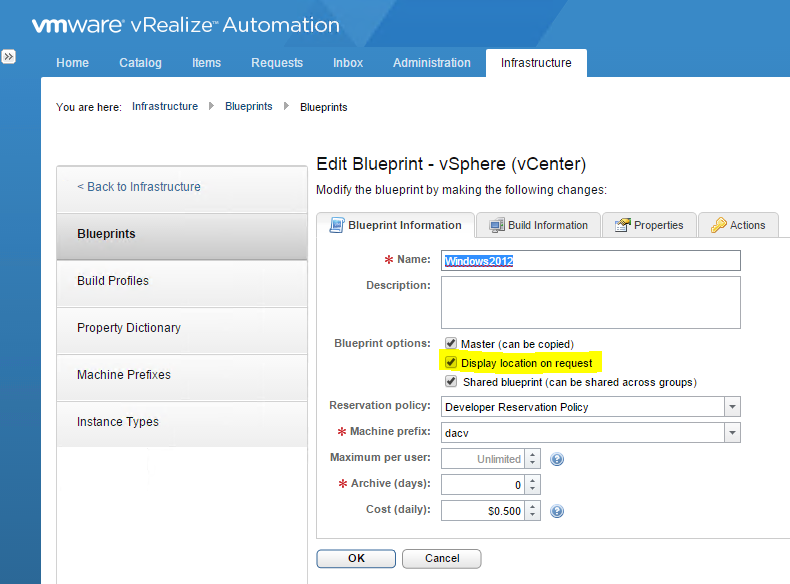
- Click OK and logout
- Log back in and go to Infrastructure > Compute Resources > Compute Resources
- Click Edit
- From the location menu click the location you want
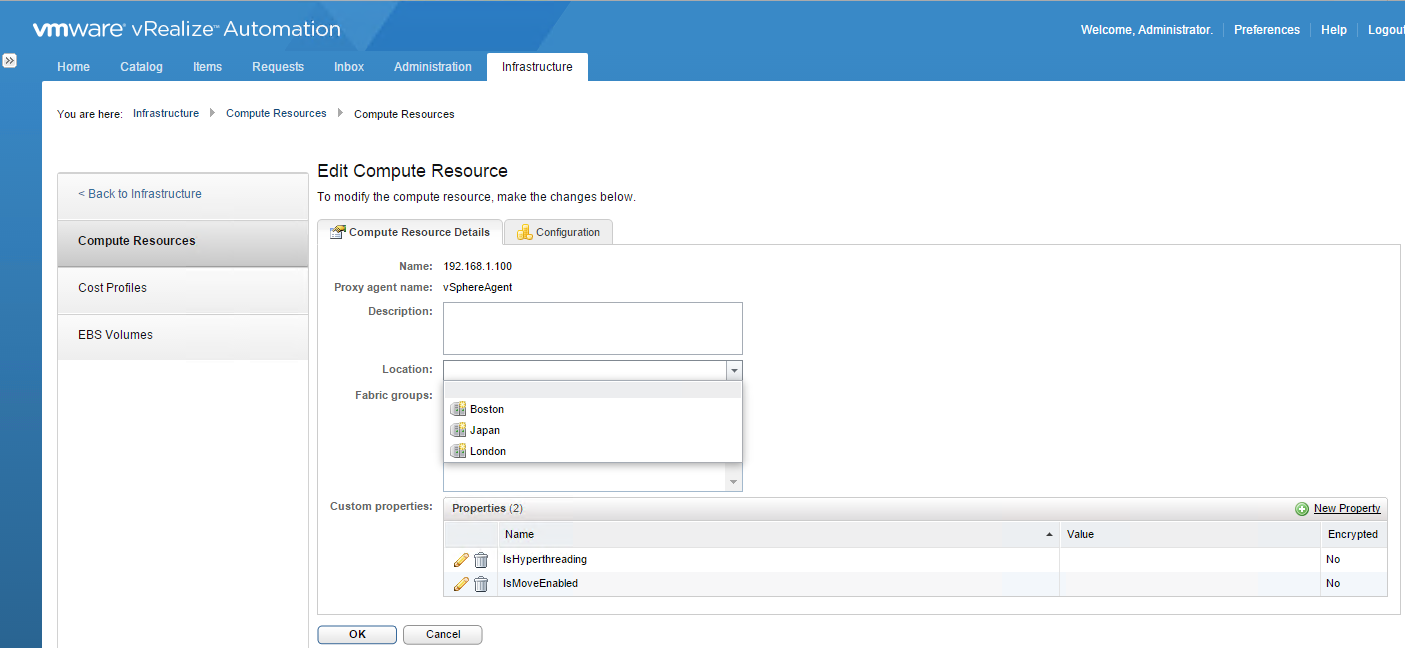
Other Custom Property Options
- Hostname
This can be used to prompt a user to put in a hostname other than the ne defined by the machine prefix on the blueprint
- VirtualMachine.Admin.ThinProvision
This option forces a new machine to be thin provisioned on the storage device
Build Profiles
A build profile is a set of properties to be applied to a machine when it is provisioned. It can be used for the following
- Determining the spec of a machine
- Determine how the machine is provisioned
- Determine the operations to be performed after the machine is provisioned
- Manage information about the machine
Build Profiles are attached to Blueprints and the spec of the build profile is available to business group users who have access to the blueprints
Build Profiles are constructed from default property sets or custom properties. Default sets include
- ActiveDirectoryCleanupPlugin
- CitrixDesktopProperties
- PxeProvisioningProperties
- SysprepProperties
- VmwareXXXXXProperties
Creating a Build Profile
- Go to Infrastructure > Blueprints > Build Profiles
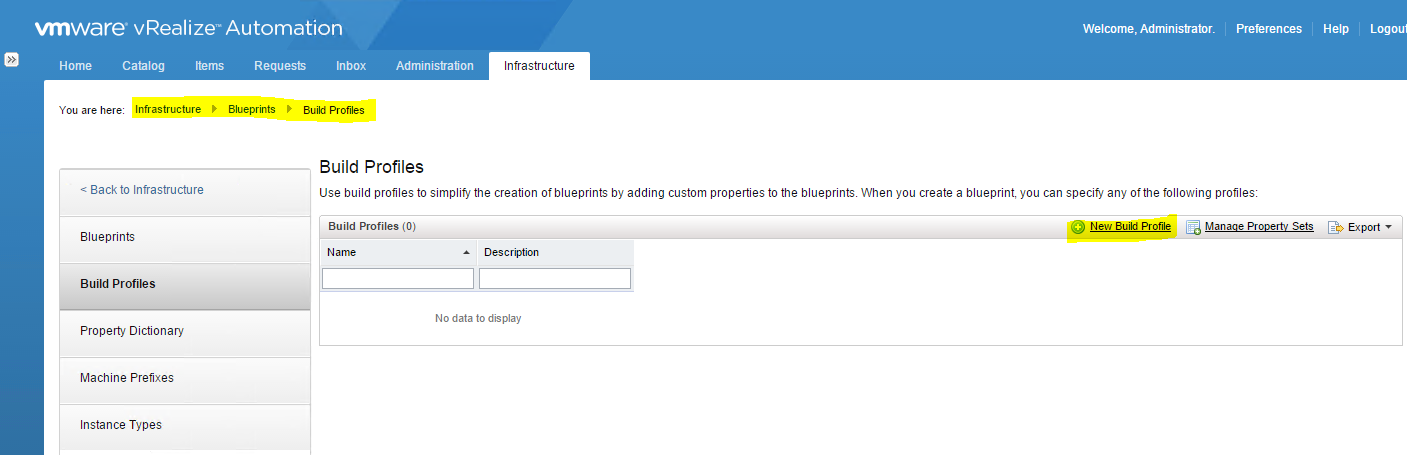
- Click New Build Profile
- Add a name and description
- From the Add from property set drop down list, select ActiveDirectoryCleanUpPlugin
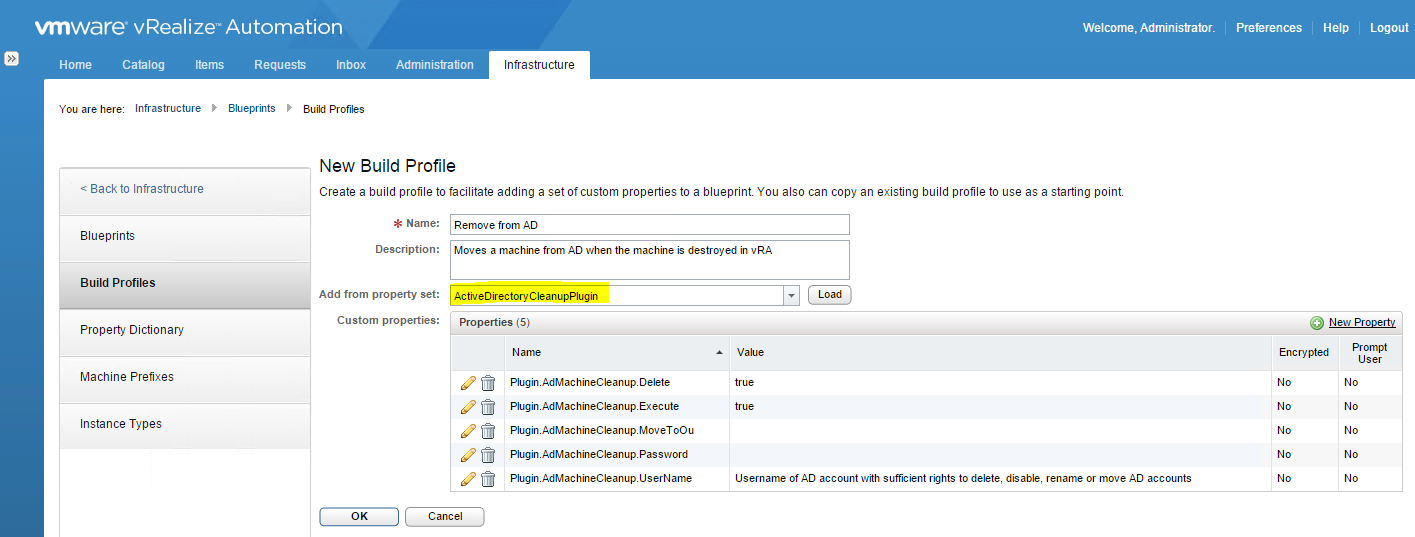
- In the Plugin.AdMachineCleanup.UserName, click Edit and add the username of a domain admin. In my case dacmt\administrator
- In the Plugin.AdMachineCleanup.Password, click Edit and add the password of a domain admin
- Make sure you click the green tick to confirm the changes
- Logout
- Login again
- Click Infrastructure > Blueprints > Blueprints
- Click Edit on your Blueprint
- Click the Properties tab
- Select the Remove from AD Build build profile
The Property Dictionary
The Property Dictionary can be used with custom properties to create a customised interface. You can statically or dynamically define the interface with the following data specification options
- Data validation
- Defined constraints on data values
- Tooltip
- Optional data
- Ordered user control layouts
Using the Property Dictionary helps stop mistakes which occur when the data value of a custom property is passed into extensibility tools like Orchestrator and Powershell
When users request new machines they are prompted for these custom properties in the form of a required text box, drop down menu or buttons and more
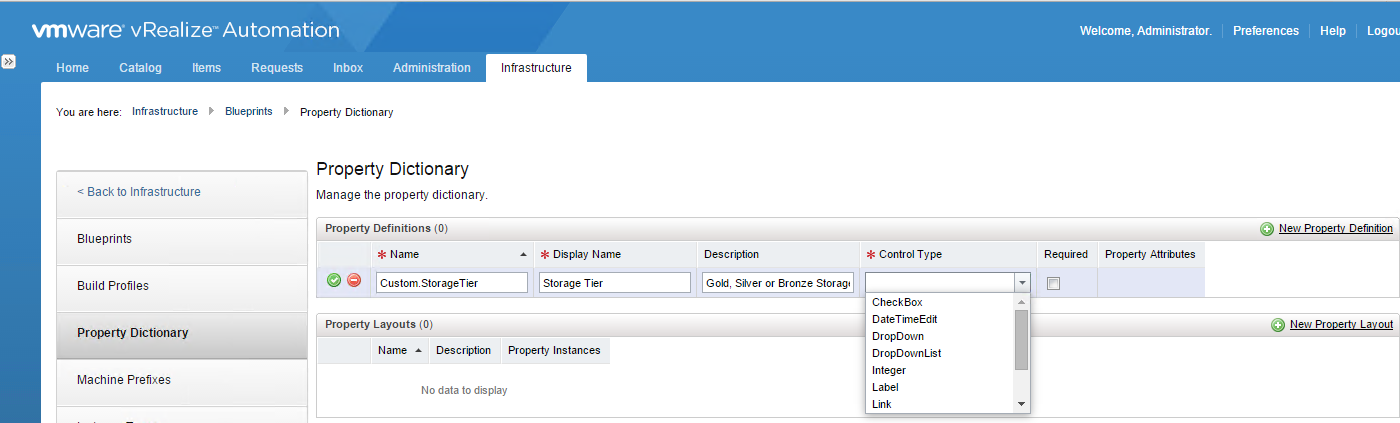
- Go to Infrastructure > Blueprints > Property Dictionary
- On the Property Dictionary page, click New Property Definition

- Fill in the required details
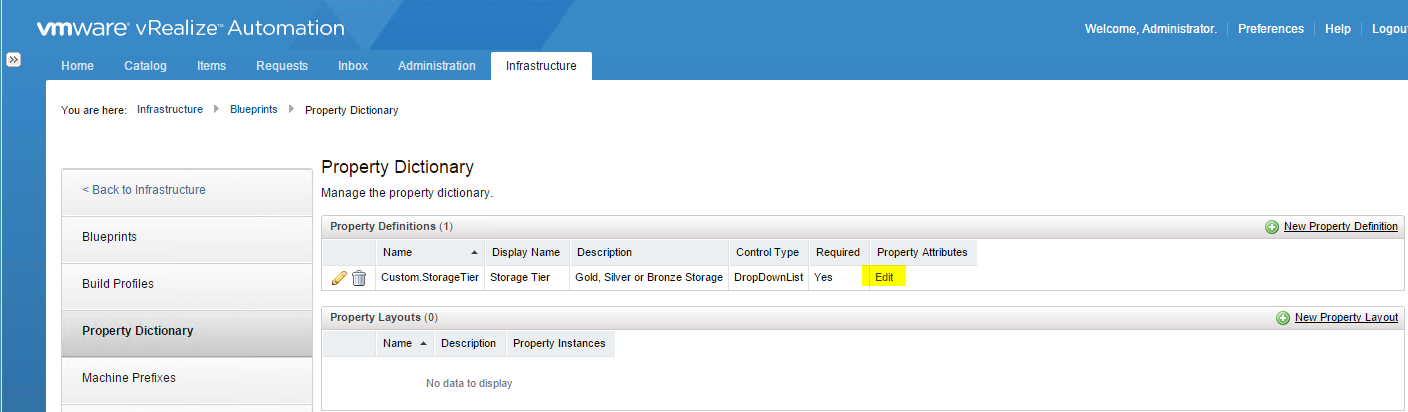
- Click required and then click the green arrow
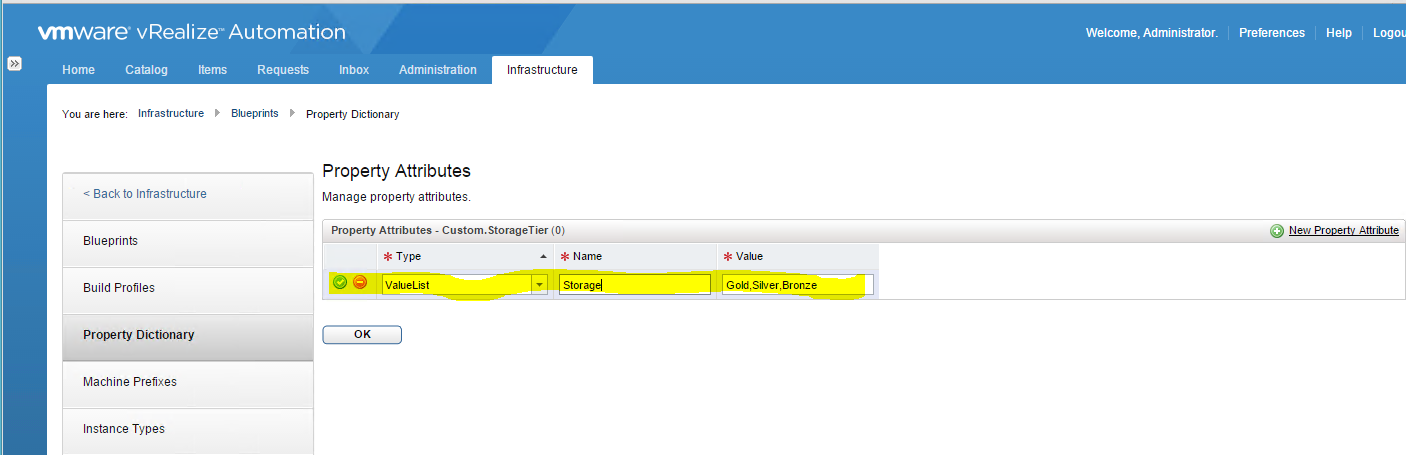
- Click Edit under Property Attribute
- Click New Property Attribute
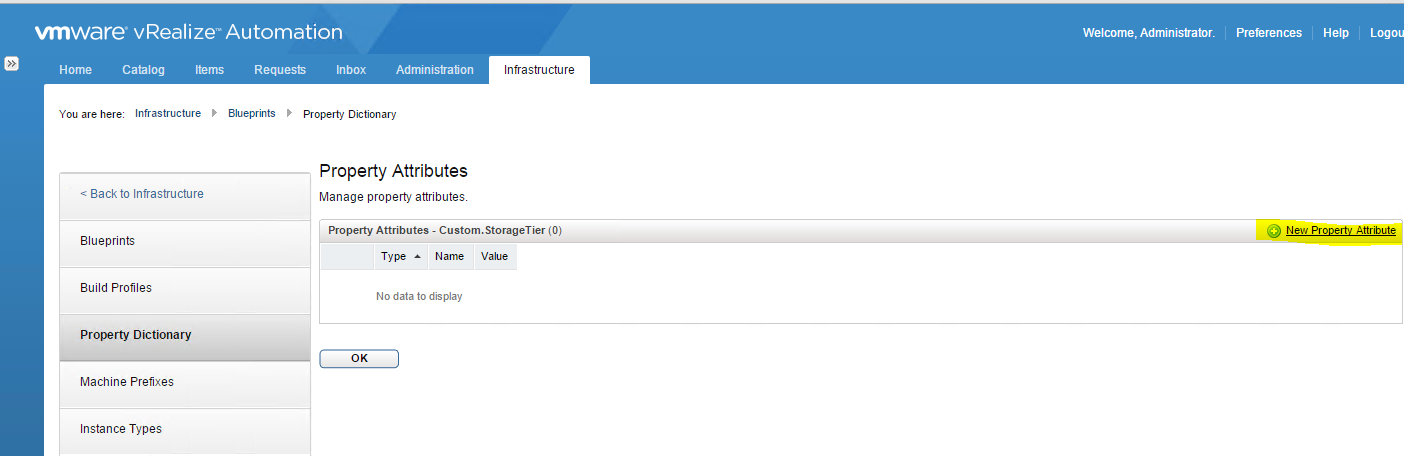
- Add in the below values
- Log off
- Log on again and go to Infrastructure > Blueprints > Blueprints and edit your blueprint and select the Properties tab
- Select New Property
- Type Custom.StorageTier in to the name an leave the value blank with Prompt user selected

- Click OK
- Go to Catalog > Request your machine
- Look at the new option you have on the interface for Storage Tier
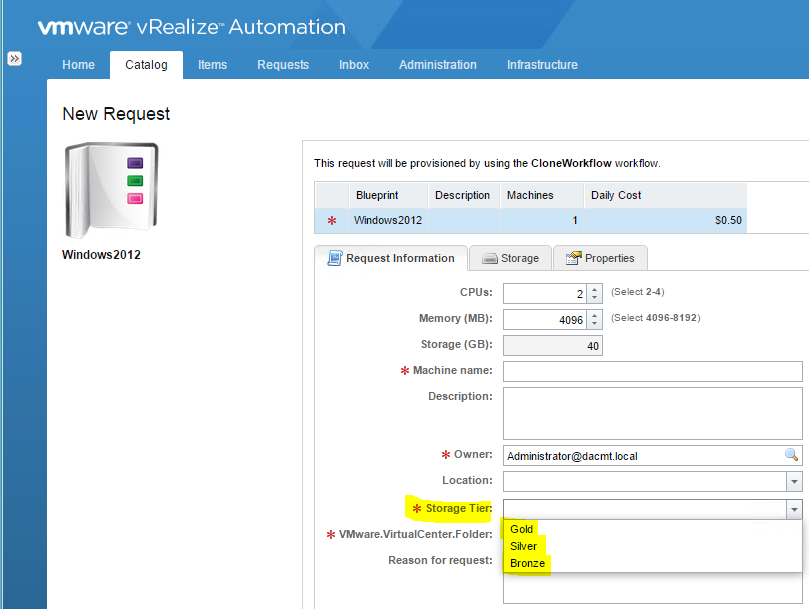
- Note: vRA does not directly use storage tiering. You have to use custom properties and workflow modification with vSphere PowerCLI or Orchestrator
Approval Policies
Any catalog item or entitled action can be subject to an approval. The Approval Policies must first be defined by either a tenant administrator or a business group user and set as active before they appear in an entitlement
There can be multi levels of approvals with all different Boolean conditions as to how the policy can be approved across these levels.
Active and Linked approvals can only be cloned not edited
Creating an Approval Policy
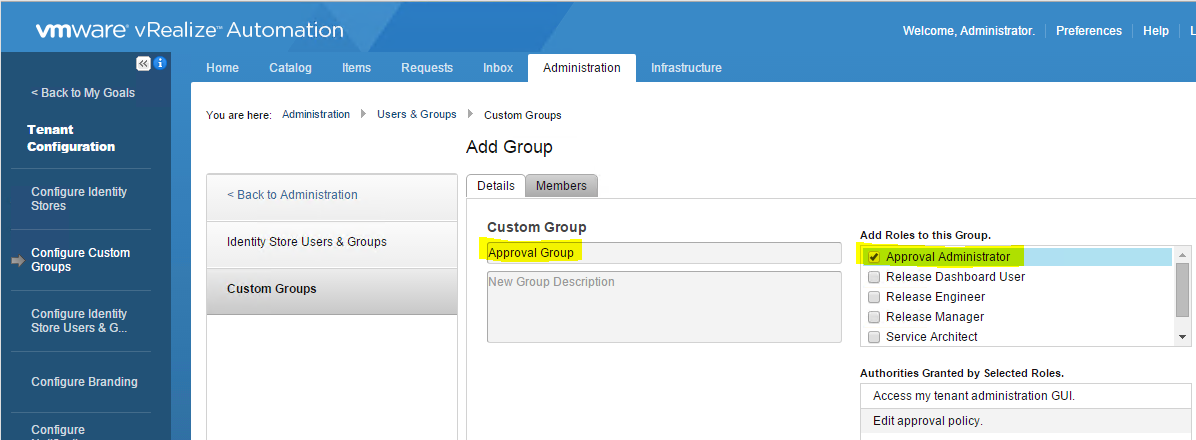
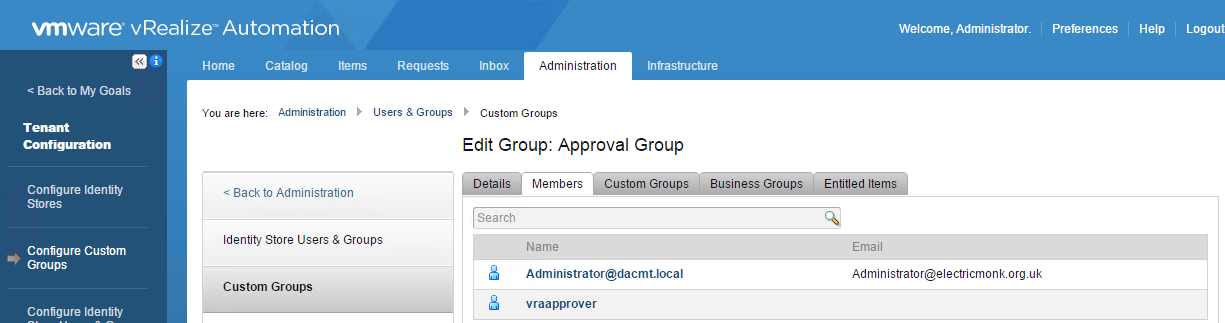
- Click the Administration tab > Users and Groups > Custom Groups
- Search for the user or group you want to add as an approver
- Click Next
- Add in the users who you want to be Appprovers
- Next go to Administration > Approval Policies

- Click Add
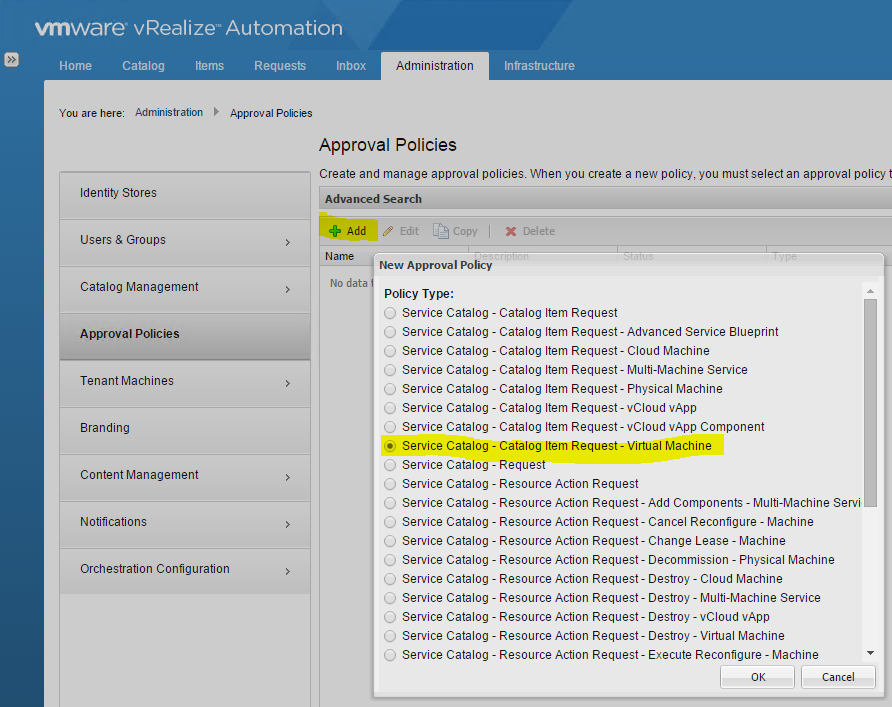
- Click OK
- I am going to create a vCPU approval policy
- Put in the name and set to Active
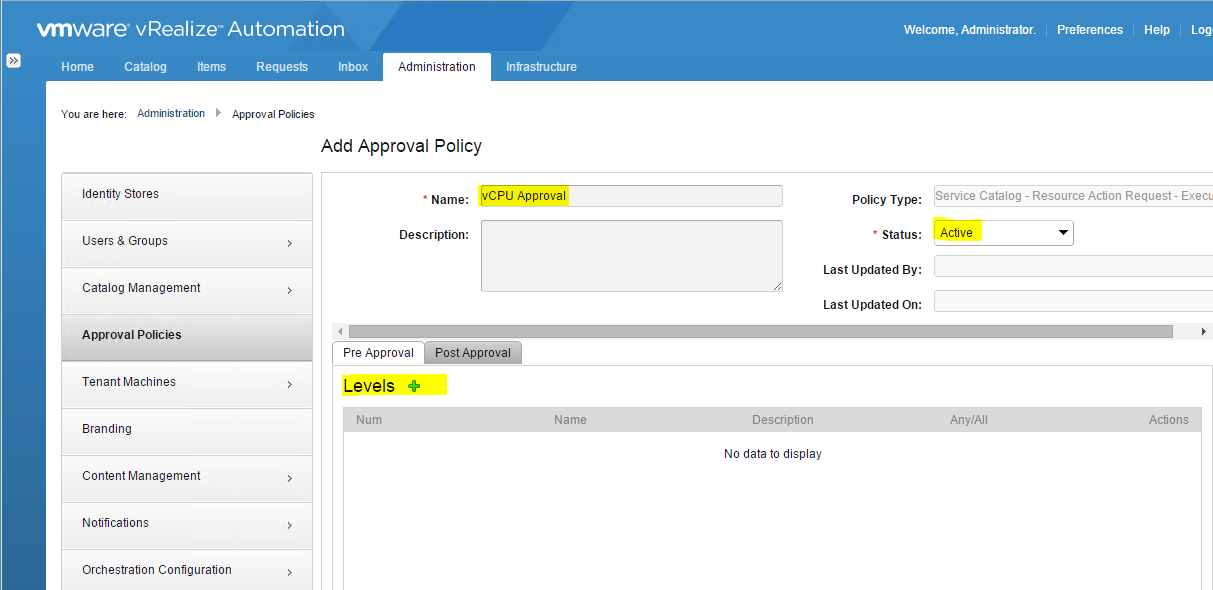
- Click the green plus sign next to Levels
- Fill in the required information
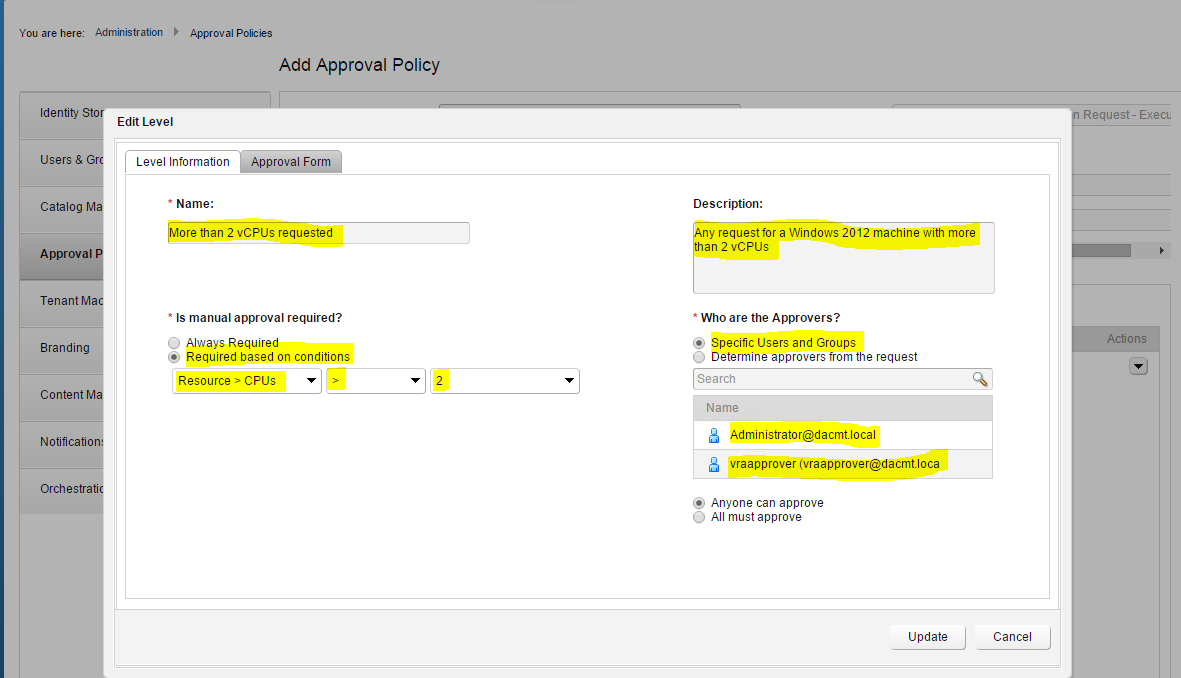
- Click Add and Add again
- Log out
- Log in again
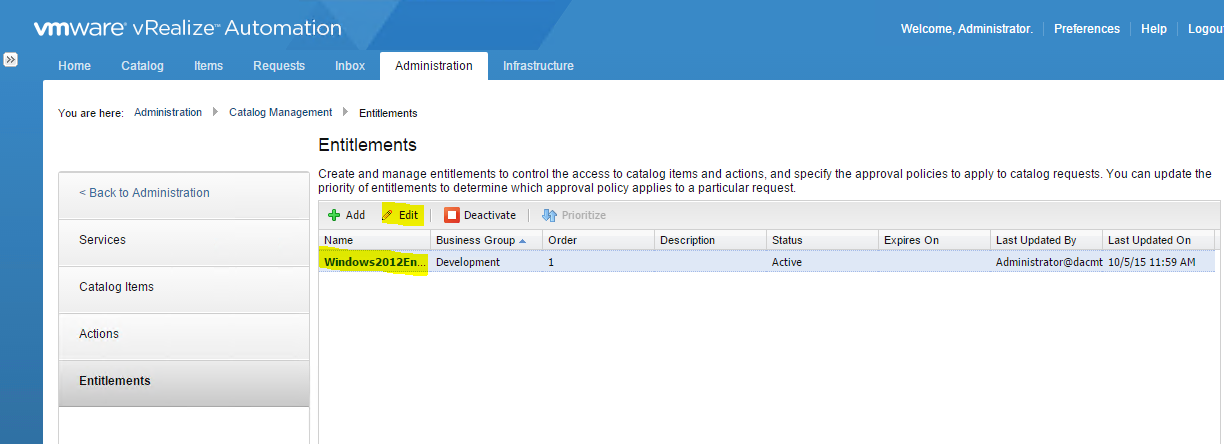
- Click Administration > Catalog Management > Entitlements
- Highlight your Blueprint and click Edit
- Click Items and Approvals
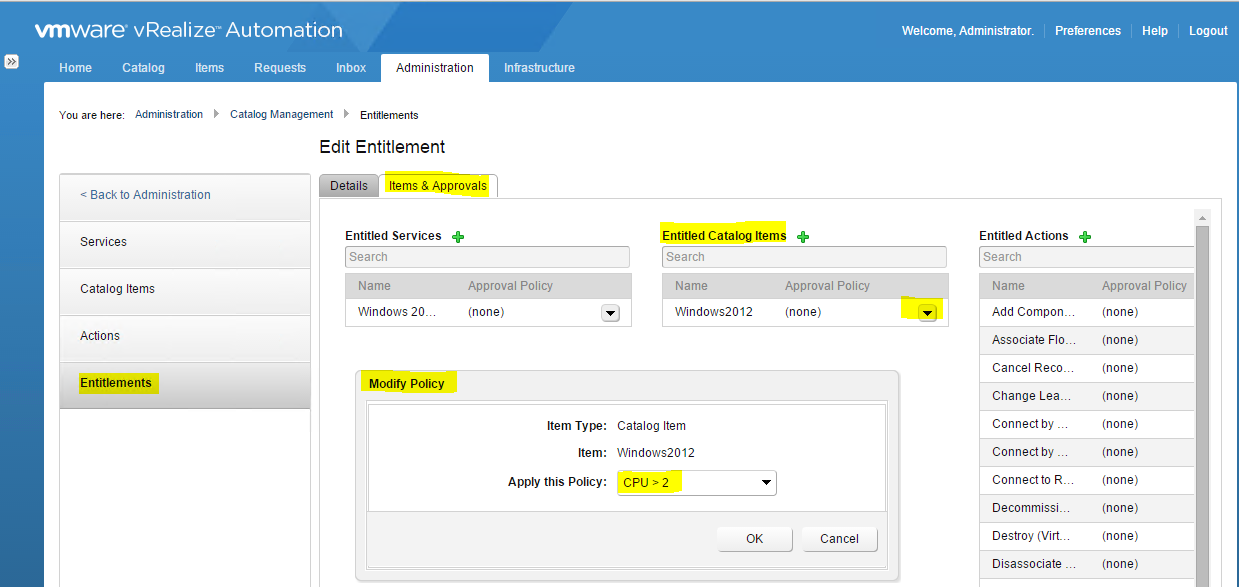
- Click Entitled Catalog Items and Modify Policy
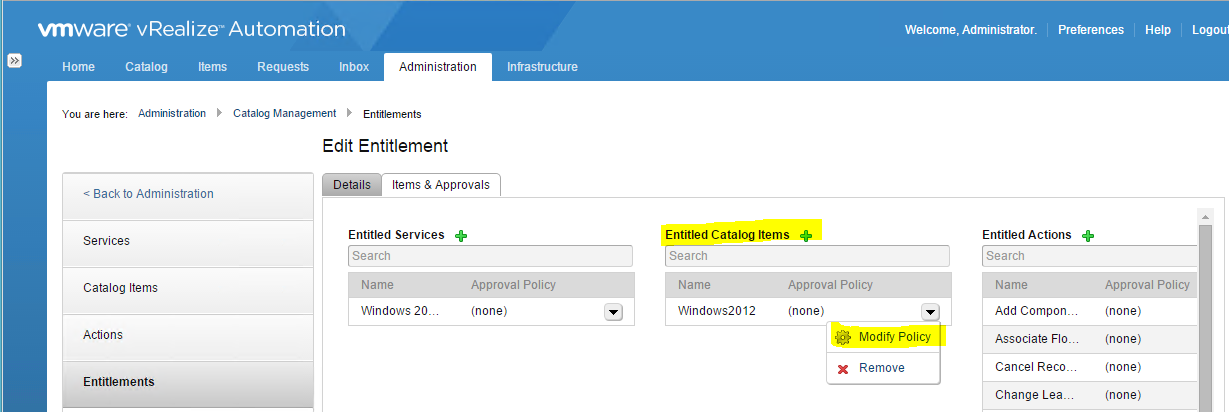
- Click the drop down menu and select your policy. Note apologies I had to recreate mine as CPU > 2
- Click on Catalog > Request and select your VM
- Change the vCPUs to 4
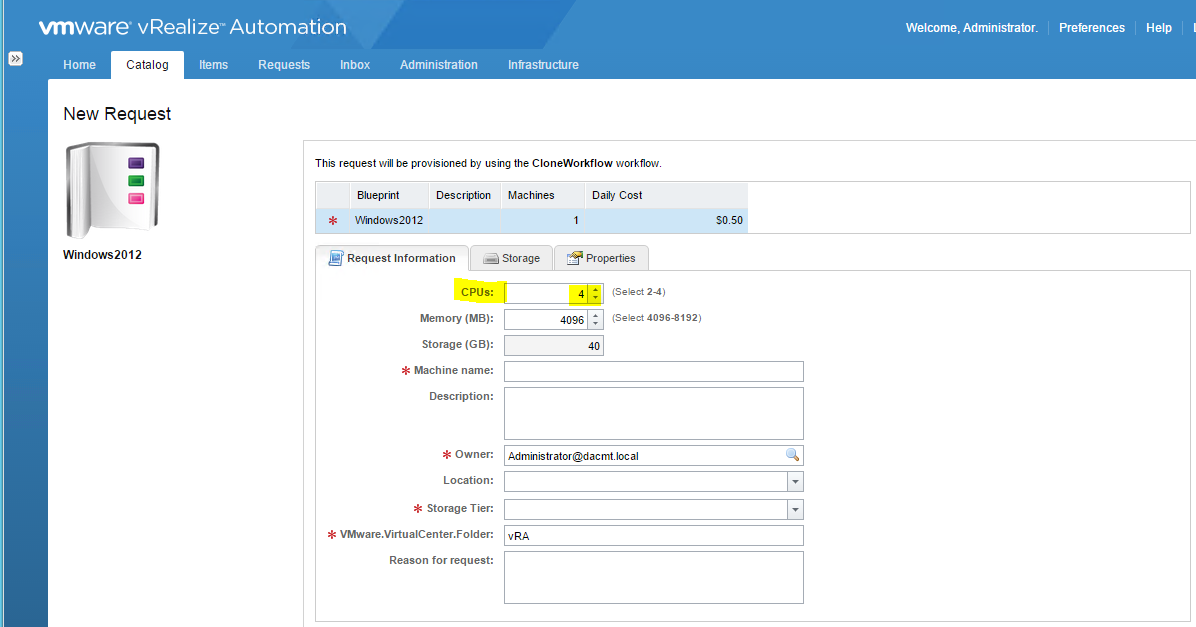
- Click Submit
- Now look at the Request tab where we should see the request sitting in the pending approval status
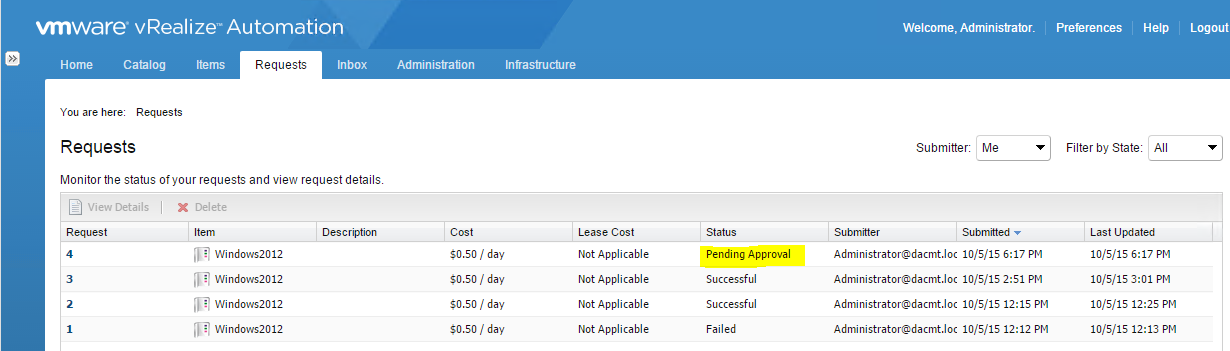
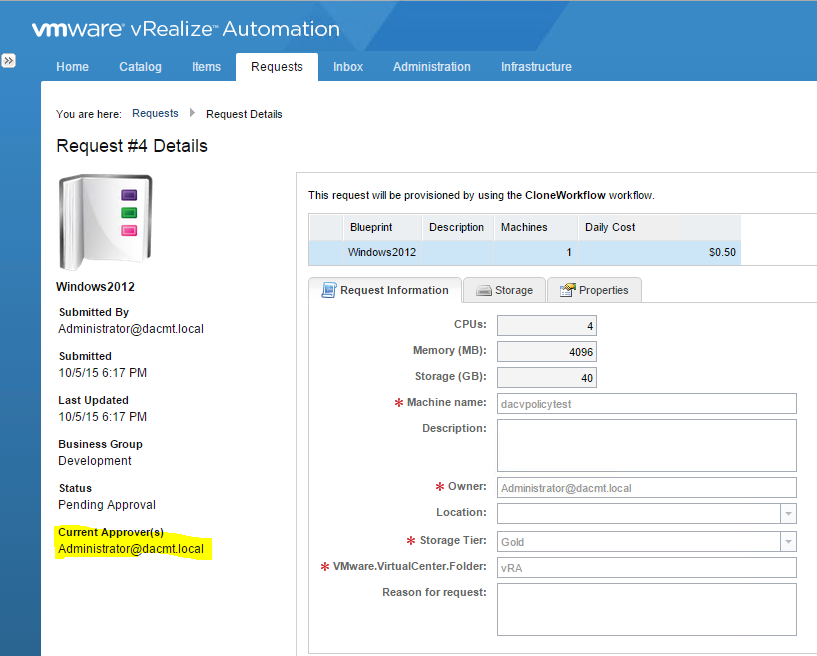
- If you click on the request and select view details, it will show you who is the approver
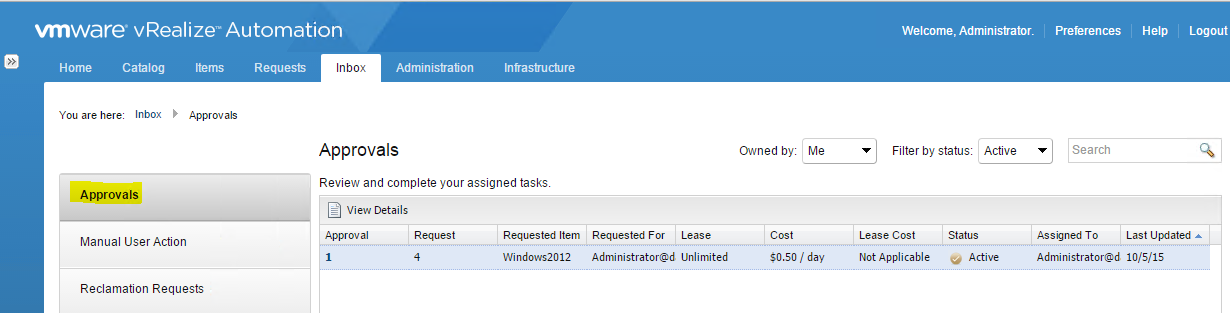
- Click on Inbox > Approvals as I am already logged in as myself as the approver
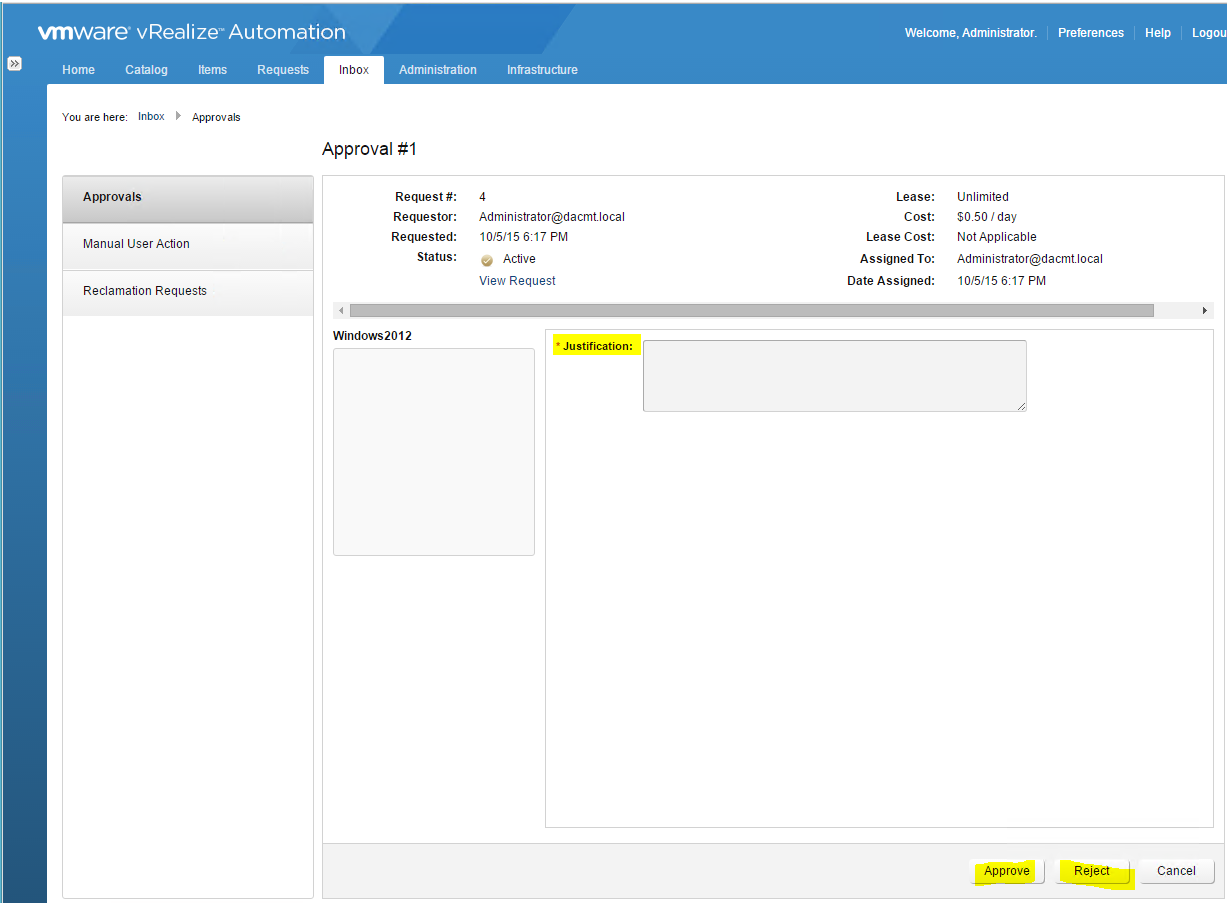
- Click View Details and select whether to Approve or Reject
- This concludes the configuration and management Part 5
- Part 6 will go into more of the extensibility options like Advanced Service Designer and Orchestrator

