
What is Guest Operating System Customization
Customizing guest operating systems can help prevent conflicts that can result if virtual machines with identical settings are deployed from a template or cloning, such as conflicts due to duplicate computer names and IP Addresses
You can specify the customization settings by choosing to launch the Guest Customization wizard during the cloning or deployment process. Alternatively, you can create customization specifications, which are customization settings stored in the vCenter Server database. During the cloning or deployment process, you can select a customization specification to apply to the new virtual machine.
Quick Note on Sysprep
The guest operating system customization feature in vCenter Server uses the functions of the Sysprep tool.
Microsoft has a different version of Sysprep for each release and service pack of Windows. You must use the version of Sysprep specific to the operating system you are deploying.The differences are not immediately visible in the packaging and documentation of the service packs
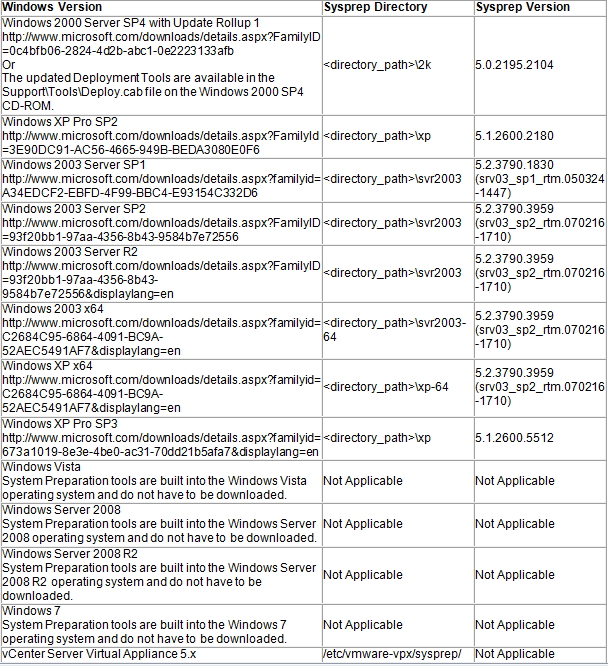
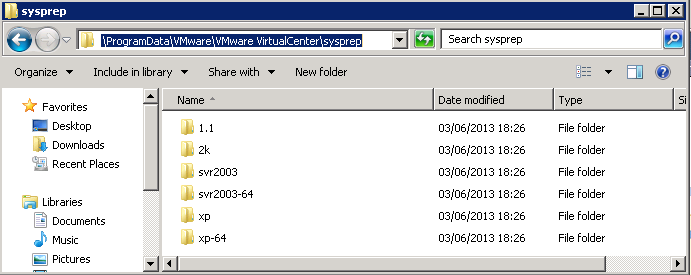
You will find the various versions of sysprep in the following directories on vCenter
Guest Operating System Customization Requirements
Guest operating system customization is supported only if a number of requirements are met.
- The most current version of VMware Tools must be installed on the virtual machine or template to customize the guest operating system during cloning or deployment.
- The guest operating system being customized must be installed on a disk attached as SCSI node 0:0 in the virtual machine configuration.
- Virtual machines that reside on hosts running ESX Server 3.0.x or earlier have additional disk requirements:
Windows Requirements
- On a Windows guest operating system, the active partition (the partition containing boot.ini) and the system partition (the partition containing the system directory, for example, \WINNT or WINDOWS) must be on the same virtual disk. The active partition and the system partition do not need to be the same partition
- Microsoft Sysprep tools must be installed on the vCenter Server system. See Installing the Microsoft Sysprep Tools.
- Microsoft Sysprep tools must be installed on the vCenter Server system. See Installing the Microsoft Sysprep Tools.
- The ESX/ESXi host that the virtual machine is running on must be 3.5 or later
- Guest operating system customization is supported on multiple Windows operating systems. To verify customization support for Windows operating systems and compatible ESX/ESXi hosts, see VMware vSphere Compatibility Matrix
Linux Requirements
- On a Linux guest operating system, the virtual disk containing the system partition (the partition containing the /etc directory) must reside on the SCSI 0:0 node.)
- Perl must be installed in the Linux guest operating system.
- The clone or template must have a root volume formatted with an ext2, ext3, or ReiserFS file system
Procedure
- Log into vCenter
- Click Home > Customization Specification Manager
- Click New
- Choose Windows or Linux for the Target Virtual Machine O/S
- Choose a name for your Customization Specification Information
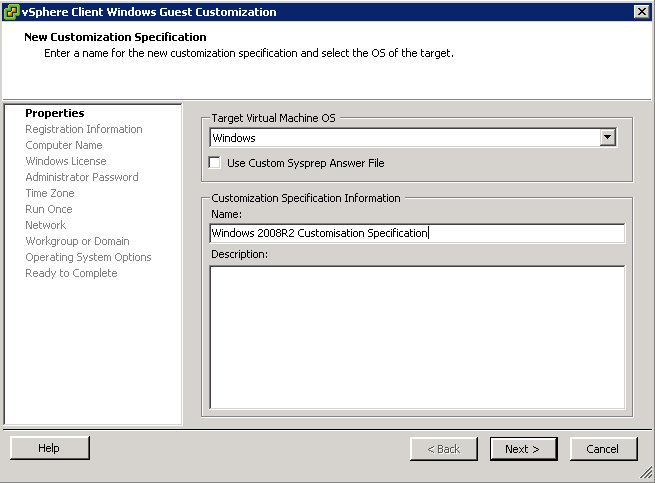
- Click Next
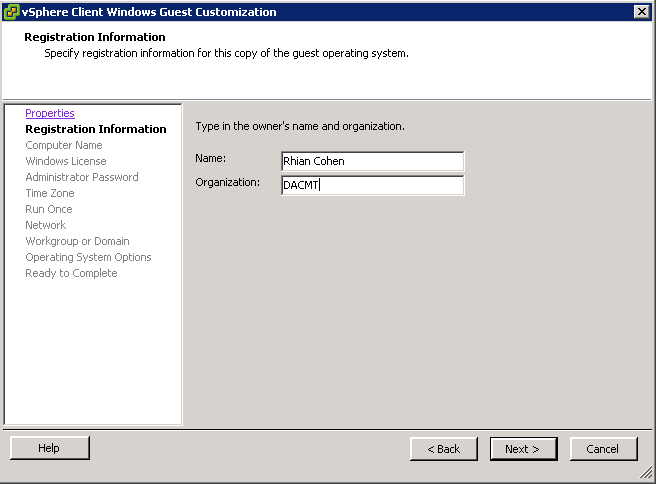
- Type in Name and Organisation
- I would use Choose “Use the Virtual Machine Name”
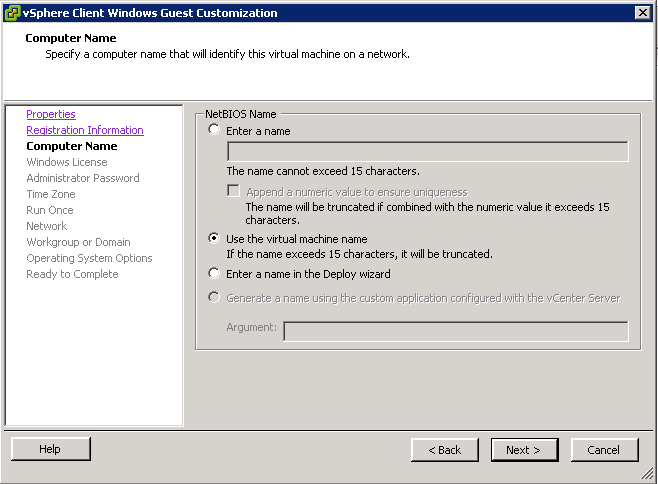
- Click Next
- Put in your Volume Licensing Key
- Include Server Licensing Information if you are customising a server guest operating system
- Select Per Seat or Per Server
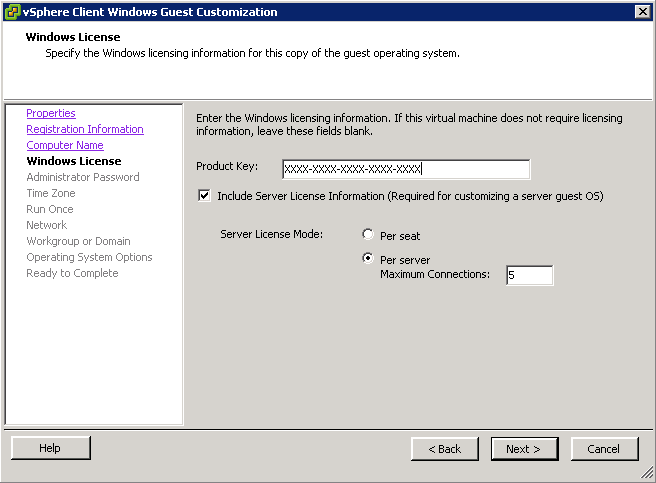
- Click Next
- Put in a password for the Admin account
- Select whether you want to login automatically (Choice is up to you)
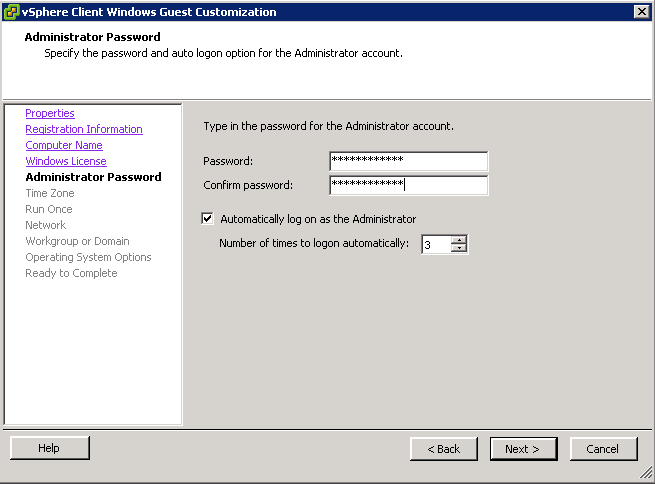
- Click Next
- Choose Timezone
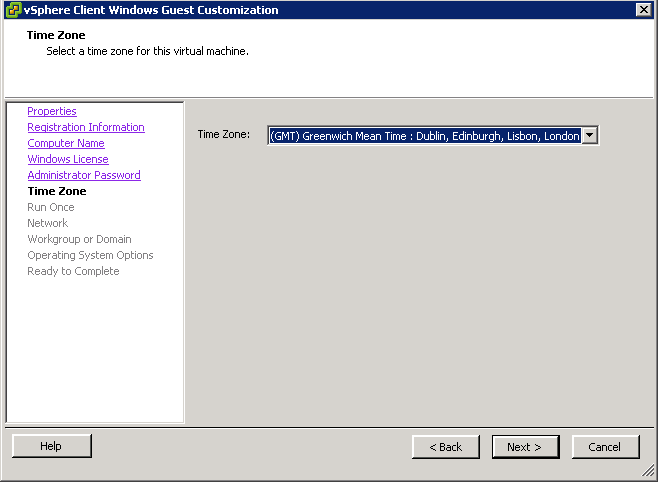
- Click Next
- Specify any Run once commands
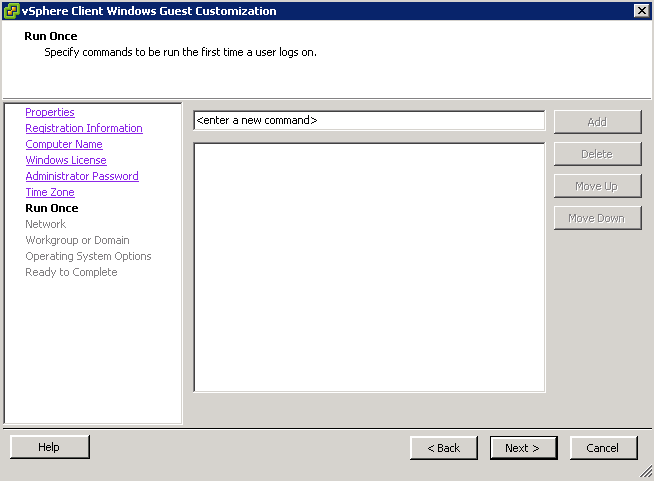
- Click Next and this takes you into Network customisation
- You can choose Typical or Custom.
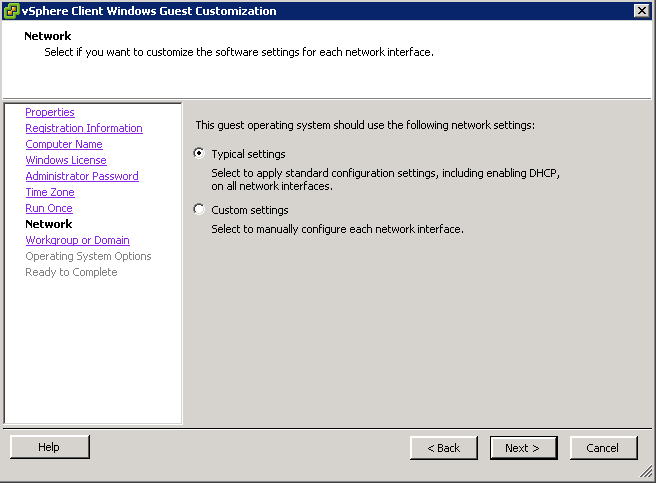
- Typical will just assign a DHCP Address which you can change afterwards
- With Custom, you get the following choices
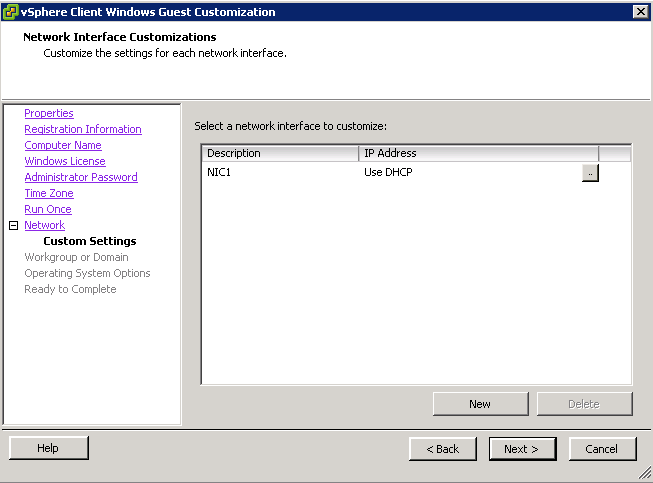
- If you click New, it will let you add a new adapter say if you wanted a second nic for backup

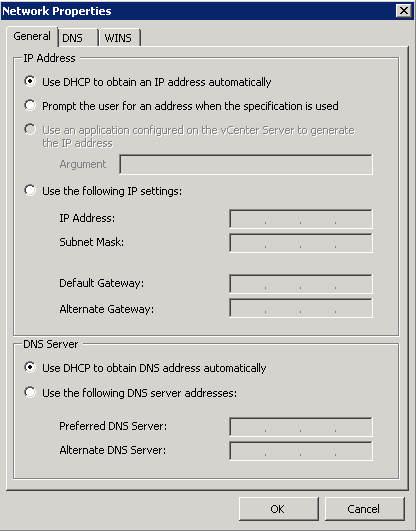
- If you click the radio button to the side, you get a whole set of options as per below
- Click Next
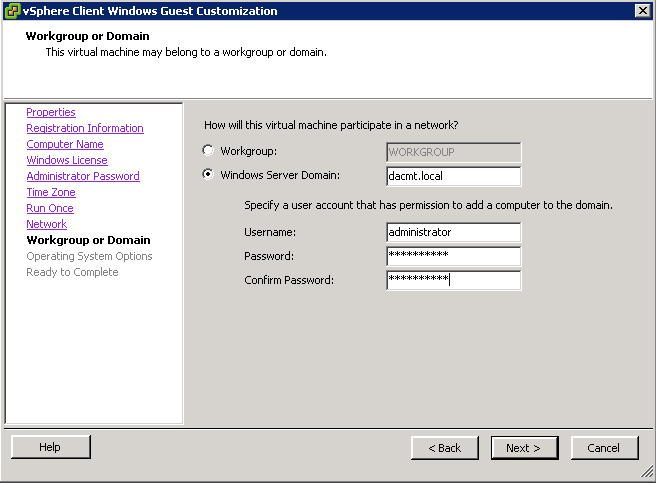
- Choose whether you want to join your domain automatically
- Click Next
- Generate a new SID

- Click Next
- Review your settings
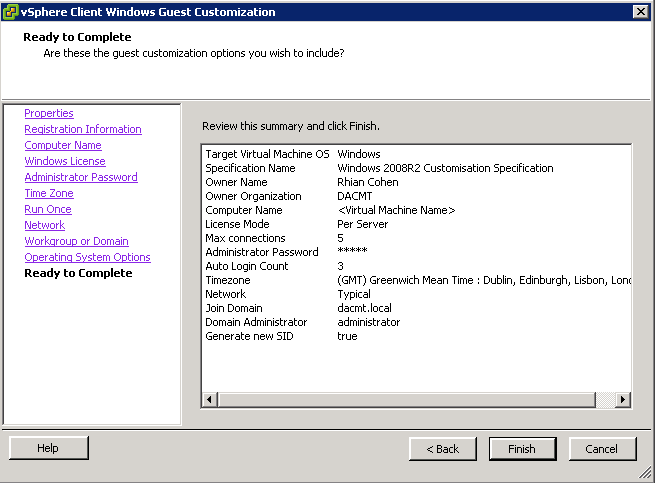
- Finish

