
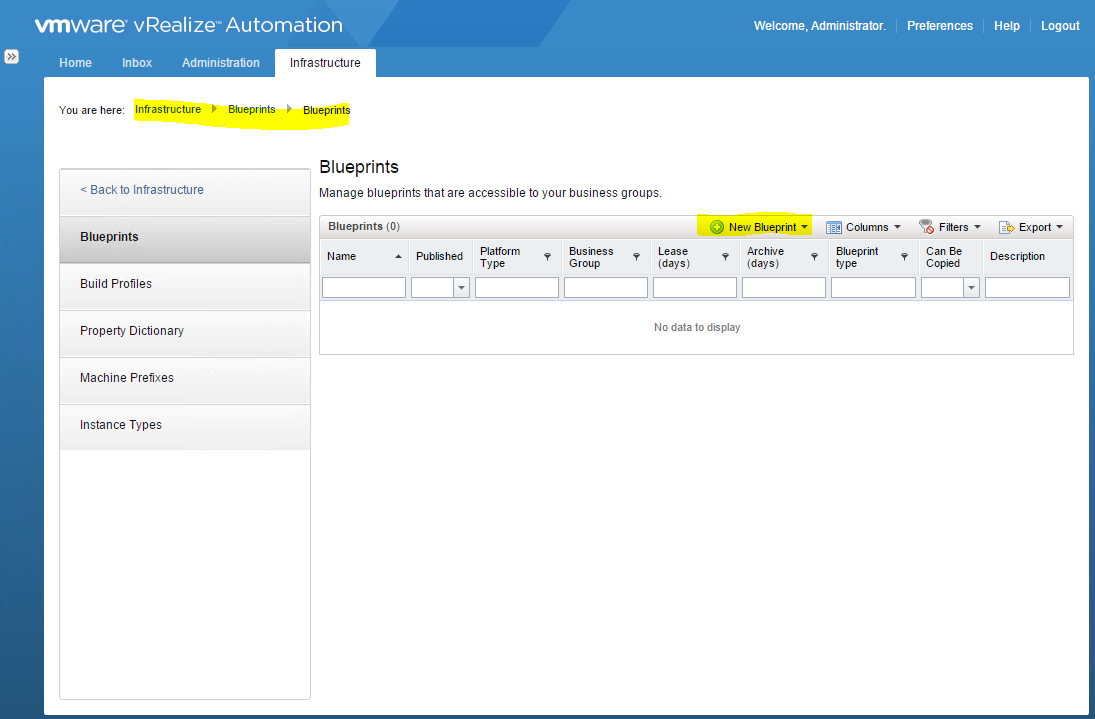
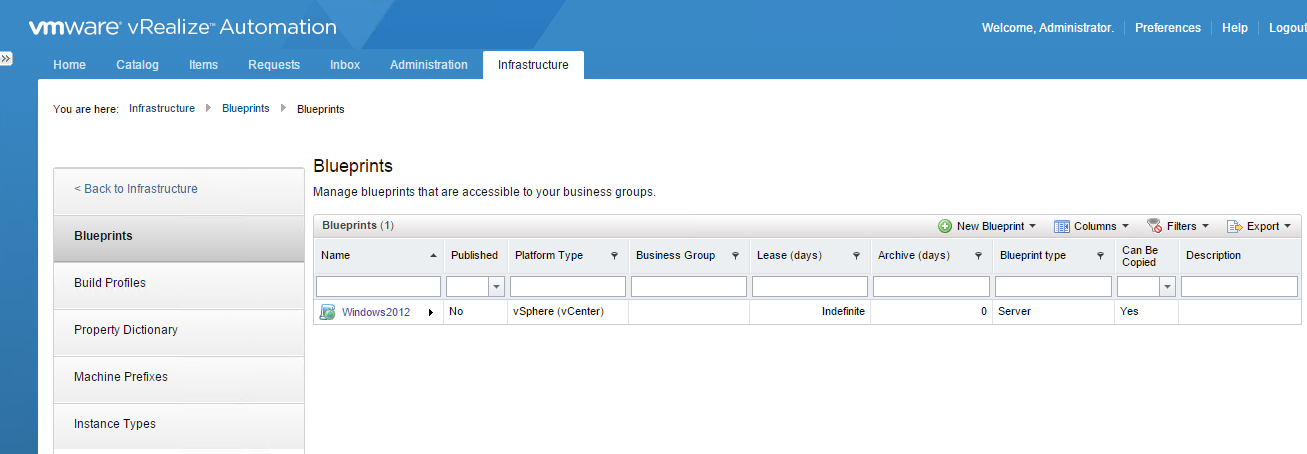
Blueprints
Blueprints are used to define a machines attributes and methods of provisioning. These blueprints are then added into the Service Catalog ready for users to provision machines. There are 4 different types
- Cloud
- Physical
- Virtual
- Multimachine (New in vRA 6)
A user can request VMs if the below conditions are met
- The Blueprint is published as a catalog item
- The item is added to a service
- The user is entitled to use the service
Configuring Blueprints
- Go to Infrastructure -> Blueprints -> Blueprints
- Click New Blueprint > Virtual > vSphere (vCenter)
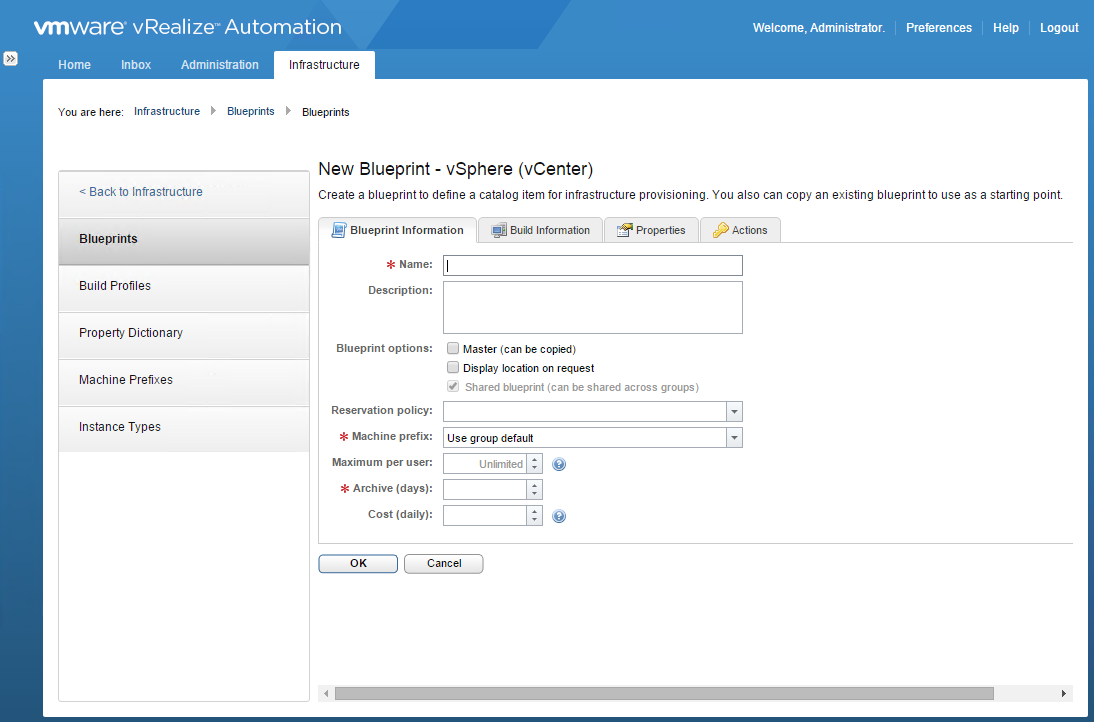
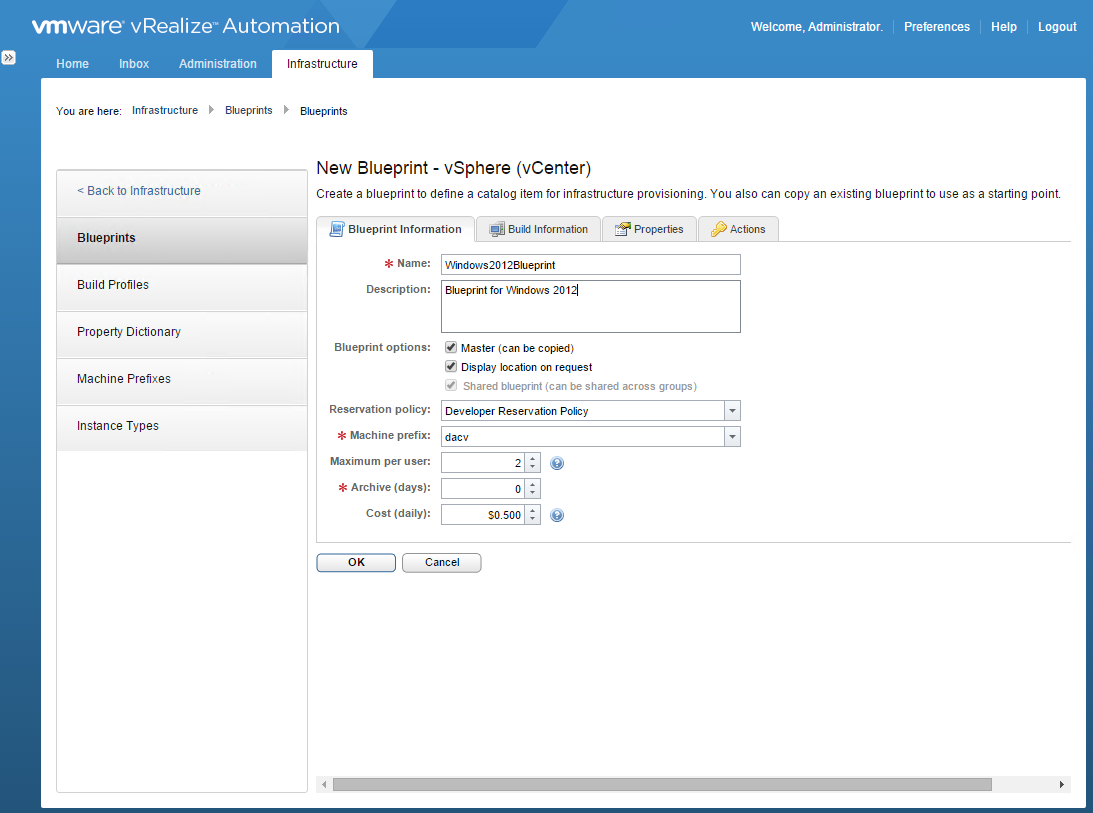
- Put in a name. I am going to call mine Windows2012Blueprint
- Put in a description
- (Optional) Select the Master check box to allow users to copy your blueprint.
- (Optional) Select the Display location on request check box to prompt users to choose a datacenter location when they submit a machine request. This option requires additional configuration to add datacenter locations and associate compute resources with those locations
- (Optional)Choose your reservation policy
- Choose the machine prefix you have previously set up
- Choose the maximum amount of VMs which can be deployed from this blueprint per user
- Specify the number of days to archive machines provisioned from this blueprint, just keep it at 0 for now. Archive defines the number of days that an expired virtual machine remains available for activation. A zero value destroys the VM upon expiration
- Add in any additional costs for chargeback purposes. These costs will be added to anything that is set in a cost profile. so you can add in a OS licensing cost or specific application cost for this VM
- Click Build Information
- The build information tab options define the type of blueprint, the provisioning action and the associated workflow
- In Blueprint type, the options are Server / Desktop / Hypervisor
- In Action, the options are Create, Clone, Linked Clone and NetApp FlexClone. Using the Create option creates an empty container. The clone option creates a new machine as a full copy and the Linked Clone option deploys a space efficient copy based on snapshots and chains of delta disks
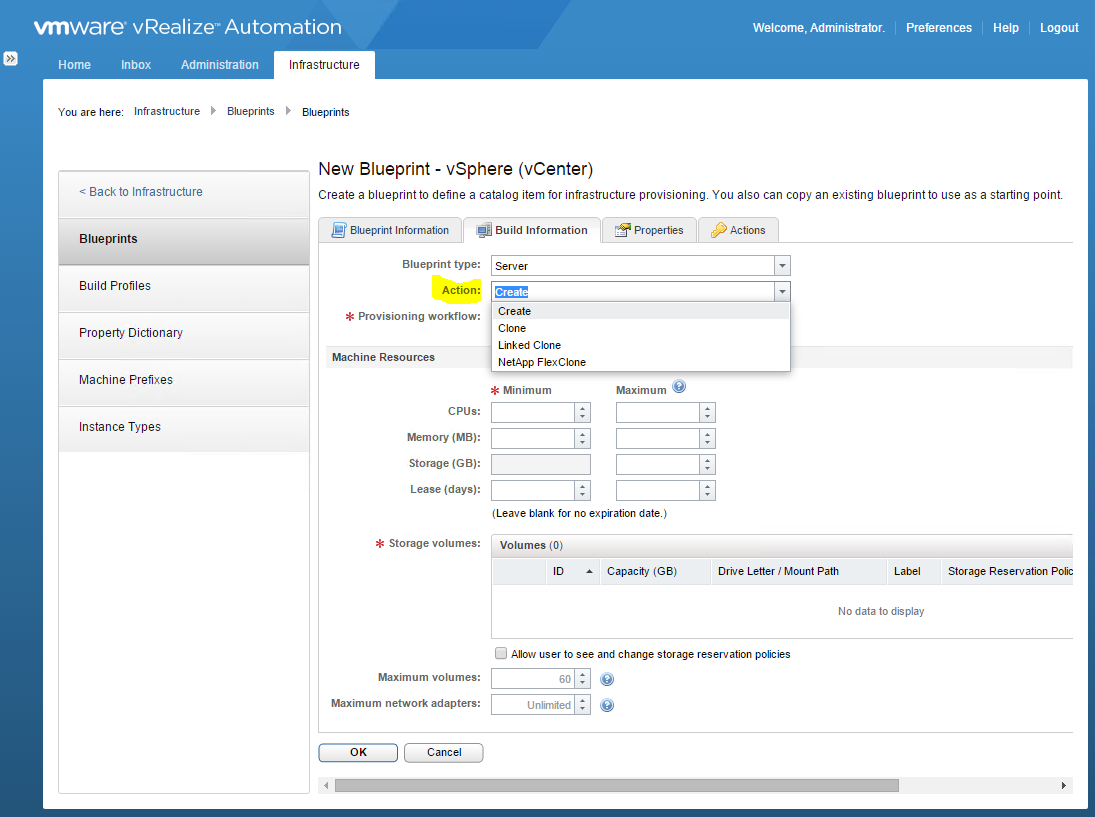
- Next the blueprint provisioning workflow option vary depending on what blueprint action you selected
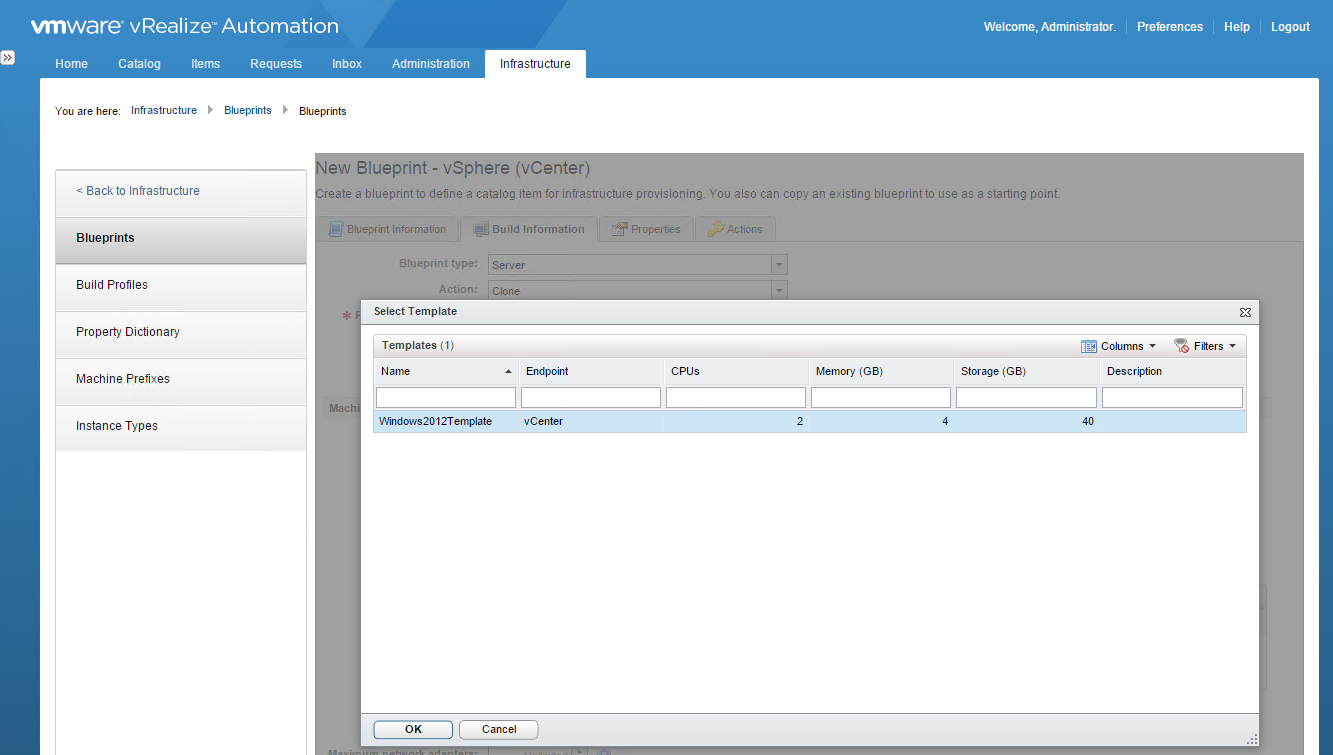
- Next we need to select a template to clone from
- Next Choose a customisation spec. A customization specification is required only if you are cloning with static IP addresses. However, you cannot perform any customizations of Windows machines without a customization specification object. For Linux clone machines, you can use a customization specification, an external script, or both to perform customizations.
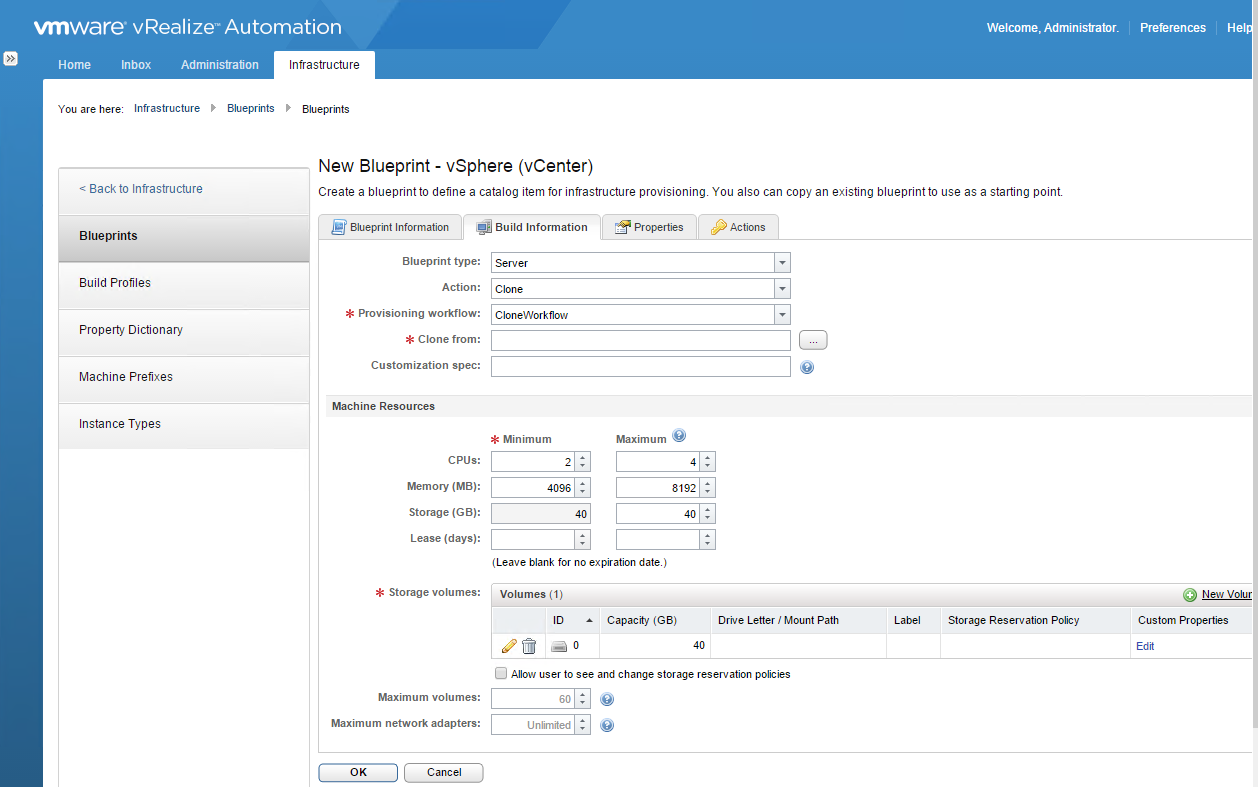
- In Machine Resources, you can define the maximum and minimum resources that can be chosen by a user who wants to provision a VM from this blueprint. It’s optional but you can specify maximum amounts of vCPU, RAM, and HDD space that can be assigned to this blue print which gives a user the ability to customize to their specific application
- Next click the Properties tab
- Additional information can be provided during the provisioning process using Custom Properties
- Custom Properties can be used throughout the lifecycle of a machine
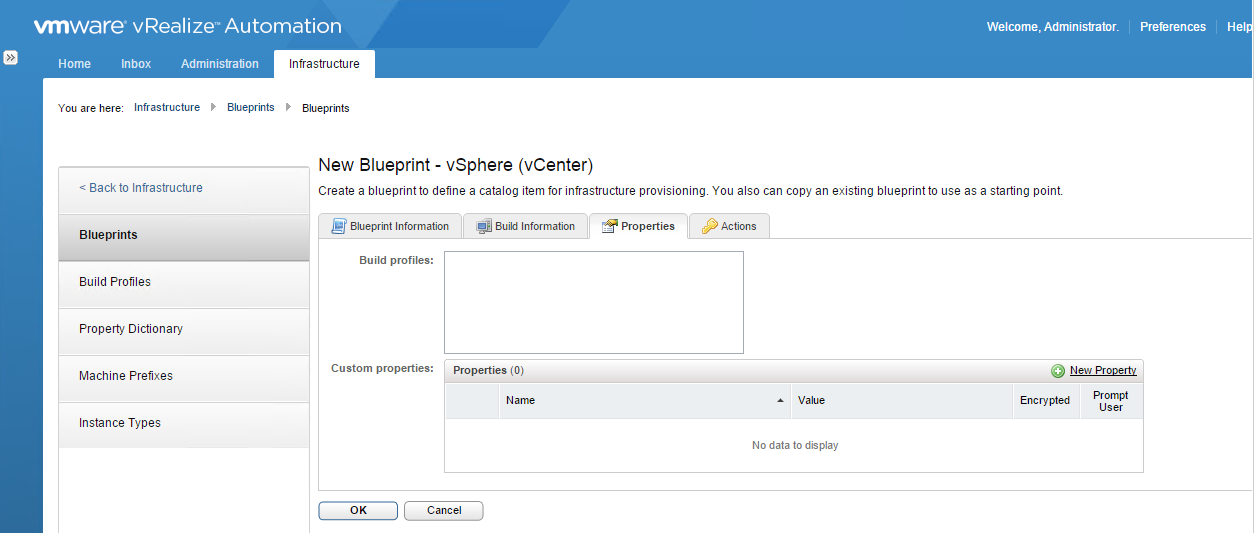
- Options for customising properties can include
Specifying the O/S to be used during provisioning
Customizing the O/S
Link for Custom Properties for Basic Workflow Blueprints
Integrating the machine with an external system
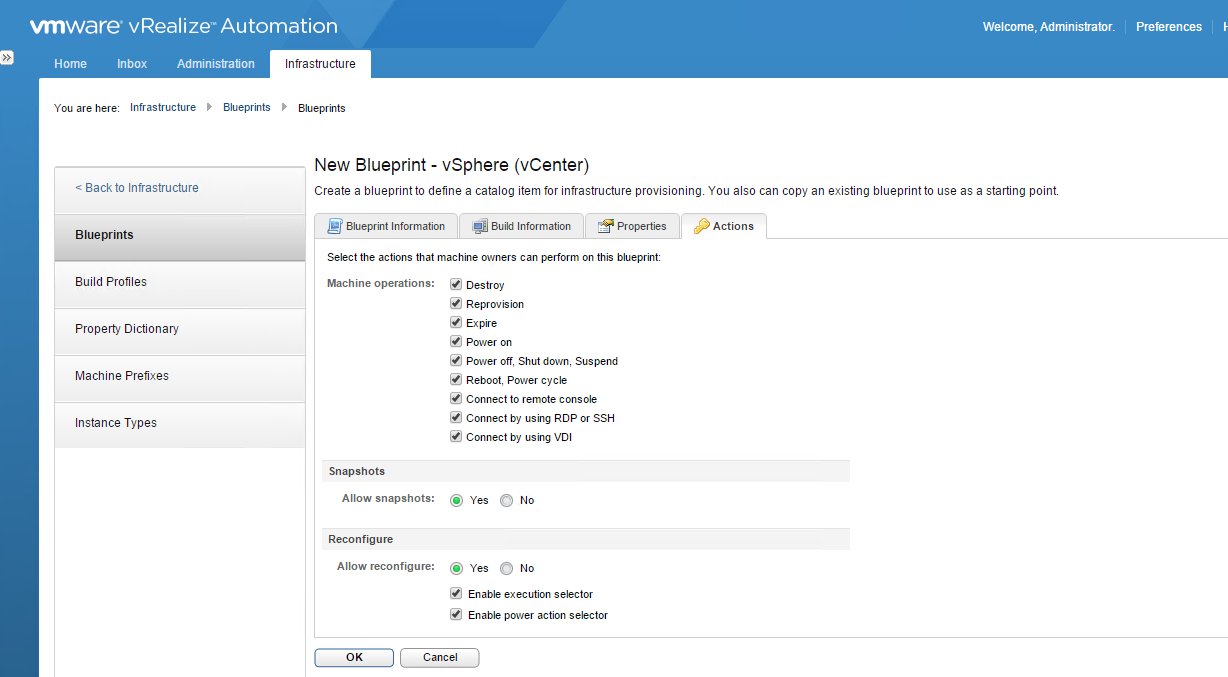
- Click the Actions tab
- Actions identify the operations that can be carried out on a VM provisioned from a blueprint with additional custom actions being defined in Advanced Services Designer and entitled to users
- Click OK to finish
- You should now see your blueprint
Publishing a Blueprint
- Navigate to Infrastructure > Blueprints > Blueprints. Highlight your new blueprint and click on Publish to publish the blueprint to the vRA catalog
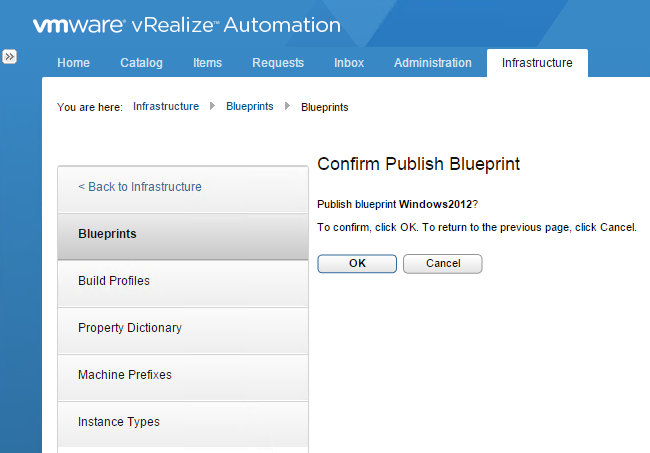
- You should now see that it is published
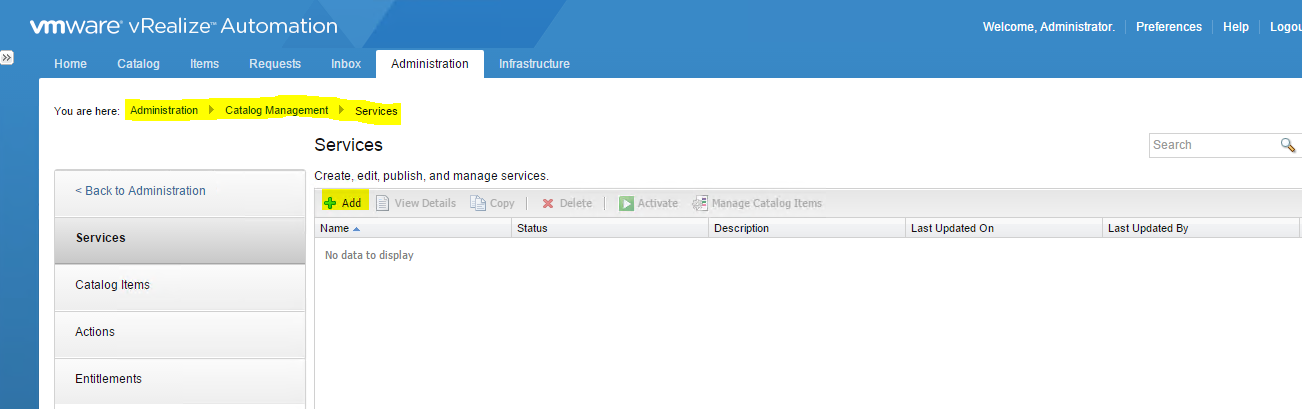
Service Catalog
The Service Catalog is a self service portal where users can locate the items they want to request and track requests and manage provisioned items.
Using Service Categories, catalog items can be organised into containers such as Linux, Windows or User Support
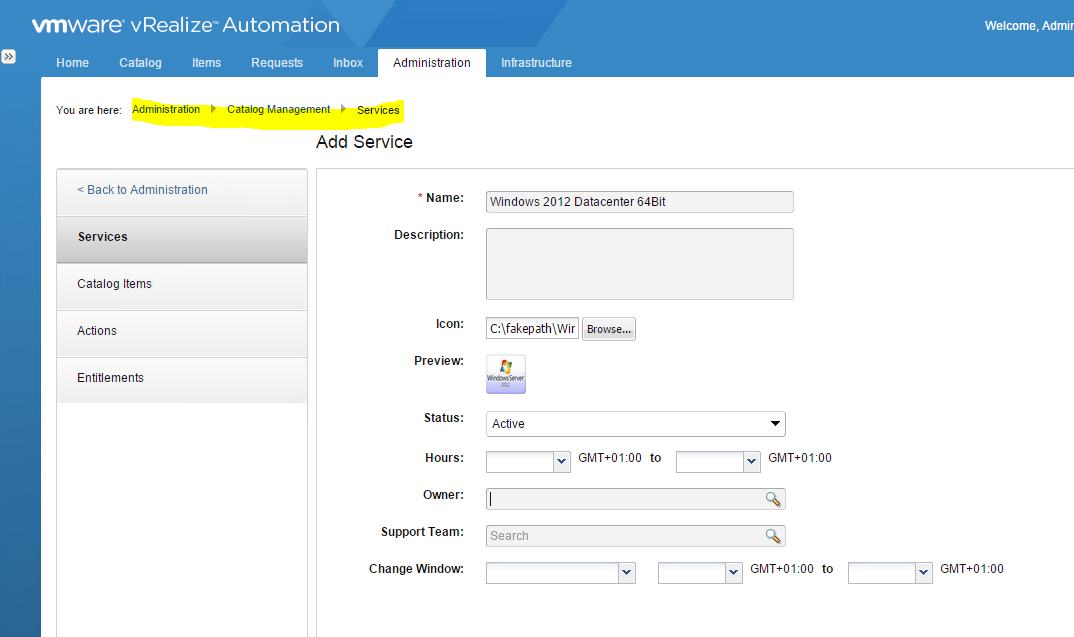
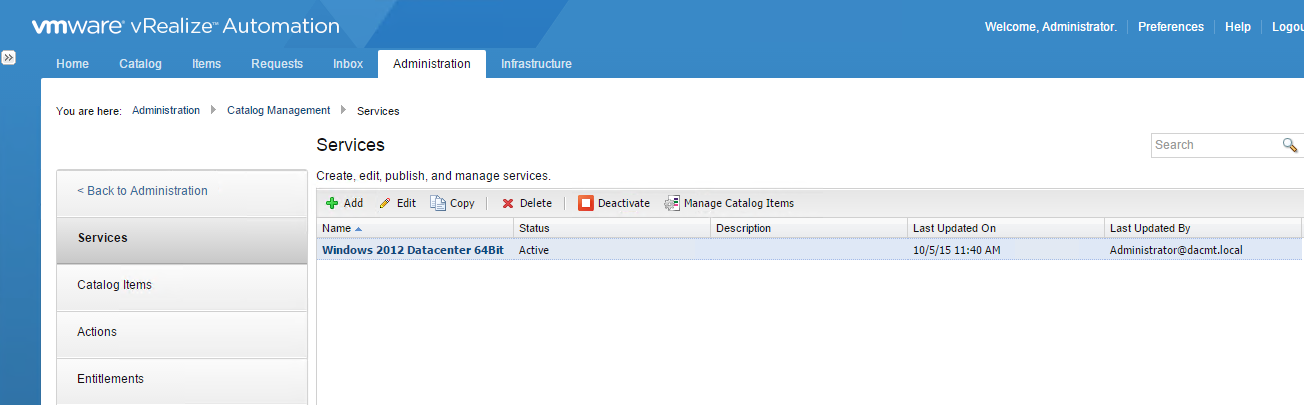
- Go to Administration > Catalog Management > Services. Click on the green “+” sign to add a new service.
- Fill in the required data and choose an icon as necessary to reflect the Service, in my case Windows
- You should now see your service
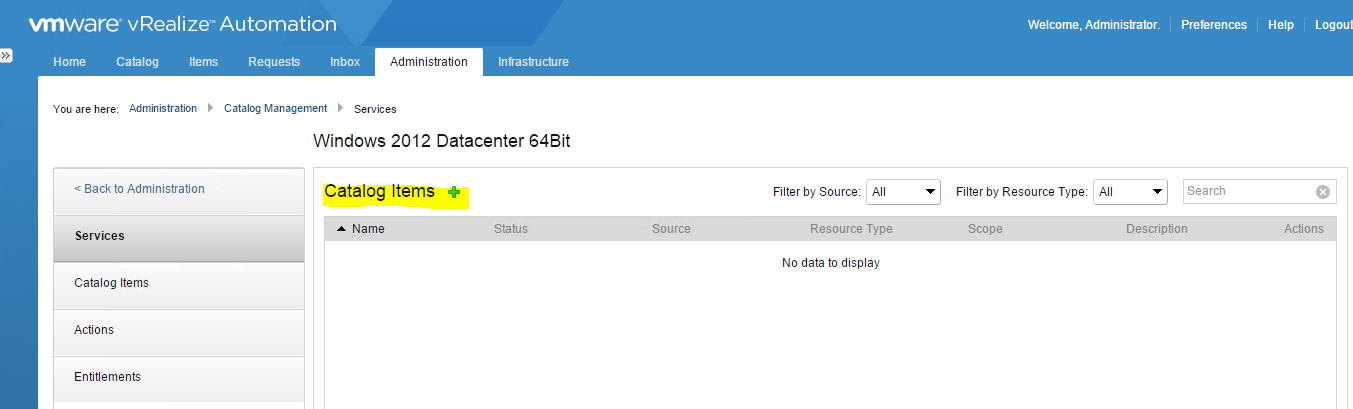
- Click on Manage Catalog Items. A catalog item must be associated with a service before it can be requested

- Click the green + sign
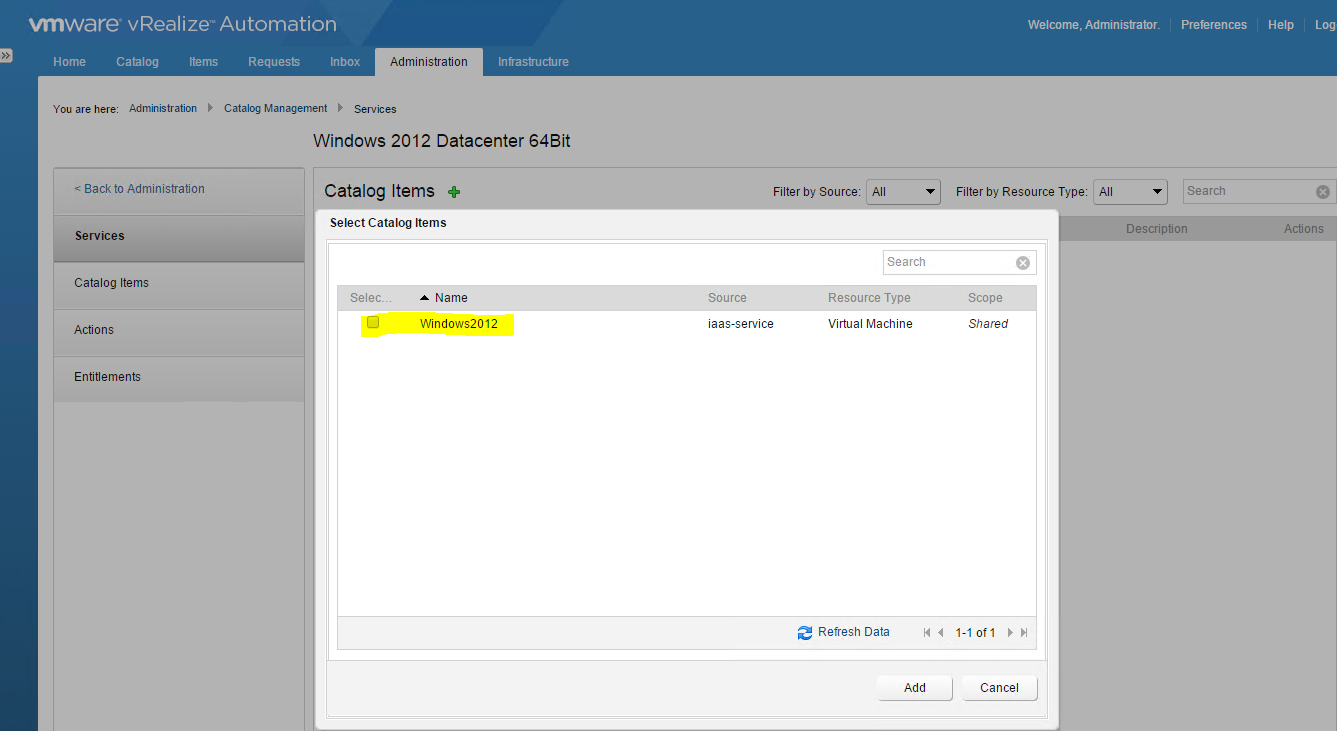
- Choose your catalog item. In my case the Windws2012 item
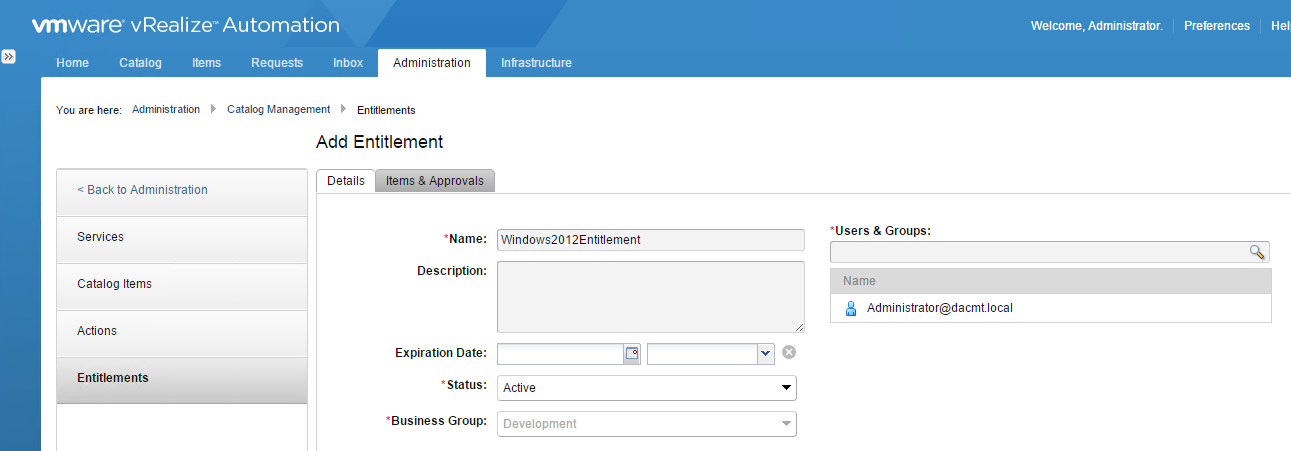
Create an Entitlement to the catalog item
- Go to Administration > Catalog Management > Entitlements and click on the green “+” mark
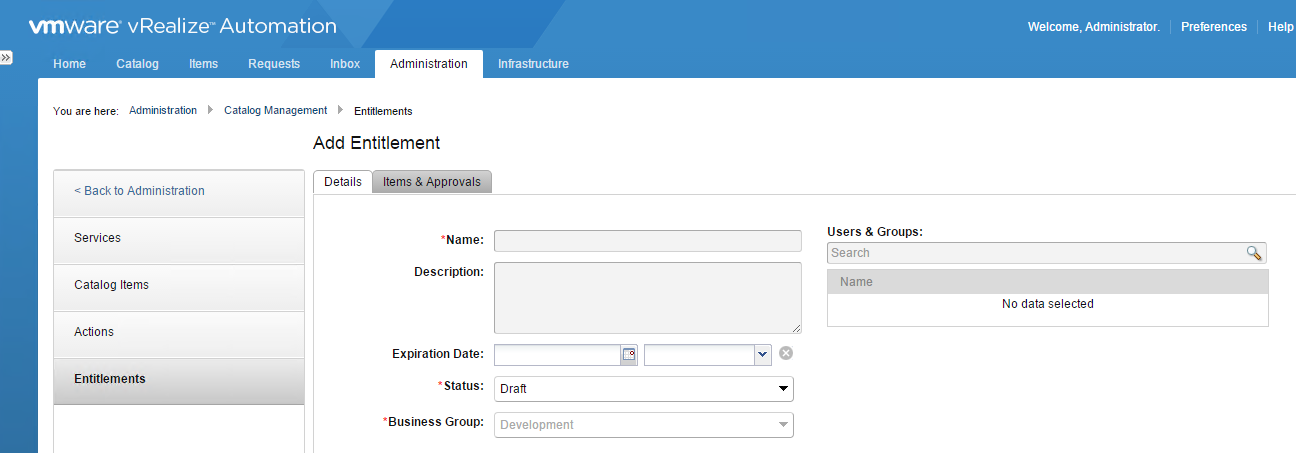
- Fill in your details
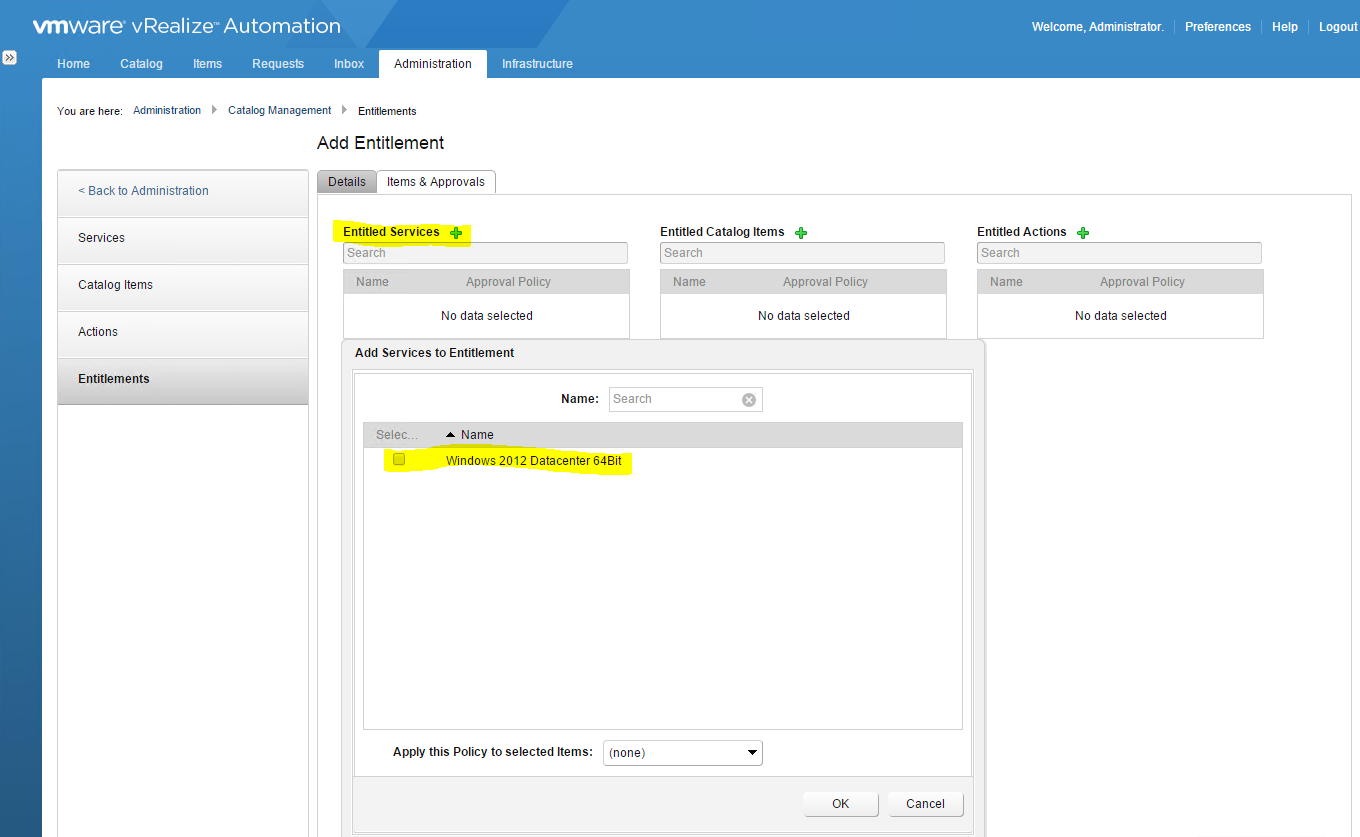
- Click Next
- Click the green + sign next to Entitled Services and select your service
- Click the green + sign next to Entitled Catalog items and select your Catalog item
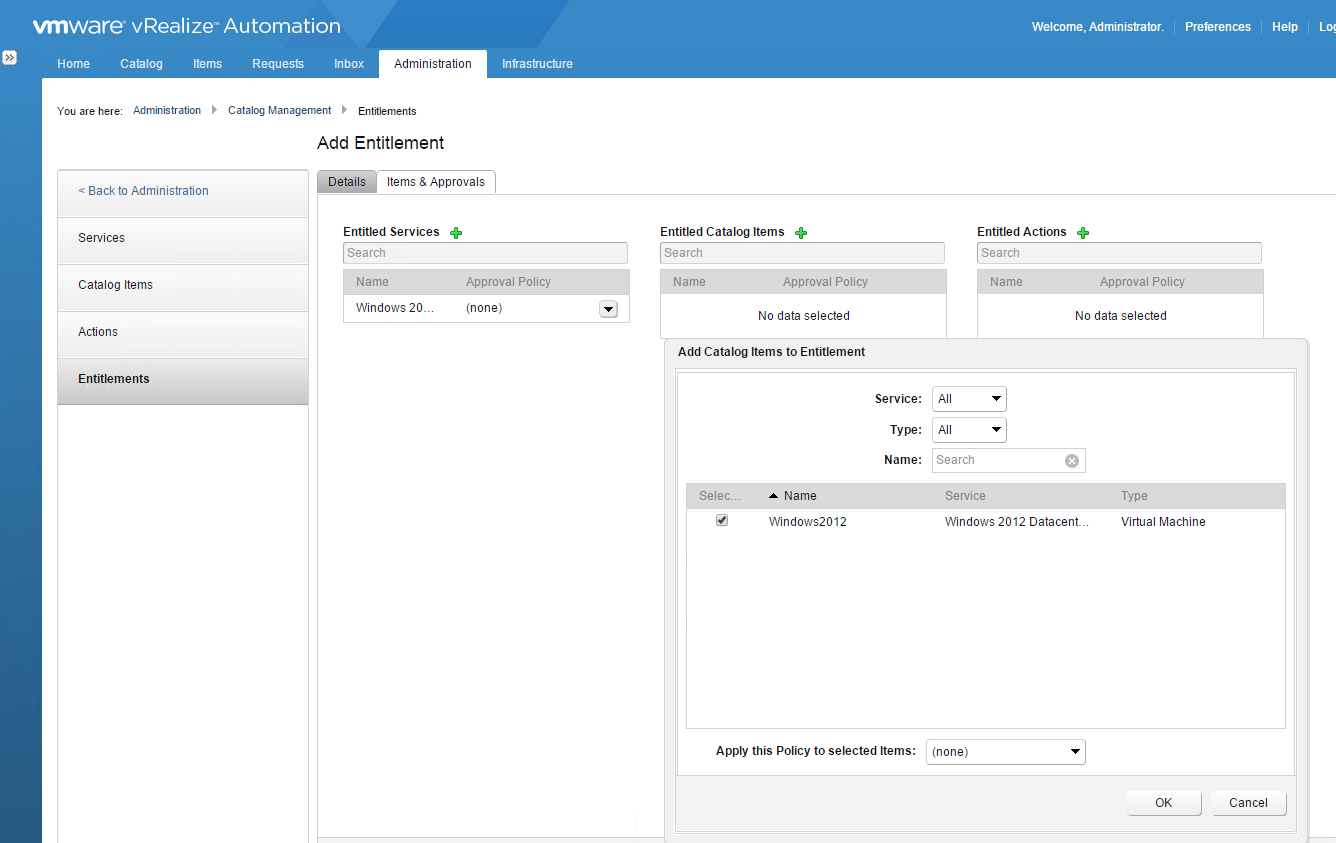
- Click the green + sign next to Entitled Actions and select your Actions

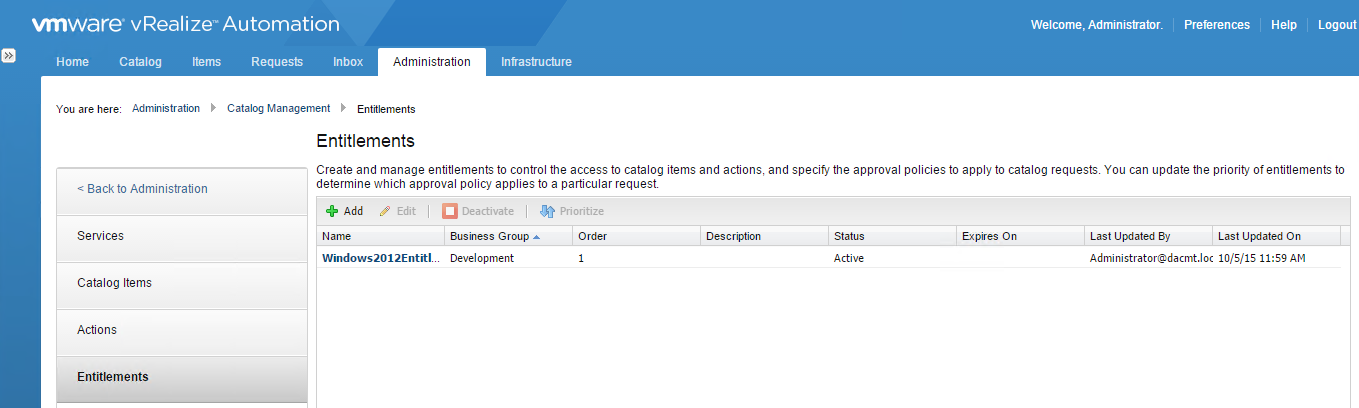
- Click OK and you should now see your entitlements
Provision a machine
- Go to the Catalog tab and check if your service is available
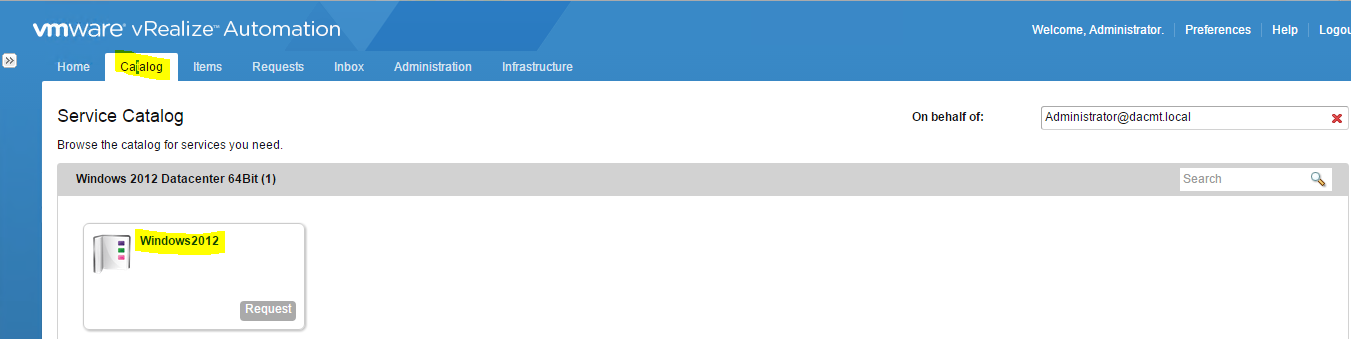
- Click Request
- Check the details and modify the request reason
- Remember you can only modify the resources up to the maximum set in the blueprint and sometimes these are subject to approval policies as well. (Which haven’t been covered yet)
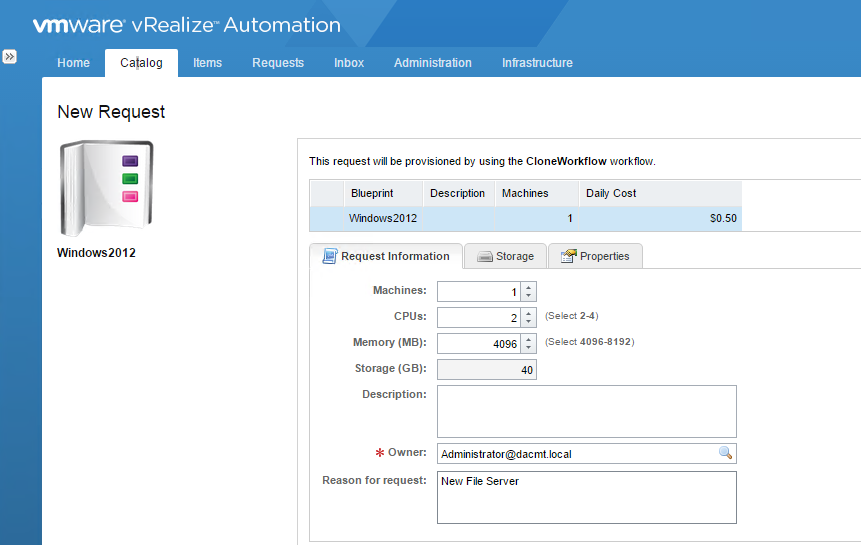
- Click Submit and the VM should be provisioned in vCenter
- Click the Requests tab to monitor the request

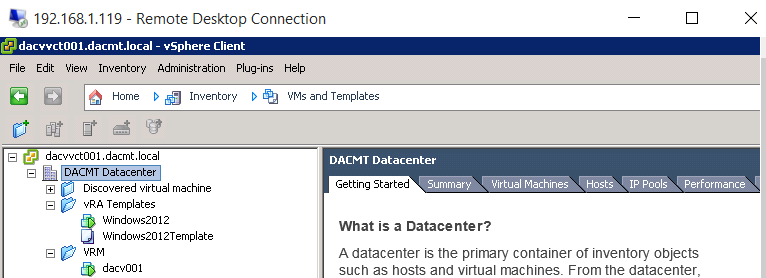
- If you log into vCenter and go to Virtual Machines and Templates, you will see that vCAC by default will place all provisioned machines into a vCenter folder named VRM. You can override this using the custom property VMware.VirtualCenter.Folder to tell vRA where to place the provisioned machine.
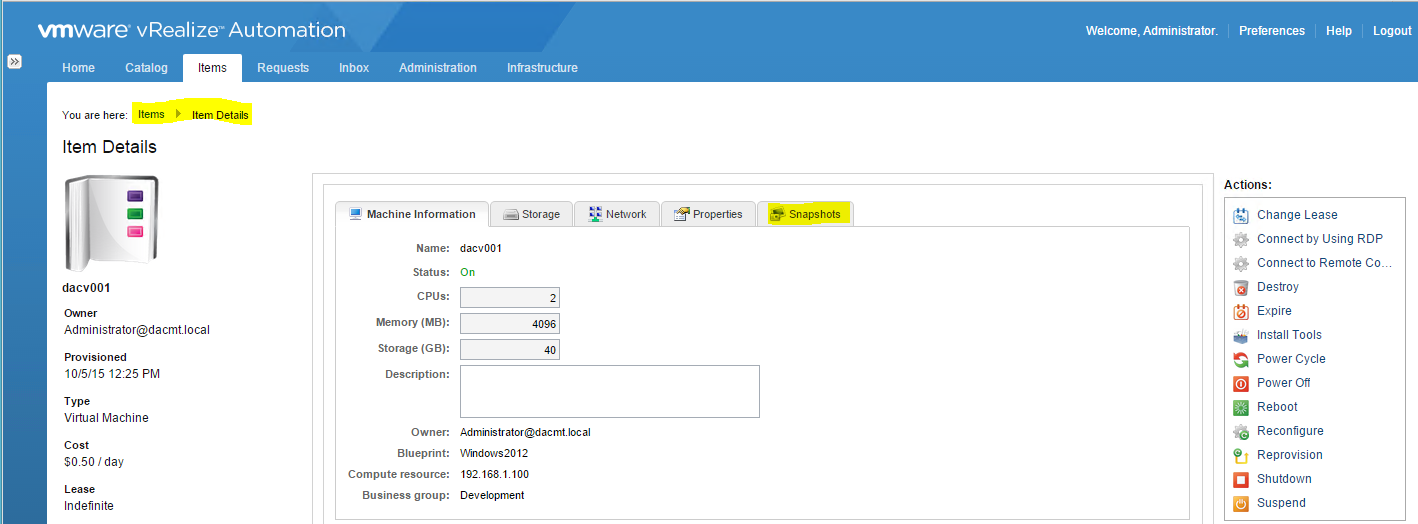
- My machine is dacv001
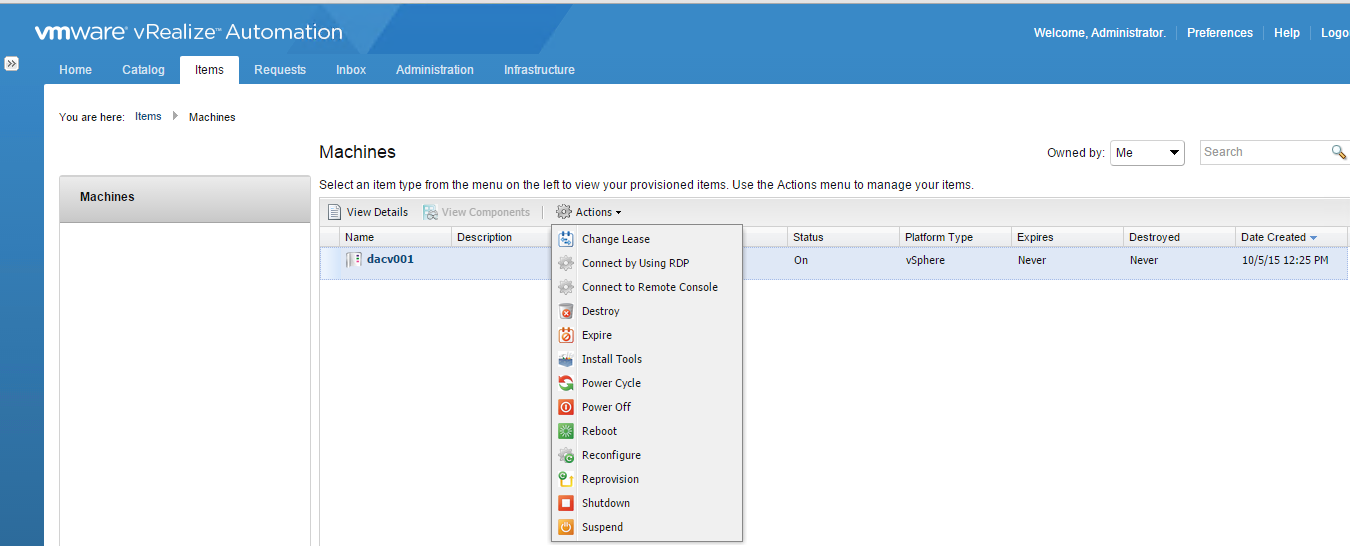
- If you click on the Items tab once the machine is provisioned, you can manage some actions which are controlled by entitlements
Taking a snapshot
- Click on Items
- Click on the Owned by drop down menu and change this to “All groups I manage”
- Click on View Details
- Click New Snapshot

- vRA allows one snapshot per machine and no age limits

