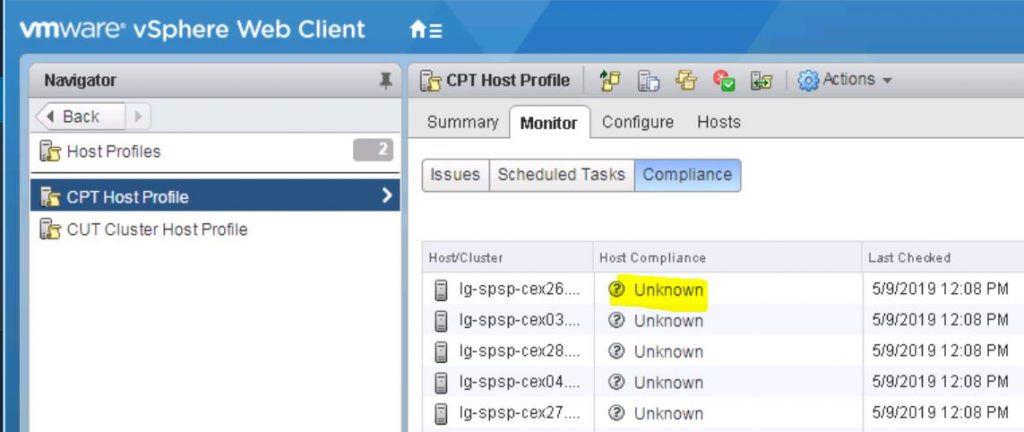
This error comes up on a 6.5U2 environment running on HP Proliant BL460c Gen9 Servers. Where it previously had fully compliant hosts, now when checking compliance of a host against a host profile, all you see is Host Compliance Unknown.
The Resolution
I’m still not entirely sure how we went from a state of Compliant hosts to Unknown but this is how we resolved it
Deleted the AutoDeploy Rule
Recreated the AutoDeploy Rule
Ran the below command. Anytime you make a change to the active ruleset that results in a host using a different image profile or host profile or being assigned to a different vCenter location; you need to update the rules in the active ruleset but you also need to update the host entries saved in the cache for the affected hosts. This is done using the Test-DeployRuleSetCompliance cmdlet together with the Repair-DeployRuleSetCompliance cmdlet or running the single PowerCLI command below
foreach ($esx in get-vmhost) {$esx | test-deployrulesetcompliance | repair-deployrulesetcompliance}
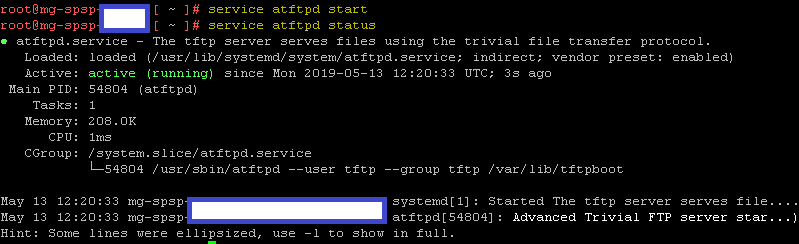
Checked the status of the atftpd service in vCenter. Note: We are using the inbuilt TFTP server in vCenter however this is now not supported by VMware but we find it works just fine. Solarwinds is a good alternative.
service atftpd status
service atftpd start
Rebooted one host while checking the startup in the ILO console.
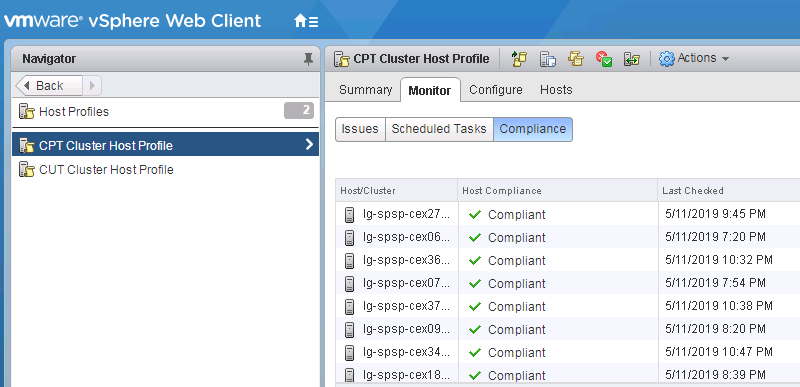
You may need to remediate your hosts after boot-up or if everything is absolutely configured correctly, it will simply boot up, add itself into the cluster and become compliant
As virtual infrastructures grow, it can become increasingly difficult and time consuming to configure multiple hosts in similar ways. Existing per-host processes typically involve repetitive and error-prone configuration steps. As a result, maintaining configuration consistency and correctness across the datacenter requires increasing amounts of time and expertise, leading to increased operational costs. Host Profiles eliminates per-host, manual or UI-based host configuration and maintains configuration consistency and correctness across the datacenter by using Host Profiles policies. These policies capture the blueprint of a known, validated reference host configuration, including the networking, storage, security and other settings.
You can then use this profile to:
• Automate host configuration across a large number of hosts and clusters. You can use Host Profiles to simplify the host provisioning process, configure multiple hosts in a similar way, and reduce the time spent on configuring and deploying new VMware ESX/ESXi hosts.
• Monitor for host configuration errors and deviations. You can use Host Profiles to monitor for host configuration changes, detect errors in host configuration, and ensure that the hosts are brought back into a compliant state. With Host Profiles, the time required to set up, change, audit and troubleshoot configurations drops dramatically due to centralized configuration and compliance checking. Not only does it reduce labor costs, but it also minimizes risk of downtime for applications/ virtual machines provisioned to misconfigured systems.
Accessing Host Profiles
Click Home > Host Profiles
You should see the below
What can we do with Host Profiles?
Create a Host Profile
Edit a Host Profile
Extract a Host Profile from a host
Attach a Host Profile to a host or cluster
Check compliance
Remediate a host
Duplicate a Host Profile
Copy settings from a host – If the configuration of the reference host changes, you can update the Host Profile so that it matches the reference host’s new configuration
Import a Host Profile – .vpf
Export a Host Profile – .vpf
Steps to create a profile
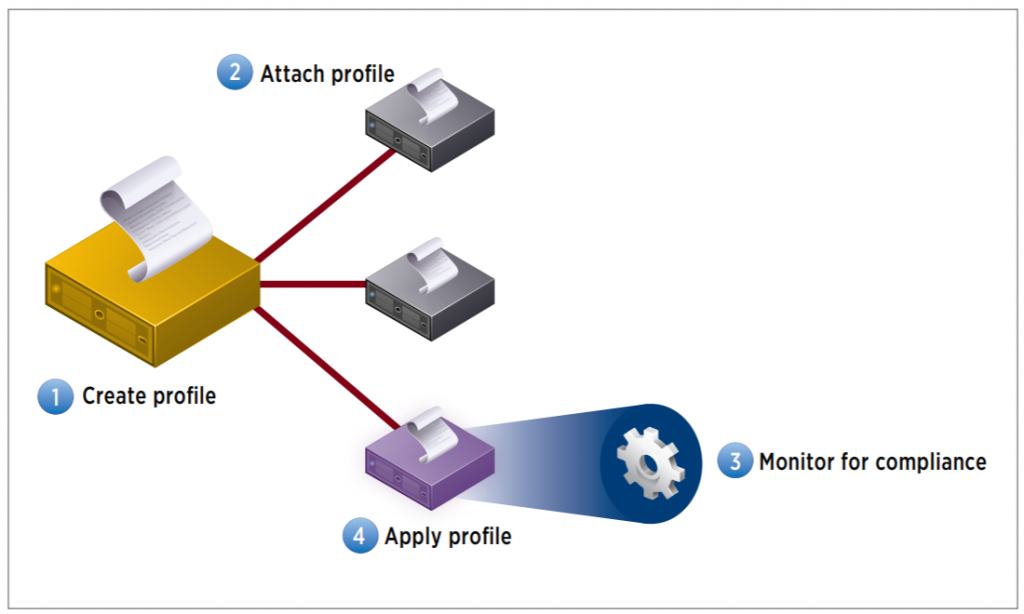
Host Profiles automates host configuration and ensures compliance in four steps: 1.
Step 1: Create a profile, using the designated reference host. To create a host profile, VMware vCenter Server retrieves and encapsulates the configuration settings of an existing VMware ESX/ESXi host into a description that can be used as a template for configuring other hosts. These settings are stored in the VMware vCenter Server database and can be exported into the VMware profile format (.vpf).
Step 2: Attach a profile to a host or cluster. After you create a host profile, you can attach it to a particular host or cluster. This enables you to compare the configuration of a host against the appropriate host profile.
Step 3: Check the host’s compliance against a profile. Once a host profile is created and attached with a set of hosts or clusters, VMware vCenter Server monitors the configuration settings of the attached entities and detects any deviations from the specified “golden” configuration encapsulated by the host profile.
Step 4: Apply the host profile of the reference host to other hosts or clusters of hosts. If there is a deviation, VMware vCenter Server determines the configuration that applies to a host. To bring noncompliant hosts back to the desired state, the VMware vCenter Server Agent applies a host profile by passing host configuration change commands to the VMware ESX/ESXi host agent through the vSphere API
Steps to create a host profile
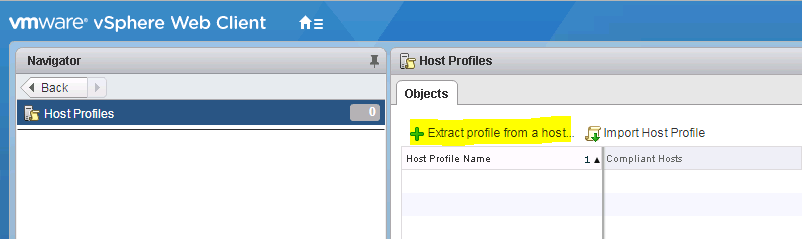
In the Host Profiles view, click Extract Profile from a host
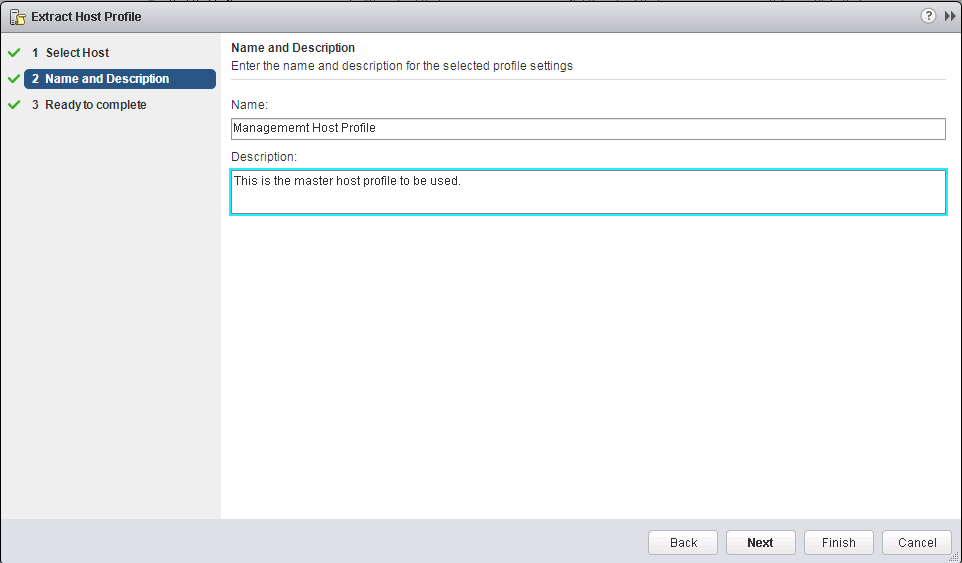
2. You should get a wizard pop up. Choose the vCenter followed by the host you want to extract the profile from
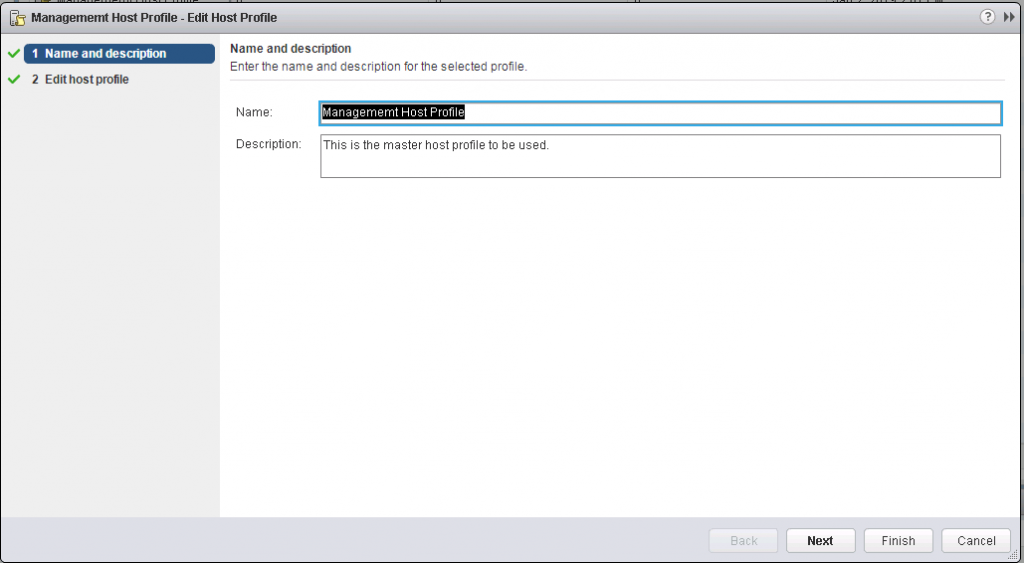
3. Put in a name and description
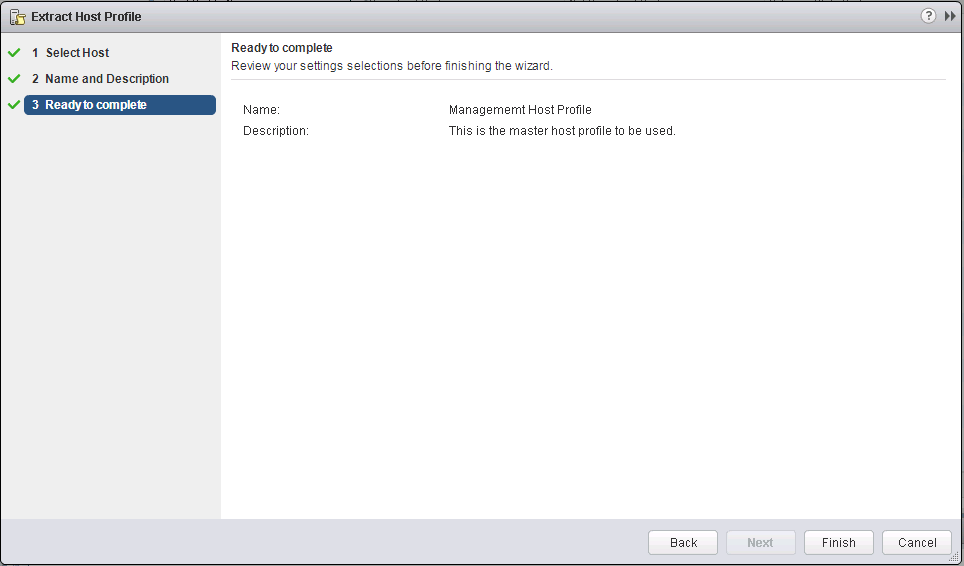
4. Ready to Complete
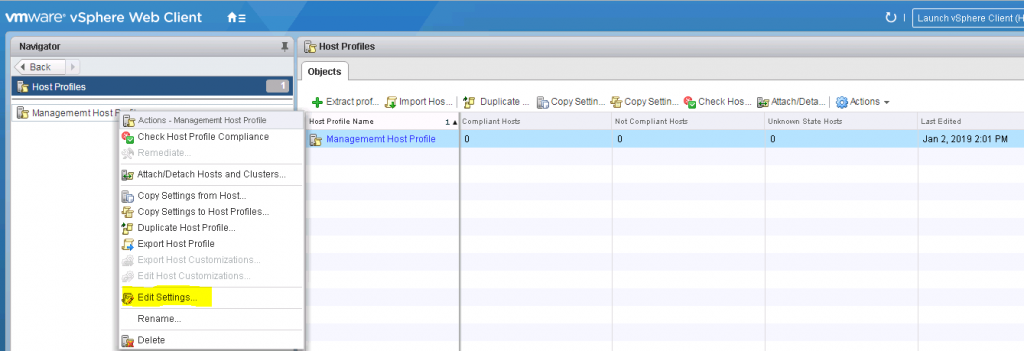
5. A Host profile will be created and appear in the Host Profiles section
6. Edit the settings of the Host Profile by right clicking on the profile and click Edit Settings
7. The Edit Host Profile screen will pop up
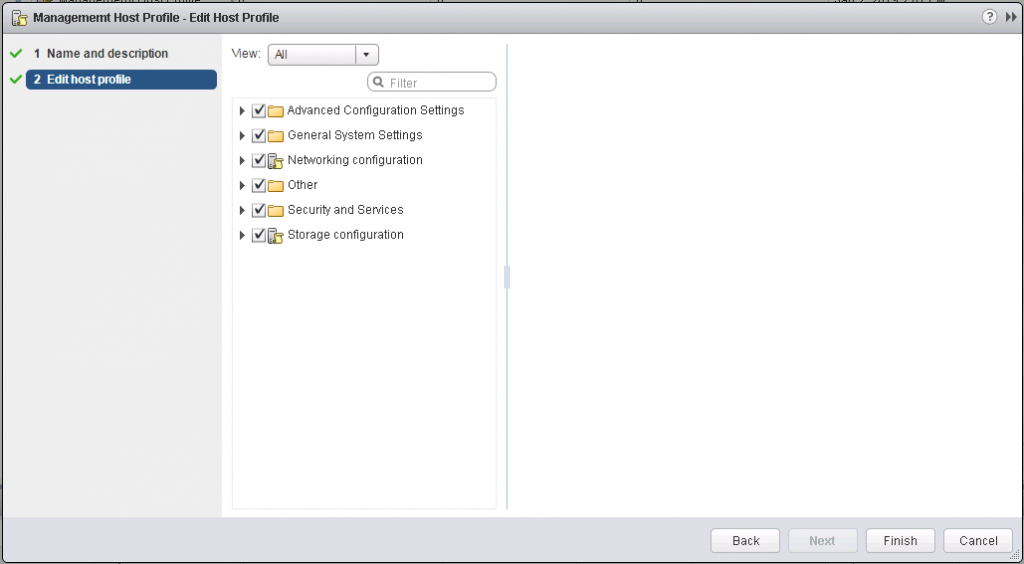
8. Click Next to get to the Settings screen
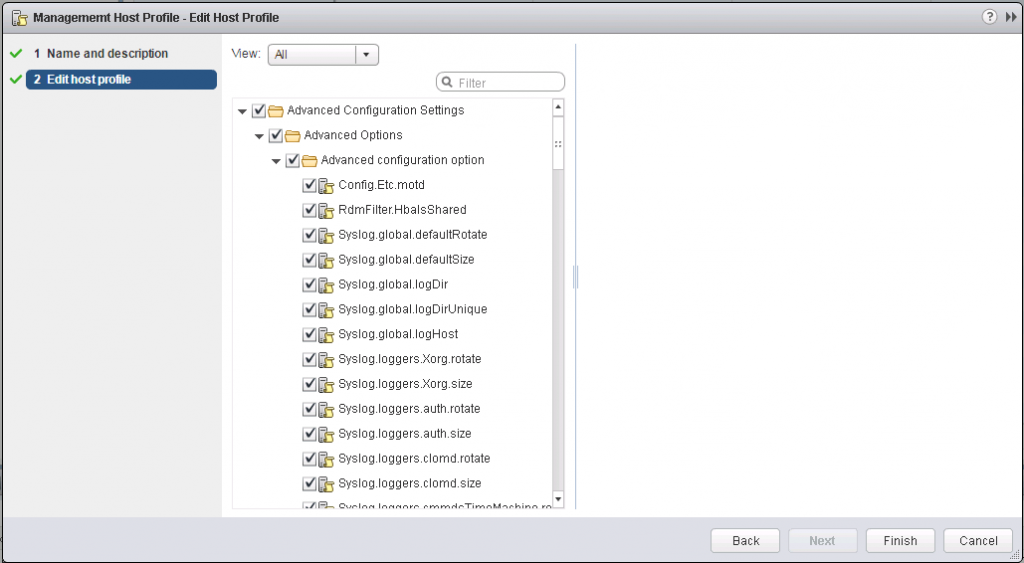
9. When you edit the Host profile you can expand the Host profiles configuration hierarchy to see the sub profile components that comprise the Host profile. These components are categorised by functional group or resource class to make it easier to find a particular parameter. Each subprofile component contains one or more attributes and parameters, along with the policies and compliance checks
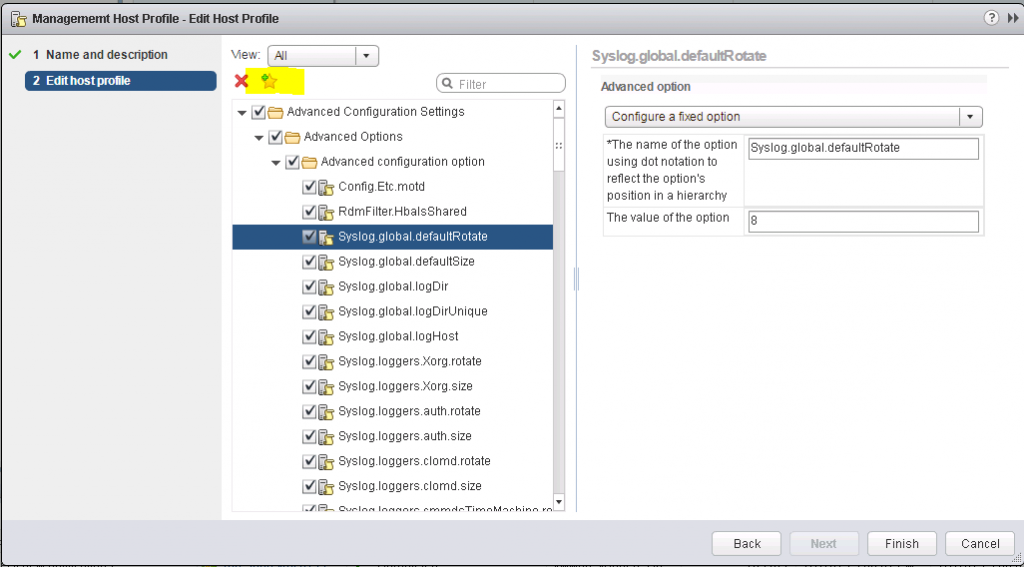
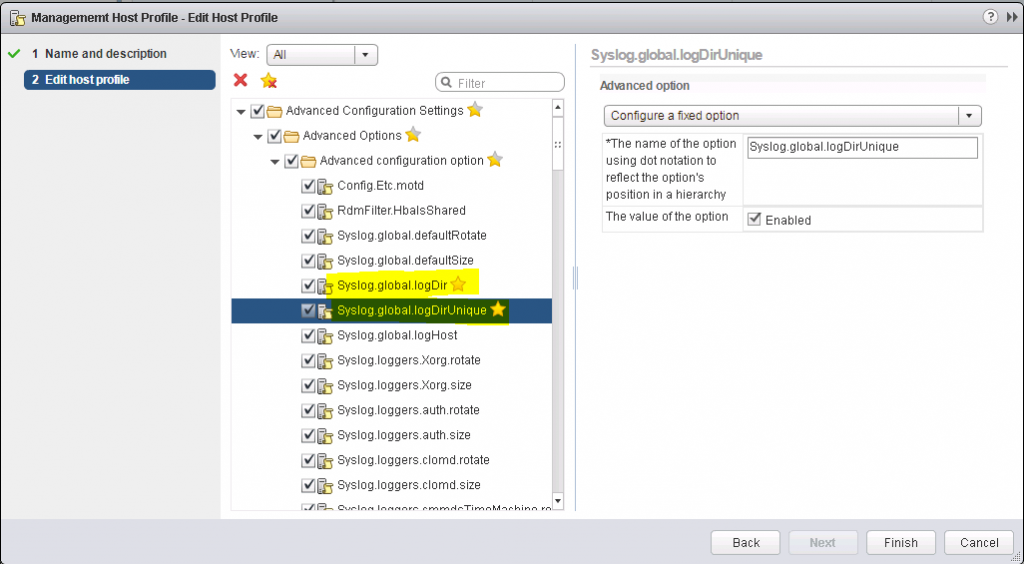
10. You can also mark settings as favourites by clicking the yellow star. you can then click View > Favourites to simplify searching for settings.
11. For example we have a default shared Datastore for storing logs under their own unique name. This saves us time configuring it manually
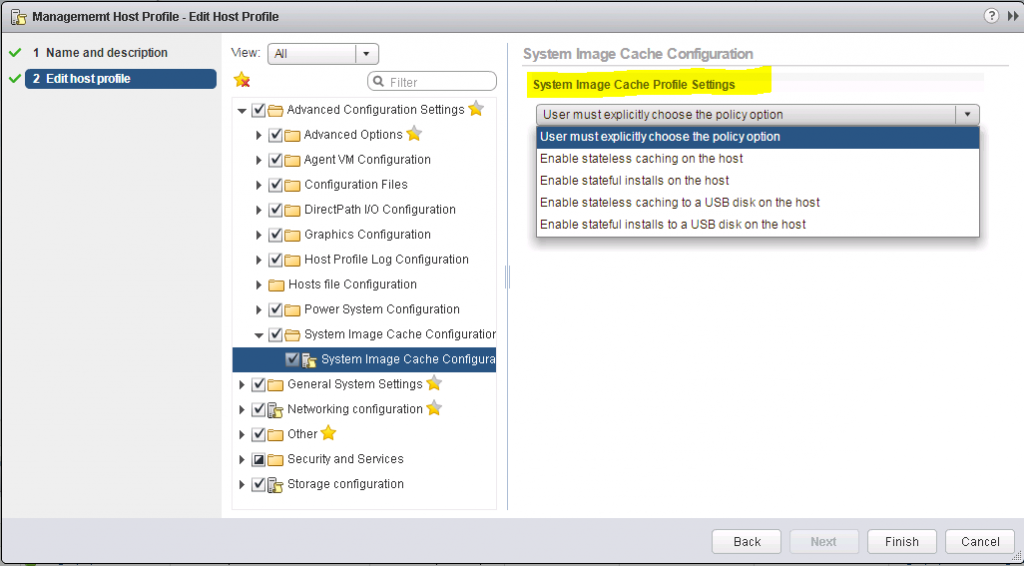
12. Note: There is an important setting if you are using a host profile with AutoDeploy. It will dictate how ESXi is installed and how the install will work on future reboots. vSphere has introduced new options described below for deploying hosts. I will be doing a further blog about AutoDeploy using these settings
Stateless Caching
Upon provisioning, the ESXi image is written or cached to a host’s server local (internal) or USB disk. The option is particularly useful when multiple ESXi hosts are being provisioned concurrently so rather than saturate the network, ESXi is re-provisioned from a cached image from a local or USB disk. Problems can occur such as the below though.
a) If the vCenter Server is available but the vSphere Auto Deploy server is unavailable, hosts do not connect to the vCenter Server system automatically. You can manually connect the hosts to the vCenter Server, or wait until the vSphere Auto Deploy server is available again.
b) If both vCenter Server and vSphere Auto Deploy are unavailable, you can connect to each ESXi host by using the VMware Host Client, and add virtual machines to each host.
c) If vCenter Server is not available, vSphere DRS does not work. The vSphere Auto Deploy server cannot add hosts to the vCenter Server. You can connect to each ESXi host by using the VMware Host Client, and add virtual machines to each host.
d) If you make changes to your setup while connectivity is lost, the changes are lost when the connection to the vSphere Auto Deploy server is restored.
Stateful Install
When the host first boots it will pull the image from the AutoDeploy server, then on all subsequent restarts the host will boot from the locally installed image, just as with a manually built host. With stateful installs, ensure that the host is set to boot from disk firstly, followed by network boot.
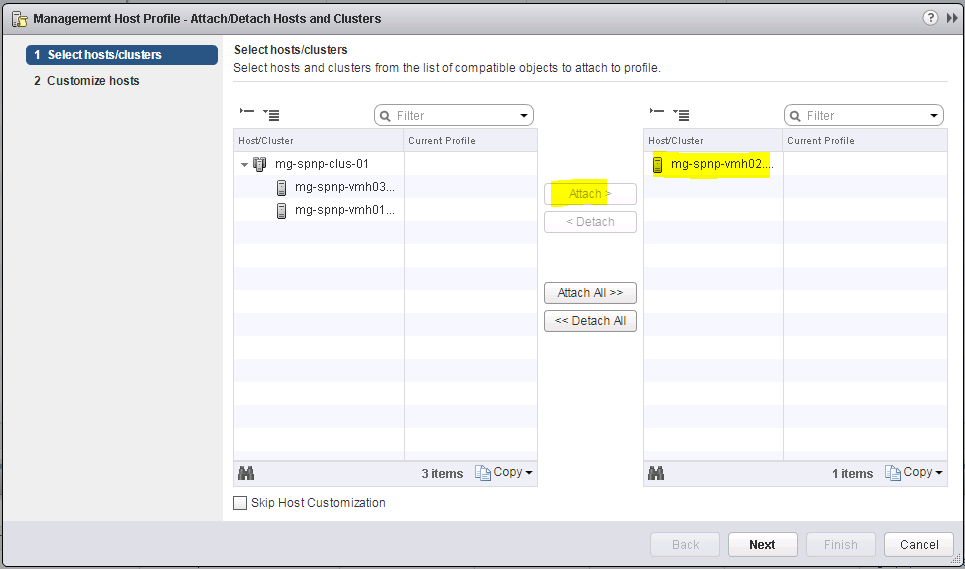
13. Once we have finished customising our profile, we can save it then we need to attach it to our hosts
14. Click the Attach/Detach Hosts and Clusters button within Host Profiles. A wizard will appear. I’m just going to test one of my hosts first and select attach. Keep Skip Host Customization unticked as we will see where we get any missing information which needs entering.
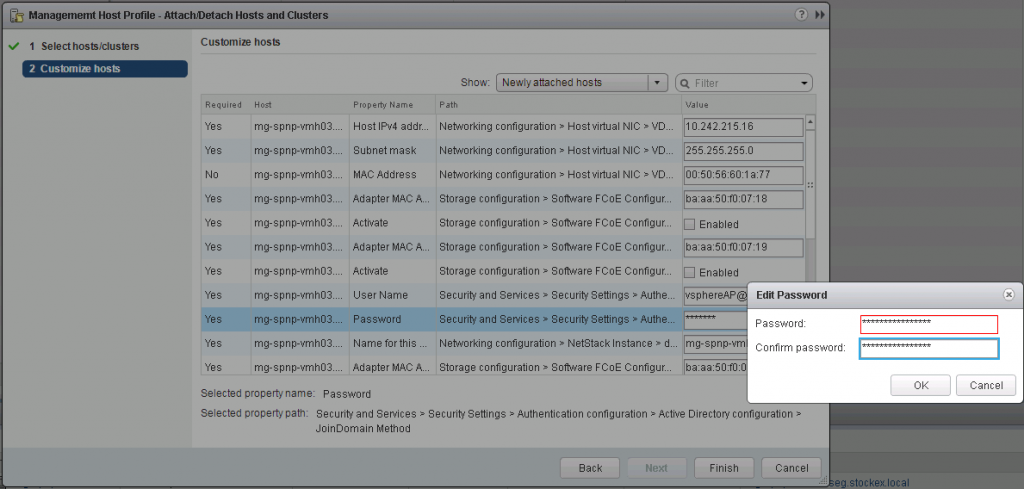
15. You will likely get some host customization errors as I did where I needed to fill in a DNS name of my host and add a username and password to join the hosts to the domain.
16. Next click on the button to check host compliance
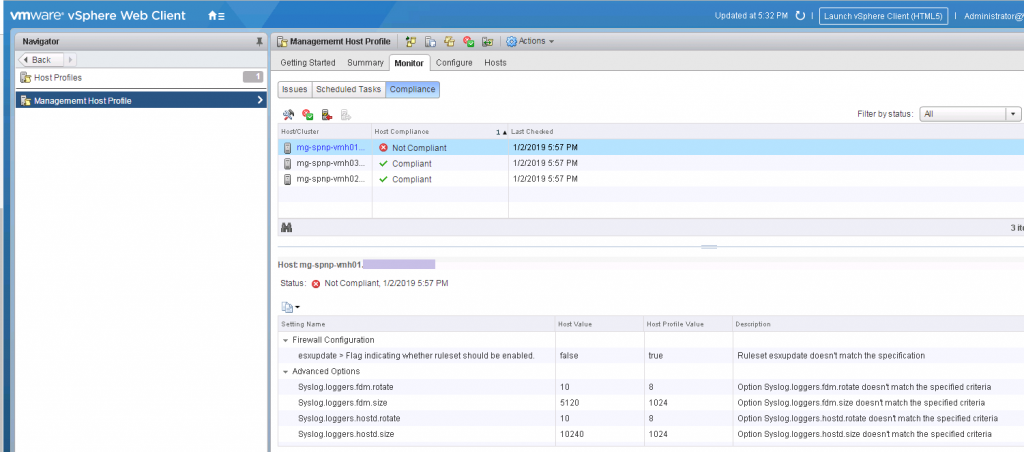
17. I can see that one of my hosts is not compliant so I will see what I need to adjust
18. So I double check all my settings and find that yes, there is a mismatch in the config for esxupdate in the firewall config and there are different values between hosts for syslog settings. I’ll check and adjust these and run the Check Host Compliance again.
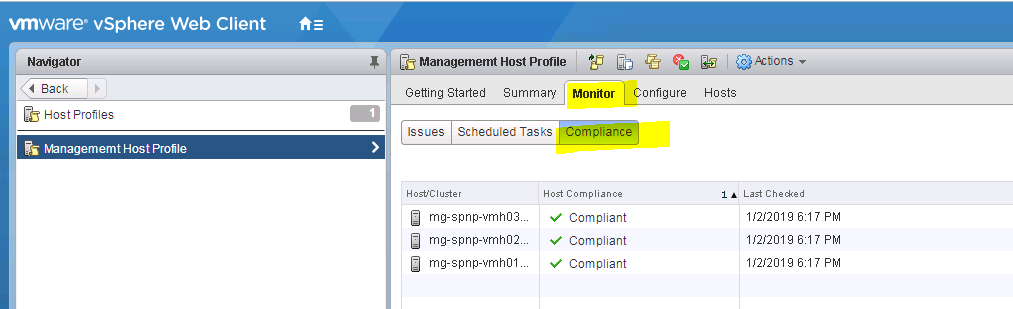
19. Lo and behold, I now have 3 compliant hosts 🙂
Reference Host setup for Autodeploy
A well-designed reference host connects to all services such as syslog, NTP, and so on. The reference host setup might also include security, storage, networking, and ESXi Dump Collector. You can apply such a host’s setup to other hosts by using host profiles.
The exact setup of your reference host depends on your environment, but you might consider the following customization.
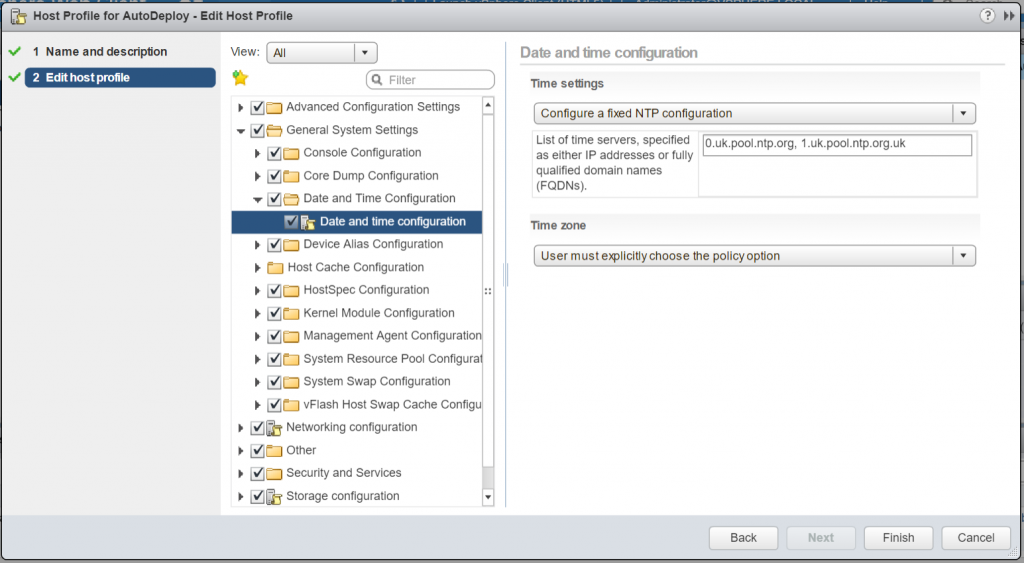
NTP Server Setup
When you collect logging information in large environments, you must make sure that log times are coordinated. Set up the reference host to use the NTP server in your environment that all hosts can share. You can specify an NTP server by running the vicfg-ntp command. You can start and stop the NTP service for a host with the vicfg-ntp command, or the vSphere Web Client.
Edit the Host profile with the settings for your NTP service
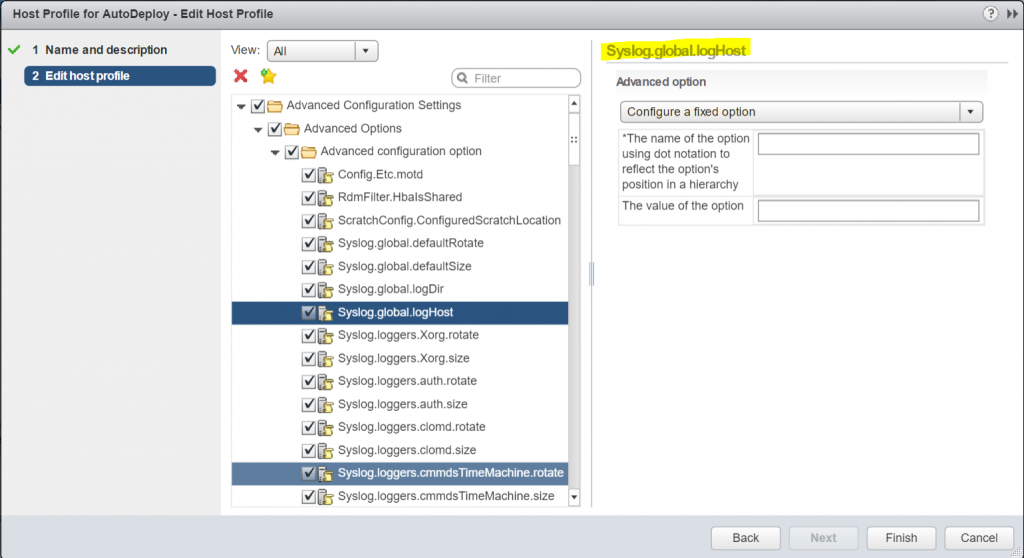
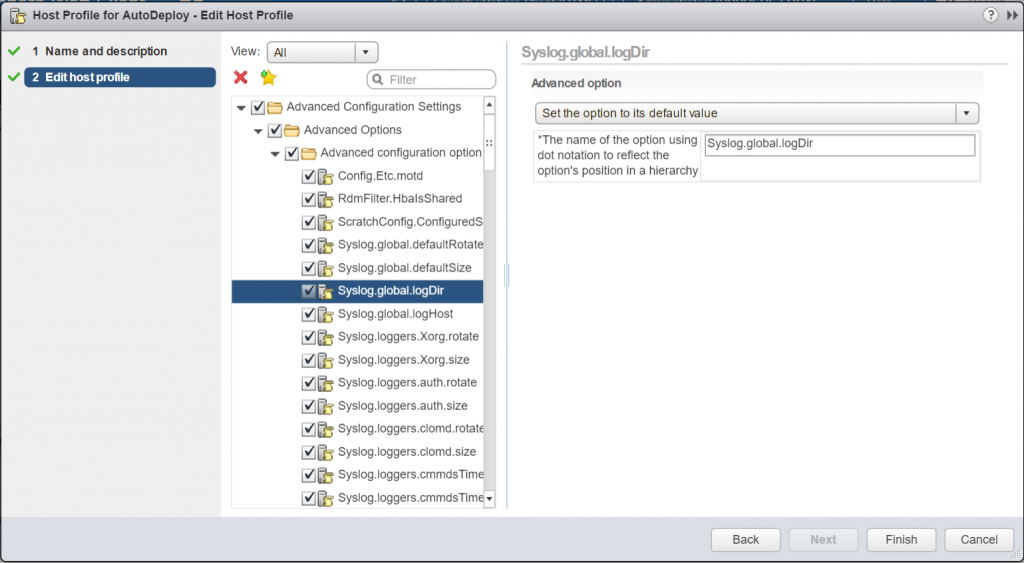
Syslog Server Setup
All ESXi hosts run a syslog service (vmsyslogd), which logs messages from the VMkernel and other system components to a file. You can specify the log host and manage the log location, rotation, size, and other attributes by running the esxcli system syslog vCLI command or by using the vSphere Web Client. Setting up logging on a remote host is especially important for hosts provisioned with vSphere Auto Deploy that have no local storage. You can optionally install the vSphere Syslog Collector to collect logs from all hosts.
Edit the Host profile with the below 2 settings
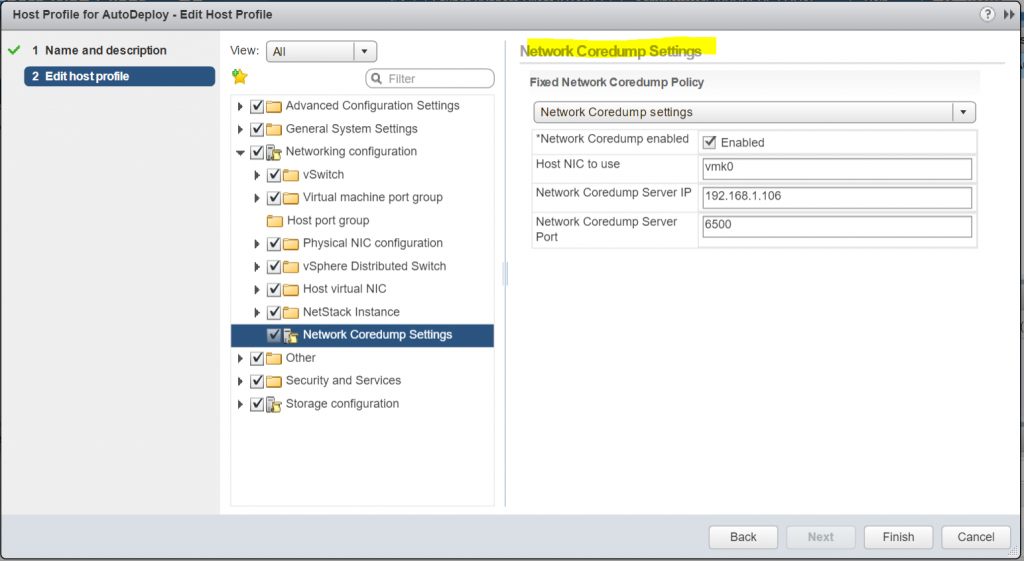
Core Dump Setup
You can set up your reference host to send core dumps to a shared SAN LUN, or you can enable ESXi Dump Collector in the vCenter appliance and configure the reference host to use ESXi Dump Collector. After setup is complete, VMkernel memory is sent to the specified network server when the system encounters a critical failure.
Turn on the Dump Collector service in vCenter
Configure the host profile to enable and point the host to the vCenter on port 6500
Security Setup
In most deployments, all hosts that you provision with vSphere Auto Deploy must have the same security settings. You can, for example, set up the firewall to allow certain services to access the ESXi system, set up the security configuration, user configuration, and user group configuration for the reference host with the vSphere Web Client or with vCLI commands. Security setup includes shared user access settings for all hosts. You can achieve unified user access by setting up your reference host to use Active Directory. See the vSphere Securitydocumentation.
Don't think about what can happen in a month. Don't think what can happen in a year. Just focus on the 24 hours in front of you and do what you can to get closer to where you want to be :-)