vCenter services use SSL to communicate securely with each other and with ESXi. SSL communications ensure data confidentiality and integrity. Data is protected and cannot be modified in transit without detection.
vCenter Server services such as the vSphere Web Client also use certificates for initial authentication to vCenter Single Sign-On. vCenter Single Sign-On provisions each set of services (solution user) with a SAML token that the solution user can authenticate with.
In vSphere 6.0 and later, the VMware Certificate Authority (VMCA) provisions each ESXi host and each vCenter Server service with a certificate that is signed by VMCA by default.
You can replace the existing certificates with new VMCA-signed certificates, make VMCA a subordinate CA, or replace all certificates with custom certificates. You have several options:
Requirements for imported certificates
- Key size: 2048 bits or more (PEM encoded)
- PEM format. VMware supports PKCS8 and PKCS1 (RSA keys). When you add keys to VECS, they are converted to PKCS8.
- x509 version 3
- SubjectAltName must contain DNS Name=machine_FQDN
- CRT format
- Contains the following Key Usages: Digital Signature, Key Encipherment.
- Client Authentication and Server Authentication cannot be present under Enhanced Key Usage
VMCA does not support the following certificates
- Certificates with wildcards
- The algorithms md2WithRSAEncryption 1.2.840.113549.1.1.2, md5WithRSAEncryption 1.2.840.113549.1.1.4, and sha1WithRSAEncryption 1.2.840.113549.1.1.5 are not recommended.
- The algorithm RSASSA-PSS with OID 1.2.840.113549.1.1.10 is not supported.
The work required for setting up or updating your certificate infrastructure depends on the requirements in your environment, on whether you are performing a fresh install or an upgrade, and on whether you are considering ESXi or vCenter Server.
What is the VMCA?
The VMware Certificate Authority (VMCA) is the default root certificate authority introduced in vSphere 6.0 that supplies the certificates to ensure communication over SSL between vCenter Server components and ESXi nodes in the virtualized infrastructure.
The VMCA is included in the Platform Services Controller and provides certificates for
- Solution users (Replacing Solution user certificates is not normally required by company policy)
- Machines that have running services
- ESXi hosts. An ESXi host gets a signed certificate, stored locally on the server, from the VMCA. For environments that require a different root authority, an administrator must change the option in vCenter to stop automatically provisioning VMCA certificates to hosts.
If you do not currently replace VMware certificates, your environment starts using VMCA-signed certificates instead of self-signed certificates.
What is the VECS?
VMware Endpoint Certificate Store (VECS) serves as a local (client-side) repository for certificates, private keys, and other certificate information that can be stored in a keystore. You can decide not to use VMCA as your certificate authority and certificate signer, but you must use VECS to store all vCenter certificates, keys, and so on. ESXi certificates are stored locally on each host and not in VECS. VECS runs on every embedded deployment, Platform Services Controller node, and management node and holds the keystores that contain the certificates and keys.
How does VMCA deal with certificates?
With VMCA you can deal with certificates in three different ways.
- VMCA Default
VMCA uses a self-signed root certificate. It issues certificates to vCenter, ESXi, etc and manages these certificates. These certificates have a chain of trust that stops at the VMCA root certificate. VMCA is not a general-purpose CA and its use is limited to VMware components.
- VMCA Enterprise
VMCA is used as a subordinate CA and is issued subordinate CA signing certificate. It can now issue certificates that trust up to the enterprise CA’s root certificate. If you have already issued certs using VMCA Default and replace VMCA’s root cert with a CA signing cert then all certificates issued will be regenerated and pushed out to the components
- Custom
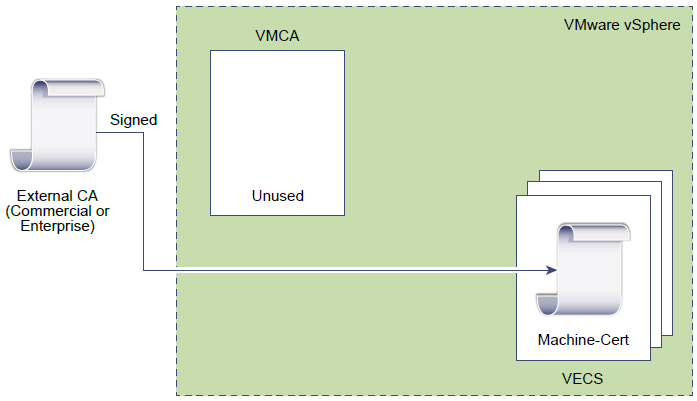
In this scenario VMCA is completely bypassed. This scenario is for those customers that want to issue and/or install their own certificates from their own internal PKI or third party signed certificates generated from an external PKi such as Verisign or GoDaddy. You will need to issue a cert for every component. All those certs (except for host certs) need to be installed into VECS.
In Default and Enterprise modes, VMCA certificates can be easily regenerated on demand.
Certificate Manager Tool
For vSphere 6, the procedure for installing certificates has changed. A new Certificate Manager Tool is shipped as part of vCenter for Windows and VCSA. The location is below
/usr/lib/vmware-vmca/bin/certificate-manager
Deployments
I’m going to use a custom deployment method to just change machine certs but not ESXi host or Solution certificates.
Hybrid Deployment
You can have VMCA supply some of the certificates, but use custom certificates for other parts of your infrastructure. For example, because solution user certificates are used only to authenticate to vCenter Single Sign-On, consider having VMCA provision those certificates. Replace the machine SSL certificates with custom certificates to secure all SSL traffic.
Company policy often does not allow intermediate CAs. For those cases, hybrid deployment is a good solution. It minimizes the number of certificates to replace and secures all traffic. The hybrid deployment leaves only internal traffic, that is, solution user traffic, to use the default VMCA-signed certificates
Where vSphere uses certificates
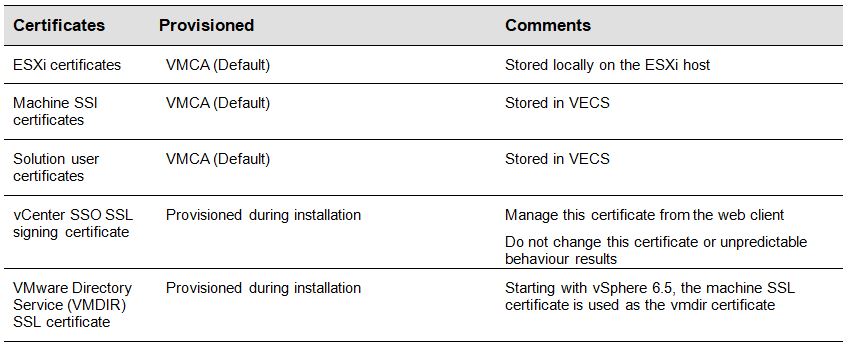
ESXi Certificates
- Stored locally on each host in the etc/vmware/ssl directory
- ESXi certificates are provisioned by VMCA by default when the host is first added to vCenter and the host reconnects, but you can use custom certificates instead
Machine SSL Certificates
- The machine SSL certificate for each node is used to create an SSl socket on the server side
- SSL clients connect to the SSL socket
- Used for server verification and for secure communications such as HTTPS or LDAPS
- Each node has its own machine SSL certificate. Nodes include vCenter, Platform Services Controller or embedded deployment instance
- VMware products use standard X.509 version 3 (X.509v3) certificates to encrypt session information. Session information is sent over SSL between components.
The following services use the machine SSL certificate
- The reverse proxy service on each Platform Services Controller node. SSL connections to individual vCenter services always go to the reverse proxy. Traffic does not go to the services themselves.
- The vCenter service (vpxd) on management nodes and embedded nodes.
- The VMware Directory Service (vmdir) on infrastructure nodes and embedded nodes.
Solution User Certificates
- A solution user encapsulates one or more vCenter Server services. Each solution user must be authenticated to vCenter Single Sign-On. Solution users use certificates to authenticate to vCenter Single
Sign-On through SAML token exchange
- A solution user presents the certificate to vCenter Single Sign-On when it first must authenticate, after a reboot, and after a timeout has elapsed. The timeout (Holder-of-Key Timeout) can be set from the vSphere Web Client or Platform Services Controller Web interface and defaults to 2592000 seconds (30 days).
The following solution user certificate stores are included in VECS on each management or embedded node.
 Managing certificates with the vSphere Certificate Manager Utility
There are a few ways of managing certificates but I am going to run through the vSphere Certificate Manager Utility.
The vSphere Certificate Manager utility allows you to perform most certificate management tasks interactively from the command line. vSphere Certificate Manager prompts you for the task to perform, for certificate locations and other information as needed, and then stops and starts services and replaces certificates for you.
If you use vSphere Certificate Manager, you are not responsible for placing the certificates in VECS (VMware Endpoint Certificate Store) and you are not responsible for starting and stopping services.
Before you run vSphere Certificate Manager, be sure you understand the replacement process and procure the certificates that you want to use
Certificate Manager Utility Location

Procedure
- First of all I need to create a template in my own internal Certificate Authority. I’m going to follow the below article with the steps and screenprints to show what I’m doing.
https://kb.vmware.com/s/article/211200
- Connecting to the CA server, you will be generating the certificates from through an RDP session.
- Click Start > Run, type certtmpl.msc, and click OK.
- In the Certificate Template Console, under Template Display Name, right-click Web Server and click Duplicate Template.
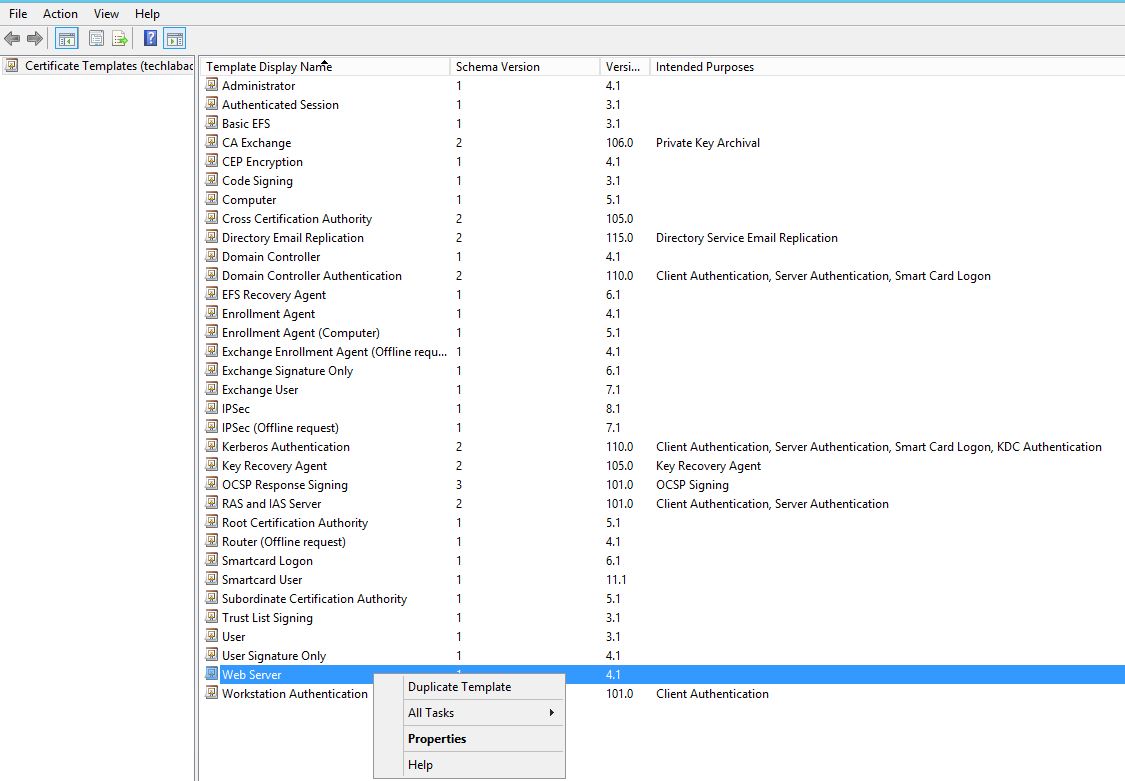
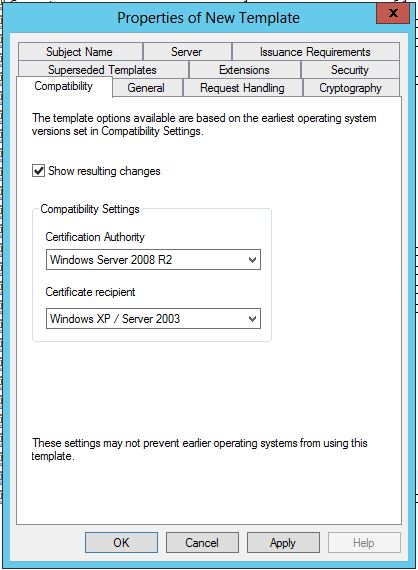
- In the Duplicate Template window, select Windows Server 2003 Enterprise for backward compatibility.Note: If you have an encryption level higher than SHA1, select Windows Server 2008 Enterprise.
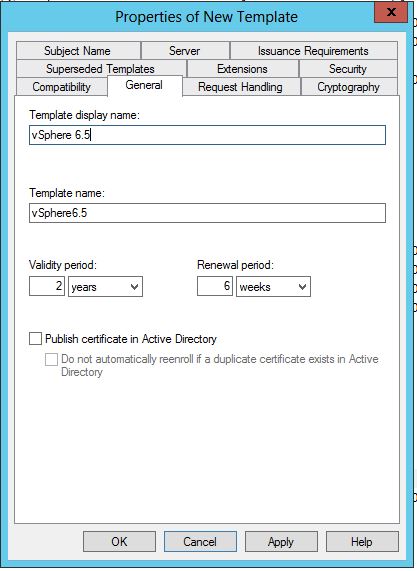
- Click the General Tab
- In the Template display name field, enter vSphere 6.x as the name of the new template
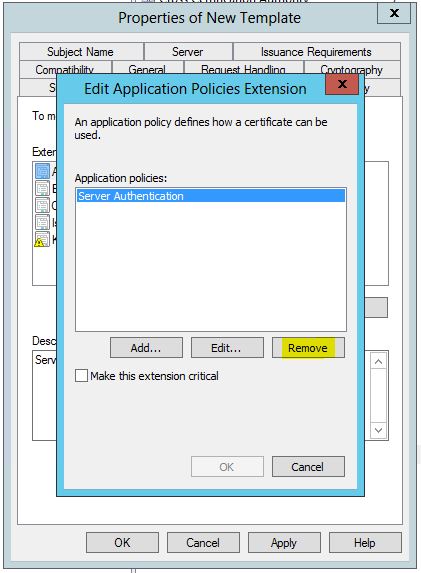
- Click the Extensions tab.
- Select Application Policies and click Edit.
- Select Server Authentication and click Remove, then OK.
- Note: If Client Authentication exists, remove this from Application Policies as well.
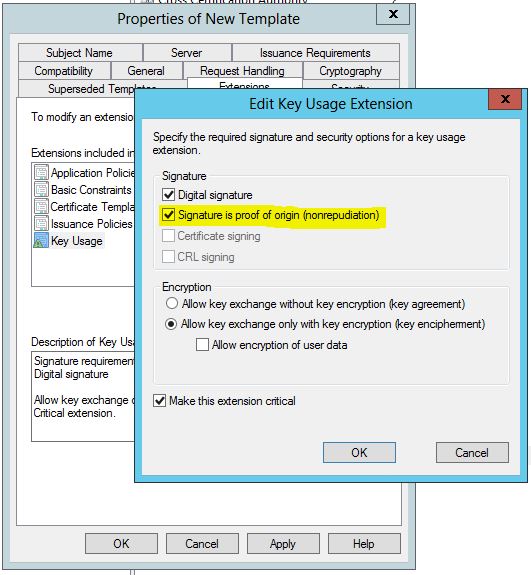
- Select Key Usage and click Edit
- Select the Signature is proof of origin (nonrepudiation) option. Leave all other options as default
- Click OK.
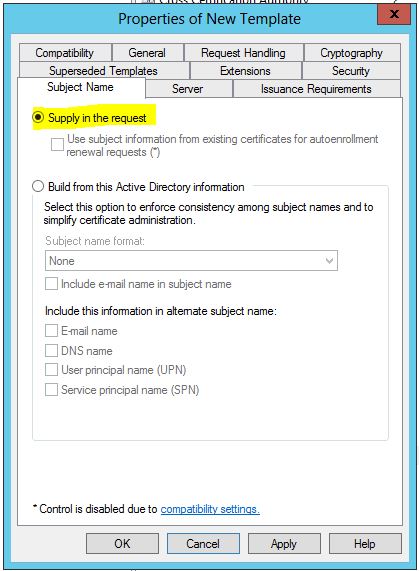
- Click on the the Subject Name tab.
- Ensure that the Supply in the request option is selected.
- Click OK to save the template.
Next: Adding a new template to certificate templates section in the article to make the newly created certificate template available
- Connecting to the CA server, you will be generating the certificates from through an RDP session.
- Click Start > Run, type certsrv.msc, and click OK.
- In the left pane of the Certificate Console, if collapsed, expand the node by clicking the + icon.
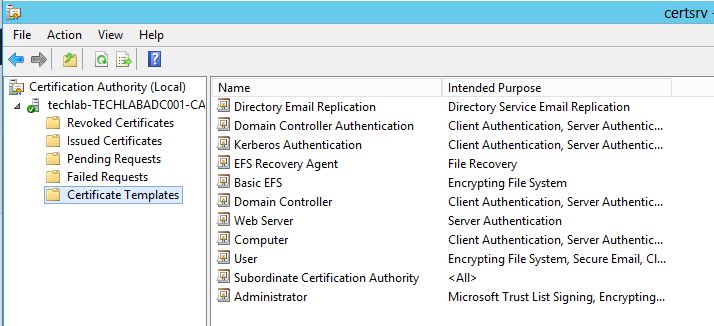
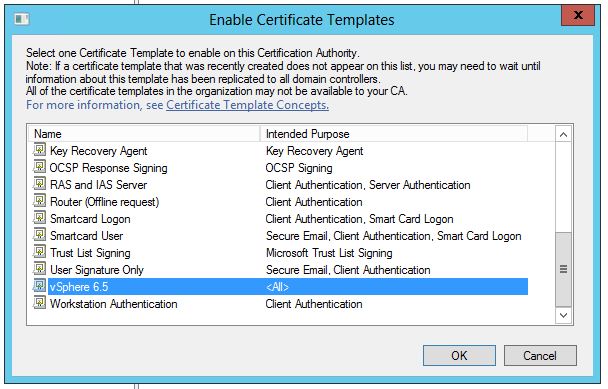
- Right-click Certificate Templates and click New > Certificate Template to Issue.
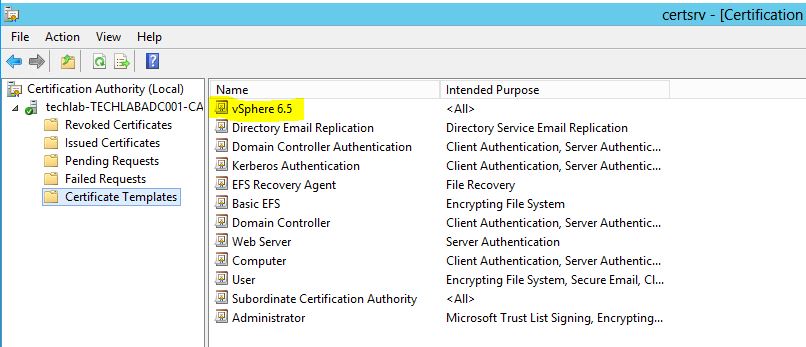
- Locate vSphere 6.x or vSphere 6.x VMCA under the Name column.
- Click OK.
- You will then see the certificate template
Next: Create a folder on the VCSA for uploading and downloading certificates
- WinSCP into the VCSAs/PSCs and create a folder that you can upload and download to. E.g. /tmp/machine_ssl
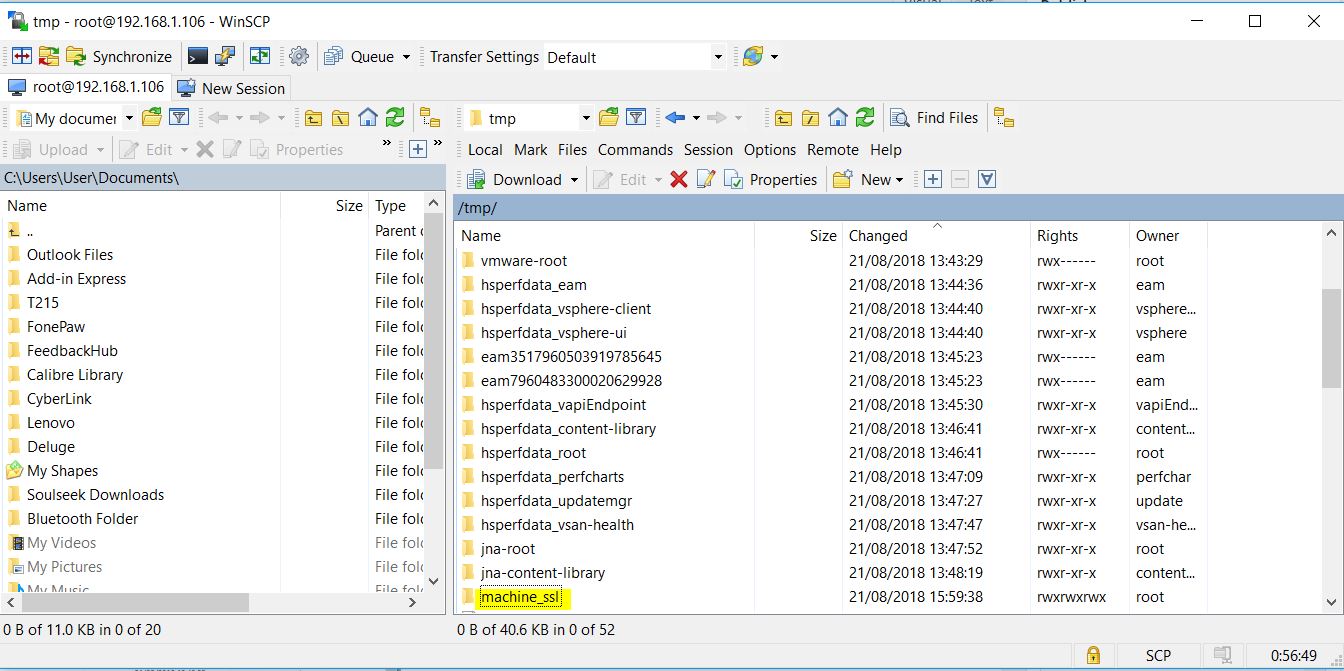
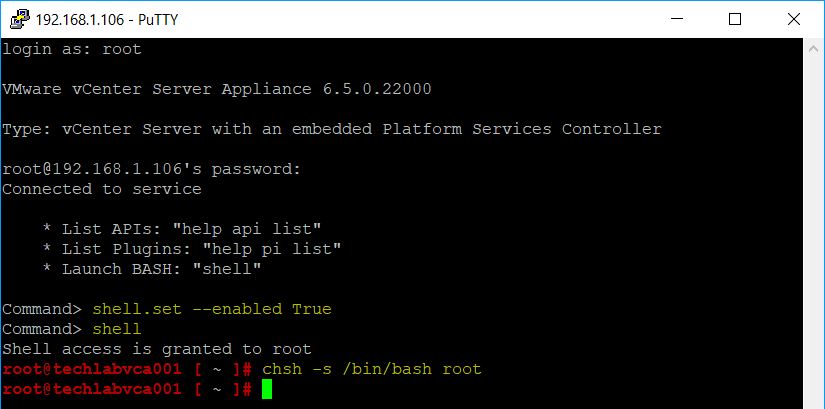
- Take note of this link before copying any files up through WinSCP – https://kb.vmware.com/s/article/2107727 Commands below for enabling access to the VCSA/PSC below
shell.set –enabled True
shell
chsh -s /bin/bash root
Generate the Certificate signing request
Note: If you have external PSCs then do these first before doing the Centers.
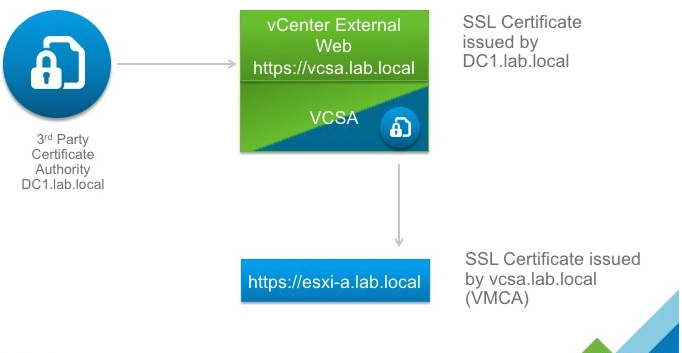
The Machine SSL certificate is the certificate you get when you open the vSphere Web Client in a web browser. It is used by the reverse proxy service on every management node, Platform Services Controller, and embedded deployment. You can replace the certificate on each node with a custom certificate.
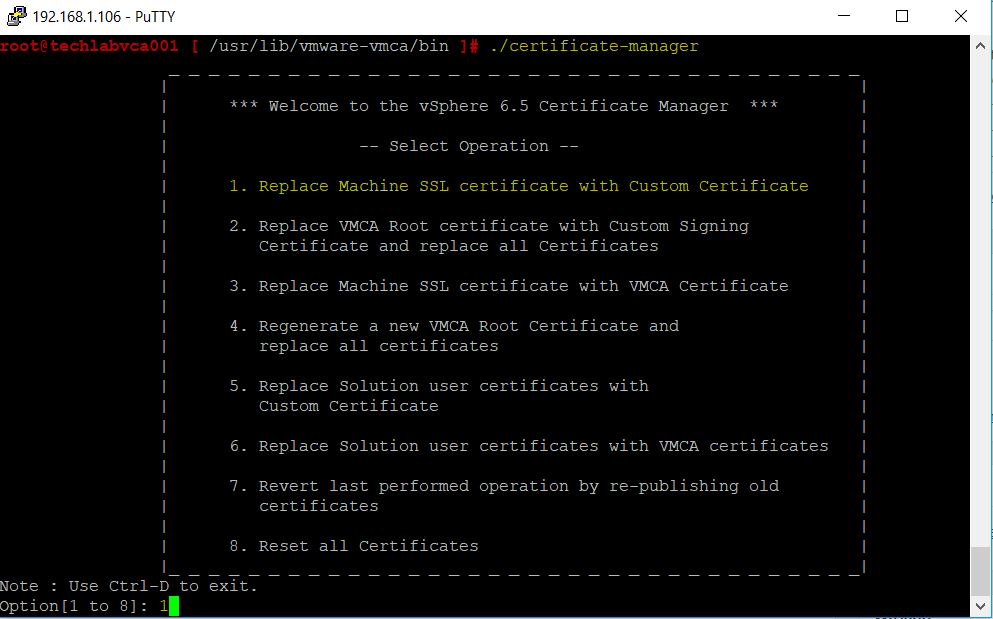
- In Putty, Navigate to /usr/lib/vmware-vmca/bin/ and run ./certificate-manager
- Put in the administrator@vsphere.local account and password
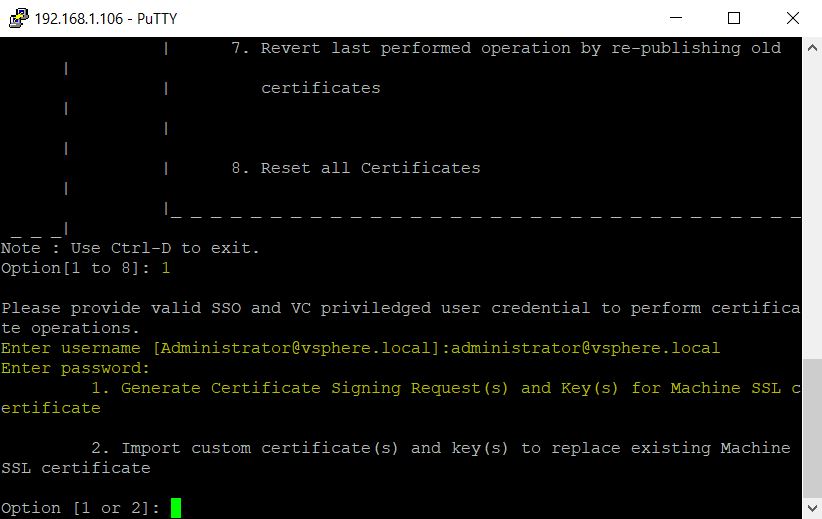
- Select Option 1 to Replace Machine SSL certificate with Custom Certificate
- Put in the path to the /tmp/machine_ssl folder on the appliance
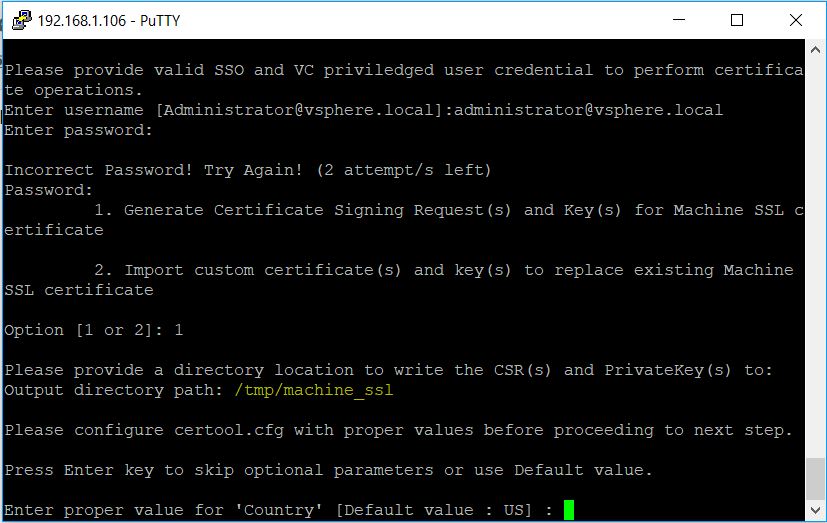
- Enter all the relevant cert info
- Output directory path: path where will be generated the private key and the request
- Country: your country in two letters
- Name: The FQDN of your vCSA
- Organization: an organization name
- OrgUnit: type the name of your unit
- State: country name
- Locality: your city
- IPAddess: provide the vCSA IP address
- Email: provide your E-mail address
- Hostname: the FQDN of your vCSA
- VMCA Name: the FQDN where is located your VMCA. Usually the vCSA FQDN

- You will then see the generated csr and key in the /tmp/machine_ssl folder
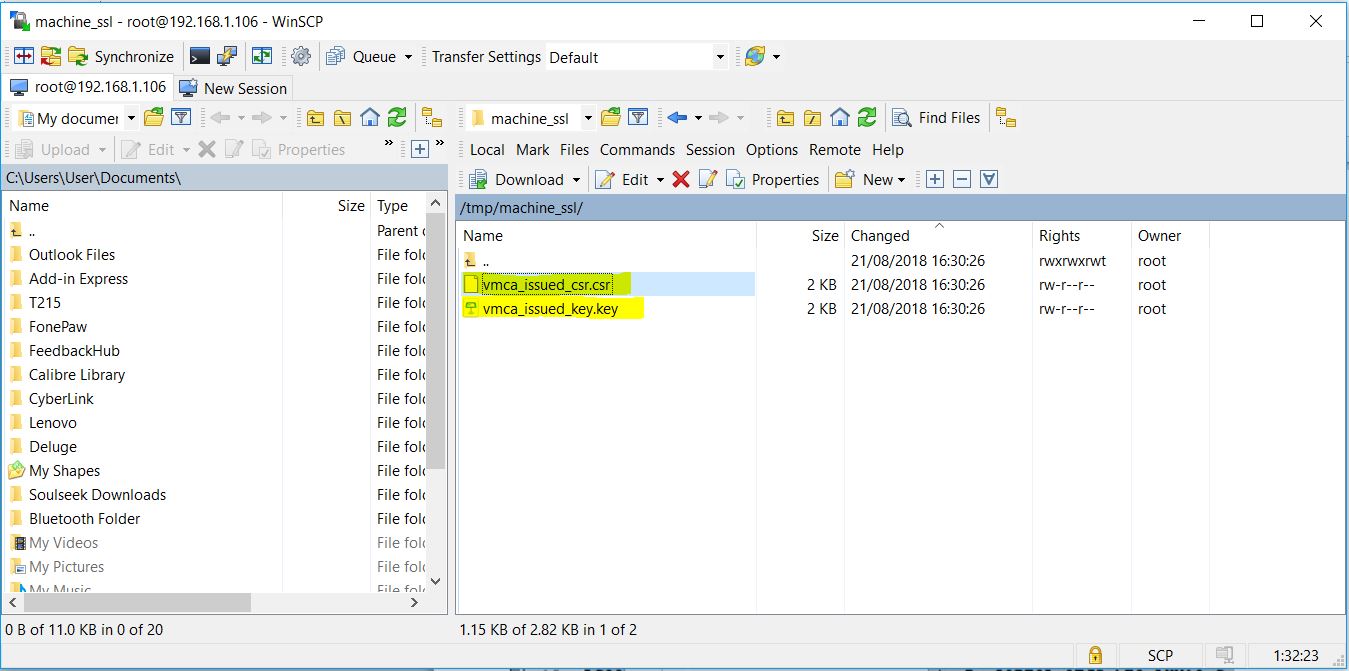
- Open the vmware_issued_csr.csr file and copy the contents

Next: Request a certificate from your CA.
The next step is to use the CSR to request a certificate from your internal Certificate Authority.
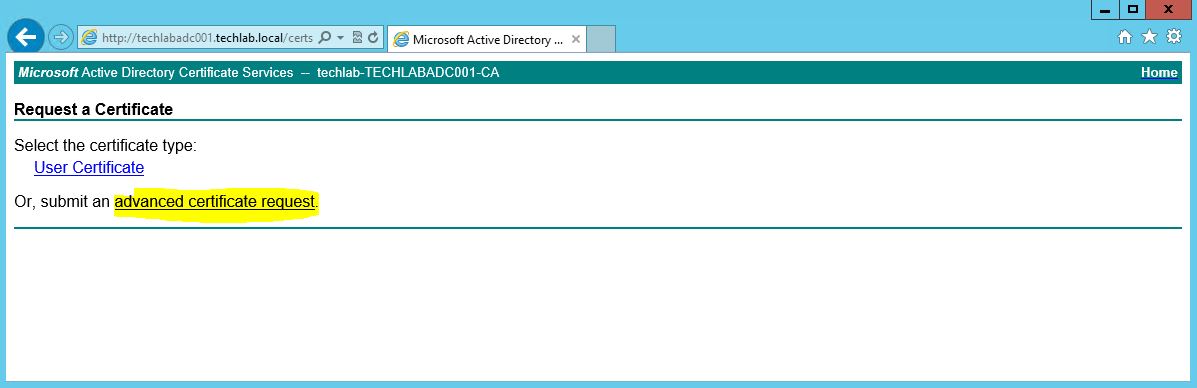
- Log in to the Microsoft CA certificate authority Web interface. By default, it is http://CA_Server_FQDN/CertSrv.
- Click the Request a certificate (.csr ) link.

- Click advanced certificate request.
- Click the Submit a certificate request by using a base-64-encoded CMC or PKCS #10 file, or submit a renewal request by using a base-64-encoded PKCS #7 file link.

- Open the certificate request (machine_ssl.csr) in a plain text editor and copy from —–BEGIN CERTIFICATE REQUEST—– to —–END CERTIFICATE REQUEST—– into the Saved Request box.

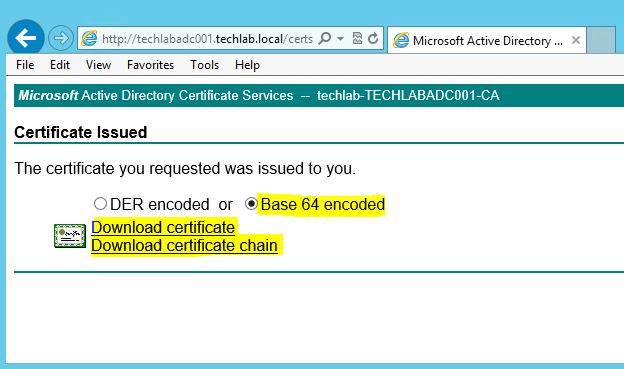
- On the download page, Select “Base 64 encoded” and click on “Download Certificate”. The downloaded file will be called “certnew.cer”. Rename this to “machine_ssl.cer”
- Go back to the download web page and click on “Download certificate chain” (ensuring that “Base 64 encoded” is still selected). The downloaded file will be called “certnew.pb7”. Rename this to “cachain.pb7”
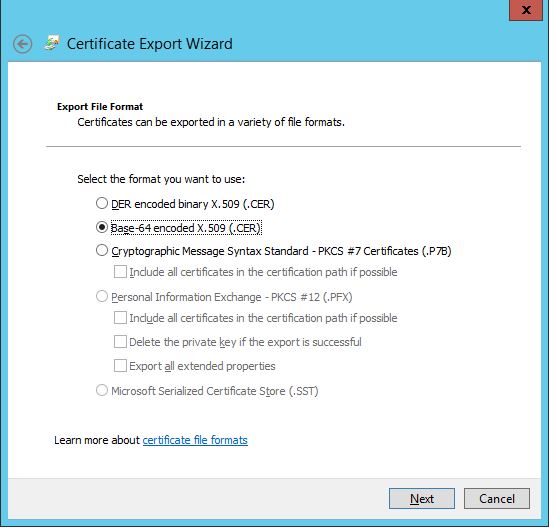
- We are now going to export the CA Root certificate from the cachain.pb7 files. Right-click on the cachain.pb7 file and select “Open”

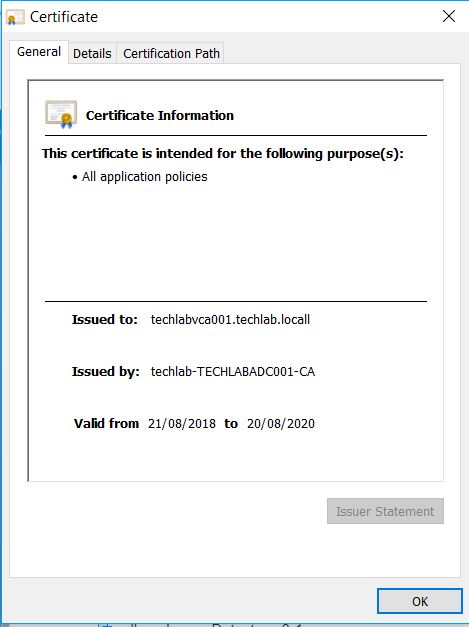
- Expand the list and click on the Certificates folder. Right-click on the CA root cert (techlab-TECHLABDCA001-CA in this example), select All Tasks…Export

Select Base 64 encoded
- Save the file as root-64.cer
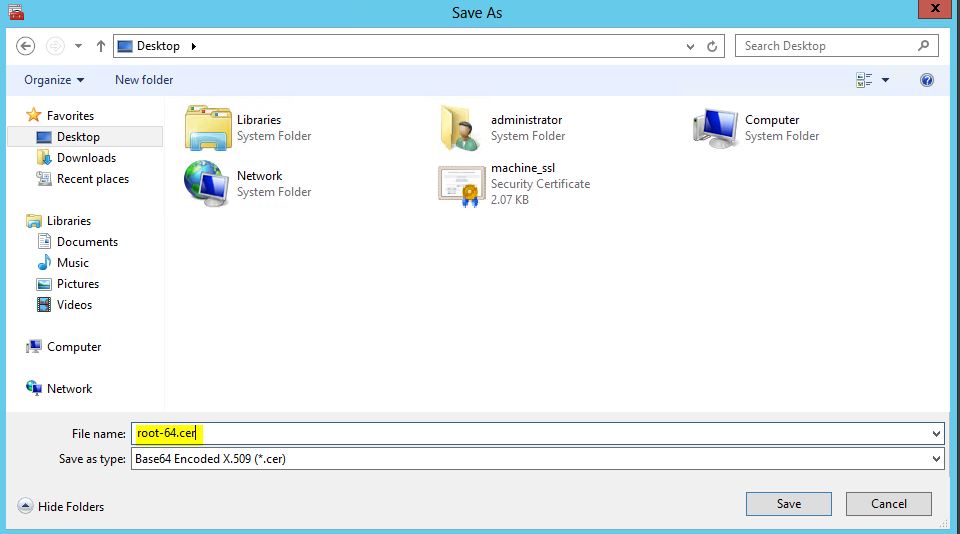
- You should now have the machine_ssl.cer file and the root-64.cer file
- Using WinSCP copy the machine_ssl.cer and root-64.cer certificate files to the VCSA.
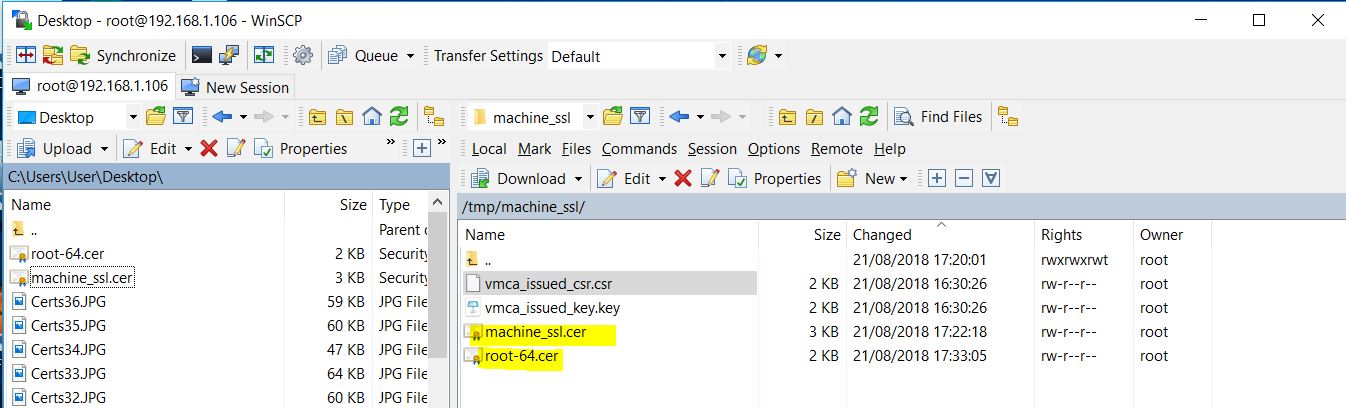
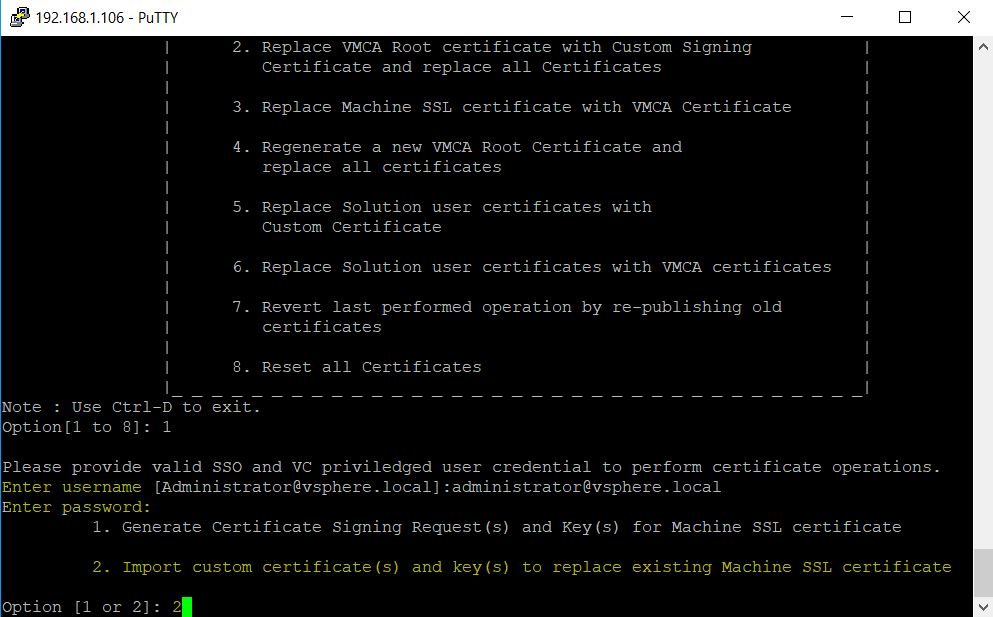
- Now that the files have been copied, open the Certificate Manager Utility and select Option 1, Replace Machine SSL certificate with Custom Certificate.
- Provide the password to your administrator@vsphere.local account and select Option 2, “Import Custom Certificate(s) and key(s) to replace existing Machine SSL certificate”
- You will be prompted for following files:
- machine_ssl.cer
- machine_ssl.key
- root-64.cer
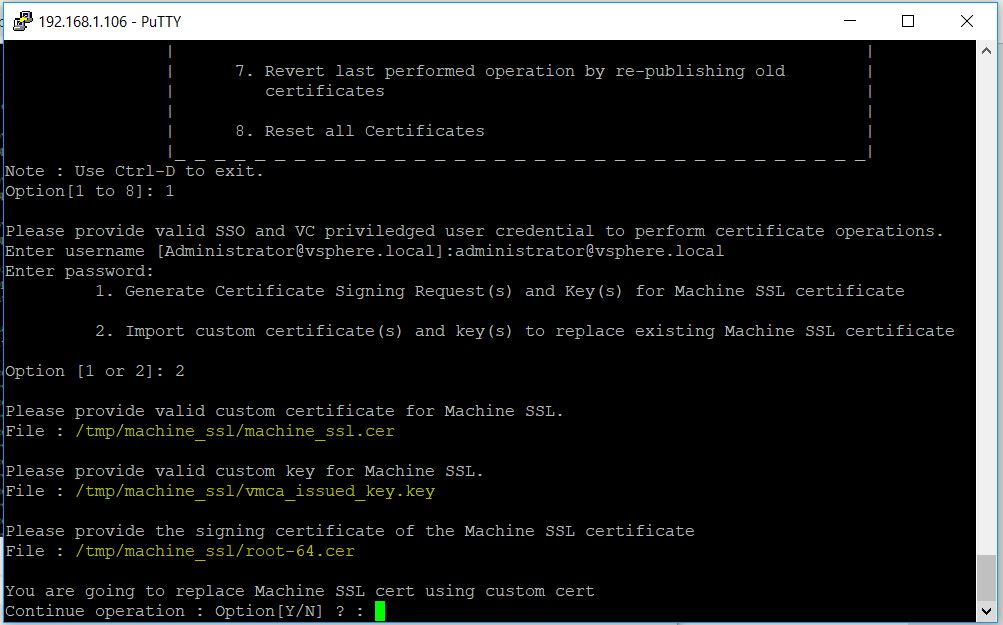
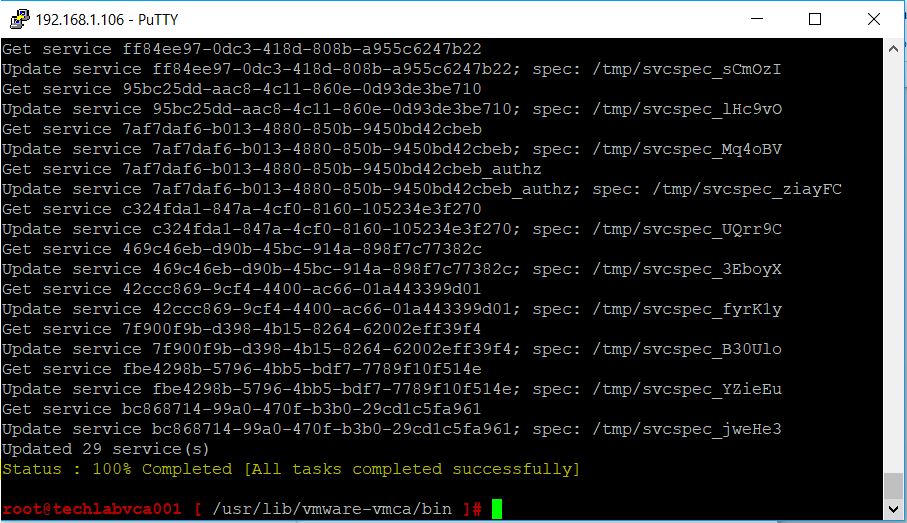
- Type Y to begin the process
- It will kick of the install
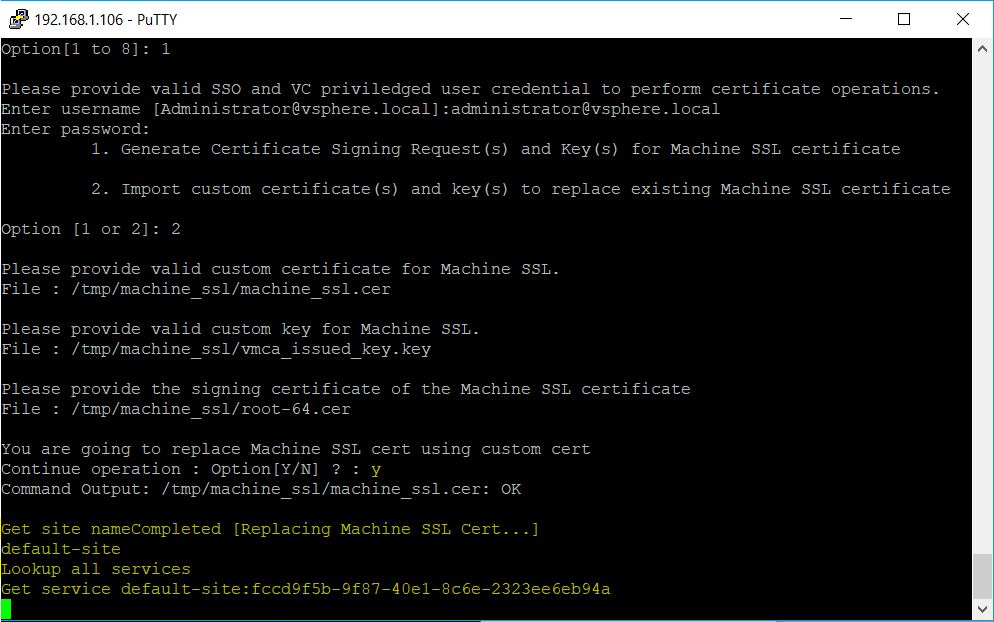

- You should get a message to say that everything is completed
- Now check to see if everything has gone to plan. One thing to remember before we start. Because the new Machine SSL cert has been issued by the CA on the domain controller, you may need to install the root-64.cer fle into the browser. Once done, close the browser and log into the vSphere Web Client.
- Now open your vCenter login page and check the certificate being used to protect it
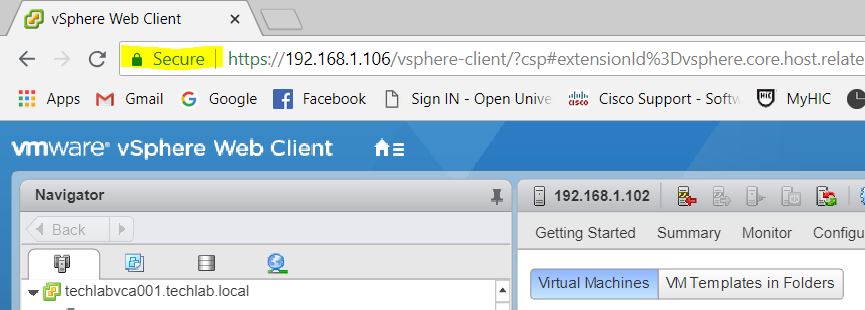
- Now open your vCenter login page and check the certificate being used to protect it
- You’ll see that the certificate has been verified by “techlab-TECHLABADC001-CA”. This is the CA running on the Windows domain controller.