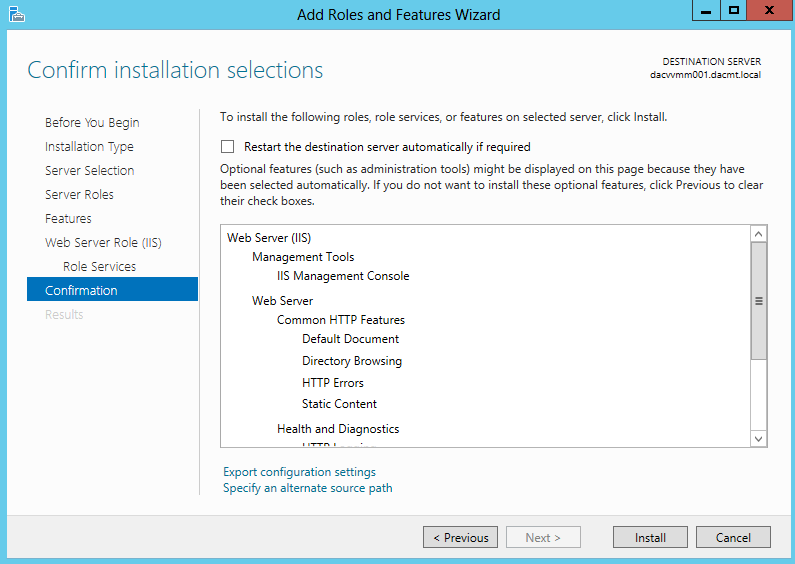
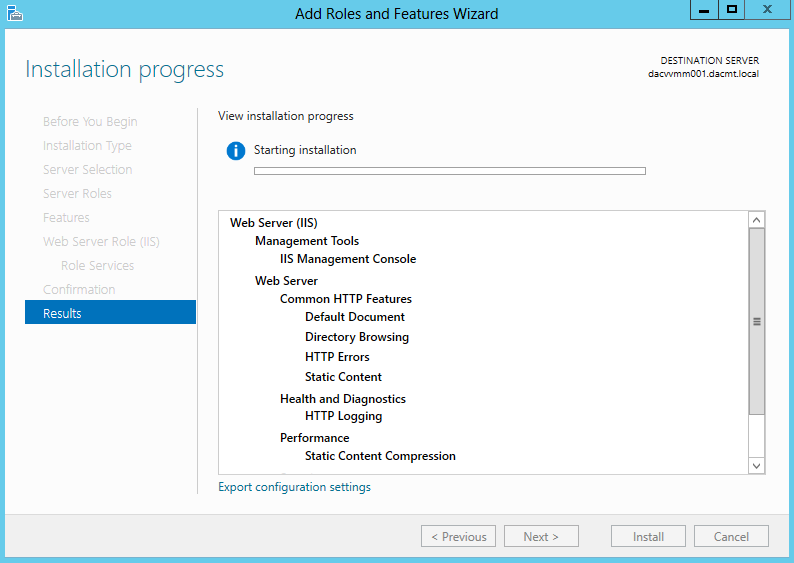
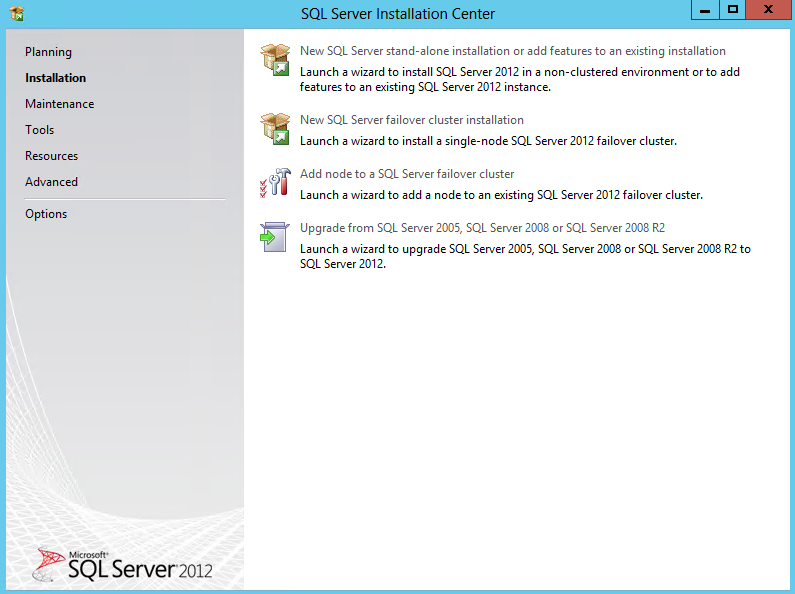
Archive for June 2013

Understanding DNS on Windows Server 2012

images

Installing DNS

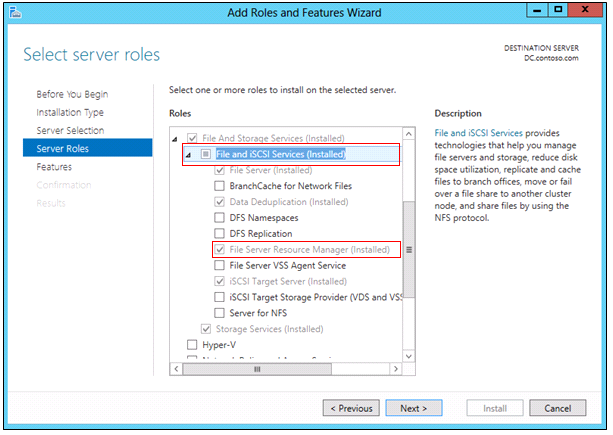
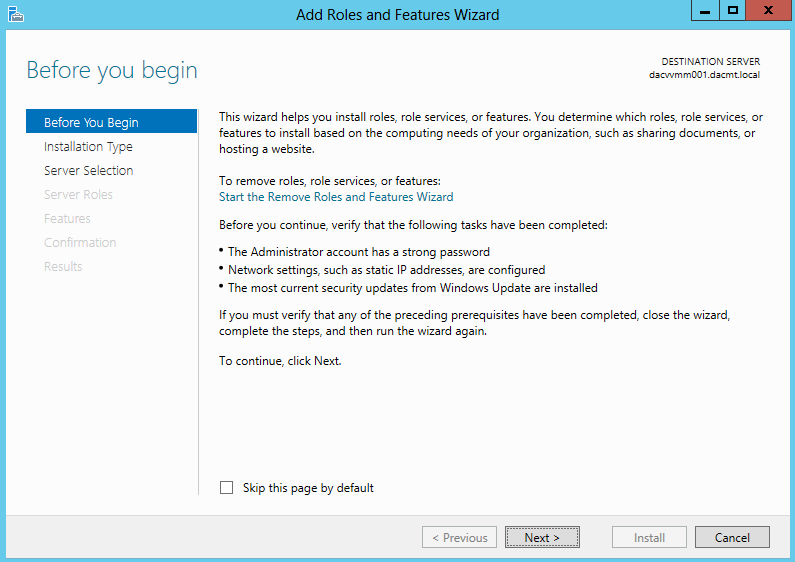
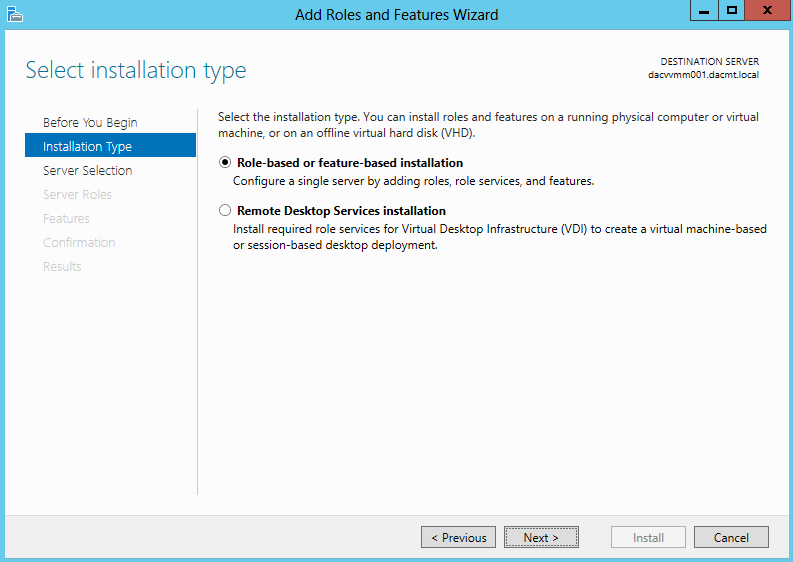
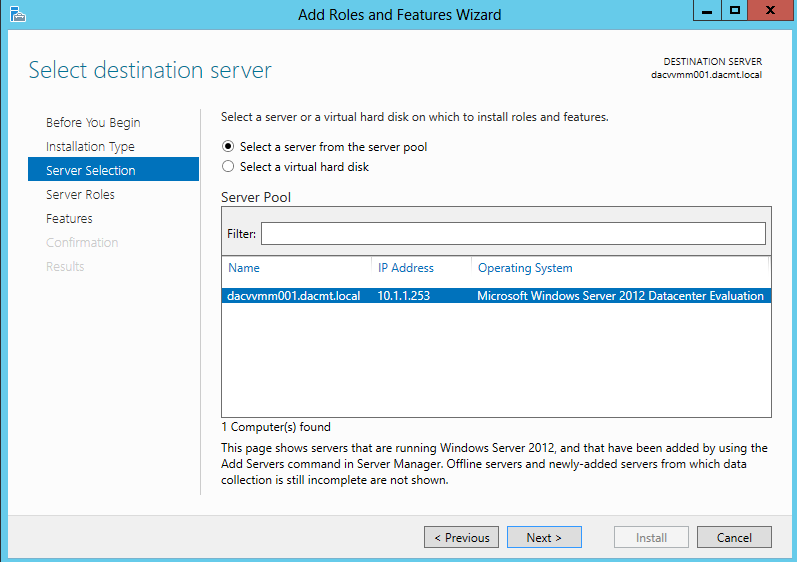
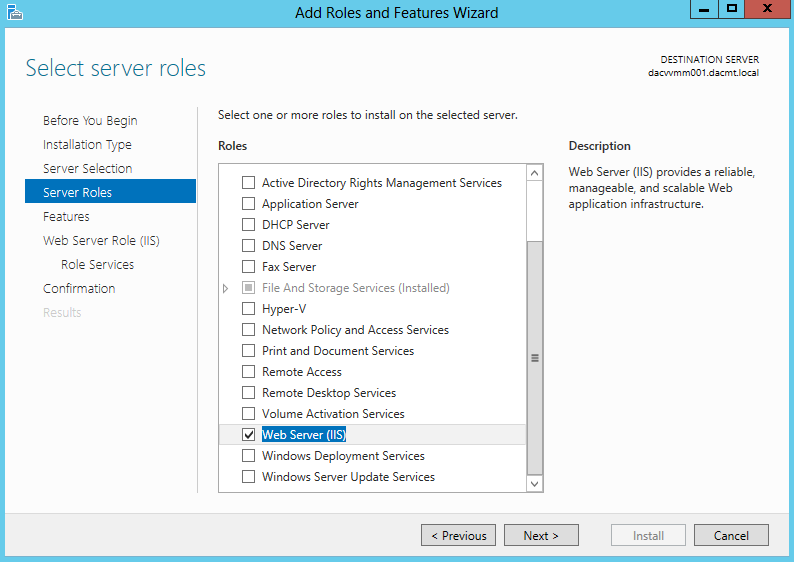
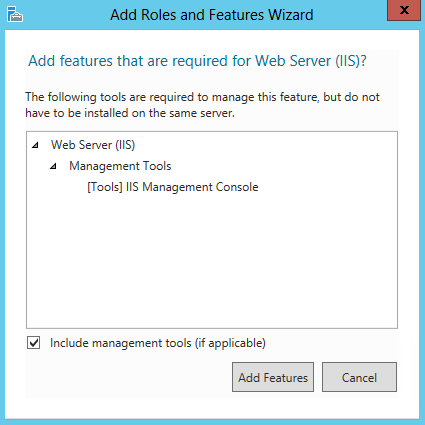
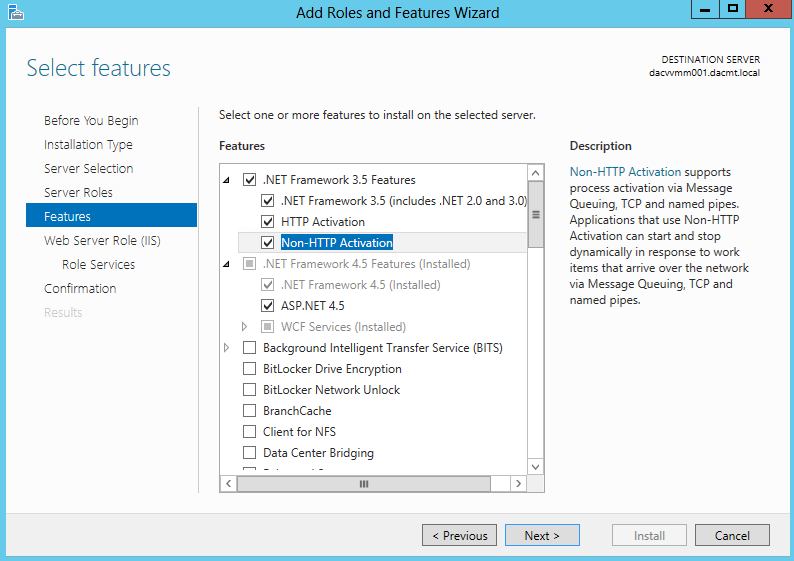
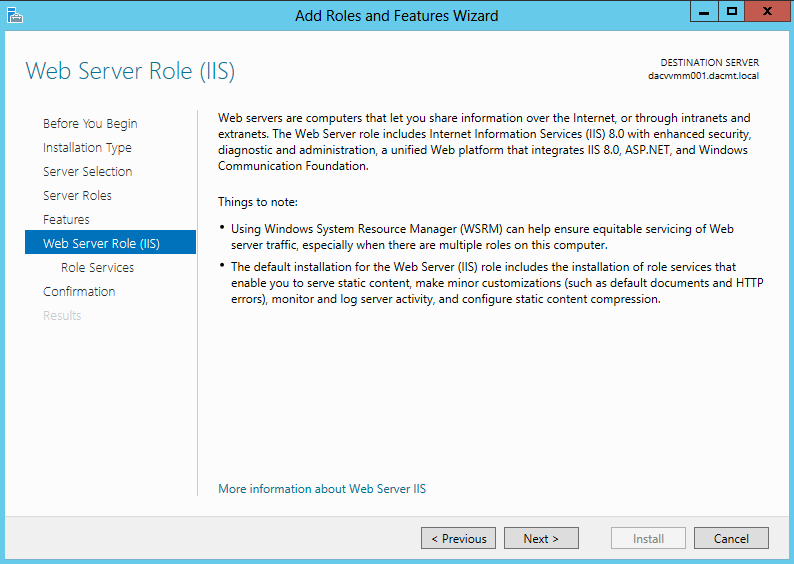
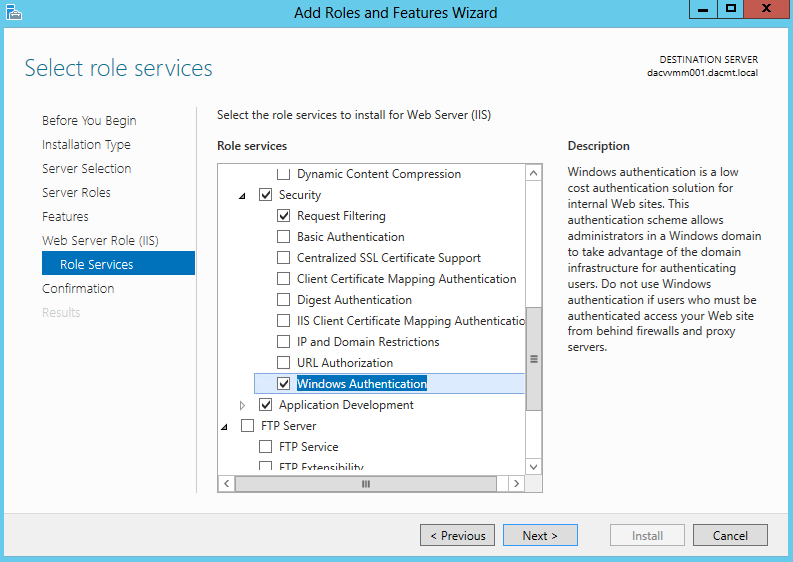
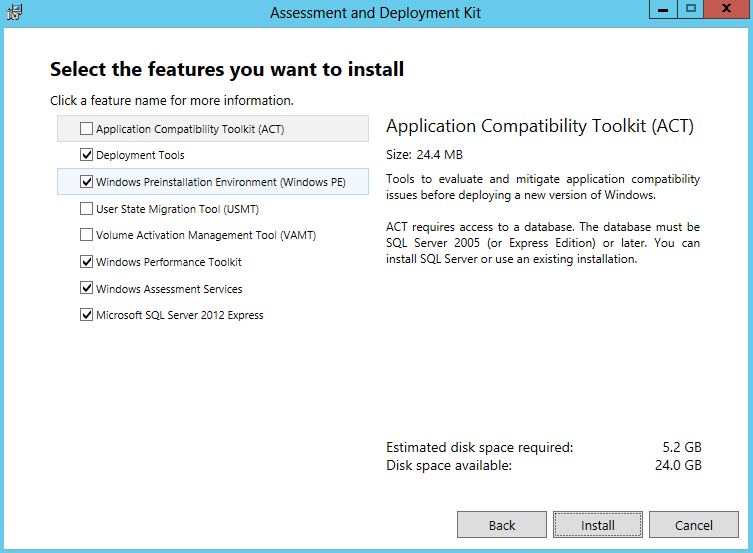
The process of deploying a DNS server on a Windows Server 2012 computer involves installing the DNS Server role by using the Add Roles and Features Wizard in Server Manager. The actual installation requires no additional input; there are no additional pages in the wizard and no role services to select. Once you install the DNS Server role, the computer is ready to perform caching-only name resolution services for any clients that have access to it. The role also installs the DNS Manager console, which you use to configure the DNS server’s other capabilities

DNS Queries

  • An iterative query is one where the DNS server may provide a partial answer to the query (or give an error). DNS servers must support non-recursive queries.
  • A recursive query is one where the DNS server will fully answer the query (or give an error). DNS servers are not required to support recursive queries and both the resolver (or another DNS acting recursively on behalf of another resolver) negotiate use of recursive service using bits in the query headers
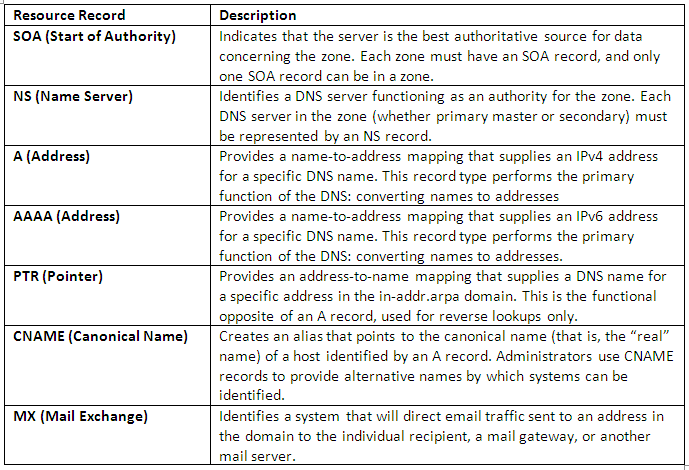
QUERIES

Types of DNS Record

dns_records

Creating zones

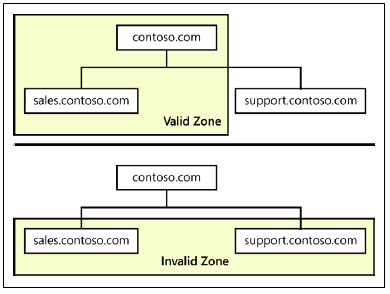
A zone is an administrative entity you create on a DNS server to represent a discrete portion of the DNS namespace. Administrators typically divide the DNS namespace into zones to store them on different servers and to delegate their administration to different people. Zones always consist of entire domains or subdomains. You can create a zone that contains multiple domains as long as those domains are contiguous in the DNS namespace. For example, you can create a zone containing a parent domain and its child, because they are directly connected, but you cannot create a zone containing two child domains without their common parent, because the two children are not directly connected.

zone

The DNS server in Windows Server 2012 can support as many as 200,000 zones on a single server, although it is hard to imagine a scenario that would require that many. In most cases, an administrator creates multiple zones on a server and then delegates most of them to other servers, which then become responsible for hosting them.
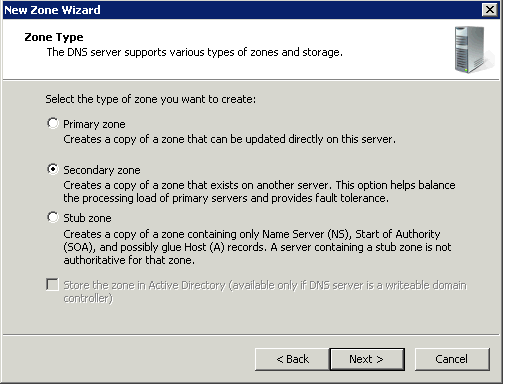
Every zone consists of a zone database, which contains the resource records for the domains in that zone. The DNS server in Windows Server 2012 supports three zone types, which specify where the server stores the zone database and what kind of information it contains. These zone types are as follows
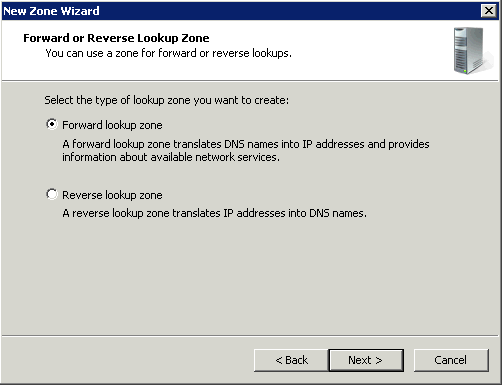
Forward Lookup Zone

A forward lookup zone is a DNS zone in which hostname to IP address relations are stored. When a computer requests the IP address of a specific hostname, the forward lookup zone is queried and the result is returned.
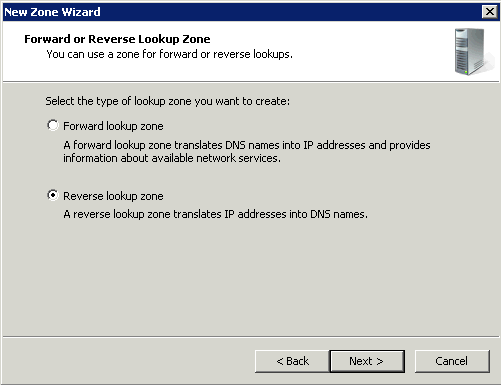
Forward

Reverse Lookup Zone

A reverse lookup zone does just the opposite. When a computer requests the hostname of an IP address, the reverse lookup zone is queried and the result is returned.

reverse

Primary/Active Directory Integrated Zone

Zones that are integrated with Active Directory Domain Services (AD DS) use directory replication to transfer zone data between DNS servers. Zones that are not integrated with AD DS (that is, that store zone data in files) use conventional zone transfer to propagate zone changes among primary and secondary DNS server. Zones that are integrated with AD DS usually require little or no management apart from the management of the corresponding AD DS forests and domains. Active Directory–integrated zones do not ordinarily employ secondary DNS servers.

primary zone

Secondary Zones

Secondary servers can be used as backups for DNS clients. This allows you to use secondary servers as a means to create fault tolerant and load balanced DNS query traffic on your network and reserve your DNS-enabled primary servers for use only by those clients that need them to perform dynamic registration and updates of their A and PTR RRs. Secondary DNS servers maintain a read-only copy of zone data that is transferred periodically from the primary DNS server for the zone. You can configure DNS clients to query secondary DNS servers instead of (or in addition to) the primary DNS server for a zone, reducing demand on the primary server and ensuring that DNS queries for the zone will be answered even if the primary server is not available.
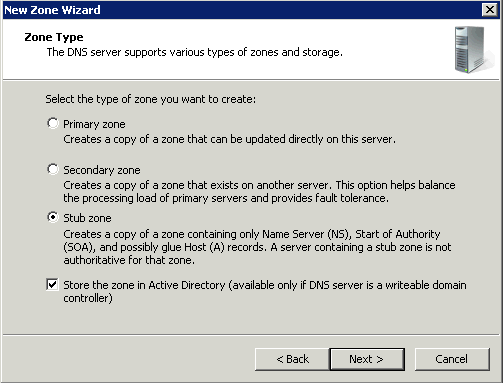
secondaryzone

Stub zones

Stub zones are used when you want a DNS server hosting a parent zone to remain aware of the authoritative DNS servers for one of its child zones. If the stub zone for a child zone is hosted on the same DNS server as the parent zone, the DNS server hosting the stub zone will receive a list of all new authoritative DNS servers for the child zone when it requests an update from the stub zone’s master server . This method of updating the DNS server hosting the parent zone maintains a current list of the authoritative DNS servers for the child zone as they are added and removed.

A conditional forwarder is not an efficient method of keeping a DNS server hosting a parent zone aware of the authoritative DNS servers for a child zone. If you used this method, whenever the authoritative DNS servers for the child zone changed, the conditional forwarder setting on the DNS server hosting the parent zone would have to be manually configured with the IP address for each new authoritative DNS server for the child zone.

stub zone

Caching Server

Caching servers can also be arranged in a hierarchy. This makes sense in cases where the network capacity is limited and/or network latency between the DNS client and the rest of the Internet is high. When connecting a laptop to the Internet through a slow dial-up connection it makes sense to run a caching server right on the laptop. This way each click on a hyperlink on the same web-site will not cause DNS related traffic over the dial-up link. Such a local caching server is often configured to send all queries for which it does not have cached answers to the ISPs caching server in turn. Sometimes corporate networks have local caching servers that in turn send queries to a corporate caching server before they are sent out to the Internet. This way the corporate caching server can build a large cache based on queries from the whole enterprise.

Types of DNS Configuration
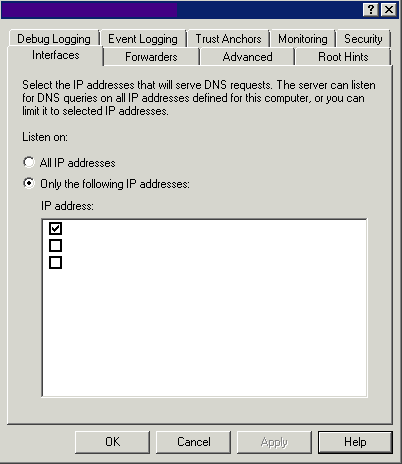
Interfaces

Use this tab to select the IP Addresses that the DNS Server will use to listen to queries

interfaces

Forwarder

A forwarder is a Domain Name System (DNS) server on a network that you can use to forward DNS queries for external DNS names to DNS servers outside that network. You can also use conditional forwarders to forward queries according to specific domain names.

A DNS server on a network is designated as a forwarder when you configure the other DNS servers in the network to forward the queries that they cannot resolve locally to that DNS server. By using a forwarder, you can manage name resolution for names outside your network, such as names on the Internet

To use forwarders to manage the DNS traffic between your network and the Internet, configure your network’s firewall to allow only a dedicated set of DNS servers to communicate with the Internet. When you configure other DNS servers in your network to forward queries that they cannot resolve locally to these designated DNS servers, they act as your forwarders. DNS servers that forward queries to the Internet should not host zones to avoid exposing your internal network namespace to external attackers.
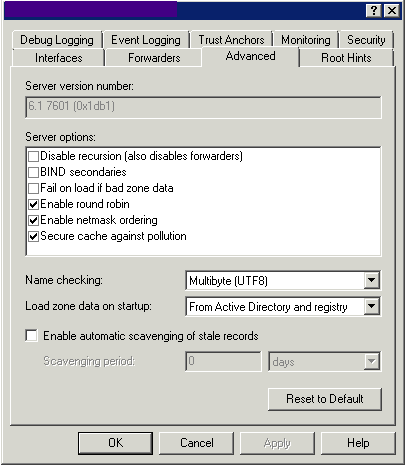
forwarder

Advanced

Use this tab to set Advanced Settings
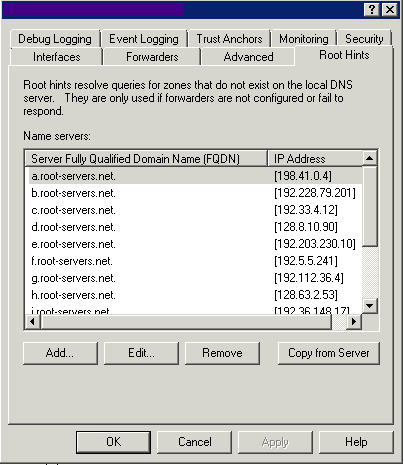
Advanced

Root Hints

Use this tab to specify the servers to be used for root hints when forwarders are not configured or do not respond. The 13 root name server names are located in a domain called root-servers.net and are named using letters of the alphabet. The servers are scattered around the world on different subnets to provide fault tolerance.
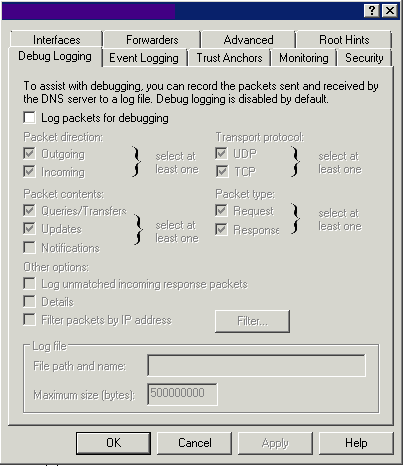
root hints

Debug Logging

Use this tab to configure packet-level logging for debugging purposes.
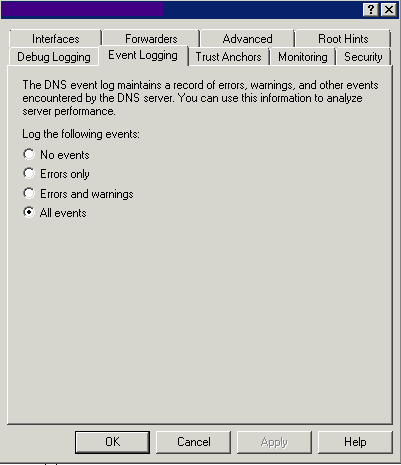
Debug

Event Logging

Use this tab to specify the types of events that will be recorded in the DNS event log.
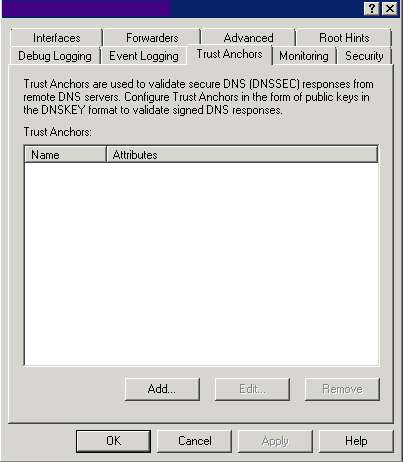
Event_Logging

Trust Anchors

Trust Anchors is the new feature in Windows Server 2008 R2 and Windows 7. We can now sign and host DNSSEC-signed (Domain Name System Security Extension) zones to provide more security in our DNS infrastructure.
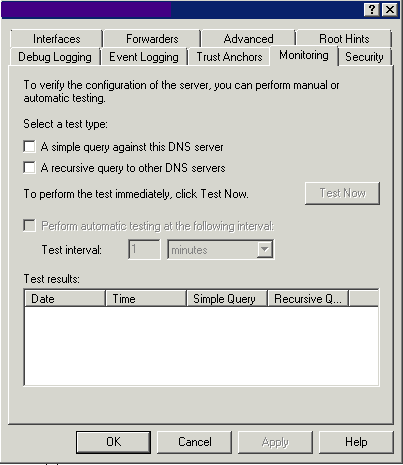
Trust Anchors

Monitoring

Use this tab to perform tests to verify the correct server configuration.
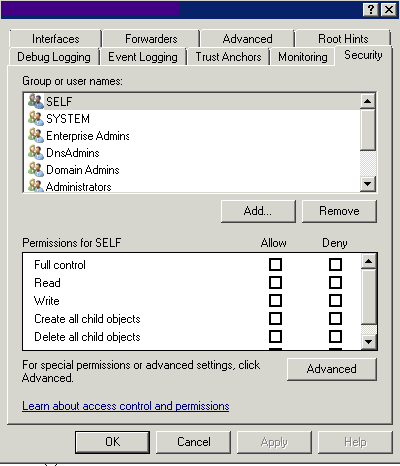
Monitoring

Security

Use this tab to set permissions for the DNS Server

DNSSecurity

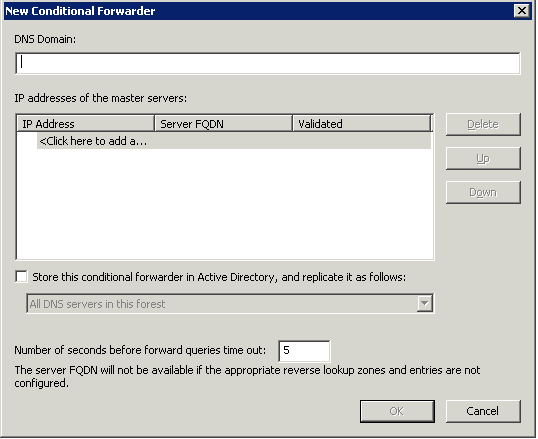
Conditional forwarders

A conditional forwarder setting configures the DNS server to forward a query it receives to a DNS server depending on the DNS name contained in the query. In situations where you want DNS clients in separate networks to resolve each others’ names without having to query DNS servers on the Internet, such as in the case of a company merger, you should configure the DNS servers in each network to forward queries for names in the other network. DNS servers in one network will forward names for clients in the other network to a specific DNS server that will build up a large cache of information about the other network. When forwarding in this way, you create a direct point of contact between two networks’ DNS servers, reducing the need for recursion.

Stub zones do not provide the same server-to-server benefit because a DNS server hosting a stub zone in one network will reply to queries for names in the other network with a list of all authoritative DNS servers for the zone with that name, instead of the specific DNS servers you have designated to handle this traffic. This configuration complicates any type of security settings that you want to establish between specific DNS servers running in each of the networks.

condforwarder

Zone Delegation

Domain Name System (DNS) provides the option of dividing up the namespace into one or more zones, which can then be stored, distributed, and replicated to other DNS servers. When you are deciding whether to divide your DNS namespace to make additional zones, consider the following reasons to use additional zones:

  • You want to delegate management of part of your DNS namespace to another location or department in your organization.
  • You want to divide one large zone into smaller zones to distribute traffic loads among multiple servers, improve DNS name resolution performance, or create a more-fault-tolerant DNS environment.
  • You want to extend the namespace by adding numerous subdomains at once, for example, to accommodate the opening of a new branch or site.

If, for any of these reasons, you can benefit from delegating zones, it might make sense to restructure your namespace by adding additional zones. When you are deciding how to structure zones, use a plan that reflects the structure of your organization.

When you delegate zones within your namespace, remember that for each new zone that you create, you need delegation records in other zones that point to the authoritative DNS servers for the new zone. This is necessary both to transfer authority and to provide correct referral to other DNS servers and clients of the new servers that are being made authoritative for the new zone.

When a standard primary zone is first created, all the resource record information is stored as a text file on a single DNS server. This server acts as the primary master for the zone. Zone information can be replicated to other DNS servers to improve fault tolerance and server performance.

When you are structuring your zones, there are several good reasons to use additional DNS servers for zone replication:

  • Added DNS servers provide zone redundancy, which makes it possible for DNS names in the zone to be resolved for clients if a primary server for the zone stops responding.
  • Added DNS servers can be placed so as to reduce DNS network traffic. For example, adding a DNS server to the opposing side of a low-speed, wide area network (WAN) link can be useful in managing and reducing network traffic.
  • Additional secondary servers can be used to reduce loads on a primary server for a zone.

Microsoft Qualification Pathways

exam

This may prove helpful to those of you who are undertaking qualifications with Microsoft or upgrading qualifications.

Pathways

  • Client
  • Server
  • Database
  • Developer

exams

Dynamic Access Control on Server 2012

security

What is Dynamic Access Control?

Controlling access and ensuring compliance are essential components of IT systems in today’s business environment. Windows Server 2012 includes enhancements that provide improved authorization for file servers to control and audit who is able to access data on them. These enhancements are described under the umbrella name of Dynamic Access Control and enable automatic and manual classification of files, central access policies for controlling access to files, central audit policies for identifying who accessed files, and the application of Rights Management Services (RMS) protection to safeguard sensitive information.

Dynamic Access Control is enabled in Windows Server 2012 through the following new features:

  • A new authorization and audit engine that supports central policies and can process conditional expressions
  • A redesigned Advanced Security Settings Editor that simplifies configuration of auditing and determination of effective access.
  • Kerberos authentication support for user and device claims
  • Enhancements to the File Classification Infrastructure (FCI) introduced previously in Windows Server 2008 R2
  • RMS extensibility to allow partners to provide solutions for applying Windows Server– based RMS to non-Microsoft file types

There is one good rule of thumb to remember when you’re deploying DAC into existing
Windows networks: NTFS permissions won’t give more access than a claims-based rule
allows, and a claims-based rule won’t give more permission than NTFS allows

dac26

Instructions

Step 1 – Open Active Directory Administrative Center

  • Click Server Manager.
  • Click Tools, and then click Active Directory Administrative Center.
  • NOTE: Active Directory Administrative Center provides functionality that is separate from, but overlapping with Active Directory Users and Computers.
  • Click the Tree View icon to simplify navigation

dac1a

Step 2 – Configure claim types for users

In this step, you will add two existing Active Directory attributes to the list of attributes which can be used when evaluating Dynamic Access Control. The user’s country value and department value will be part of the calculation that determines if they have access to specific files.

  • In Active Directory Administrative Center, expand Dynamic Access Control, and then click Claim Types.
  • Click New, and then click Claim Type.
  • In the Source Attribute list, click Department, and then click OK.
  • NOTE: This uses the existing Active Directory attribute.

dac2

  • Click New, and then click Claim Type.
  • In the Source Attribute list, click C, and then in Display name, type Country.
  • NOTE: This uses the existing Active Directory attribute.
  • Click OK.

dac3a

Step 3 – Configure resource properties for files

In this step, you will configure the properties which will be downloaded by file servers and used to classify files. Future dynamic access control rules will compare user attribute values with resource properties. The list of resource properties is predefined by Microsoft as a starter set of properties that can be used by most organizations. You can enable existing properties or create new ones. You will add a resource property to match the country claim, and then enable the existing department property to match the department claim

  • In Active Directory Administrative Center, click Resource Properties.
  • Click New, and then click Resource Property.
  • In Display name, type Country.

dac4

  • Click Add.
  • In Value and Display Name, type US, and then click OK.
  • Click Add.

DAC5

  • In Value and Display Name, type JP, and then click OK.

DAC6

  • Click OK
  • NOTE: The Country property is now listed and is enabled.

DAC7

  • In the Resource Properties, under ID, locate the Department_MS property.
  • Click Department_MS, and then click Enable

DAC8

  • NOTE: The Country property is now listed and is enabled.

Step 4  – Add resource properties to the global list

Each resource property must be added to at least one resource property list before it is downloaded by file servers. The global resource property list is downloaded by all file servers; however individual lists can be created and delivered to specific file servers using Group Policy.

  • In Active Directory Administrative Center, click Resource Property Lists.
  • Click Add resource properties.
  • Select Country and Department, and then click the Add button (>>).
  • Click OK.

dac10

Step 5 – Create a new central access rule

In this step, you will create a new central access rule. This is similar to an access control list (ACL) in that it describes which conditions must be met in order for file access to be granted. In this specific rule, you will require that the user accounts, department, and country attributes match the value of the file’s department and country attributes prior to access being granted

  • In Active Directory Administrative Center, click Central Access Rules.
  • Click New, and then click Central Access Rule.
  • In Name, type Department-Country-Match-Required.
  • Under Target Resources, click Edit.
  • Click Add a condition.
  • Add the condition Resource-Country-Exists.
  • Click Add a condition.
  • Add the condition Resource-Department-Exists.
  • Click OK.

dac11

  • In Permissions, select Use the following permissions as current permissions.
  • NOTE: This setting enforces dynamic access control. The default setting will only create audit log entries and is used for impact analysis prior to implementation.
  • In Permissions, click Edit.
  • Click Add.
  • Click Select a principal, and then type Authenticated.
  • NOTE: This will automatically select Authenticated Users.

dac12

  • Click OK.
  • In Permissions, check the Full Control check box.
  • Click Add a condition.
  • Add the condition User-Country-Equals-Resource-Country.
  • Click Add a condition.
  • Add the condition User-Department-Equals-Resource-Department.

dac14

  • IMPORTANT: In creating this rule, the list of attributes for the user is generated by the list of attributes used for claim types. The list of attributes for the resource is generated by the list of enabled resource properties.
  • Click OK three times to return to Active Directory Administrative Center.

Step 6 – Create a central access policy

In this step, you will take the new rule and add it to a central access policy. A central access policy is a group of rules that are enforced as a unit. A file or folder can have only one central access policy applied to it.

  • In Active Directory Administrative Center, click Central Access Policies.
  • Click New, and then click Central Access Policy.
  • In Name, type Contoso File Server Policy, and then click Add.
  • Click Department-Company-Match-Required, and then click the Add button (>>)

dac15

  • Click OK.
  • Click OK.

Step 7 – Publish the central access policy with Group Policy

In this step, you will create a new Group Policy Object (GPO) to deliver the central access policy to your file servers. This will make the policy available, but will not enforce it on individual files or folders.

  • Open Server Manager.
  • On the Tools menu, click Group Policy Management.
  • Under Domains, click Contoso.com.
  • Click Action, and then click Create a GPO in this domain and link it here.
  • Type Dynamic Access Control Policy, and then click OK.
  • Expand Contoso.com, click Dynamic Access Control Policy, and then click OK.
  • In Security Filtering, click Authenticated Users, click Remove, and then click OK.
  • Click Add.
  • Click Object Types, check Computers, and then click OK.
  • Type Server1, and then click OK.
  • NOTE: We are limiting this GPO to be applied only on Server1.

dac16

  • Right-click Dynamic Access Control Policy, and then click Edit.
  • Navigate to Computer Configuration/Policies/Windows Settings/Security Settings/File System, and then click Central Access Policy.

dac17

  • On the Action menu, click Manage Central Access Policies.
  • Click Contoso File Server Policy, and then click Add.

dac18

Step 8 – Enable Kerberos armoring for domain controllers

In this step, you will enable Kerberos armoring for domain controllers, which ensures that Kerberos tickets contain the required claims information which can then be evaluated by file servers.

  • In Group Policy Management Console, navigate to Contoso.com, and then click Default Domain Policy.
  • Click OK.
  • On the Action menu, click Edit.
  • Navigate to Computer Configuration/Policies/Administrative Templates/System/KDC.
  • Click KDC Support for claims, compound authentication, and Kerberos armoring.
  • NOTE: This setting must be applied to all domain controllers in your organization to extend the Kerberos protocol to support Dynamic Access Control. You can do this in any manner which is appropriate for your organization.
  • Kerberos armoring addresses security concerns that dogged Kerberos authentication,
    such as vulnerability to brute force attacks and spoofing. With Kerberos armoring, a
    secured tunnel is created between a domain client and a domain controller

dac21

  • On the Action menu, click Edit. Select Enabled
  • Click OK.
  • Navigate to Computer Configuration/Policies/Administrative Templates/System/Kerberos.
  • Click Kerberos client support for claims, compound authentication, and Kerberos armoring.
  • NOTE: This setting must be applied to all clients in your organization to extend the Kerberos protocol to support Dynamic Access Control. You can do this in any manner which is appropriate for your organization.

dac20

  • On the Action menu, click Edit > Enabled
  • Click OK.
  • Close Group Policy Management Editor.

Step 9 – Deploying a File Server with Dynamic Access Control

In this exercise, you will install the required components for Dynamic Access Control on a file server, and then configure the resources properties of a folder.
Install the file server roles and role features
In this step, you will install the file server role and the file server resource manager role service.

  • Open Server Manager.
  • In Server Manager, click Add Roles and Features.
  • Click Next at each step of the wizard until you reach the Select server roles page.
  • Expand File and Storage Services (Installed).
  • Check File and iSCSI Services, and then expand File and iSCSI Services.
  • NOTE: File Server Resource Manager is required to manage DAC properties locally

dac22

Step 10 – Add classification data to the file share

In this step, you will classify the files in the file share by adding and configuring the resource properties you defined in Step 1

  • In Windows Explorer, navigate to C:\Shares on the File Server
  • Right-click CorpData, and then click Properties.
  • Click the Classification tab.
  • NOTE: Note that the two defined resource properties are available.
  • IMPORTANT: If you do not see Country and Department, run the Windows PowerShell command Update-FSRMClassificationPropertyDefinition, as this will force the update to occur. You will need to reopen the properties box after this command.

dac23

  • In CorpData Properties, click Country, click JP, and then click Apply.
  • Click Department, and then click Finance.
  • NOTE: The department list is present because the resource property Department is predefined by Microsoft and contains this set of default department names.

dac24

  • Click Apply and leave the Properties window open

Step 11 – Add the central access policy to the CorpData folder

In this step, you will configure the CorpData folder to use the central policy you created in Step 1 as part of the access control evaluation process.

  • Click Windows PowerShell.
  • Type GPUpdate /Force, and then press ENTER. Wait for Group Policy to refresh.
  • NOTE: This is required to ensure the central policy defined by the Dynamic Access Control Policy GPO is applied to this system. Under normal circumstances, the regular group policy refresh would perform this step.
  • Switch to the CorpData Properties window.
  • On the Security tab, click Advanced.
  • Click Central Policy, and then click Change.
  • Select Contoso File Server Policy, and then click Apply.

dac25

  • NOTE: You can use this screen to review the policy rules and the conditions when selecting the policy.


Testing an install of Microsoft Virtual Machine Manager 2012 SP1 on Windows 2012

cloud

What is Microsoft Virtual Machine Manager? Virtual Machine Manager (VMM) is a management solution for the virtualized datacenter, enabling you to configure and manage your virtualization host, networking, and storage resources in order to create and deploy virtual machines and services to private clouds that you have created A deployment of VMM consists of the following: vmm Pre-Requisites Your servers may slightly differ as to how many roles you put on one server but you will generally need the following. I am going to presume you have a Domain Controller and a Hyper V Server.

  • 1 x Windows 2008 or Windows 2012 Domain Controller
  • 1 x Windows 2012 Server running Microsoft Virtual Machine Manager
  • 1 x Windows 2012 Server running Microsoft SQL Server 2008 or 2012
  • 1 x Windows 2012 Server running Hyper V 2012 Server for testing VMM. Note: You will need to add hypervisor.cpuid.v0 = “FALSE” and mce.enable = “TRUE” and vhv.enable = “True” to the .vmx file if this server is a VM running on VMware
  • For System Center 2012 – Virtual Machine Manager: Windows Automated Installation Kit (AIK) for Windows 7
  • For VMM in System Center 2012 SP1: Windows Assessment and Deployment Kit (ADK) for Windows 8. SCVMM Management Server only requires the Deployment Tools and Windows PE components.
  • For System Center 2012 – Virtual Machine Manager: At least Microsoft .NET Framework 3.5 Service Pack 1 (SP1)
  • For VMM in System Center 2012 SP1: Microsoft .NET Framework 4, or Microsoft .NET Framework 4.
  • The computer on which you install the VMM management server must be a member of an Active Directory domain.
  • The name of the computer on which you install the VMM management server cannot exceed 15 characters.
  •  The SCVMM machine name can’t include –SCVMM- for example My-SCVMM-Server but can be called SCVMM.
  • If using Dynamic memory the start-up RAM must be at least 2048 MB.  This demo uses 4096 MB of RAM.
  • It is also recommended that the SQL Command Line Tools and Native Client Tools are also installed on the SCVMM server. See links at the end of this article.  We have used the SQL 2012 versions here.
  • Membership in the local Administrators group, or equivalent, on the computer that you are configuring is the minimum required to complete this procedure.

Extra Notes on SQL Server In System Center 2012 Service Pack 1 (SP1) you can take advantage of the AlwaysOn feature in Microsoft SQL Server 2012 to ensure high availability of the VMM database. To configure SQL Server with the AlwaysOn feature, complete both procedures below. For more information about the AlwaysOn feature, and AlwaysOn availability groups see the followings:

Before you begin the installation of the VMM management server, ensure that you have a computer with a supported version of Microsoft SQL Server installed and running. Unlike VMM 2008 R2, System Center 2012 – Virtual Machine Manager will not automatically install an Express edition of SQL Server Instructions

  • Firstly make sure you have Windows Server 2012 installed on your VMM Server
  • Click Manage > Install Roles and Features on your VMM Server

iis1

  • Select Installation type as Role based or Feature based installation

iis2

  • Select Destination Server

iis3

  • Go to Roles and select Web Server (IIS)

iis4

  • Click Add Features > Next

iis5

  • Select Features

iis6

  • Read the Information

iis7

  • Add Windows Authentication

iis8

  • Check Install Information and tick Restart if required

iis9

  • Click Install

iis10

  • Next Install Windows Assessment and Deployment Kit which you should have downloaded and copied to your VMM Server ready to install
  • Note this seems to take long to install!
  • The Windows ADK is a collection of tools that you can use to customise, assess and deploy Windows Operating Systems to new computers, is a pre-requisite for VMM 2012 SP1 and is used for bare metal deployment of Hyper-V Servers
  • Specify Location

deploy1

  • Join the Customer Improvement Program

deploy2

  • Accept the License Agreement

deploy3

  • Select the Features to Install. You generally need Deployment Tools and Windows Pre-Installation Environment (Windows PE)

deploy4

  • Click Install

deploy5

  • On the SCVMM server – install the SQL 2012 Native Client with SQL 2012 Command Line Utilities to follow
  • SQL Native Client contains runtime support for applications using native code APIs (ODBC, OLE DB and ADO) to connect to Microsoft SQL Server 2005, 2008, 2008 R2 and 2012. SQL Native Client is used to enhance applications that need to take advantage of new SQL Server 2012 features

sql1

  • Accept the License Agreement

sql2

  • Choose your Features in the Feature Selection Box

sql3

  • Install

sql4

  • Next Install SQL 2012 Command Line Utilities
  • The SQLCMD utility allows users to connect to, send Transact SQL batches from and output row set information from SQL Server 2008, 2008 R2 and 2012. It is used to enhance applications that need to take advantage of new SQL Server 2012 features

sql5

  • Accept License Agreement

sql6

  • Click Install

sql7

  • Next go to your SQL Server 2012 Server
  • Attach the SQL ISO
  • Run the Installer > New SQL Server stand-alone installation

sql1

  • Setup Support Rules will run > Click Next

sql2

  • Choose Specify the free edition

sql3

  • Accept the License Terms

sql4

  • Select Next to Install Product Updates if connected to the internet

sql5

  • You will see the status of the updating

sql6

  • Check Setup Support Rules

sql7

  • Choose SQL Server Feature Installation

sql8

  • Select All on the Feature Installation and choose where you want to install the Shared Feature Directories

sql9

  • Check Installation Rules

sql10

  • Just keep the Default Instance for now – MSSQLSERVER

sql11

  • Check Disk Space Requirements

SQL12

  • Check SQL Server Service Accounts and add your own as required

SQL13

  • Check Collation

sql14

  • Database Engine Configuration > Choose Mixed Mode and add the Domain Admin

sql15

  • Choose Data Directories

sql16

  • Check Analysis Services Settings

sql17

  • Reporting Services Configuration > Choose Install Only

sql18

  • Distributed Replay Controller > Just add the current user

sql19

  • Distributed Replay Client

sql20

  • Check Error Reporting

sql21

  • Installation Configuration Rules check

sql22

  • Ready to Install

sql23

  • Click Install

sql24

  • Don’t forget to go into SQL Server Configuration Manager > SQL Server Network Configuration > Protocols for MSSQLSERVER and enable Named Pipes and TCP/IP

sqlports

sqlports2

  • Restart SQL Services once this is done and it should look like the below

SQL Enabled

  • I also found I had to add my Domain Admin account to the Local Administrators group on the SCVMM and SQL Server or I got a message saying “Setup cannot connect to the specified SQL Server Instance. Ensure the server name is correct etc”
  • I also found that I add to adjust the hosts file in c:\Windows\System32\Drivers\etc on both the SCVMM Server and SQL Server and add in a mapping for the SQL Server
  • Now you are ready to install Microsoft VMM
  • Launch the Installer
  • Click Install

vmm1

  • Choose Features
  • Select VMM Server, VMM Administrator Console

vmm2

  • Put in Product Registration Information > Name, Organisation and Product Key if you have one. If not it will enter Evaluation Mode

VMM3

  • Accept the License Agreement

vmm4

  • Choose an option for the Customer Service Program

vmm5

  • Turn on Microsoft Update

vmm6

  • Select Installation Location

vmm7

  • Pre-Requisite Checking will then run. You can see I need to put more memory in my VM

vmm8

  • Put in your Database configuration. In my case I am using a separate SQL 2012 Server called DACVSQL002
  • Change the Database Name if you want to and the port is usually 1433
  • If you find you experience connection errors, then you will need to adjust firewall ports

vmm10

  • Put in Service Account Information
  • Ignore Distributed Key Management for now
  • DKM is used to store VMM encryption keys in Active Directory Domain Services. By default, using the Windows Data Protection API (DPAPI) VMM encrypts some data in the VMM Database (for example the Run As account credentials and passwords) and this data is tied in to the VMM server and the service account used by VMM. However with DKM, different machines can securely access the shared data. Once a HA VMM Node fails over to another node, it will start accessing the VMM database and use the encryption keys conveniently stored under a container in AD to decrypt the data in the VMM database

vmm11

  • Check Port Configuration Information

vmm12

  • Specify a Share for the Virtual Machine Manager Library

vmm13

  • Check the Installation Summary

vmm14

  • Install

vmm15

  • Once finished it should look like the following

vmm16

  • If there is a problem with setup completing successfully, consult the log files in the %SYSTEMDRIVE%\ProgramData\VMMLogs folder. ProgramData is a hidden folder.
  • Connect to VMM Console

vmm17

  • You will now see the VMM Console

vmm18

  • Next explore around VMM 2012.
  • Create a Run As account

creds

  • Practice adding a host Group and a Hyper-V Host
  • Right click on All Host and Select Create Host Group
  • Right click the New Host Group and select Add Hyper V Hosts and Clusters

hyperv1

  • Specifiy credentials to run for discovery. Use your previously created Run As account

Add resource

  • Choose the scope to search for the Hosts you want or add them manually

hyperv1

  • Choose your Hyper V Server

hyperv2

  • Choose Host Group and Virtual Machine Placement

HostSettings

  • Choose Migration Settings

Migration

  • Check Summary and Confirm Details

summary

  • You will see the job start in the job window
  • Check any warnings post addition

finish

  • See the articles below by Scott Lowe which walk you through VMM 2012

Links