![]()
vSphere 6 Platform Services Controller HA Setups – High Availability
Useful Links
Useful VMware Feature Walkthrough Link here
VMware vCenter Server 6.0 Deployment Guide here Includes F5 setup steps in the Appendix.
vCenter Single Sign-On and Platform Services Controller High Availability Compatibility Matrix here
Configuring Windows PSC 6.0 High Availability for vSphere 6.0 (2113085) here
Information
When configuring PSC High Availability, the load balanced pair are required to be the same type; it is not supported to mix Appliance-Base and Windows-Based PSCs in the same load balanced pair.
New to vSphere 6.0, both the Appliance-based PSC and Windows-based PSC can be deployed in both multi-site or high availability configurations. Additionally, if you need multi-site in conjunction with high availability, you can now setup your vSphere environment to have multi-sites and then configure each site with secondary PSCs. A load balancer is still required per site to provide high-availability. Only local load balancers (often times referred to as LTM, or Local Traffic Manager) are supported for PSC HA
PSC Config (Lab Setup)
1 x Windows 2012 Server – techlabpsc001 (192.168.2.152/24)
1 x Windows 2012 Server – techlabpsc002 (192.168.2.153/24)
Load Balanced Name – psclb.techlab.local
Load Balanced IP – 192.168.2.155
F5 Load Balancer is Version 12
Steps to enable High Availability on 2 Platform Service Controllers
- Install Windows 2012 on a new server
- Attach the vCenter 6 ISO to the server
- In the software directory, double click the autorun installer
- Accept the License Agreement
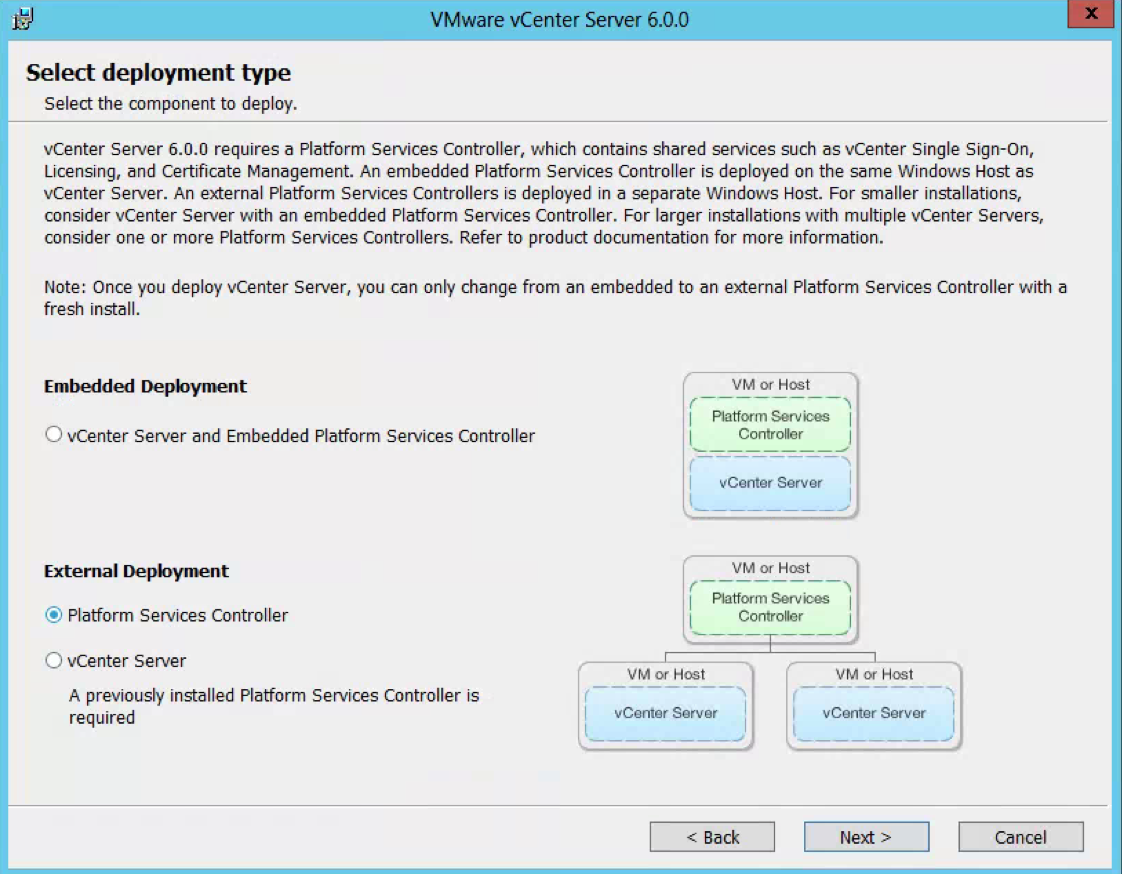
- Choose External Deployment > Platform Services Controller
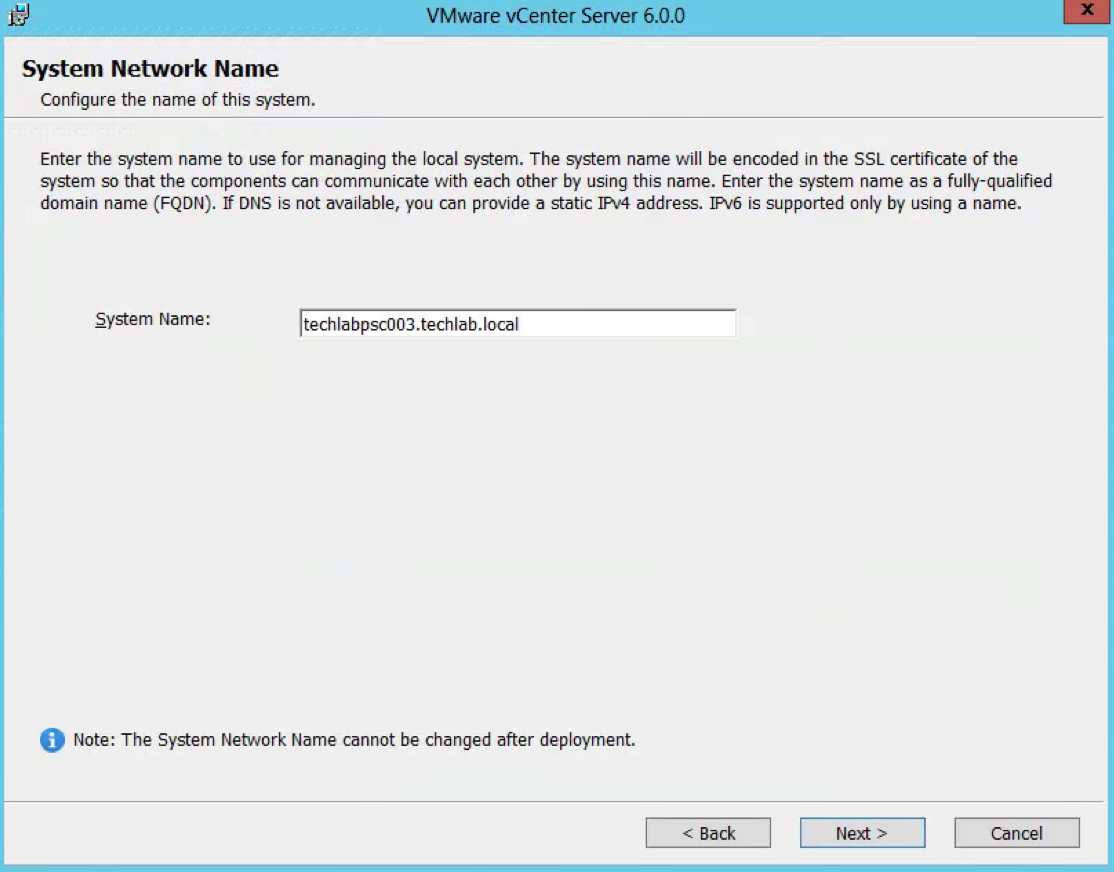
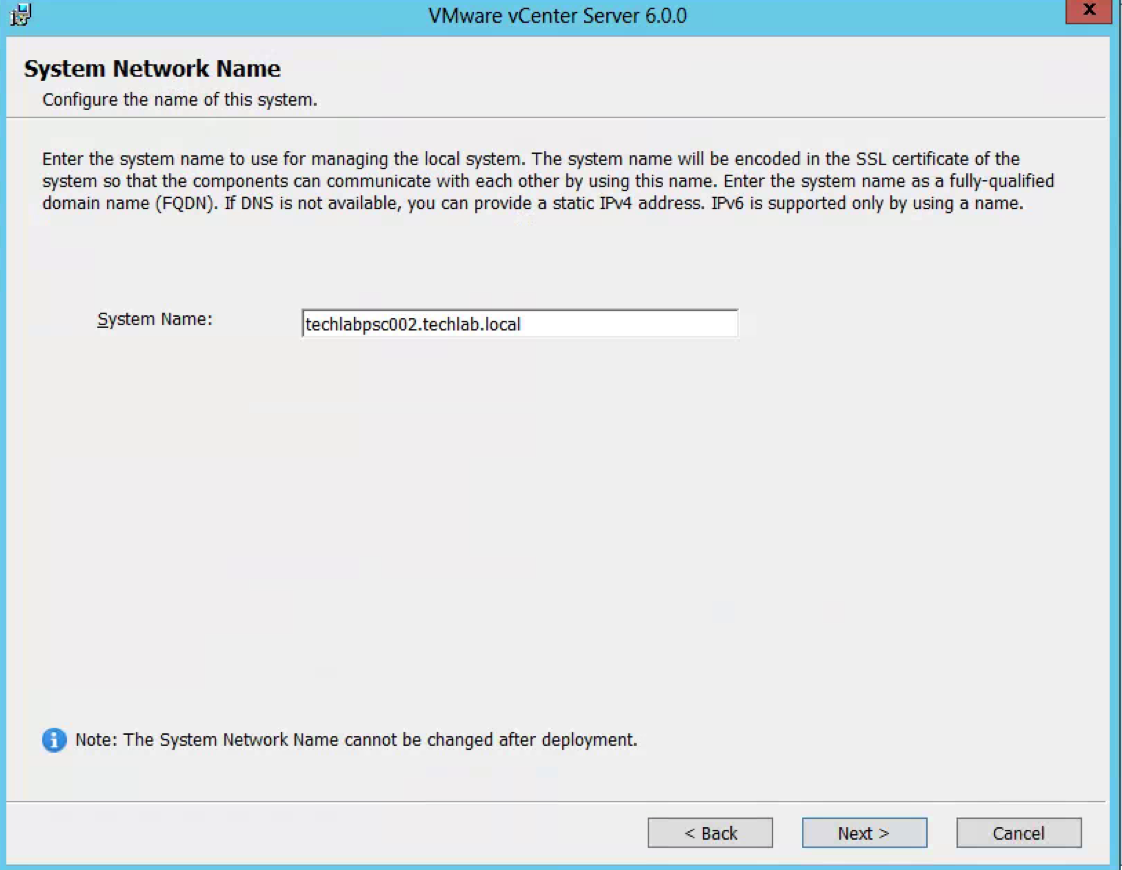
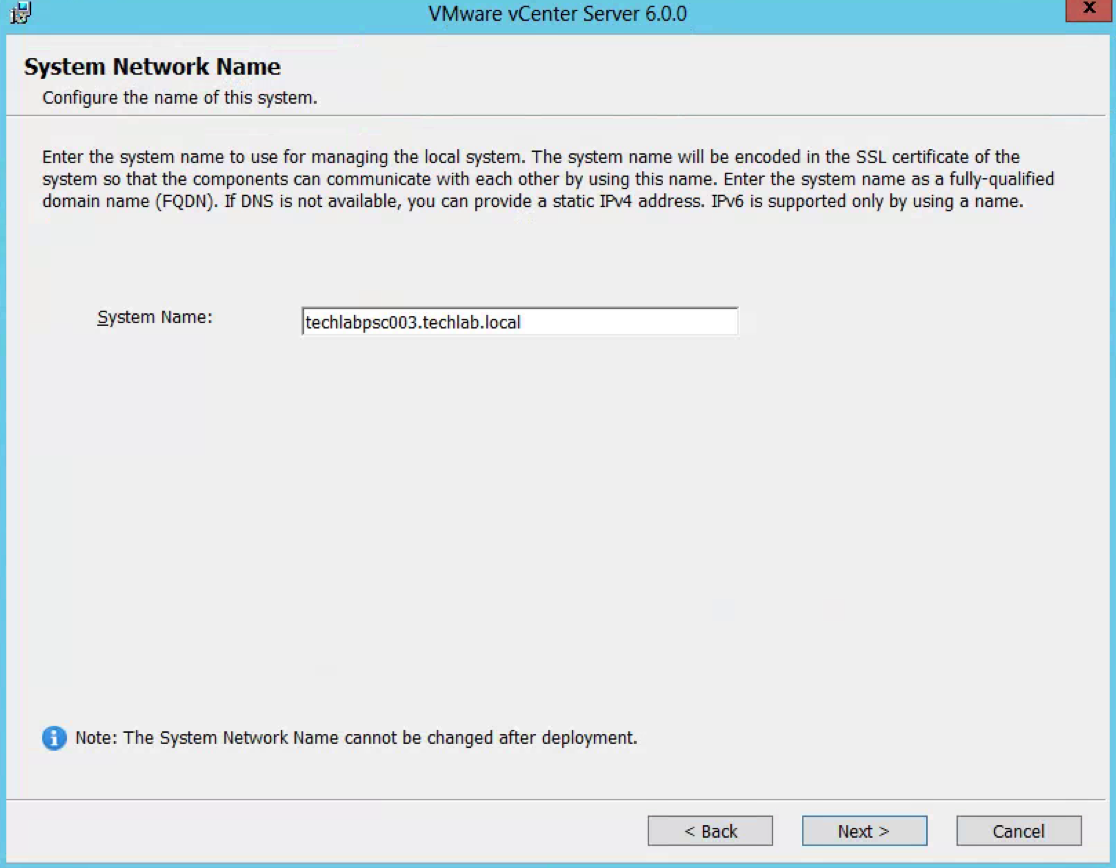
- Put in a FQDN System Network Name for the Platform Services Controller
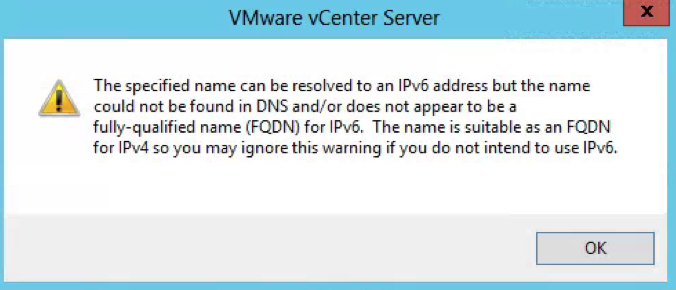
- Ignore the warning below but do make sure you have added a DNS entry for the PSC into your DNS server and that it is joined to the domain
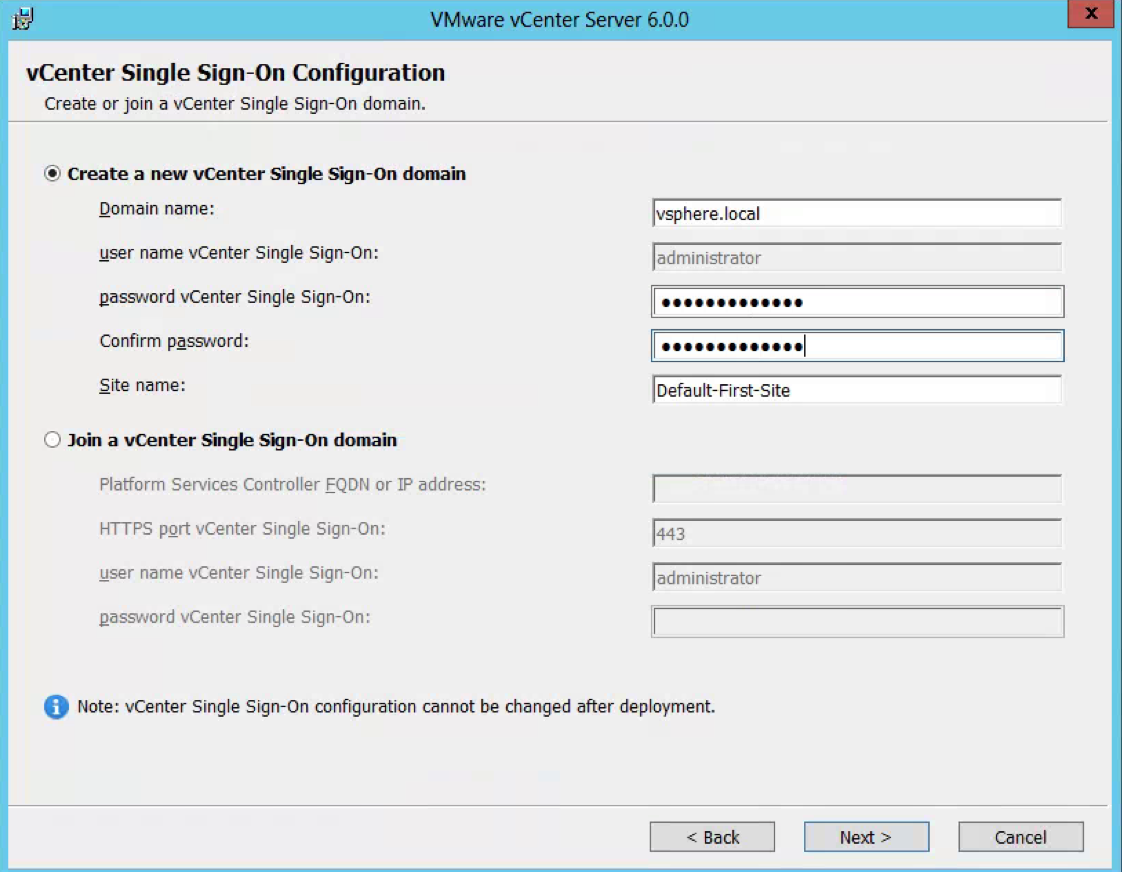
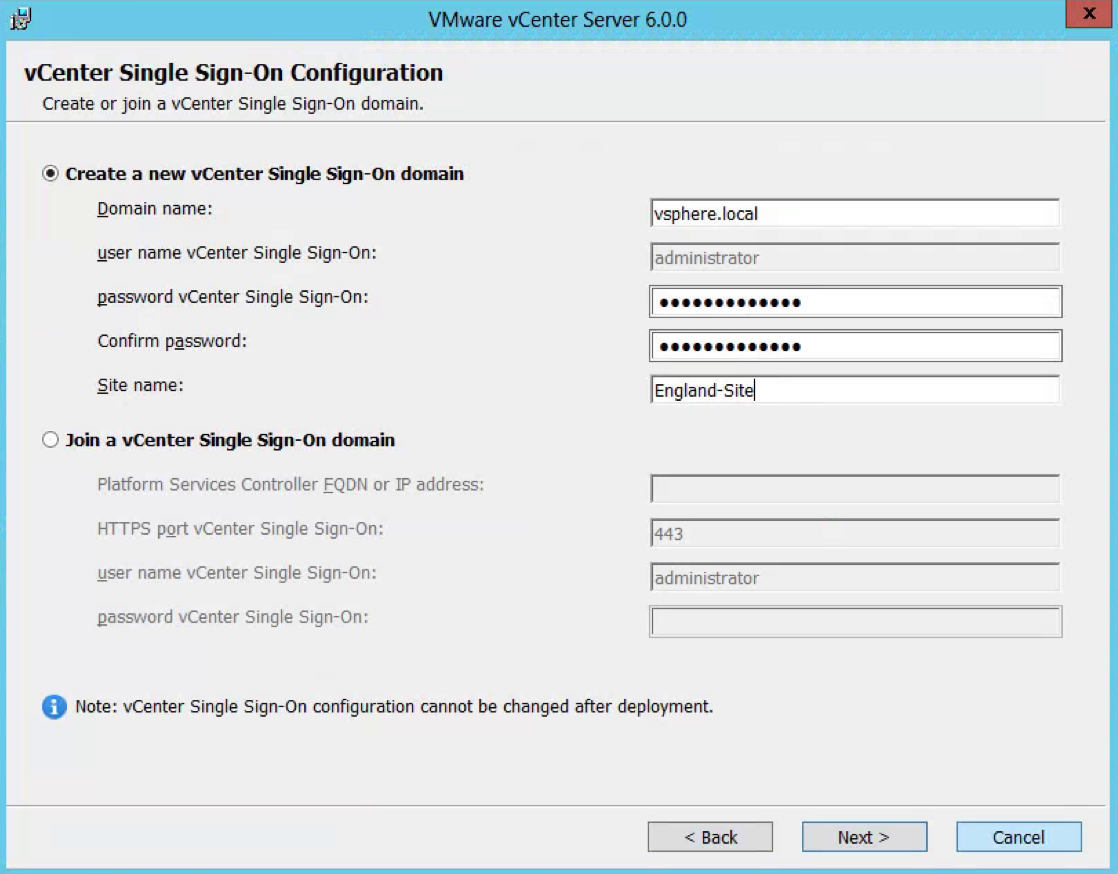
- As this is the first PSC, you will need to select Create a new vCenter Single Sign-On domain.
- Enter an SSO password
- Put in the Site Name. In this case I am just using the name England-Site
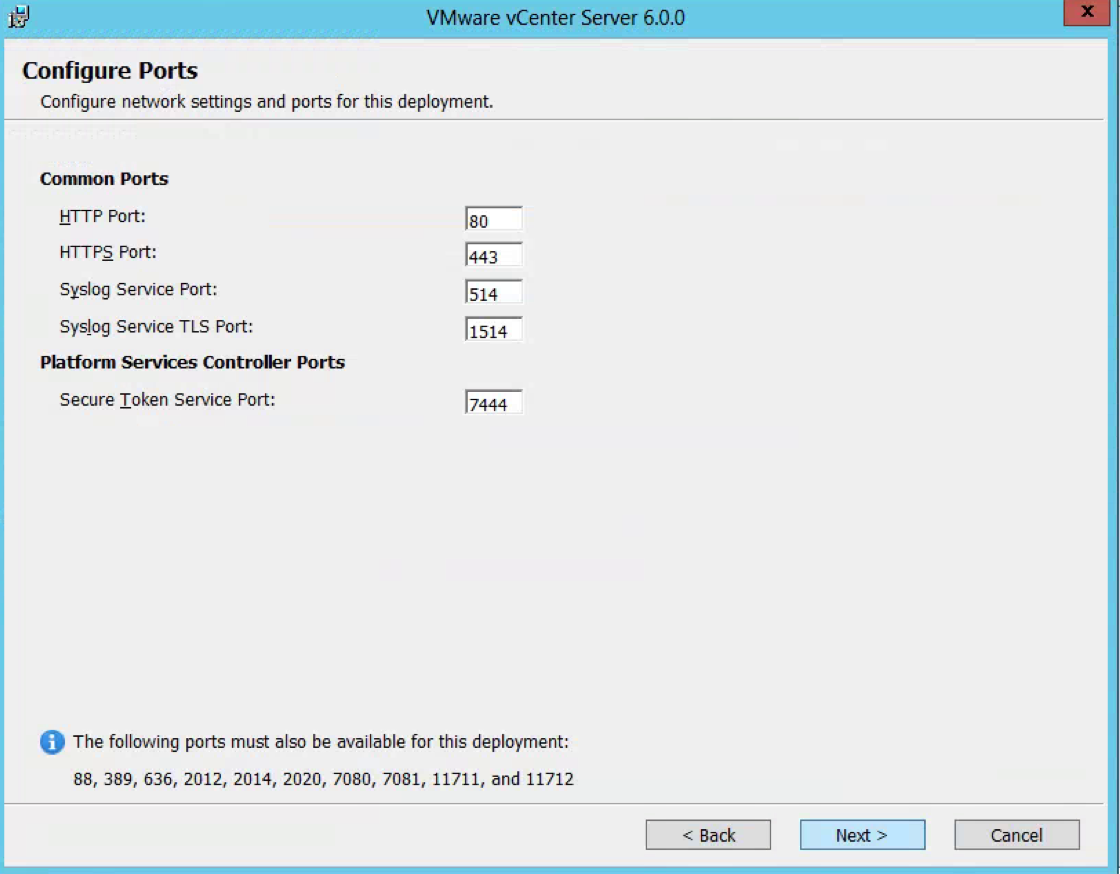
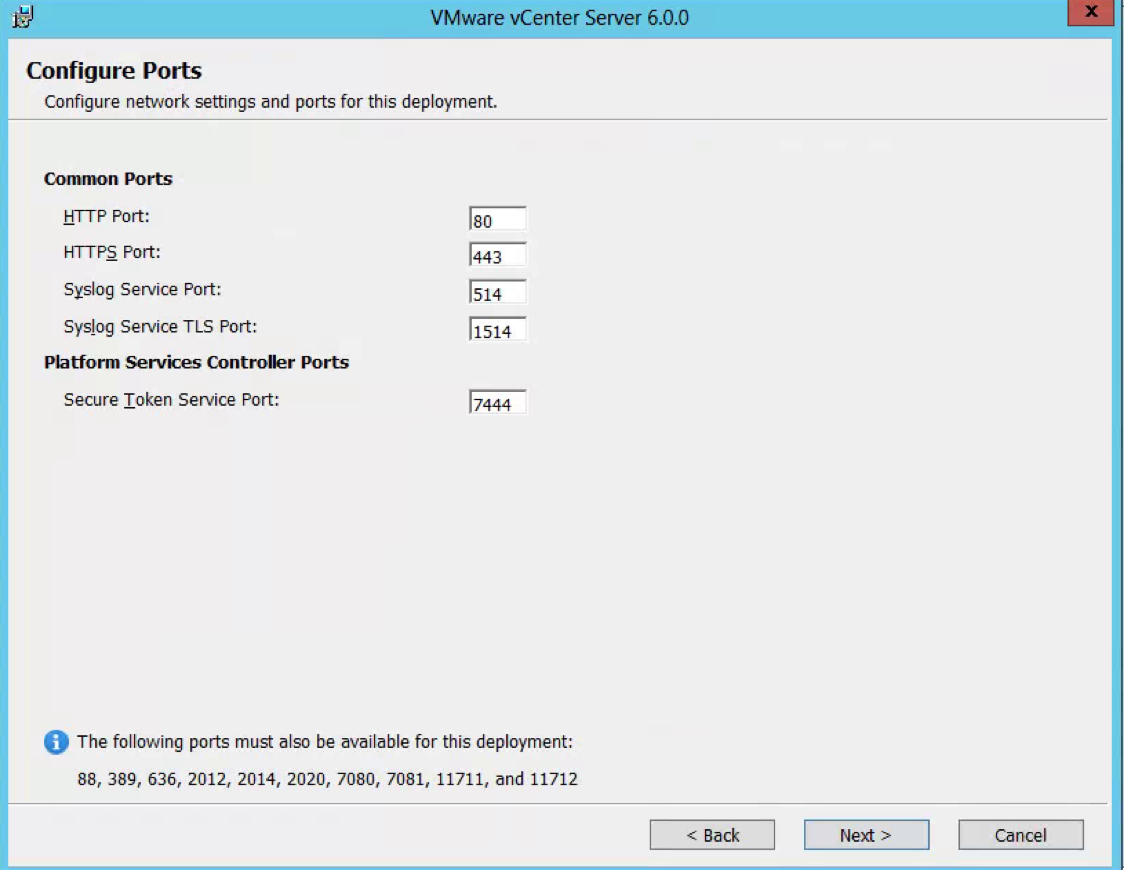
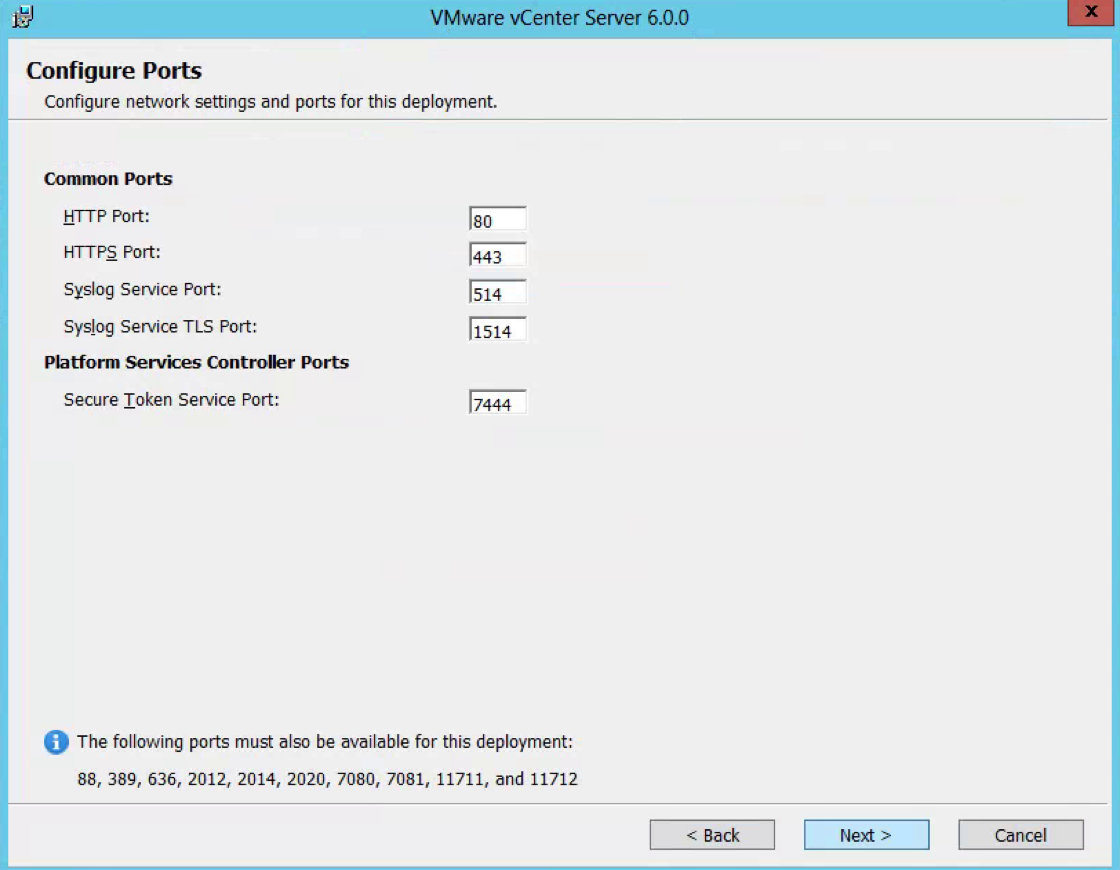
- Check the ports which need to be available
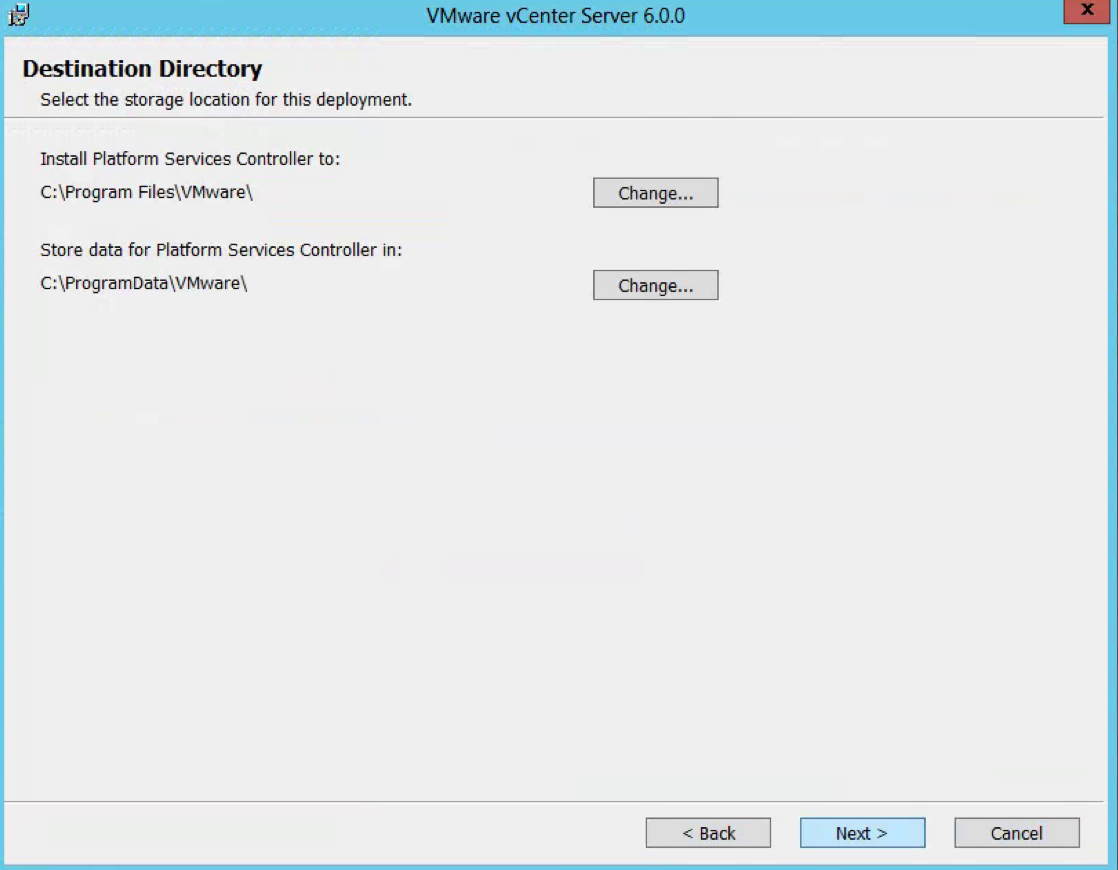
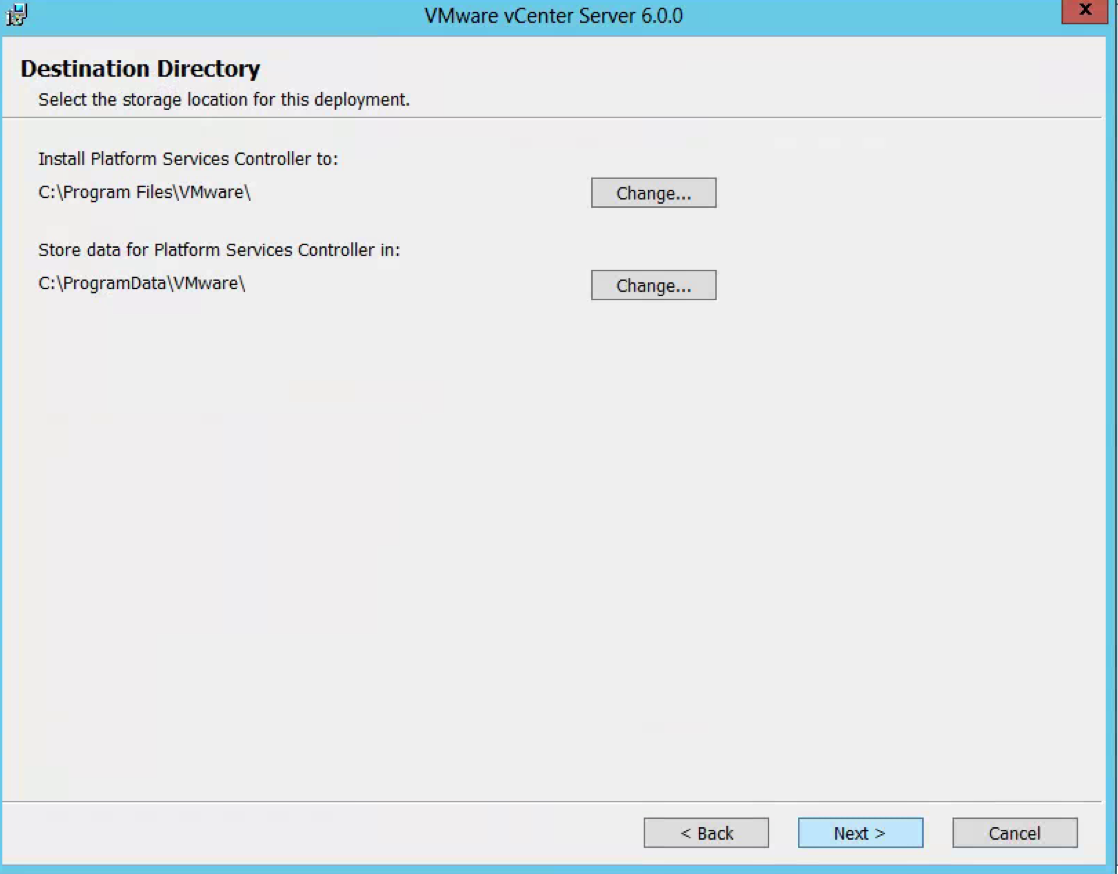
- Select the destination directory
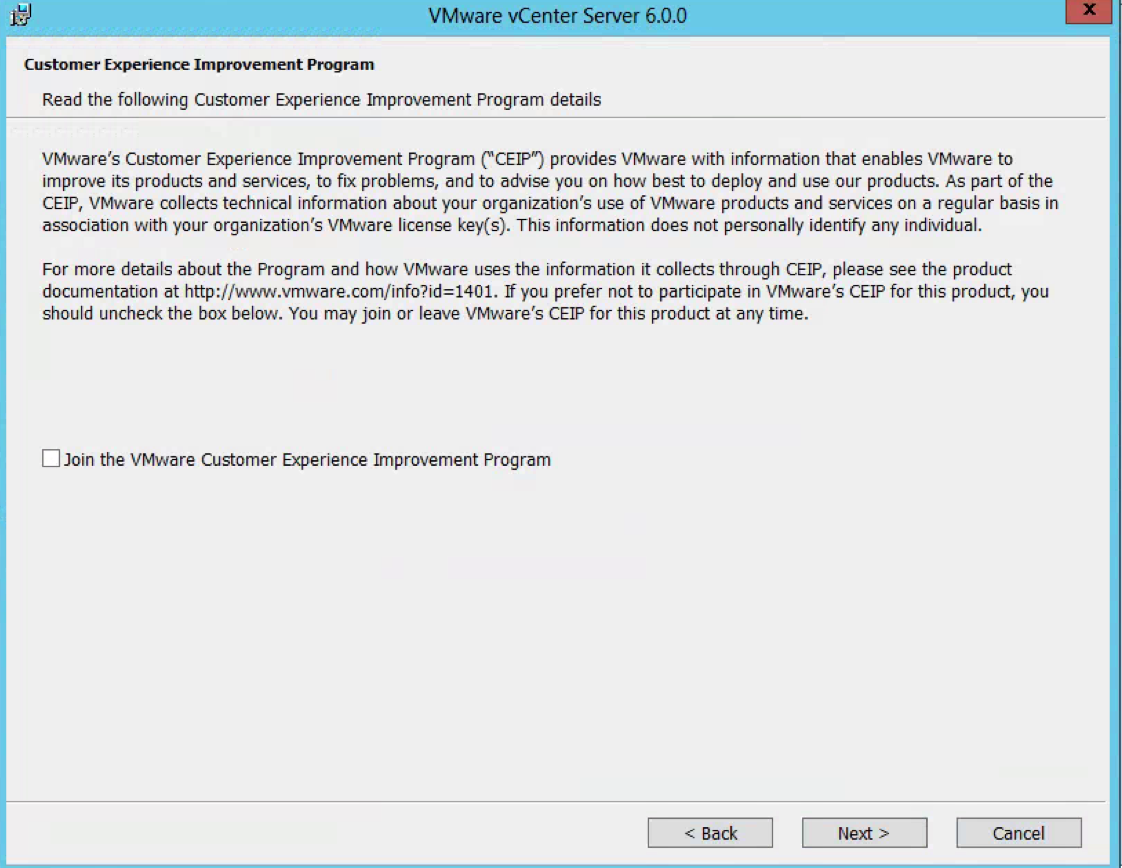
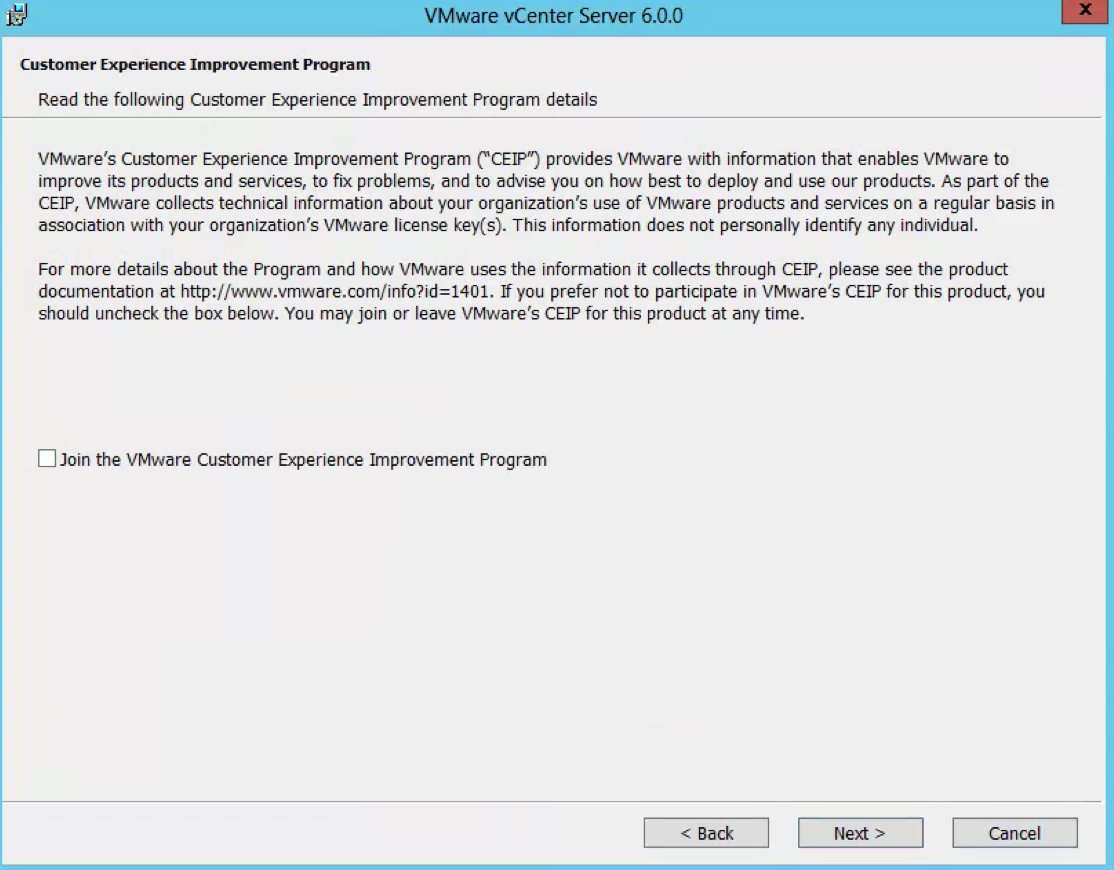
- Choose whether to join the VMware Customer experience program
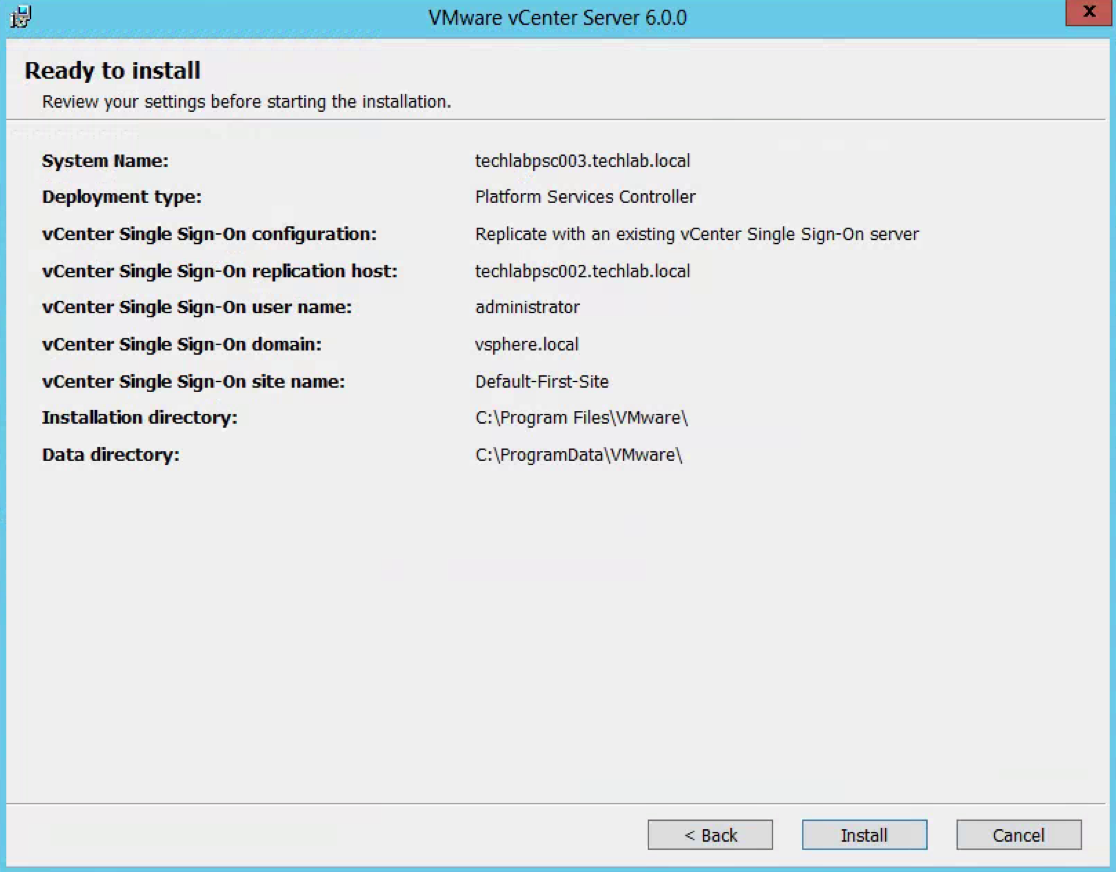
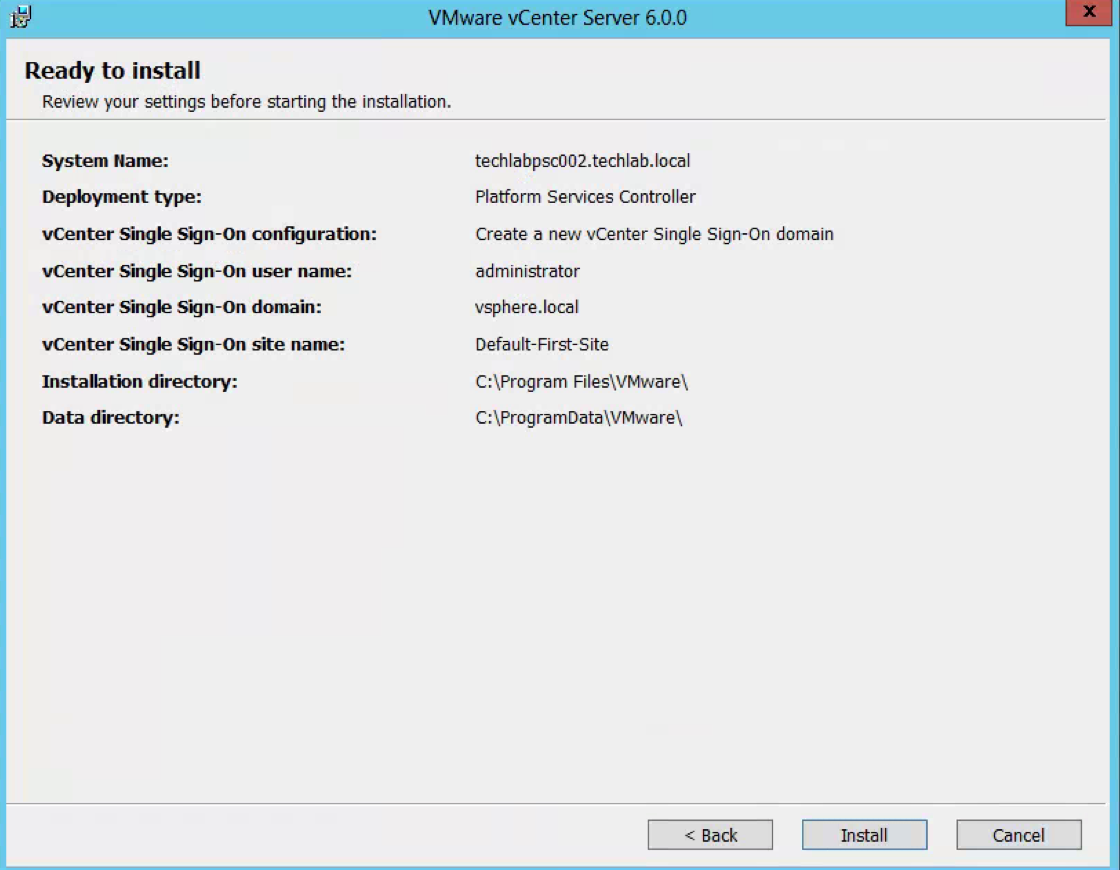
- Double check the details you have entered
- Once installed you should see the below screen

NEXT Install the second Platform Services Controller
- In the software directory, double click the autorun installer
- Accept the License Agreement
- Choose External Deployment > Platform Services Controller
- Put in a FQDN System Network Name for the Platform Services Controller
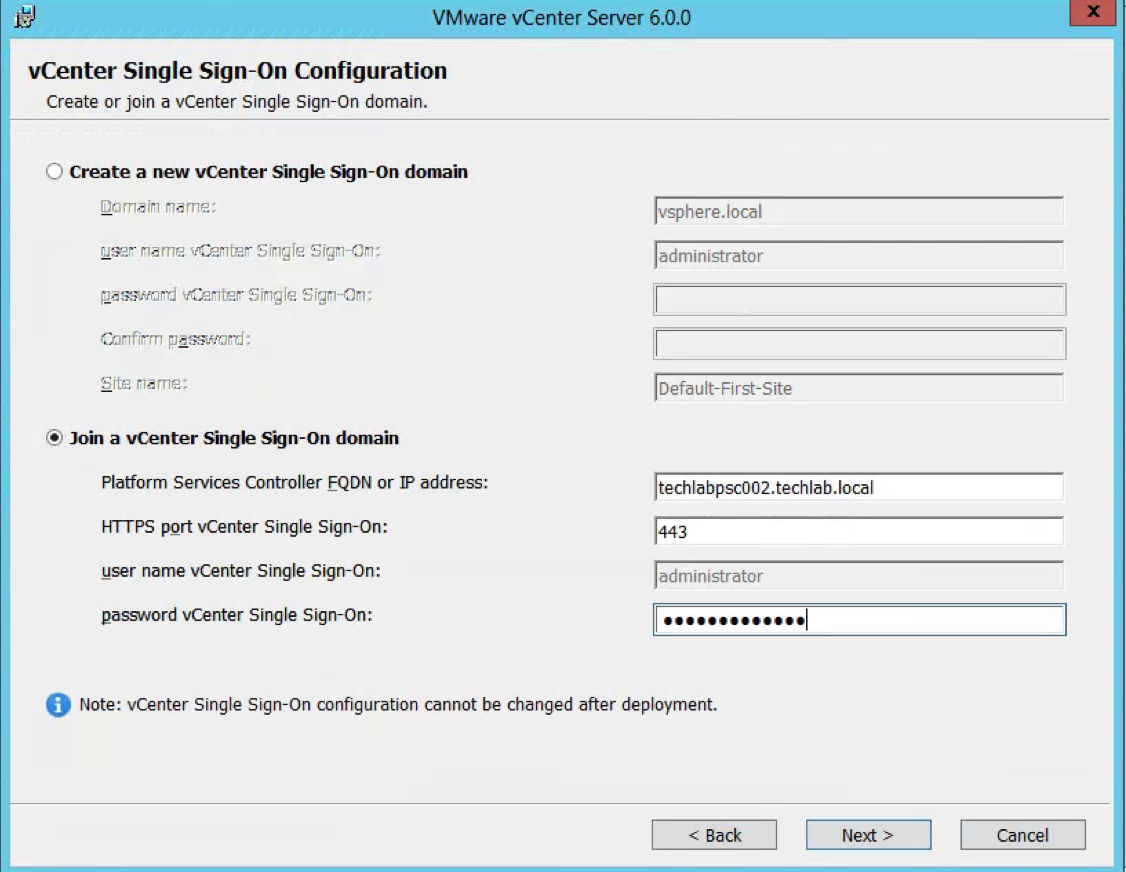
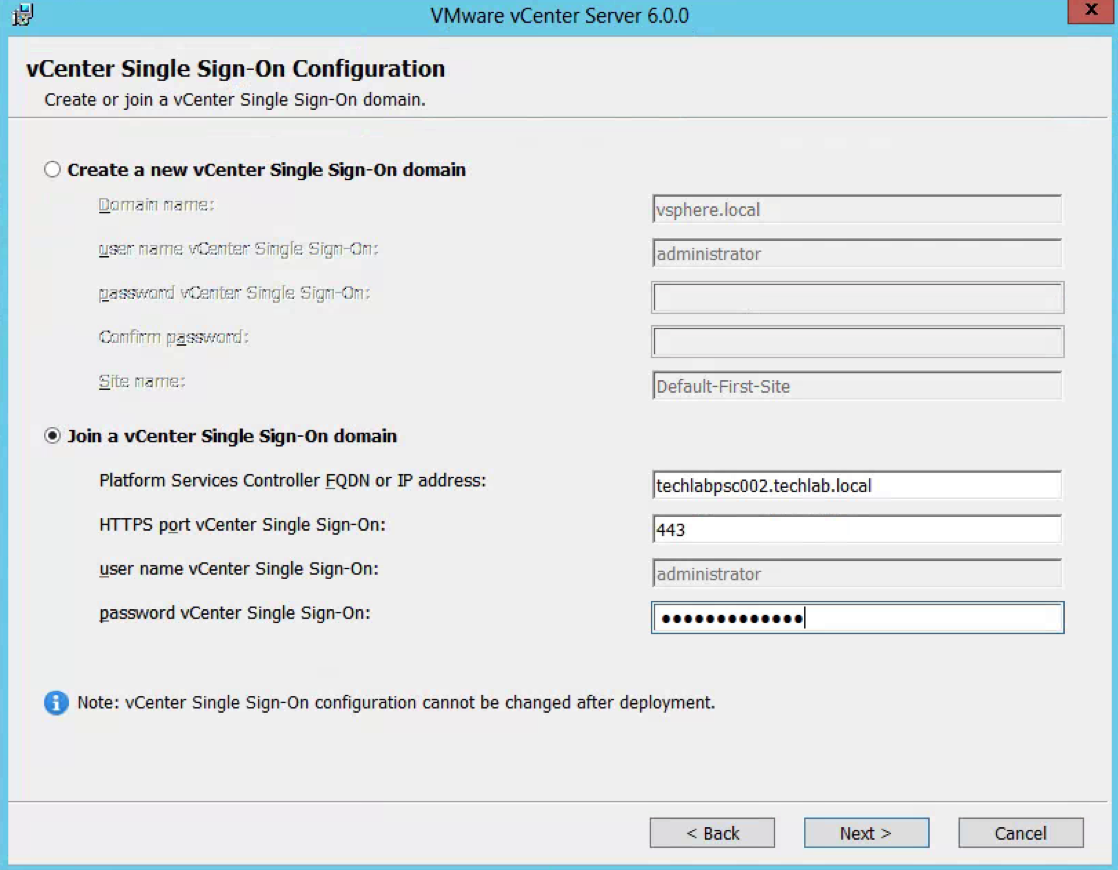
- Select Join a vCenter Single Sign-On domain
- Put in the first PSC FQDN
- Put in the SSO password
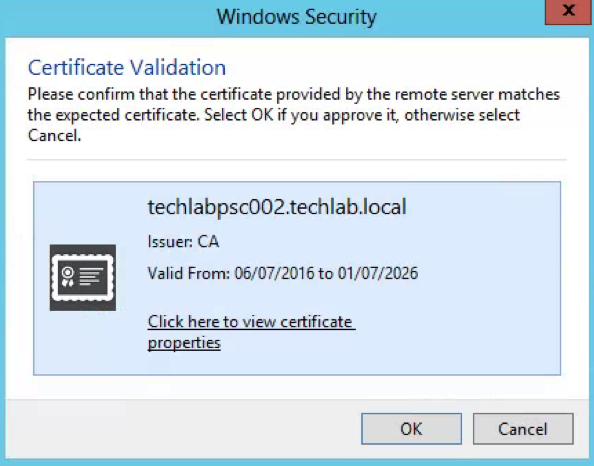
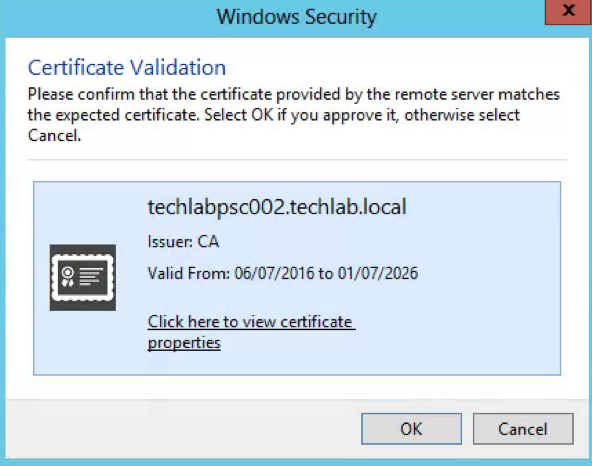
- Accept the Certificate
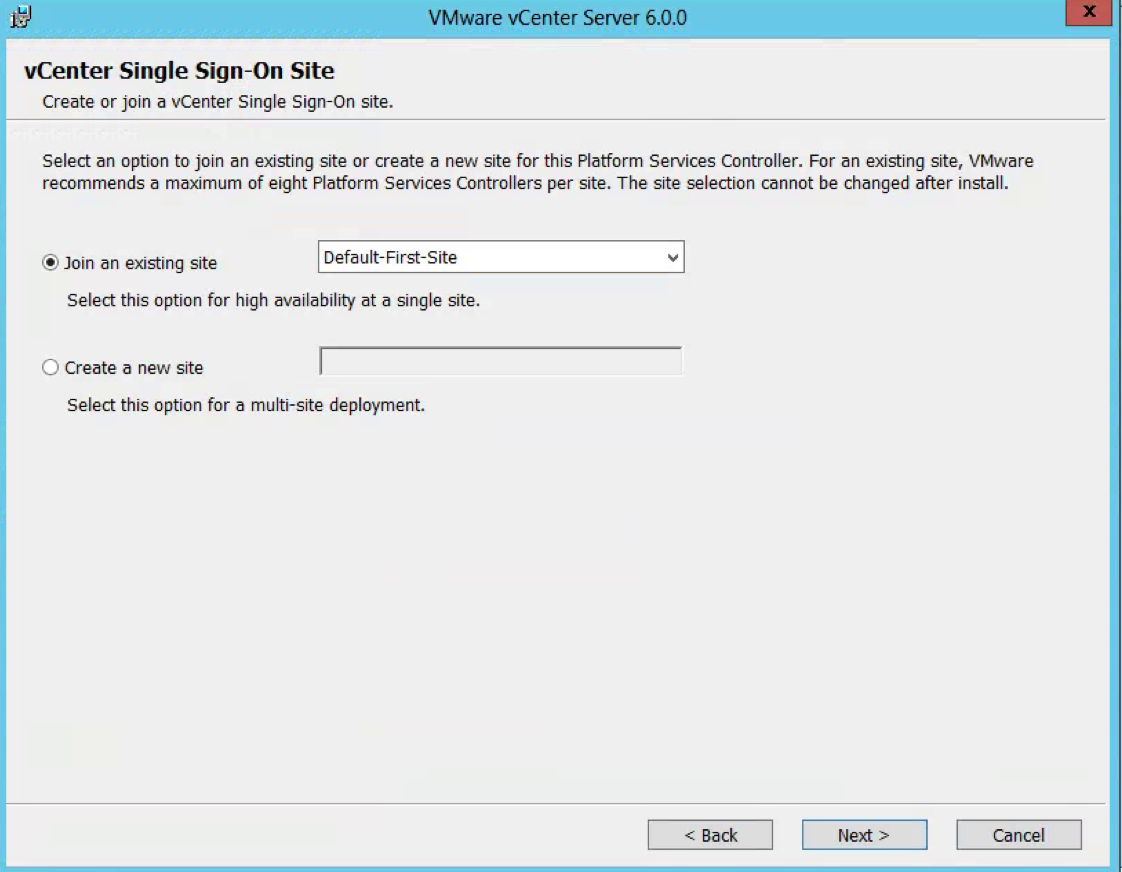
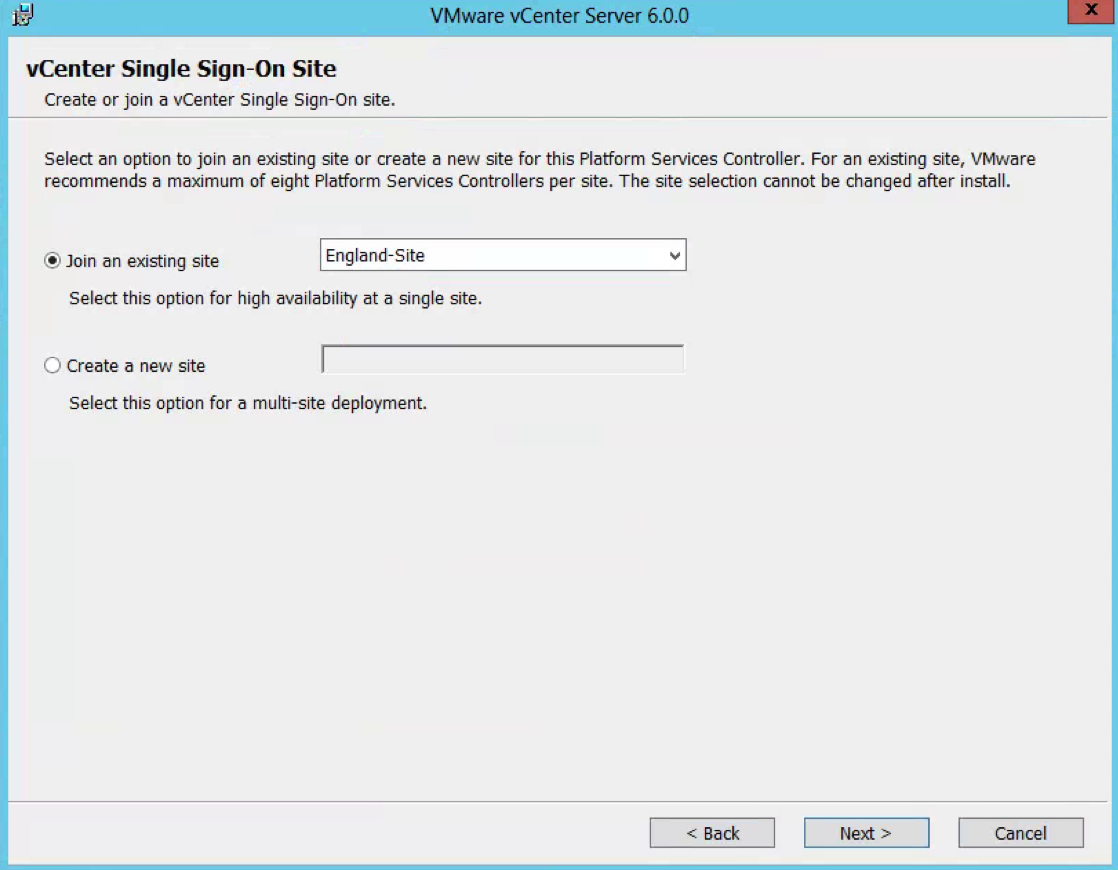
- Select to join an existing site which is my England site
- Check the Configure Ports screen
- Choose your Destination Directory

- Choose whether to join the Customer Experience Program
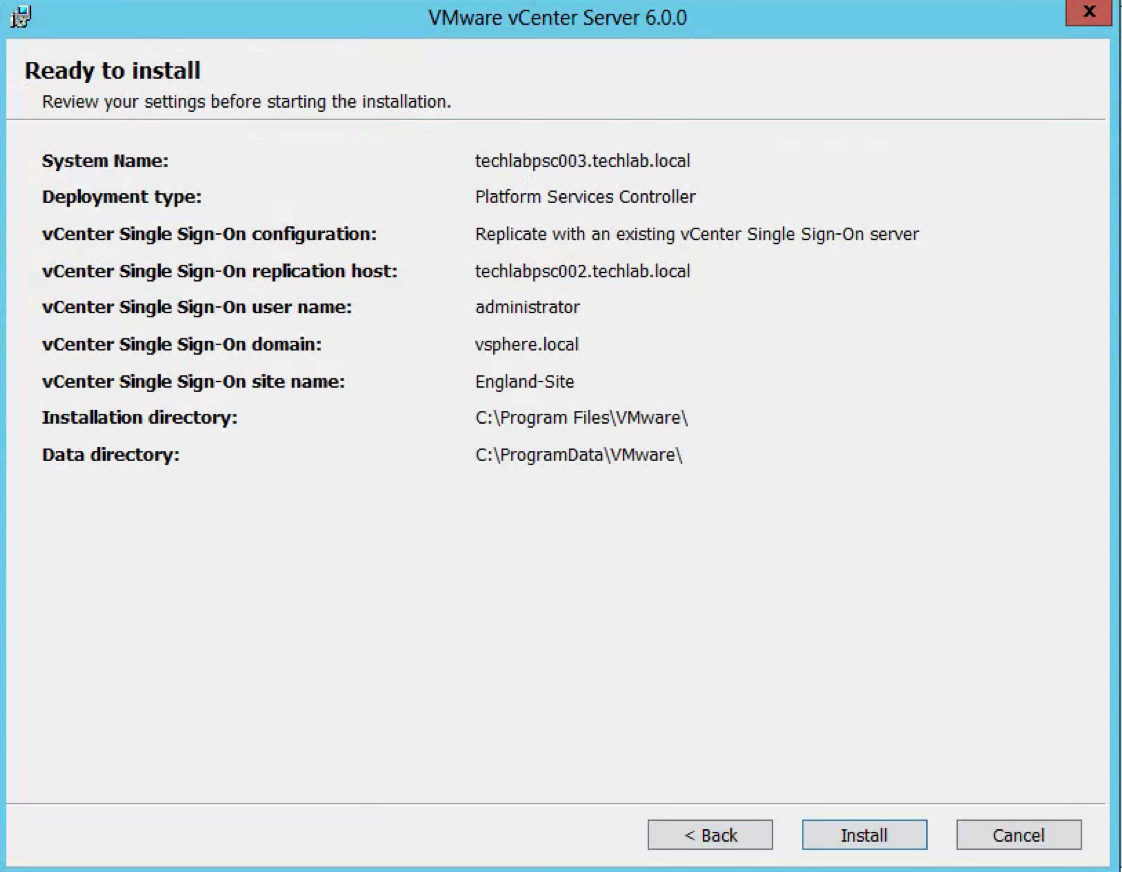
- Check the final details and Install
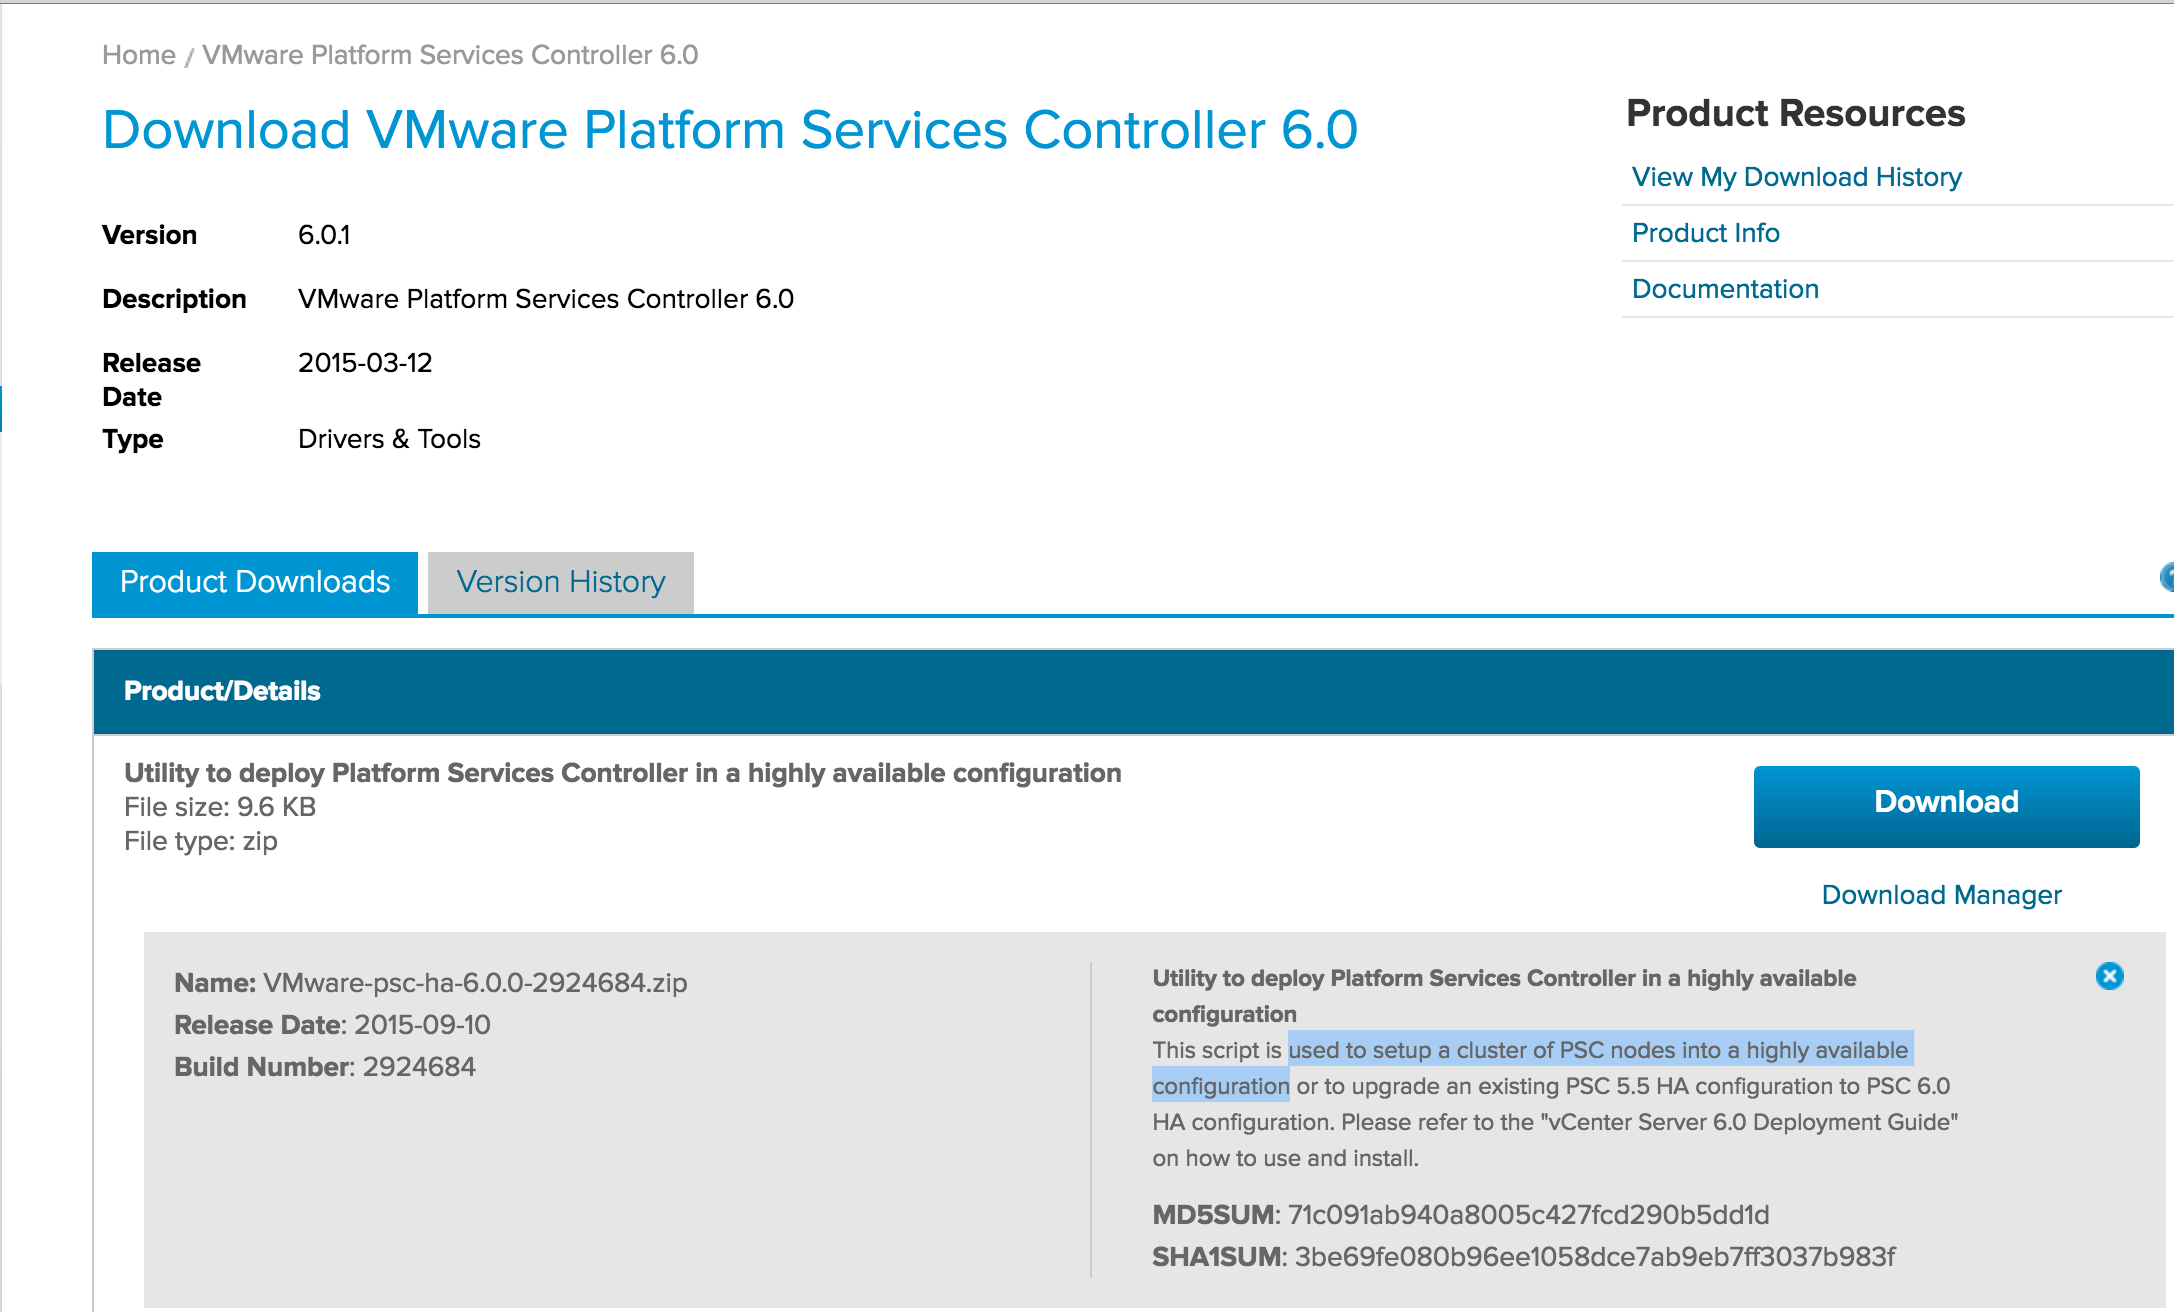
NEXT: Now we need to download the scripts used to setup a cluster of PSC nodes into a highly available configuration from here
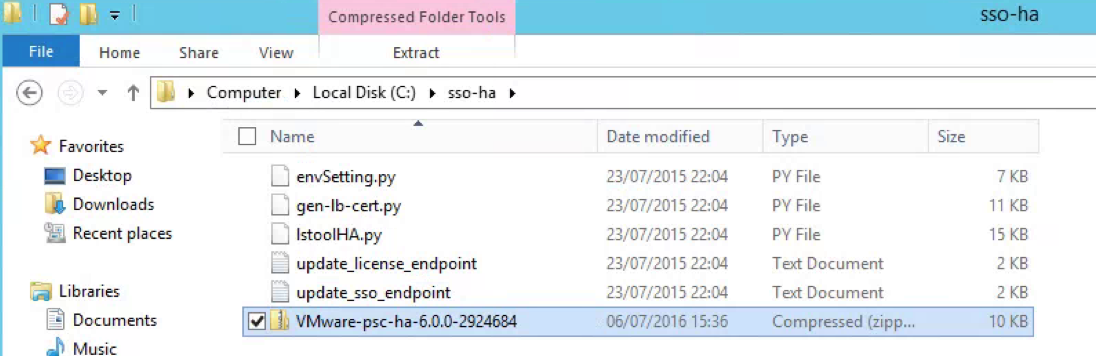
- Download and unzip the scripts into a folder called c:\sso-ha
- You should see the scripts here
- Go to the first Platform Services Controller
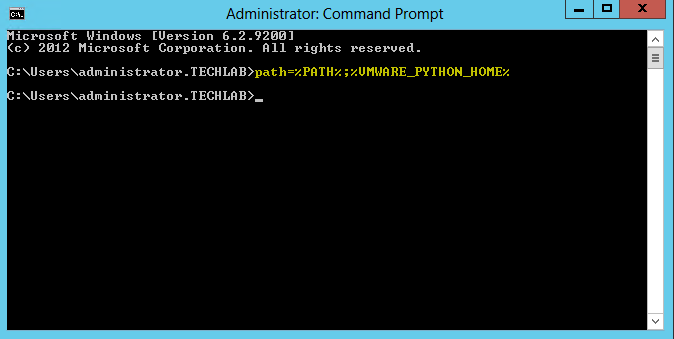
- Open a Command Prompt and add Python to the path
- Type path=%PATH%;%VMWARE_PYTHON_HOME%

- Type cd c:\sso-ha
- Type python gen-lb-cert.py –primary-node –lb-fqdn=loadbalancerFQDN Where loadbalancerFQDN is the FQDN of the load balancer’s virtual IP used for load balancing the Platform Service Controllers
- In my case I typed python gen-lb-cert.py –primary-node –lb-fqdn=psclb.techlab.local
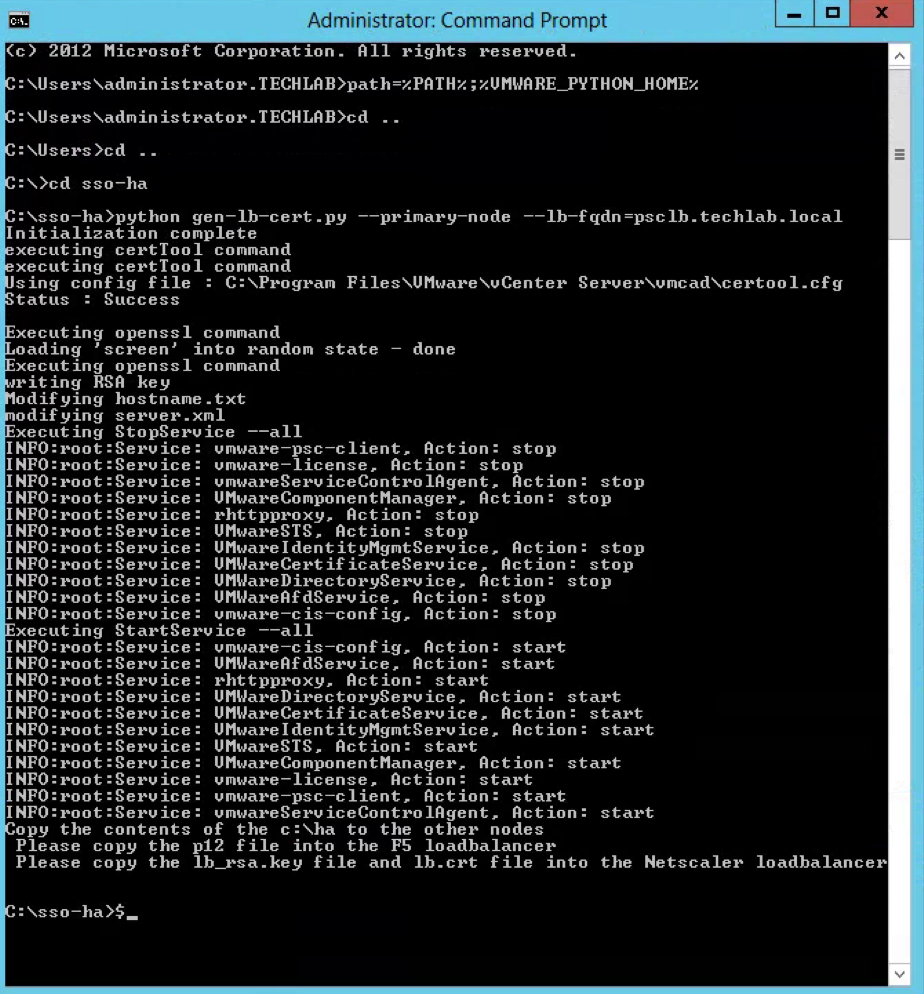
- This also generates a ha folder on the C Drive
- Next Setup your load balancer to balance between the two Platform Service Controllers on ports 443, 2012, 2014, 2020, 389, and 636. See the vCenter Server 6.0 Deployment Guide – Page 88 for specific instructions on configuring the load balancer or read my notes below
My F5 v12 Load Balancer Notes below
- Download the lb.p12 file from the c:\ha folder from the first Platform Services Controller.

- Log in to the F5 BIG-IP configuration Web page.
- Click System.
- Open File Management, SSL Certificate List.
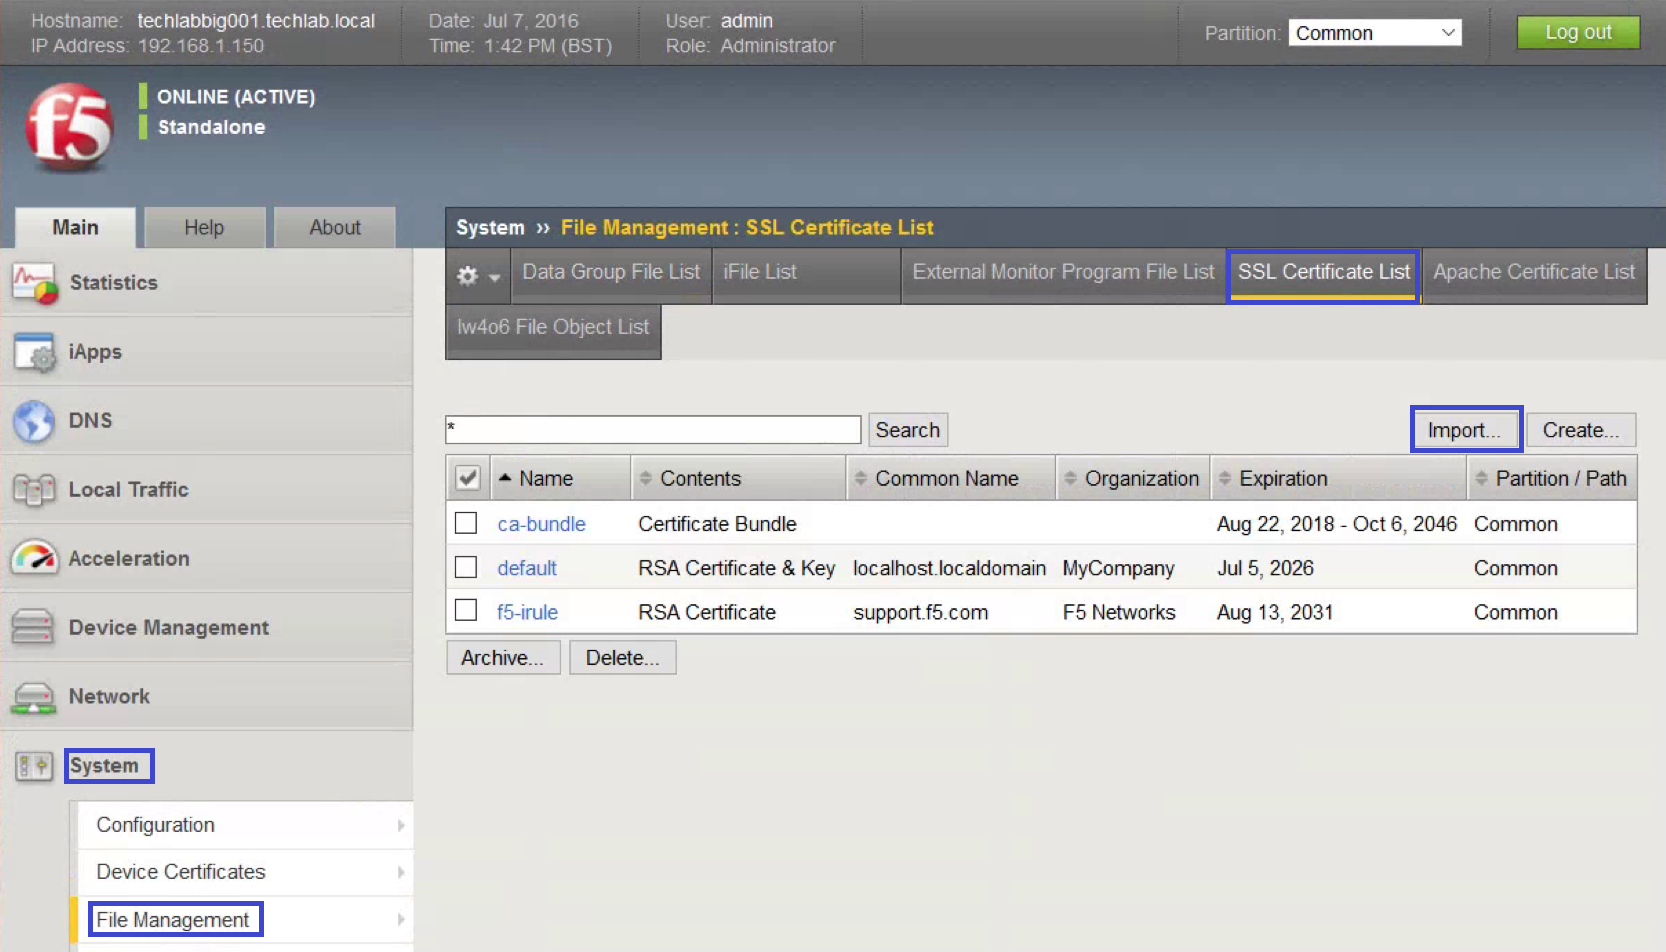
- Click Import.
- For Import Type, select PKCS
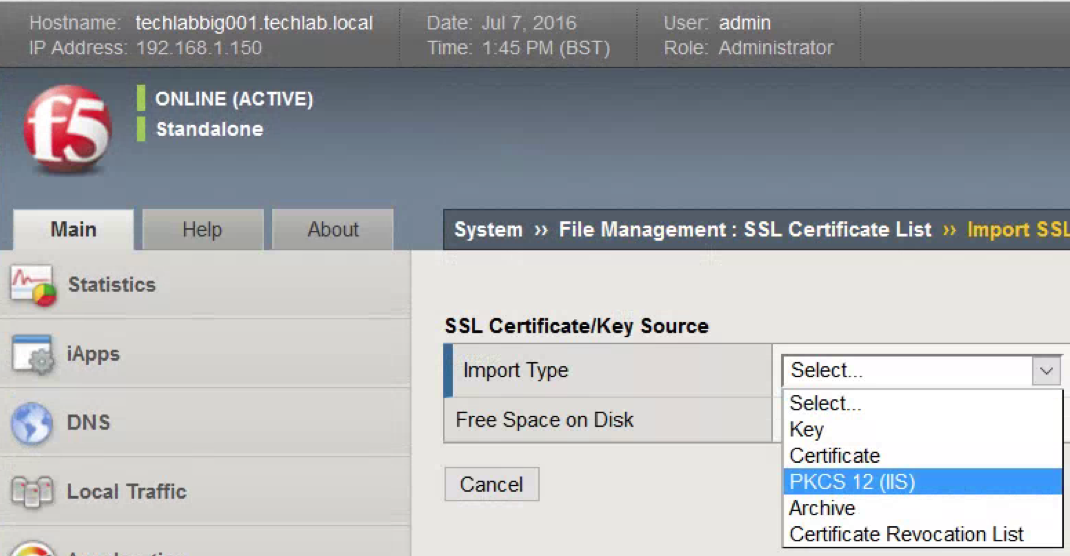
- Provide a descriptive Certificate Name. Browse for the Certificate downloaded earlier. Click Import.
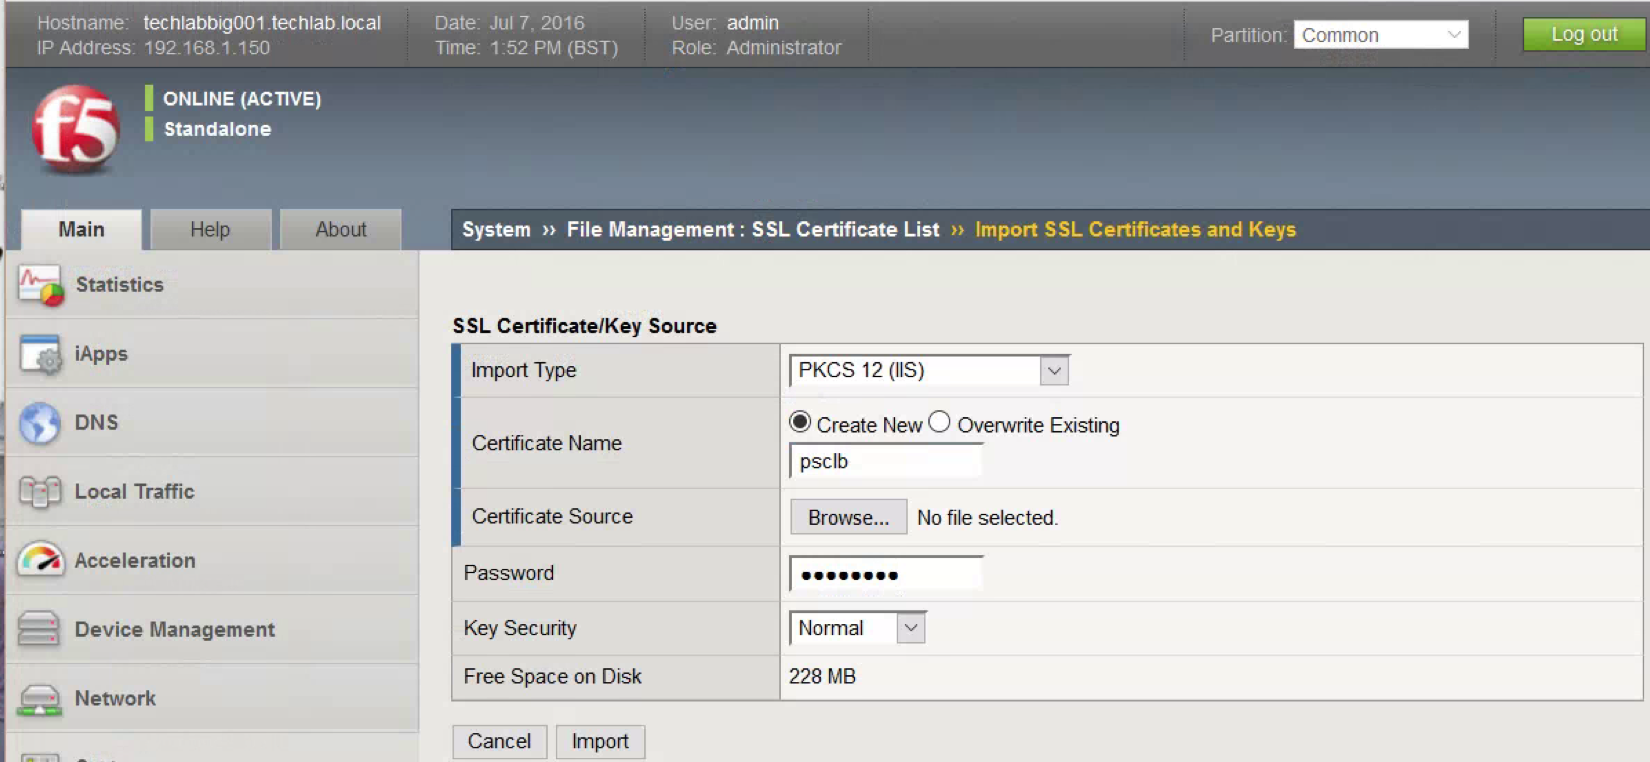
- You should now see the certificate as per below screenprint (psclb)

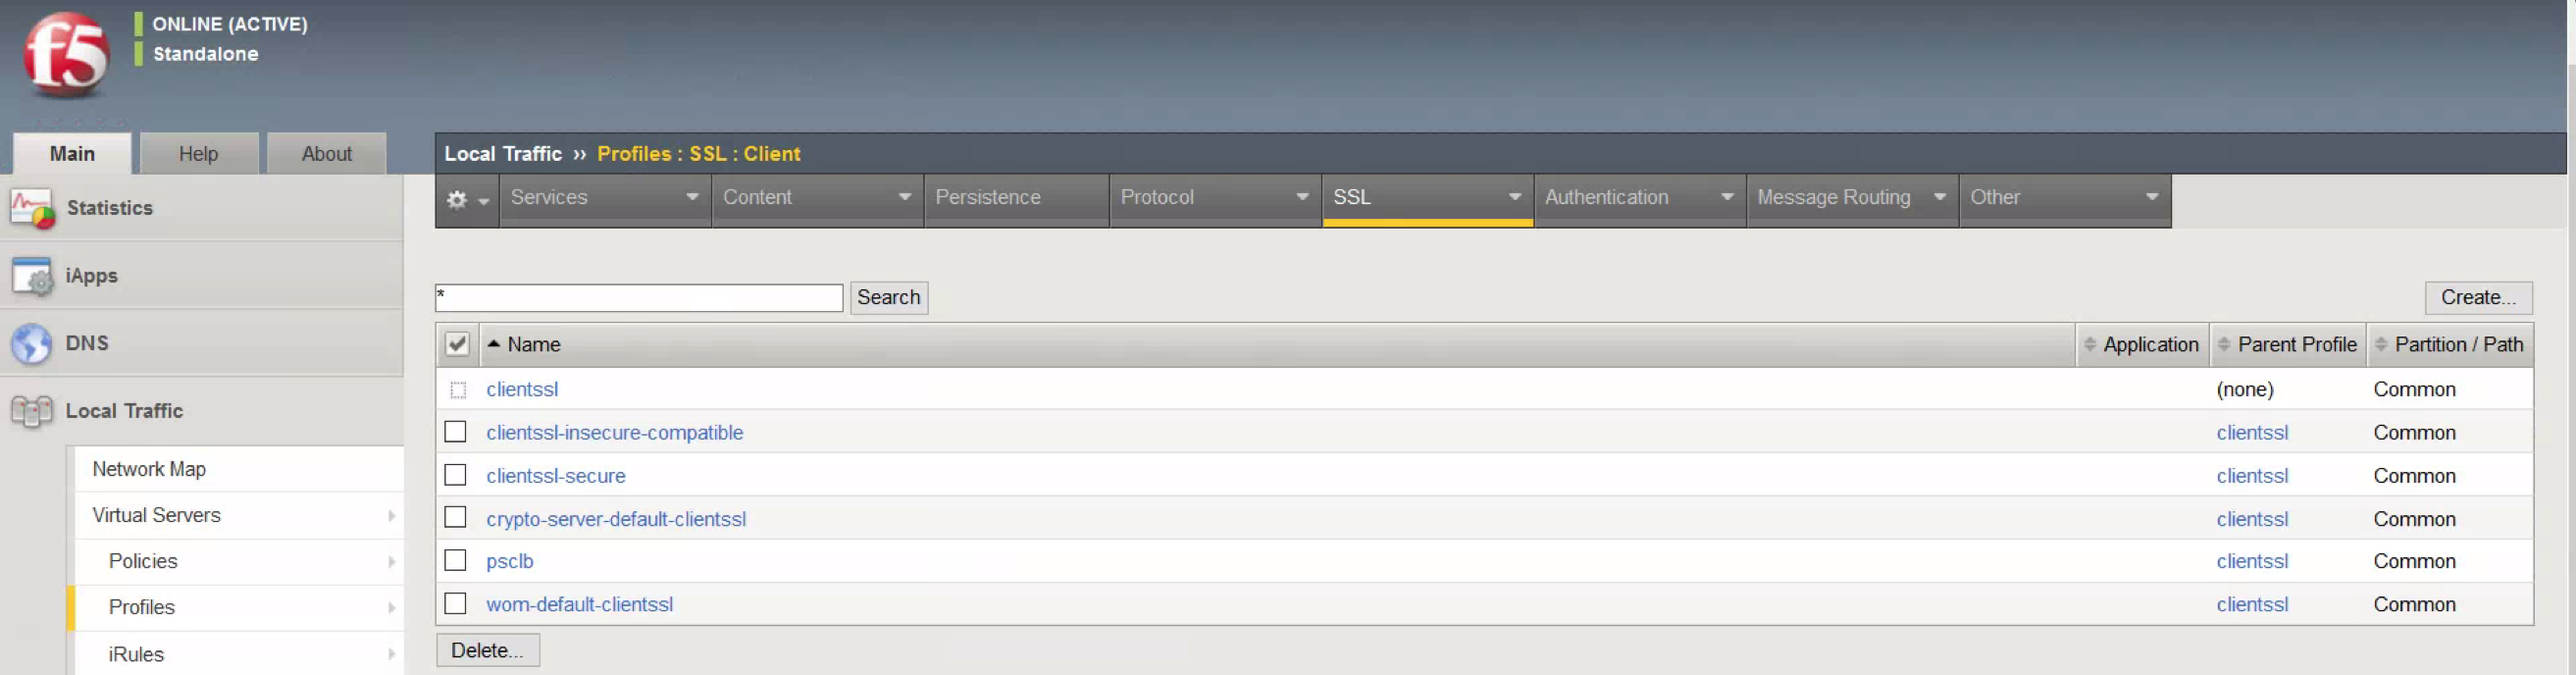
- Click Local Traffic.
- Open Profiles, SSL, Client.
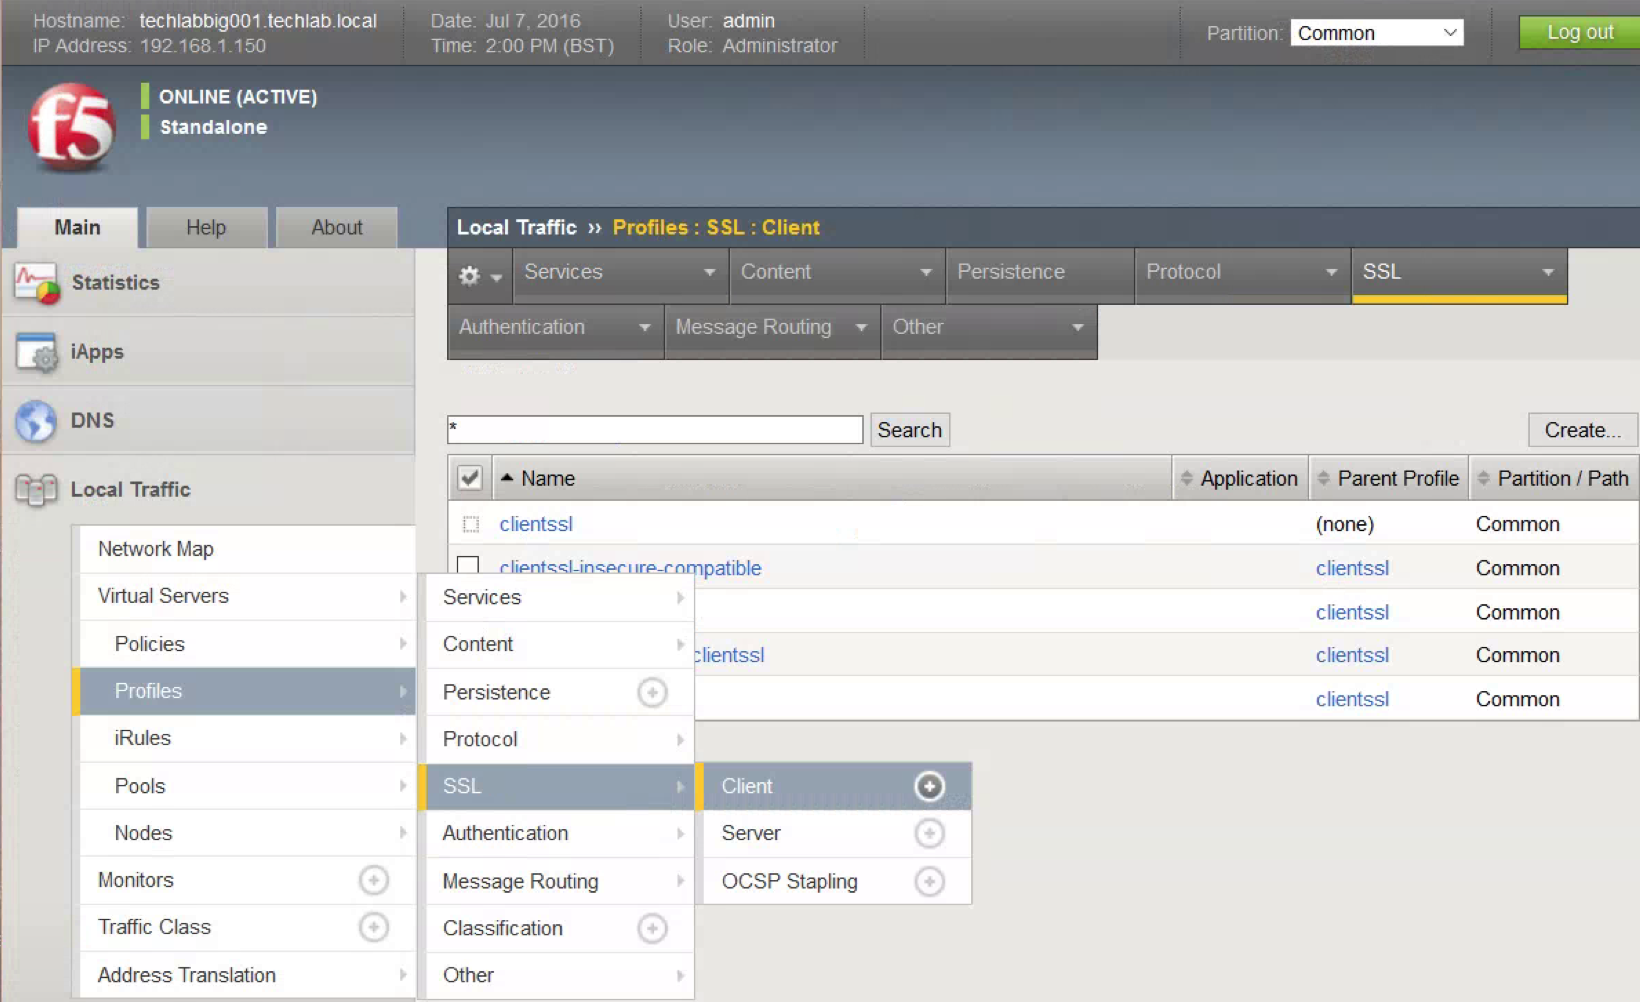
- Click Create.
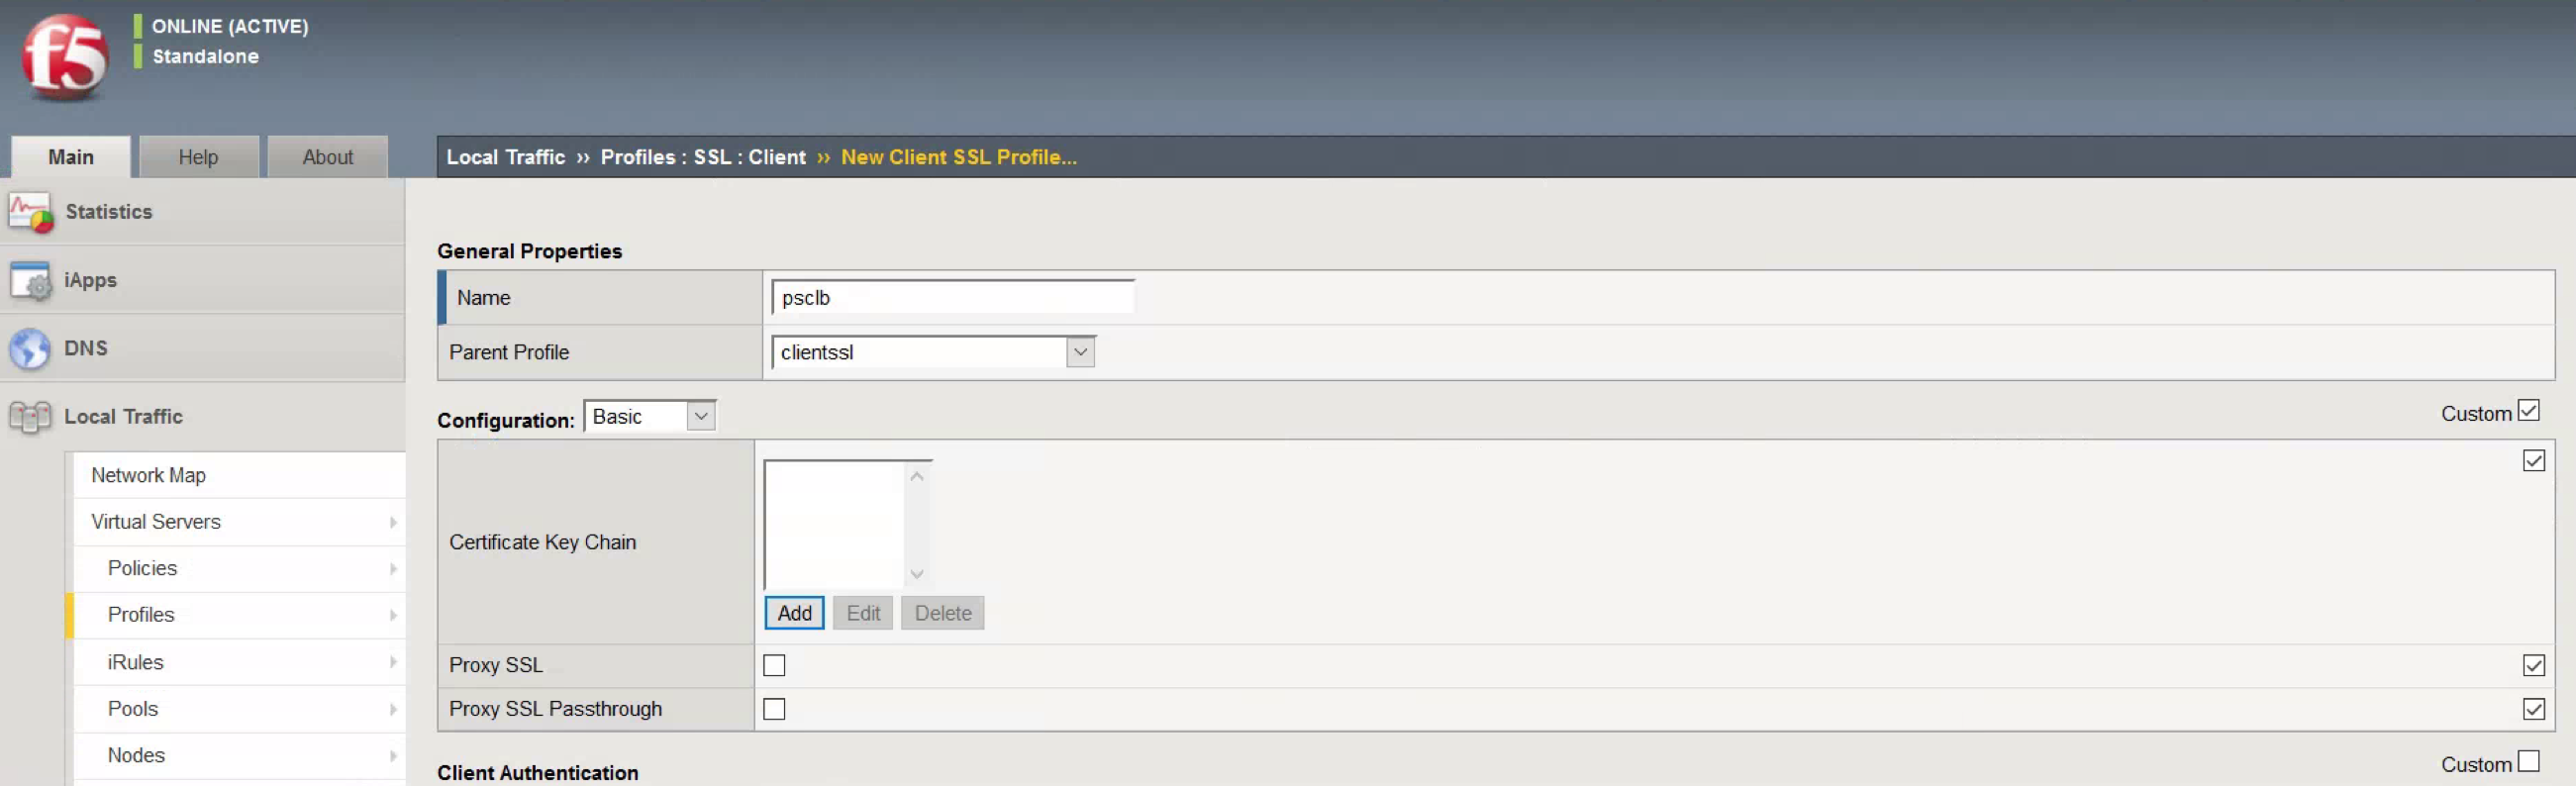
- Provide a descriptive Name. In my case psclb
- Click Custom under Configuration
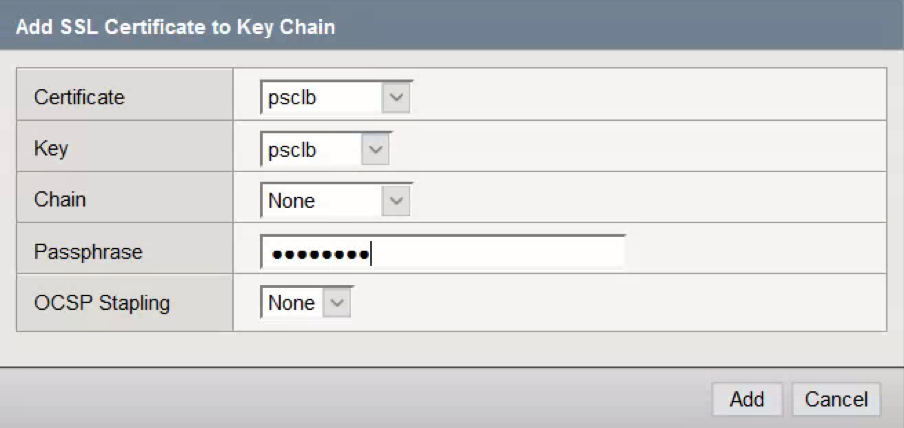
- Click Add under Certificate Key Chain
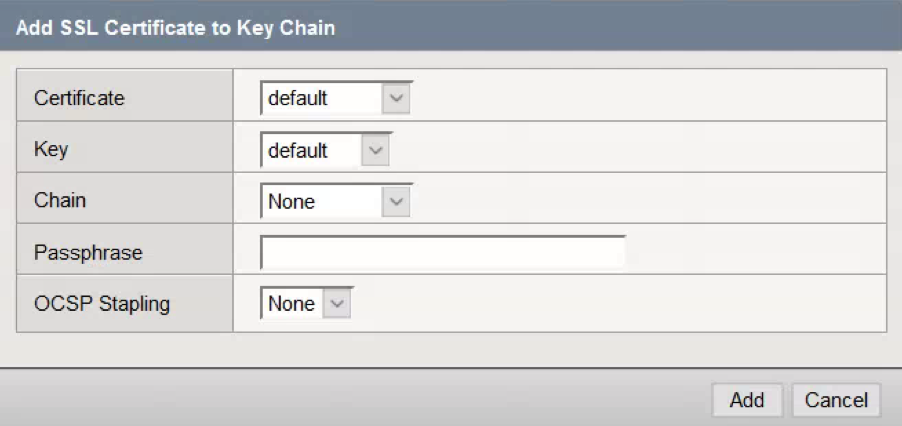
- Choose the Certificate and Key installed earlier.
- Enter the Passphrase for the certificate. In this case it was changeme
- Click Add.
- Scroll to the bottom and click Finished. You will be taken back to the screen below
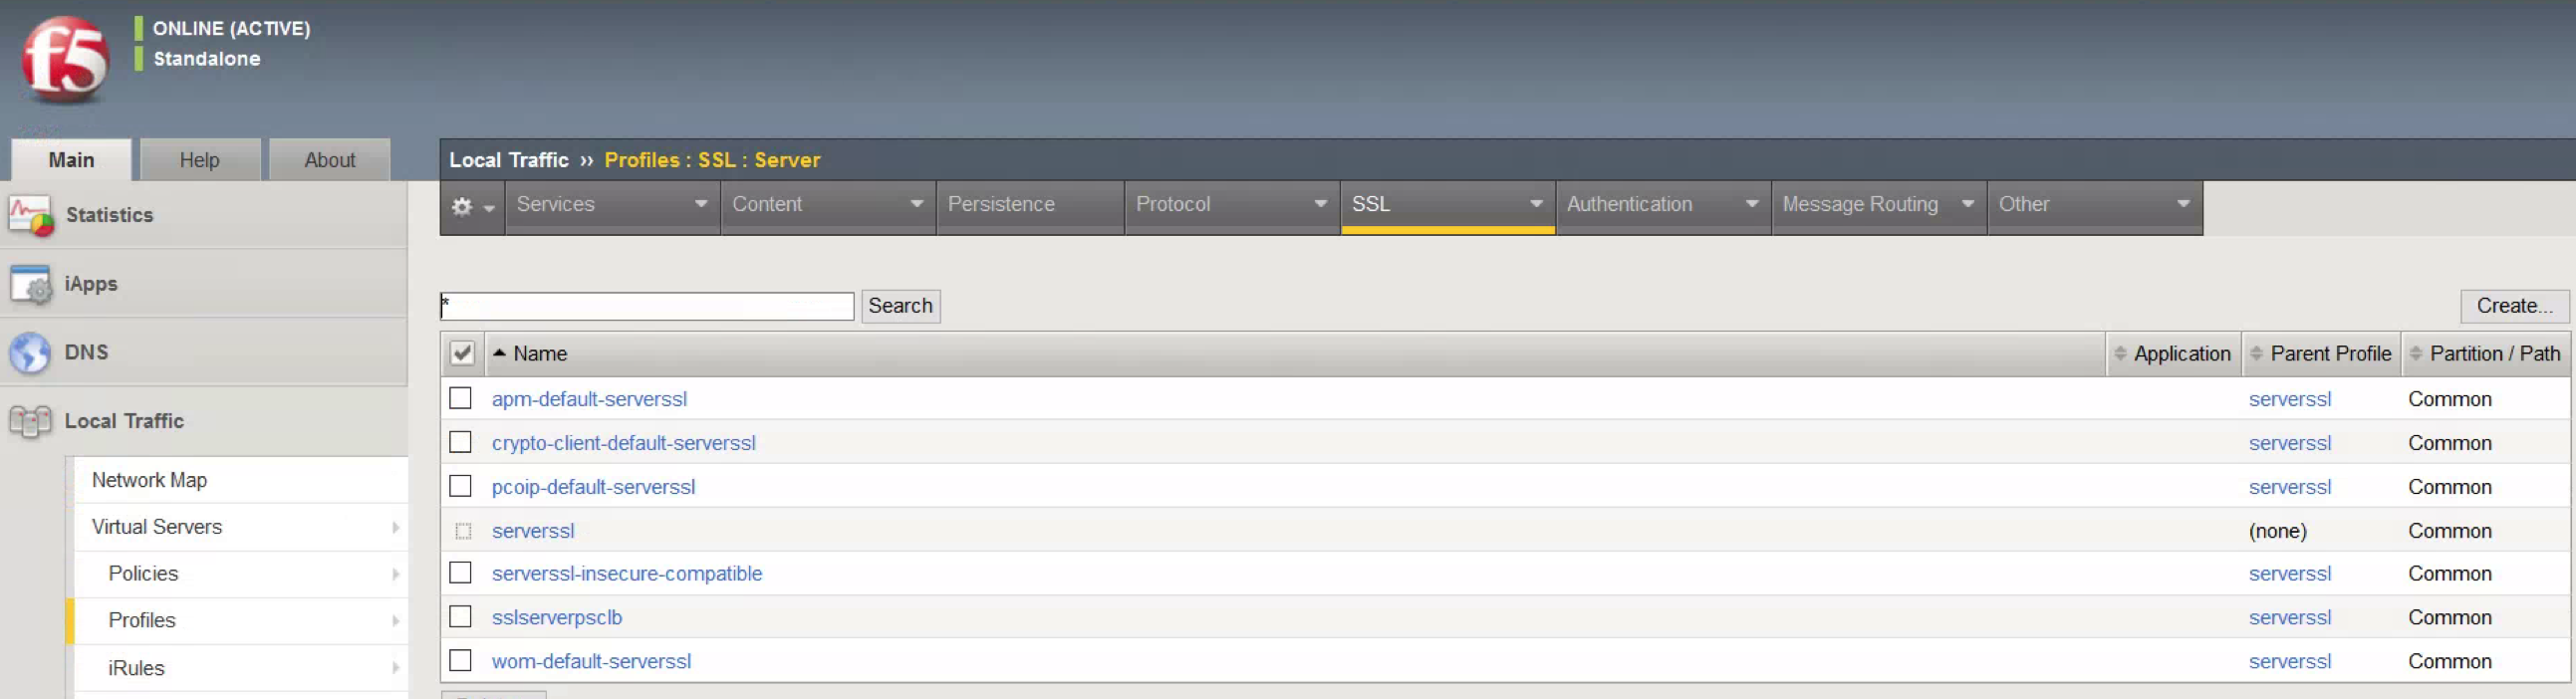
- Open Profiles, SSL, Server.
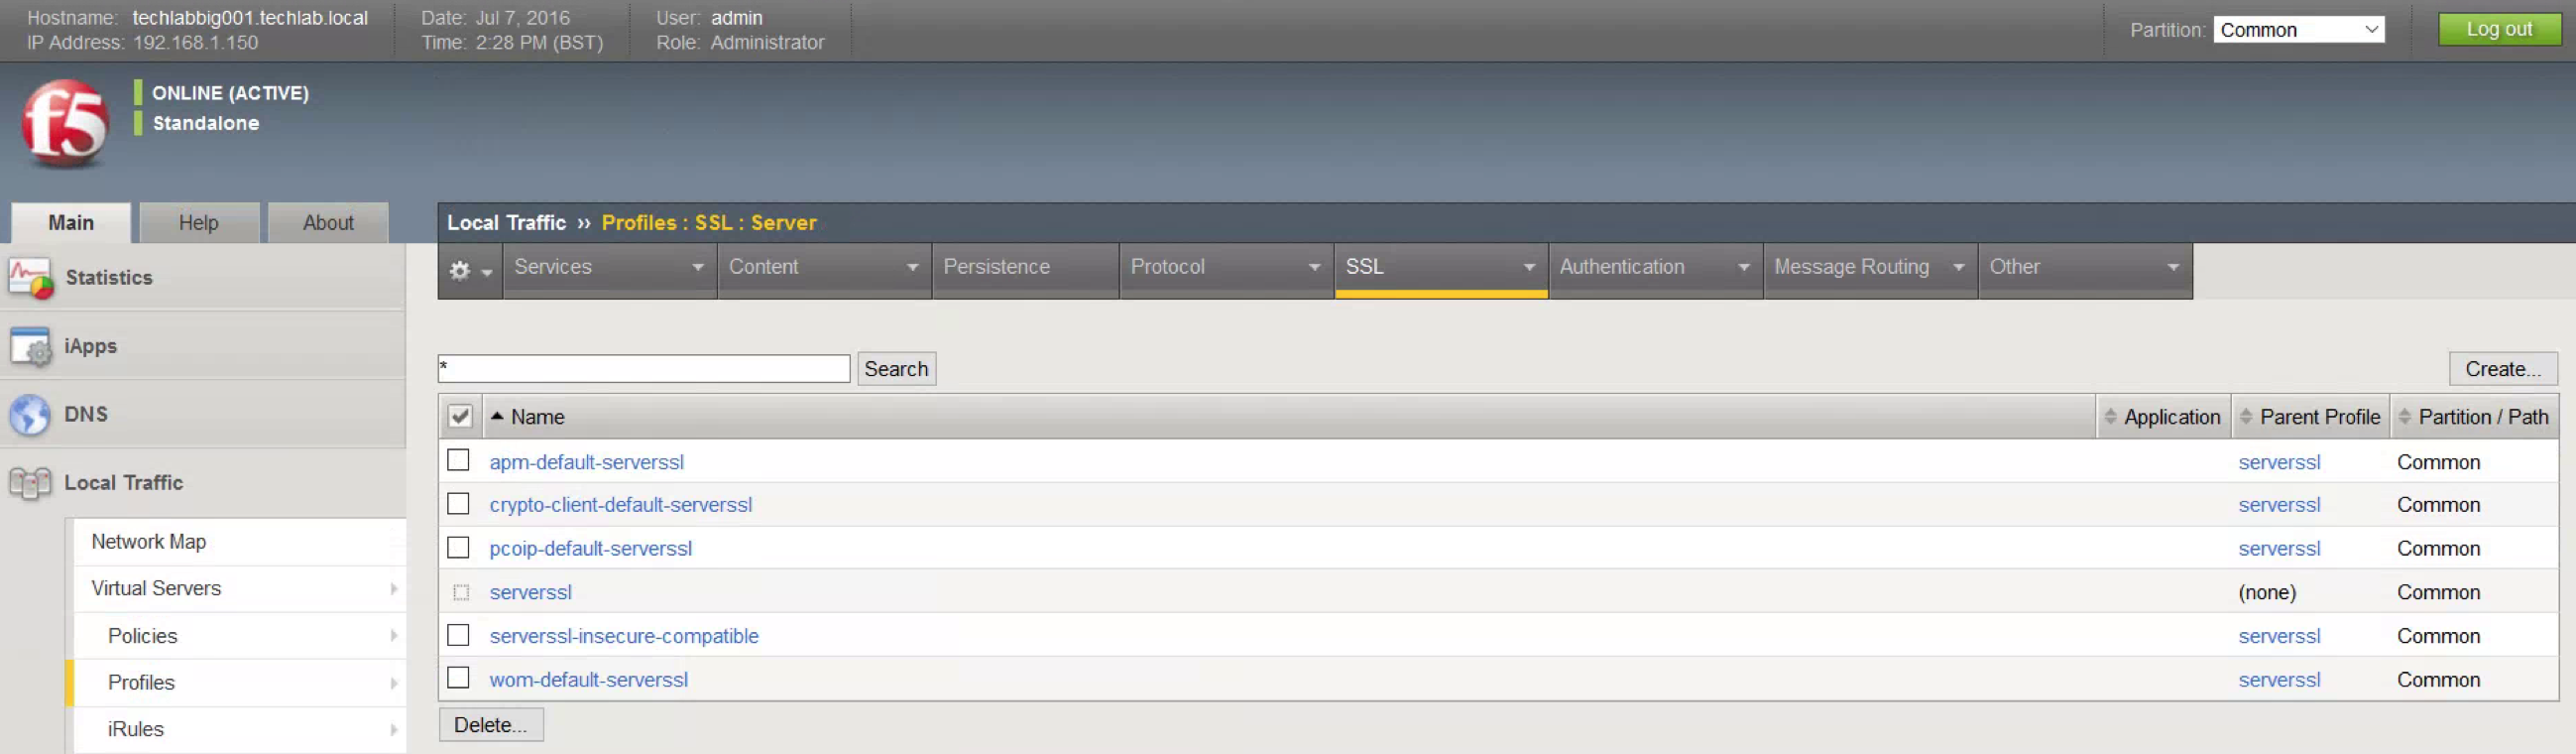
- Click Create.
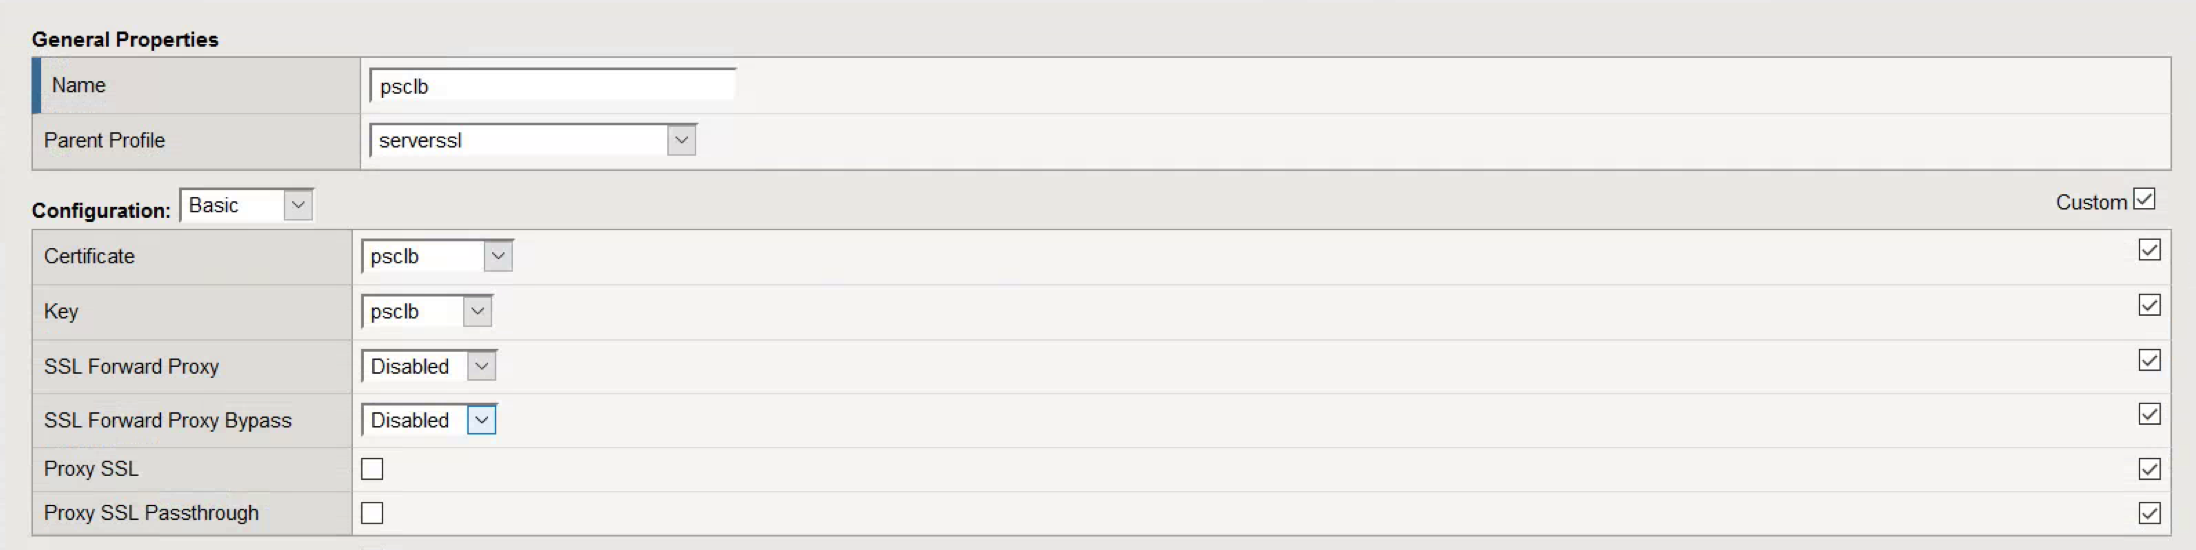
- Provide a descriptive Name.
- Click Custom.

- Choose the Certificate and Key installed earlier.
- Scroll to the bottom and click Finished
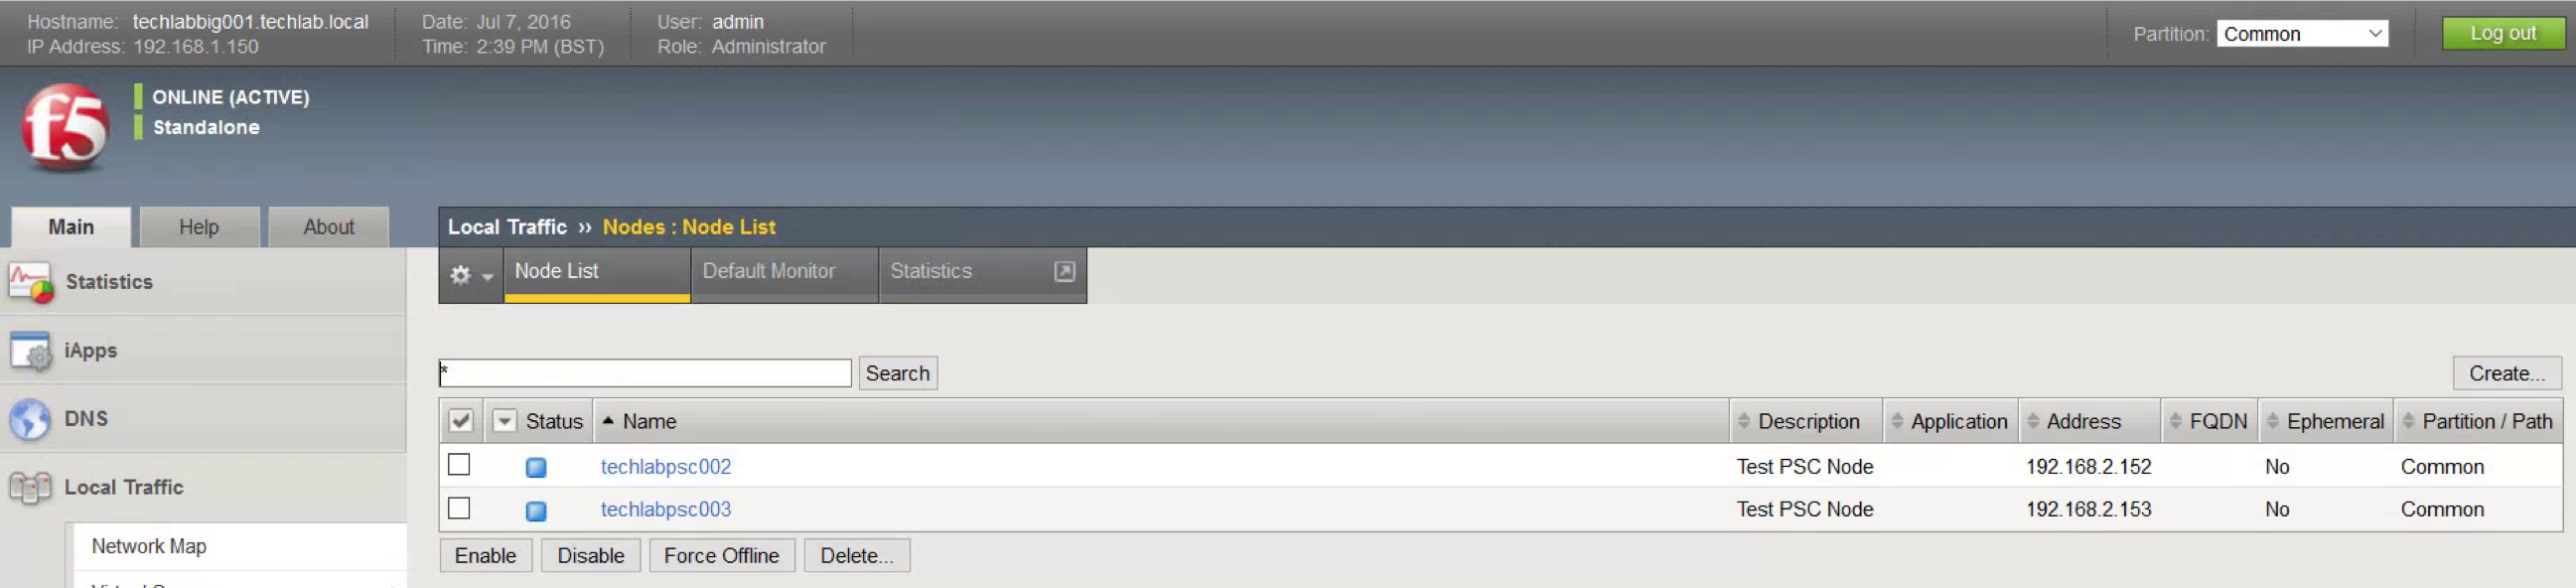
- Open Nodes, Node List.
- Click Create.

- Add all Platform Services Controllers as a node. (I added my 2 PSC Nodes techlabpsc002 and techlabpsc003)
- Use Repeat to speed up the process.
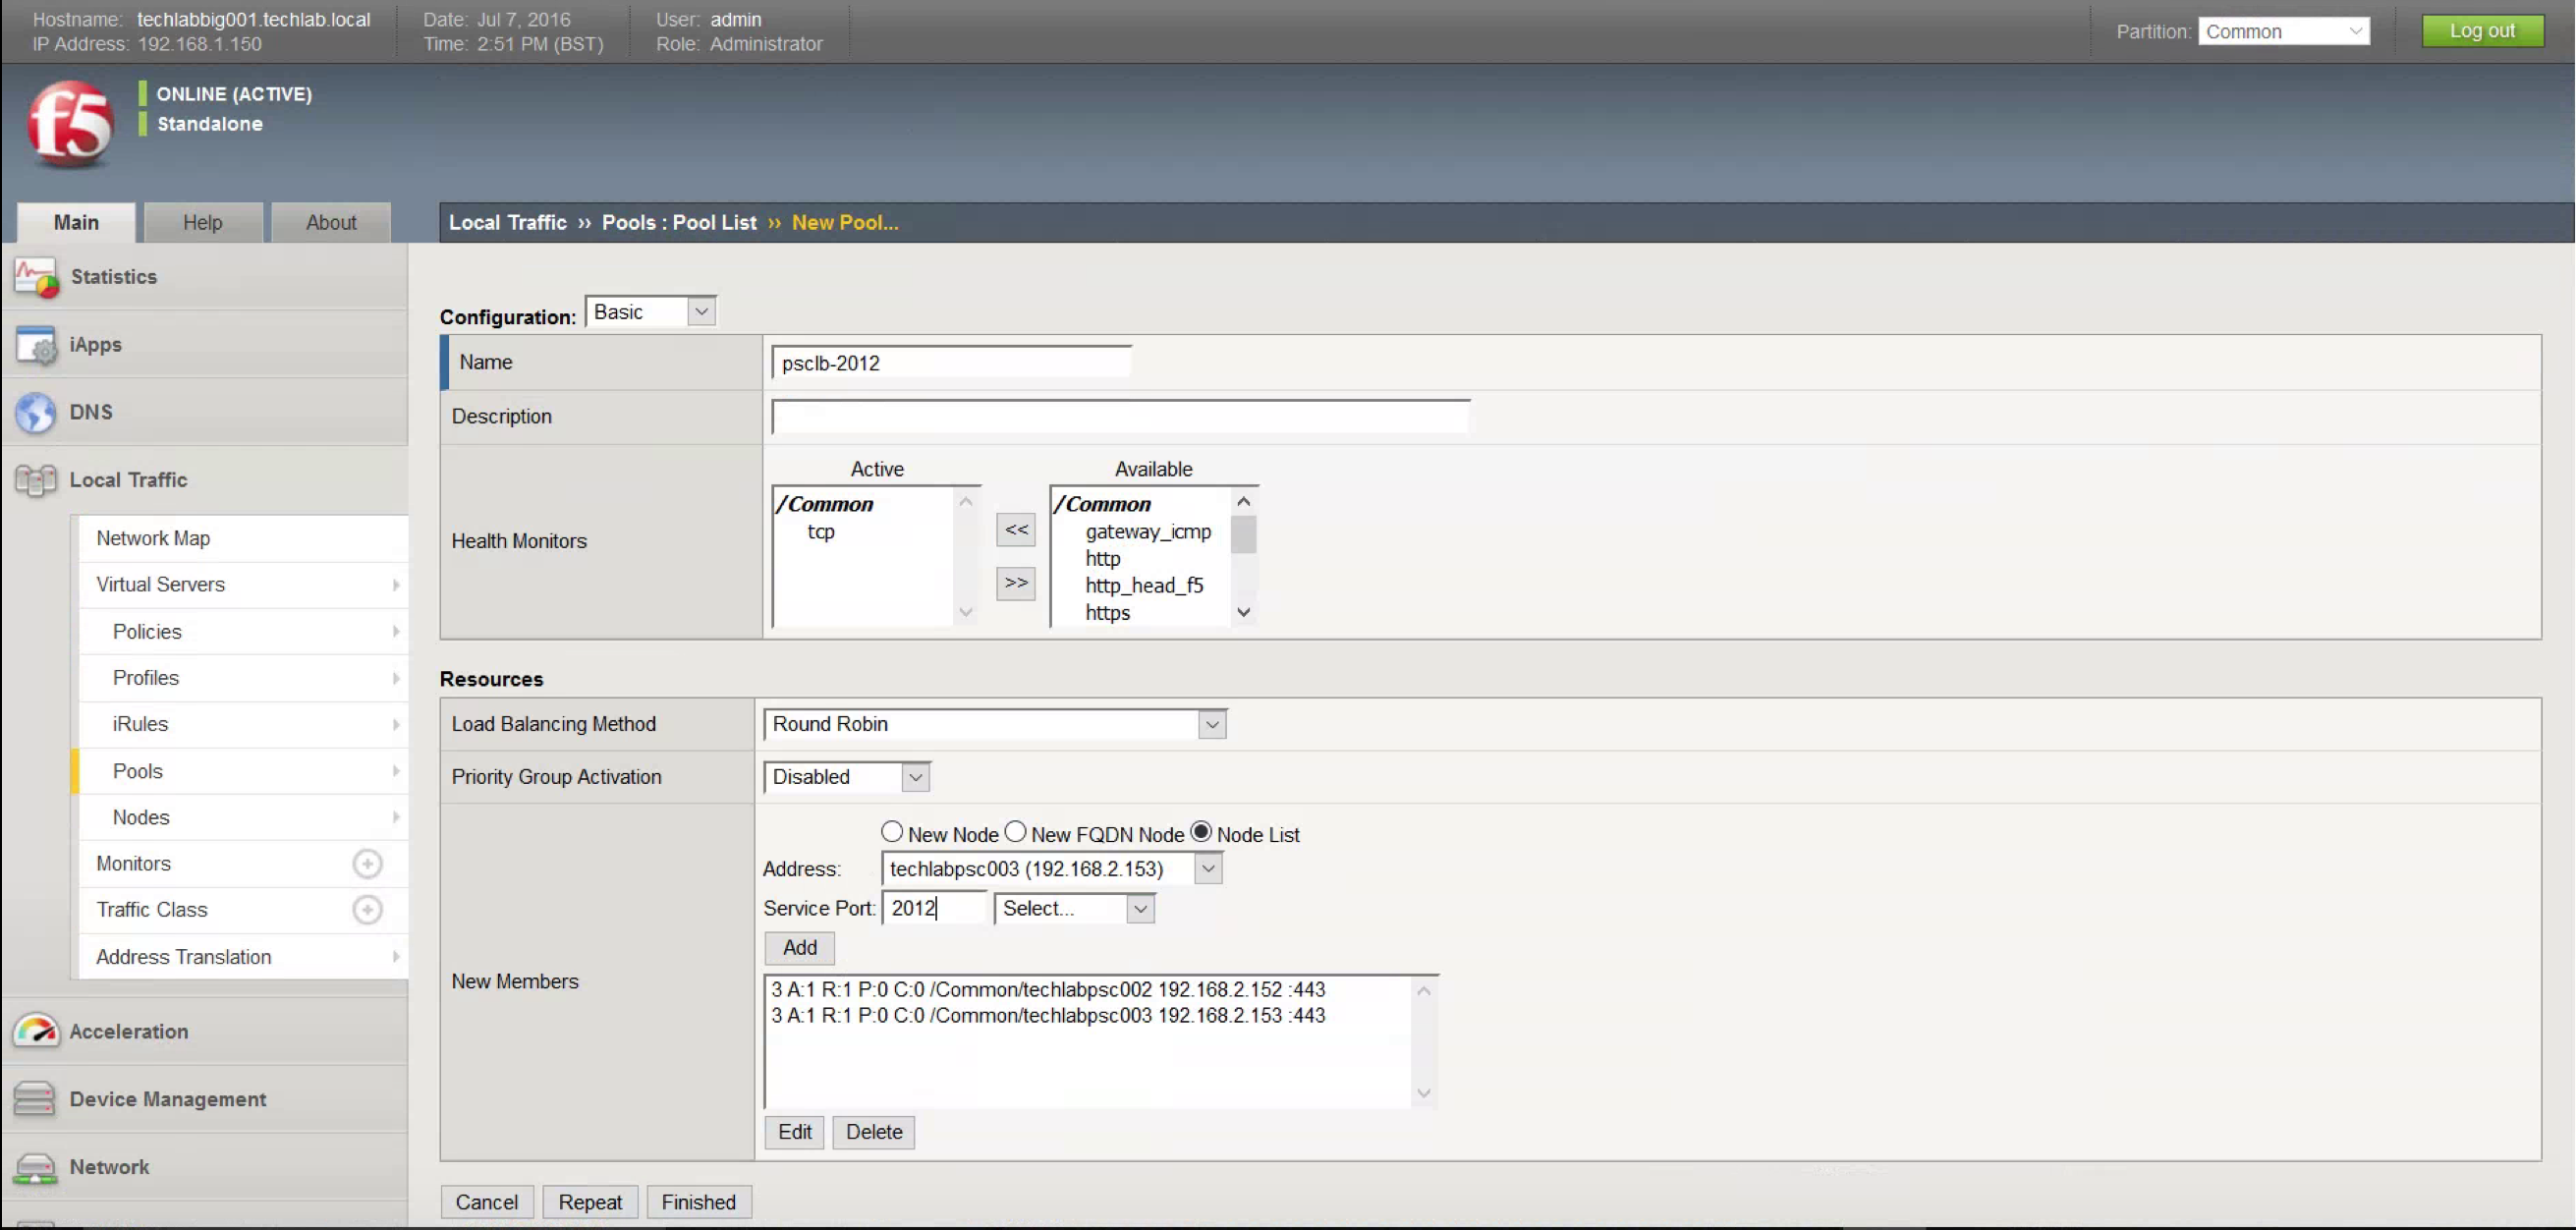
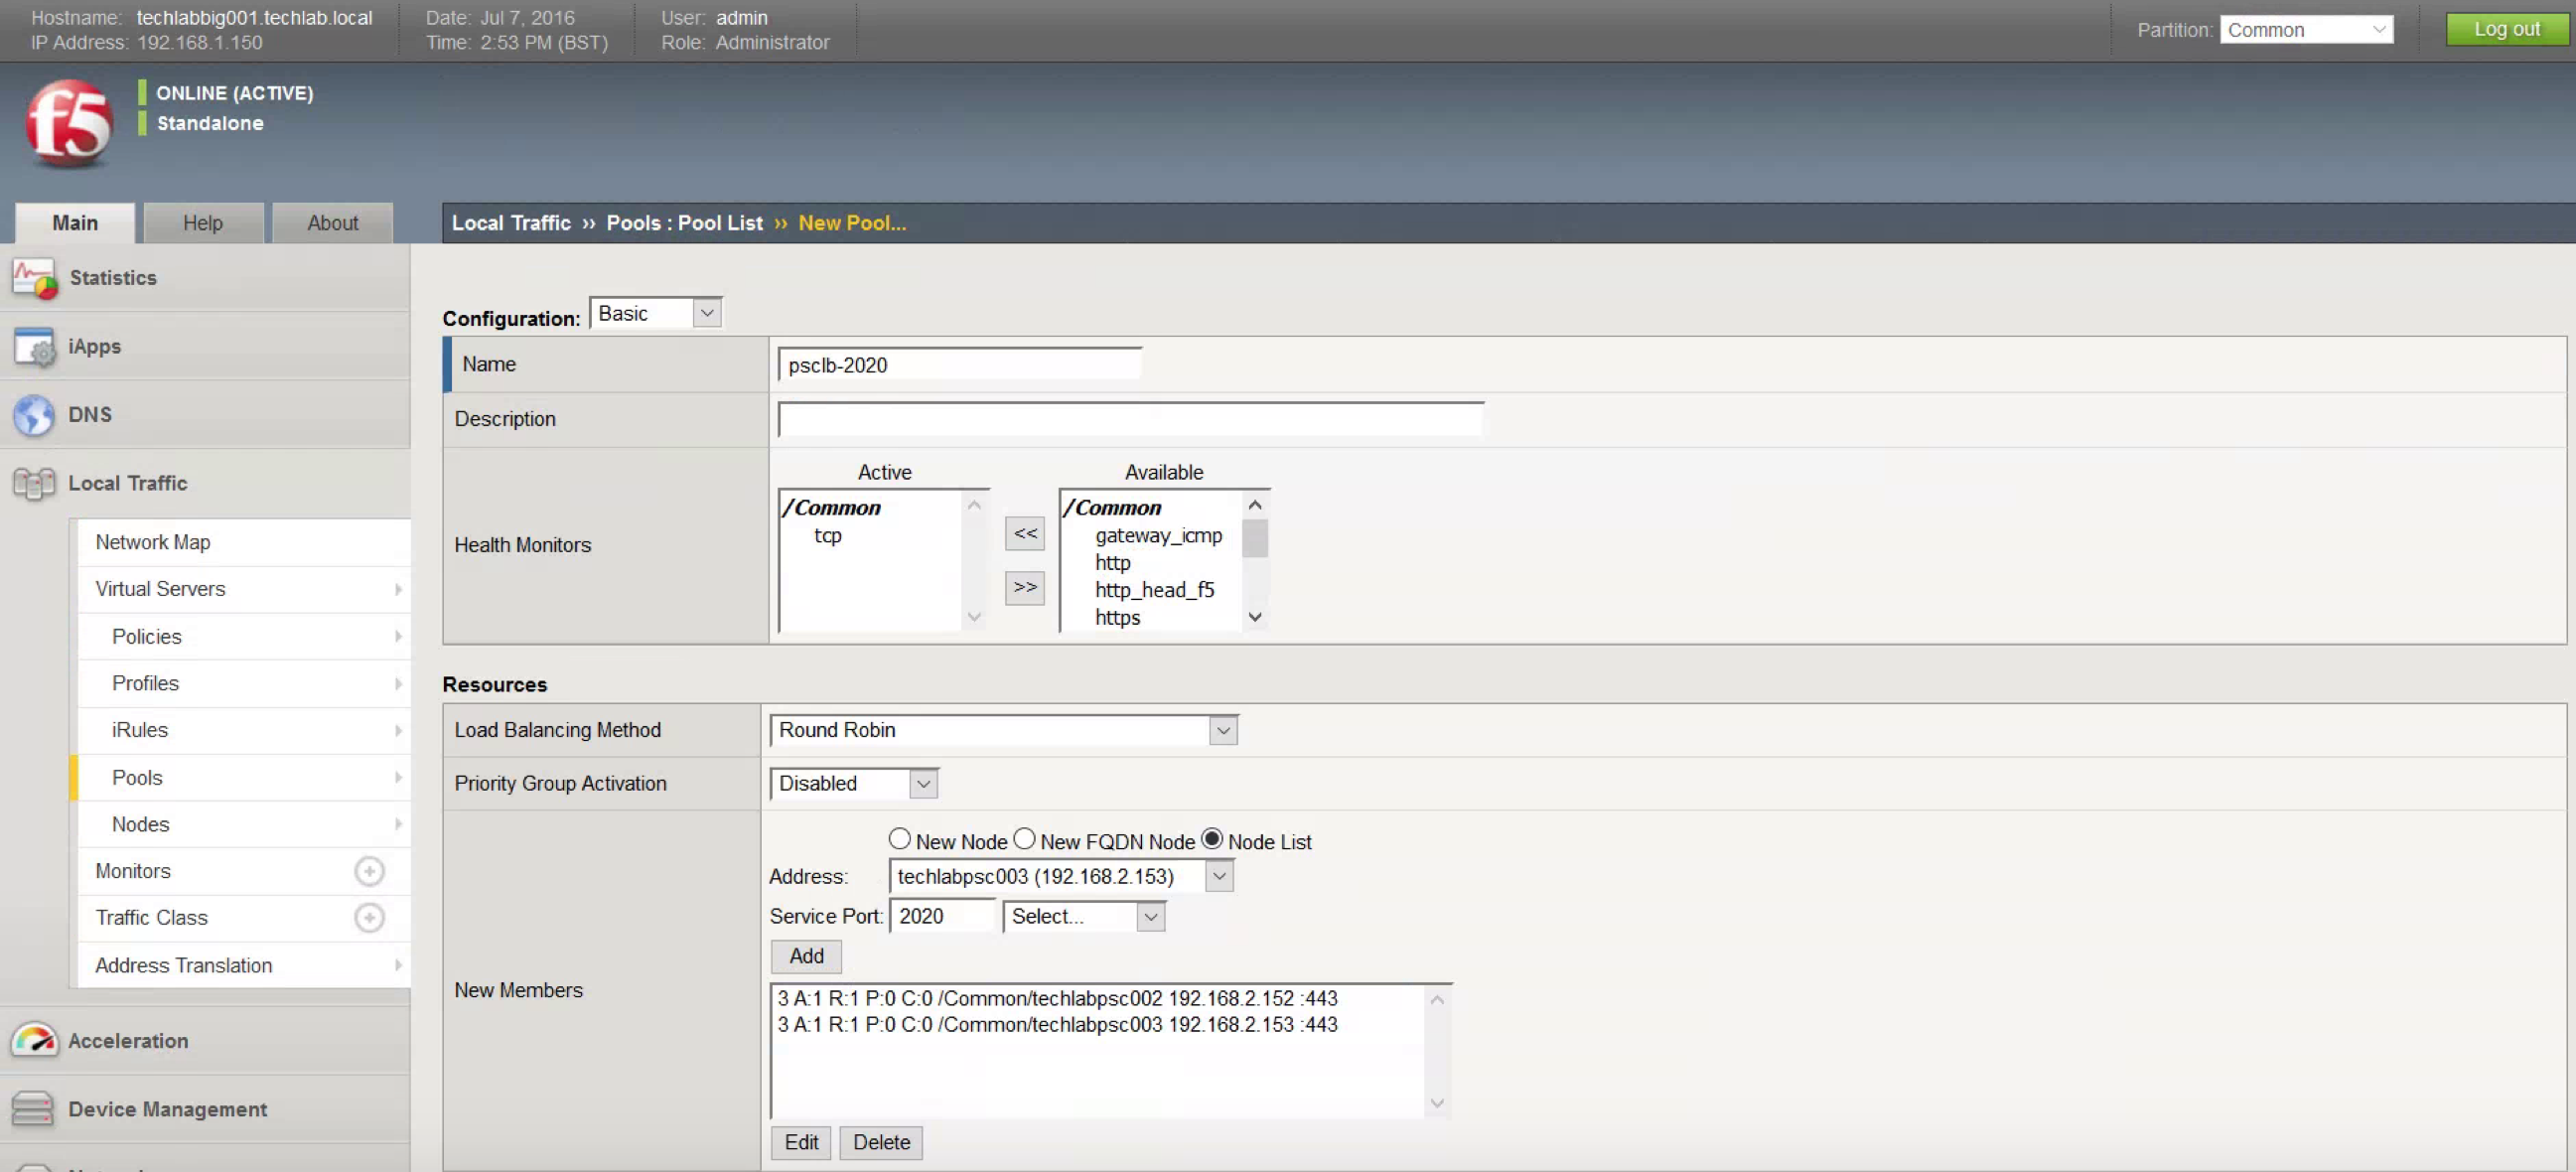
- Open Pools, Pool List.
- Click Create.
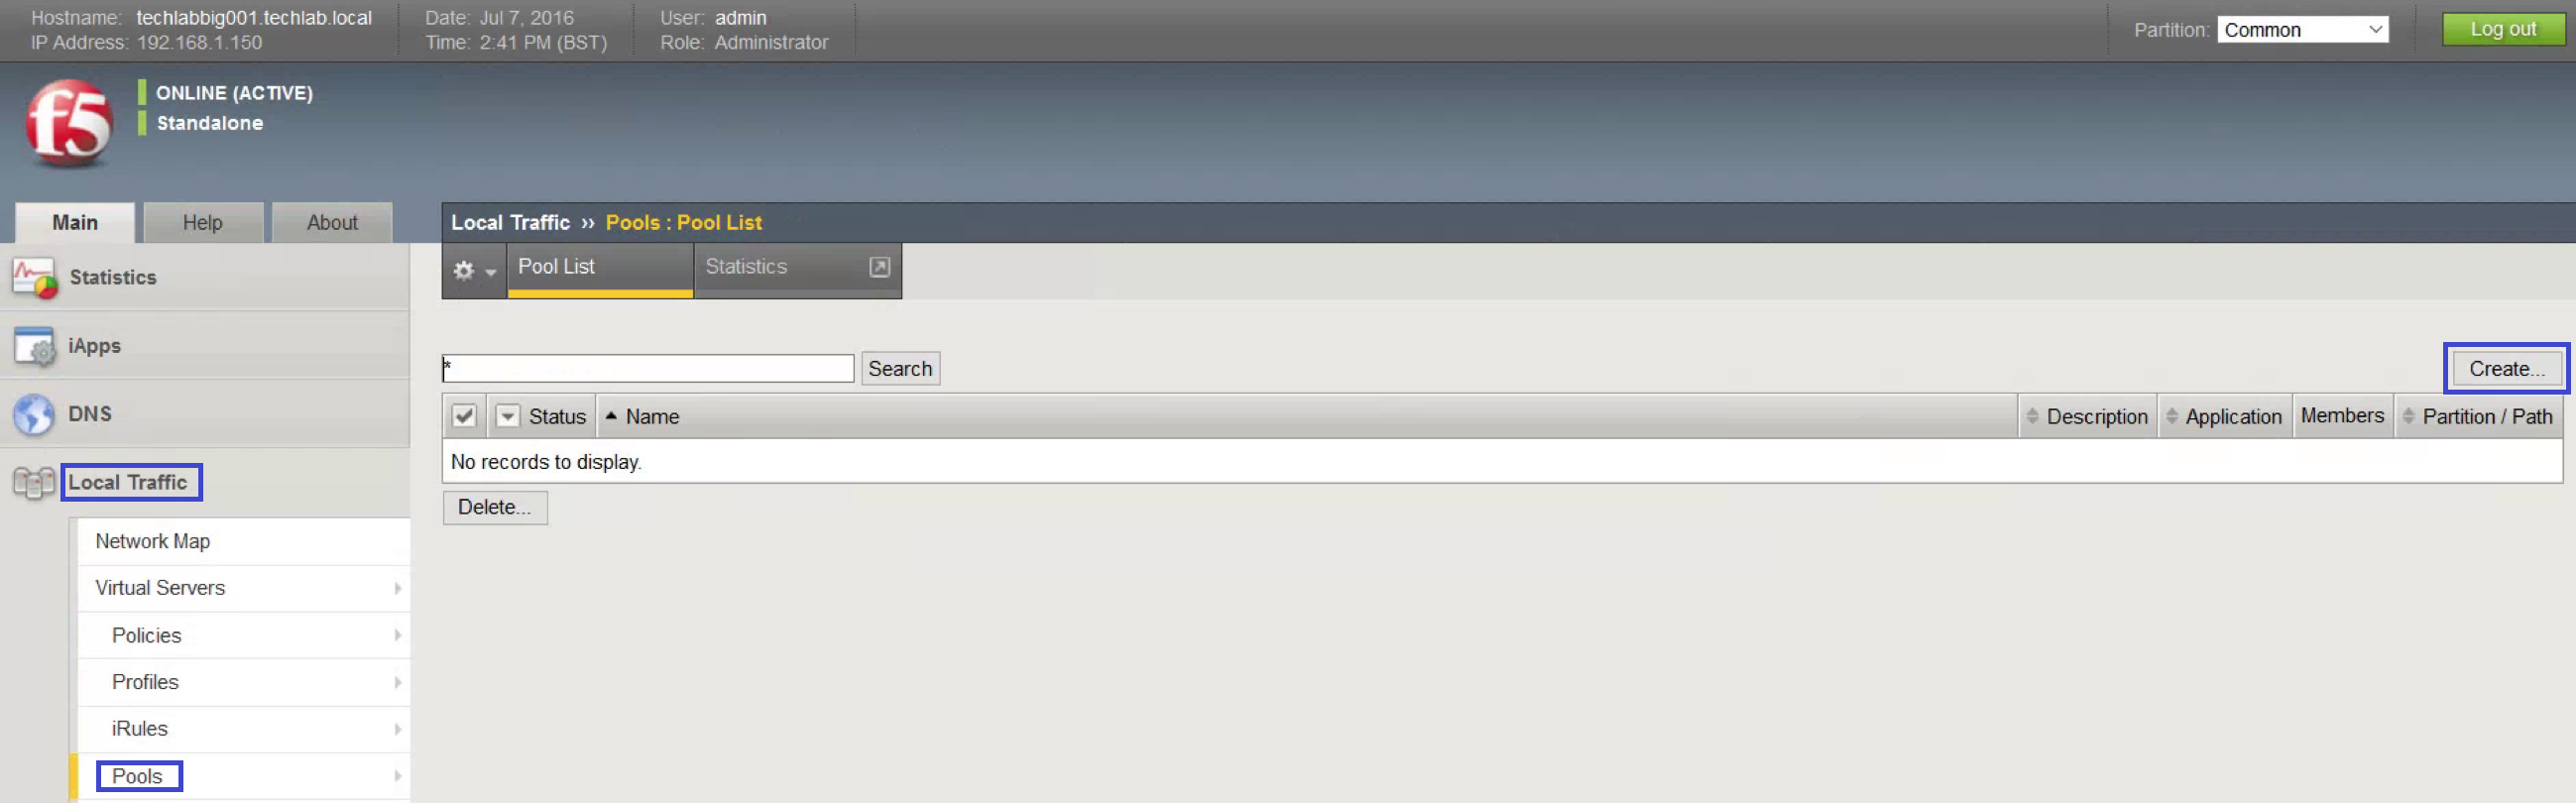
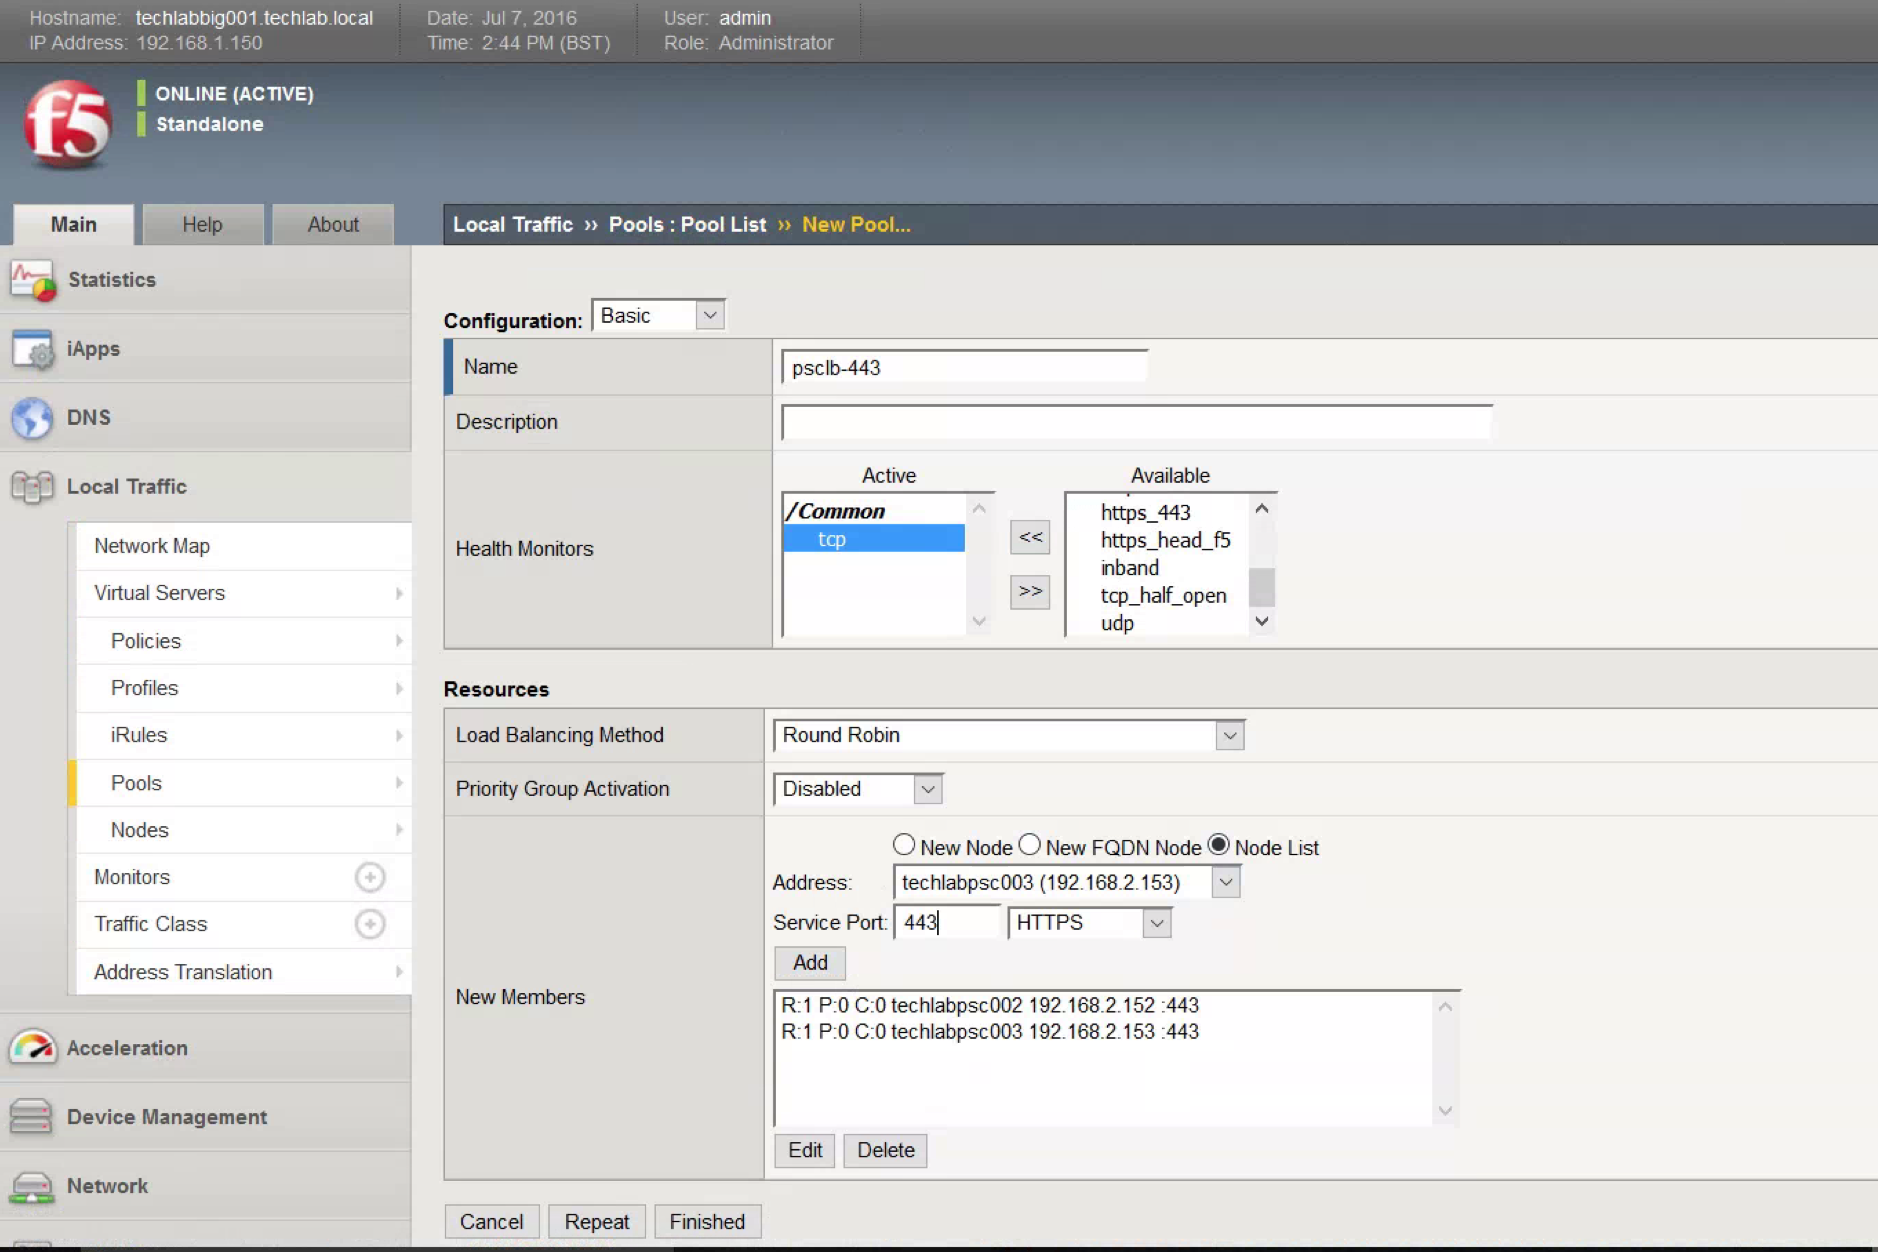
- Create six pools, one each for port 443, 2012, 2014, 2020, 389, and 636.
- All pools have the same Configuration, tcp for monitoring, and Round Robin for Load Balancing Method.
- Add both psc servers to he New Members box
- Use Repeat to save time: Remove the existing members from the list.
- Open Virtual Servers, Virtual Server List.
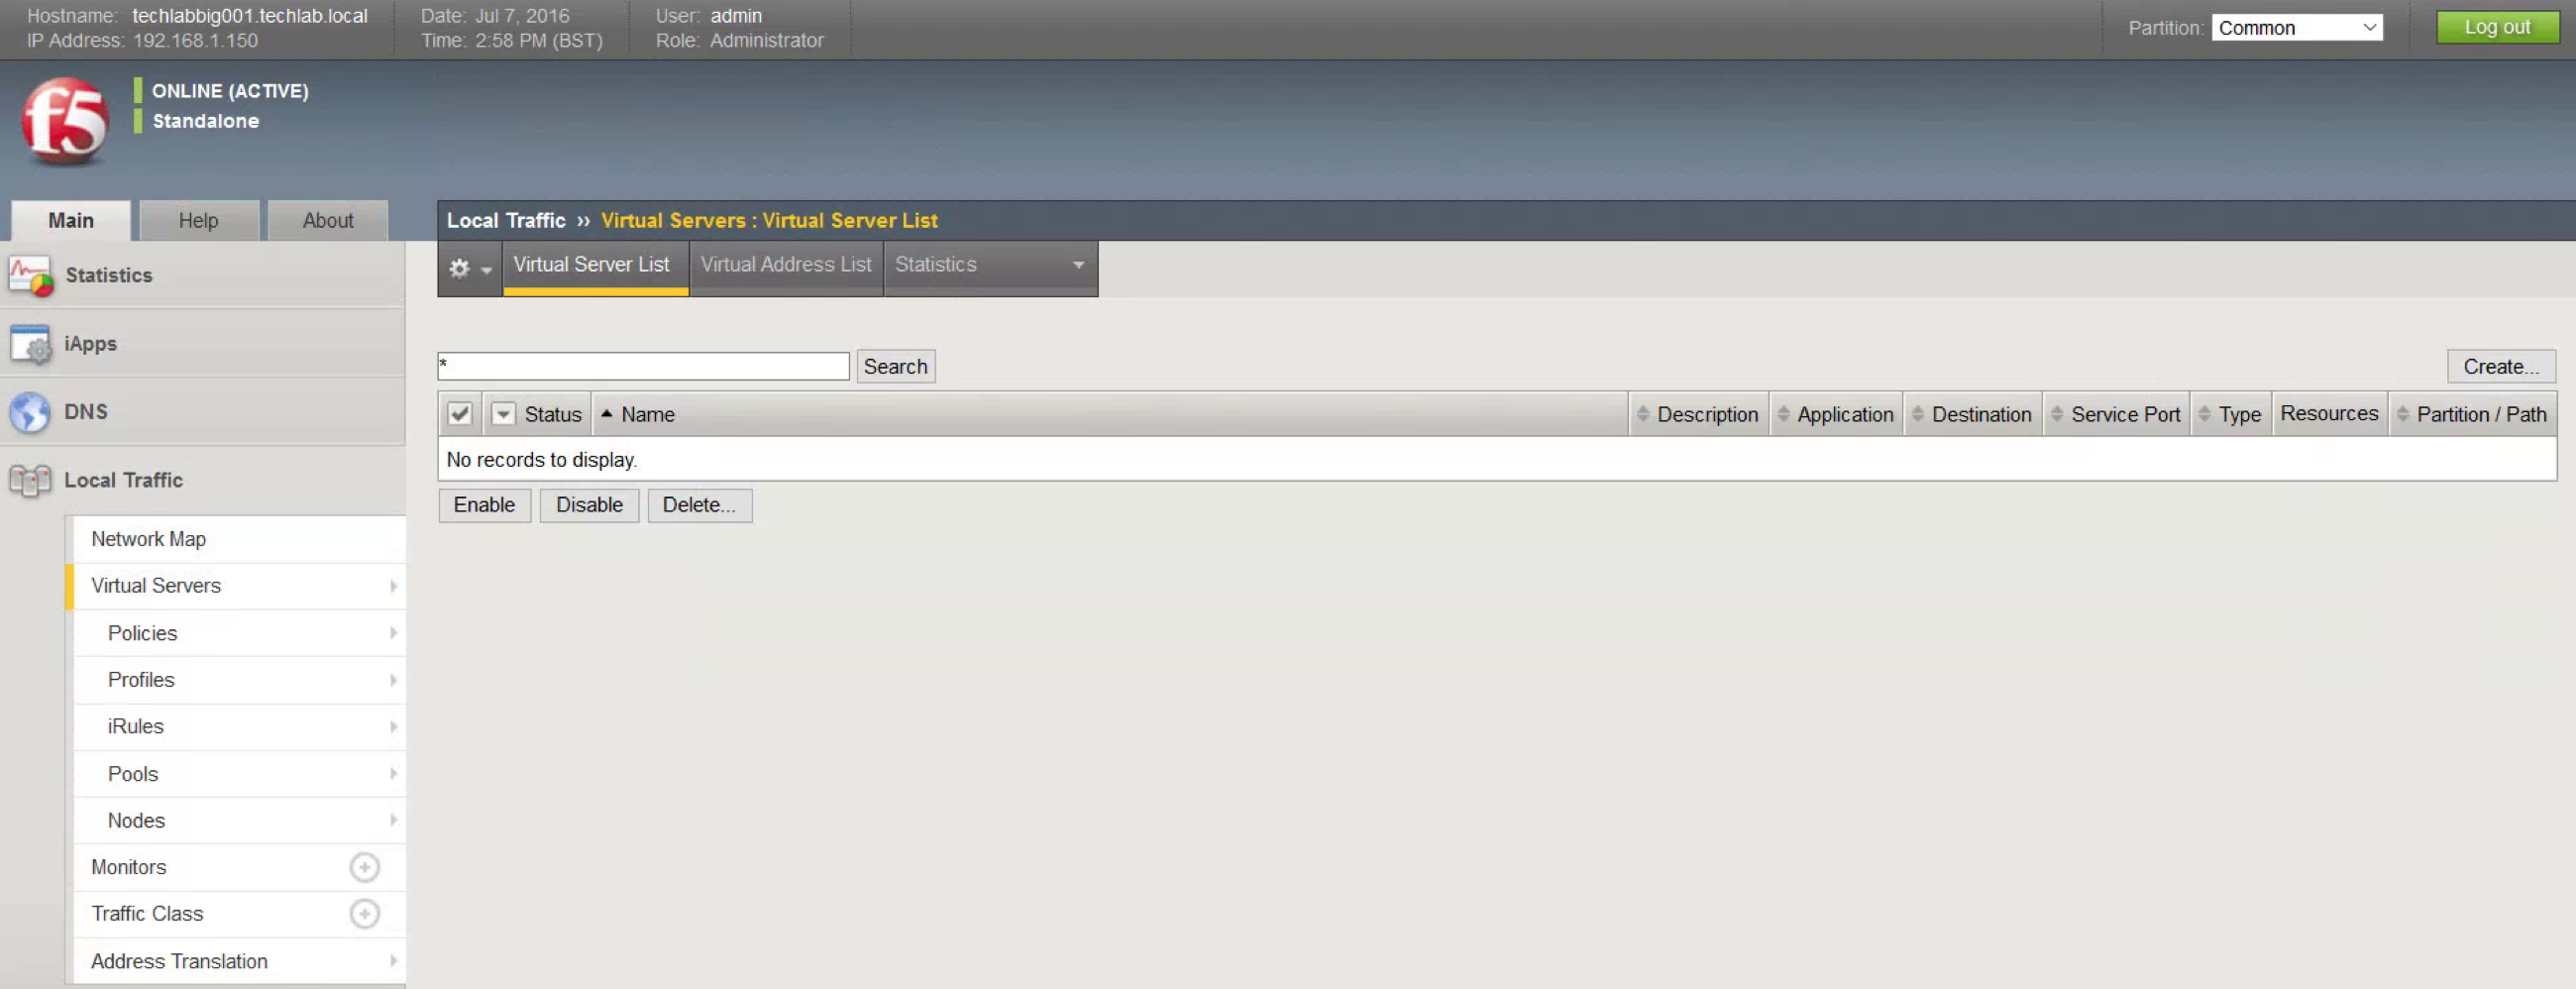
- Click Create.
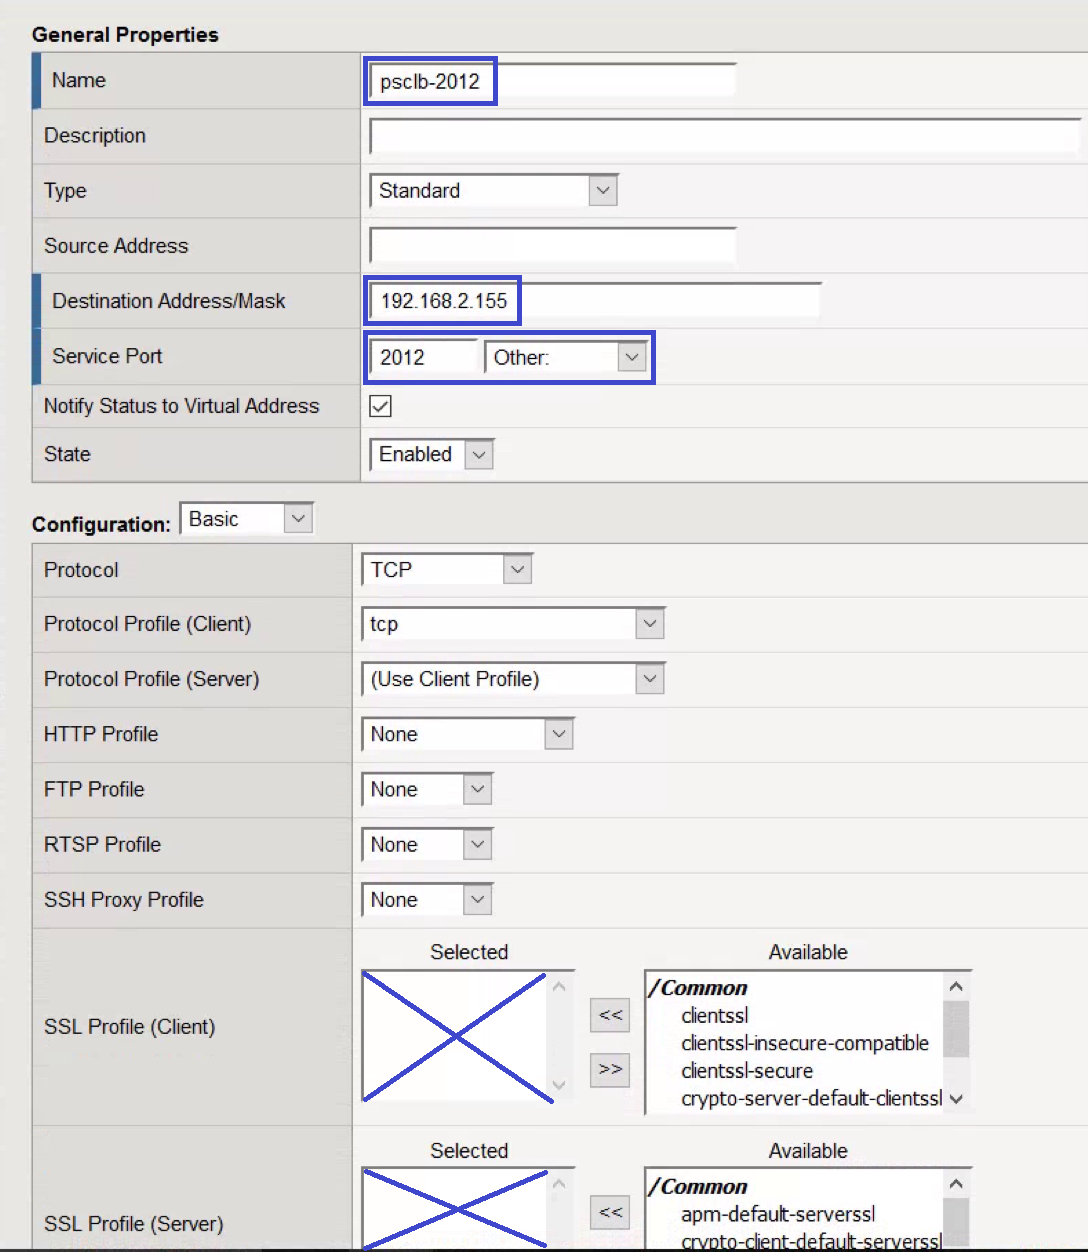
- All virtual servers—except the one for port 443—have the same configuration.
- Provide a descriptive Name.
- Enter the Destination Address. (The Load Balanced address)
- For Service Port, enter 443 and HTTPS
- For SSL Profile (Client), select the client profile created earlier.
- For SSL Profile (Server), select the client profile created earlier.
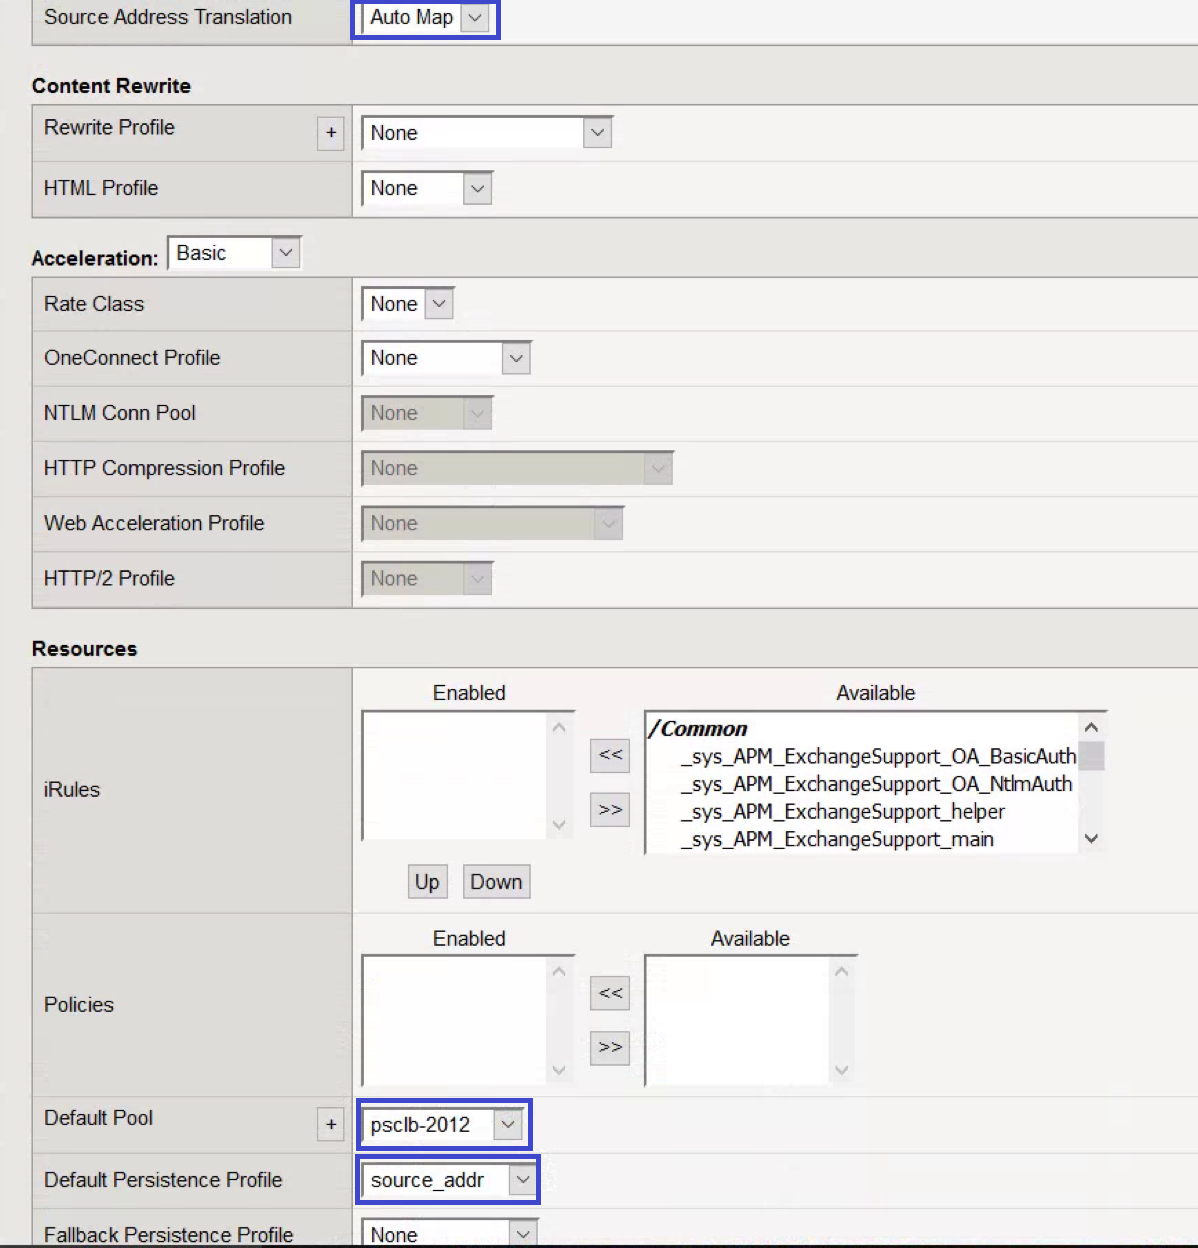
- For Source Address Translation, select Auto Map.
- For the Default Pool, select the pool created for port 443.
- For the Default Persistence Profile, select source_addr.
- Click Finished
- Repeat the steps above from Click Create to create virtual servers for all other ports: 2012, 2014, 2020, 389, and 636. All settings are the same as port 443, except there is no SSL Profile (Client) or SSL Profile (Server) and the Service Port and Default Pool should match. For example, if the Service Port is 2012, the Default Pool should be the pool set up for port 2012.
- Open Profiles, Persistence.
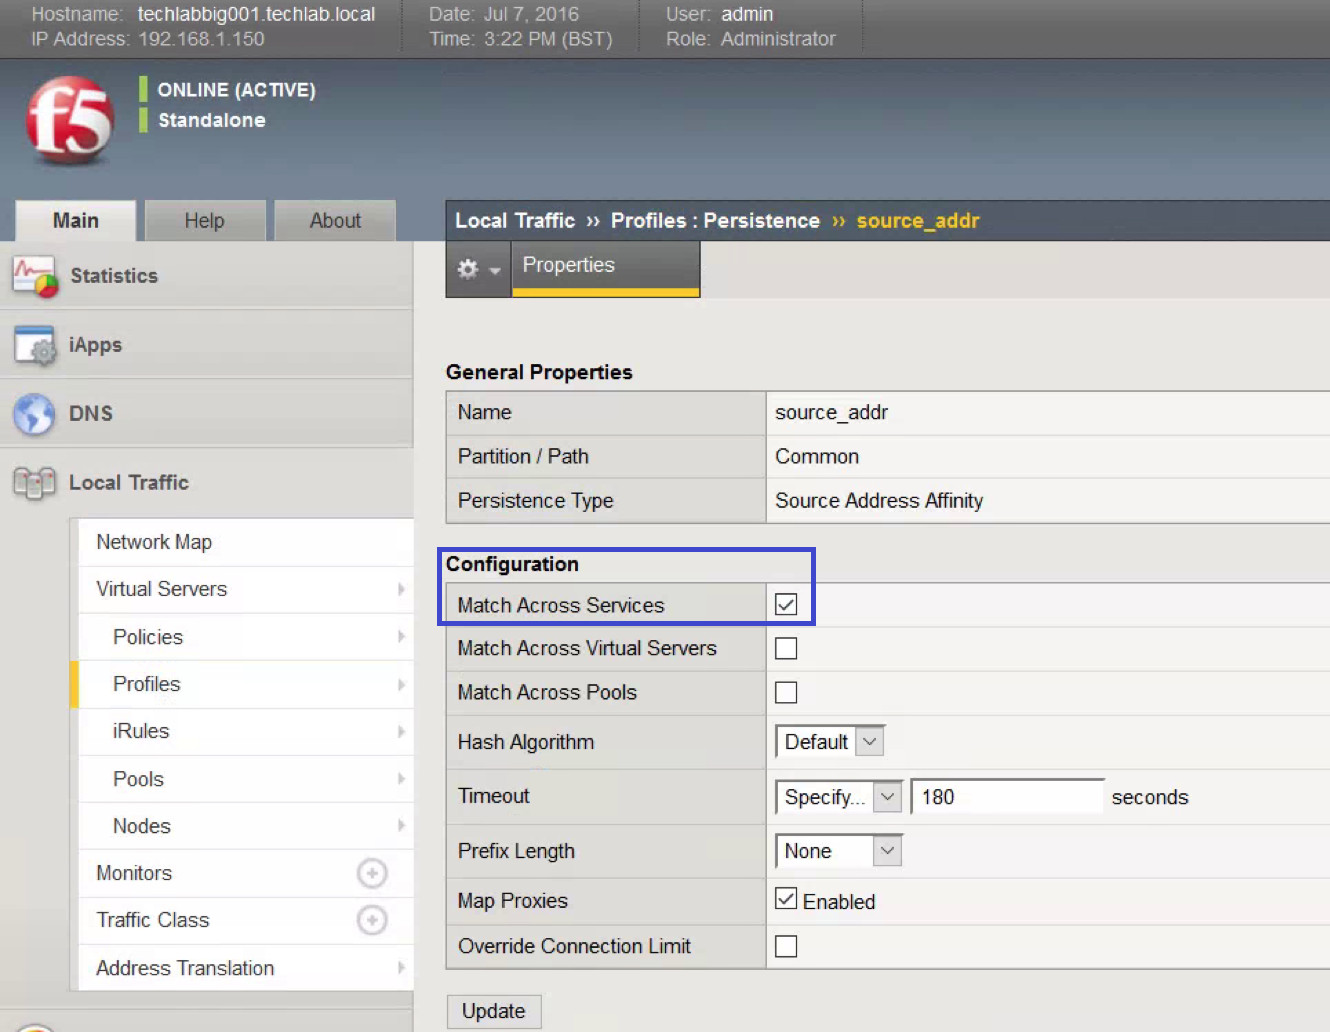
- Click source_addr.
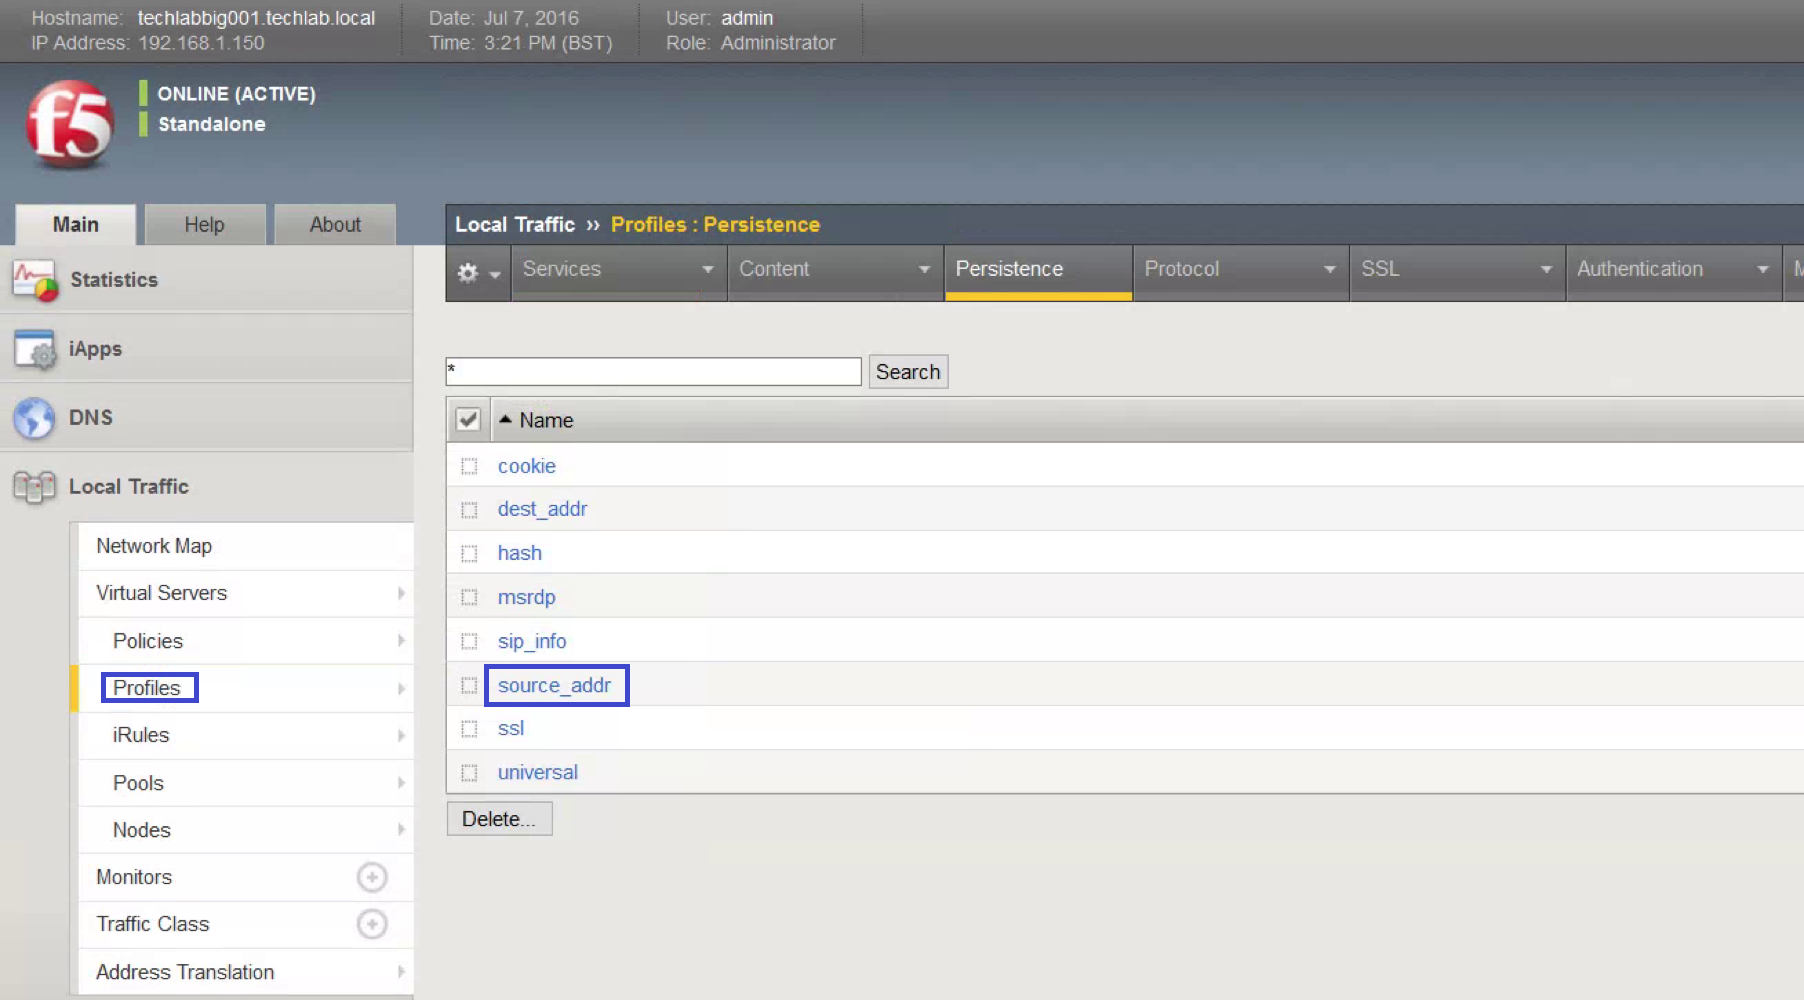
- Check Match Across Services and click Update
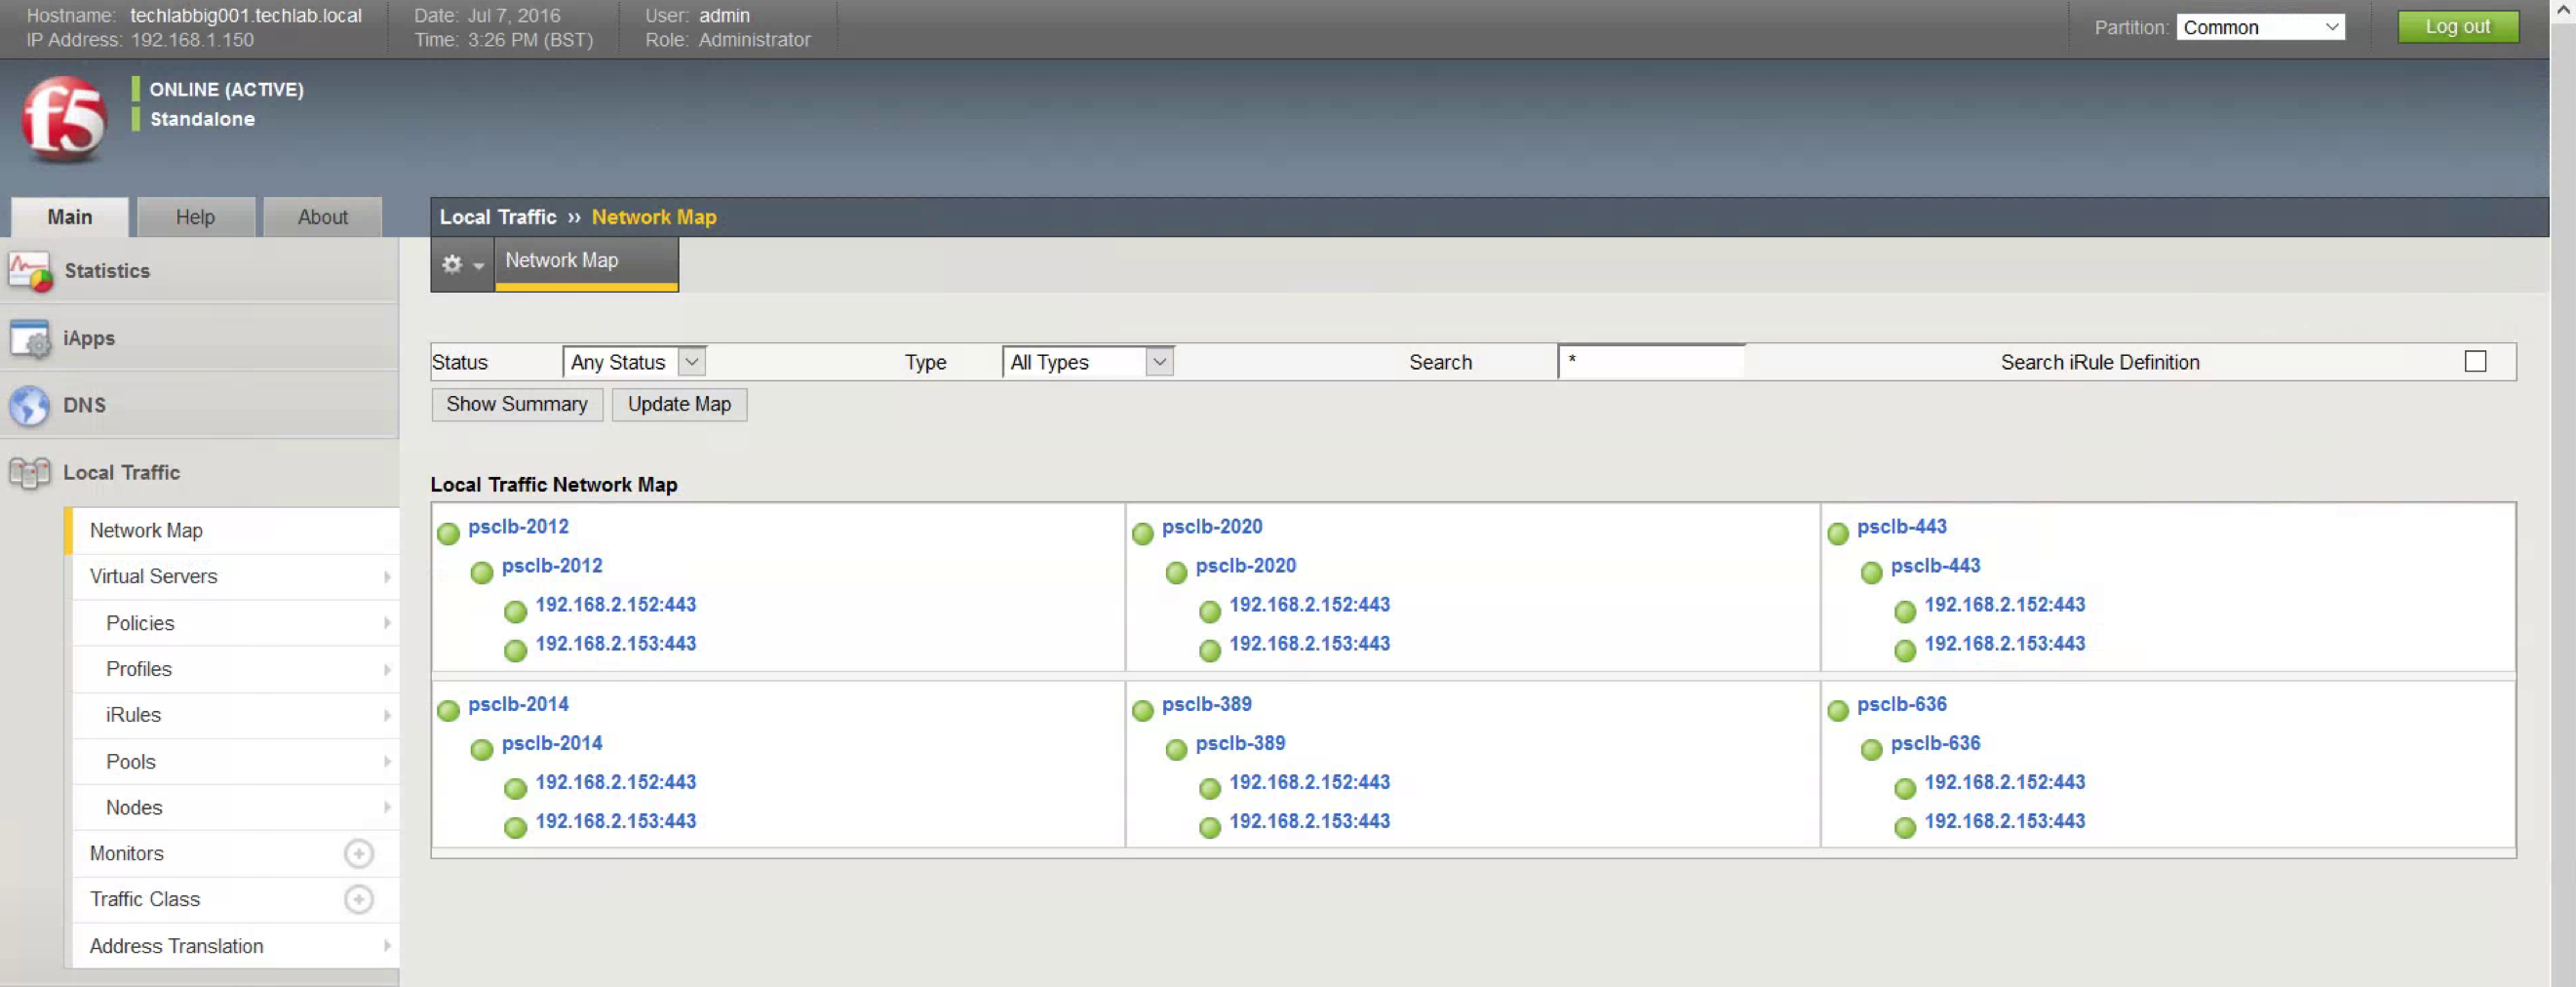
- After both Platform Services Controller nodes have been installed and configured, click Network Map and verify that all services are up (green).
- Next log into the second PSC
- Copy the sso-ha and ha folder from the first Platform Services Controller into the c: drive.
- Copy C:\ProgramData\VMware\vCenterServer\cfg\sso\keys from the first Platform Services Controller to c:\ha\keys.
- Open a command prompt.
- Add Python to your path by typing: path=%PATH%;%VMWARE_PYTHON_HOME%
- Change directories to c:\sso-ha.
- Run: python gen-lb-cert.py –secondary-node –lb-fqdn=loadbalancerFQDN –lb-certfolder=C:\ha –sso-serversign-folder=c:\ha\keys\ where loadbalancerFQDN is the FQDN of the load balancer’s VIP used for load-balancing the Platform Services Controllers
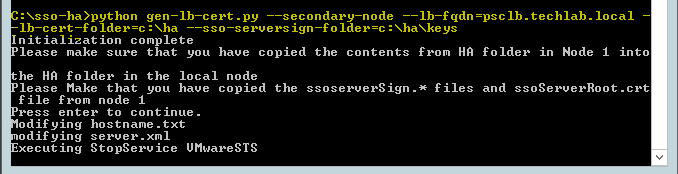
- Repeat this step on any additional PSCs
- On one Platform Services Controller, update the endpoint URL by running: python lstoolHA.py –hostname=FQDNofLocalMachine –lb-fqdn=loadbalancerFQDN –lb-cert-folder=C:\ha –user=Administrator@SSODomain –password=”password” where FQDNofLocalMachine is the FQDN of the machine where the script is being run, loadbalancerFQDN is the FQDN of the load balancer’s VIP used for load balancing the Platform Services Controllers, SSODomain is the vCenter Single Sign-On domain (by default vsphere.local), and password is the password for the vCenter Single Sign-On administrator. The password parameter is optional; if not specified, you will be prompted for it.
C:\sso-ha> python lstoolHA.py –hostname=techlabpsc002.techlab.local –lb-fqdn=psclb.techlab.local –lb-cert-folder=C:\ha –user=Administrator@vsphere.local

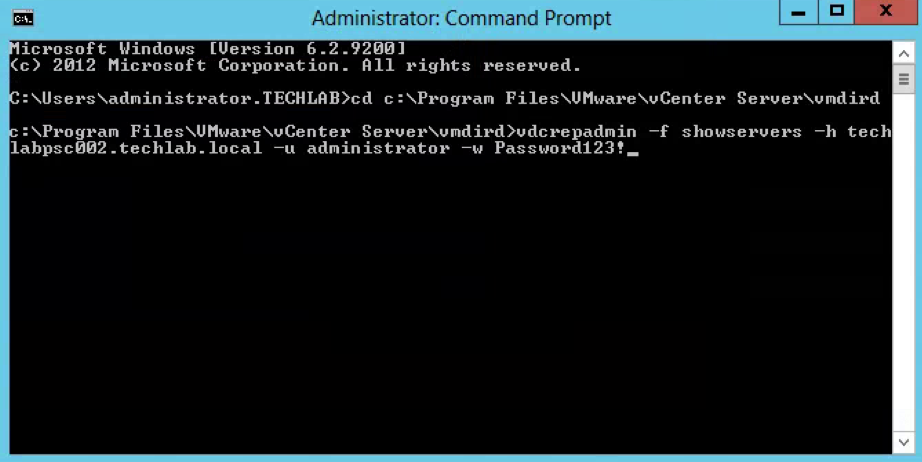
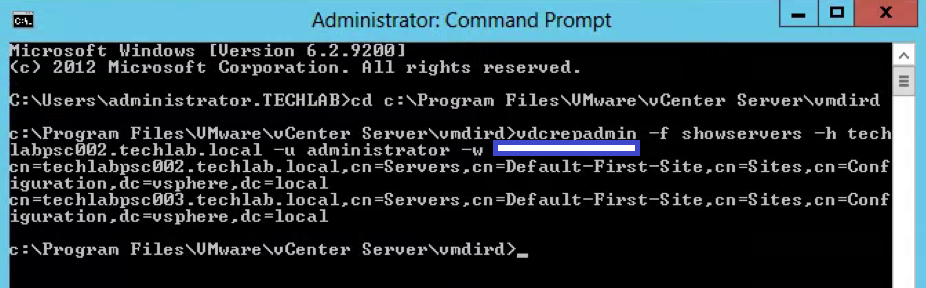
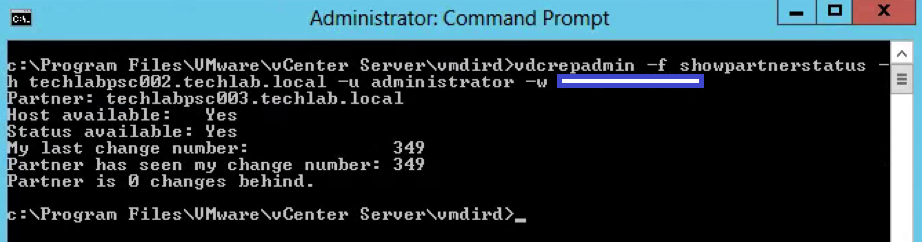
- To verify the endpoints have been updated correctly run these commands using the First PSC Node FQDN entry:
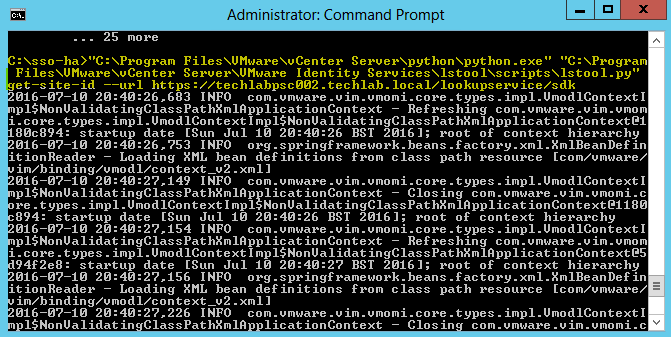
- Obtain the Site ID by running the following
“C:\Program Files\VMware\vCenter Server\python\python.exe” “C:\Program Files\VMware\vCenter Server\VMware Identity Services\lstool\scripts\lstool.py” get-site-id –url https://psc_node_1_fqdn/lookupservice/sdk

- Using the output sitename from the previous step, run these commands to verify the endpoints have been updated with the Load Balanced FQDN:
“C:\Program Files\VMware\vCenter Server\python\python.exe” “C:\Program Files\VMware\vCenter Server\VMware Identity Services\lstool\scripts\lstool.py” list –url https://psc_node_1_fqdn/lookupservice/sdk –site My_Site_ID –type cs.license | findstr “URL:”

“C:\Program Files\VMware\vCenter Server\python\python.exe” “C:\Program Files\VMware\vCenter Server\VMware Identity Services\lstool\scripts\lstool.py” list –url https://psc_node_2_fqdn/lookupservice/sdk –site My_Site_ID –type cs.identity | findstr “URL:”
- Should bring back the same information as the above screenprint
- Follow the steps to install a new external vCenter Server. When asked for the Platform Services Controller, enter the FQDN of the load balancer’s VIP.