What is VMmark?
VMmark is a free tool used by hardware vendors and others to measure the performance, scalability, and power consumption of virtualization platforms.
VMmark is a free tool used by hardware vendors and others to measure the performance, scalability, and power consumption of virtualization platforms.
The VMmark benchmark:
- Allows accurate and reliable benchmarking of virtual data center performance and power consumption.
- Allows comparison of the performance and power consumption of different virtualization platforms.
- Can be used to determine the performance effects of changes in hardware, software, or configuration within the virtualization environment.
How to install
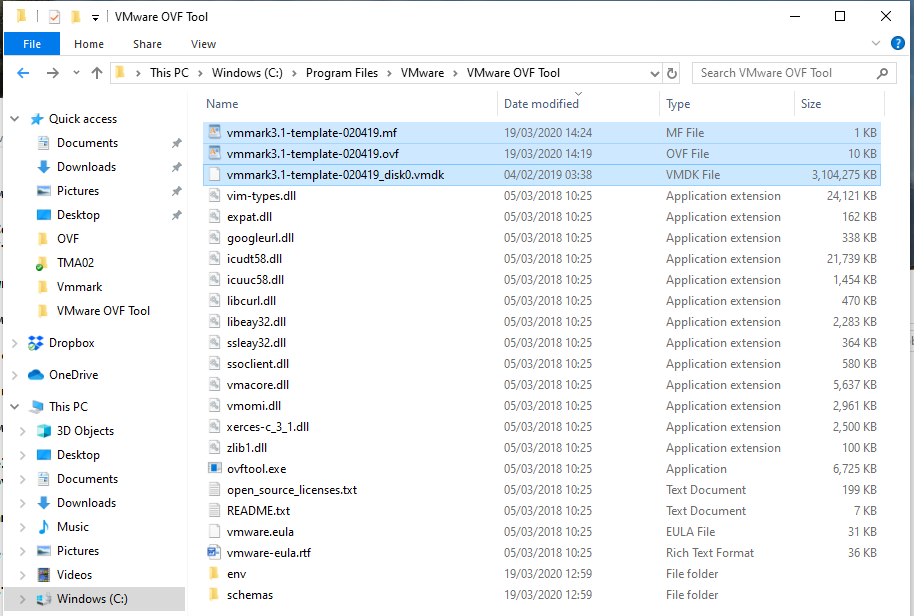
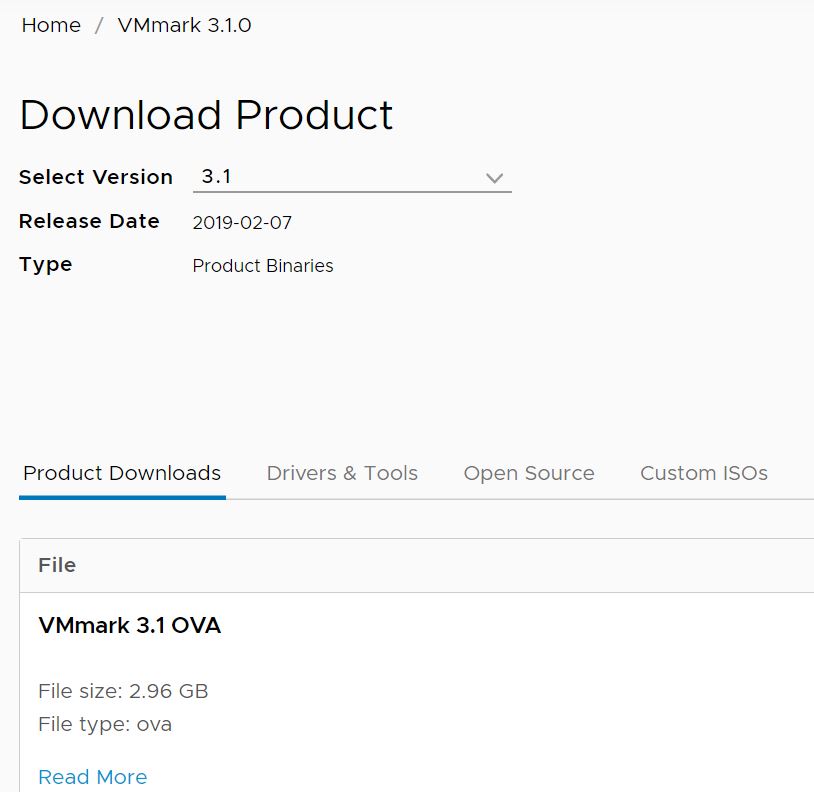
Download the VMmark OVA
Right click on the cluster and select Deploy OVF template
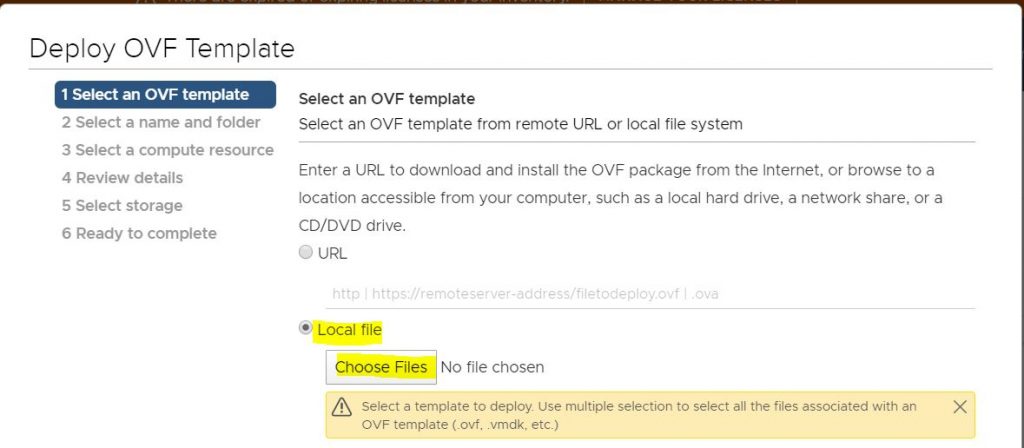
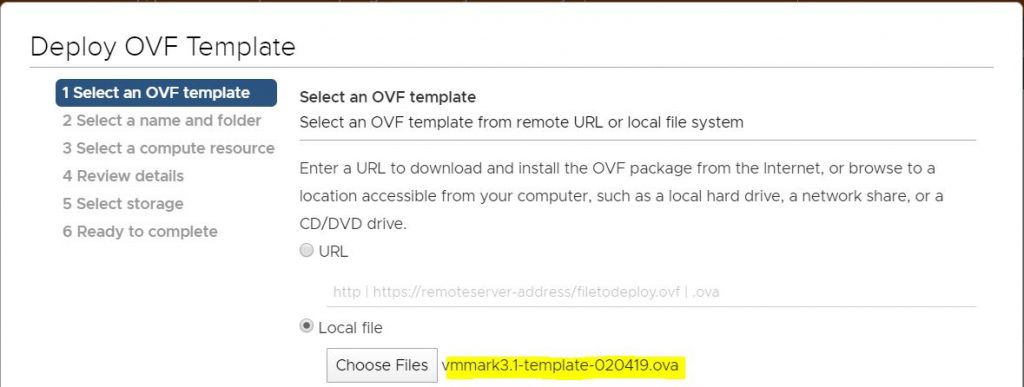
Select your VMmark downloaded OVA
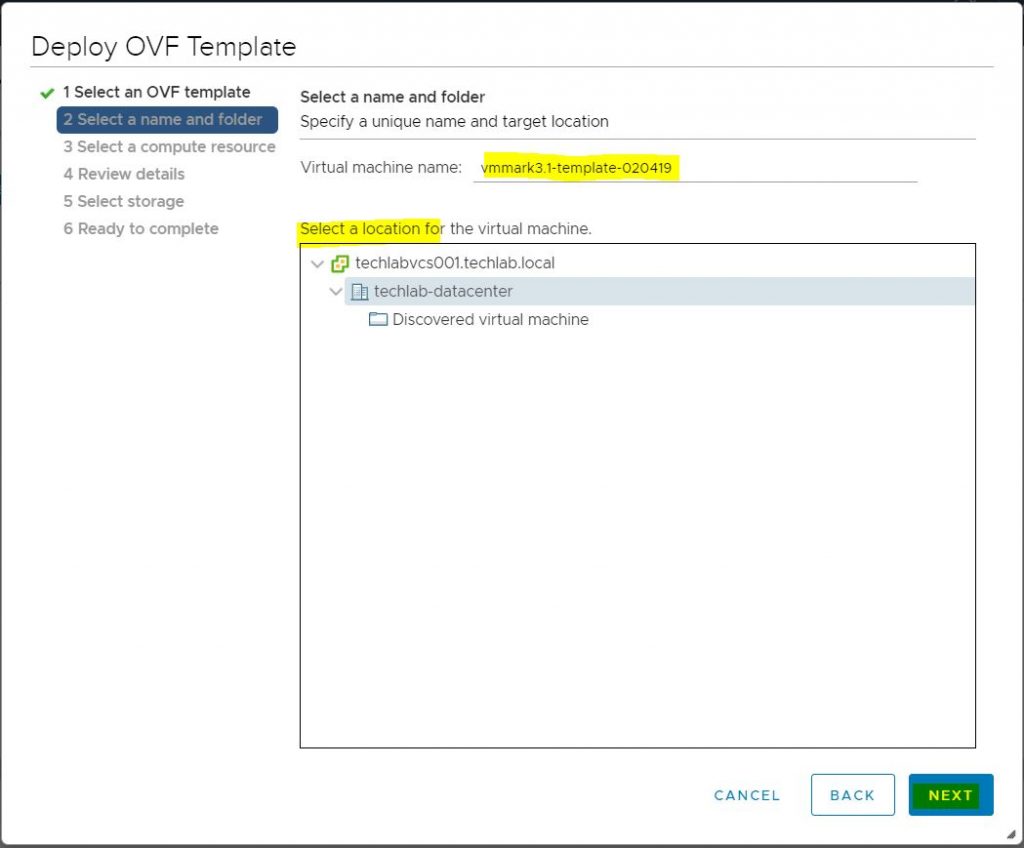
Select a name and folder
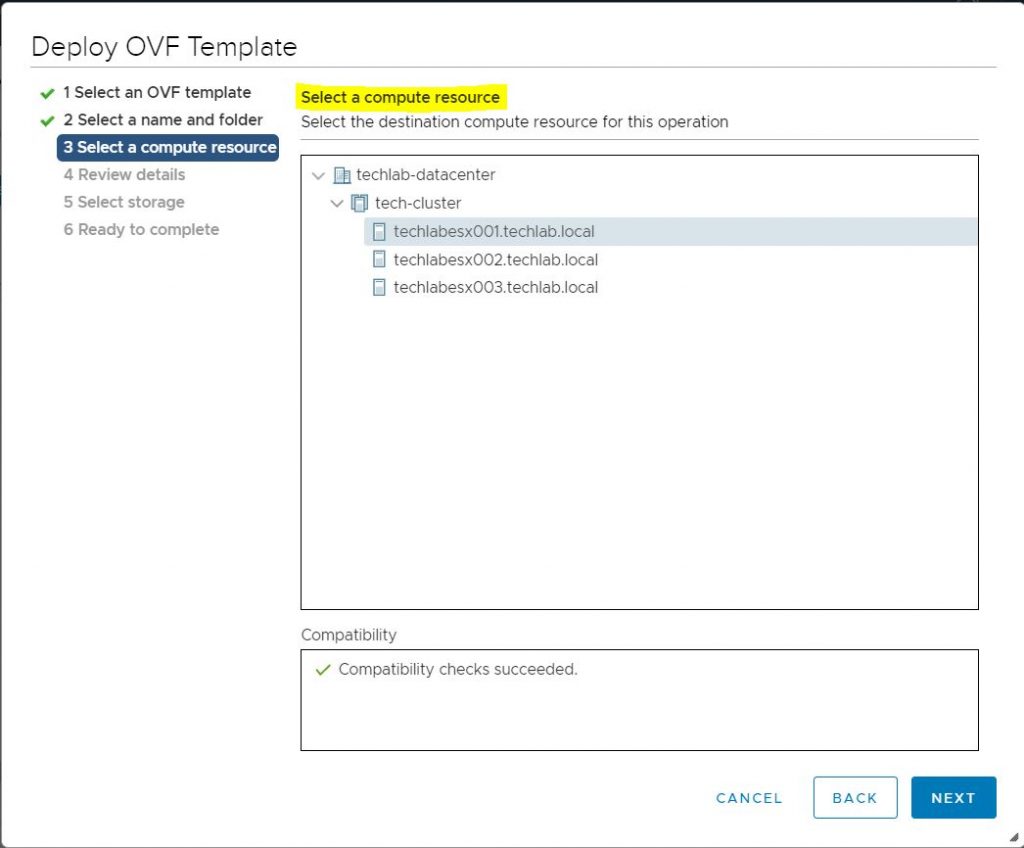
Select a compute resource
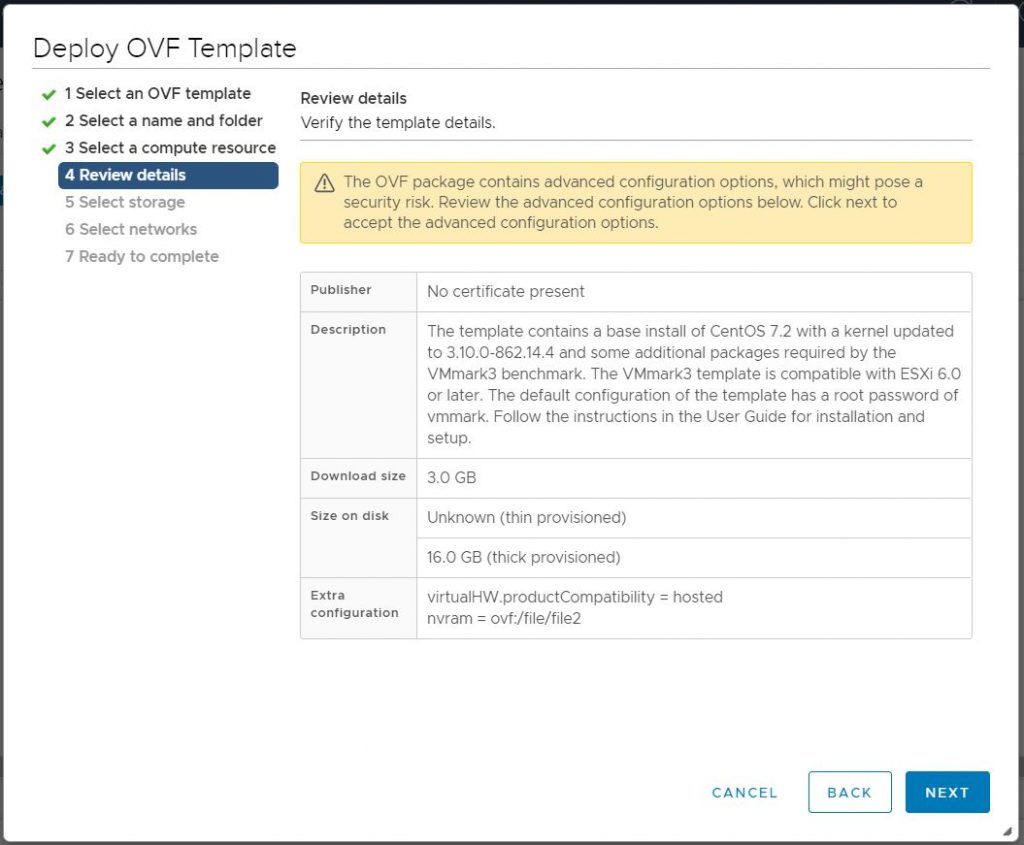
Review details
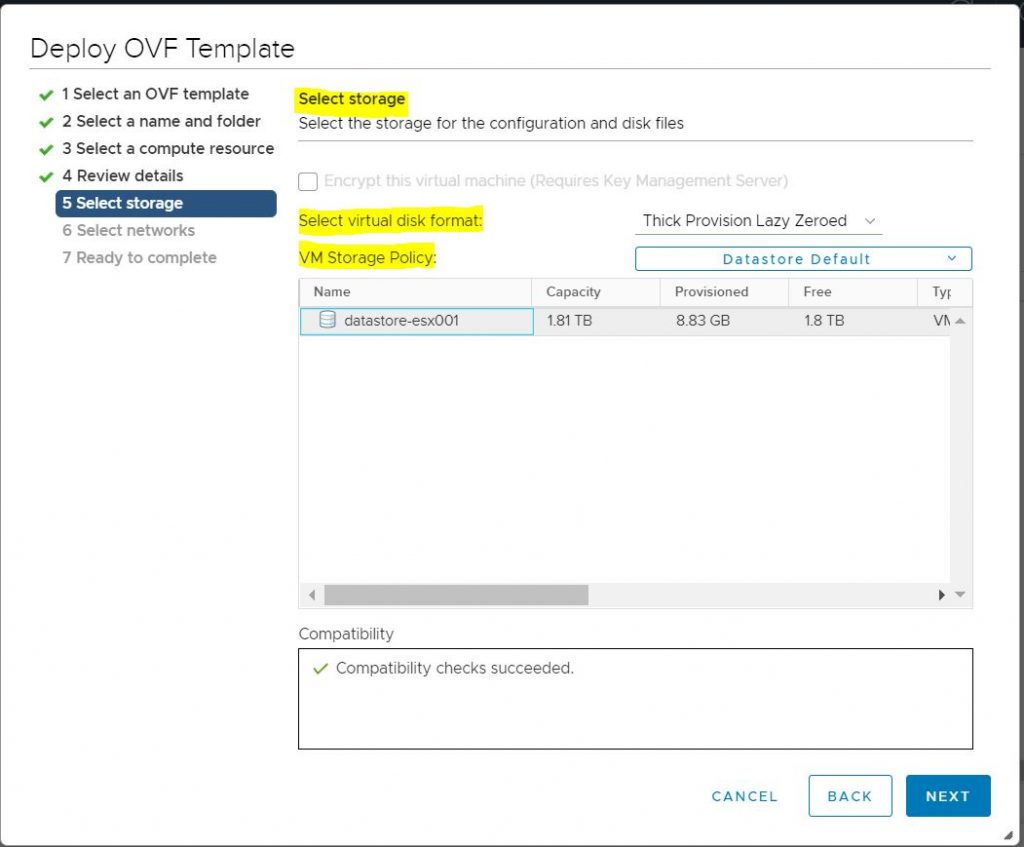
Select Storage
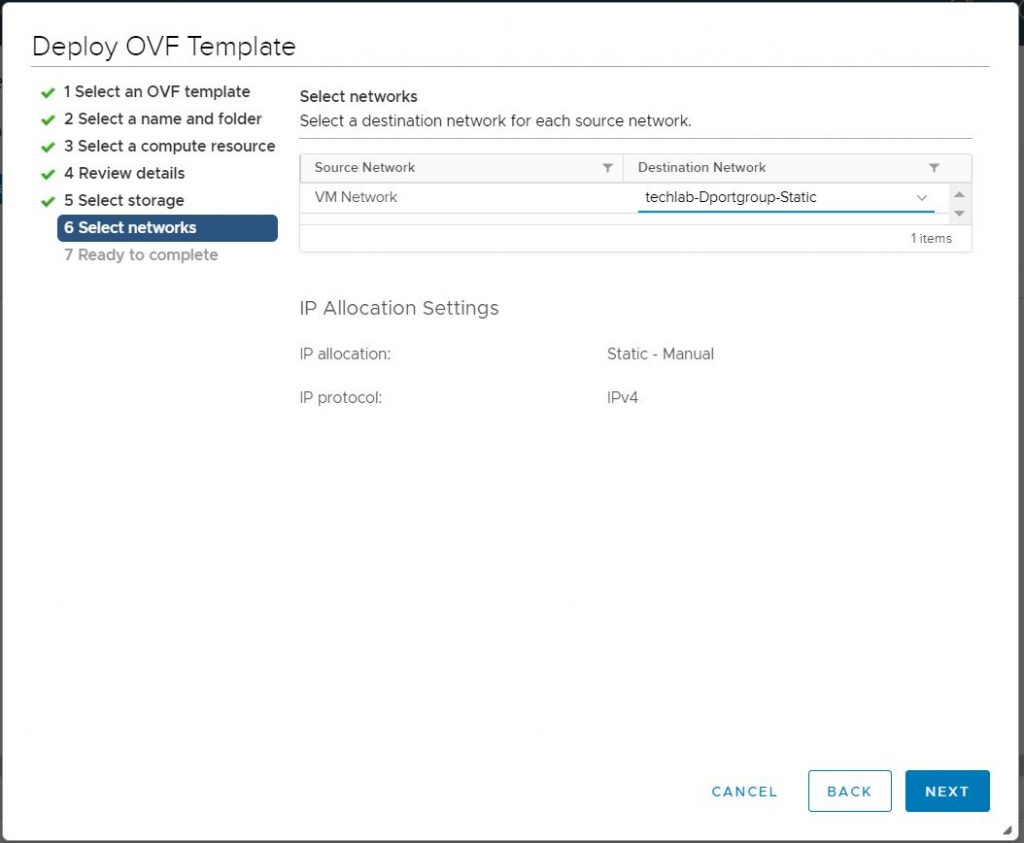
Select networks
Check Ready to Complete page
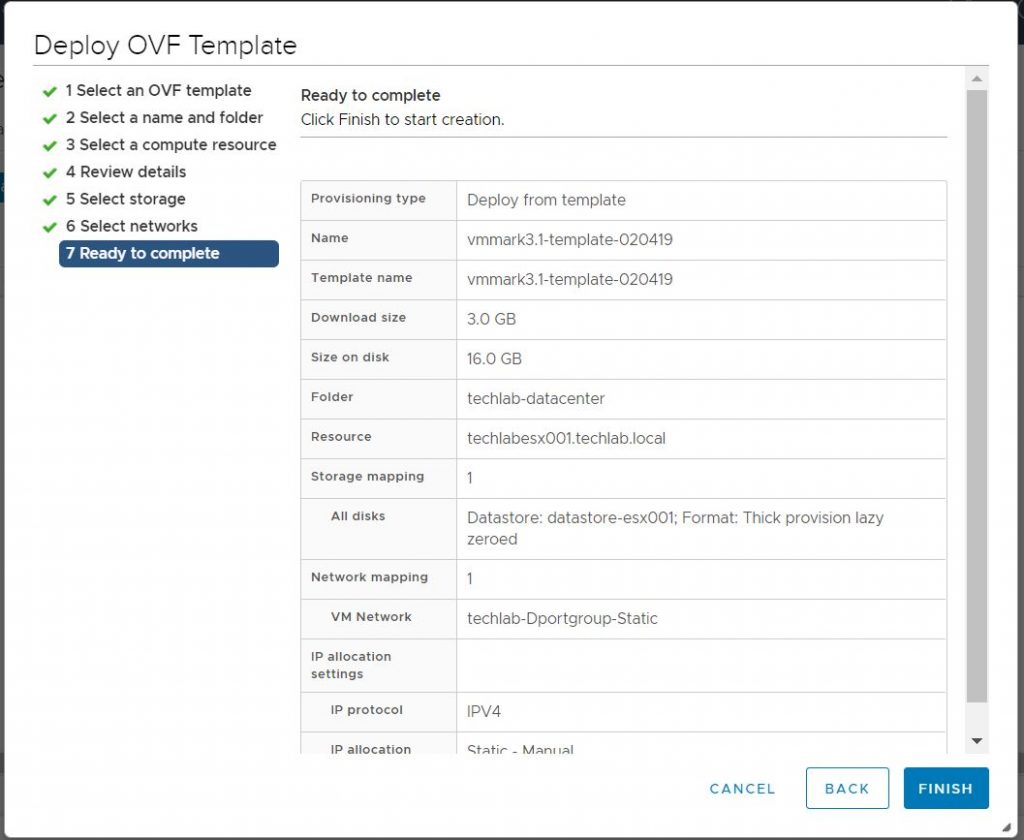
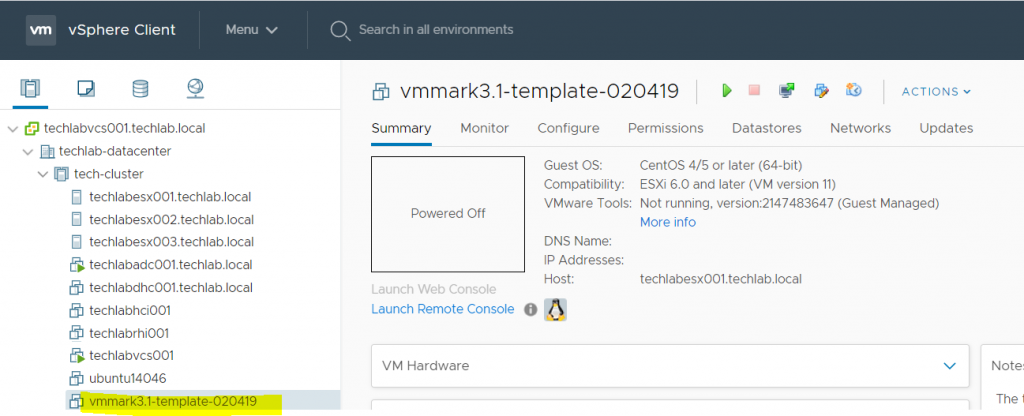
The template will deploy

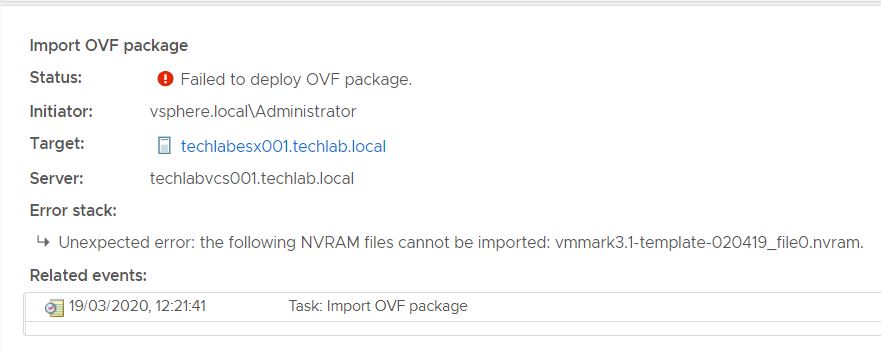
Follow steps in my other blog to upgrade this template – Note, you only need to run the four commands in Step 5 if this is a fresh install which hasn’t been used for benchmarking before.
http://www.electricmonk.org.uk/2020/04/13/upgrading-from-vmmark-3-1
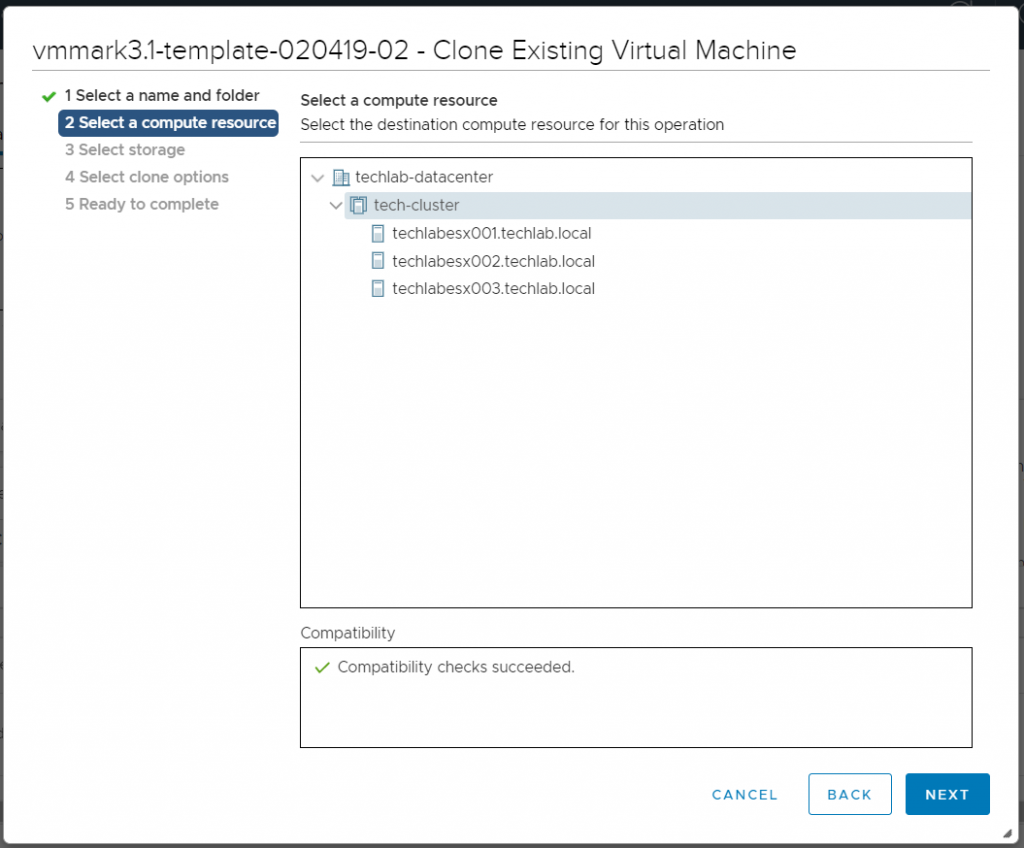
Next, from the vSphere Client, right click on the newly-deployed vmmark3-template* virtual machine and select Clone > Clone to Virtual Machine. This creates an infrastructure operations template which has -02 at the end . You can create multiple templates. Page 47 of the user guide details more.

Choose the host or cluster to deploy on
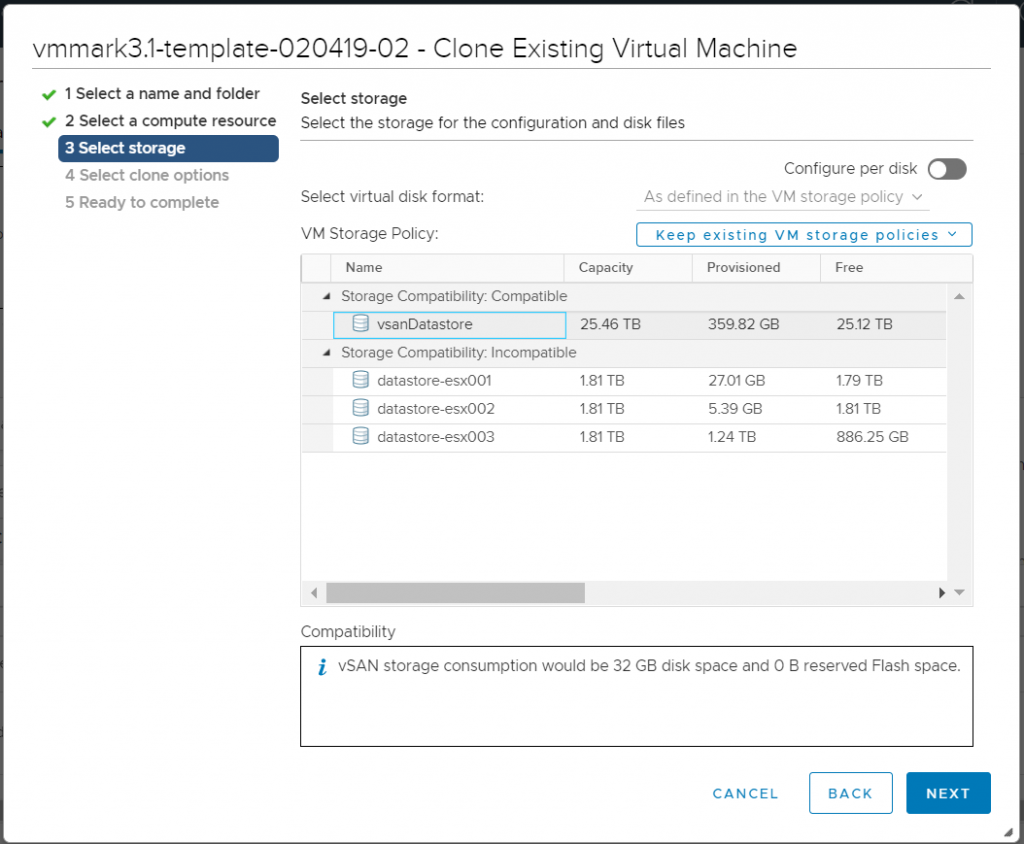
Select the storage
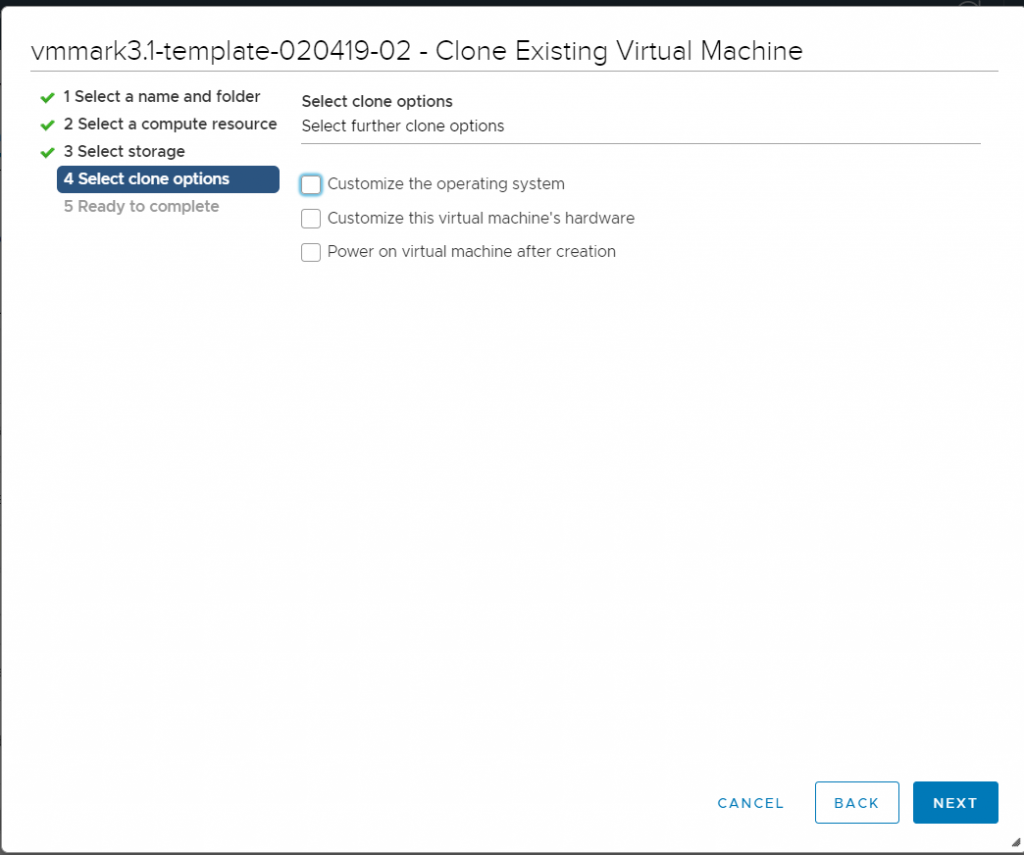
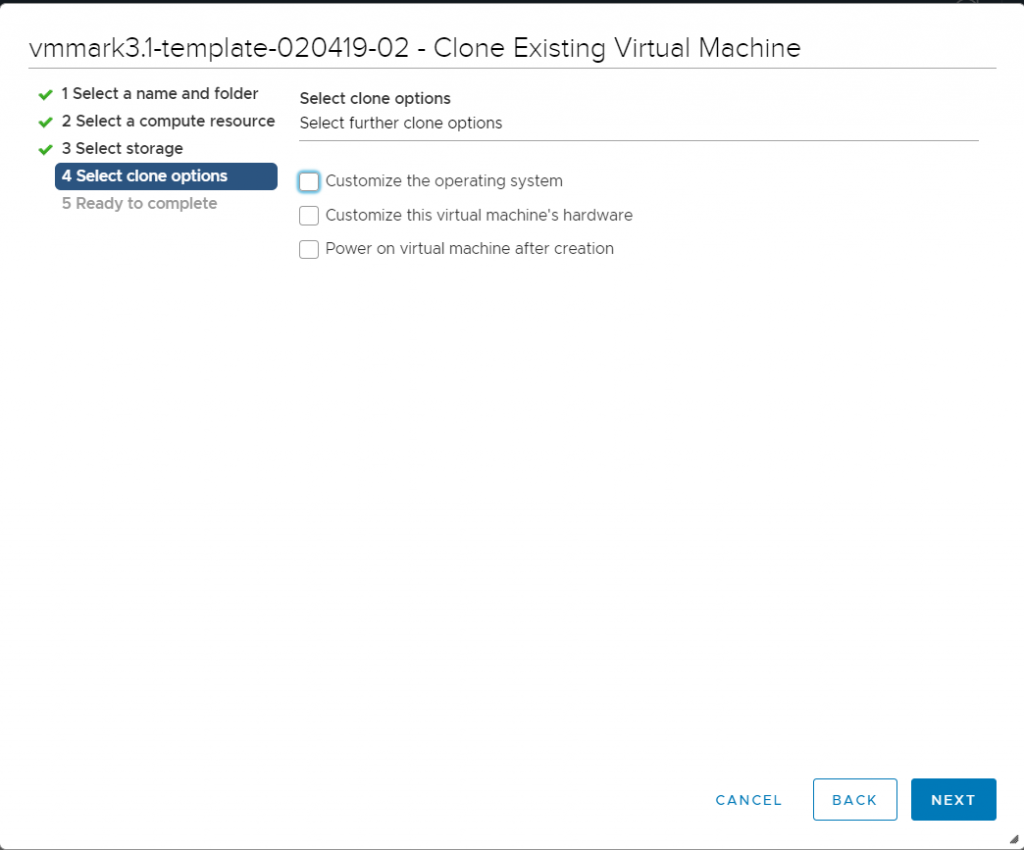
Leave customisation options blank
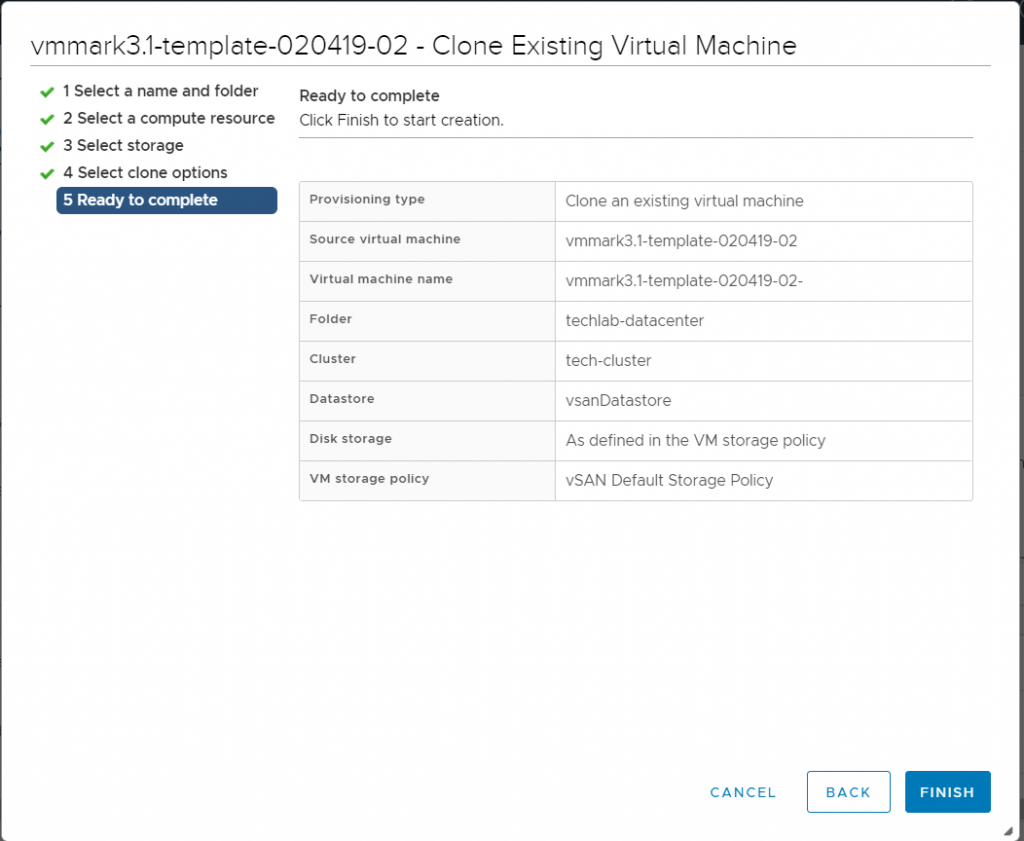
Check the details and Finish the wizard
Next we need to create the Prime Client
From the vSphere Client, right click on the newly-deployed vmmark3-template* virtual machine and select Clone > Clone to Virtual Machine…
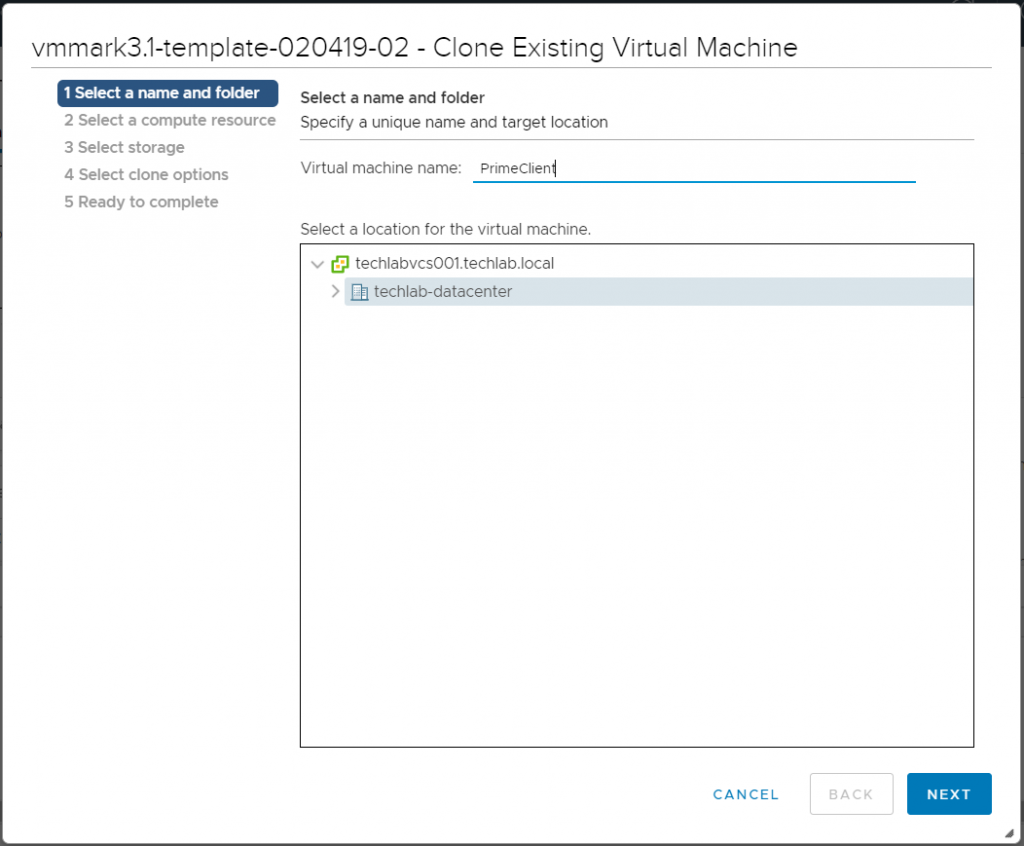
Under Select a name and folder enter PrimeClient, select the location for the prime client, then click
Next.
Select a compute resource

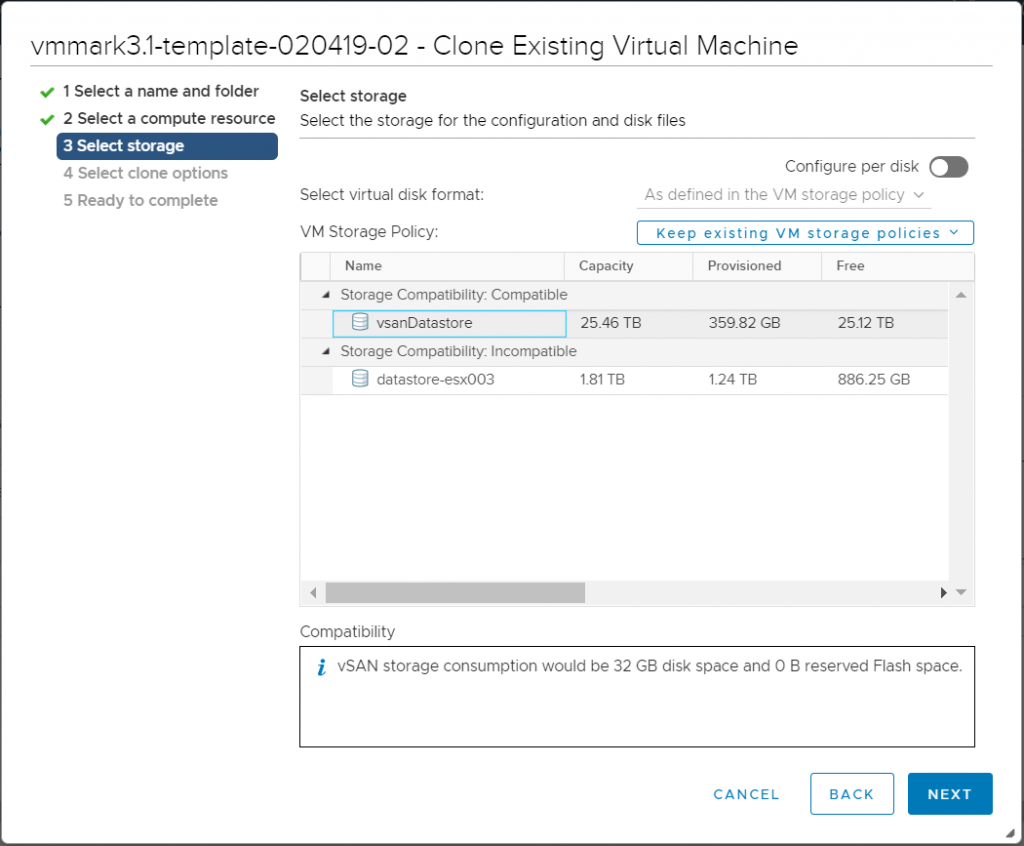
Select storage
Don’t choose any clone customisation options
Check and finish
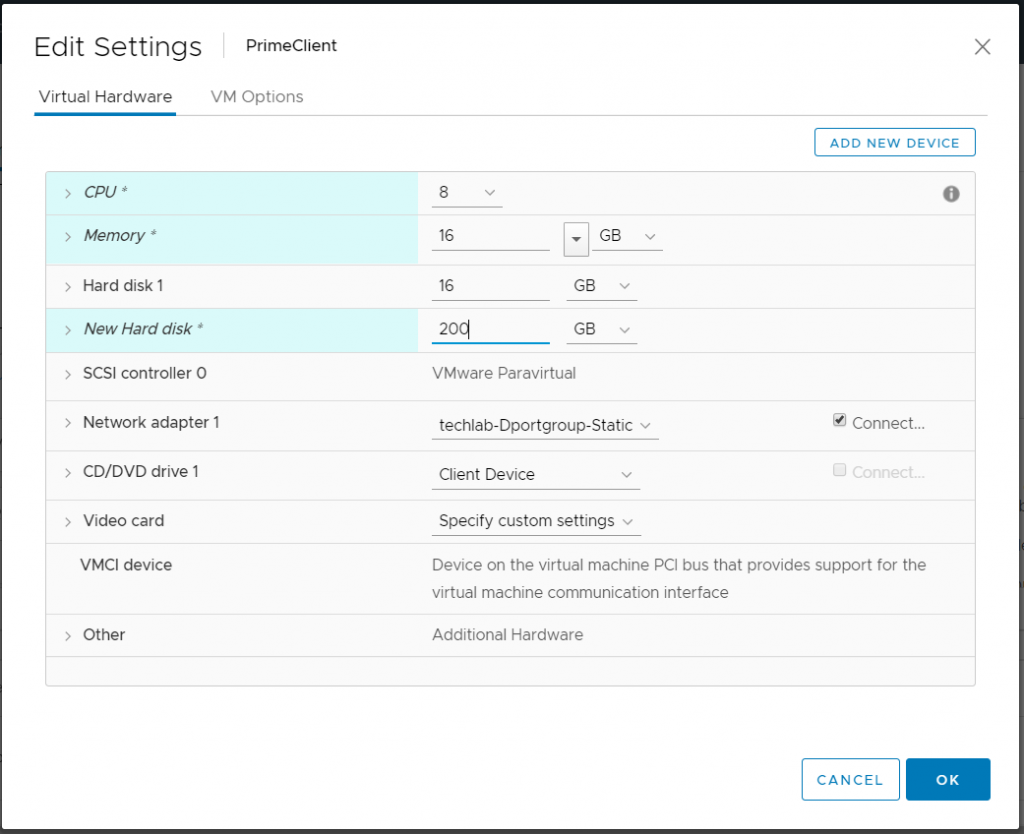
Edit the virtual hardware using 8vCPUs, 16GB RAM and a second virtual disk of 100GB. You can add another nic also.
Next we need to configure the Prime Client
Power on the PrimeClient VM.
Right click on the PrimeClient VM and select Open Console

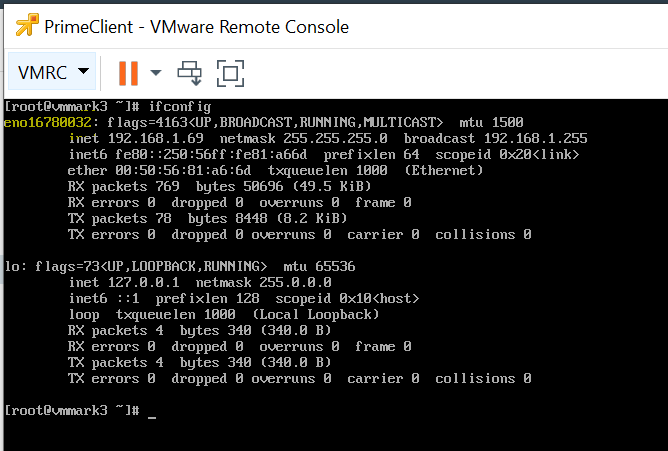
In a terminal window run ifconfig to determine which network is active. It will be of the form enoXXXXXXXX.
Change to the networks script directory – cd /etc/sysconfig/network-scripts

Copy the appropriate network script (ifcfg-sample-static for networks with static IP address assignment, ifcfg-sample-dhcp for networks with DHCP IP address assignment) to be used by the active network identified in Step a above. In my case ifcfg-en16780032.
For example, to configure a network named eno16780032 for use with a static IP address use the below command and press enter to overwrite the file.
cp ~/VMmark3/samples/ifcfg-sample-static ifcfg-eno16780032

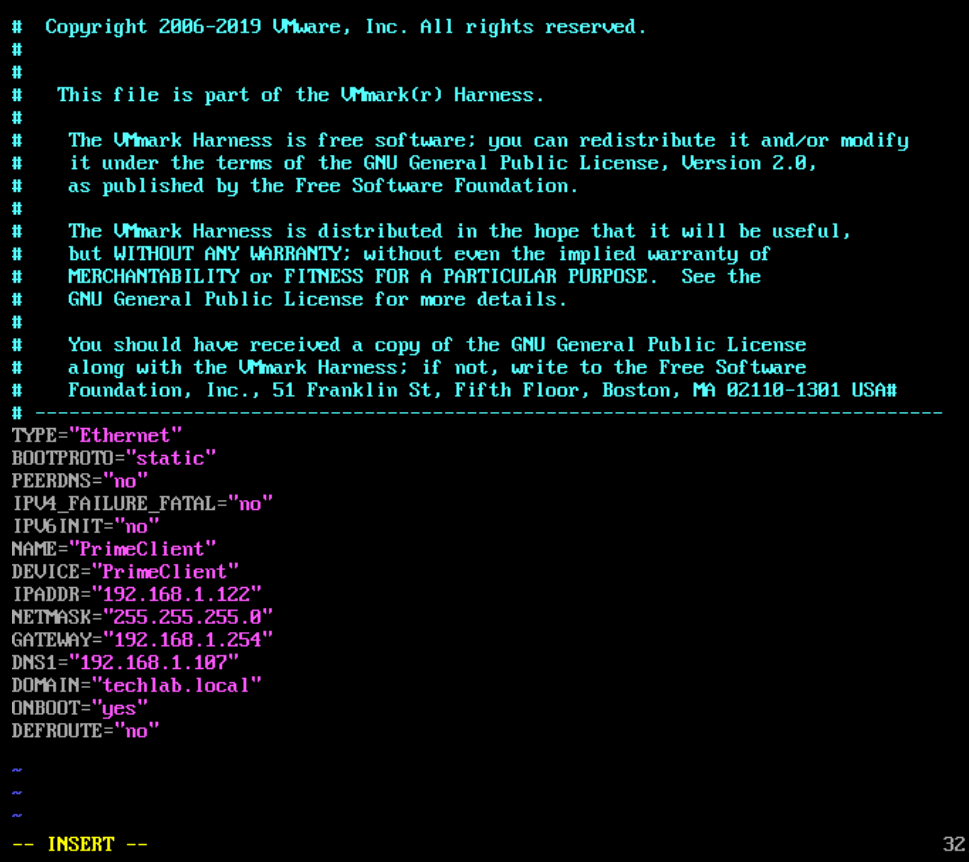
Open the new network script in an editor and update the name, the device, the IP address and other IP settings as needed. Place the cursor where you want to edit and press the letter i to enter insert mode to be able to edit what you need.
Type vim ifcfg-eno16780032 and you will see the below screen
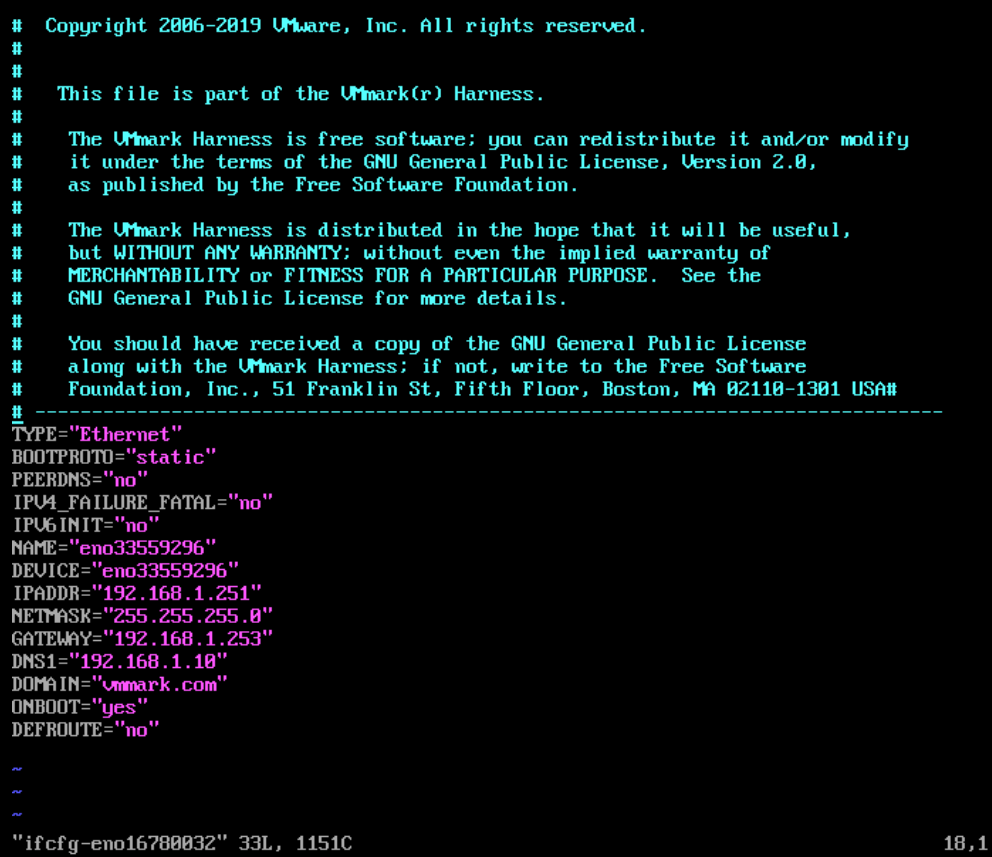
Note: On our work lab we had to do a command route add default gw $default_gw_ip and in the file below select yes to DEFROUTE. I have edited the file as seen below. Press Esc and then :wq to save and exit the file
Note: If you get an LSB cannot start when you restart the network after configuring these fields, then the device field below may need to be changed to your network device. In our case it will be eno16780032 instead of PrimeClient.
Run the following command

Still in the terminal window, convert this virtual machine into the prime client by running the make-prime script: cd ~/VMmark3/tools
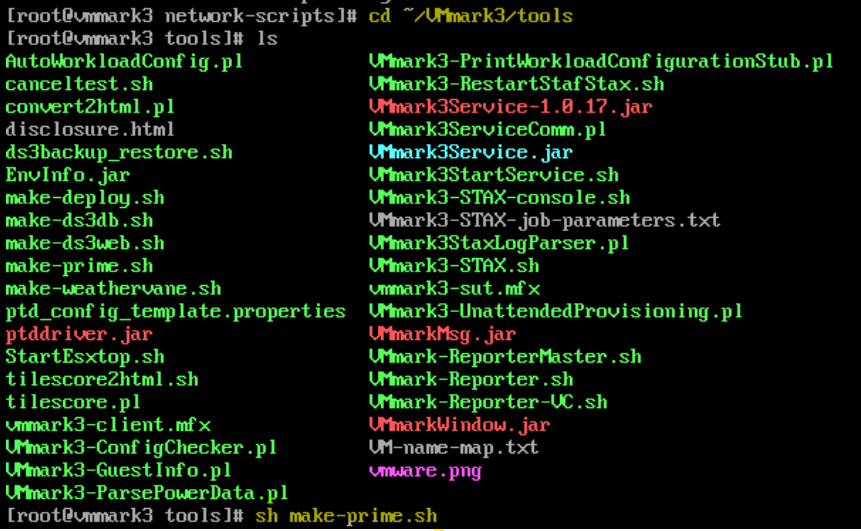
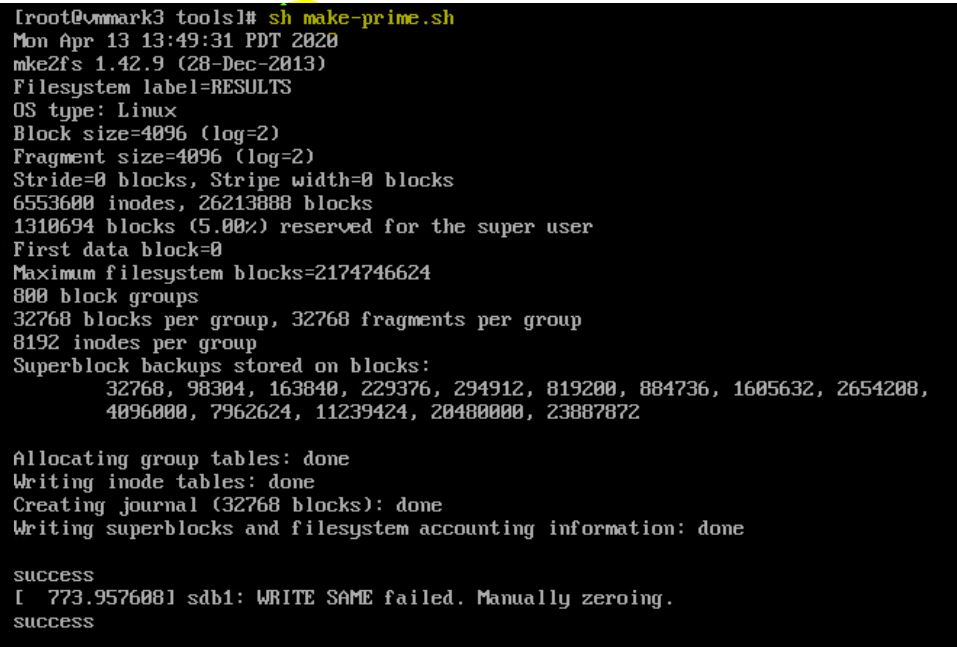
Run the script: sh make-prime.sh The make-prime script will start an X Windows GUI and display a login dialog.
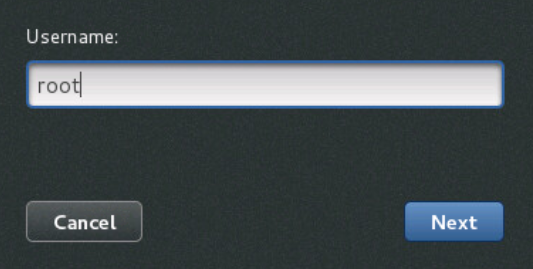
Click Not Listed
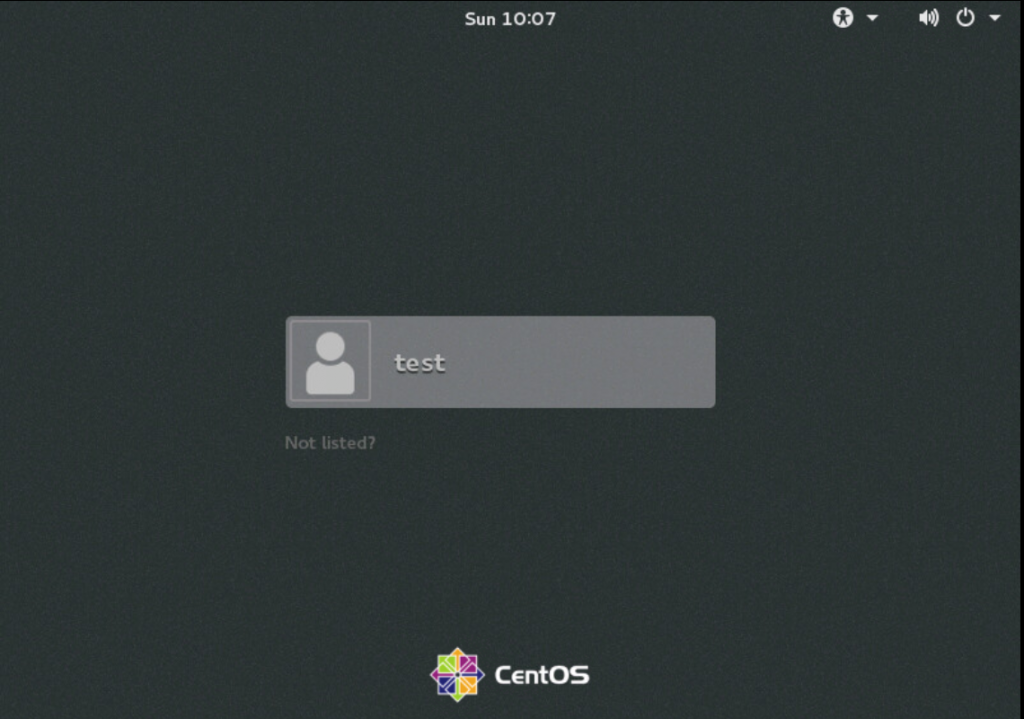
Log in as root. (The default login is test, but click Not listed? and log in as user: root, password: vmmark.)
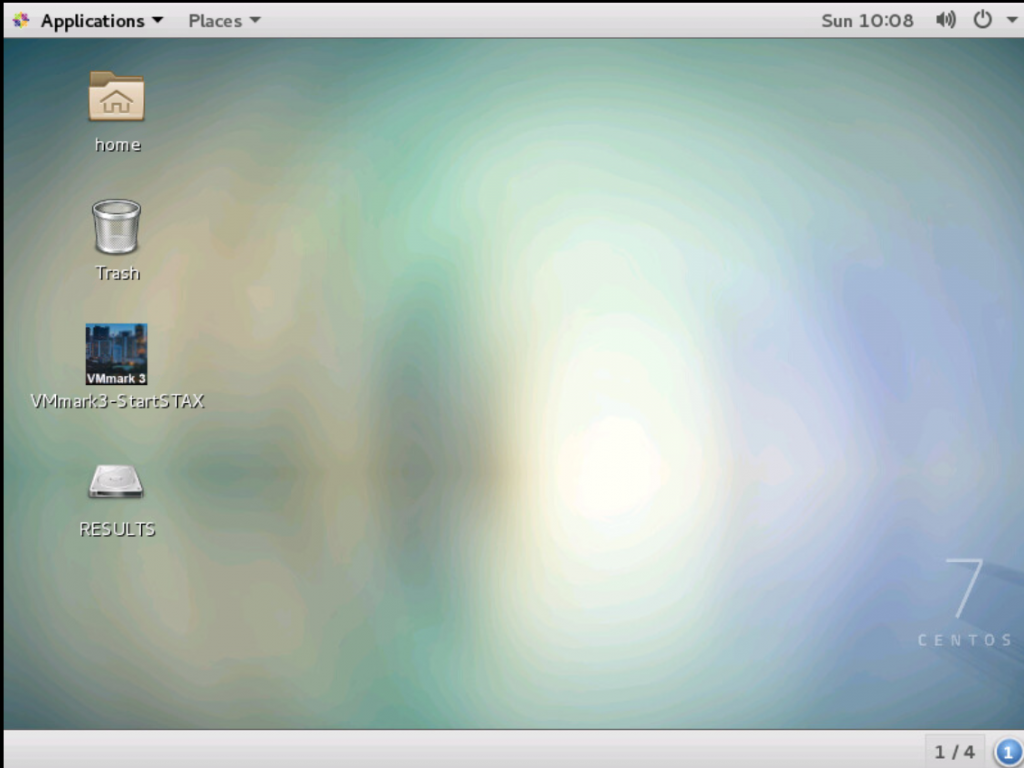
You will see the below screen when logged in
Configure passwordless SSH in the VMware ESXi hosts to allow for the PrimeClient to log into them without a password. Make sure you have enabled ESXi Shell access and SSH access on your hosts

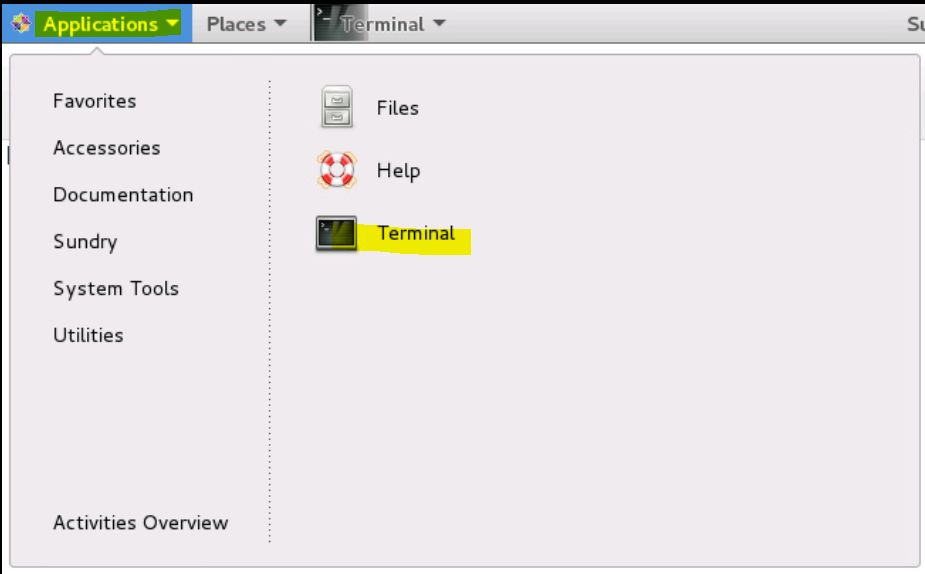
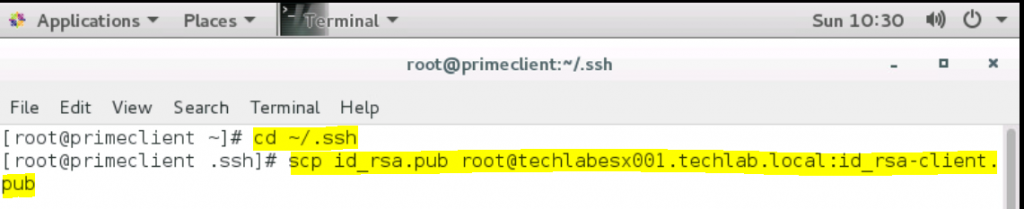
From the PrimeClient copy id_rsa.pub to each ESXi system. Open Terminal.
cd ~/.ssh
scp id_rsa.pub root@techhlabesx001.techlab.local:/id_rsa-client.pub
You will be asked to accept a certificate and enter the host password
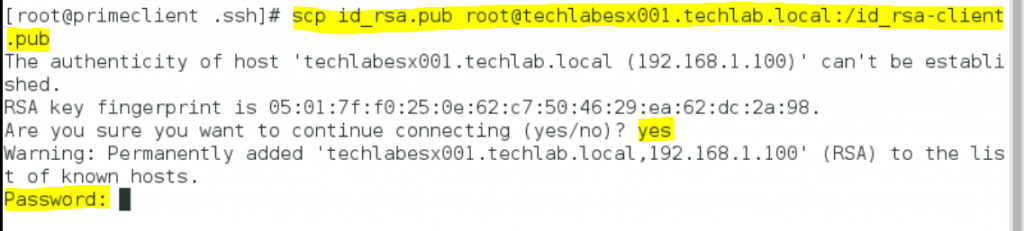
Do the same for the rest of your hosts
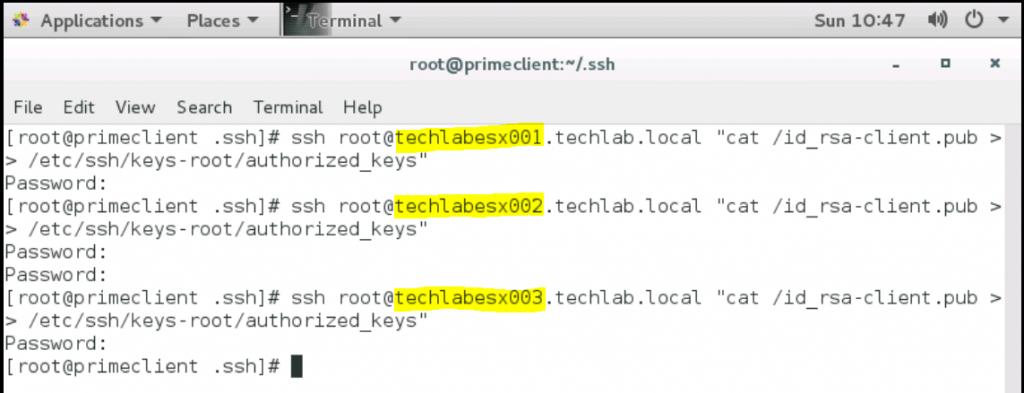
Still on the prime client, for each ESXi system, add the new key to the authorized-keys list: ssh root@ESXisystem “cat /id_rsa-client.pub >> /etc/ssh/keys-root/authorized_keys”
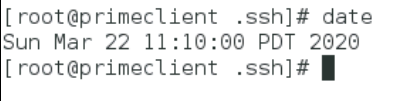
Make sure the prime client is configured for the correct time zone. The prime client, tile clients, and all workload virtual machines must be set to the same time zone. In a terminal window, run the date command to determine the prime client’s current time zone.
In my case the date is correct but the timezone is wrong
Make a backup copy of the default localtime file: mv /etc/localtime /etc/localtime.bak

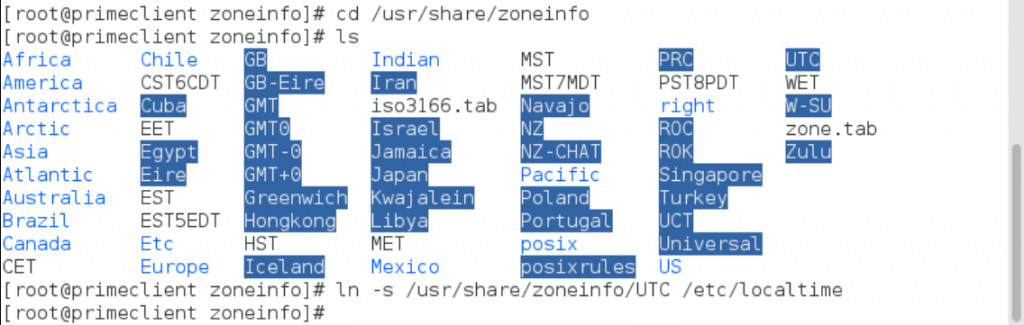
Under /usr/share/zoneinfo, locate the correct time zone file for your environment.
Type ln -s /usr/share/zoneinfo/<Your_time_zone> /etc/localtime to change. in my case this was UTC.
Reboot the PrimeClient
I took a snapshot at this point of the PrimeClient.
VMmark Harness
It is worth noting some information on VMmark harness
The VMmark Harness is a utility run on the prime client system that can start and stop the applications running on the workload virtual machines and can report the results of a test run.
The VMmark Harness is based on the open-source Software Testing Automation Framework (STAF, see http://staf.sourceforge.net/index.php) and its companion execution engine, STAX. These tools support the development and running of distributed coordinated tests across heterogeneous machines and operating systems.
The VMmark Harness consists of several STAX XML modules, the VMmark3.properties file, and several workload-specific configuration files. The main STAX module, vmmark3_main.xml, processes the VMmark3.properties file to configure the test to be run. Each workload has its own <workload>_functions.xml module that contains the workload-specific code needed to initialize the test, run the test, and collect the results.
The VMmark3.properties file defines the actual test, identifying all the clients and server virtual machines involved in the test, the number of tiles to be run, and the workloads within each tile.
After the VMmark3.properties file has been processed, the VMmark Harness performs pre-run system and timing validation and initiates the setup phase for the VMmark infrastructure operations and for each workload in each tile. After the setup has completed, the VMmark Harness simultaneously initiates the individual workloads in all the tiles. When the workload runs have completed, the harness again validates the timing, then collects the results into a results directory
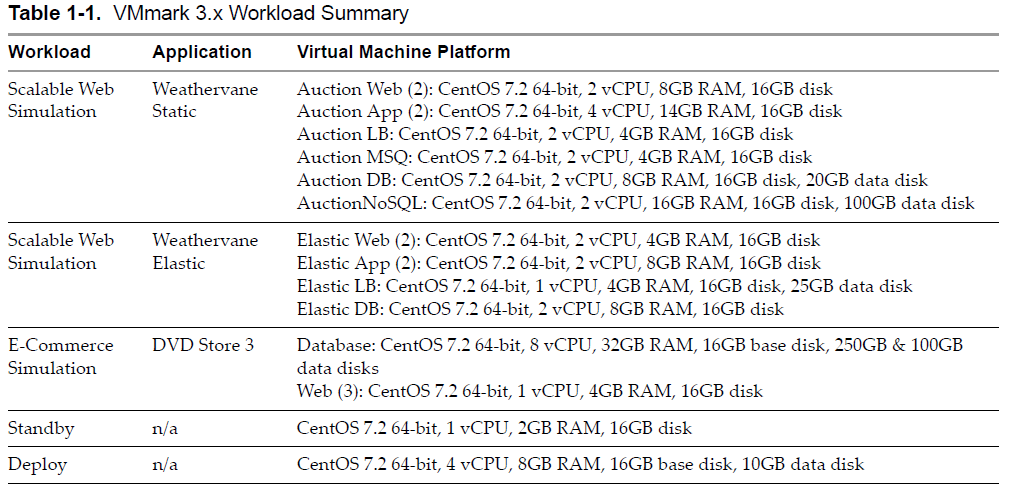
Resource usage per tile
You need to ensure that you have adequate resources across the system to accommodate the increasing tile load

Provision VMmark Tiles
Once the prime client is created and configured, it is used to create all other clients and the workload virtual machines
Stay logged in to the PrimeClient and type cd ~/VMmark3
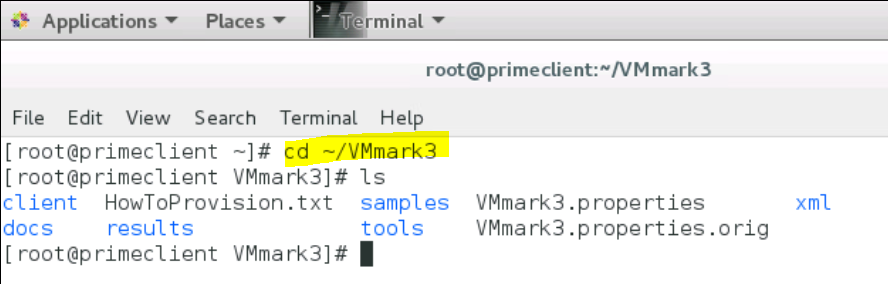
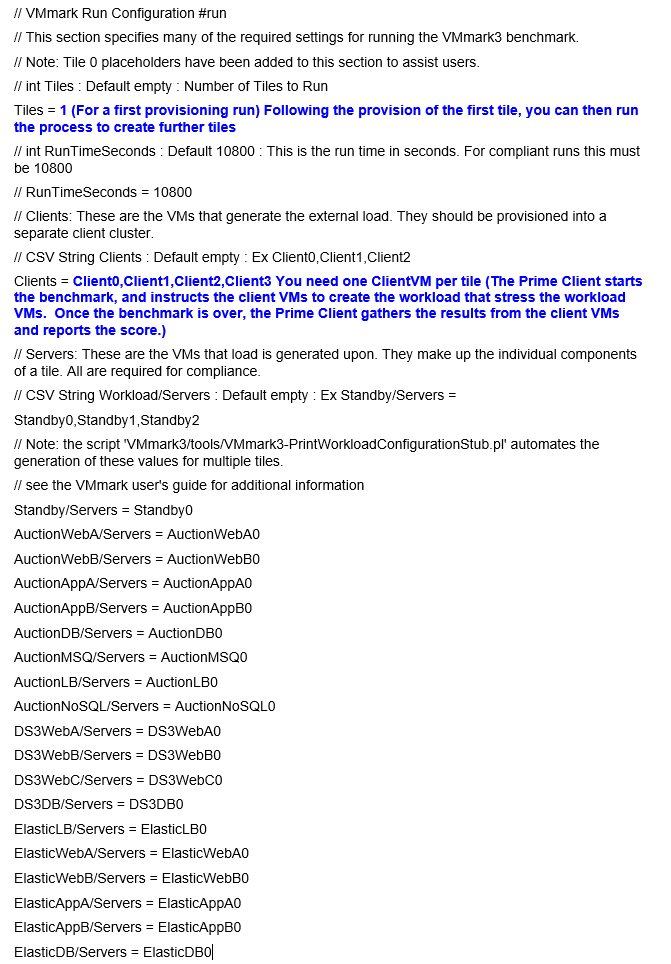
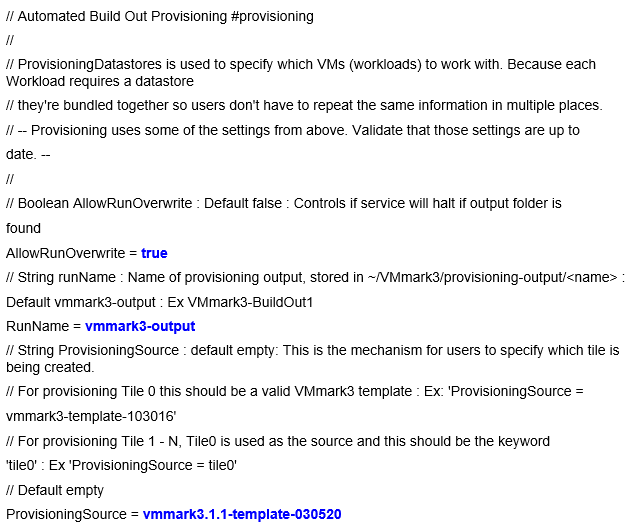
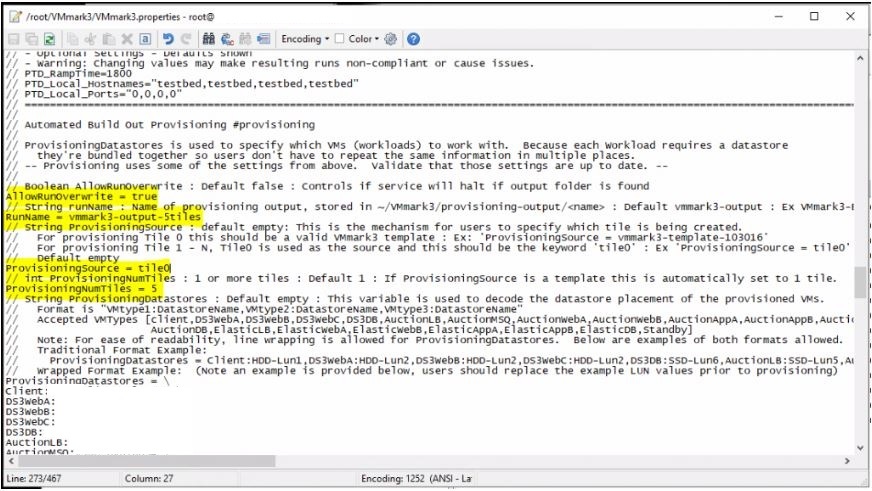
Modify the following parameters in the VMmark3.properties file according to your environment and needs. (Page 51 of the Users Guide has some information and Page 57 has a full template file so you can see all the settings) See more info following the figure below. Note the file is very large
Edit the VMmark3.properties file by typing vim VMmark3.properties
You will see the below screen. Type i to enter Insert Mode
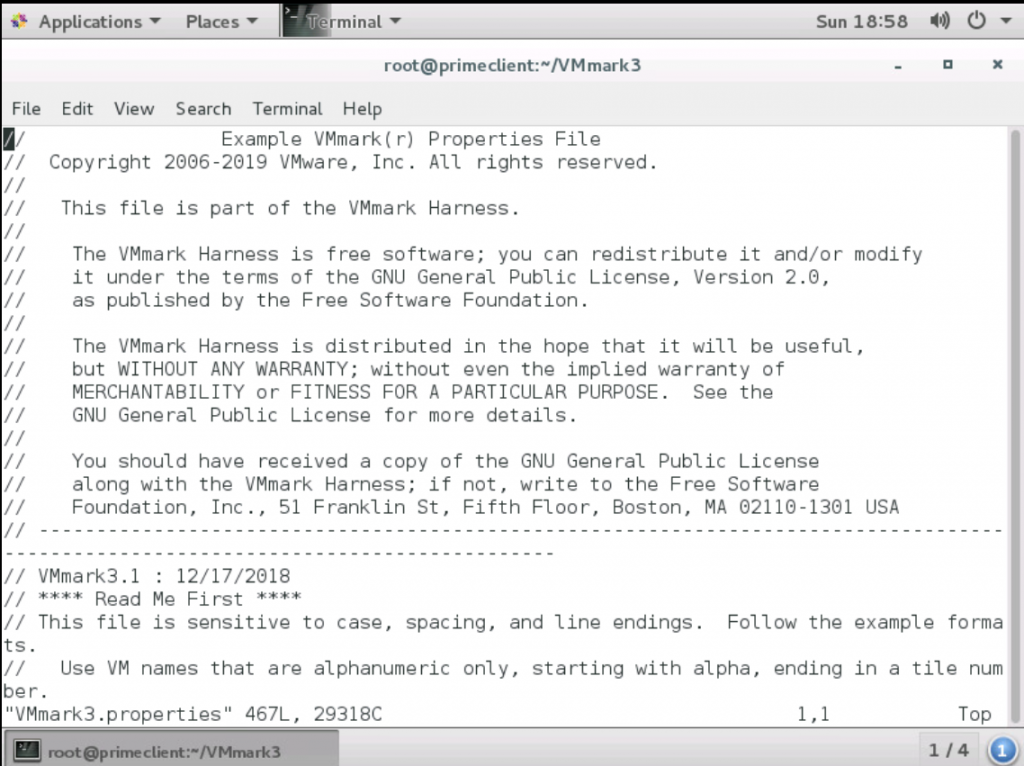
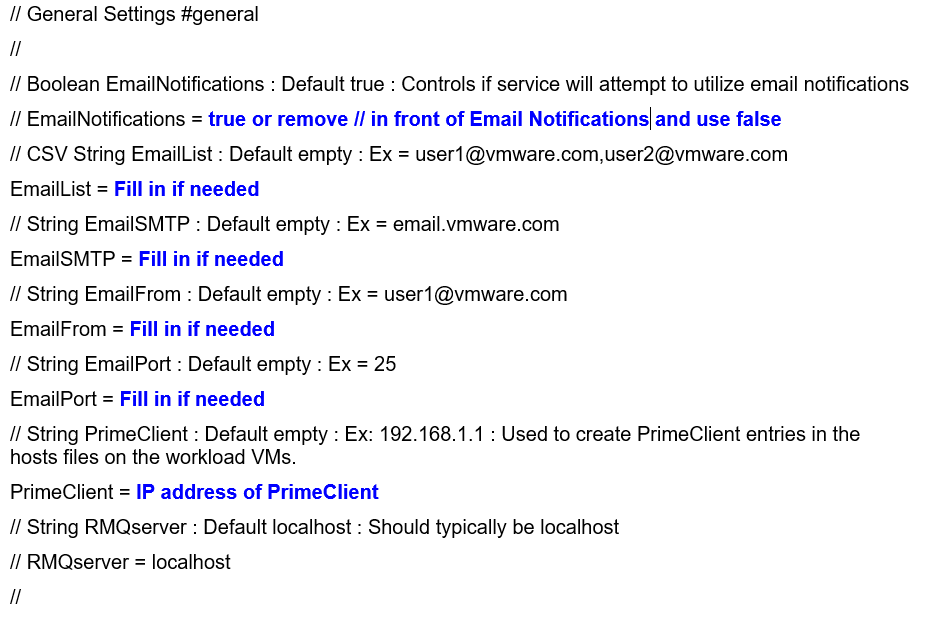
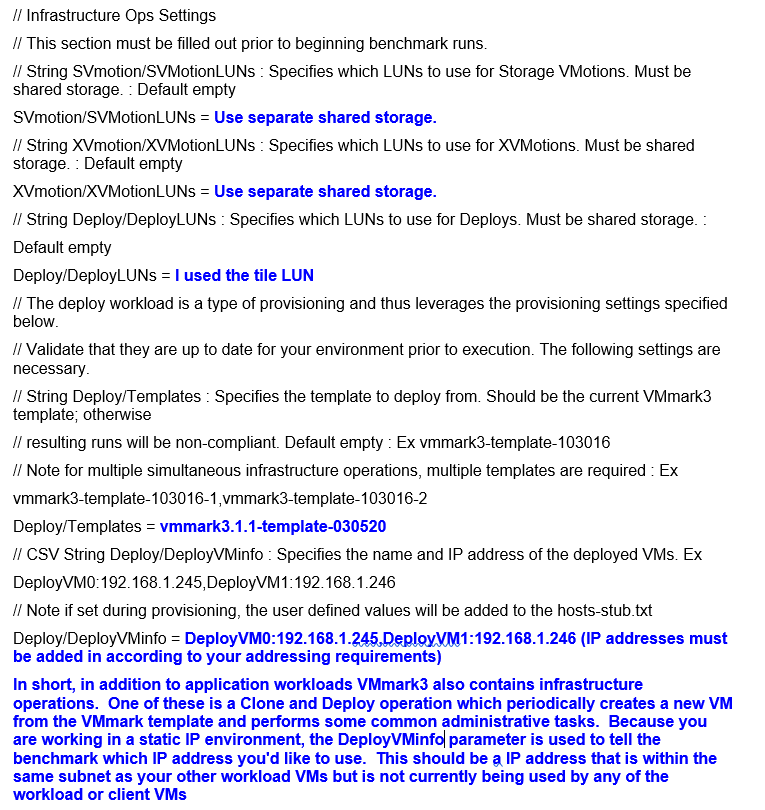
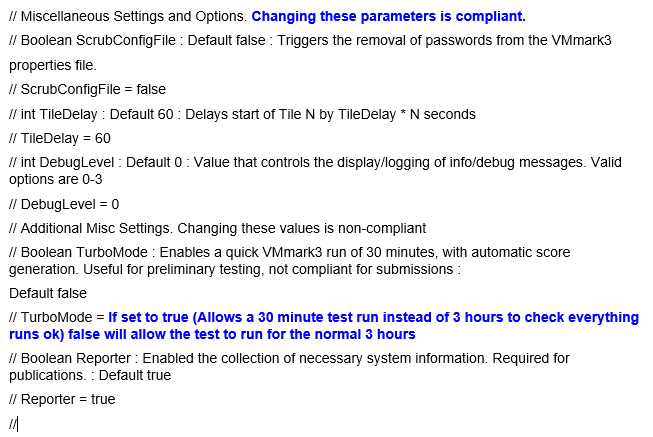
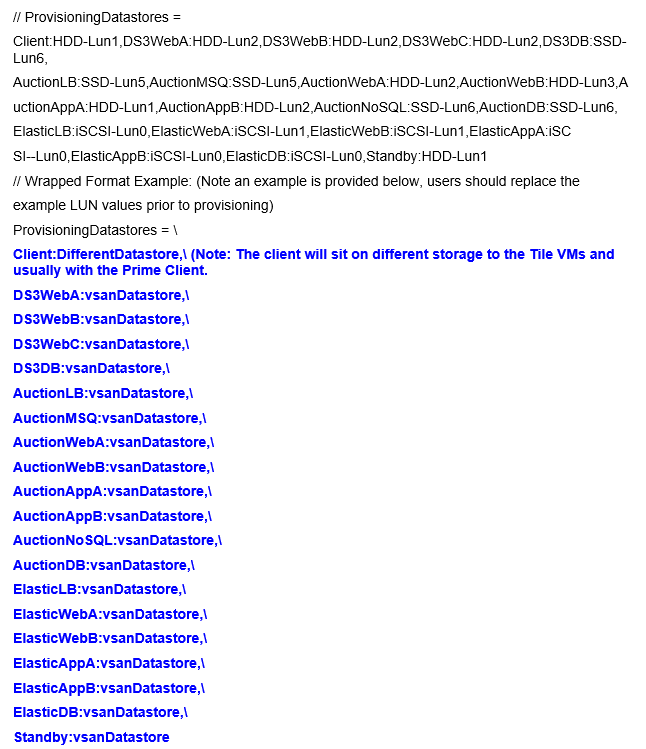
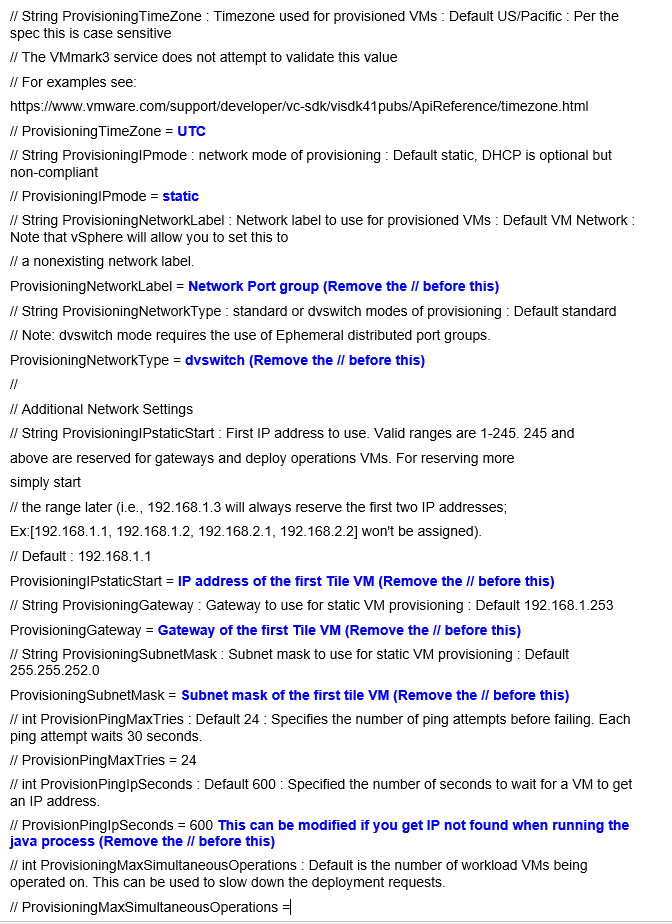
Scroll down and fill in the various settings required in all sections of the file. Note: Some are not modified or the test is not valid.
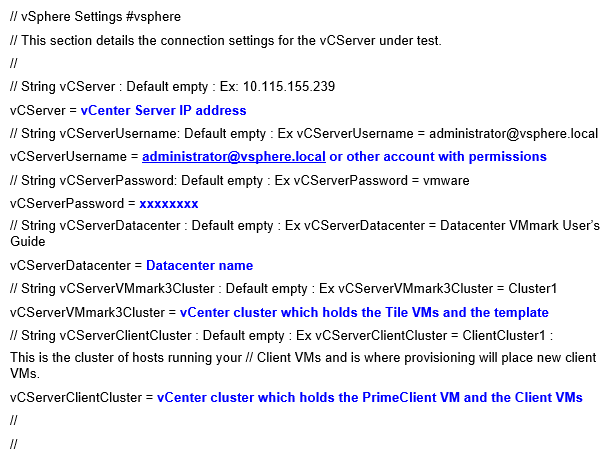
The settings I modified are as per below

To start the provisioning process, from the VMark3 folder execute:
java -jar tools/VMmark3Service.jar -c VMmark3.properties
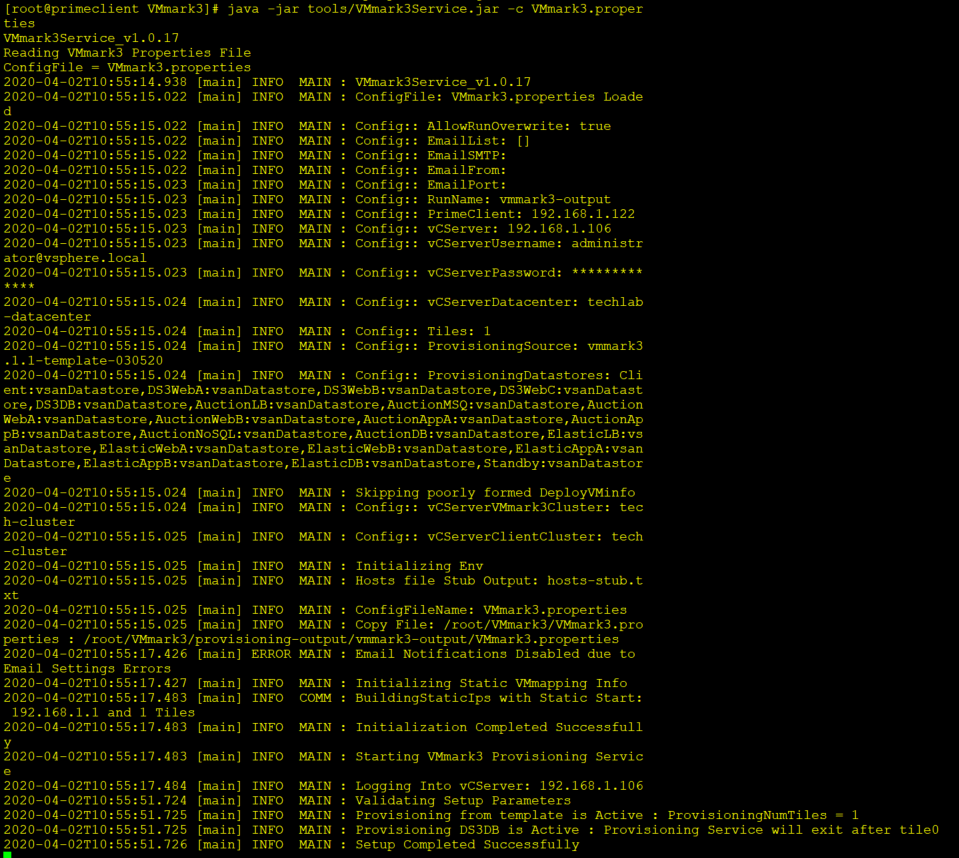
NOTE The provisioning process initiates creation of the DS3DB0 virtual machine, which can take 12 hours or more while data is loaded into the DS3DB0 database. This procedure is not considered part of the provisioning process.
A tile consists of
Though creation of the DS3DB0 virtual machine can take many hours, the provisioning process will complete much more quickly than that. Once the provisioning process has completed, update the prime client’s hosts file, with the command below while DS3DB0 builds. Check the names and addresses are correct and add the ESXi hosts as well.
cat ~/VMmark3/provisioning-output//hosts-stub.txt >> /etc/hosts
You should start seeing your Tile VMs deploying.

NOTE The provisioning service does not modify the prime client’s hosts file. Once provisioning has completed, the output folder will contain a hosts-stub.txt file that can be imported into the prime client’s hosts file as described below.
Populate the prime client’s hosts file. In a terminal window on the prime client, run the following command:
cat ~/VMmark3/provisioning-output/YourProvisioningRunname/hosts-stub.txt >> /etc/hosts
Add entries for the systems under test to the prime client’s /etc/hosts file.
Test the passwordless SSH configuration by using SSH to manually log in at least once to each host (i.e. ssh root@[ESXhost1,2…] hostname).
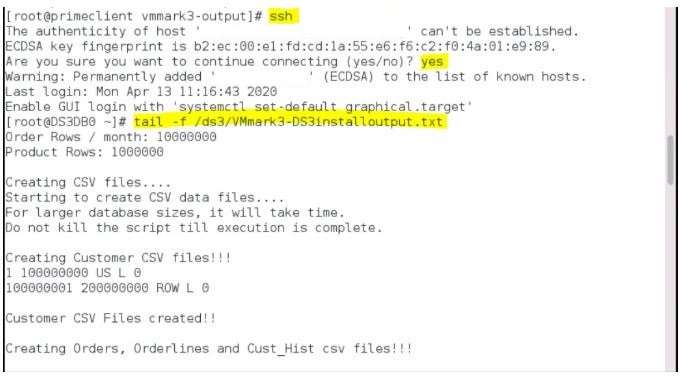
Wait for the DS3DB0 creation process to complete; depending on your environment, this can take 12 hours or more. To determine if it’s complete, follow these steps:
a. In a terminal window on the prime client, SSH into DS3DB0 using its IP address and run tail -f /ds3/VMmark3-DS3installoutput.txt or run the following command:
ssh <DS3DB0)-IP-address> ‘tail -f /ds3/VMmark3-DS3installoutput.txt’
(where <DS3DB0-IP-address> is the IP address of the DS3DB0 VM, which can be found in the hosts-stub.txt file referenced above). You will see the start of the creation of DS3DB0.
If you check the console screen of DS3DB0, you might see this message which you can safely ignore

b. Watch for the following text: VMmark3 DS3DB Setup Completed : Rebooting

Once this is complete we can try and test Turbo mode run which will run 1 tile for 30 minutes just to check everything is ok with no errors to start with
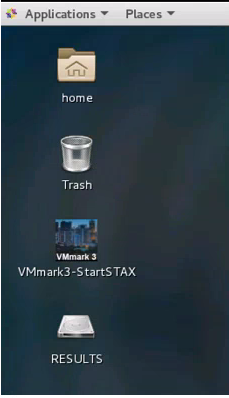
Log into the Primeclient and double click on the VMmark3-StartSTAX icon on the desktop
Click on Submit new job
In the Job Info tab in XML Job File > Local Machine > Filename
Browse to /root/VMmark3/xml/ and select vmmark3_main.xml
In the STAX Job monitor window, under the Job Info tab, under Job Options, enter a name. (No spaces in the job name)
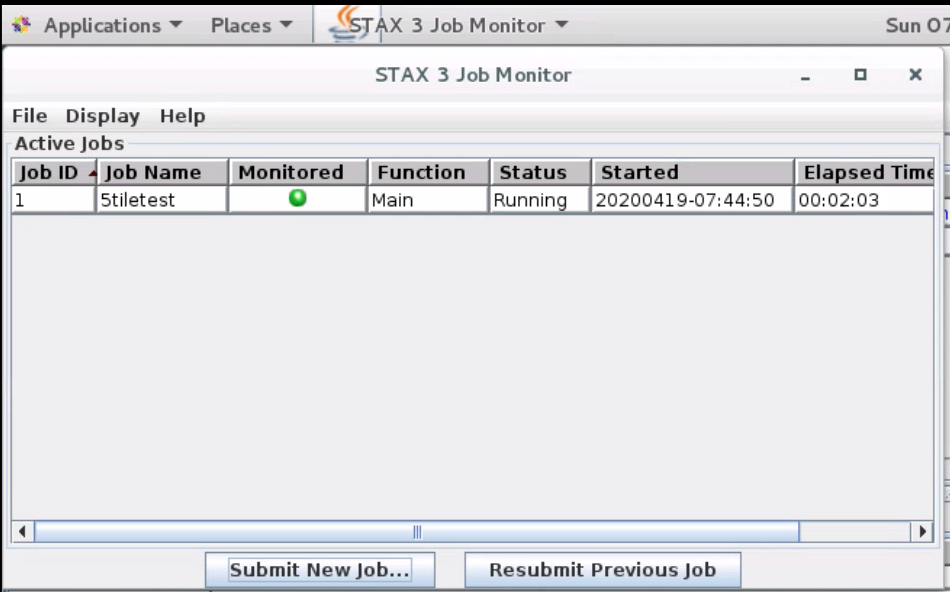
Click Submit new job and you will see the STAX Job Monitor Machine test running
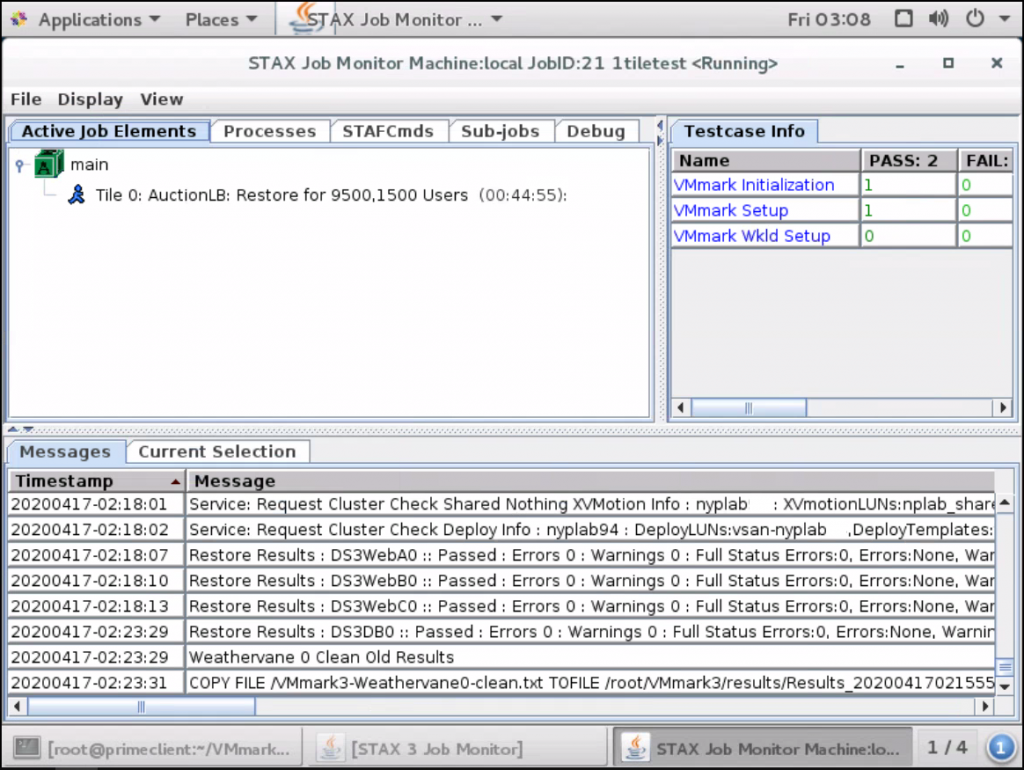
Once this has finished, check everything has run ok in the GUI as seen below – Results can be found in /root/VMmark3/results/<yourjobname>
Next you will need to create the extra tiles you need to use – Follow Page 53 of the manual to do this under section Creating Additional VMmark Tiles (Tiles 1 through n) I needed to run 5 tiles.
Run the below command to create the extra tiles
cd ~/VMmark3
java -jar tools/VMmark3Service.jar -c VMmark3.properties -m tilePower -tiles 1
Once the 5 tiles are created you then need to edit the VMmark.properties files again under the VMmark Run Configuration section
Select 5 for Tiles (Or however many tiles you need)
Add the extra Clients (1 Client per tile) so I need to make sure there are 5.
You then need to add the extra names in for each of the extra tiles as per below. You can run a perl script which will print the output on screen to tell you what you need to put in (5 at the end for 5 tiles)
perl tools/VMmark3-PrintWorkloadConfigurationStub.pl 5
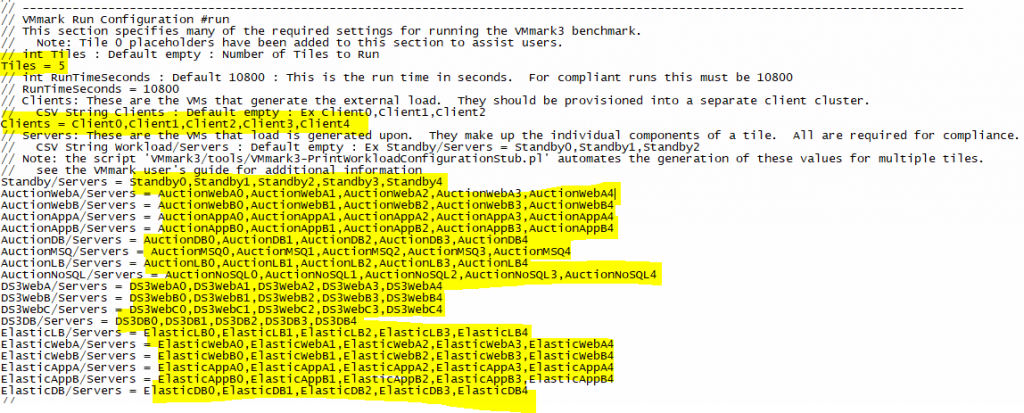
You will also need to make sure that all the new tile hosts are in the file /etc/hosts
Run the test with 5 tiles
To start STAX using the GUI, double click on the VMmark3-StartSTAX icon on the desktop.
In the Job Info tab: XML Job File > Local Machine > Filename
Browse to /root/VMmark3/xml/vmmark3_main.xml
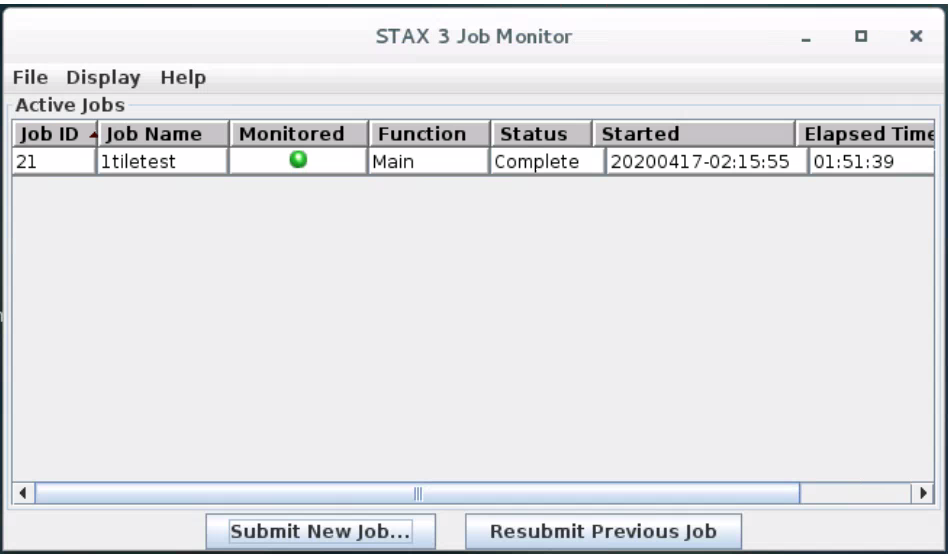
In the STAX 3 Job Monitor window, under the Job Info tab, under Job Options, enter a job name with no spaces and click Submit job which will then start running in a STAX 3 Monitor window and a job window
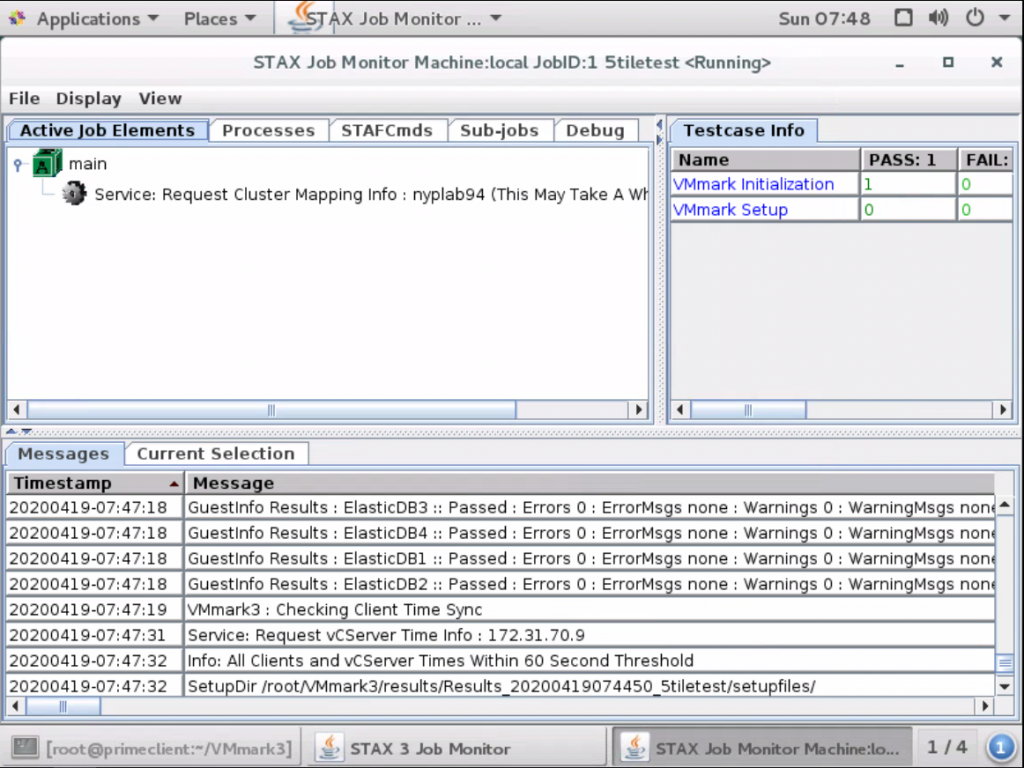
When the test completes, you should see the below screen
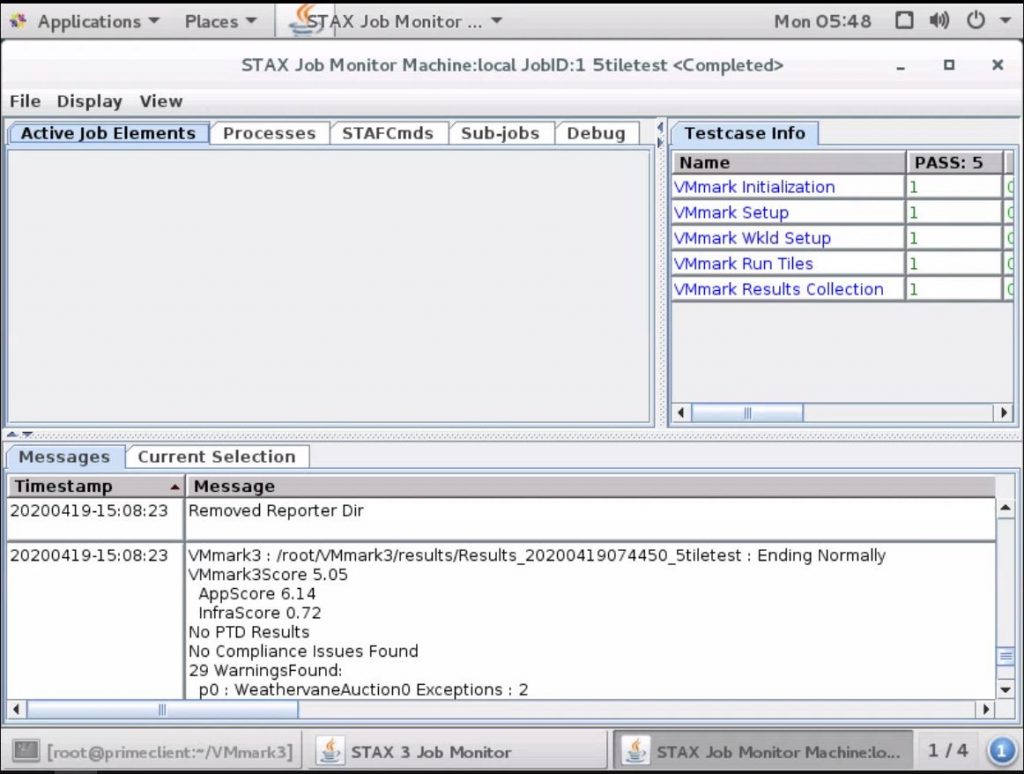
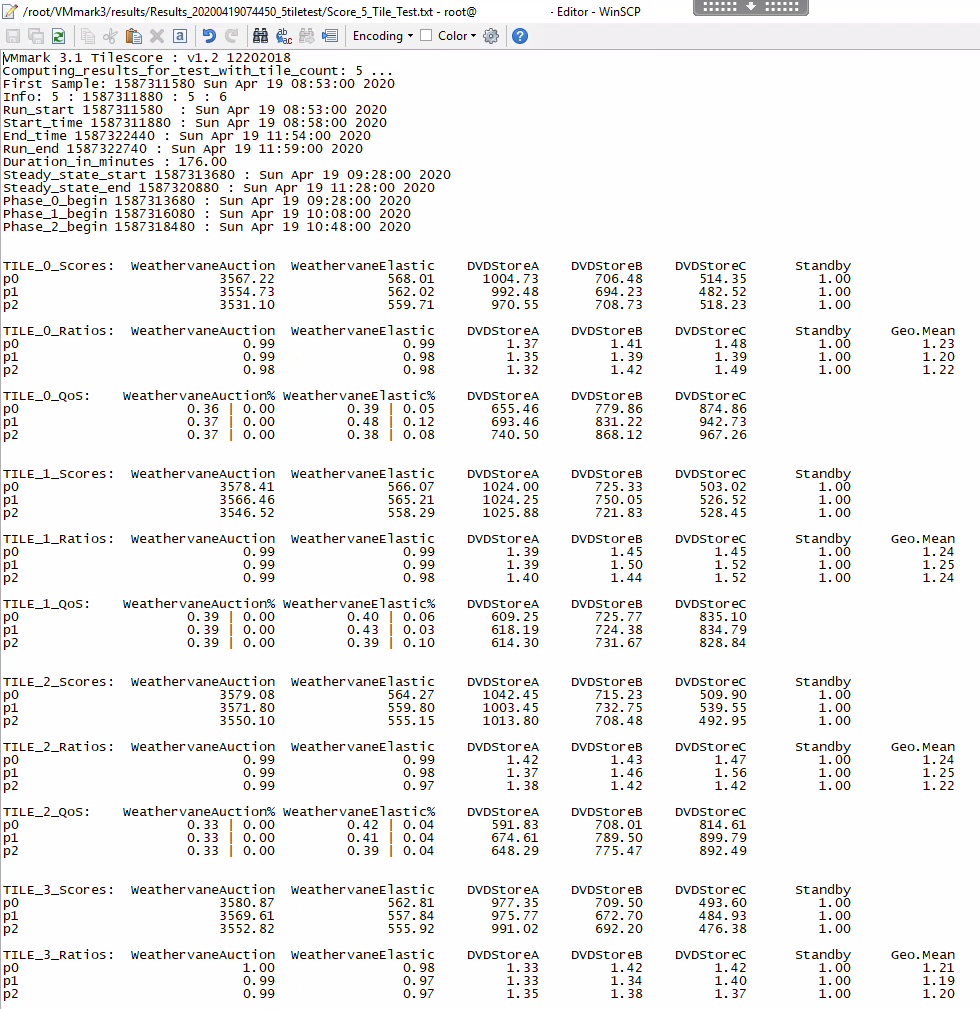
Results can be found in root/vmmark3/results/<yourjobname>
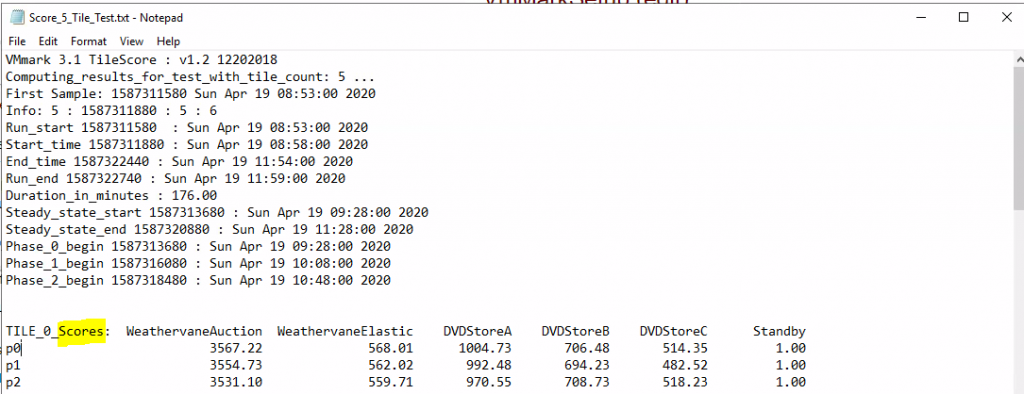
The file is screenprinted below in 2 parts so you can see what gets produced
Analysing the results
Each workload within a tile is constrained to execute at less than full utilization of its virtual machine. However, the performance of each workload can vary to a degree with the speed and capabilities of the underlying platform
A VMmark 3.x score aggregates the throughput metrics of all application and infrastructure workloads to create a single overall benchmark score that can be used to quickly compare different platform configurations. Every workload must also pass its minimum quality-of-service requirements for the benchmark result to be considered compliant
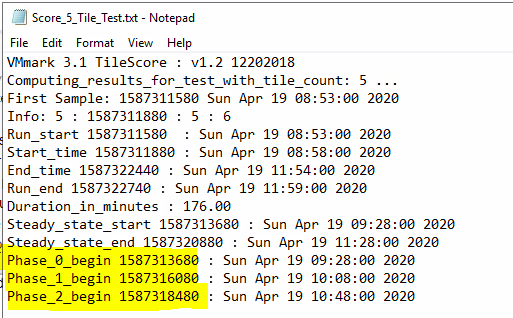
The test has a ramp up time, three 40 minute steady state phases and a ramp down time. For each of the 40 minute phases, we compute the overall result for the platform and select the median score of the three as the reported score. The 40 minute phases can be seen as P0, P1 and P2
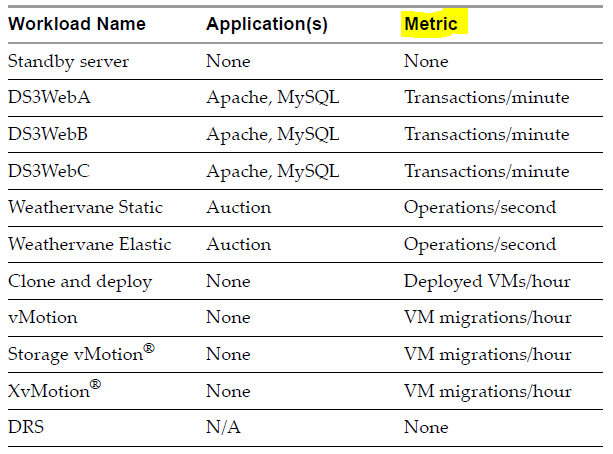
After a VMmark Benchmark test run completes, each individual application and infrastructure workload reports its relevant performance metric. The performance metrics are shown below
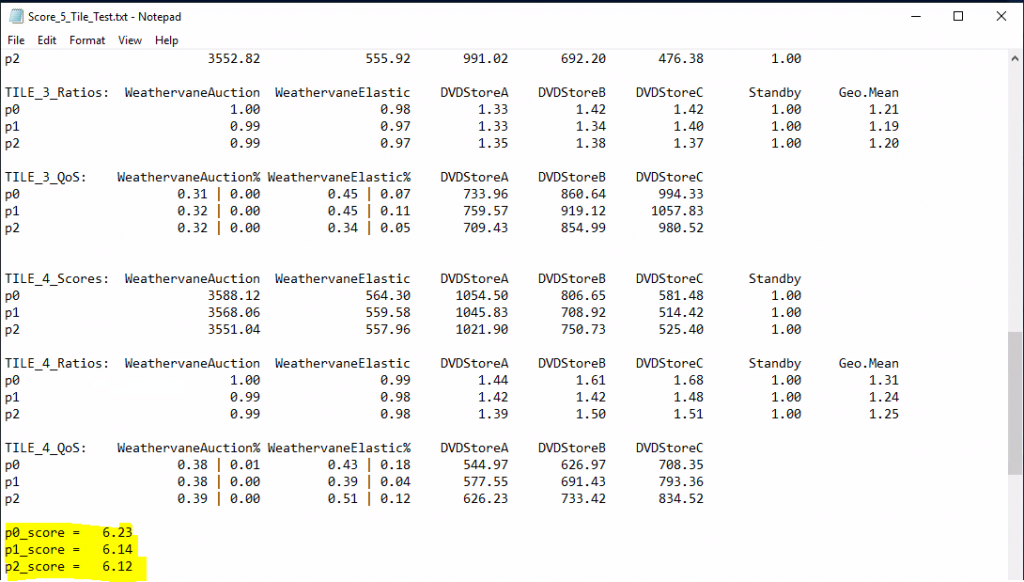
These metrics are collected at frequent intervals during the course of the run. The standard VMmark 3.x workload is designed to run for at least 3 hours with workload metrics reported every 60 seconds. This means that rather than having a single number upon completion of a test run, the user will have a series of numbers for each of the workloads. The series of data points for each workload is averaged to generate a single score for that workload which is then listed in the VMmark results file (Score_N_Tile_Test.txt).
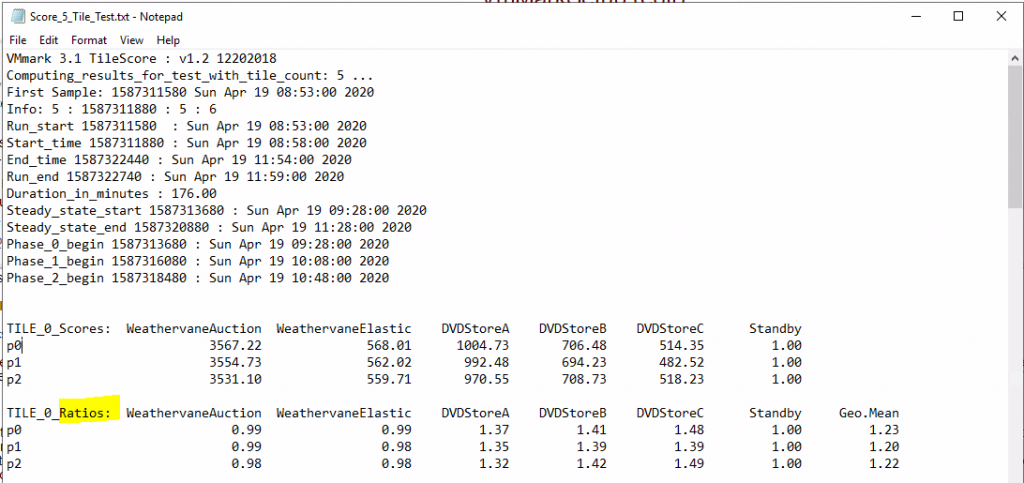
After a valid run, the metrics of the application workloads within each tile are computed and aggregated into a score for that tile. This aggregation is performed by first normalizing the different performance metrics (such
as Actions/minute and operations/minute) with respect to a reference platform. Then a geometric mean of the normalized scores is computed as the final score for the tile. .
The ratios are calculated based on a baseline from VMware so the closer to 1 the better
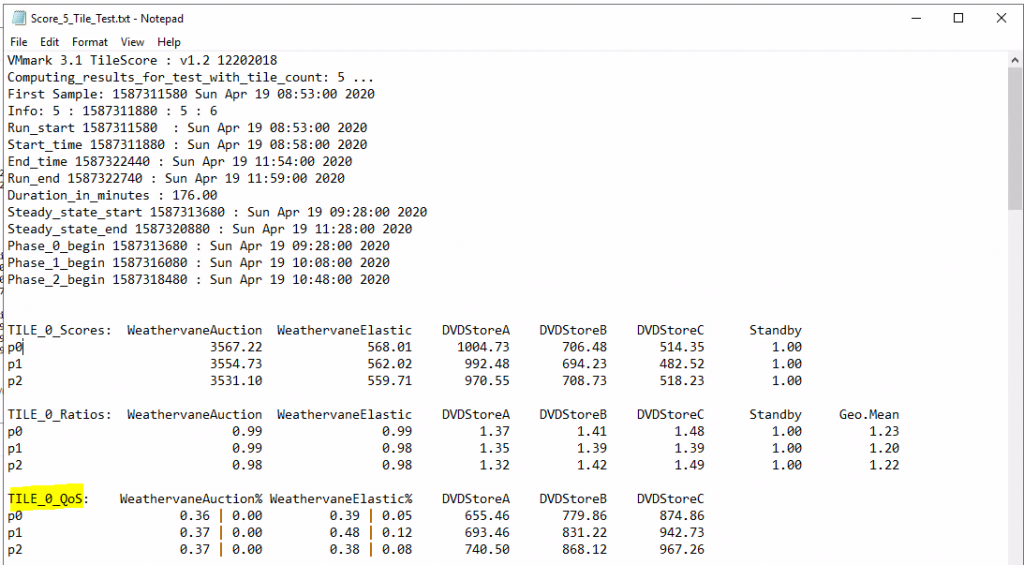
QoS is an important section to look at to see if workloads passed QoS requirements. You need to get a passed run or at least one workload failed the requirements. A * will indicate a failed run
The resulting per-tile scores are then summed to create the application-workload portion of the final metric
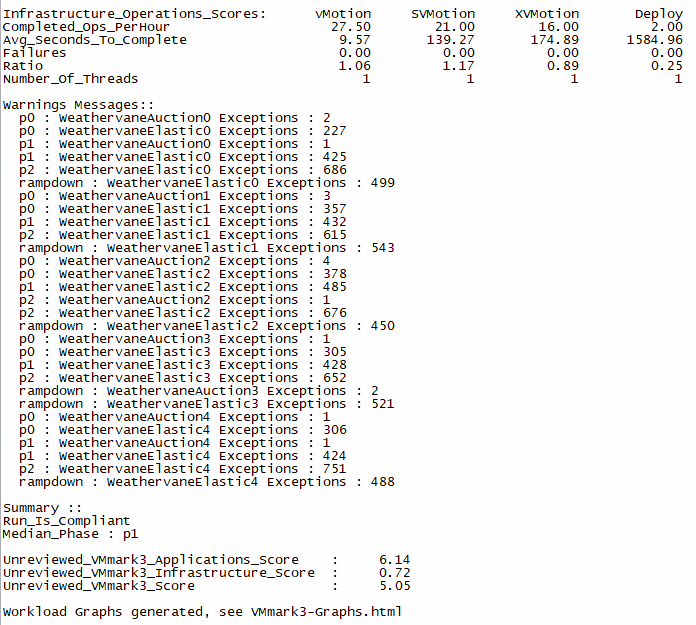
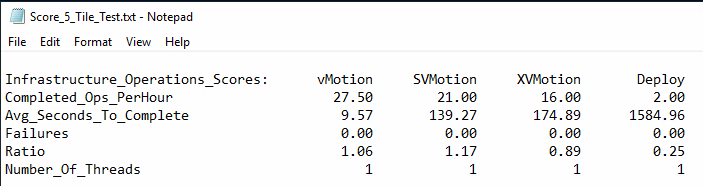
The metrics for the infrastructure workloads are aggregated separately using the same mathematical technique of normalization with respect to a reference platform followed by the computation of the geometric mean. Unlike the application workloads, the infrastructure workloads are not scaled explicitly by the user. Consequently, the infrastructure workloads are compiled as a single group and no multi-tile sums are required.
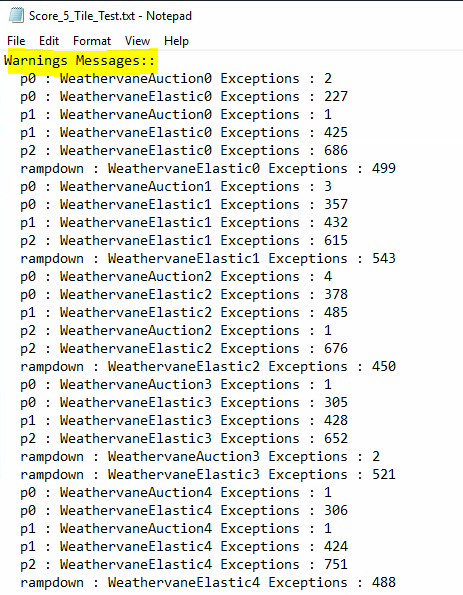
You will also see any warning messages listed. This is normal and will log a warning if there are timeouts for example. You just do not want the figures to be too large or it may indicate an issue.
The final benchmark score is then computed as a weighted average of the application-workload component and the infrastructure-workload component. VMmark 3.x gives weights of 80% to the application-workload
component and 20% to the infrastructure-workload component. These weights were chosen to reflect the relative contribution of infrastructure and application workloads to overall resource demands.
The benchmark helps measure the virtualization overheads of the individual workloads as well as the scalability of the entire system. Therefore results for multi-tile runs are reported as the aggregate score for all tiles, the individual scores for each of the tiles, and the scores for the workloads within the tiles as well as the individual scores for each infrastructure workload.
If any of the workloads within any tile fails to run, produces errors during a run, or fails its minimum quality-of-service requirement, that entire VMmark run is considered to be invalid. This applies to programs running on both the servers and the client systems. Also, the configuration of the workloads, the versions of the benchmarks, operating systems, tools, and all other software used must conform to the specifications in the VMmark documentation.
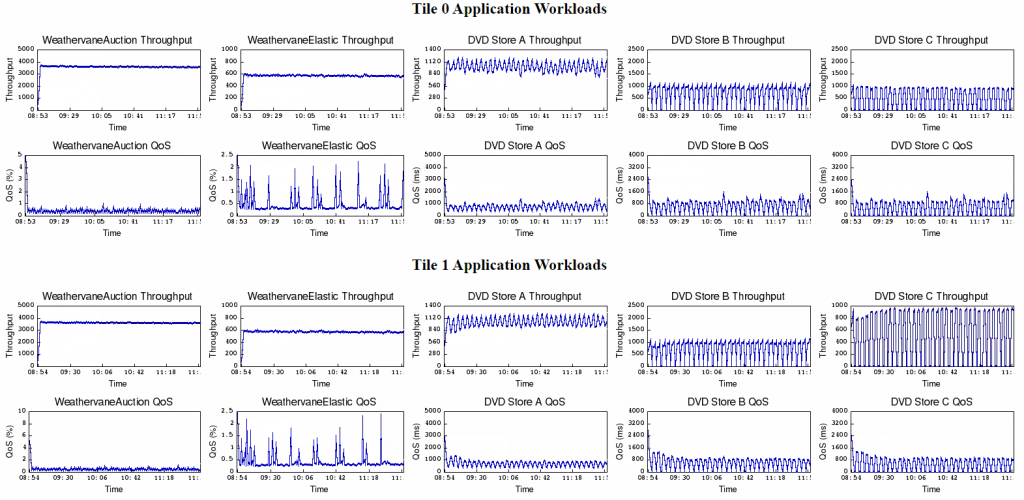
There is also a file called VMMark3-Graphs.html in the results file. You will need to download the results and open the file from here
The VMmark3-Graphs.html file plots the throughput and quality of service (QoS) results of each VMmark workload over time for each tile. This provides an in-depth and visually intuitive look at workload performance during the run. Compliant workloads are graphed in blue and non compliant workloads are graphed in red, so you can easily isolate characteristics of non-compliant workloads and can compare performance across tiles. Note that the plotted workload includes the ramp-up and ramp down periods. The VMmark3-Graphs.html file also contains details of the test, such as duration, start time, and end time, so that the most important information about the run is accessible in one file.

Useful Benchmarking link
This link will show you other vendors benchmarking scores and information in a much more detailed view for comparison