![]()
Instructions
- On the F5 website, click trial license and download your software and request a license to be emailed to you (F5 BIG-VE-LAB-LIC)
https://f5.com/products/trials/product-trials

- Download the installer (ESXi Server)

- Open vCenter and select File > Deploy OVF Template

- Accept License agreement
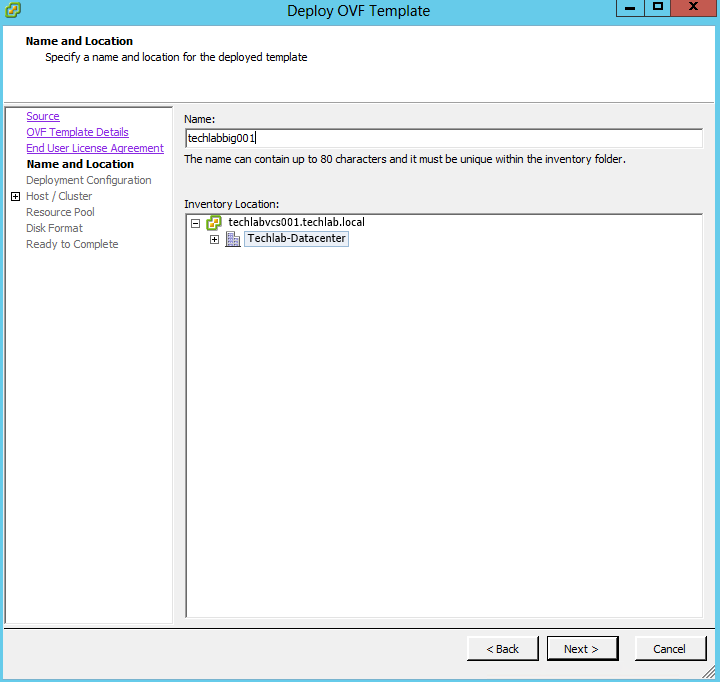
- Put in a name
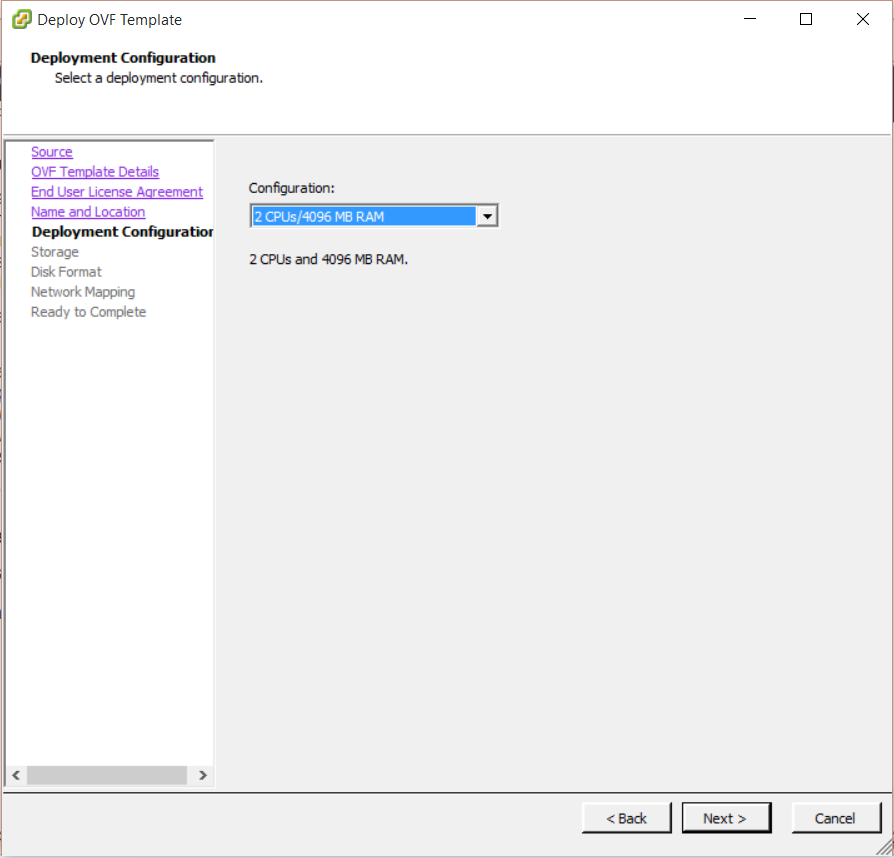
- Check the resources
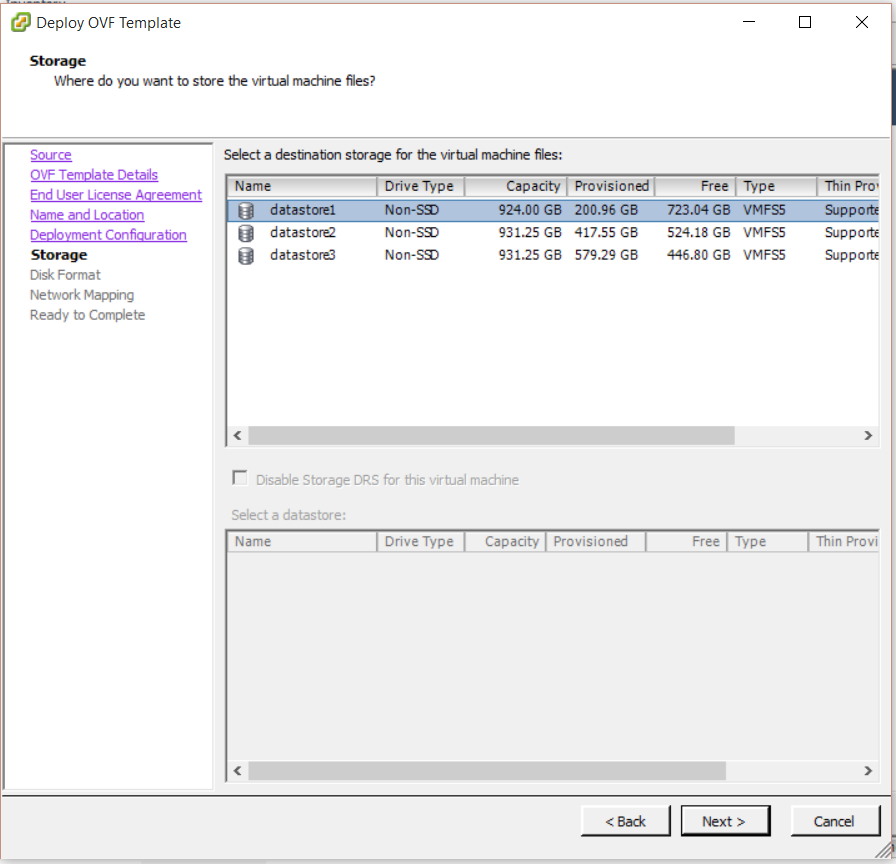
- Choose the storage
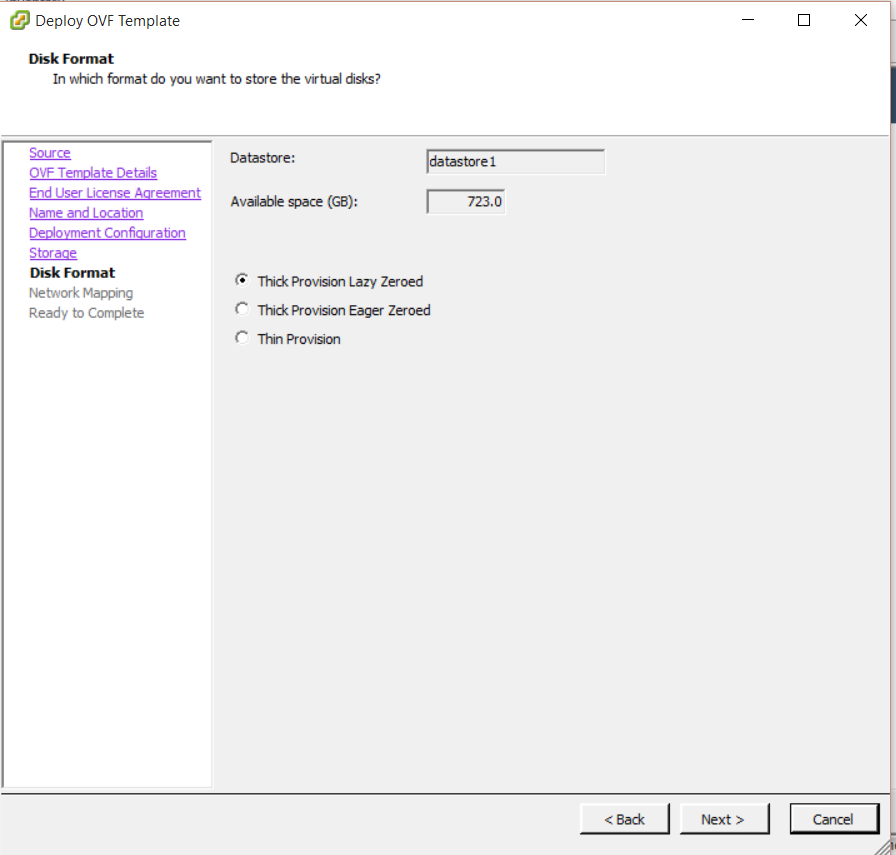
- Choose disk formatting options
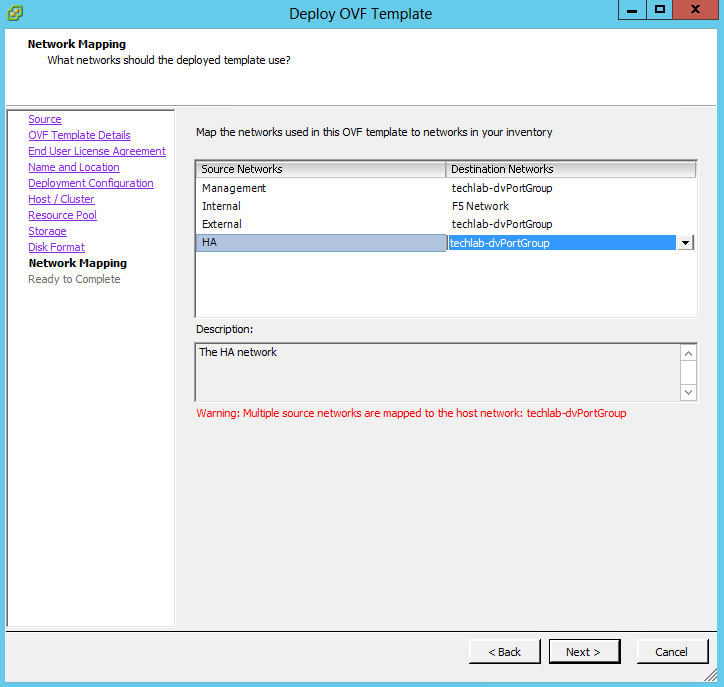
- Check network mappings
- Management and Internal need to be on different networks so my machines will sit on the F5 network. I’m not worried about the oher 2 networks for now as I will use the management and the Internal only
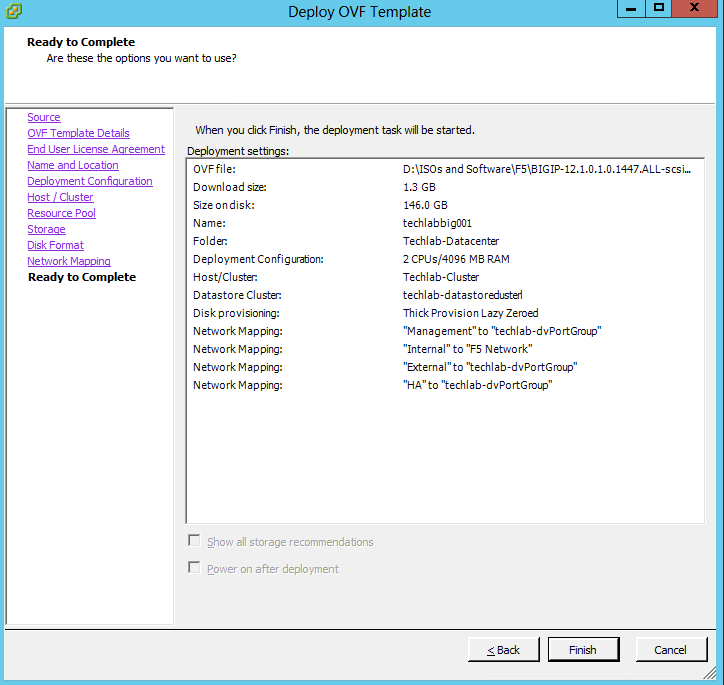
- Check details
- Click Finish
- Power on the appliance
- Put in root as the username and default as the password
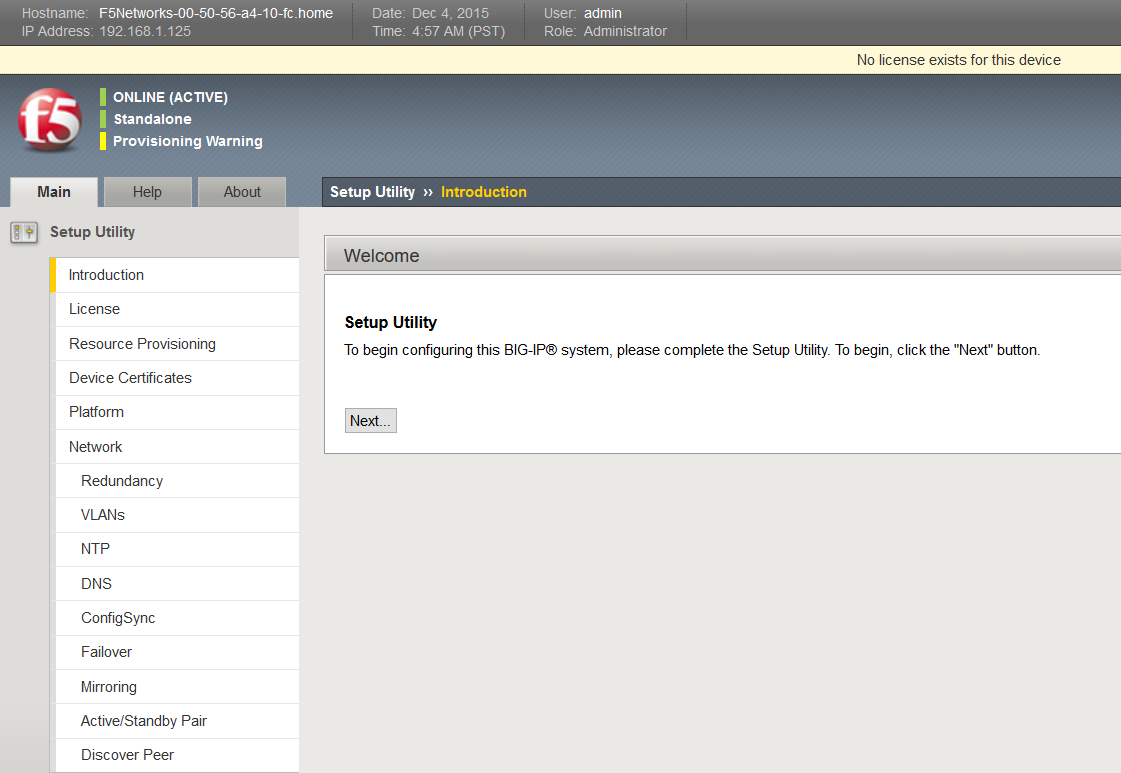
- Type config and the following screen will open
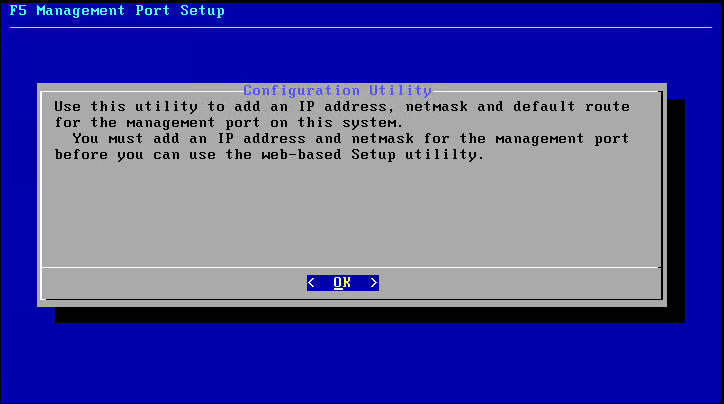
- Say No to automatically configured address
- Put in your IP address, Subnet Mask and Gateway
- You should now be able to log into the interface on https://youripaddress
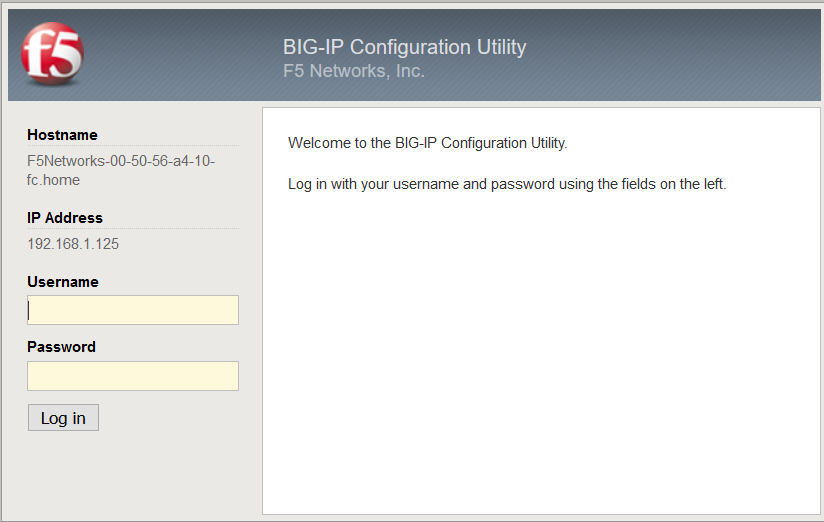
- The username is admin and the password is admin
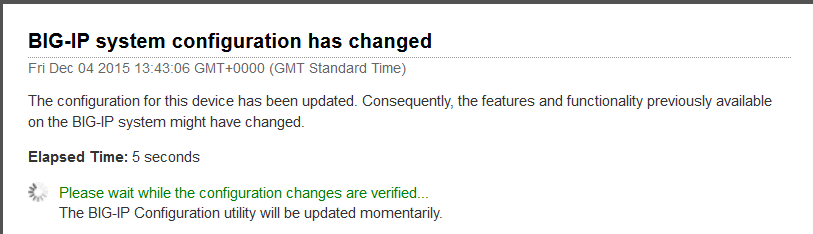
- You will need to activate the license which will have been emailed to you

- Accept the license agreement
- You should now see the below screen which shows you current resource reservations, License status and disk provisioning figures
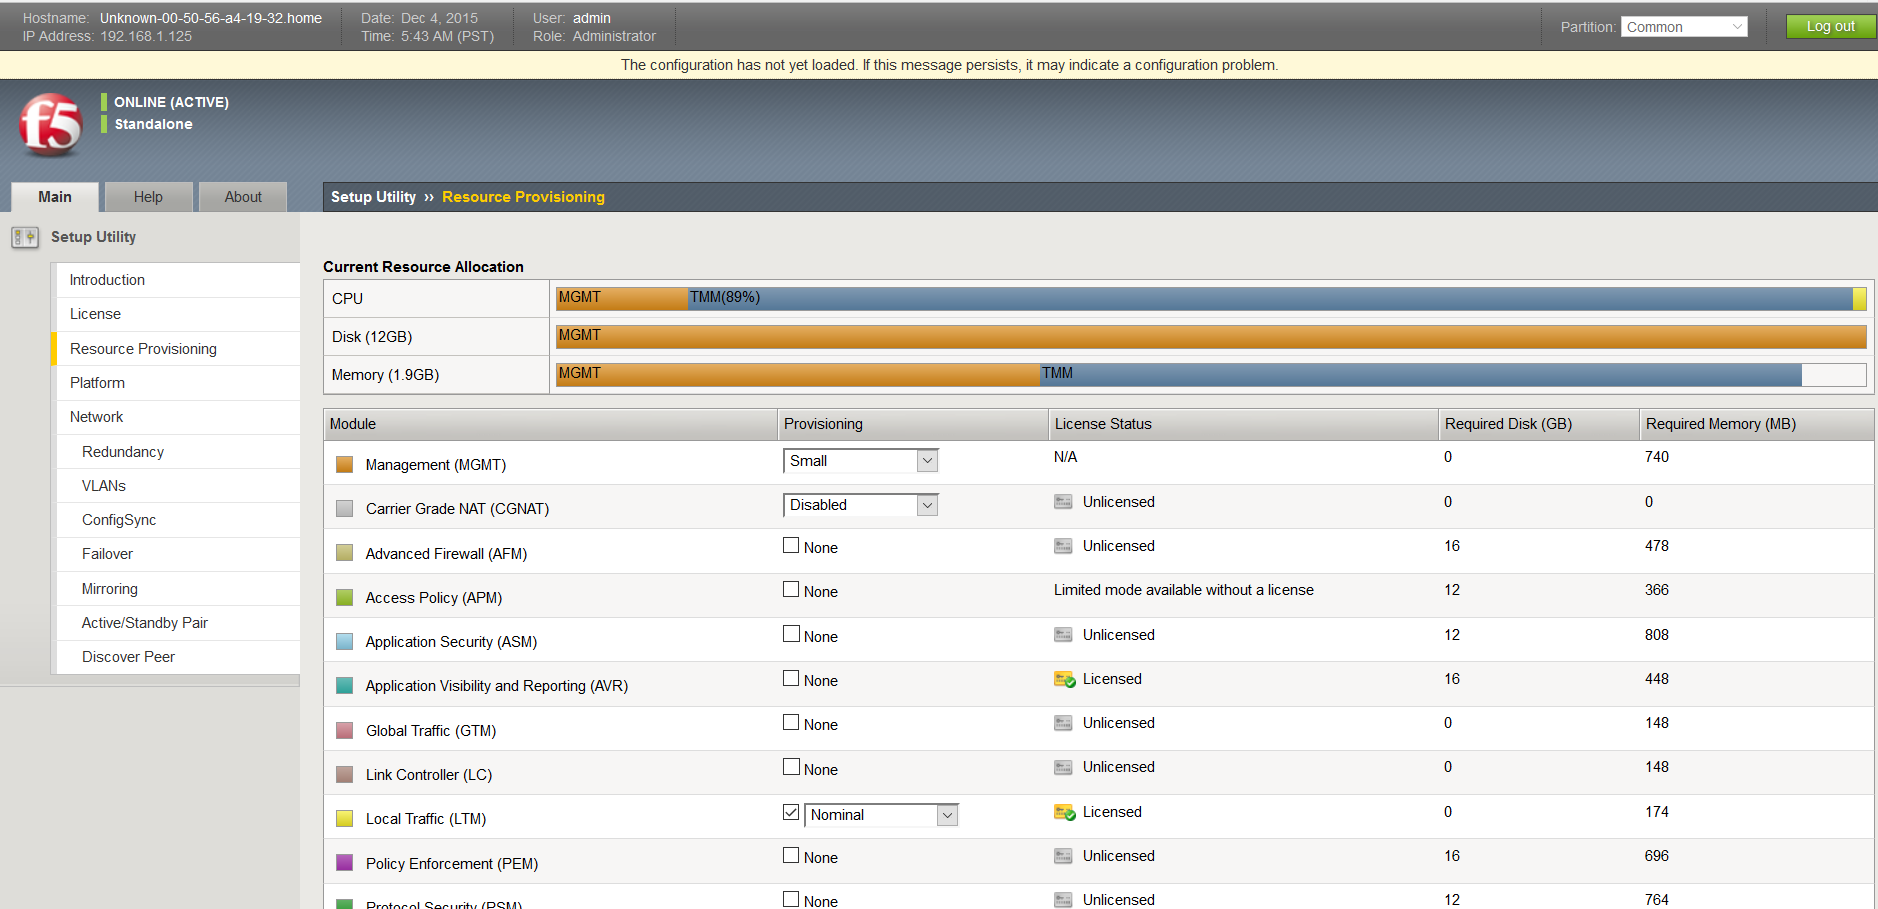
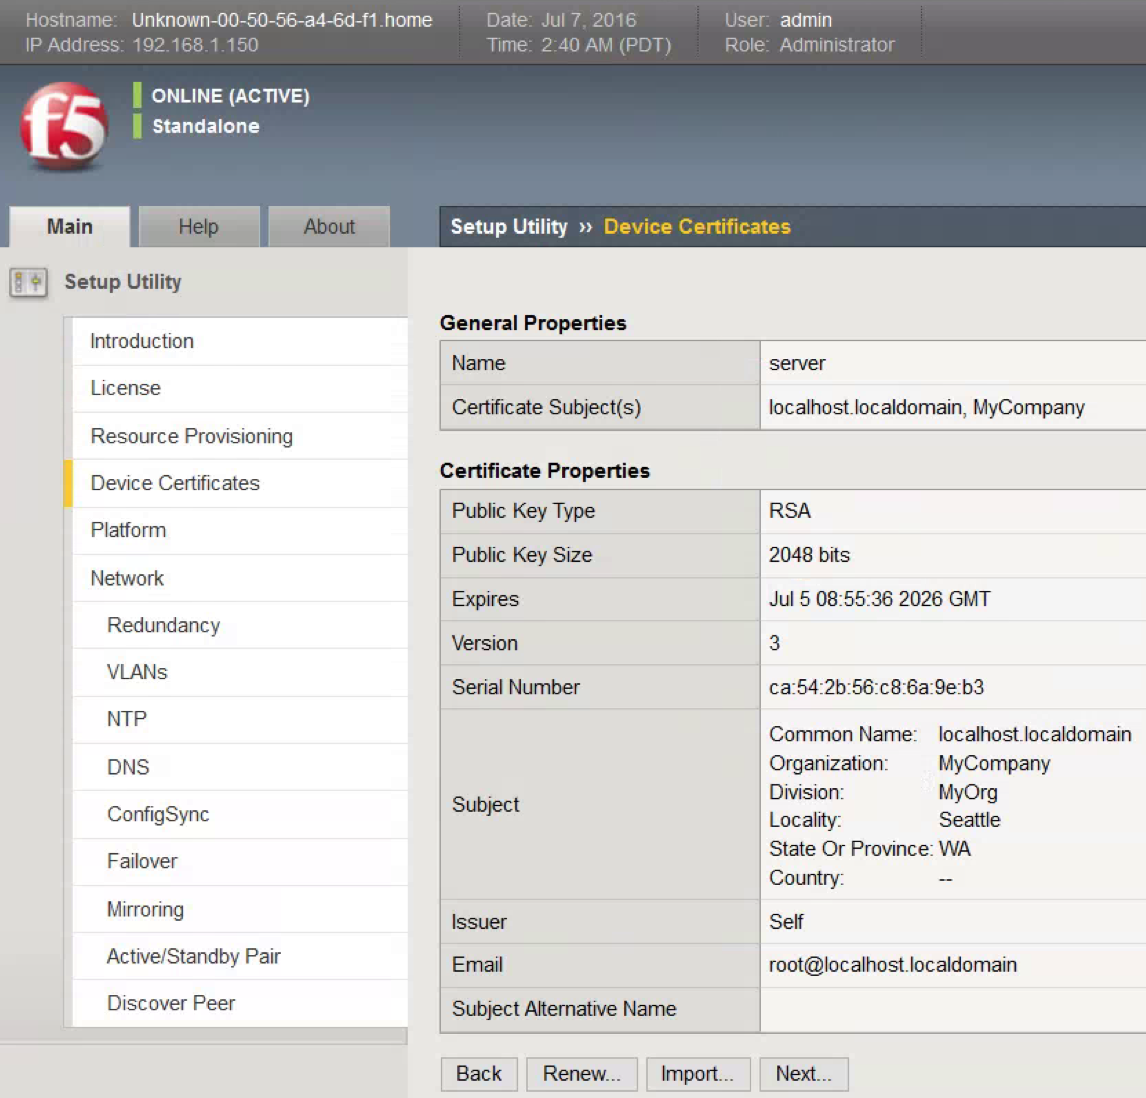
- Click Next and you will now see your device certificates screen
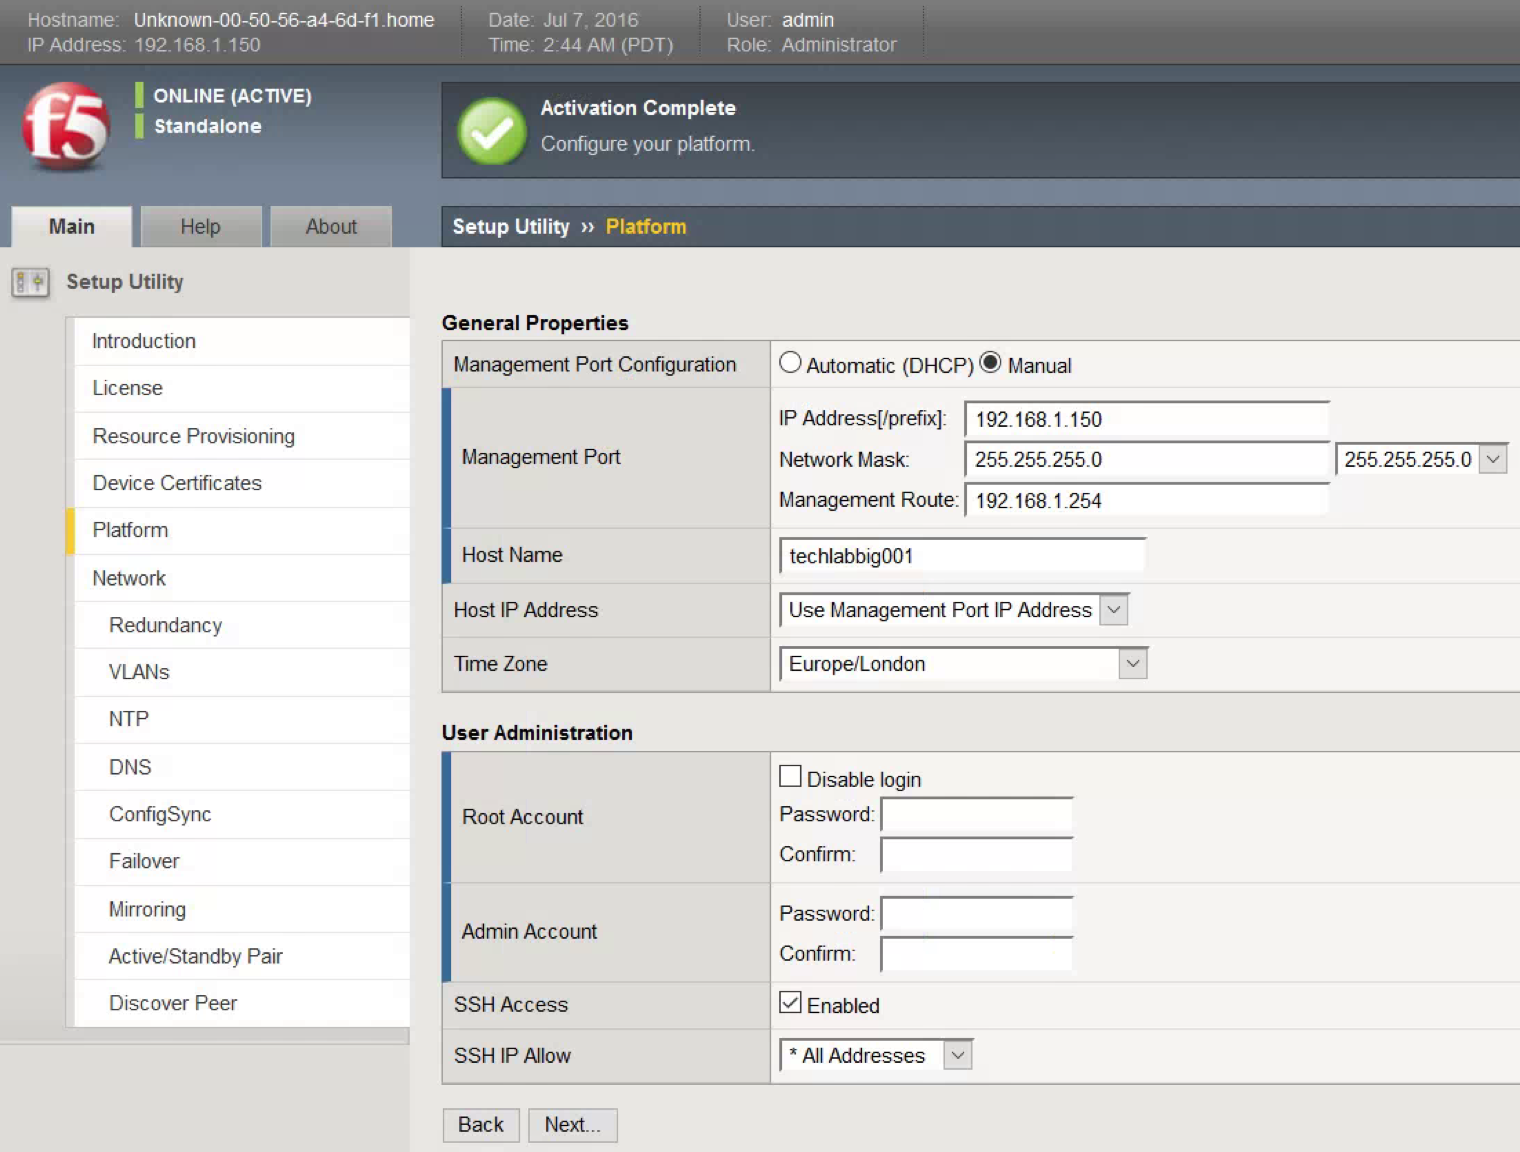
- You will now be on the General properties screen
- Add in your Hostname in FQDN format, Timezone and change the Root and Admin account password and any other details which require changing
- It will ask you to Log out and in again
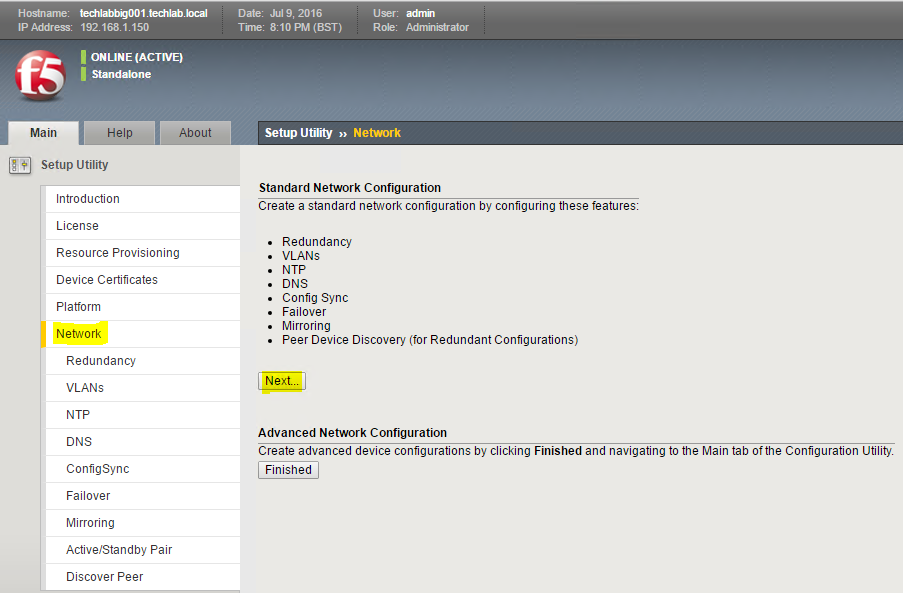
- When you log back in you will be presented with a network screen
- Click Next
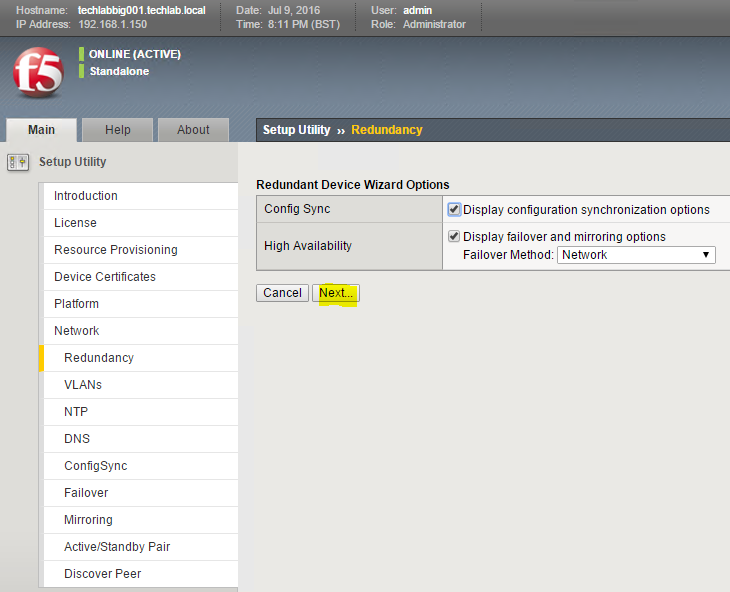
- Click Next on the page below
- On the VLANs page put in a self IP, and subnet mask this needs to be an address on your internal network, in my case the F5 network
- Put in a floating IP address on the same network
- In Internal VAN configuration, select the 1.0 VLAN interface and select untagged and click Add

- Interface 1.0 is the Management interface that was initialized during the deployment of the OVA and configured earlier in this document.
- As mentioned earlier for the purpose of this document we will be utilizing only the Internal (Interface 1.1) Interface for load balancing
- The Internal Interface or Interface 1.1 corresponds to Network Adapter 2 of our F5 appliance
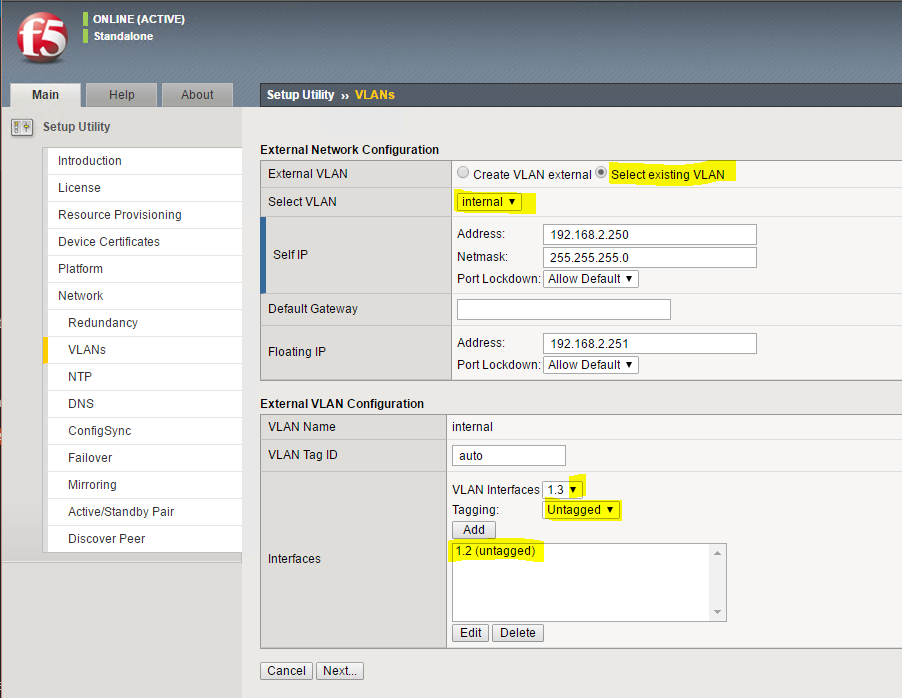
- You are now on the External Network Configuration screen
- In External Network Configuration, Choose Select existing VLAN and select Internal
- In External VLAN configuration delete anything in interfaces then add 1.2 as untagged
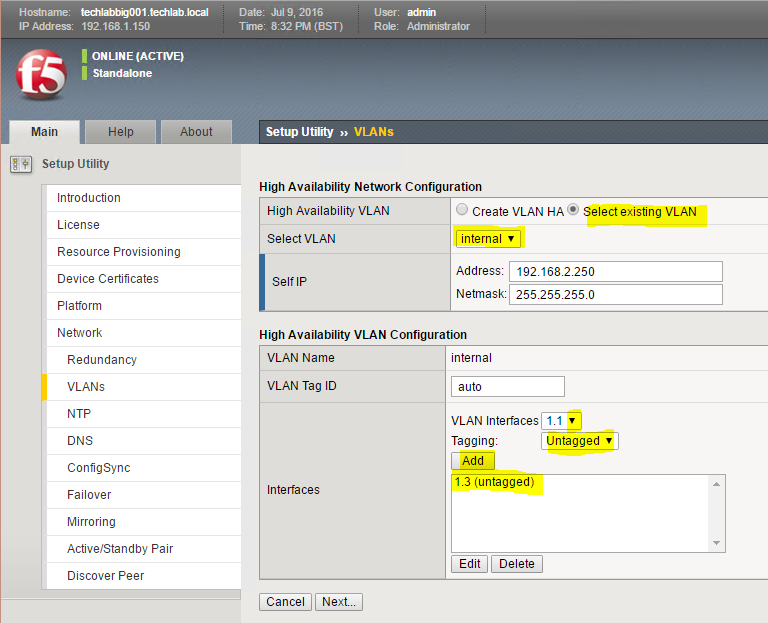
- On the High Availability screen do the same as the above and Select existing VLAN as Internal
- On the High Availability VLAN Configuration screen, delete the interface in interfaces and choose 1.3 and untagged and add
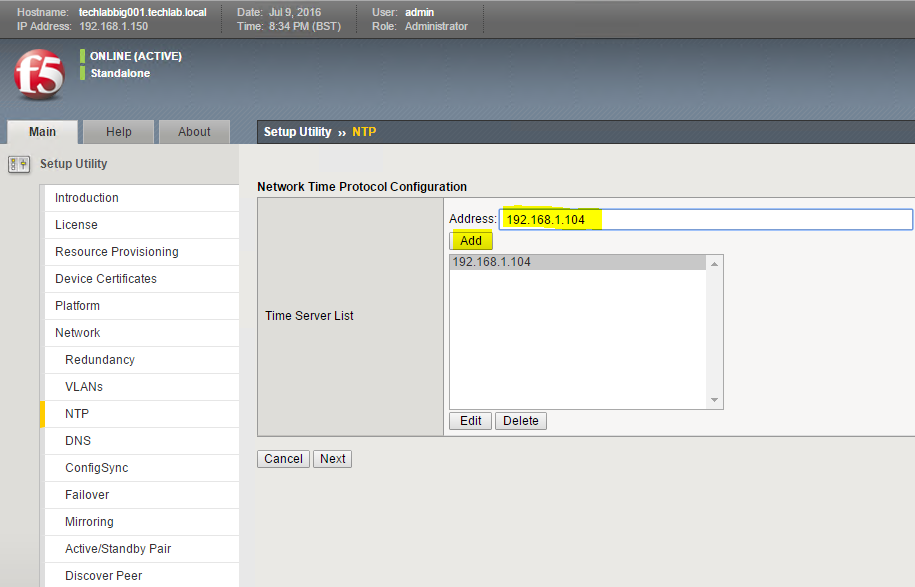
- Add in the NTP Configuration. I just pointed to my domain controller.
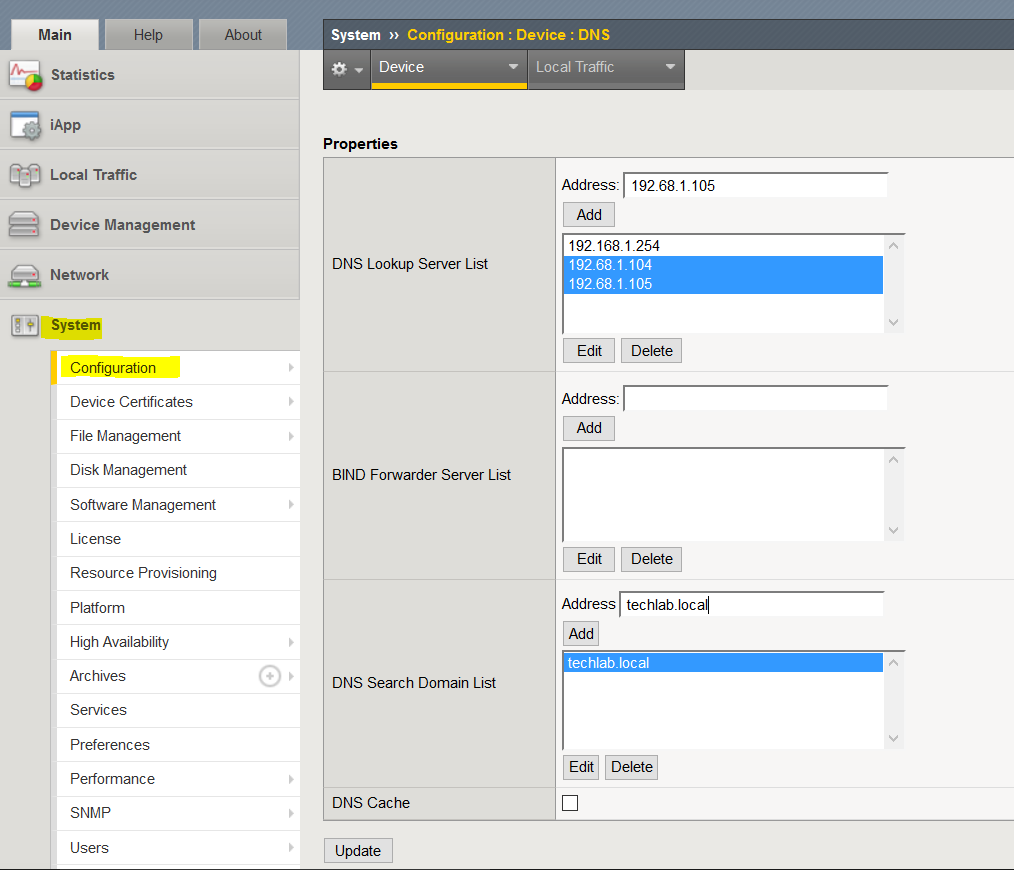
- Make sure the correct DNS Lookup Servers and DNS search Domain have been added.
- Click Next, Next, Next until you get to the Finished screen
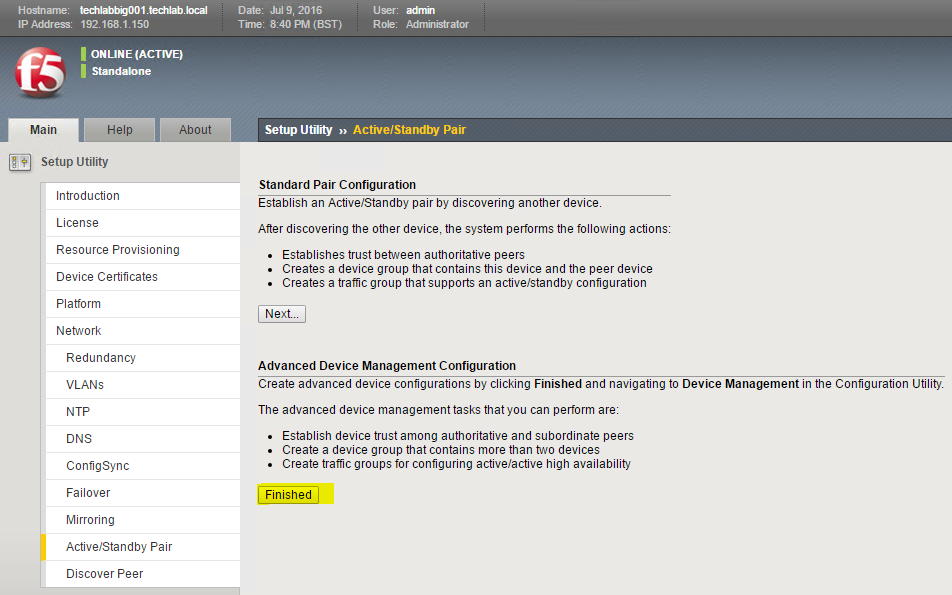
- You will now be on the default F5 page and ready to set up load balancing
Setting up VMware vCenter PSCs with an F5 Load Balancer
Please see the below link to see the F5 in action 🙂
vSphere 6 Platform Services Controller HA Setups – High Availability with an F5 Load Balancer
Useful Links
http://kaloferov.com/blog/configuring-vrealize-automation-load-balancing-using-f5-big-ip/
http://networkjutsu.com/f5-big-ip-ltm-ve-home-lab/
https://downloads.f5.com/esd/ecc.sv?sw=BIG-IP&pro=big-ip_v11.x&ver=11.6.0&container=Virtual-Edition

